Armoire Grow Box

HighAndMighty

New Member
Determined never to run out again, I've decided to grow my own. It's too cold here, so I gotta grow indoors. Luckily, I live alone. But I do have guests, a cleaning lady, neighbors. And all closets are full. So I decided to build into an armoire to hide my grow box in plain sight.

Here, I'll share the story in case anyone's interested.

Me personally, I'm so freakin' excited about it, I need to share with someone. And since reading this site, I know I can't tell my friends or neighbors, so here goes...

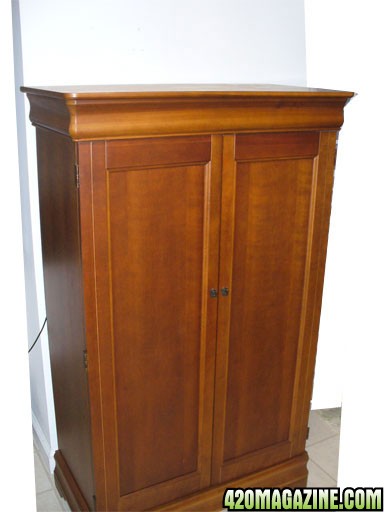
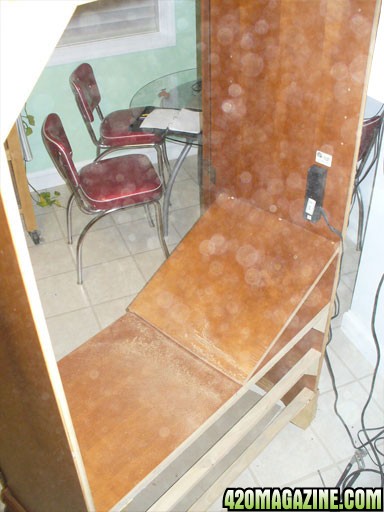
Some quick and dirty photoshopping hides the background of my house.

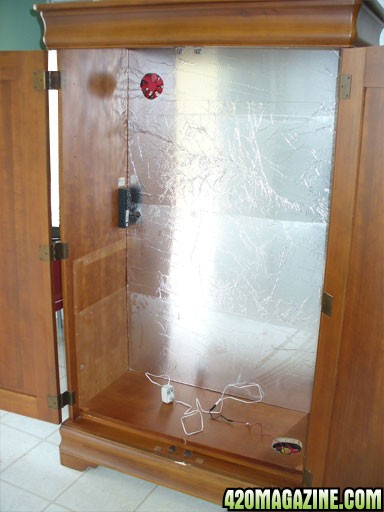
This is my armoire picked up off CraigsList for $99.
 
Looks like the edit didn't accept the photo, so here's my armoire before I cut into it. Very nice on the outside, with feet keeping it up off the ground. Taller than most at 71" (60" tall door opening).

1756.jpg
 
Cool, thanks MeanBean. Figured out my mistake.

This is the power cord that came with my armoire. Handy. The opening in the back was for a TV set. I'll seal up that back.

3438.jpg
 
OK after you upload your photos there in your gallery. So go to "Photo Gallery" from menu up top of site, then "My Photos". Select the photo you want.

When it's page loads below the photo is a place to get the html source code for the photo. Copy this "Ctrl + C"

example.png


Then go to your thread post. hit the image button on the text editor, remove the "html://" and paste the source code from the pic "Ctrl + V"
Then close the image dialoge...

Still need help just let me know.
 
Now, at this point, I had already paper-toweled my seeds, and they were sprouting. I spend 3 days driving around checking out 3 different armoires I found on CraigsList. So time was a MAJOR FACTOR.

I wanted to build this thing in one day. It took 3 days.

Here, I carefully cust the shelf in half, so I could remove it. The blade depth was set to the shelf thickness, so as to save the nice cross-brace bar beneath the shelf.

6240.jpg
 
Here's the top shelf cut out, and the bottom shelf about to go. I did this in my kitchen because by the time I got home, my neighbors had kindly carried the heavy sucker into my house for me, and I couldn't move it too easily.

I also didn't realize the dust on the camera lens at the time.

4343.jpg
 
This pic shows the backside crossbars I wanted to save, for sturdiness.

Key thing here: the bottom is open, filled only with cardboard, because originally there were drawers there. So the bottom-most crossbar is super important.

7203.jpg
 
Removed the cardboard. Sadly, the top crossbar I so carefully saved simply fell out. It wasn't installed well. But the other 2 are rock solid.

At this point, the armoire looks almost like trash. This is all day #1, and my house is a dusty mess :(

8173.jpg
 
The shelf could not be "lifted" out, or wedged out, because they had been installed with these dowel rods. Now, with 2 halves of each shelf, I cut these dowel nubs off, leaving me with 2 shelf halves, clean and square.

9139.jpg
 
The newly cut shelf sat nicely in the bottom of the armoire, on the front- and back-braces, now giving me a solid bottom. I rather like that, so in the future, if my bottom becomes gross with spilled water, whatever, I can simply pull it up and lay in a new board.

The 2nd back brace seen here is saved for a reason -- shown later.

10109.jpg
 
I pulled up one half-shelf, cut a hole, and installed the intake fan. The fan is set under the shelf, so the pot(s) won't knock it around. The wire, however, does come up into the grow box.

11178.jpg
 
Here's the undersdie of that half-shelf. The fan hangs below. But because the armoire is real fancy-like, it has legs and "hanging eaves" that hide the fan from view.

NOTE: When done, I learned that much light escapes through the fan :( So I must figure a remedy for that. Right now, at night in my dark kitchen, the armoire looks like somebody installed a weak version of those under-car neon lights. Not as strong, not that bad, but not as clandestine as I would like.

12149.jpg
 
I'm really diggin' the way that half-shelf just sits there. It's surprisingly snug, doesn't shift around at all, and is easy to lift out. Super!

Here, the new full-back hardboard (1/8") has been installed. Soon to be drilled with holes.

13119.jpg
 
This part is important. This is a secondary backboard. It's cut to fit inside the box. Its purpose is to provide a gap where I can run wires so they don't interfere with the plants. This board just sits against the lower crossbar seen here (about 1" wide) and against the corner braces up top (about 3/4" thick).

The larger hole is for the exhaust fan. The smaller hole is for the power cord. In the lower right is another small hole, for the intake fan power. So a little bit of power cord will be exposed there, but most of its length will run behind this board.

14106.jpg
 
Here we see the outer back panel. A large hole was cut to match that of the inner back panel. Also shows the upper corner brace. The inner back panel rests against that.

16100.jpg
 
Here we see the inner back panel has been foiled. YES, I have since read this site and learned that simple foil is not ideal. But alas, it's done. And I can change it later if desired.

What you don't see here is that the power cord goes through the 1-1/8" hold in the inner panel, then down about 3 feet, then out a second 1-1/8" hole in the outer back panel. This controls light here. I was proud of that. Alas, again, I failed to consider the fan. This lets light out the back. And I will work on that later.

I am now on day #2. My seedlings have completely shed their shells, and I'm racing fast and hard, with multiple trips to Home Depot and Radio Shack.

1757.jpg


Note: This pic also shows the small bit of armoire I broke off, bottom/front/center. That really ticked me off. But I swept up the offending piece and glued it back on - almost good as new.
 
The inner back panel is easily removed to install the exhaust fan. The power cord will simply drop 3' there and into the small hole to the power box. You can see the existing power cord for the intake fan running across.

1855.jpg
 
At the end of day #2, I happily re-insert the back panel, hide the cords (although I need another trip to another Radio Shack to find a power cord for the exhaust fan).

I'm pleased so far (so fast).

1937.jpg
 
Back
Top Bottom