Blue Dream x Tutankhamon x Green Crack

I haven't herd of Flooming before. I will have to check it out. In my Flower room I have the roots suspended in the nutrient solution with a air stone.


This is a root ball at Harvest time.
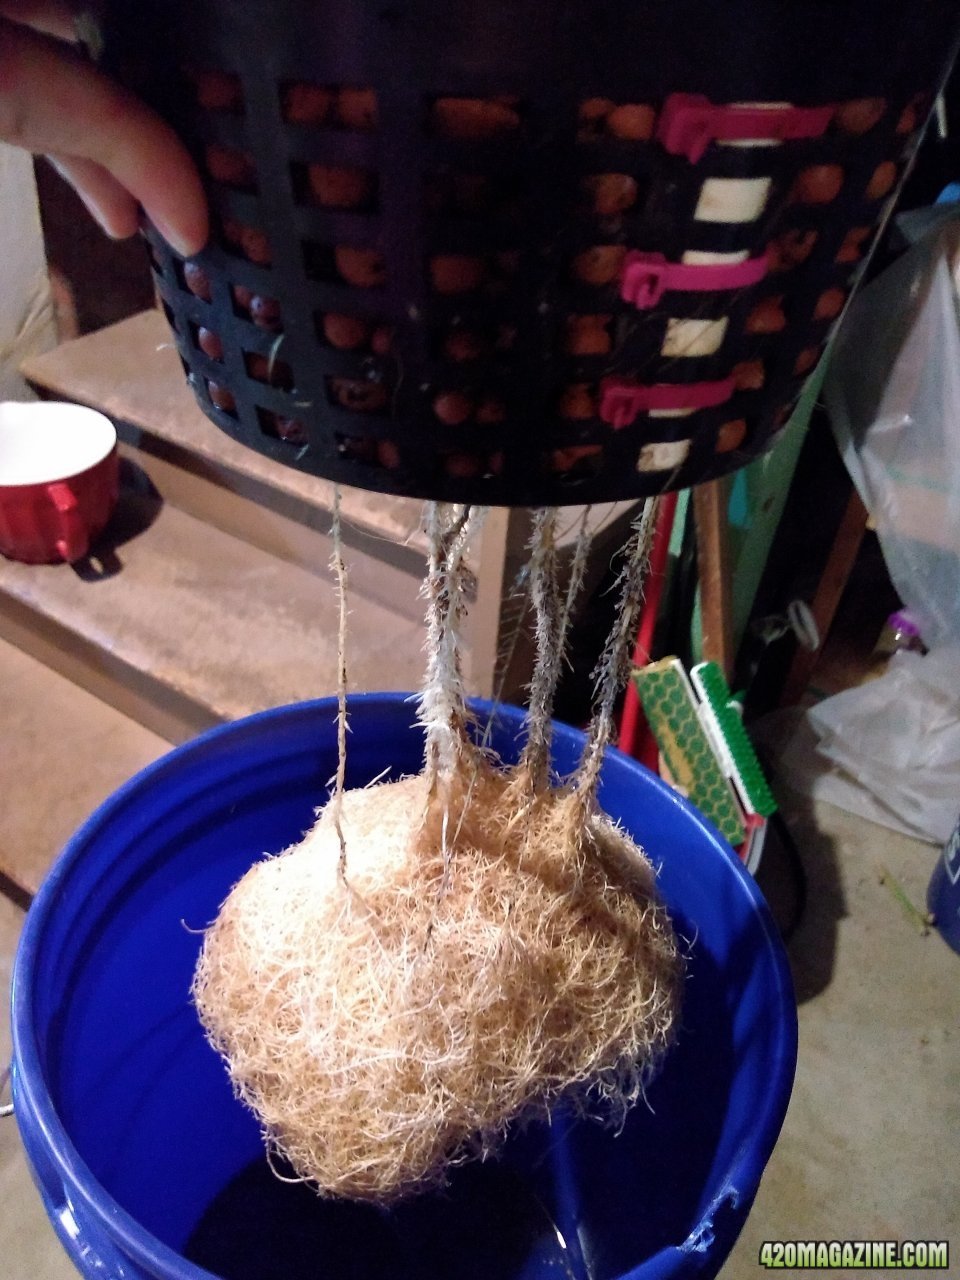
I just wanted to show you what I have found that works best for me.

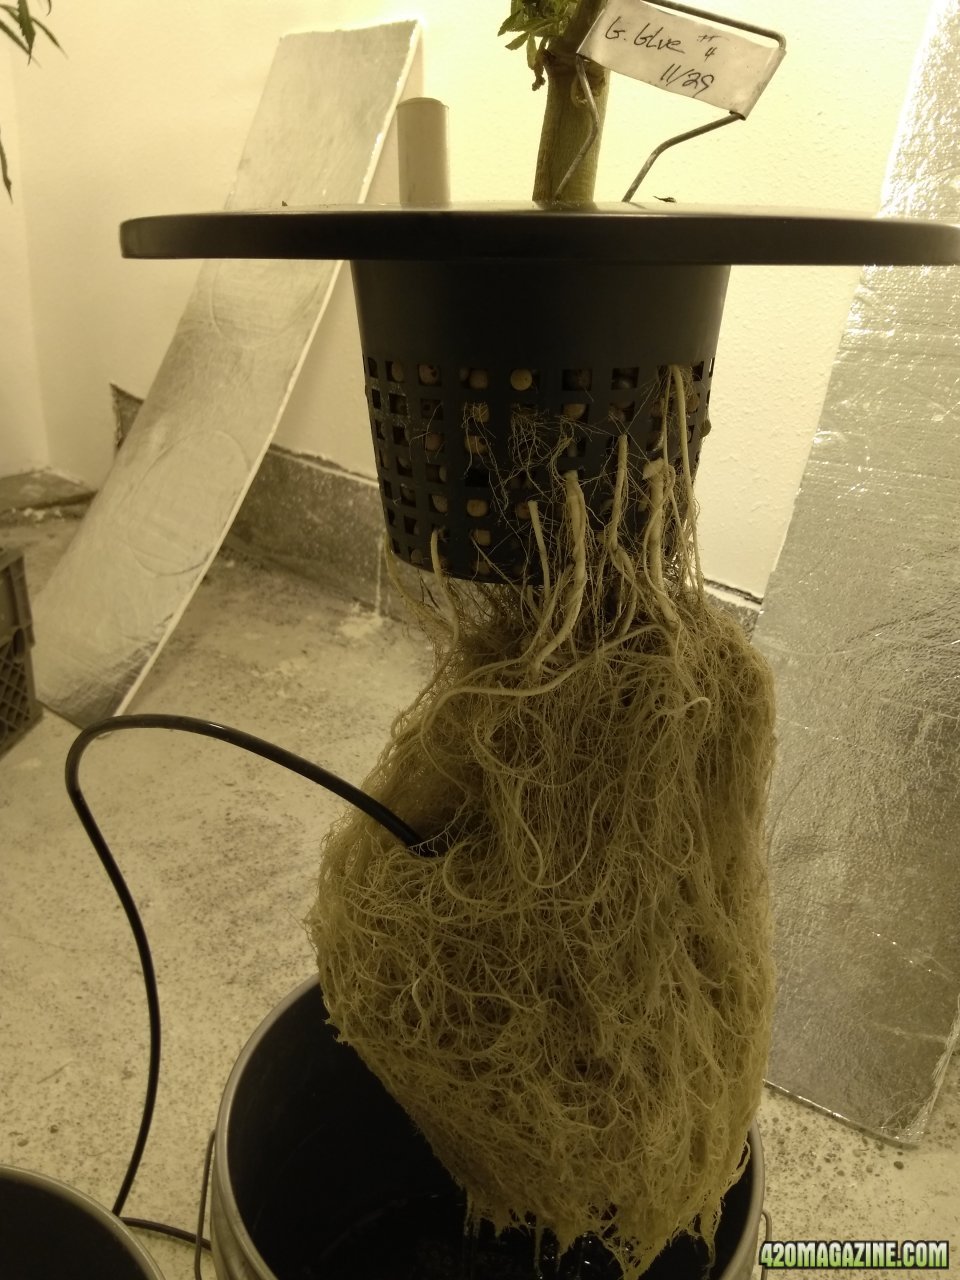
And I thank you for the sharing!

Check my link about the flooming and the forum link. There is a picture of a root system with flooming which will definitely impress you!
 
Still looking high tech in here......
 
Still looking high tech in here......

Haha we try to do our best to give the ladies the best condition possible :)

Did you have time to look at the flooming?
 
Haha we try to do our best to give the ladies the best condition possible :)

Did you have time to look at the flooming?
Yes, I did look at flooming.....

If I ever do go back to a water grow method, flooming will be my method of aeration.
 
From what I am reading is that fooming is moving water from the bottom to the top. Did I get that right? Here is what a air stone does in a 5 gallon bucket.
When the bubbles go up it moves the water as well.

Exactly #flooming. I think your airstone is big for your container! That's great cause it produces lots of movement at the surface which is exactly what you want. The more water that gets in contact with air the more O2 in the reserve when the water drops back! In your case I don't think flooming would give better results! Your system is great!
 
Exactly #flooming. I think your airstone is big for your container! That's great cause it produces lots of movement at the surface which is exactly what you want. The more water that gets in contact with air the more O2 in the reserve when the water drops back! In your case I don't think flooming would give better results! Your system is great!
To change the nutrients I just pull up on the lid and the plant and air stone goes into a bucket that has the new nutrients. I drain the old stuff out and clean out the bucket for the next time.
 
Hi guys,

After 10 days of hanging down drying, I trimmed the second tutankhamon tonight. I didn't have the courage to start the blue dream.


I truly encourage dry trimming! Wish I had trim bag but it s too expensive. You just have to touch the leaves from the bottom to the top multiple times to see them fall so easily. The buds remain wetter so don't fall along with the leaves. It makes trimming so easier! Plus it makes it also easier to differentiate leaves from flowers


I have also finished the rockwool prep :


I have also cut small pieces of my coco mat. Goal is to cover the holes with them so that the seeds can be in the dark once planted. I could have put straight coco medium or soil on top but the advantage of the pieces of coco mat I cut is that they are so small and super light weight! So while blocking light to allow germination, the little babies will later be able to reach the light without having to fight to much gravity pressure while being in a well aerated and moist environment! The goal behind is also to prevent light from reaching the rockwool to avoid algae.


The coco pieces will fill the holes. There is a bit less than 1 inch between the top of the rockwool and the one of the cocomat. This should allow a good humidity for the first seedling days as the coco mat retain a lot of water (and oxygen as well).

Can t wait to start!

Next update will be blue dream trimmed and dry weight :Namaste:
 
NASA grow going on here...

Cool tip on the dry trimming..... :thumb:
 
Hi guys,

After 10 days of hanging down drying, I trimmed the second tutankhamon tonight. I didn't have the courage to start the blue dream.


I truly encourage dry trimming! Wish I had trim bag but it s too expensive. You just have to touch the leaves from the bottom to the top multiple times to see them fall so easily. The buds remain wetter so don't fall along with the leaves. It makes trimming so easier! Plus it makes it also easier to differentiate leaves from flowers


I have also finished the rockwool prep :


I have also cut small pieces of my coco mat. Goal is to cover the holes with them so that the seeds can be in the dark once planted. I could have put straight coco medium or soil on top but the advantage of the pieces of coco mat I cut is that they are so small and super light weight! So while blocking light to allow germination, the little babies will later be able to reach the light without having to fight to much gravity pressure while being in a well aerated and moist environment! The goal behind is also to prevent light from reaching the rockwool to avoid algae.


The coco pieces will fill the holes. There is a bit less than 1 inch between the top of the rockwool and the one of the cocomat. This should allow a good humidity for the first seedling days as the coco mat retain a lot of water (and oxygen as well).

Can t wait to start!

Next update will be blue dream trimmed and dry weight :Namaste:
They look a lot better after the trim. They are looking great now!!. Now you know what not to do in the future. That is how life trains us. Either you learn from your mistakes or you keep doing them.

On your new setup I didn't see anything for the reservoir to move the water around so it can be oxygenated. If you are not going to do anything down there I would suggest that you keep your feeding pump on 24/7.

Hi @cmeflyin05

I had posted sooner about the oxygen part :


One pump for reuse what s going in the reservoir when it gets out of the rockwool drying, and one for flooming. It s not like in the picture anymore with all the tubes going in. There is just the waterpump sitting on the bottom that pushes water up and agitate the water to oxynate it. I posted about flooming earlier as well. I turned the pump to max flow (600L/h). This allows a tiny geyser. When the water that went up goes back down she s refreshed and fully oxygenated. From the multiple hours of research I did, flooming and waterfall effects are more efficient than airstones (unless you have a specific big airstone like @cmeflyin05 that has the ability to move a lot of water even at the surface, where exchanges of air and o2 happen!)

And in fact I m trying to learn from my mistakes and make it useful for the future. The plants were harmed by foliar terpinator spraying, but I could get 30g from tutankhamon #1, 60g from green crack and 40g from tutankhamon #2. I had made those estimations before so for the blue dream I guess a 80g dry weight. Will trim it later today and post pictures later

@Bonsaiweed you made me laugh haha. I just wanted to use all the precious knowledges I have learnt and put the ladies in the bests pots conditions possible! I m proud of my system cause I feel like they will have a nice home where they will thrive and express their full potential!

That time there will be no terpinator. I ve realized I can't smoke too strong weed. I prefer feeling good but not lazy. Regarding the taste, I preferred the one of my previous grow without terpinator. The green crack I had was the best weed I had smoked in my life (and I ve been to Amsterdam multiple times hahaha). For the resin aspect I never make resin I m 100% weed smoker :p:Namaste:


This marks the end of this journal

To sum it up :

Green crack : 60g
Tutankhamon #1 : 30g
Tutankhamon #2 : 40g
Blue dream : 96g

I didn't keep the smallest popcorn buds

When I start my next grow I ll make a new journal. I ll take time to put all the information about my pots and system but also all the links I had provided about lights, rockwool, flooming, etc... All in the first page. I also put as many pictures with little comments to avoid big posts with tons of words!

Thanks for your support guys!
I think your system is intriguing and can't wait till the new system is up and running with the girls
 
If I manage to find a kind of small and cheap ac that I could place in the grow room, I may start sooner! I've seen 8000 BTU small ac with exhaust duct that has to go outside through a window. I m wondering if maybe some smaller 4000btu exist.... They would be enough for a grow room
 
If I manage to find a kind of small and cheap ac that I could place in the grow room, I may start sooner! I've seen 8000 BTU small ac with exhaust duct that has to go outside through a window. I m wondering if maybe some smaller 4000btu exist.... They would be enough for a grow room
I use a portable AC unit in my room when the temps get too warm. I use a 10,000 BTU unit and I have the exhaust go through the chimney. I chose a higher BTU than what is needed for a 10 by 10 room because I will have the AC run 24/7. I don't want the AC unit to over heat. I set it at 75 degrees and all is good.You got to make sure that the lights are covered or your plants will start to seed.
 
I use a portable AC unit in my room when the temps get too warm. I use a 10,000 BTU unit and I have the exhaust go through the chimney. I chose a higher BTU than what is needed for a 10 by 10 room because I will have the AC run 24/7. I don't want the AC unit to over heat. I set it at 75 degrees and all is good.You got to make sure that the lights are covered or your plants will start to seed.
In fact in my previous grow my green crack made seeds. It was too hot in the grow space. I m thinking of buying an ac. I m looking for a cheap one
 
Over in the states you can get a portable AC unit for $400 for 10,000 BTU. The lower the BTU's are the lower the price.

I ve been looking for the best cost effective solution. 8000 BTU consume around 2000w. Adding that power consumption to the lights is a lot. I m already running around 1000w with the lights. I made the calculation based on around 0,20 dollars for 1kwh. It would cost me too much for let s say 2 months of veg under 20/4 and 2 months of flowering. Something like 500 dollars more on the Bill. Plus the price of the AC.... So I could see on the net that using à cooler to maintain a 72F is the same in terms of refreshing feeling that using both cooling @78F and fans. Cause fans increase evaporation. So the cooler the room is the cooler feeling it will give by Adding fans. So I m trying to find a 4000 or 5000 BTU that consumes around 6000w. So a Frigidaire with good review but can't find it where I m leaving. So I m still seeking.
 
Back
Top Bottom