Calyx Hunter
New Member
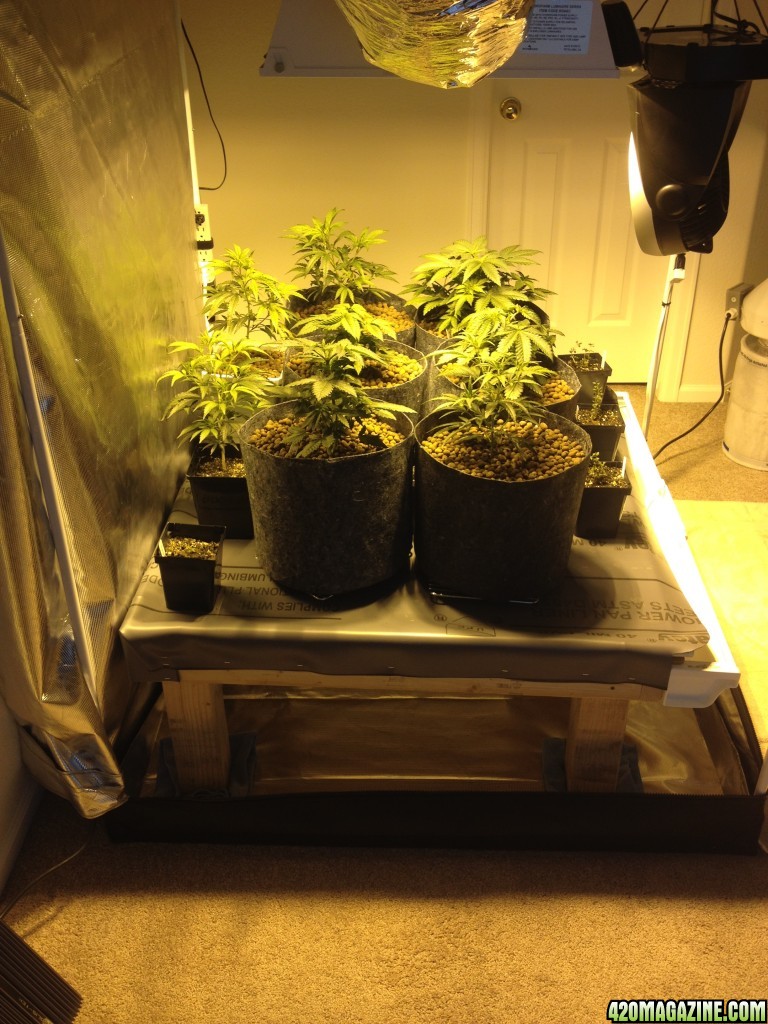
The Drain Table was conceived during my Jedi Death Star grow due to the extreme discomfort I experienced from crouching on the floor during irrigation routines, LST wiring and defolitatoin. The Drain Table serves three purposes:
1. It elevates the plants off of the floor for much easier manipulation, handling, and irrigation
2. All of the drainage is collected via gravity and only one bucket needs to be dumped
3. It saves me many hours so that I can spend them with the most important woman in my life, my wife
All supplies were purchased from Home Depot for approximately $100 which were:
2x4 pine- for deck framing
4x4 pine- for legs Back two legs cut to 17" and Front two legs cut to 16"
1/2" plywood- for deck
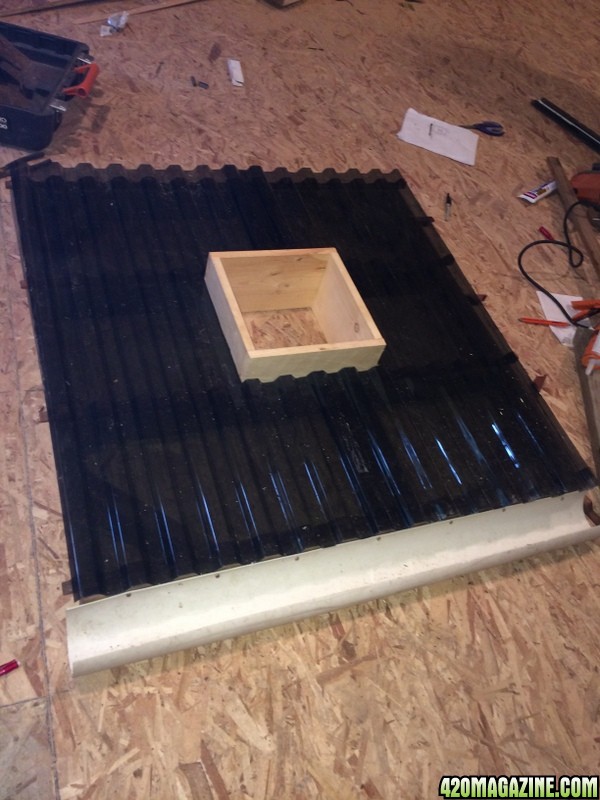
40 mil PVC Shower Pan Liner- for deck water proofing
1/2" PVC Pipe for deck edge lift
Conduit Clamps- to secure PVC pipe to deck
Rain Gutter Assembly(Gutter, End caps, T Drain)- for front edge water control
Wood Screws(various sizes)- to assemble frame, attach deck, legs, conduit clamps, and rain gutter
After I had all of my wood cut to length I power sanded all of the corners and edges to prevent splinters.
I finished the deck with stain and a clear coat to prevent it from soaking up moisture and being a potential spot for mold
The deck frame was assembled first with the 2x4's
Next the plywood deck was screwed onto the frame
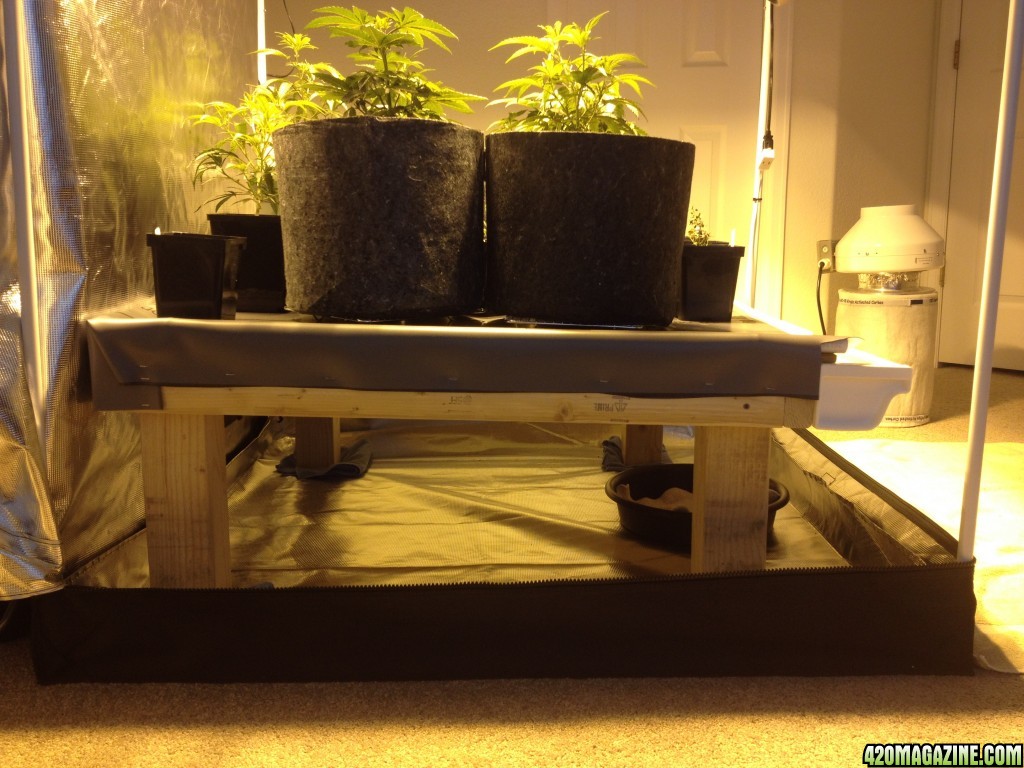
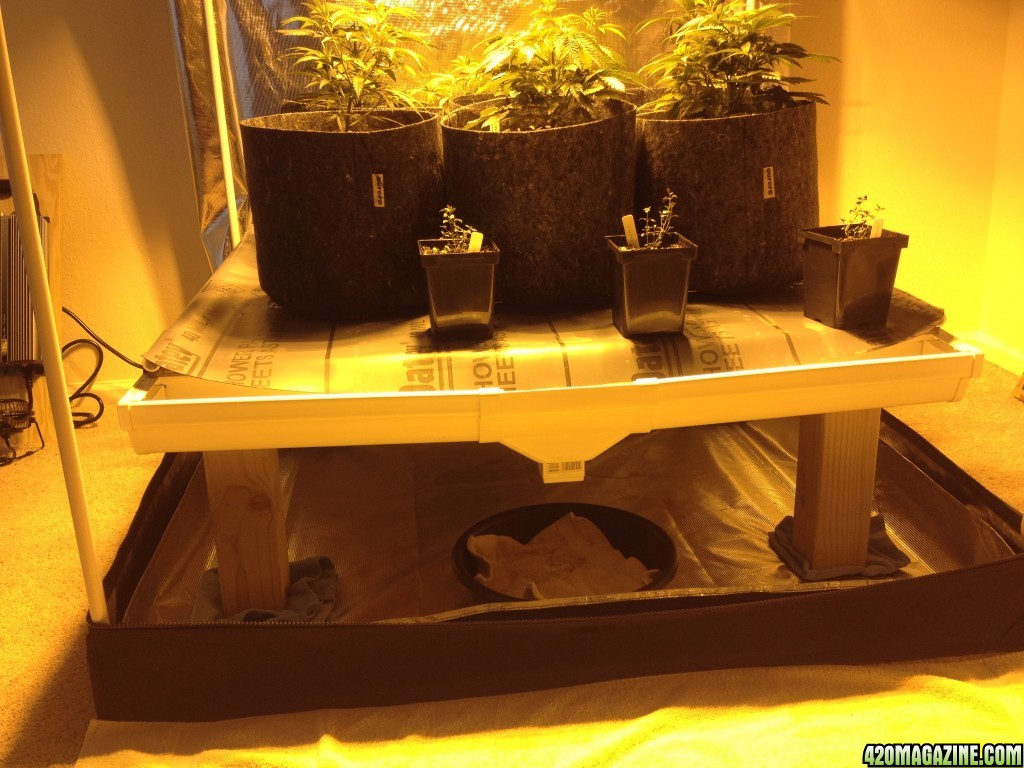
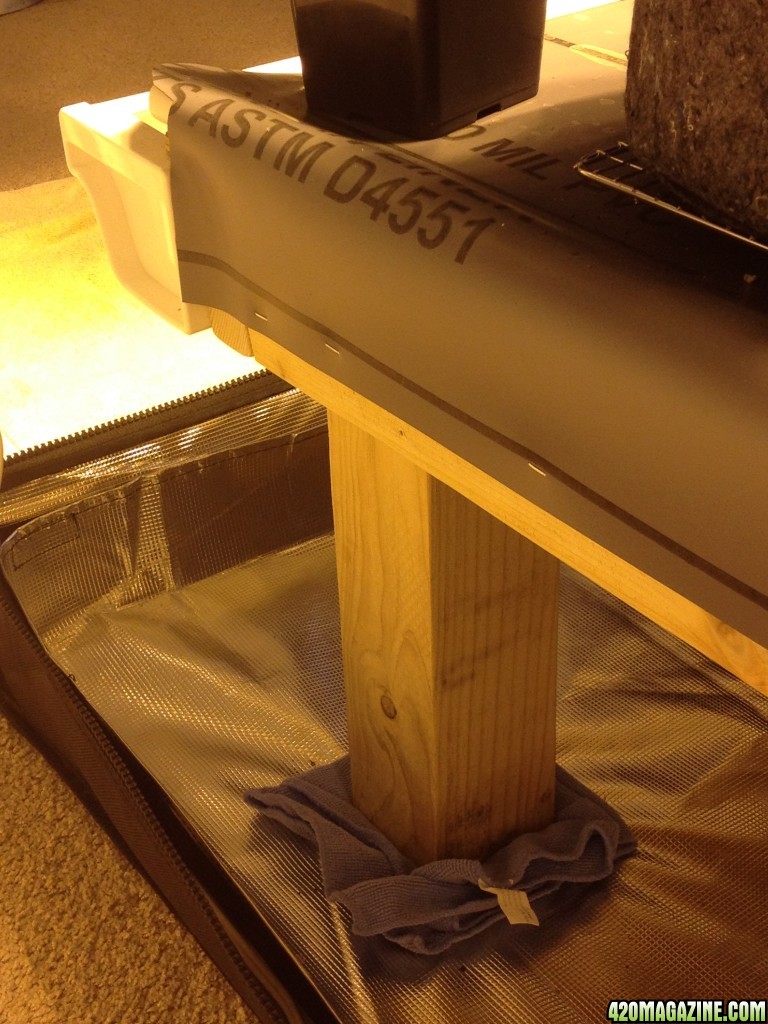
All of the magic of the Drain Table happens due to the incline created from the back two legs being 1 inch longer. Attaching the legs was the most difficult part. Since the deck inclines with the back two legs being longer the table wanted to fall over due to it not being level. It would have been easier with a pile of clamps but I work with what I have. I placed all the legs under the deck and pushed them into each corner of the frame. I made sure each leg was vertically level before I drilled pilot holes and secured with two woods screws on two sides and one screw through the deck into the top of the leg. The top screw was placed closer to the front edge of the leg due to the slight gap towards the back of the top of the leg caused by the incline. The deck is cut to 3' 6" X 3' 2" since my tent is 4X4 I wanted 3 inches of clearance around all sides for air flow as the Gorilla Grow Tent meshed vents and air intake ducts are very low to the ground.
I left 4" of room on the front side for the rain gutter so total total deck dimensions with gutter is 3'6" X 3'6"
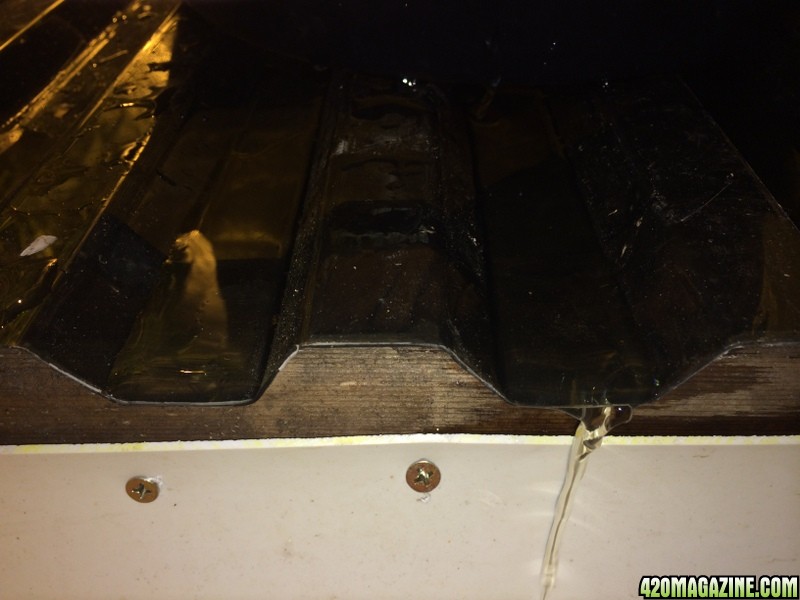
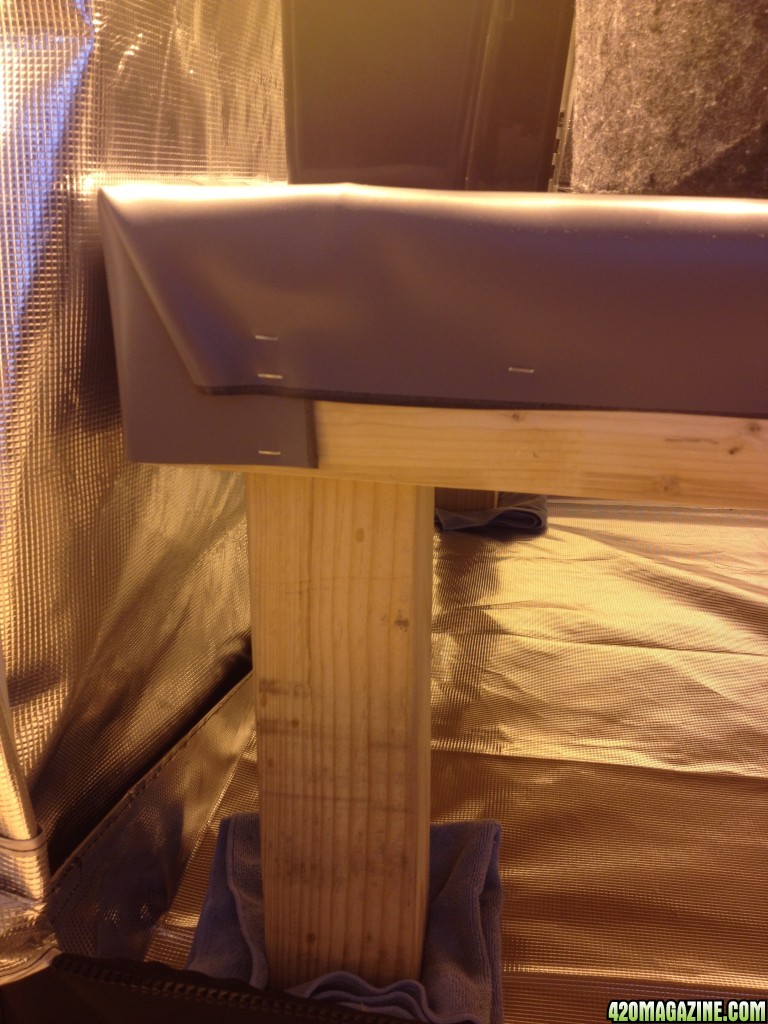
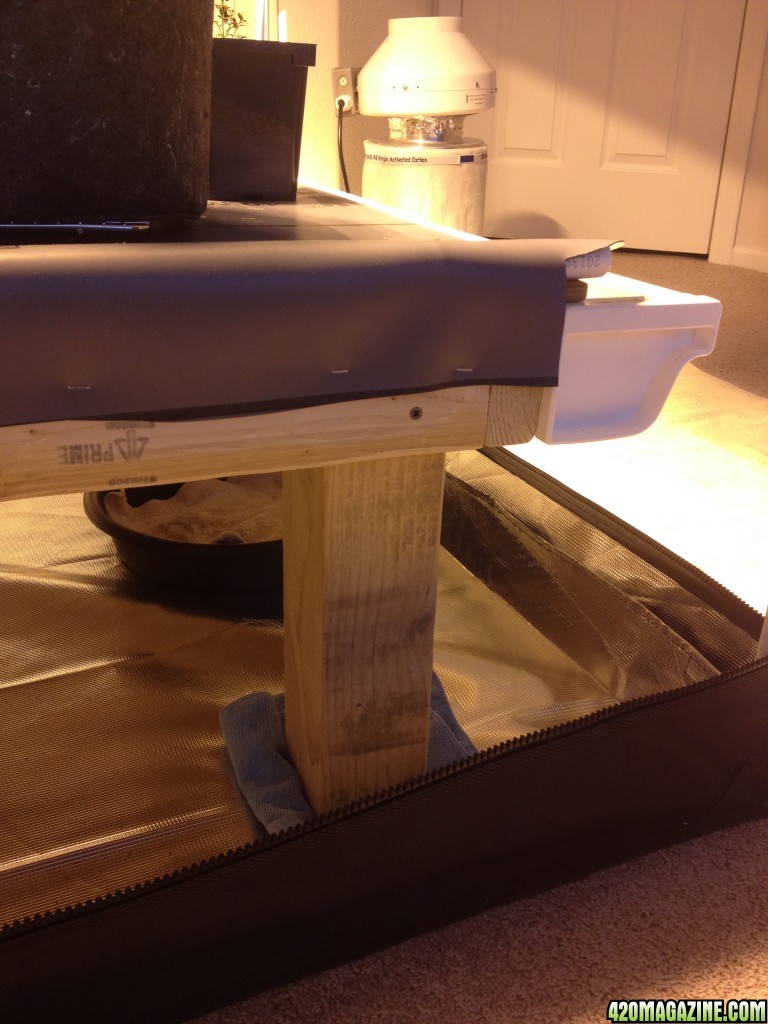
The front edge of the plywood deck hangs over the frame by an inch so gutter could be mounted underneath the drip edge. On the deck I mounted PVC pipe with conduit clamps on the back and side edges. I evenly draped the shower pan liner over the deck, spray tacked it down then stapled it around the frame. The back and side edges of the PVC liner are lifted by the PVC pipe to control water flow. I cut the front edge of the liner to shape so that all the water will drip into the middle of the gutter. It is super solid and I stood on it to show my wife that she does not need to worry about it collapsing.
This option was way cheaper than buying a flood table and stand
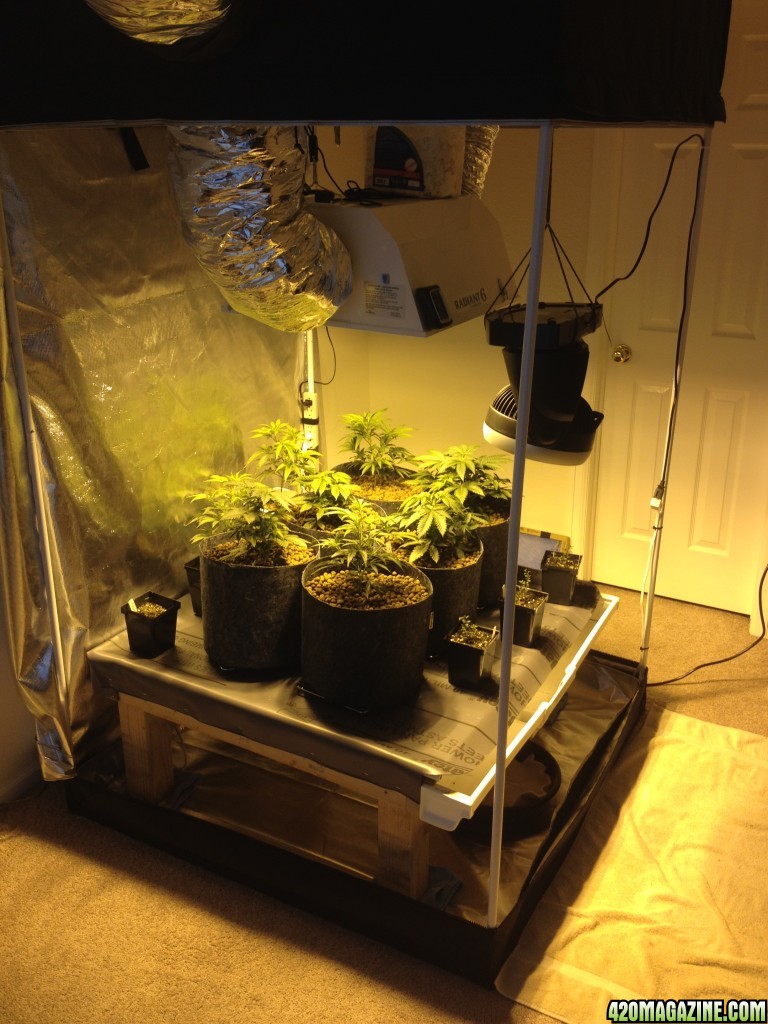
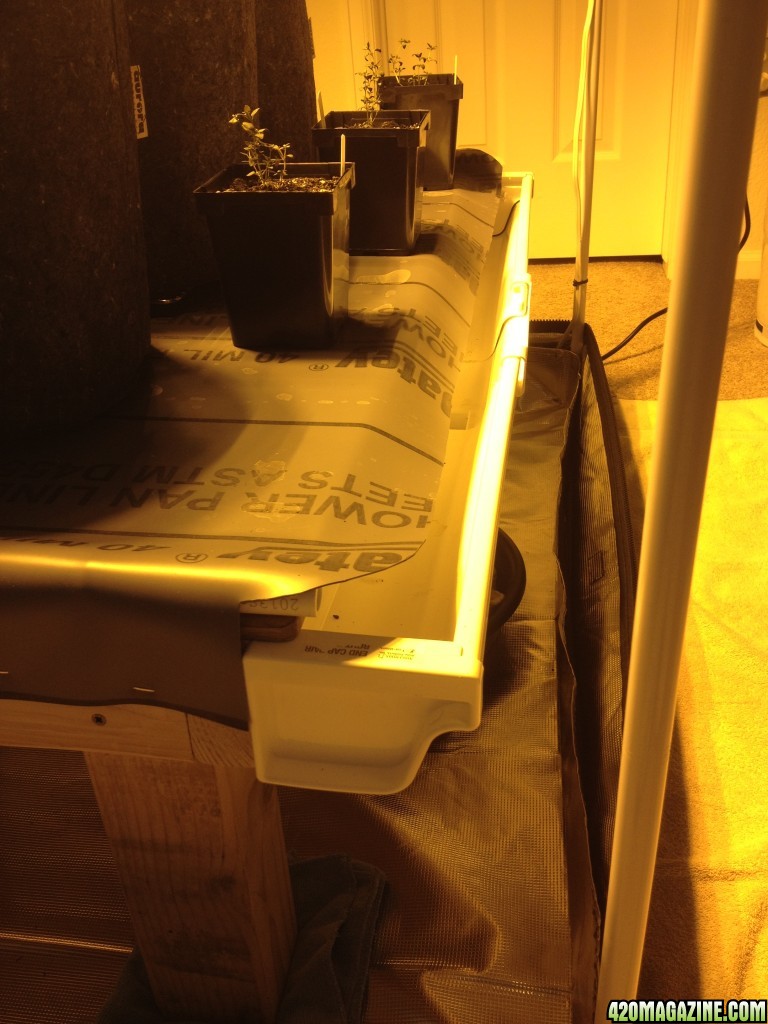
The Aurora Fabric pots are all raised off of the deck slightly by baking cooling racks. This allows for better drainage from each pot and the drainage from all the pots to flow freely straight to the gutter. When I irrigate now it is such a pleasure to watch all the water go exactly where I want it to. I put a bucket inside the tent under the gutter drain and I can come back later and easily remove the bucket and dump it outside whenever I want. My pots are never sitting in standing water and have airflow around all sides of the fabric pot 24/7.
I hope this inspires others to create and build something that makes theirs and possibly others lives easier
Back Left corner
Front Left corner
Front Left corner showing PVC pipe lifting the edge of the shower pan liner and pots on racks
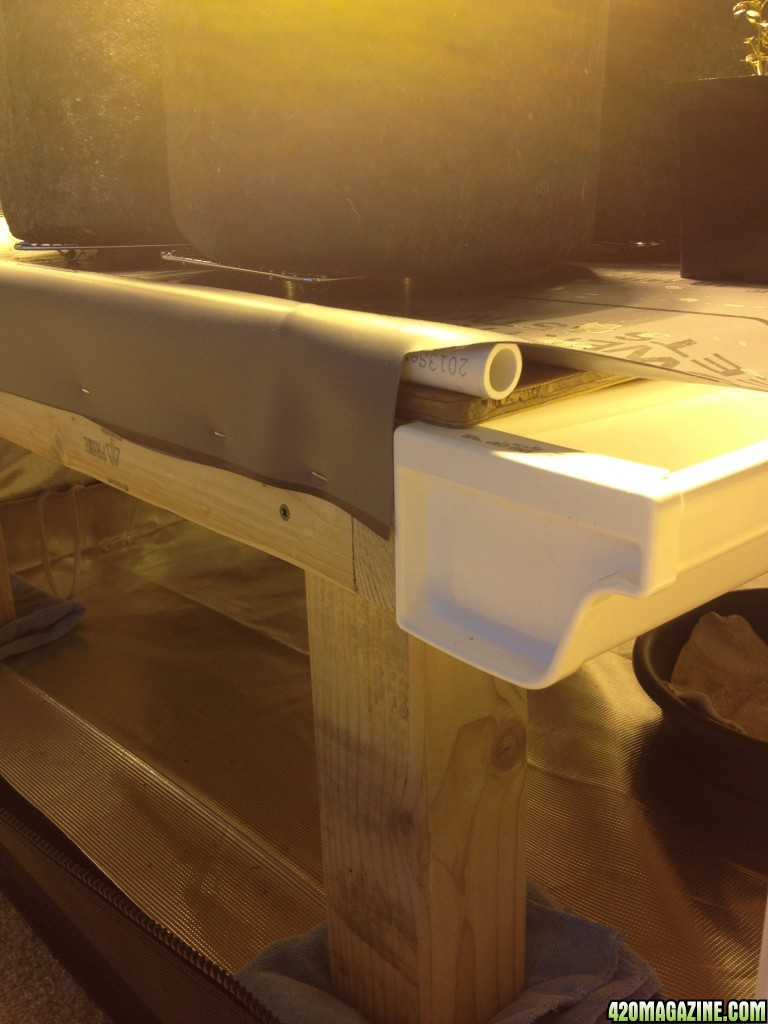
Front edge with gutter
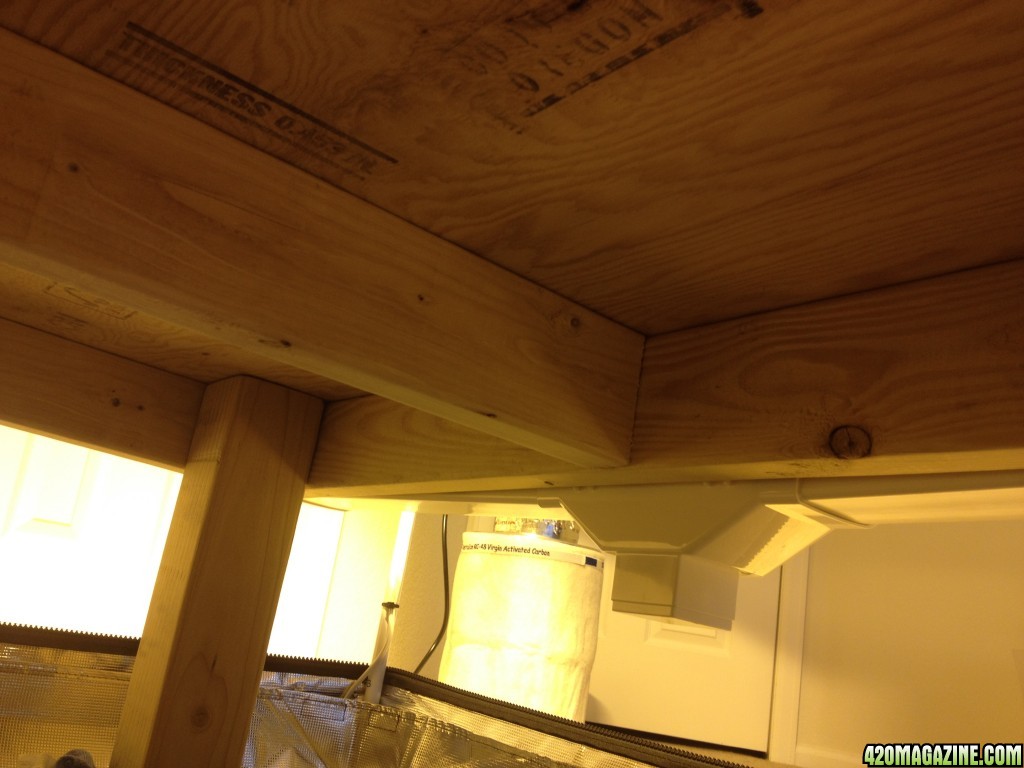
Front edge under deck showing framing
Front right corner
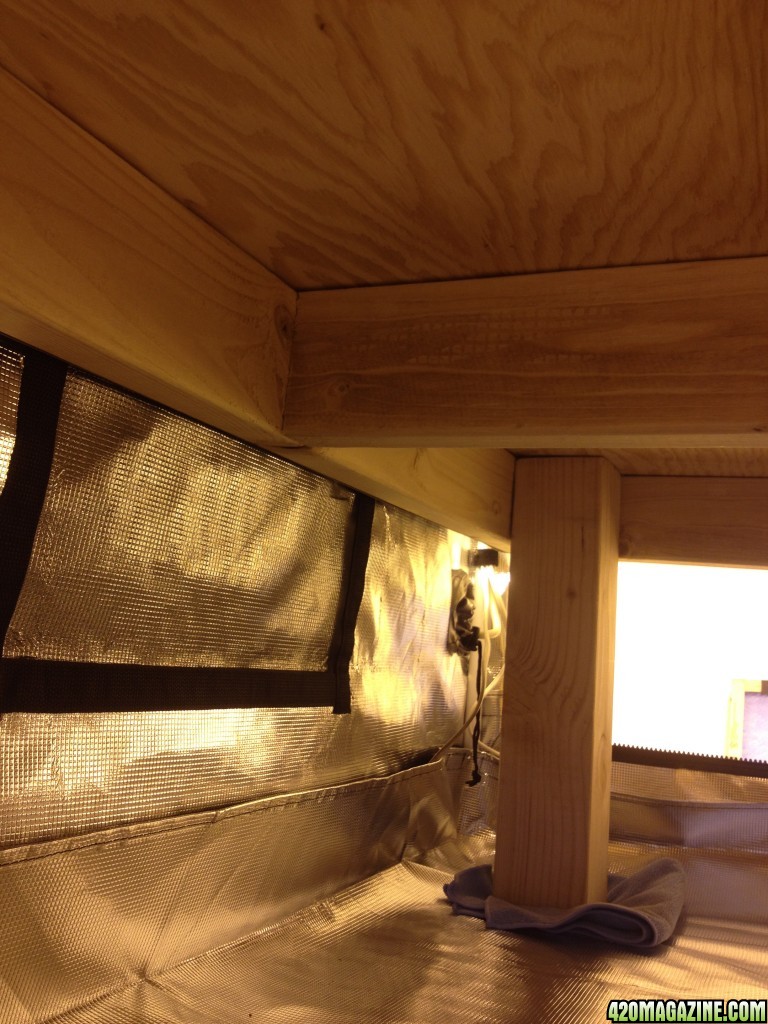
Back edge underneath showing frame and leg

1. It elevates the plants off of the floor for much easier manipulation, handling, and irrigation
2. All of the drainage is collected via gravity and only one bucket needs to be dumped
3. It saves me many hours so that I can spend them with the most important woman in my life, my wife
All supplies were purchased from Home Depot for approximately $100 which were:
2x4 pine- for deck framing
4x4 pine- for legs Back two legs cut to 17" and Front two legs cut to 16"
1/2" plywood- for deck
40 mil PVC Shower Pan Liner- for deck water proofing
1/2" PVC Pipe for deck edge lift
Conduit Clamps- to secure PVC pipe to deck
Rain Gutter Assembly(Gutter, End caps, T Drain)- for front edge water control
Wood Screws(various sizes)- to assemble frame, attach deck, legs, conduit clamps, and rain gutter
After I had all of my wood cut to length I power sanded all of the corners and edges to prevent splinters.
I finished the deck with stain and a clear coat to prevent it from soaking up moisture and being a potential spot for mold
The deck frame was assembled first with the 2x4's
Next the plywood deck was screwed onto the frame
All of the magic of the Drain Table happens due to the incline created from the back two legs being 1 inch longer. Attaching the legs was the most difficult part. Since the deck inclines with the back two legs being longer the table wanted to fall over due to it not being level. It would have been easier with a pile of clamps but I work with what I have. I placed all the legs under the deck and pushed them into each corner of the frame. I made sure each leg was vertically level before I drilled pilot holes and secured with two woods screws on two sides and one screw through the deck into the top of the leg. The top screw was placed closer to the front edge of the leg due to the slight gap towards the back of the top of the leg caused by the incline. The deck is cut to 3' 6" X 3' 2" since my tent is 4X4 I wanted 3 inches of clearance around all sides for air flow as the Gorilla Grow Tent meshed vents and air intake ducts are very low to the ground.
I left 4" of room on the front side for the rain gutter so total total deck dimensions with gutter is 3'6" X 3'6"
The front edge of the plywood deck hangs over the frame by an inch so gutter could be mounted underneath the drip edge. On the deck I mounted PVC pipe with conduit clamps on the back and side edges. I evenly draped the shower pan liner over the deck, spray tacked it down then stapled it around the frame. The back and side edges of the PVC liner are lifted by the PVC pipe to control water flow. I cut the front edge of the liner to shape so that all the water will drip into the middle of the gutter. It is super solid and I stood on it to show my wife that she does not need to worry about it collapsing.
This option was way cheaper than buying a flood table and stand
The Aurora Fabric pots are all raised off of the deck slightly by baking cooling racks. This allows for better drainage from each pot and the drainage from all the pots to flow freely straight to the gutter. When I irrigate now it is such a pleasure to watch all the water go exactly where I want it to. I put a bucket inside the tent under the gutter drain and I can come back later and easily remove the bucket and dump it outside whenever I want. My pots are never sitting in standing water and have airflow around all sides of the fabric pot 24/7.
I hope this inspires others to create and build something that makes theirs and possibly others lives easier
Back Left corner
Front Left corner
Front Left corner showing PVC pipe lifting the edge of the shower pan liner and pots on racks
Front edge with gutter
Front edge under deck showing framing
Front right corner
Back edge underneath showing frame and leg

")
 I wish this post had been a few weeks earlier! I built a similar 4x4 drain table as well. Your gutter inspires me to make a change to my layout. I chose to skimp and use a section of 4" PVC pipe ripped open. I have been fighting leaks ever since.