Sweetsue's First Grow - Stealthy Trio of Autos Under CFLs

This will be my first real grow. Prior to this I had performed two rescue grows, adopting plants that were struggling in someone else's grow space. The first was a Medical No Name and the second a Northern Lights Big Bud. The Medical No Name showed us the power of home grown meds. The second rescue taught me how to get the most out of the lights. By the time we were harvesting the NL I was completely hooked and exploring the numerous forums. A current 420 journal, "PeeJay's Prudent Home-Brewed Organic Soil - Outdoor Out 'a Sight Deck Grow" caught my eye and turned out to be the first journal to hold me from beginning to current. He got me excited about creating soil that was so alive that it only required water. I even took on a side job to finance the soil components. Since then I've been exploring other grow journals and getting my feet wet. And researching. And more researching. The learning streams never stop. One leads to another and another and now I'm absolutely enthralled with the details of cultivation in living soil.

This grow journal will likely be a rambling one as I learn the field and expand my knowledge. There's much to cover, beginning with the major stars, the strains.

Choosing the strains for my first real grow was quite a challenge. The options seem endless, and then you have to decide between photo- or autoflowering, feminized or regular. In the end we settled on autoflowering, for the faster turn-around time, and feminized for the assurance of flowering. Paying so much for a seed was sobering. We live on a severely restrictive income. This investment is an attempt to supply medication I can trust for my husband. It made my search for a recipe for the best living soil I could create all the more necessary.

We considered strains for over a week and researched reviews of seed banks carefully. Thrifty by nature, I wanted to be certain before we committed family funds. I'm beginning this grow with three different strains, starting all at once, from seed.

1. THC Bomb Auto (Indica/Sativa/Ruderalis), chosen for its low profile, high potency, potential high yield and its sheer beauty. When I was searching for a strain this one actually called to me. :D Being a fast finisher was a bonus, although my instinct is that those finish times are often underestimated.

2. Buddha Magnum Auto (unknown origin - not much info on this strain), chosen for its intriguing structure, high potency, potential yield and it's promise of climbing cerebral effect to the point of uncontrollable laughter. I've always said laughter was the best medicine and if this strain lives up to its reputation, this may be the strain for me.

3. White Widow Auto (Indica dominant, unknown percentage), a seed I was gifted and which I honestly expected to be harvesting already. Then I got caught up in the lure of living organic soil and I lost a month buried in research before I realized it. This seed will benefit from that delay. I thought about holding off on this one, questioning if I wanted to graduate from saving a plant to growing three at once. My original plan was to start with only one. After researching soil I decided to go for it. I'm an attentive and loving gardener and I'll be planting into excellent soil. I like my chances.

If anyone has any insights into the successful cultivation of these strains in LOS, input will be gladly received. I may be new, but I take pride in being a quick study.

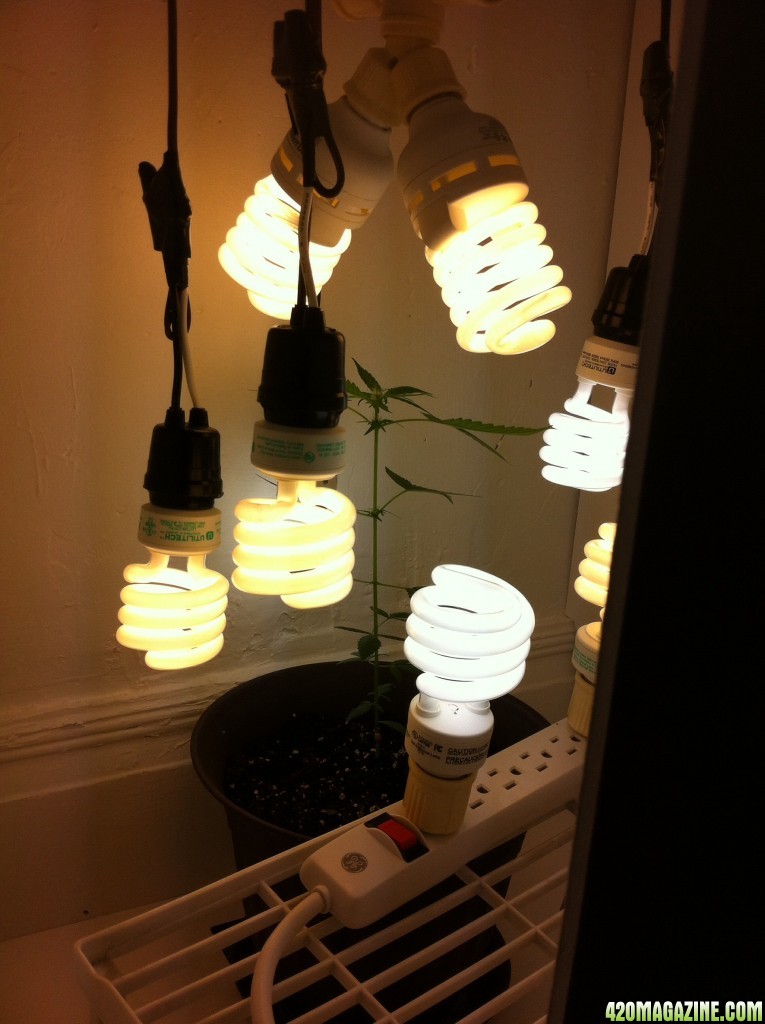
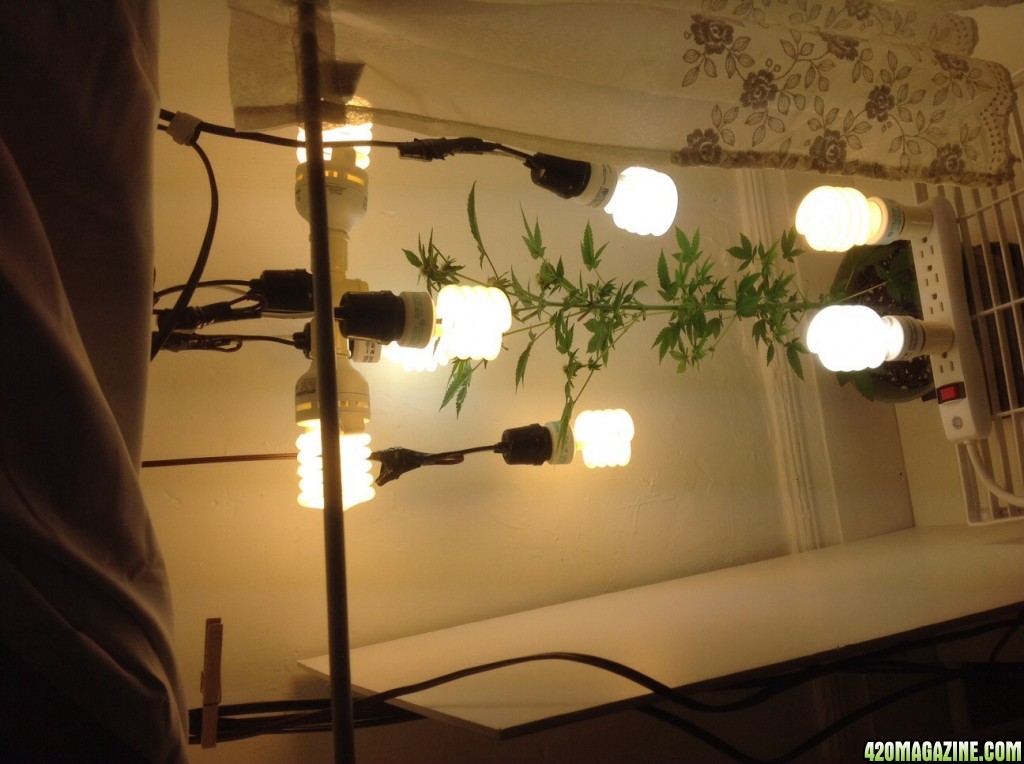
Off to hunt and gather dinner. I'll be back later with more info and, hopefully, some photos.

Susan :Namaste:
 
gl with the grow susan,
ill be checking in periodically to see your progress. I dont really know anything about autoflower cannabis no help there. Looks like you are gonna focus on the soil and avoid bottled products, you will do great im sure. The mix i use does well for everything i have put in it so far, a high quality living soil is pretty forgiving. Id be interested to see what exactly you went with for a soil mix.
have a good one,
ttyl
 
Welcome to the journal guys. This is all new to me, so bear with me until I get my bearings.

Nine44, that Magnum intrigues me too, and I haven't yet found a complete grow journal on it, much less one in living organic soil. This should be interesting.

Anyone know how to get the pictures loaded top to bottom instead of sideways?
 
The closet in transition. Time to get started.
image14746.jpg


OK, I figured that photo orientation out. You just have to keep trying until it works. To continue...

The grow space is a stealth closet grow in the corner of our living room. The basic measurements are 1' deep x 2' wide. The closet actually extends slightly further to the sides, but those spaces are too restrictive. I'll be blocking the space to the basic dimensions and utilize the sides for water and supply storage. We also raise carnivorous pitcher plants, which necessitated catching rainwater on the balcony, so we were already familiar with the process of storing water for the winter.

When I took on the responsibility of saving the Medical No Name this space was my standing computer center with storage beneath. Looking around the tiny apartment it became obvious this was the only adaptable space. After figuring out that I needed this plant in 12/12 lighting I painted the entire lower space with three nice coats of ultra white flat paint.

It was at this stage that I discovered the value of blocking the space in using flat white foam boards. Still feeling my way, I didn't want to do anything permanent, so I simply trimmed them to fit around the baseboards and leaned them in against the door jam. This covered up the shadows from surface irregularities and threw that excess light right back to the plant. I even placed a sheet of foam board beneath the plant to reflect up.

Starting totally uneducated in cultivation practices and doing almost everything wrong I coaxed less than 1/2 oz of some of the best cannabis we had ever smoked and learned how to position the lights for maximum effect.

Then I adopted a sad Northern Lights halfway through its flowering stage. I left the lights as they were before harvest, with simple height adjustments. I actually harvested the No Name slightly early in order to save that Northern Lights.

Since the Northern Lights was an autoflowering and this closet was in the far corner of the room and out of the way behind a recliner, I didn't even bother to close it up. I wasn't concerned about humidity and temperature levels at this point. Outdoor temps were decent and I knew the Northern Lights wasn't going to perform at maximum levels anyway. It was a cool back light for that corner of the room. Keeping the space wide open allowed us to grow without a ventilation system in place. We lived with the smell. I miss that most of all now that there's nothing growing. It was so wonderful to open the apartment door and be enveloped by the sweet smell of ripening cannabis. It felt so normal.

It's worth noting that we were able to do this without a scrubber because we live in a small apartment building, we are on the top floor, more or less the last house on the block, and we were only growing one plant at a time. That will be different with this grow. More on filtration in another post.

Going into this grow we decided to take my workspace out entirely. I wasn't really working there anyway and it had become more of a book shelf. Last week I emptied all of my stuff out to prepare for the new grow. I've decided to use the shelf to set up an additional grow space. The plan is to let the Buddha Magnum have the lower space and place the other two on the shelf.

The shelf is 42.5" high. The space above the shelf is 44" to the ceiling. This gives me two equivalent spaces to work with. I'm hoping I can get four plants going at one time at some point. Today I pulled out the upper shelf - a project that was a real frustration. That sucker was nailed in with 4" nails!!! Now it needs cleaned, painted, and some system must be worked out to hang lights in the upper chamber.

We also need to work out a closure that allows for ventilation. The shelf leaves a gap on the front that will allow easy air flow throughout the closet. The scrubber will be hung above and vented out through the closure. For simplicity's sake I think we'll go with 2 large sheets of white foam project board, cut to fit the upper and lower spaces and secured with magnets. Lightweight, inexpensive, easy to manipulate and simple to camouflage with artwork.

That's where it stands now. Supplies for soil are being delivered almost daily and the soil mixes will need cooking before planting, so I have about three weeks before planting seeds to get it all prepared. By then we'll have a scrubber for perfume control.

Exciting stuff. I can't wait to get my hands into some young and healthy soil. I can hear my grandpa laughing with joy.

Susan :Namaste:
 
THE SOIL

My maternal grandparents were urban organic farmers. As a small child I played in the stepped raised beds that fed numerous members of the extended family through hard financial times. The last years of their lives were spent transforming 1/4 acre of marginal soil into a bountiful source of vegetables and fruits that spoiled my taste buds for a lifetime. Another driving force in my search for instruction in creating living organic soil to plant and nurture my cannabis seeds. I should have paid more attention to my grandparents' gardening skills. How dare I act like the small child I was and be self-absorbed?

PeeJay's grow journal got me excited about soil that fed the plant. COorganics has a grow journal going on at this time that has led me to the process of creating Living Organic Soil. I've been researching the process for a couple weeks now. I feel like I took a seminar on the subject. I have combined what I learned from research with what PeeJay shared, and have come up with a soil mix that also utilizes some ingredients we already had on hand from a previous venture into Bonsai gardening that had to be abandoned when my husband's health began to fail. My thought here is that including a wide diversity of surfaces will let the community of micro beasties benefit from having a wide diversity of divots, crevasses and caves to hide, breed, and lovingly feed my plants.

My soil mix will comprise of a mix of Sphagnum peat moss, FFOF, pumice, humus (EWC and some compost), Yum Yum Mix plant fertilizer (thank you PeeJay), a purchased organic nutrient kit for LOS, and some assorted sands and such left over from bonsai, including zeolite, which I'm excited about using. Zeolite can hold up to 55% it's weight in water and release it slowly as the plant needs it. It helps prevent root rot and buffers nicely against mild drought conditions. Of course there will be a mycorrhizal inoculant added. I'll be topping off with a mulch of some kind. Not sure yet what I'll be using. I'm considering chives as a living mulch. I've just started looking into this.

Pictures will follow of components and ratios.

I want to do a no till grow, so I'm planting in 5 gallon pots. I'd love to have GEO pots, but that's for another day. I'm growing Autos, which means they should be planted directly into the pot they will veg and flower in.

I have a question here: Autos don't like the stress of transplanting, but seeds need a lighter soil mix to thrive (at least that's the gist of my research). Would it be acceptable to create a small central pocket for the seeds that is of a light mix, surrounded by the growing soil mix, and then, by carefully watering to encourage root development, have success without transplanting? In theory it sounds good. I would appreciate your thoughts on this.

After everything arrives I will be mixing the soil blends and set them aside to cook. I'll give the seedling mix two weeks and the basic soil a full month before potting up. The basic soil will get an ACT of my choice (as yet undecided - still researching) as it goes into cook.

I'm excited about finally moving forward. I have learned so much already from this community and we have just begun to know each other.

Susan :Namaste:
 
the LOS ammendment kit you bought should be complete, adding the other stuff in addition to that could make it "hot". if I was in your shoes I would mix the soil to the exact specs given in that kit you bought and top dress with the yum yum occasionally so you are getting some use out of it. remember less is more with soil mixes. my living organic soil has proven to take freshly rooted clones without burning them. you may wanna mix light and er on side of caution with all you have going on. you can easily do as you suggested and make a pocket of mellow soil to germinate seeds in. i havent ever seen the need to have separate soil mixes for seedlings, vegging, and flowering plants. thats just my experience with TLO and LOS so far.

you have a plan to bring fresh air into the closet grow room you are building and exhaust it out?
 
1/3 peat
1/3 humus
1/3 drainage

+ the amendments you purchased. there is room to play around and but being new to it, you will likely find best results sticking somewhere near this. im new as well and not varying to far from the accepted recipes has been so far rewarding for me.

some people do less peat and some top soil, you could use your FF in this manner so as not to waste it.
 
oh yeah and not to be a bother...
I looked up 25 gallon geo pots without handles 15$+ free shipping. I would love to see your 3 autos at home together in single big pot. i have never grown in small spaces like that but if i had to it would be a no brainer for me, 1 big pot, 4-5 plants and one big happy ecosystem in a little closet.

you have a great start susan, keep it up!!
 
All valid points CO, and all things that have been tumbling around in my mind. Please be a bother!

I keep coming back to the idea of less is more. I haven't gotten the nutrient kit yet, but the thought has been foremost that the best use of the Yum Yum mix would be as a top dressing. I've also been hounded by the idea that plants enjoy sharing a space. They like to talk to each other apparently. I won't be planting until after the money for next month becomes available, so I may spring for the geo pots anyway. Unfortunately the 25 gallon will extend right out of the grow space into the living room. I'm pretty restricted by the dimensions of this tiny Victorian-era closet. Five gallon pots for each is doable though. They can still converse in the close proximity, they just won't share root space.

And then I keep thinking "This is a corner of the room that is quiet and unused. Why not build a bump-out that would accommodate the plants?". My husband looks at me like I'm a bit crazy when I say stuff like that. I saved the first two plants keeping the space wide open, but I'd like to see if we can get better results by controlling humidity levels (although that wasn't much of a concern with my adoptees). I liked having the space open. It was like the plants were part of the family. We have a dresser in the living room topped with my husband's Nepenthes collection, under a couple shop lights with mixed spectrum bulbs. They grow there because he wants to be able to enjoy them all the time. I kind of liked having the same arrangement with the cannabis. Of course the Nepenthes don't have any perfume, so there's that.

I don't think adding the Japanese river sands in small quantity will adversely effect the soil mix. They'll just supply more diverse hiding places for beneficial bacteria and fungi. PeeJay has great luck with adding the yum yum, but then he's not growing autos. Since I'm doing three maybe I should try one with the yum yum mixed in and two with the CC mix and top dressing with yum yum and see what happens. Life is one big science experiment anyway, no?

I'd almost convinced myself to give the FFOF to my brother-in-law who swears by it. Instead I think I'll mix a light bit into the overall ratio of sphagnum. When he starts his next grow I'll give him what I have left.

Yes, plans are in place for adequate air intake for the closure. So many details to get it right. The beauty of this approach is the "just add water" end game. This will be so much fun.

Still trying to find out how to orient photos. This is frustrating.

Susan
 
This is the lighting array I used to bring my previous adopted plants to harvest. This is the NorthernLights, the day it came home to us.
image14758.jpg

Sorry this one is sideways. I'm still trying to work out the particulars of posting photos, and this one wants to be on its side. Any helpful ideas on overcoming this problem will be greatly appreciated. This is my first cannabis plant grow ever, a wonderful Medical No Name that was the best smoke of my entire adult life. Only part of that was due to the fact that it was my first. An amazing cerebral high that was achievable in less than four hits. Wow!
image14761.jpg


LIGHTING
I opted to go with CFL lights. Research taught me that the 23watt bulbs are actually the most efficient delivery system, providing you can get them close to the plant (within 3" max.). Using this method I was able to get that 1 1/2 ounce harvest from the Northern Lights. I used two 40 watt bulbs with a y-adapter for a canopy and surrounded the rest of the plant with 23 watt bulbs. Using a surge protector and some plug in adapters I added lighting from beneath. With the Northern Lights I had a total of five 23 watt bulbs (3 warm, 2 cool) and two 40 watt bulbs overhead, for a total of 13,400 lumens. I was shooting for 14,000 lumens in this space, but 13,400 worked pretty well. That will likely increase with this new grow. One more well-placed bulb should do it. I'll need to replicate that on the upper shelf as well.

My husband was an electrician in a previous stage, so the manufacturing of the individual light cords fell to him. We went to Lowe's and loaded up on wire, plugs and sockets and spent a fun afternoon making hanging lights. They'll be modified before this grow to remove the loop he put in to protect the wire from the weight of the bulbs. I have since convinced him that the weight is negligible, and a redesign is in the works.

I secured a wire rack to the underside of the wooden shelf and used a combination of Velcro and S hooks to hang the cords. Using wooden clothes pins kept everything from slipping out of place. I still have to work out the details for hanging lights in the upper chamber. It will be along the same idea, but the ceiling is old plaster. I'm trying not to make any holes in these antique walls.

The chief advantage I found with this system was the ability to bathe the entire plant with light. There were no shadows to speak of and once I inserted the white foam boards you almost needed sunglasses to look into the closet. I'm looking forward to seeing what I can create from seed. Other benefits were affordability and easy access to bulbs. I purchase them from Lowe's, which is just down the street from our home. I'm having difficulty finding 45 watt cool bulbs for the veg grow, but I've already come up with a solution using more 23 watt bulbs and some y-adapters instead.
 
I found a neat tutorial on another site for a home-made carbon scrubber using hardware cloth and odor removing filters for a typical furnace. I have priced the materials at our local Lowe's for under $90. I like the idea of building my own. Then there's the consideration of funds. This project has taken a big bite out of family funds already, so I'm saving money here and hoping that it works as well as the growers who are using the model say it does, at least until I can invest in a professional model. At that point my home-made version becomes a backup.

This project won't get done until next month, when more funds are available. Thankfully the perfume shouldn't be a concern before then. I'm of the opinion that a decent odor filtration system is every bit as necessary as good lighting. I loved the smell of growing cannabis, but there are neighbors to consider. We're using a 6" inline vent fan with a speed modulator tied in. A 4" would do the job easily, but I instinctively feel that the 6" will do a better job with the scrubber attached, and then when I can finally afford a grow tent we will already have a good fan on hand. It's a good thing I married a man who can do electrical.

When complete the grow space will be air cooled by the vent fan. This should keep temps under control as well. We keep the apartment at a cozy 73 degrees year-round to make things easier on my husband. Kidney disease has messed with his internal temperature control.

I'lll work out humidity concerns as they arrive. It gets pretty dry in the apartment during the heating season, so I will need to make some accommodations. Any input here would be greatly appreciated.
 
FEEDING THE HERD
I won't be checking PH at all. With Living Organic Soil it's a waste of time. The idea is to include the nutrients in the living soil mix and then feed through top dressing with organic materials and ACTs. I played around a little with teas with the adoptees and feel confident I can learn this. Simplicity is the best approach.

With the two adopted plants I had a small problem with gnats, likely brought in with the plants. Diatomaceous earth was my go p-to, and an effective go-to at that. Water, let the surface dry and add a sprinkling of DE. Voila'. No gnats. It took me a couple waterings to realize this. Thankfully we had a bag of DE on hand, left over from a bed bug scare in the building a couple years ago.

I am an attentive gardener and will be watching the plants closely for signs of thirst. One can develop a sense with the plants, if you allow it to happen. Thanks CO, for the insight into how you water. Because I'm attempting a no till approach and will be using pumice rather than perlite it will be different than it was with my adopted babies. I won't be able to lift and feel for dryness in the same way. This just means I'll need to be alert. Eventually I'm sure I'll figure out how much water each plant requires.

I only water with rainwater, gathered from the balcony. It's a system that hasn't failed me in many, many years. You simply must prepare for winter storage.

No added frets will be applied, other than top dressing with organic materials and the occasional ACT using home-made plant fertilizers derived from local "weeds". I started making them months ago. That's a whole new adventure. The soil will feed the plant. My goal is to create soil that is so healthy and alive that I can plant the seed and just water. Exciting.

That's where we stand as of today. I need a couple days to get some doctor visits out of the way and then I can begin painting and securing the space. The soil mix components should be here by week's end. Hopefully the seeds will be here as well by then, but I need another couple weeks to cook the soil anyway, so they can take more travel time if necessary.
 
good morning susan,
the Japanese river sands seem like they would be a nice addition to ANY soil mix.
to effectively up the humidity in that small space, just hang damp towels from a hook or rack or something in there, even a pail of water would help. the damp towel should do wonders for upping RH for you, for free.
watering, sounds like you're getting it. I used to do wet dry cycles and feel the weight of the pot to know when to water, now its simply keeping it moist, all the time but never soaking wet, ever. This is a great environment for soil health, and beware gnats like it too, and there are plenty of gnats in FF bag. But gnats aren't a big deal anyway and im beginning to think no pest problem is really too big a problem.

rock and roll, make that space a little bigger if you can get away with doing so, if you made it a little bigger, it would give more back to you.

morning joint and coffee and a mellow kelp tea foliar for the flowering girls before my lights go out is calling me..
 
Good morning CO. I turned to my husband and said "CO says if we make the space bigger it will give more back to us" and without skipping a beat he replied "If we make it bigger we can create a shelf to display some orchids and a Betta Fish in a nice tank."

This is why we are still happily married after 33 years. Time to draw up some designs.

Thanks for that wet towel idea. I would never have thought of that. It's perfect for the small space. I love a simple low-tech idea.

Gnats in FF? That would explain a lot. I had to dose with diatomaceous earth with every watering on the NL. Maybe I'll pass on it. It was a small part of the mix anyway.
 
Aaand... Then we looked at the dimensions of the geo pots and realized that by going that big we had lost all sense of stealthy. It's hard to explain a full bump-out of the closet. Until I figure that out we're limited to the original 12" 5gal pots. I also realized I will need to lose the shelf to allow space for optimal growth. It hadn't fully occurred to me that my previous charges were stunted when I got them.

OK, we talked it over and decided to plant only two and save one for the next grow. Look at me - looking forward to the next grow!

This is why you plan and plan before you start spending money. This is a permanent fixture in our home but needs to leave no permanent footprint marks in this rented apartment. I always have to keep in mind that we get inspected once a year. It's a cursory inspection that takes less than five minutes, but we don't need raise any suspicions.

So two 5 gallon Geo Pots. $10.50 and free shipping. They'll be about a foot high and the tallest strain I'm growing is about 4' max height. I need to take the shelf out and rethink the lighting array. Maybe I'll put that shelf I tore out back in (isn't life fun?) and use it for storage. At least everything will be clean and freshly painted. The shelf I took out has to be over 100 years old. It needs a serious cleaning and repaint.

The plan moves one more step towards the goal of safe, organic medicine that we know we can trust because we grew it ourselves.
 
that all sounds great, a larger grow space isn't necessary, although I bet 100:1 you will end up wanting one. same with HIDs. whats cool is you are about to grow some fine organic cannabis!
 
The blessing and the curse. I already know I am capable of growing a higher quality cannabis than we have ever been able to purchase, without any chemical additives. With all the crap my husband takes in prescription meds I will know that this medication is clean. My simple and limited history with cannabis cultivation has already left me intolerant of the product on the open market.

Reading through grow journals of my strains over the weekend I am longing for a larger grow space, but it is what it is. Making it work in this space will teach me invaluable lessons to be applied to future grows. I can see there's a construction project in the works at some point. I'll need to take a corner somewhere and build a serious box. It gets tricky without power tools at our disposal. I should begin that fund for a tent. Seriously. And rethink my layout in the apartment.
 
Just an idea to throw out.. because I wouldn't want to put holes in original plaster either. The beauty of old homes is amazing, and we just don't see that kind of craftsmanship as much anymore...

But a lot of folks like to use grow tents. And some others will shop around at yard sales and thrift stores to find old cabinets, armoires, anything tall.. And they modify them to become grow cabinets. You can also find a nice armoire or cabinet to match your interior decor so it doesn't stick out like a sore thumb as well.

You'll want to keep your lights spread out around the plant the way you're doing it now, this will give even light to all the bud sites. So you're doing great so far.

For the next grow, you and your husband might want to consider topping the plant and using LST (low stress training) to keep the canopy flat, which translates to less adjusting of individual light bulbs, and would be only a single adjustment of a whole light hood.

This topic here is a perfect example, one member, guttamane2486 did a great job modifying a cabinet into a grow cabinet. He was even able to use the wire basket, and converted it into a light hood: First Grow Box
 
Back
Top Bottom