

HashAssassin
New Member
A couple people have asked me for plans so here is yet another addition to the family of DIY carbon filter designs.
Materials
2'x5' roll of 1/4" Hardware cloth
1- 6" & 1- 8" duct caps
6" duct collar
6" x 8" duct reducer
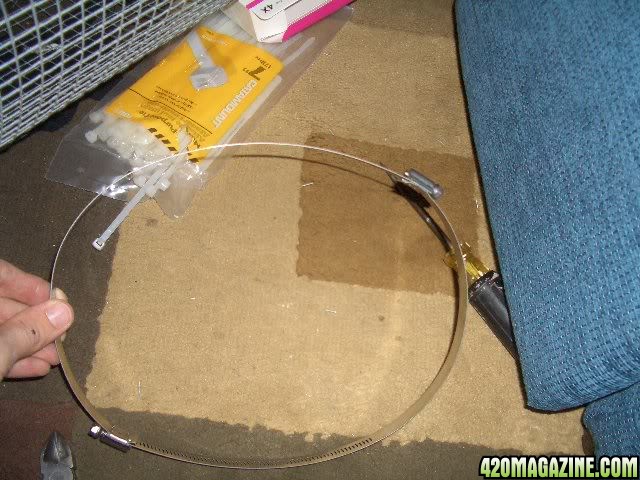
Hose clamps(2- 6" clamps and 4- 4" clamps)
Activated Carbon or Carbon Furnace Filter
Small package of Poly-fill
Two packages(or two-pair) Extra Queen size pantyhose
Extras you might want to pick up or have laying around:
Twist Ties
Scissors
DuctTape
First to build the "core", get the hardware cloth out and wrap it around the 6" cap and snip. Leave a few inches to overlap to strengthen the seem.
Be sure to snip so as to not leave a row of points that will undoubtedly poke you, not to mention it'll rip the panty hose.
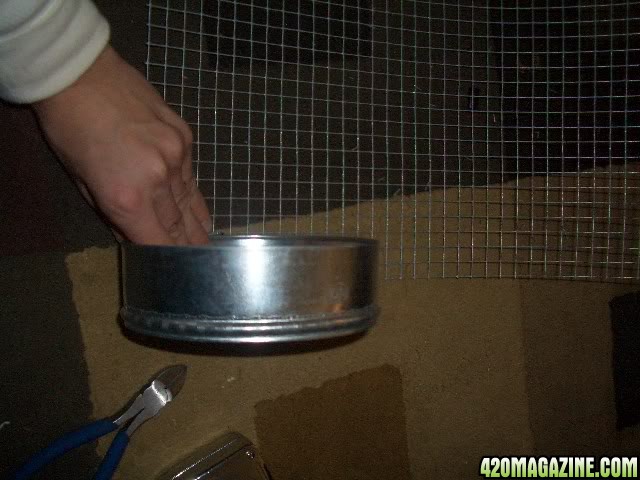
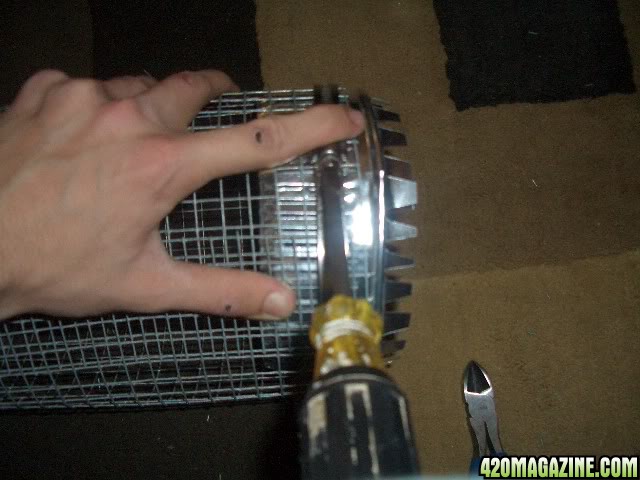
Once the hardware cloth is snipped and wrapped around the cap, use a 6" hose clamp to clamp it down.
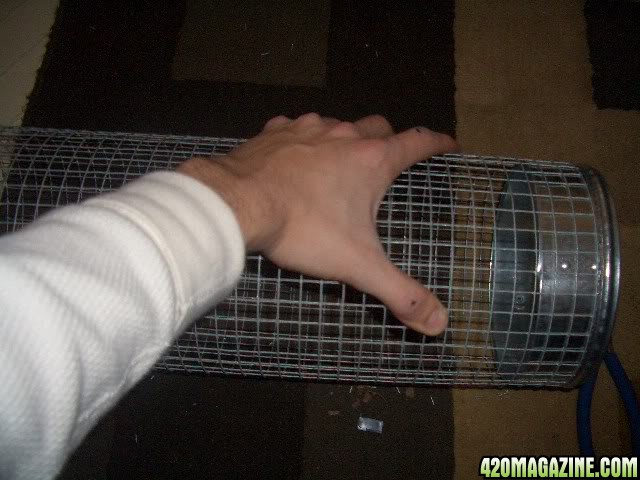
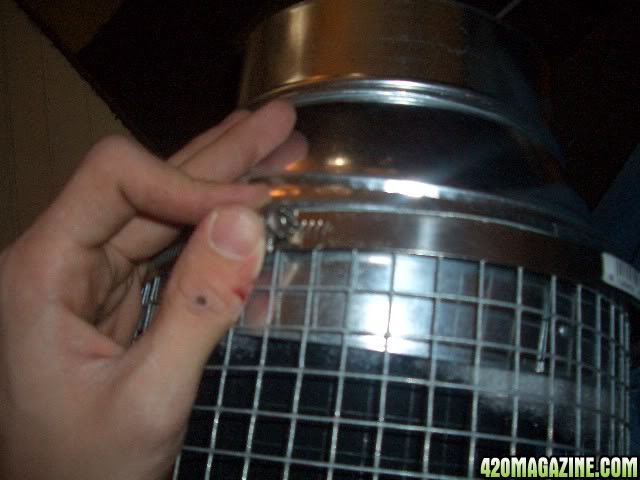
Do the exact same thing on the other end but using the 6" collar - put the crimped end of the collar inside the core, leaving the tabbed end outward.
Cut the legs off a pair of pantyhose and stretch each one over the capped end of the core, stretching them and covering the entire core with two layers.
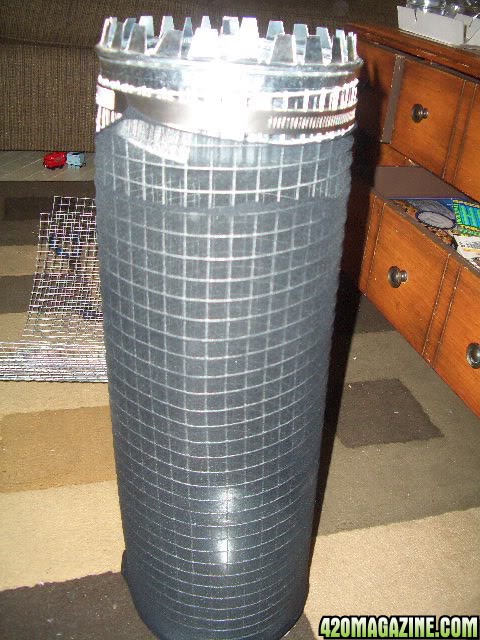
So that's the core, it's finished. Next, take the collar-end of the core and set it into the 6" x 8" reducer as shown. Flip it over and tape the collar to the inside of the reducer. I used aluminum tape, but a good quality duct tape should do just as well.
Fill in the space between the collar and the core with Poly-fill.
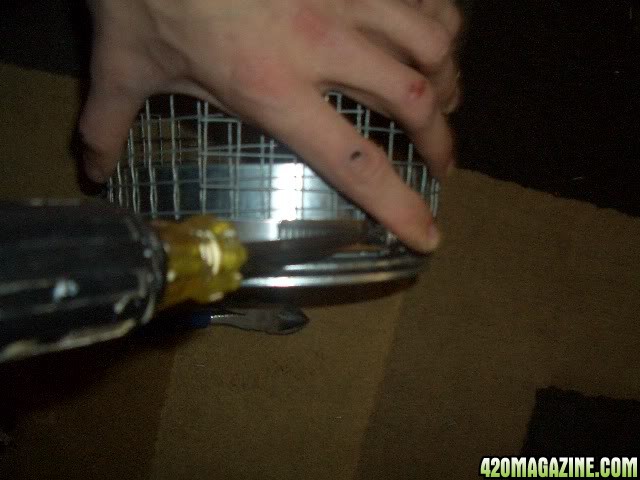
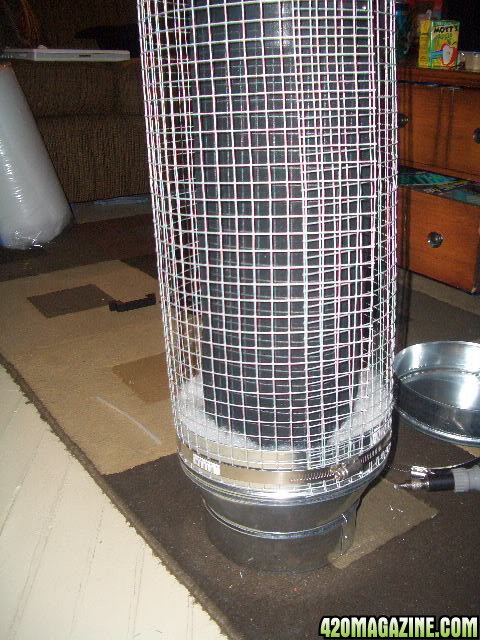
Once you have that done, it's time to affix the hardware cloth to the 6" to 8" reducer.
Place the 8" cap in the opposite end of the hardware cloth for spacing and structure. Form the hardware cloth around the reducer, just as it was done with the 6", and clamp it down using two 4" hose clamp together-running into each other. If you want to use the carbon furnace filter you will want to wrap it around the 6" center assembly prior to this step.
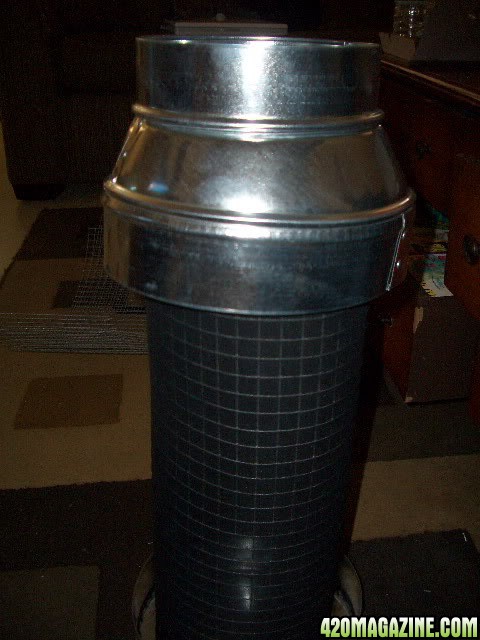
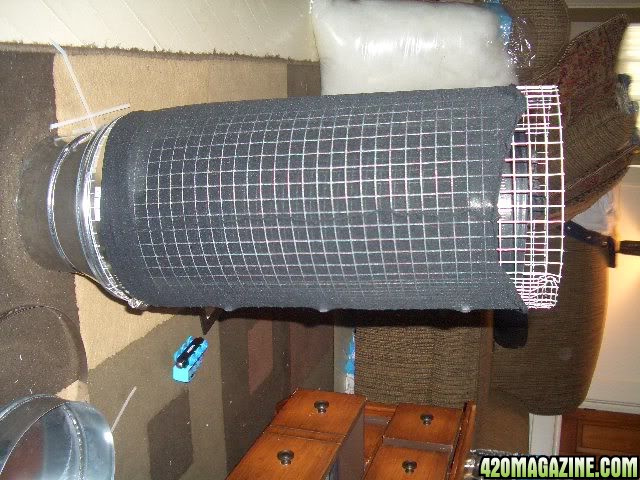
Time for the hardest part of the whole project. Putting pantyhose on the outside. I recommend putting some duct tape over the end of the hardware cloth and clamps. Insert the entire assembly into one leg, stretch, cut to length and repeat with the other leg for double layering.
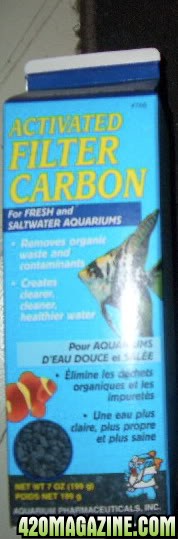
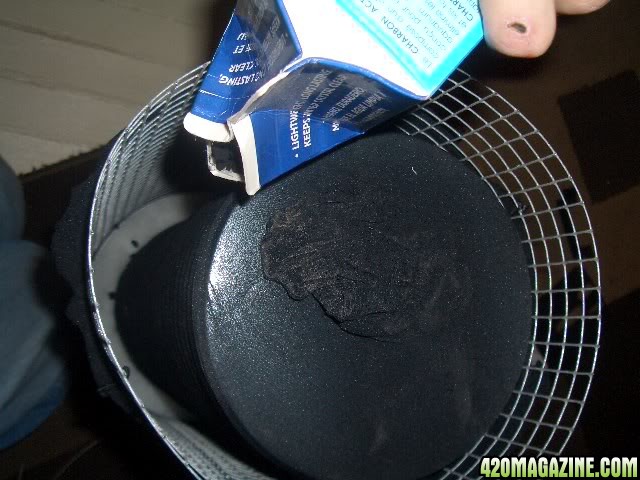
Now for the exciting part, fill it in with the carbon. Below is the most expensive yet readily available carbon option. Cheapest source is online or at a pool supply store.
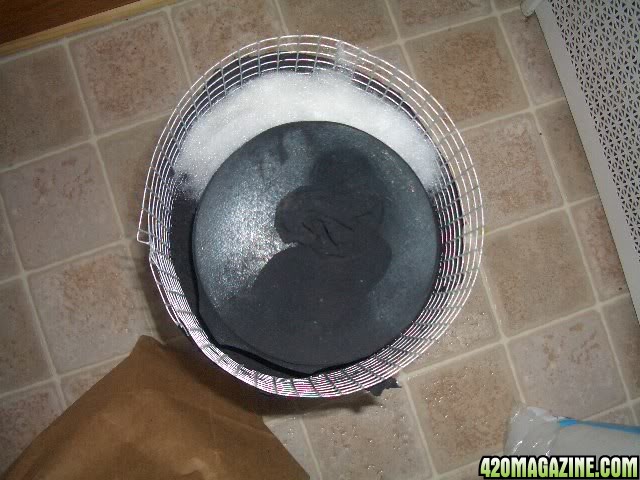
You may need to hold the core at first to keep the spacing even. This will give you a continuous 1" layer of carbon. Perfect.
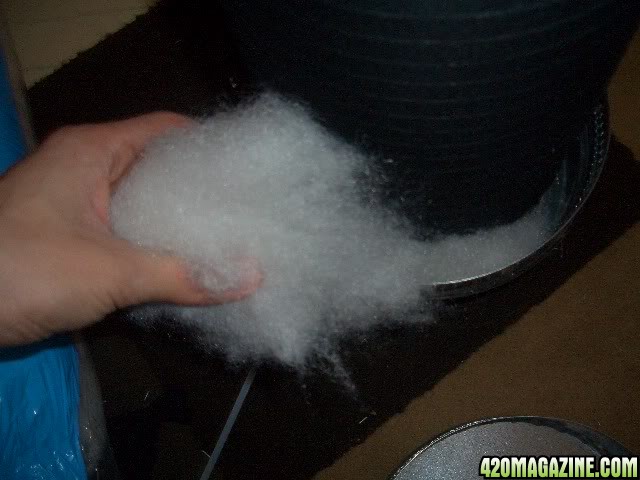
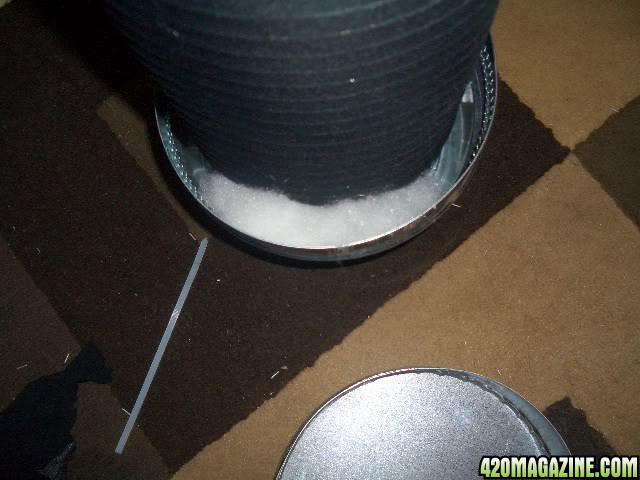
Leave an inch or two of space and fill in with the Poly-fill.
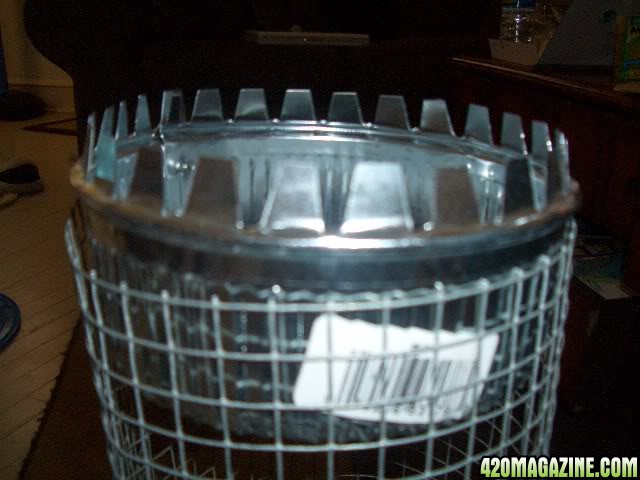
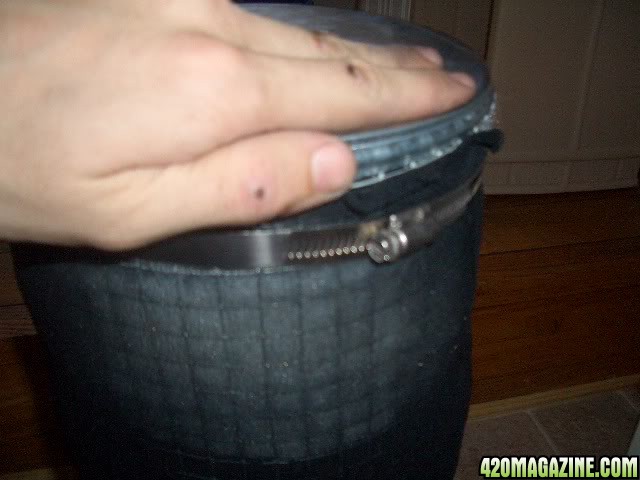
Now replace the 8" end-cap, clamp it down, and you're done
To refill, simply loosen the clamp on the 8" end cap, remove the cap, dump the carbon, refill, and replace cap.

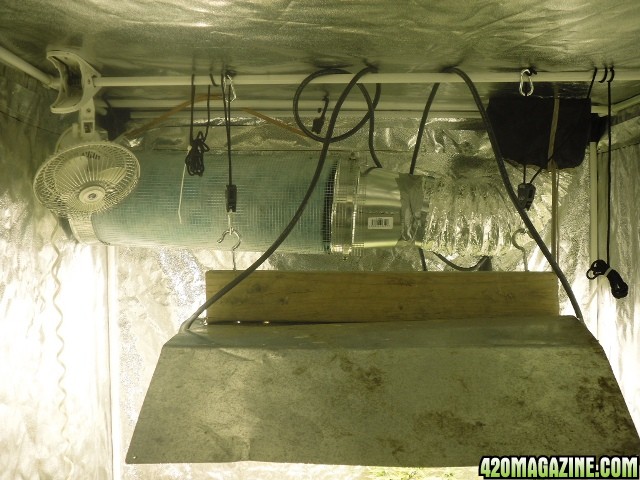
Now your ready to install. Remember filters work better when you pull air through, not push.
For this filter I used a carbon furnace filter instead of my usual carbon because I couldn't find any fatty size pantyhose.
Materials
2'x5' roll of 1/4" Hardware cloth
1- 6" & 1- 8" duct caps
6" duct collar
6" x 8" duct reducer
Hose clamps(2- 6" clamps and 4- 4" clamps)
Activated Carbon or Carbon Furnace Filter
Small package of Poly-fill
Two packages(or two-pair) Extra Queen size pantyhose
Extras you might want to pick up or have laying around:
Twist Ties
Scissors
DuctTape
First to build the "core", get the hardware cloth out and wrap it around the 6" cap and snip. Leave a few inches to overlap to strengthen the seem.
Be sure to snip so as to not leave a row of points that will undoubtedly poke you, not to mention it'll rip the panty hose.
Once the hardware cloth is snipped and wrapped around the cap, use a 6" hose clamp to clamp it down.
Do the exact same thing on the other end but using the 6" collar - put the crimped end of the collar inside the core, leaving the tabbed end outward.
Cut the legs off a pair of pantyhose and stretch each one over the capped end of the core, stretching them and covering the entire core with two layers.
So that's the core, it's finished. Next, take the collar-end of the core and set it into the 6" x 8" reducer as shown. Flip it over and tape the collar to the inside of the reducer. I used aluminum tape, but a good quality duct tape should do just as well.
Fill in the space between the collar and the core with Poly-fill.
Once you have that done, it's time to affix the hardware cloth to the 6" to 8" reducer.
Place the 8" cap in the opposite end of the hardware cloth for spacing and structure. Form the hardware cloth around the reducer, just as it was done with the 6", and clamp it down using two 4" hose clamp together-running into each other. If you want to use the carbon furnace filter you will want to wrap it around the 6" center assembly prior to this step.
Time for the hardest part of the whole project. Putting pantyhose on the outside. I recommend putting some duct tape over the end of the hardware cloth and clamps. Insert the entire assembly into one leg, stretch, cut to length and repeat with the other leg for double layering.
Now for the exciting part, fill it in with the carbon. Below is the most expensive yet readily available carbon option. Cheapest source is online or at a pool supply store.
You may need to hold the core at first to keep the spacing even. This will give you a continuous 1" layer of carbon. Perfect.
Leave an inch or two of space and fill in with the Poly-fill.
Now replace the 8" end-cap, clamp it down, and you're done
To refill, simply loosen the clamp on the 8" end cap, remove the cap, dump the carbon, refill, and replace cap.
Now your ready to install. Remember filters work better when you pull air through, not push.
For this filter I used a carbon furnace filter instead of my usual carbon because I couldn't find any fatty size pantyhose.