Hi, g'day. No, Sir, I did not. I, atm, will refrain from using the word 'Plan'. I feel I am still at the stage r & d/t & s; Try and See. Either I've had a bunch of luck up til now, or I am doing something partially correct. I hope the later is the case, more to that below...
As said, I are not planning, going by any senses I can utilize at any given moment, yes. Healthy I would say looks somewhat different. Well, the AF's at least. Trying to follow the Canna Nutrient schedule (Shed-u-el, not sked-uoull...Regime for those who daren't pronounce schedule properly...), but it's meant for regular/Fem Seeds/plants... The leaf rims are yellowish, and again, not each plant... same strain, same seeds, same everything. Thought perhaps I hadn't warshed the H2O2 out of the perlite properly after sanitizing post 1st run... Saw vids on youtube saying H2O2 is actually good/great for rooting.. releases O2/the extra atom when in contact with water. THEN (!!!) I pulled the Clones out of the net pots (2 Inch dia) and saw mold ALL OVER the stem/root area. Opened my rooting compound, and it too was moldy on top... garbage.. 7 clones and a jar of iclone... the other 4 looked ok, then along came mounty and it were only 3.. ooppss..
So, in the Veg space we haveth: 3 freshly rooted/rooting clones, 10 AF's, 10 fems in veg/solo cups, yet. In the Bloom space we haveth: 3 Fems at week 6/7, 4 Fems at week 4/5 (Mom is one of these now) and 2 ea fresh new maybe 30 cm tall fems/clones from moms 2nd last (of 3) donations. The feeding is like at a zoo.... almost have to wear armour!!
On to the pix (Pix of bloom space tomorrow/weekend, girls are dreaming now...)
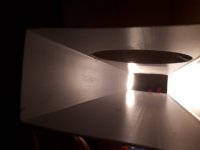
Mounty
K, my question(s), and I had wanted to ask Pidgeons420 in his last livefeed, had stayed up extra, (Its what, a 2 day time difference between here and Yonder Province??), but was too tired and fell asleep infront the pc... So, my dilema: I am using 100% Perlite as a drow medium. Is that the reason my dope dosen't smell or taste?? I dried it/no longer fed them, in the grow space, in the pot like 3 days before harvest. Cut and hung for what 8 days, been curing and smoking since. I do not know if you/anyone saw the pix above, but I would say them girls looked damned good, with room for improvement, naturally. If the perlite is at fault/guilty, what, if, can I do to get some more/better flavour flave out of them? I find too, for using perlite I was under feeding.. any comments/tips/advice sehr welkom!!
Hey peeps, got some stuff done around here aswell as enjoying some commeraderie here amongst you(s) in other Threads.
So, what have we done.... quite a bit actually, just where to begin todays excursion/story time...
The 4 clones are no longer under us.. dead/muerte/tot/finito/basta amen... the mold in my rooting compound is/was too much.. note to self: iclone is garbage
Mom and 2/3 siblings are doing just fine. Just today as I was doing my daily visual inspections, I noticed the one girl cowering in a corner, shaking like a leaf, looking damned unhealthy. Pulled her out. Yupp. Sick. But what? Stunted growth in comparrison to her sistas.. Looks dry, malnutrishioned.. did I oversee her during watering, or perhaps miss the pot EACH TIME??? Fork me!!
In the veg space:
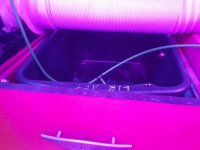
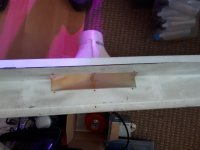
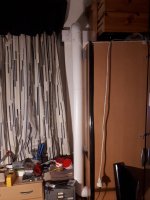
I pulled the middle shelf out, lifted the lightworks as high as possible. I installed a 2mm thick steel plate(****) instead of the wooden shelving I had been using, Reason: Mold. Not that it is a problem, or has been a problem, but prophylactic, to act before a problem occurs. Water spillage, high humi. Spores get into wood to fast and just explode, population/mass wise. Ok, steel may rust but for 2mm to rust through.. AND it should help keep the temp in winter, once up to temp..
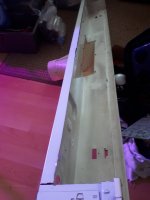
Below this steel plate, I now have an A/C unit in the 'Open' space, in the drawer I have a plastic collector (17l) for my drain to waste water. I have devised a plan for the watering. Waiting on parts, then testing. Ifn all goes well, I will post. If not, my name is rabbit.. I had wanted to install a larger, 33L hamper in this cannister as drain collector stage 1, smaller cannister then cathing any overflow from stage 1, as a back-up so to say. That does not work as wanted. Ducting from a/c is in the way. see pics below. note to self: needs rethinking/reworking. No autowatering w/o secondary back-up/water catch tank...
Drilled a hole 100mm in the wall between grow/bloom, at the height of the air out from A/C unit. On the inside, bloom side, there is a vent with vanes that open when air flows. I hope to get this set up so A/C only runs when bloom lights are on, preventing any false light from veg side through, sending them back into veg... This, upper vent, enters the bloom area at pot/root height... Like said, the a/c unit is BELOW the shelf, so it is quite dark, just not sure just how dark. (Perferably utter/pitch black)
On the opposing/putside wall, I too drilled a 100 mm hole for the venting of the a/c. The duct coming out the a/c is 125mm, the pipping I have is 100mm. I reduced the dia before going through the wall. Once exited, i have a 90° elbow taking me straight up, where I will be joing this ducting to the pre-existing exhaust ducting. I have an extra inline fan (100mm/240 m cu/hr) ordered, but doubt I will need the extra fan. A/C blower is quite strong already. I will be installing a non return valve into the ducting to keep critters out. Perhaps beg/borrow/steal a pair if nylons from the wife for added finer filtering/doorman.
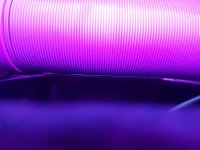
Got some ultra fine parts in from Rapid LEDs. 1 ea Exotic board, 1 ea Emerson effect board, 2 ea Growmau5 Far Red Pucks. Pucks are installed in the veg space, to help the autoflowers with their turn-over. Only on 15 min after daylight cycle ends. The last 10 cm of the 2 long boards extend into the grow space, perhaps 2 leds (COBS)/board are in grow space. No problems. Plants lean towards the blue light of exotic board. It seems not to be affecting the other, vegging plants. I also installed 4 ea diy led boards, using sets of three (3) 3w leds. IR/UVA/Deep Blue all mixed. Blue lights on during normal daylight cycle. Far reds on with Growmau5 pucks.
Disco ball installed incase thge girls want to do a bit of dancing in the limelight.
The 2 46w TLEDS are now mobile, can be placed diagonally almost anywhere needed. Was a crap idea to install them in a firm/immobile position. Looked good/clean, but impractical...
2 fans 220v up top, keep the air between plants/light in motion, 24/7
1 fan 12v (PC Tower fan, unducted, blades not protected) keeps the air around the roots/pots moving 24/7
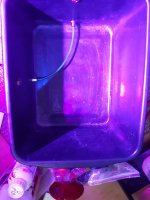
2 ea drain pans, ea with their own drain spigot and hose/tube. Hope to be able to have the plants divided up into age groups/watering plans per pan, so I can collect run-off for analysis. Right now too many plants, too much chaos. Note to self; Mui Importante!! Get this shit done!!
In the bloom space:
Same metal plate(****) installed as in veg space. Installed as far down as possible, even removed more wood, and installed new brackets. These 2 metal plates are not to be adjusted.. thats what the hangers are for...
'Effect boards' from rapid LEDs installed. They are like 100 cm long each, my space(s) is (are) only 88 cm wide. Bought an Oscilirating cutting tool, and cut 2 rectangular holes in the wall between spaces. On the far/inside wall of bloom space installed 2 pieces of wood as brackets for the boards to rest upon. They are not bolted down, but the weight of the heatsinks should hold them in place through a smaller earthquake/headboard banging... The exotic board (UVA and IR) is on the whole 12 hrs. The emerson board comes on 15 min at end of daylight cycle.
2 fans 220v up top between plants and light.
1 fan 12v by pots/roots keeping air moving there.
Drawer from closet now holds the nutrients and additives i use most. Through the a/c the temp should be moderate, and dry. In the second space, I am contemplating installing a humidifier. I already have it, not sure I want to use it though.
Extra carricular activities, also to do with greenery;
I never before knew I had a green thumb, and can handle plants quite well, or they seem to like my tlc.
I have now ventured off to further reachings of items floral: I have a small green house (IKEA 'VÄXER '), inside, where I am growing mints, clovers and basils. In another vivarium, i have 5 sorts of flesh (sushi) eating plants. In the fridge, i have berry seeds aclimating. (They need/like a cold 'snap' to tell them spring has arrived and they can germinate...)
**** I have the possibility of cutting out the middle, and installing a piece of aluminium plate with multiple holes, for added airflow. R&D atm to see if it is needed/req'd.
So, on to the pix:
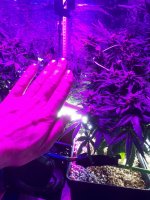
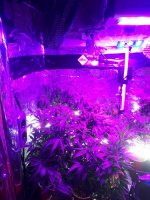
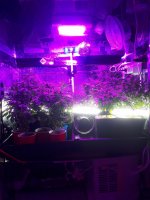
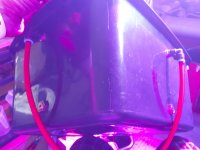
1-3 Healthy and unkealthy plants. same age, same cycle.
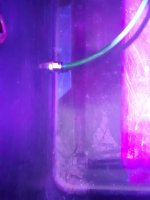
4-8 Rapid LEDs and/or DIY LED Boards
Last few.
1st: Old fluorescent light fixture I got from work, with a cooling air duct attached. I want to install this along the top of my window for exausting. For those who've not been here to Germany or Europe: The windows can be tipped, meaning they are open wider at the top than bottom, a v-shape. If I install this box up top, and 'seal/enclose' the sides no warm air or bugs should get in in summer. Insect netting will be used aswell as a precaution. The only thing is that you really should not drill into the window frame. They are 'thermo' windows, having 2 or 3 planes of glas. Drilling would cause them to loose their thermal function, meaning heat loss in winter. I will have to use glue and/or weather stripping/seals.
2 + 3 : Window 'tipped' - Lever 'up' window is tipped, lever down, window is closed/locked. In the middle, the window can be swung open wide..
Herbs and Flesh eating plants. Hope to integrate them into the garden as a bio weapon against bugs. Mints AND Carnivores
1: Led strips i encased to make waterproof in the humid propigation growhouse. No clones atm, carnivores are aclimating.
2: Growhouse from IKEA, with 2 of their lights installed and added 3 extra led strips
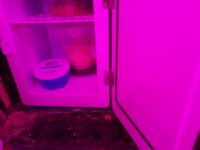
3: Little shop of horrors. Carnivorous plants. I bought some maggots, fruit fly larva and big fat wasp larva. Have a mini fridge to keep them cool. They go dormant, will not cocoon, and are easier to 'feed', less active. AND they can be kept quite some time. I fed the cannister plant 3 large larvae yesterday, should be enough for 3-4 weeks. The smaller, venus fly trap and morning thaw (translation via moi) are still too small, not sticky enough for maggots. Fruit flys are still cocooned.
Been busy, got quite a bit done, yet more to do... le Journey continues, non??
Lotsa pix (NOT Chronlogical), if explanation be required, fear ye not, ask...
Mounty