Hello from Germany

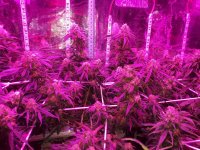
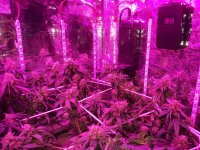
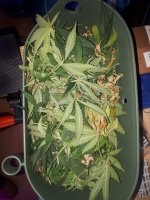
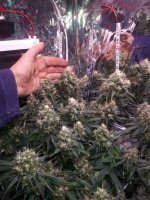
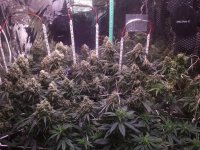
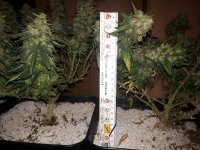
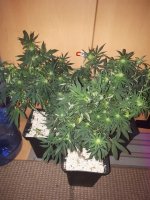
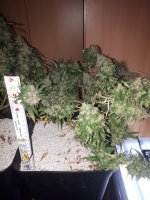
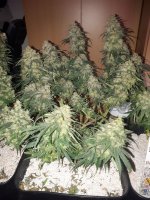
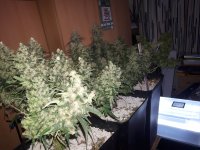
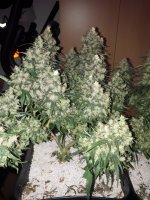
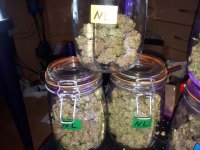
That is/was about all for ya'll right now... Things are seemingly going good/well/better than anticipated for 1st time...
A quick thanks to the ppl/cpmpanies whose equipment I am using, and am totally amazed with. I am in NO WAY affiliated with any of these companies. Yes I use the warez, but no, I do not get any free shit from them. Haven't asked nor been asked...
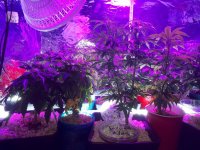
Quick rundown of general equipment:
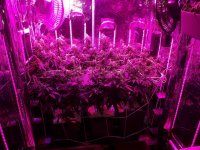
Lighting:
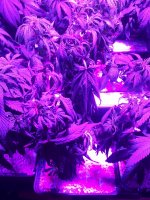
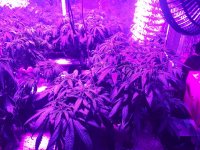
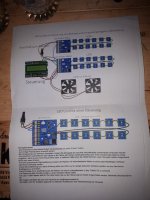
Prop: 2 ea Secret Jardin 26w/54cm Tleds
Veg: 1 ea CLW SS 275 Veg, 2 ea SG 42w/94cm Tleds
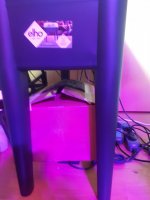
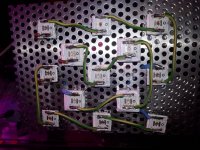
Bloom: 1 ea CLW SS 550, 2 ea SG 26w/54cm Tleds, 12ea 25w/50cm Led Strips

Heating:
Prop: 1 ea 45w/90cm Mat
Veg: 1 ea 30w/40 cm Mat, 2 ea 25w/30cm Mats
Bloom: 1 ea 45w/90cm Mat
*** Extras if needed: 2 ea 50w mini ceramic heaters, 2 ea medium size ceramic heaters.

Air/Cooling:
Prop: 2 ea 5v/80x80mm mini fans.
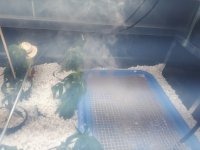
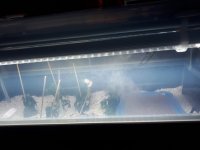
1 ea 6 membrane fogger.
Veg: 1 ea Primaklima 450 sqm/hr Suction w. Odoursock Filter.
1/2 1ea Primaklima 350sqm/hr Blow w. Standard Filter mat material, non Carbon scrubber.
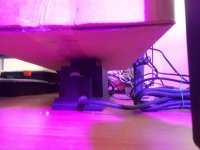
1 ea 120x120mm small blow fan in the ceiling, directly above CLW 275.
3 ea 100x100mm small fans installed in the "wall" between Veg/Bloom, or the door, either sucking or blowing air between the 2 areas.
2 ea 15cm clipfans.
Bloom: 1 ea Primaklima 825 sqm/hr Suction w. Odoursock Filter (Can be switched, via butterfly valve, so it also sucks air from the Veg Area).
1/2 350 sqm/hr Blow w. Standard Filter mat material, non Carbon scrubber.
1 ea 120x120mm small suction fan, directly above the CLW 550, sucking air up into the chest/control room.
1 ea 100x100mm suction fan in the door.
1 ea dehumidifier
2 ea 15cm clipfans.

Water/Feeding:
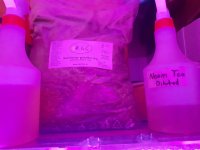
**ATM still handfeeding.
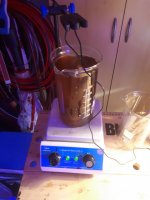
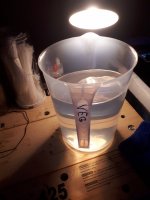
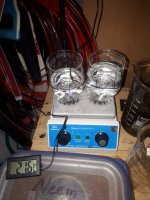
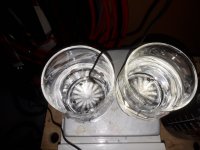
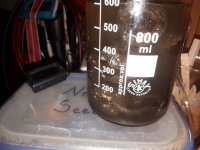
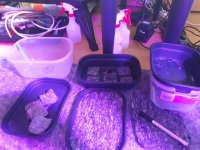
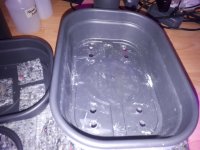
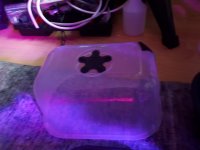
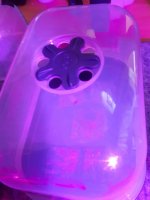
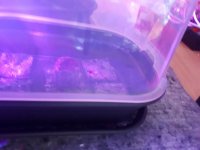
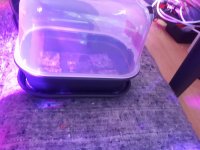
6 ea 17l Reservoirs, of which 1 is for Mom, 1 is for the teens, 2 are connected with tubes to make a 34l reservoir, for the twens (Bloom). The other 3 are there to raise everything up, 1 will be used as a catch tank for drain. (I am planning on going drip to waste).
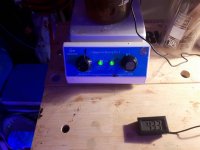
Each of the feeding reservoirs has 1ea Waterpump, and 1 ea Waterheater. The 2 smaller reservoirs have smaller pumps and heaters.
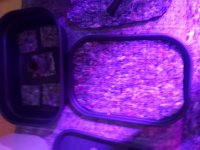
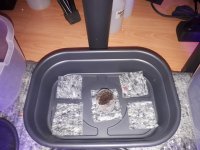
Plants in both Veg and Bloom sides are placed on drip trays, filled with perlite, attached to the drains collector via tubing. On top of the Perlite, below the heating mats, I have grill mats installed. Heat resistant, but let air through.

Ok, it is once again bedtime.
More later
Mounty
 
Bedtime brought naught. No shut-eye tonight... What am I doing you may ask. Well, I opened the veg closet at shortly after 0400. The girls are looking thirsty, so I am mixing up some nutes. I fill 5 litros into a jug, then pour approx. 800 ml into a beaker glass, heat proof. This I place on the heated mag. mixer, crank up the heat and start the magnet rotating. I made 2 marks on the scale/Vernier for what I find is a good speed and heating. I let it heat, and add nutes at the same time. Let it heat further until between 40-50°C. Then I turn off the heat, let it mix some more. When the heating pad/element has cooled to hand warm, I pour the 800ml back into the 5 litre jug, magnet and all, and place this back on the cooled/cooling plate. I turn the stir back on, hang my EC/pH probe into the jug, using these industrial size clothes pins. I test the probe beforehand, in the cal. liquids, rinse of in clear OS water, and then do the testing of the feed water. pH usually drops down to 3,5-4ish!! EC/PPM (mg/L) is good 1100-1300. ca. 15 drops of pH up and I get to a level of ca. 6,2-6,3. Water temp has dropped, through mixing, down to a feasible 22-24°C. Lets feed.
Here too is a closer upper shot of the Neem Seed Powder I use for Child food/foliar spray/jiffy pot liquid. Packing says 50g/1 Litre H2O. Let steep for min. 3 hrs, pour of, collecting swimming particles as best possible (Coffee filter/clean, unperfumed/fabric softened cloth/paper towel/fine mesh tea screen). Says you can keep it refrigerated for up to a week. I keep it unrefridgerated, at room temp, not in direct light, until its empty... what a litre, right? Used as foliar spray, or as feed water, a litre goes not far...
I also changed the config in the new prop box. (Yes, already..!!) I had had the mini fans connected/controlled by the same controller as the fogger. It has humidifying/dehumidifying control. I have now attached them to the temp controller, turned the temp down (Heat mat plus what the Tleds throw off), and voila, the fogger runs longer. During the last set-up, it was only on for a few seconds. Now a noticeable fog starts to build.
 

Attachments

  • 20190203_063811.jpg
    20190203_063811.jpg
    405.6 KB · Views: 230
  • 20190203_063901.jpg
    20190203_063901.jpg
    314.2 KB · Views: 238
  • 20190203_063201.jpg
    20190203_063201.jpg
    416.8 KB · Views: 226
  • 20190203_063209.jpg
    20190203_063209.jpg
    426.8 KB · Views: 234
  • 20190203_063219.jpg
    20190203_063219.jpg
    354.5 KB · Views: 216
  • 20190203_063250.jpg
    20190203_063250.jpg
    378.4 KB · Views: 229
  • 20190203_063257.jpg
    20190203_063257.jpg
    418.5 KB · Views: 232
  • 20190203_063732.jpg
    20190203_063732.jpg
    403.7 KB · Views: 231
Hey, sorry for the humming/thinking to myself (out loud..).. was trying to upload a few short filems, which didn't woik.
Yes, well, anyway, the clones aren\t looking too great. I left a few too many leaves on them, and didn't cut those back, even. I have now gone back to germinating some seeds. 5 ea White widow, 5 ea Northern Lights. Have these 'mini' propagators, also from the same co as the big one, ELHO. They build 'modular' planting pots/lids etc. 2 of these little ones, fit into a next larger one, (I do not have or req. these) one lid, which then fits in the big one. So you 'could', theoretically, have 4 small ones in the large one, with or without lid(s) for multiple climate/humidity zones.
I cut some gardening wool to fit in the lower watering/drain trays. I then cut little squares out, to be placed under the jiffy pots, to keep them moist, not wet from underneath. I put the 2 strains, in 2 different boxes, with lid/air vent closed. This went into a small cardboard box, which doesn't close all the way. I taped another, dry, piece of lawn wool on the box for air circulation. This I placed just above the trafo for the fogger. It gets pretty warm. Right on top I measured 36ish °C. A bit too much. I raised the box to about 3cm/1 inch above the trafo, and now the temp in the box is 31 ish °C.
I put all the seeds in jiffy pots already. 6 were showing signs of germinating/seed cracking open. I hope the others follow suit...
1 + 2: 2 Glasses to keep the strains separated. Water warmed to approx., 22 °
3 - 5:Soaking Jiffy pots
6: Making indent for seed with glass baton
7: 10 ea Jiffies
8: Brackwater after soaking the jiffies.. good for feeding..them, not me
 

Attachments

  • 20190204_231516.jpg
    20190204_231516.jpg
    578.5 KB · Views: 231
  • 20190204_231524.jpg
    20190204_231524.jpg
    480.8 KB · Views: 230
  • 20190204_233415.jpg
    20190204_233415.jpg
    488.2 KB · Views: 227
  • 20190204_233424.jpg
    20190204_233424.jpg
    415.8 KB · Views: 227
  • 20190204_233524.jpg
    20190204_233524.jpg
    444 KB · Views: 223
  • 20190204_233904.jpg
    20190204_233904.jpg
    377.2 KB · Views: 225
  • 20190204_233910.jpg
    20190204_233910.jpg
    258.2 KB · Views: 229
usw (etc)
 

Attachments

  • 20190205_143544.jpg
    20190205_143544.jpg
    607.2 KB · Views: 226
  • 20190205_143553.jpg
    20190205_143553.jpg
    475.2 KB · Views: 236
  • 20190205_143559.jpg
    20190205_143559.jpg
    492.3 KB · Views: 214
  • 20190205_143605.jpg
    20190205_143605.jpg
    411.4 KB · Views: 226
  • 20190205_143612.jpg
    20190205_143612.jpg
    352.3 KB · Views: 239
  • 20190205_143643.jpg
    20190205_143643.jpg
    364.3 KB · Views: 213
  • 20190205_143646.jpg
    20190205_143646.jpg
    383 KB · Views: 232
  • 20190205_143649.jpg
    20190205_143649.jpg
    485.7 KB · Views: 224
usw (ii)
 

Attachments

  • 20190205_144015.jpg
    20190205_144015.jpg
    471.2 KB · Views: 229
  • 20190205_144736.jpg
    20190205_144736.jpg
    506.4 KB · Views: 229
  • 20190205_144758.jpg
    20190205_144758.jpg
    547.6 KB · Views: 225
  • 20190205_144851.jpg
    20190205_144851.jpg
    531.2 KB · Views: 225
  • 20190205_144854.jpg
    20190205_144854.jpg
    421.8 KB · Views: 222
  • 20190205_145136.jpg
    20190205_145136.jpg
    536.6 KB · Views: 221
  • 20190205_145214.jpg
    20190205_145214.jpg
    463 KB · Views: 232
  • 20190205_145851.jpg
    20190205_145851.jpg
    604.5 KB · Views: 221
usw (iii)
 

Attachments

  • 20190205_145950.jpg
    20190205_145950.jpg
    661.7 KB · Views: 231
  • 20190205_151145.jpg
    20190205_151145.jpg
    414.4 KB · Views: 233
  • 20190205_151603.jpg
    20190205_151603.jpg
    378 KB · Views: 224
  • 20190205_151905.jpg
    20190205_151905.jpg
    359.1 KB · Views: 222
  • 20190205_151918.jpg
    20190205_151918.jpg
    410.2 KB · Views: 218
  • 20190205_151949.jpg
    20190205_151949.jpg
    315.4 KB · Views: 215
Buds under View Mode (White Light)
Just slowly starting to get frosty
 

Attachments

  • 20190205_170701.jpg
    20190205_170701.jpg
    567.5 KB · Views: 240
  • 20190205_170710.jpg
    20190205_170710.jpg
    876.7 KB · Views: 243
  • 20190205_170652.jpg
    20190205_170652.jpg
    562.9 KB · Views: 242
I placed 3 more girls into the Bloom area. They did not enjoy it too much, or the light intensity was too much/no cross-over like their predecessors.. Only had time for a quick visit and a drink for them, then they had to go to bed already. I had no time to see if the droopy leafs healed. The lights were still off this morning before work. Hrmpf!! Today after work we had a ton of time to catch-up on things. I gave the already bloomers a nice weeding-out.. (Pardon the pun.) cut almost a whole basket back on swarf, leafs, micro buds. I believe the larger buds shall now acquire efficient lighting. (Funny thing: Some of the leafs had actually turned 180° and were facing what is supposed to be the aux lighting...)
Seedlings are coming along. A few have turboed their way out of the earth already. Temp therein around 26-30°C.
I took the heatsinks I had bought, and drilled/countersunk them for attaching via screw to a piece of alu where the controllers shall reside.
Alu must yet be cut down the middle, but blue side will have 4 deep blue @ 451 nm and 12 blue @ 465 nm. Red side will be 5 UVA 395-405 nm and 8 far red 730 nm. trying to figure out how to install the drivers and software. am new to Arduino..
1 - 2: Droopage due to lights or thirst??
3 - 4: Pre and Post weeding out
5: Basket o cuttings/swarf etc.
6 - 8: Post weeding out
 

Attachments

  • 20190207_154504.jpg
    20190207_154504.jpg
    782.3 KB · Views: 224
  • 20190207_154515.jpg
    20190207_154515.jpg
    850.1 KB · Views: 228
  • 20190208_160510.jpg
    20190208_160510.jpg
    867.7 KB · Views: 230
  • 20190208_160518.jpg
    20190208_160518.jpg
    852.6 KB · Views: 236
  • 20190208_165900.jpg
    20190208_165900.jpg
    846.5 KB · Views: 228
  • 20190208_165911.jpg
    20190208_165911.jpg
    955.5 KB · Views: 218
  • 20190208_165915.jpg
    20190208_165915.jpg
    1.1 MB · Views: 231
  • 20190208_165919.jpg
    20190208_165919.jpg
    1 MB · Views: 231
1: Heatsinks drilled in my new stand drill machine, Countersunk to use sunk head screws. Epoxy/heat paste over this/under the led
2: Drilled heat sinks. these ones have heat absorbing tape/pads
3 - 5: Heatsinks installed on alu piece, not yet cut down the middle for blue/red sides
 

Attachments

  • 20190208_132132.jpg
    20190208_132132.jpg
    379.9 KB · Views: 219
  • 20190208_132137.jpg
    20190208_132137.jpg
    294.4 KB · Views: 218
  • 20190208_193251.jpg
    20190208_193251.jpg
    735.4 KB · Views: 232
  • 20190208_201301.jpg
    20190208_201301.jpg
    758.5 KB · Views: 218
  • 20190208_201314.jpg
    20190208_201314.jpg
    805.8 KB · Views: 224
Wired the LEDs together. Each light will be controlled by either a master or slave driver, because each can drive up to 12 LEDs each. I had at first used 0,25mm cables to connect the leds. Then I went over the manual again, and saw that a minimum of 0,5mm is req'd. Redid it all. Alas.. All LEDs are in-line. Max is 12, least is 4.
 

Attachments

  • 20190209_214851.jpg
    20190209_214851.jpg
    612.5 KB · Views: 219
  • 20190209_214932.jpg
    20190209_214932.jpg
    548.2 KB · Views: 217
  • 20190209_214944.jpg
    20190209_214944.jpg
    489.4 KB · Views: 247
  • 20190211_132609.jpg
    20190211_132609.jpg
    796 KB · Views: 246
  • 20190211_132621.jpg
    20190211_132621.jpg
    652.6 KB · Views: 228
  • 20190211_132917.jpg
    20190211_132917.jpg
    730 KB · Views: 224
  • 20190211_132951.jpg
    20190211_132951.jpg
    578.4 KB · Views: 242
While I was doing the weeding out, I mistakenly cut a few branches too much off. These were not flushed, cured or even inspected for trichomes/crystals, other than what my terrible naked eyes see.. I had hung them in a (yet another) cupboard/closet, on a laundry drying rack.
This morning, after work, not having any smokeables in da haus, decided to inspect that which was drying. Ok, the little buds, got quite a bit littler in 4-5 days. Light-no smell, except that green/lawny smell... fresh! But dry (ish). I had done nothing to them, no air venting or circulation, such a small amount in such a large space: Overkill. I pulled out my new usb microscope, toyed around (more fiddling actually) until I had it up and running. Note: Don't forget to remove the lens cover... Well look what my poor eyes see, avec le microscope. TRICHOMES!!! No poop, brothers and/or sisters. Actual Trichomes! Ok, ok, they are still way too white, not nearly enough are amberish/milky... The frail stem made an eager effort at producing a snapping sound. . And that's what it was, a meer effort. Oh, there was resistance, and an almost audible sigh, but not near the tree felling thunder I was awaiting!!! Still, kind of moist, not wet, guesstimate about 50-60%, the grinder made quick work of it. Stringy, like tobacco from a fresh bag, it went spongily into my pipes chillum. Smoke was heavy, like burnt leaves in autumn, taste, lets not even try to describe how unnice it was. It did 'kick', not in the face/between the legs, more a light-headedness; high. Guess that comes from the tri's not being amber enough.
1: Fan leaves and Swarf removed. a few smaller branches fell victim to the sheer...
2: Post cutting/weeding out
3 + 4: Buds hung to dry
5 - 7: Close-up of the buds-trichomes

Cheers
Mounty
 

Attachments

  • 20190208_182904.jpg
    20190208_182904.jpg
    690.9 KB · Views: 229
  • 20190208_165938.jpg
    20190208_165938.jpg
    927.5 KB · Views: 237
  • 20190209_231640.jpg
    20190209_231640.jpg
    377.3 KB · Views: 231
  • 20190209_231649.jpg
    20190209_231649.jpg
    304.3 KB · Views: 228
  • WIN_20190212_02_47_21_Pro.jpg
    WIN_20190212_02_47_21_Pro.jpg
    260.9 KB · Views: 223
  • WIN_20190212_02_47_53_Pro.jpg
    WIN_20190212_02_47_53_Pro.jpg
    249.3 KB · Views: 237
  • WIN_20190212_02_48_19_Pro.jpg
    WIN_20190212_02_48_19_Pro.jpg
    195 KB · Views: 224
The two led boards are not yet up and/or running...
Blooming continues on the home (grow) front. I started flushing the gals. Using Canna Flush 1 x last week, 1 normal feeding inbetween. From now on in, only Flush with a dab of molasses. They seem to have recovered from my mega weeding out. The Buds are extending, getting firmer. Still, there is no big scent.. even with the doors open. Sure they can be smelt, but its not strong, something I feel I need to hide... ??? Is this normal?
B(r)ought IKEA into the garden now too. No pix of that, but soon and with a description.
So 3 pix as update.
  1. Close up of 1 Bud
  2. Size Comparrison to my hand
  3. Forrest of Green from 'only' 3 plants
 

Attachments

  • Close-up.jpg
    Close-up.jpg
    568.8 KB · Views: 244
  • Comparrison Hand - Nug.jpg
    Comparrison Hand - Nug.jpg
    947.7 KB · Views: 225
  • The Green Forrest.jpg
    The Green Forrest.jpg
    949.5 KB · Views: 215
Harvest in late winter/early spring: Had been giving the girls only r/o'd water, Canna Flush with a shot of molasses for flavor, pH'd to 6,3. PPM's were quite low. 650-800. The last 3 feedings were so. Quite a few leaves, of the ones I hadn't yet removed, were yellowing, the larger ones necromantic and falling off of their own.
I did not give them any non-light phase. I have no room for that, and there are the 3 next batch already in there with them, so a no-go...
I had a bit of a fight getting the girls unraveled from the scrog net. I had pushed the new batch down, under the canopy of the first batch, to not steal any of their light. Their growth was intertwined throughout the net. I broke no branches, cut not a single cord. A few leaves decided to not play along, and dropped. I did some re-arranging, taking the water reservoirs (Full of H2O, being heated but not moved and/or airrated… piew what a stink and gunk!!) out. Time will tell if I do ever install the drip-drain system. I moved the last 3, vegging plants, from mom's side, and they too are in the bloom closet. They are in smaller, 20 x 20 cm/8 x 8 inch square pots. I could fit 8 plants in there with this pot size. 6 at the moment, watching to see what the stretch will do, if there is still enough room. The 3 new ones were lollipopped about 10 days ago.
I must say that it wasn't an emotional moment, cutting the girls down. No pain/agony, and also no great pleasure/happiness in destruction.... relief, yes, that all hath gone well, so far, yet....
I Cut the northern Lights into their single branches/colas, and hung these from my dry rack thingy. White widow I cut down as whole, and hung the whole plant up... no more room on the rack, and this way I can keep the strains separated.
All hung up in a non ventilated/hvac vacuum cleaner closet.
On to the pix...
Mounty
 

Attachments

  • 3 Girls - 2ea NL + 1ea WW.jpg
    3 Girls - 2ea NL + 1ea WW.jpg
    618.5 KB · Views: 240
  • Approx height 3ocm.jpg
    Approx height 3ocm.jpg
    718.3 KB · Views: 235
  • Next Batch already Flowering.jpg
    Next Batch already Flowering.jpg
    675.9 KB · Views: 225
  • Norhtern Lights II.jpg
    Norhtern Lights II.jpg
    653.1 KB · Views: 230
  • Northern Lights - Royal Queen Seeds.jpg
    Northern Lights - Royal Queen Seeds.jpg
    893.2 KB · Views: 241
  • White Widow - Sensi Seeds.jpg
    White Widow - Sensi Seeds.jpg
    632.4 KB · Views: 226
  • White Widow II.jpg
    White Widow II.jpg
    823.4 KB · Views: 233
Cut and Drying
 

Attachments

  • Closet Closed - Propagation Box there before.jpg
    Closet Closed - Propagation Box there before.jpg
    297.2 KB · Views: 76
  • Cut and Hung - White Widow Whole.jpg
    Cut and Hung - White Widow Whole.jpg
    543.7 KB · Views: 232
  • Norhtern Lights Branches Hung.jpg
    Norhtern Lights Branches Hung.jpg
    648.3 KB · Views: 226
  • the Dry Room - Vacuum Cleaner + Storage Closet.jpg
    the Dry Room - Vacuum Cleaner + Storage Closet.jpg
    407.1 KB · Views: 78
Girls have been drying 1 week now, to the day. I had been taking them out throughout the week, to defoliate the drying leaves, and pest/mold control. I left the closet open in the time I was trimming so there was an exchange of air. Today I decided to start with the curing process. Was at first going to separate the good from the bad, small from large. I ended up just putting buds loosely into the marked jars. White Widow dawned me with almost 2 jars, 2 Northern Lights filled 2,5 Jars. I didn't pack the jars too full so there the air doesn't stagnate. Is/would it be wise to put those hydra packs in now?? I tried to mix dry and slightly sticky to spread the moisture around. I will be burping the jars daily.
On to the pix:
 

Attachments

  • 20190309_181757.jpg
    20190309_181757.jpg
    671.6 KB · Views: 234
  • 20190309_181804.jpg
    20190309_181804.jpg
    656.9 KB · Views: 223
  • 20190309_181812.jpg
    20190309_181812.jpg
    734.1 KB · Views: 225
  • 20190309_181817.jpg
    20190309_181817.jpg
    591.7 KB · Views: 238
  • 20190309_190257.jpg
    20190309_190257.jpg
    783.9 KB · Views: 232
  • 20190309_190306.jpg
    20190309_190306.jpg
    652.5 KB · Views: 230
  • 20190309_190314.jpg
    20190309_190314.jpg
    746 KB · Views: 230
  • 20190309_190321.jpg
    20190309_190321.jpg
    881.6 KB · Views: 234
Hi Tomuk17. Thanks! It#s not just having an imagination or being creative, more like being able to 'go-with-the-flow'... making changes, quickly, ifn being needed... on-the-job-training... for all involved.... plants and person/flora and fauna..
atm i have such a jungle going on... still testing.. this time the perpetual side of things, with a twist...
Mom, or say the gal who donated a few branches for scientific studies, got to be too big, or better: her pot was too large.
I cut 7 clones off her, let her rebound about 4-5 days, then sent her into bloom... 3 of her daughters from my 2nd or 3rd try at rooting, also wandered with her into the bloom area, about a week prior actually. I had germinated a bunch of seeds, using the 10% weeding out method within 2 weeks, a mix of fems and af's.. So at the moment i have a mixture of blooming fems at 12/12 (Sleeping, sorry no pix), and in the veg space at 18/6 a mix of blooming afs and some vegging fems.. feeding is absolutely chaos!!
PLUS!!!! I have the prop area, where I had 7 clones, of which 3 survived, aswell as a new addition: Peppermint and clover, different phenotypes/sorts. For this, and also 'thought' for the prop area, with less wattage, humi etc, I bought a home grow station from IKEA. There was a place forseen for one of their grow lights (10w), I installed 2. Then I encased the kouse in cardboard covered in reflective foil. I had a heating mat, but it burnt through... too wet.. also installed a small 5v fan w controller (also for the mat.... 1 ea heating/cooling controller... inkbird... ebay)
Again, on to the pix...
2nd Run... Femz and AFs.jpg
Clones.jpg
Ikea Grow Home A.jpg
Ikea Grow Home B.jpg
Peppermint n Clover.jpg
 

Attachments

  • Veg Front view.jpg
    Veg Front view.jpg
    909.4 KB · Views: 213
Back
Top Bottom