Medijuana's First Attempt at Growing

Medijuana

New Member
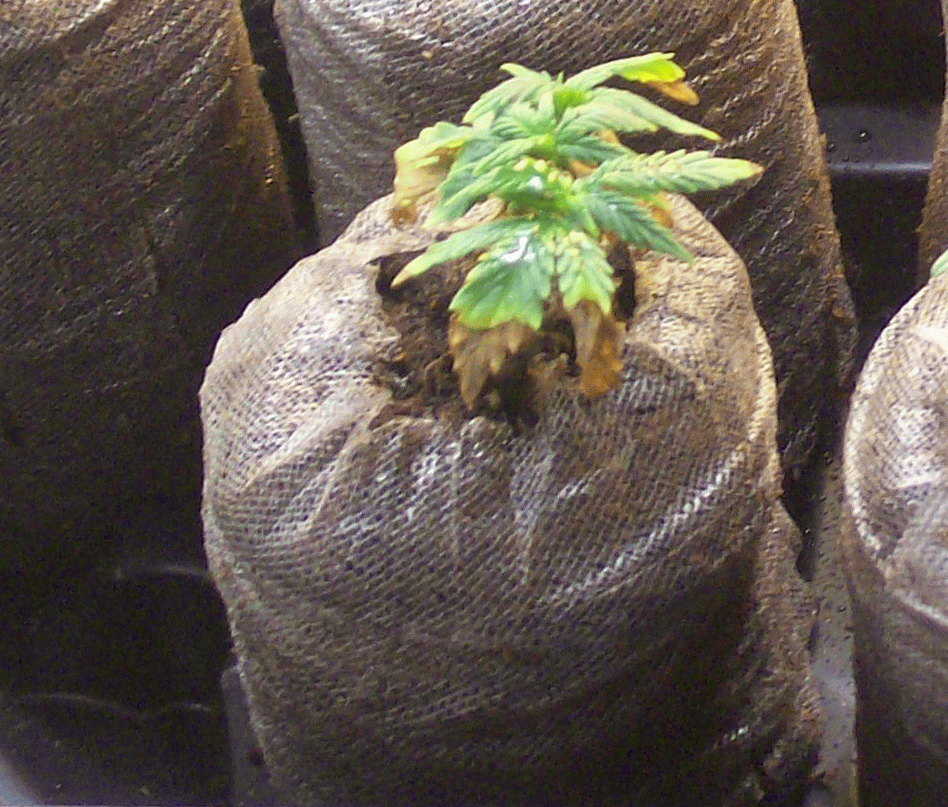
Starting with three clones, which arrived way ahead of when I was expecting them. I've had them over 3 weeks.
This is exactly how I received them:
March_7_-_Clones_in_Soil.gif


Strain: Custom hybrid designed for maximum yield in Michigan climate, has never been grown indoors.

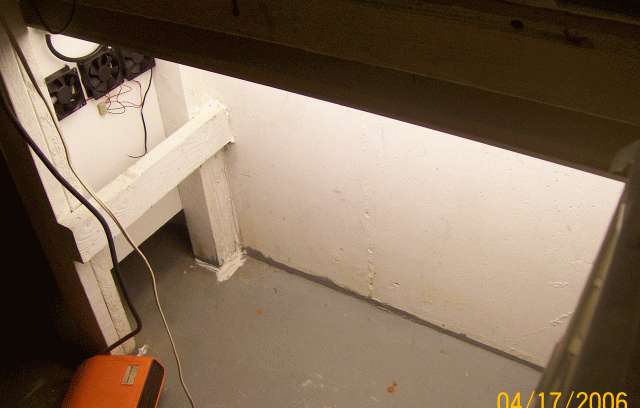
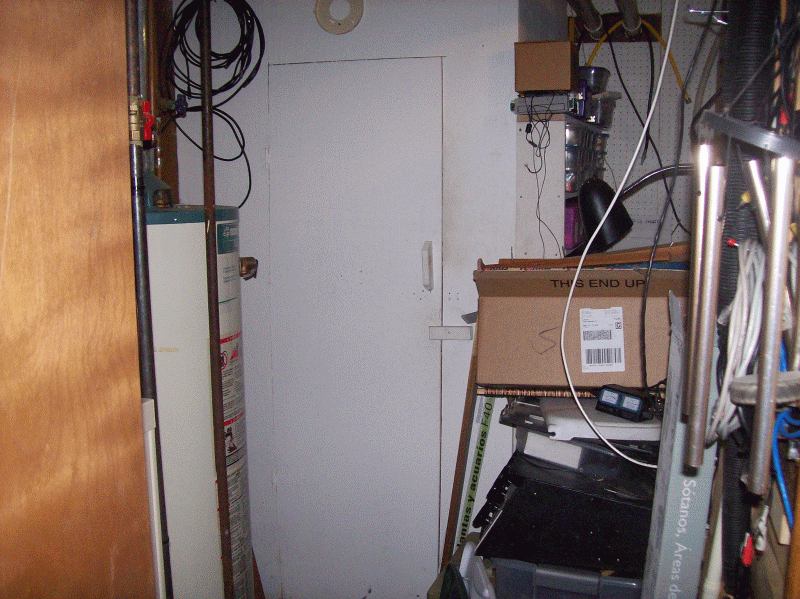
I had a room I started preparing to be my budding room, which had to be improvised to function as a veg room.
Flower_Room1.gif


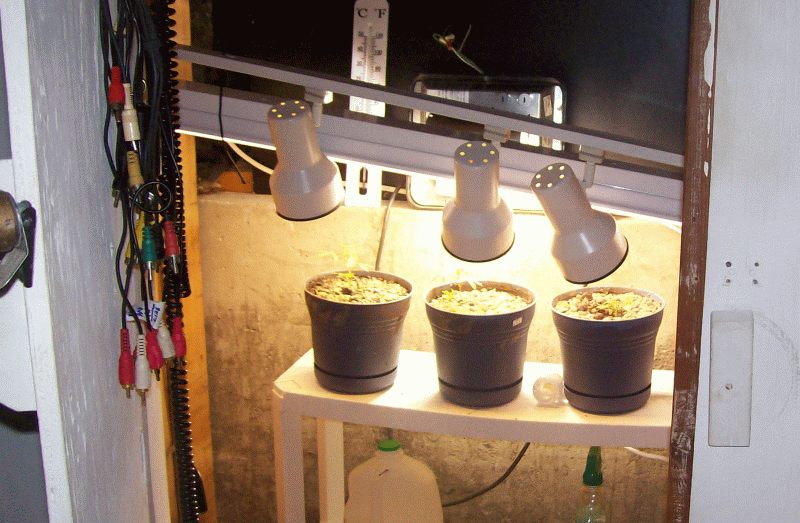
I originally intended to build a partition from the corner of that room all the way to the wall to the right, but funds and manpower haven't been available. I know that the bud room isn't working too well because it isn't 4 foot wide, and thus I cant get the T-12's close enough to do any good.
Flower_Room2.gif


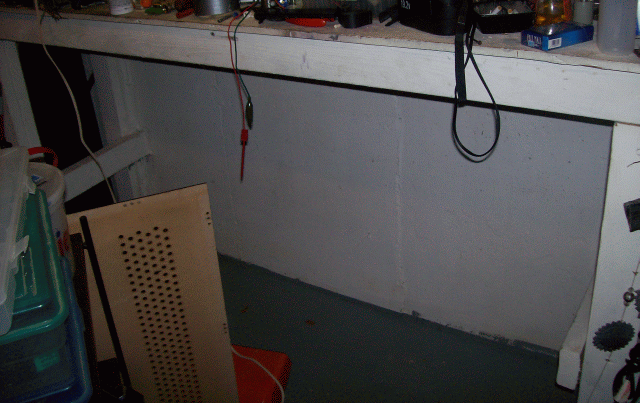
So, I need to come up with a workable veg area on practically nothing. I decided to sacrifice the area under my workbench. It won't be that difficult to box in. Doors, well, I'm still tossing around ideas. I might add that this room is an absolute disaster area at this time.
veg_room.gif


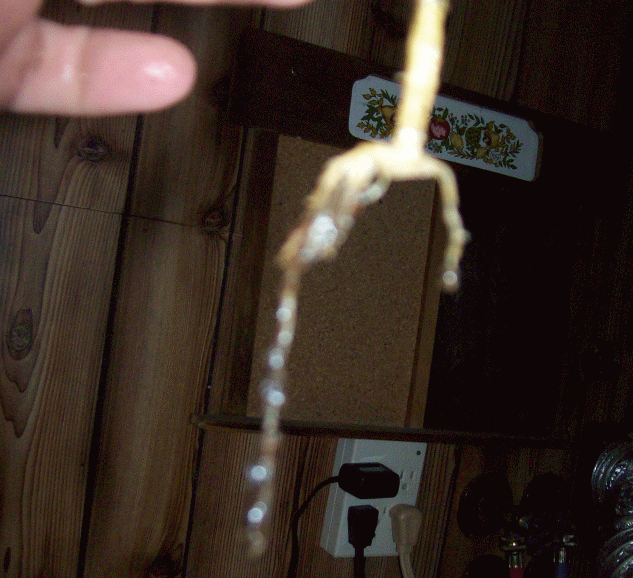
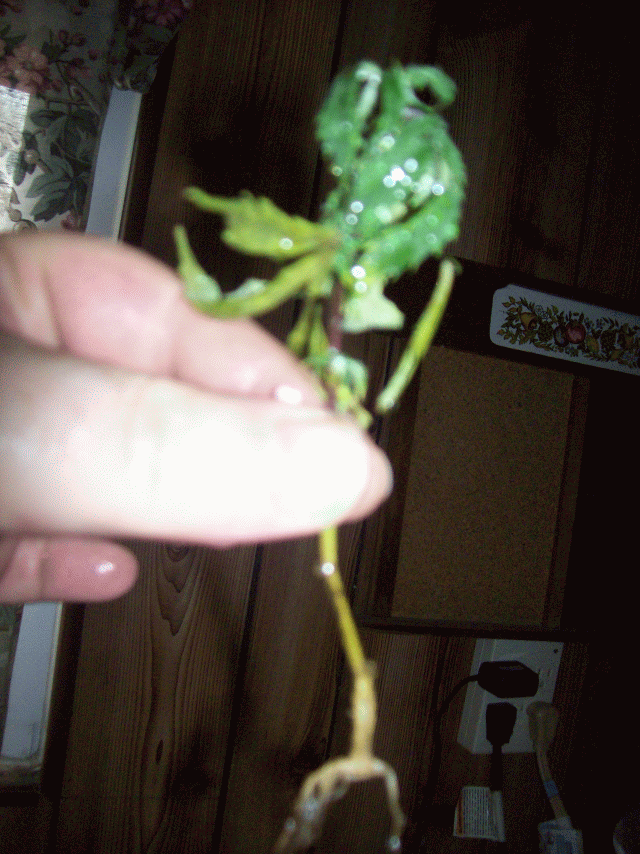
So, anyways, I eventually relocated the clones from the soil to "hempy cups" with Perlite. They were planted in the soil pots with the webbing still around the peat plugs and the root growth was badly stunted. I was going to move them today and put them in the final buckets, but that is when I discovered just how stunted the root structure really was.
roots1.gif

roots2.gif


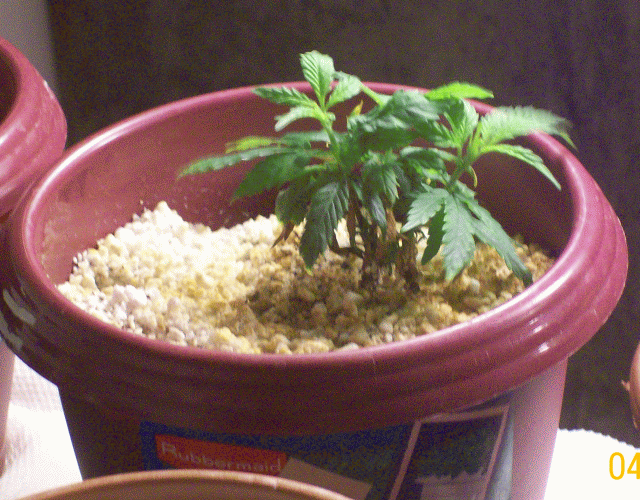
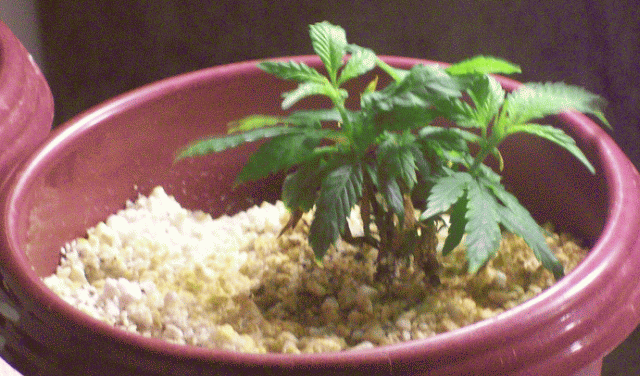
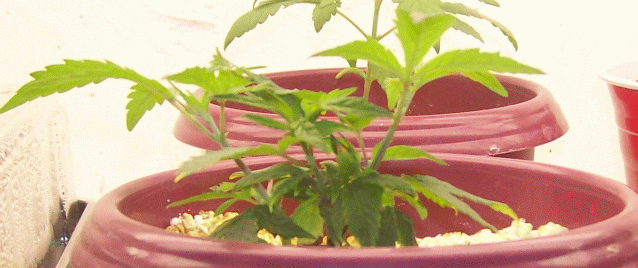
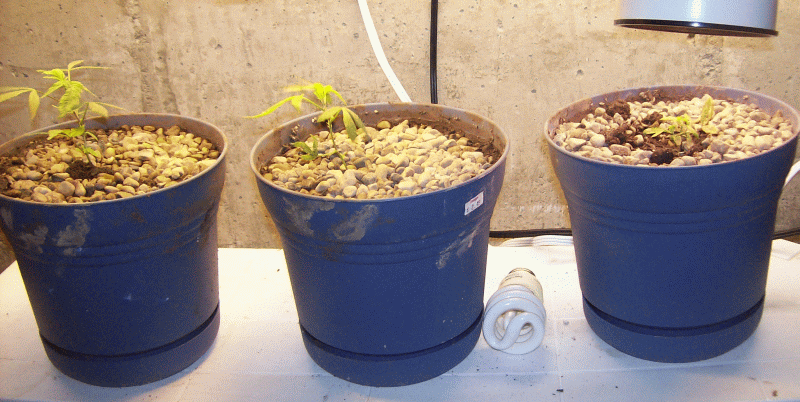
So I relocated them to small pots with a mix of sterilized potting soil, clean gravel and 50% Perlite, with a one inch layer of Perlite below the hole in the side. There is 50% 10-10-10 in the bottom. I've got them in a box lined with white paper.
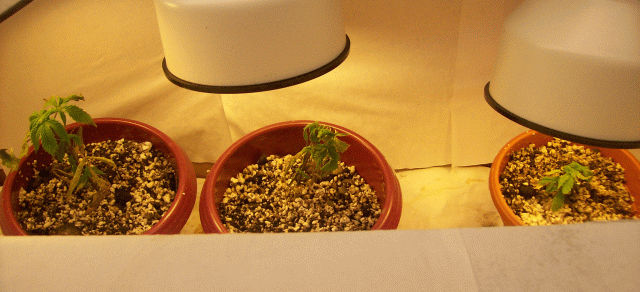
plants_3-19.gif


So, as I scramble to get this flowering area finished up, I'm praying that these clones survive. The middle one looks like it's done for, the runt on the right and the plant on the left still look like they might pull out... I hope.
 
plants_3-19.gif


I'm praying that these clones survive. The middle one looks like it's done for, the runt on the right and the plant on the left still look like they might pull out... I hope.

Hey Medijuana,

Looks to me you have done all you can for now,
Best advise I could give is to resist the temptation to spray/water and just let them go and see how it turns out .
You should know in less than a week if they will make it or not .

Clones roots looked pretty weak but MJ is very strong ... we will see !

Good luck ! + Rep
MJ420:peace:
 
The one in the middle looks pretty crispy still but the other two look like they're perking up just a tad. Yeah, I've done all I can, except maybe the Indians know of a dance I can do to help them. :adore:

:ganjamon: Now that I've had my medication, I can think straight without the feeling of extreme panic! I just accept the fact that this strain has NEVER been grown indoors before, which makes me the only mad scientist pioneering this quest. Considering the circumstances, I'm not surprised the clones are struggling. Hopefully I can at least get one of them to survive so I can have a mother. It's perhaps the best weed I've smoked in the thirty-odd years I've been smoking, so I'd like to get it to bud.
IF it lives, "Custom Hybrid designed for Michigan" just isn't a cool name for such good bud, so I guess it'll be up to me to name the strain. Hmmm... "Motown Max" sounds good to me... No, better yet, "Dale Mac" in honor of my old smoking buddy who passed a couple years back. He'd be proud to see me grow some wicked Ganjah!
 
EXTREME FAIL!!

Two clones dead, all that is still kicking is the runt. I've got 6 nice bagseeds germing right now, and I guess it's time to step back and look this over.

First things first... I've got to get a pH meter. Pure and simple. I can't accurately test below 6.2 and that simply isn't acceptable. I'll solve that problem this afternoon. We'll be heading up to the local 'hydro shop this afternoon to chat with one of the local caregivers, hopefully I can network with a few.

I tried the best I could with what I had to work with, and I've come to the conclusion that this strain just doesn't like the great indoors at all, hence why it's always been an outdoor plant. If the runt somehow miraculously takes off, I'll make it a mother plant. If it dies, well, at least I did all I could.
 
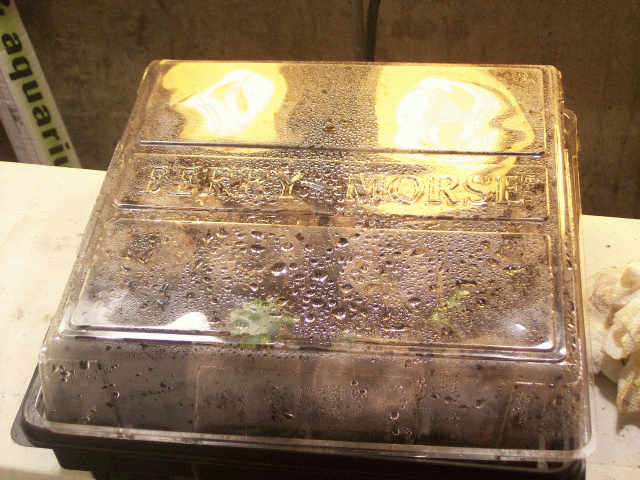
Update.... I currently have 4 seedlings sprouted and in peat pucks in a Perry Morse greenhouse under the lights. I also decided to try re-rooting the one remaining living clone, the runt. I have it in a peat plug in the greenhouse as well. Hopefully that will kick it into high gear. Temp is 75, humidity is 50% and it's under 2 100W MH lamps and a tracklight with 3 100W 2700k CFL's.

I'm hoping to get my veg cabinet done this week so I can move them out of the (not yet finished) flowering room. They'll be under three T12 fixtures with alternating cool and warm tubes. It'll be quite a novel design, totally designed for frantic growers with extremely flat wallets!
 
Update.... I currently have 4 seedlings sprouted and in peat pucks in a Perry Morse greenhouse under the lights. I also decided to try re-rooting the one remaining living clone, the runt. I have it in a peat plug in the greenhouse as well. Hopefully that will kick it into high gear. Temp is 75, humidity is 50% and it's under 2 100W MH lamps and a tracklight with 3 100W 2700k CFL's.

Hey brother back off on those lights... until you see some good growth. aslo seedlings and clones are best started in domes for heat and humidity....hope this helps....How to Grow Marijuana Everything You Need to Know - 420 Magazine ® you had plants that were made for outside and you shocked them being so close to the lights...whenever transfering any plant in or out or to a stronger light always back off quite a bit for 2 or 3 days to let them get use to it like shade outside. oh and I noticed you were nuking them with the nutes too...again clones or seedling need very little to go on in the first 7-10 days. you dont wanna fry them right away and especially using soil with nutes in it already.
 
Hey ledtester...

yeah, everything pretty much started with "OH, SHIT!" and degenerated from there. I was caught with my pants down on everything. Sooooo... time to change direction.

I popped some seed in my germination tent
seeds2.gif


That baby works fast... cracks 'em in as little as 24 hours.

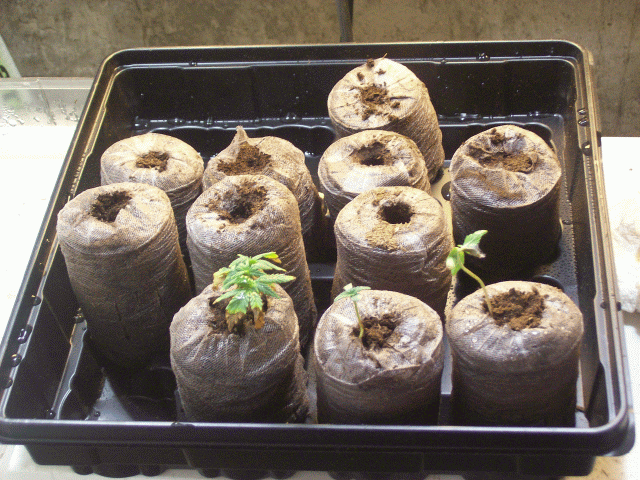
Everything is in a small greenhouse right now. I took the last clone and decided to put it in there in an effort to reroot it. Seems to still have new growth, so hopefully she'll rejuvenate in there. I've got ten sprouts in peat pucks, two of which have popped the top and the tallest one hits the roof.
Seedlings_3-31-2.gif


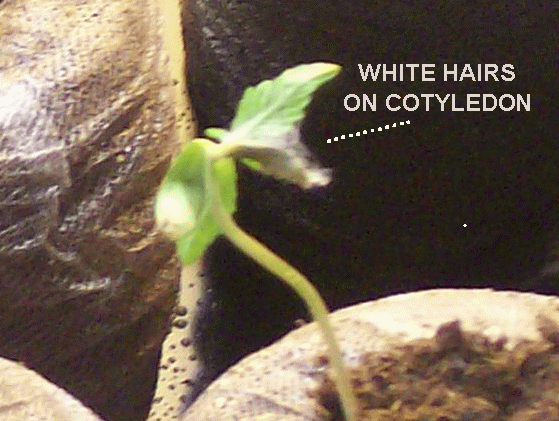
The tall one was hitting the top and has some white hairs on the cotyledon. Not sure what to think of this.
Seedlings_3-31-31.gif


As you can see, there isn't much headroom in this greenhouse. I'm wondering if I should take those seedlings out to hempy cups or is it too early?
Seedlings_3-31-1.gif


Those peat pucks expand like crazy! I'll have to use smaller ones next time. Should I just take like only the top 1/3 of them when I put them in hempy cups?? One of them would fill the whole cup!
 
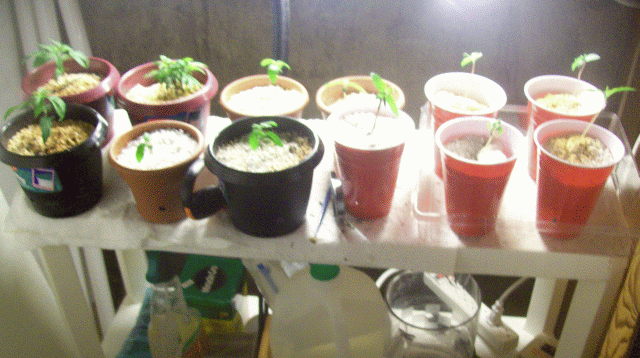
As of today, those two seedlings and the clone in the photo above are in small hempy cups and doing very well. The clone doesn't even look like the same plant! There are 9 other seedlings in cups, which are coming along okay. I've got two that I might have to cull as they've never really took off as well as the rest. I guess that's to be expected with bagseed.

Hopefully, I'll have a decent amount of females. Heck, at this point, I'd probably be delighted if I get 3!

I should have the veg cabinet done tonight if all goes well. It's a very novel idea, built as cheaply as possible out of necessity.

My goal is to learn what I can from this grow and hopefully harvest some decent buds in the process. At least I'm not out any money for expensive seeds and the buds they came from smoked quite well.

I'll have some pics to post once I find out who stole the memory card out of the camera again.
 
Naturally, true to form, nobody did anything with my mem card, it evidently teleported itself out of my camera to somewhere else. Now I just need to figure out how it teleported, so I can go to Jamaica! :p

-Screwing around in the grow room-

I had a couple seedlings that I just had to work on. It seems that these peat pucks absorb shitloads of water and holds it right at the base of the stem, making them very weak. I dumped two out into a small work bin I have for this purpose. I them broke up the peat plugs as much as possible, removing as much as possible. There was evidence of some root rot as well, so I soaked the roots of the seedlings in balanced water with a tad of hydro H2O2 while I cleaned out the pots.

I did lose some hair roots in the process, but it looks like they're doing okay now in their reloaded cups. I put some of the moist perlite on the very bottom, dangled the plants so the roots were just above it and filled the rest with dry perlite. I didn't water them as I figured the roots could use some "dry time" after being in so damp.

One other seedling is doing rough, looks droopy and stunted even though the pot isn't light yet. I may have to try the same on this one. I'm really making an effort to not overwater this time around, letting them go until they're very light before watering.

-The "Runt Clone"-

I originally had three clones of unknown strain, delivered in soil with peat pucks buried with the netting still intact.. Two have passed away, leaving just the runt. These were the clones when I first got them in early March...
March_7_-_Clones_in_Soil.gif


This is what my last remaining clone looked like on March 31st, after I decided to try rerooting it...
clone_3-31.gif


And here is the clone today... It's hard to tell from the pic, but it's twice as high as it was, with all kinds of new growth.
runt-4-16.gif


Altogether, 12 plants going, hoping for a female majority!They're still vegging in the temporary setup, but they should be in the new veg cabinet by evening.
grow-4-16.gif
 
The Frugal Vegging Cabinet

So, I'm forced to startup with what money I can shake from the piggy bank, and space is also an issue in our house. I wish I had a room I could dedicate just to growing, but all I can do is set up in my workshop, which is packed with electronic parts, tools and radio stuff, so I have my hands full with this project. It's been a very slow start due to timing issues and we're pretty much out of meds right now, so I have to use my pharma meds, which is like having a refrigerator strapped to my rear. I've also been feeling crappy overall for the last month, which isn't helping the situation at all.

I definitely want a separate area for vegging and flowering. I've got a closet in the corner of the room for a flowering room, completed just enough to function as a temporary vegging room. It's basically in "oh, shit! We gotta get lights on these things asap!" condition until I get the veggie cabinet done and can complete it the way I need it to be.

So, I got this area under my workbench I've decided to utilize for vegging...
veg_room.gif


So far, I've cleaned the area extensively with bleachwater, applied Home Defense critter spray, constructed and mounted a foam core side wall with fans, mounted two T12 fixtures, caulked any gaps and touched up the area with some white primer. Here's how it looks right now:
veg1.gif


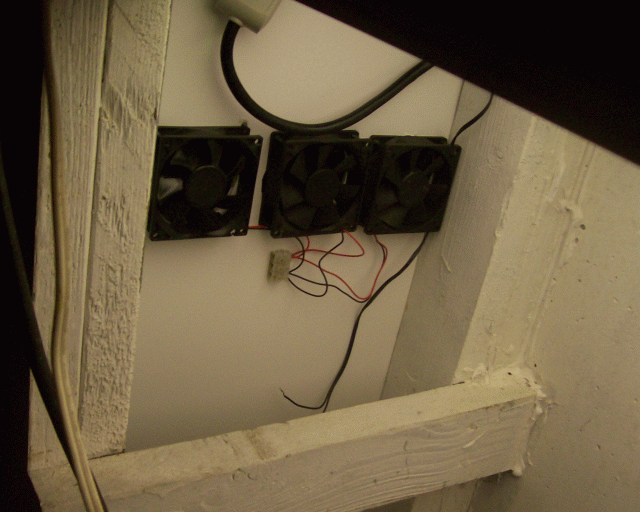
I have 3 computer fans running off of a 1A wall wart. The outside has a light baffle/hood I constructed out of black posterboard. I'll see how the 3 fans do when it's up and running. The T12 lights don't generate much heat at all, so I think it'll be fine. I have a couple Honeywell HVAC thermostats and also a light dimmer I can hook up if I deem it necessary. Here's a closer shot of the fans...
veg2.gif


I've got to add 2 upright legs and a shelf support to the right side, making a roughly 4 foot by 2 foot vegging area. I have them ready and the primer is drying under a large fan in the garage as I type. I am going to put a large 18" x 24" x 3" foam block on the right side to serve as an intake filter. Easy to clean... just put some soap and bleach in my utility sink, squish as much crud as possible out of it, put it in the washer for rinse/spin cycle and then toss it in the dryer.

For the front doors, I have a 2' x 4' folding foam core, like those for presentations, that I will hang. I'll have the entire opening weatherstripped around the edges to keep light, air, creepy crawlies and whatever else at bay.

Well, I better get off here and get some work done on this lest the internet vortex sucks me in!
 
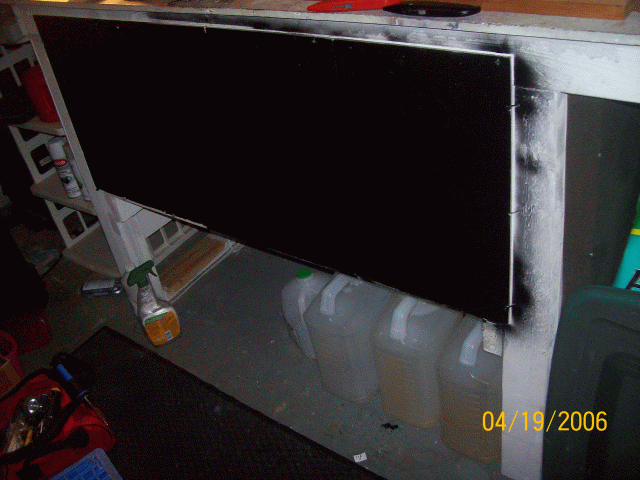
The cabinet is mostly done, except for some tweaks. Here's a pic of the veg cabinet with the door on...
veg3.gif


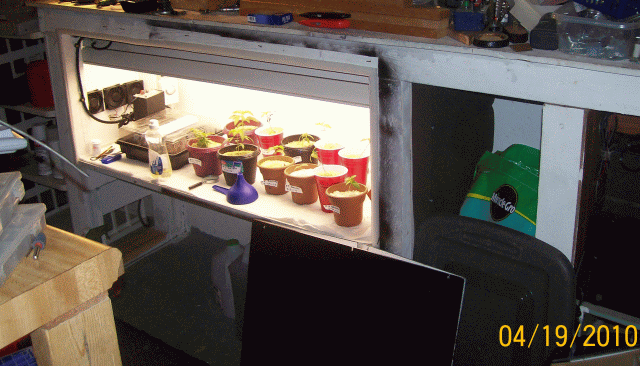
And here is with the door off... The door folds in half and is easily stashed out of the way...
room1.gif


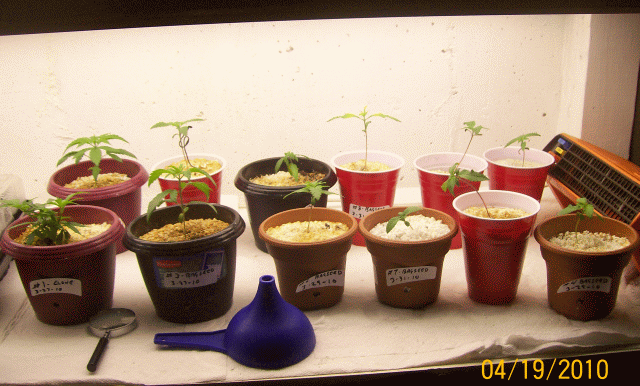
I have 12 plants in there, 11 bagweed seedlings and 1 clone of Dale Mac (a special Michigan hybrid).
plants_4-19.gif


Here was the clone on the 16th of April, stil in the old flowering room...
runt-4-161.gif


And here is the clone as of a few minutes ago...
runt-4-19.gif


At least it's up and running, so I can get to work on getting the flowering room all done.

I'll have more pics later.
 
Well, the past couple days I've been feeling good enough to actually accomplish a bit.

I've flushed all the plants after I made a goof... mixed my nutes up with raw water instead of the pH'ed water, so my pH in the plants went up to around 7.5. I noticed that they all just stopped showing new growth and figured I'd better check some runoff... it was 7.5. So, I flushed and drained all the plants with water I pH'ed to about 5.3 until the runoff was at 6.2 or lower. I'd like to get them down to 5.8, but we'll let them run like this for now as it took a few hours as it is. With the hempy cups and straight perlite, at least flushing them was rather easy compared to soil. I drained the pots and cups as much as I could and let the plants use the residual water from the flushings. The six smallest plants I added some Miracle Grow Tomato food to, the six bigger ones I won't add anything until they dry out more.

I've been doing what I can to get the flowering room done. My two outside walls are covered with sheets of styrofoam insulation, covered with foam core, plexiglas and whatever else I can find to keep things from popping holes in the styrofoam.

My goal for today is to get the rest of the foam covered, tape the corners and get ready for paint. I plan on painting the entire room, floor to ceiling, with flat white latex. Then, wherever I see a gap, it gets hit with caulk.

I'm going to assemble a light fixture with the 2 100W Metal Halides and 2 track lights with 3 100W CFL's, mounted on both sides of the MH bulbs. I had the MH on a board, ballasts enclosures and all, hung from chains, but they were way too heavy to deal with, so I removed the sockets and ran some 14g speaker cable out of the enclosures. I'm seriously considering rebuilding the ballasts into a 19" rack chassis as the metal enclosures are so heavy and bulky. Since I'll need a variable DC supply for fans anyway, I can build it in there as well. Then I can have fuses, indicators and switches on all three supplies.

I'll be posting some pics as well... I haven't been on the computer too much the past week or two, so I've been slacking on my journal. :(

Okay... off to work again.
 
MY DIY GHETTO FLOWERING LITE

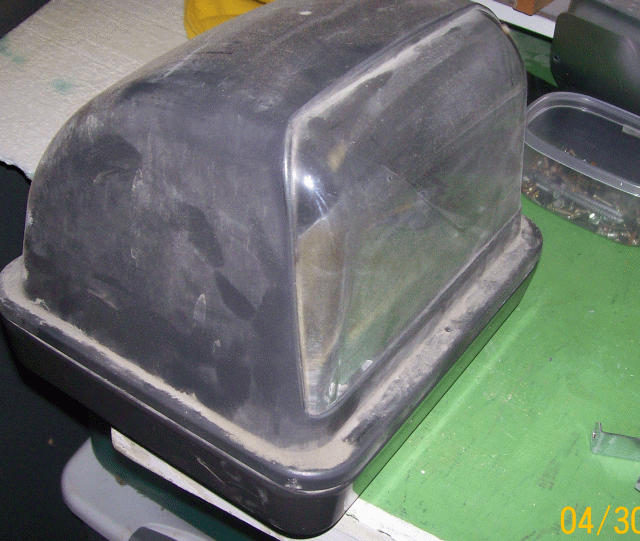
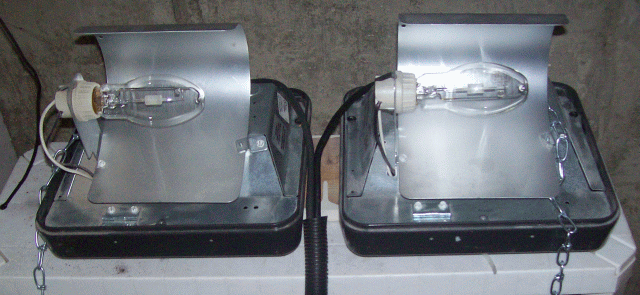
My buddy gave me two 100W MH lights that his work replaced and let him have them, which he then gave to me. Definitely not ideal, but it'll work just wonderful for that price!! :) They look like this...
MH0.gif


Here I had them, lense & cover removed, fastened to a board which could be adjusted with chains... sort of... if I could lift the chains up to the hooks without popping the wires in my sternum. Trying to lift this thing is no joke, so I knew I needed to come up with something different.
MH_lights_1.gif


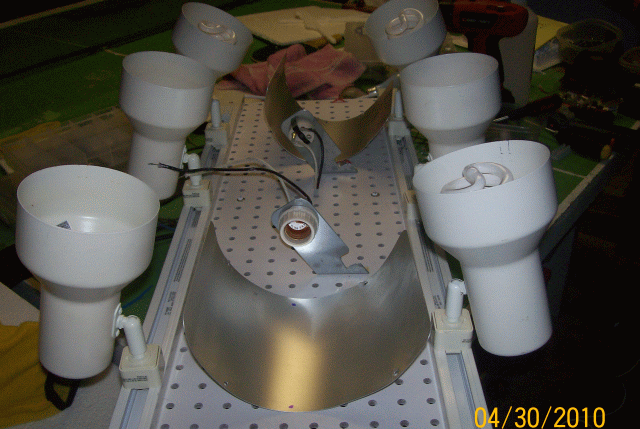
Since I love to homebrew electronic projects, it was time to come up with a design. Since this will go in my flowering room, the MH bulbs will have to be augmented for spectrum. I had 2 43" track lights with 69/100W CFL's for that. I want to make a light that is compact, light weight and easily adjusted. As I scavenge through my tons of old gear and parts (otherwise referred to as "ALL THIS JUNK" by my wife), grab my electronics warbag and start an attack, I came up with a cheap and easy design. It incorporates both the track lights and the MH lamps into a single unit. I also wanted to shorten the track lights so they weren't bumping into the walls on each end.

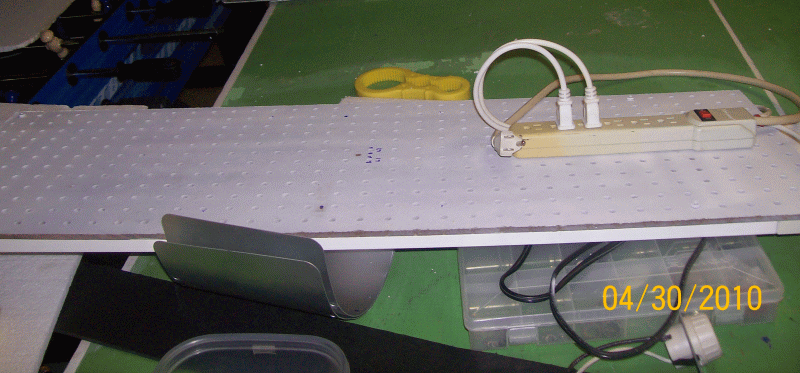
I cut a rectangular chunk of 1/4" pegboard as a mounting frame, which I painted with flat white primer. I cut four inches off the track lights on the Shopsmith and reassembled them. These were mounted on opposite sides of the pegboard frame. I then ran the power cords over the top and mounted the powerstrip.
chassis0.gif


Now for something completely different... GUT THE BALLASTS
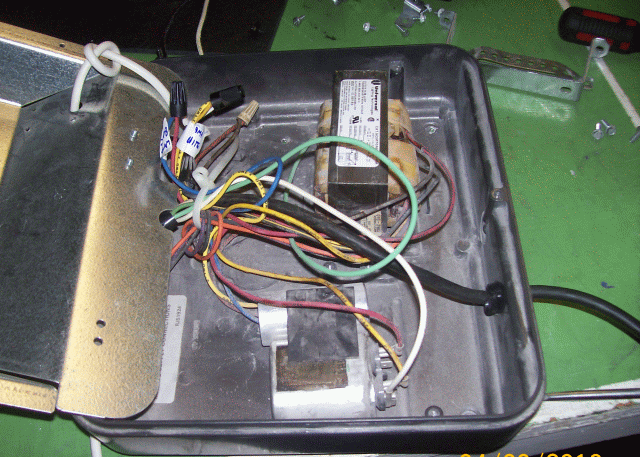
What a convoluted mass of psychadelic spaghetti! This needs to go for real!
MH3.gif


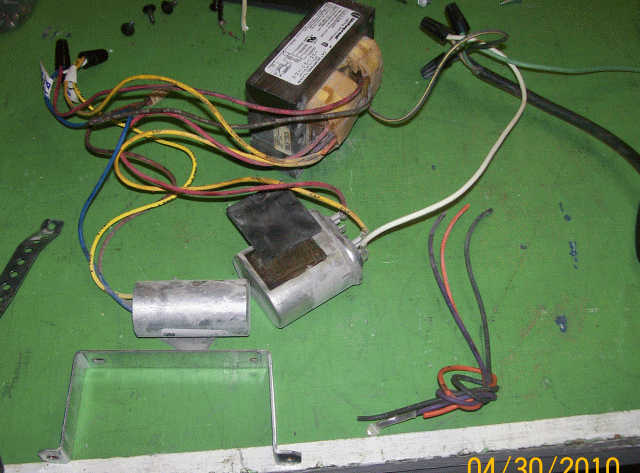
So, you guessed it!!! We're gonna cut all that jungle of wires, transformers, caps and igniter loose from the metal cabinet, resulting in this...
MH4.gif


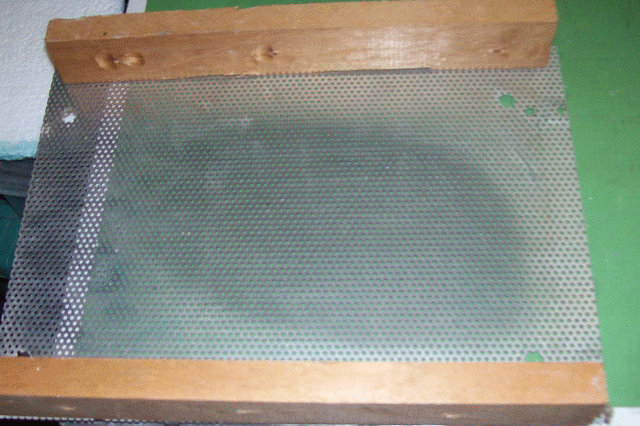
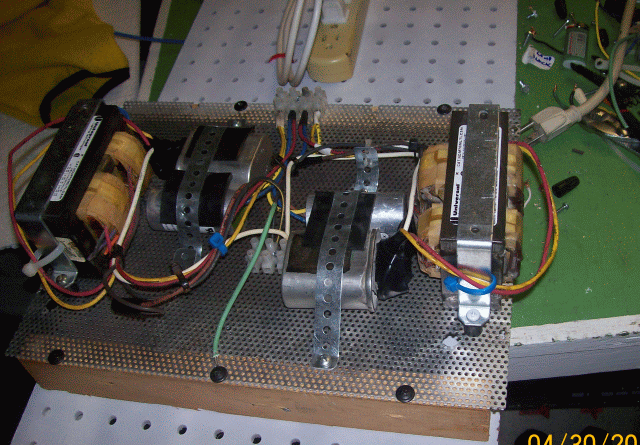
I snipped off the unused taps on the transformer and covered the stubs with heat shrink tubing. I repeated this operation on the other ballast. Of course, they're going to need some type of chassis for mounting. I found a bottom panel from an old amplifier and added two wooden rails for support.
chassis1.gif


Now, I mount the parts on the chassis, eliminating all the excess wiring as I go. I use insulated terminal strips for all connections to eliminate any exposed voltages.
chassis2.gif


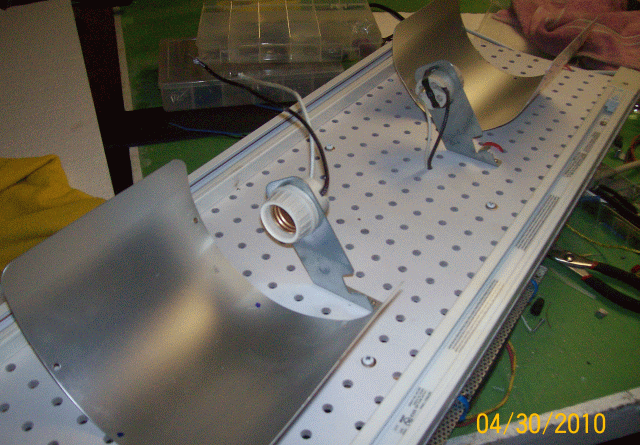
I had mounted the ballast chassis to the topside of the frame, but decided it would be better to wall mount the ballast chassis. I add the MH sockets and reflectors on the bottom side.
chassis4.gif


This is pretty much what the finished light will look like.
chassis5.gif


All that remains to be done is to add longer wires from the ballasts to the bulbs on the frame to allow for wall mounting, add a longer power cord and eye hooks for hanging and power it up.

Other than that, I still need to vacuum, mop, seal up, paint the inside of the room and mount a inlet vent/filter and exhaust fan and it'll be ready to rock!
 
As a newbie DIYer trying to get my grow up and running on a shoestring budget as well, I would question whether it's wise to mix the CFLs and MH on the same mount. From my experience, the CFLs have to be within inchs to be effective, and my MH was hot to the point of toasting the plants, even at 24 inches. Maybe you can get away with it being only 100 watts, but keep a close eye. Good luck, and keep posting, or I should say let us know what happened, as this last post was the end of March.
 
Things are coming together very nicely. The veg area looks great. I like the lighting setup. Those kinds of things are very tricky to DIY correctly, so be prepared to finesse it a little. I think a great grow going. A little roller coaster at the beginning - but you're running now!

:nicethread::peace::rollit:
 
Actually, that post was from 5/1... The light is up and works great, the ventilation and circulation fans are installed, the room is all sealed up and painted white, and I have all 12 plants in there as of today. I was starting to wonder if I'd get it finished at all, but now all I need to do is meditate for all females and maybe do the "Indian Female Plant Dance" every day.

Whatever I get out of this grow will be it for this grow. As we'll be taking a couple weeks midsummer hiatus to the woods, there will be some downtime after harvest and then I'll have to start from seed all over again.

Agreed on the "tweaks"... I already have a few to do to both setups after harvest. I have some veggie seedlings in the veg cabinet at the moment so I can hopefully make up some lost time getting them planted in the garden.
 
How did this grow turn out?

We would love to be updated with some pictures and info! :blushsmile:

If you need any help with posting photos, please read the photo gallery tutorial:
Photo Gallery Guide - How to Resize, Upload & Post Photos

I am moving this to abandoned journals until we get updates.

Thanks and hope all is well in your world!

Love and respect from all of us here at 420 Magazine!

Sending you lots of positive energy through the Universe.
 
Back
Top Bottom