SmokenGanja
New Member
Strain: White berry; 75% Indica hybrid that is currently in flower at about day 35 of flowering but some pictures are from earlier.
I am still rather new to all this. The whole setup is basically just thrown together from parts I founds around the house as much as possible. It was cheap but I tried to make it as efficient and maintenance free as possible. I have run the ebb and flow for about a year on tomatoes and peppers just to get the feel of it and make sure there were no design flaws or leaks. I wouldn't even have to have ever touched the plant besides trimming it to make it more like a SCROG. It was on automatic. It has seven 4 inch pots but only one is being used right now for this setup. I made it small to maximize the light. The rockwool that the clone came from was too large for the pot. I had to very carefully tear it apart with my hands, trying to preserve all the roots I could until it was approximately equal the size of the pot so there is no hydroton or other medium in there. The temp of the room is around 70 and it has reached 75 a few times. You have to love the SoCal weather. Humidity is about 60% on average. It could be slightly higher since the air is also pulled through the hydroponics unit. I haven't measured the temp in the box but the fan moves so much air I doubt it is more than a few degrees warmer in there. It is strong for a PC fan.
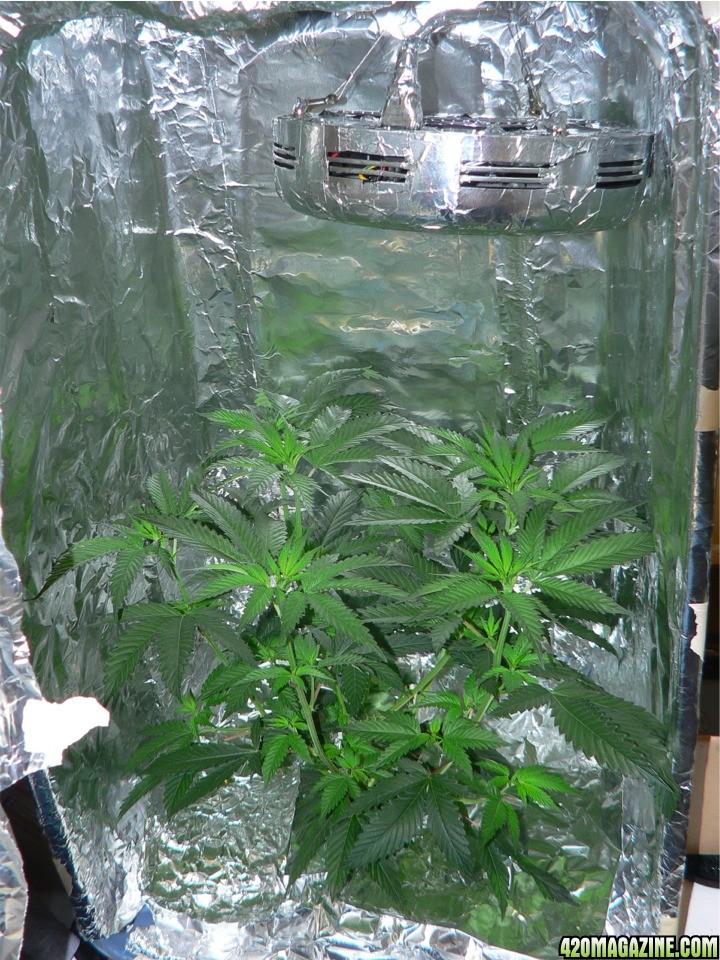
Just an overview of the setup April 27th or day 27 of flowering
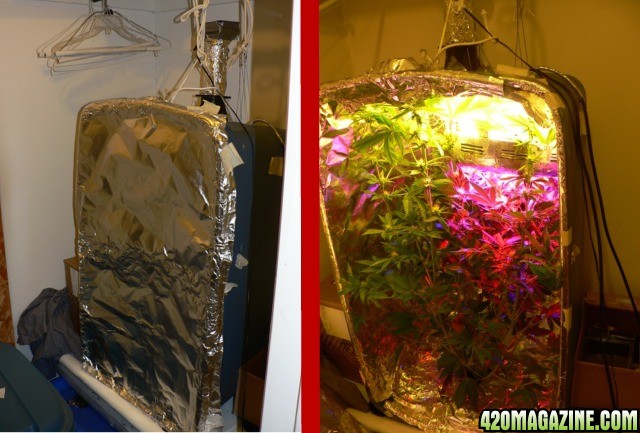
The ebb and flow is made from two plastic totes with one directly on top of the other. The tent is also made from a plastic tote box. The tank is larger and holds about 20 gallons. I used dry nutrients but found I had to use a mortar and pestle to help dissolve it. It seems to work well and I rely on the buffer in the nuits to maintain pH. I don't have a pH meter. I had some bromothymol blue indicator and that allowed me to add diluted phosphoric acid I prepared to our rather alkaline water to get the pH to about 6. You can't get lower on that indicator but it seemed like it should be close enough to me, again me counting on the buffers to set it. I was hoping it would remain stable and there doesn't seem to have been any problem there. The first month was set at about half the recommended rate of fertilizer for vegging. I didn't change the water or fuss with the water the first month. It was then almost to point of not filling the upper tray. I filled it up with an equal mix of a quarter the recommended amount of the veg fertilizer and about half the dose recommended for the flowering fertilizer. I just poured the dissolved solution into an exposed hole in the lower plastic tote. It is timed to flood for 15 minutes every 2 hours when the lights are on. The timer for the pump is only on when the lights are on so no water goes to the roots until morning. They are actually off about 13 hours. I have never moved the plant or the homemade tent at all. It is braced in there so it can't move and it is tied from the top. Obviously I should have made it a bit larger but the plant grew very fast. Next time I plan on making a larger tent but I can still make this work well enough by trimming the plant as much as I hated to do that. I have some of the very heady buds from early so it isn't all bad since I am still in the learning phase. I need to practice and to figure out how to cure it even though I have read plenty of examples. That is something that probably requires experience so I will practice with the top colas that I had to cut off. Some were growing into the UFO. I am not really that interested in yield or efficiency right now. It is more about maximizing quality as much as possible and owning an exotic pet that needs a little care. This is my first pet that eats light and produces something that I actually want. It is a little smelly and I might have to increase the carbon filtration or add some air freshener. It seems to be producing pretty well but I won't know how much until about another 25 days. I may keep it alive longer and try to revegg it and see how that works.
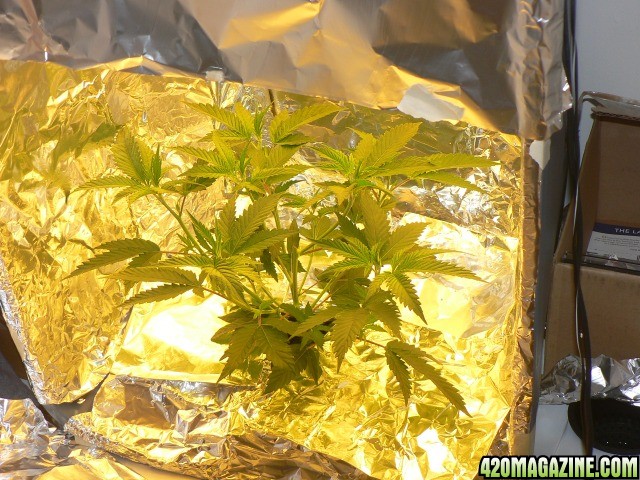
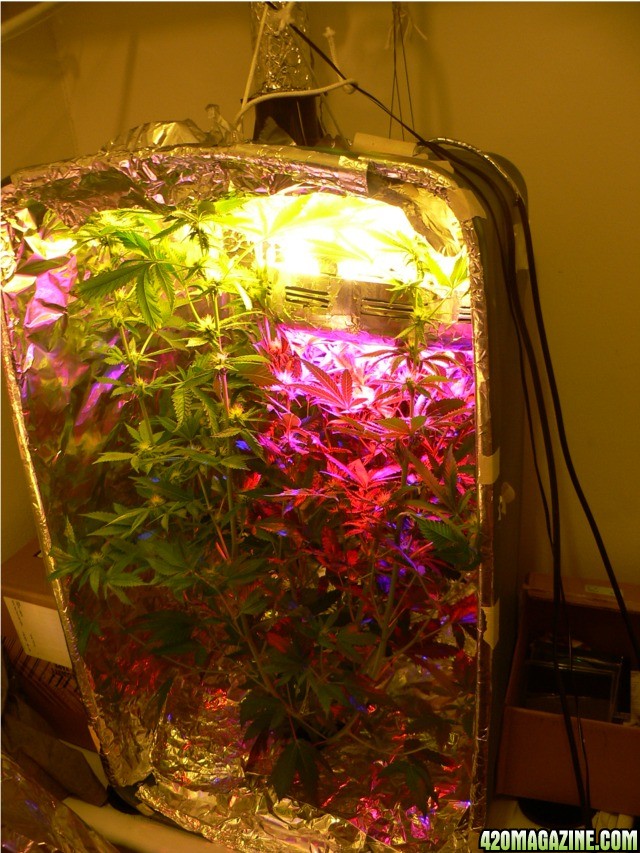
The plastic tote is cooled by a PC fan. The main light is a 135 watt flowering LED UFO. I added strips from some aluminum tape to make it far more reflective. It isn't black anymore. That makes a huge difference at first but less as the plant gets larger. It is very bright in there when over 95 percent of all surfaces are covered with aluminum foil. I realize that I could have used mylar but I don't think the slight improvement would be worthwhile with my design. I have it basically designed where the amount of light is nearly maximized and the cost is almost nothing. I don't mind the several hours it took to get the absolute most reflective surfaces possible. The light is going to reflect on average about 6 or 7 times so that is how much brighter it will be. If the reflective index of aluminum is about 90 percent, that average increase should be improved. There is no risk of hot spots when it is reflected so many times. There is a lot of misinformation about this subject out there. Some people get very passionate about their reflective mylar. Mylar is primarily reflective because of the aluminum so the argument that it is so much more reflective seems like nonsense to me. I was going to get a light meter to measure the improvement but I can see the improvement so there was no need. The only way something slightly more reflective would help is if you eliminate the last few percent of areas not covered by foil. The amount of area not covered will increase as the plant grows so any differences are likely to be minor and short lived. It is very worthwhile to have especially bright lights at the beginning though. They were just two CFL's at the beginning by the way. The bottom was made completely reflective by using squares of aluminum with the edges folded so they aren't so sharp. That allows the air to be drawn from below them but they still reflect most all the light. They can touch the plant as long as it is on a folded edge. The unfolded edge of the foil looks like it might cut a plant. Folding it also makes more space for the air to flow up from underneath when the box is closed. The front is just aluminum foil spread over the opening. The suction from the PC fan helps keeps it on and I just fold it on the edges. It hasn't fallen off yet but it is dark enough even without that being true. I used the metallic tape to make the gaps between aluminum sheets much smaller.
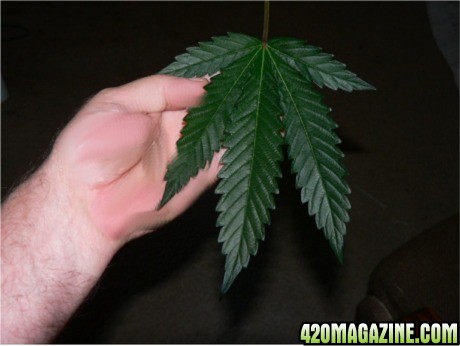
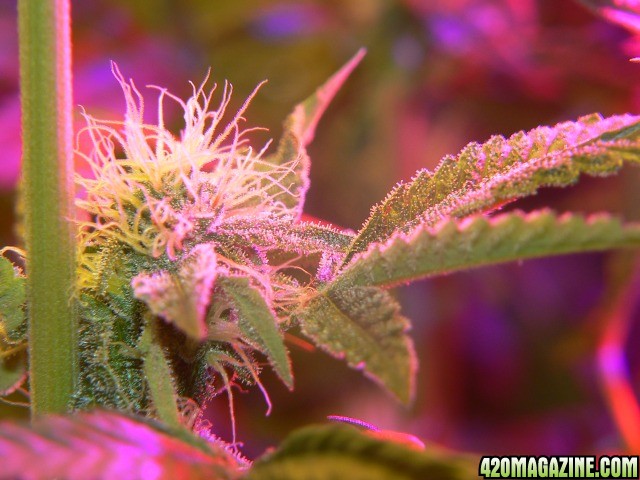
Closeup

about Day 1, March 19
I used a CFL until the LED came a couple weeks later.
March 25

March 30
April 5; day 5 of flowering

April 7
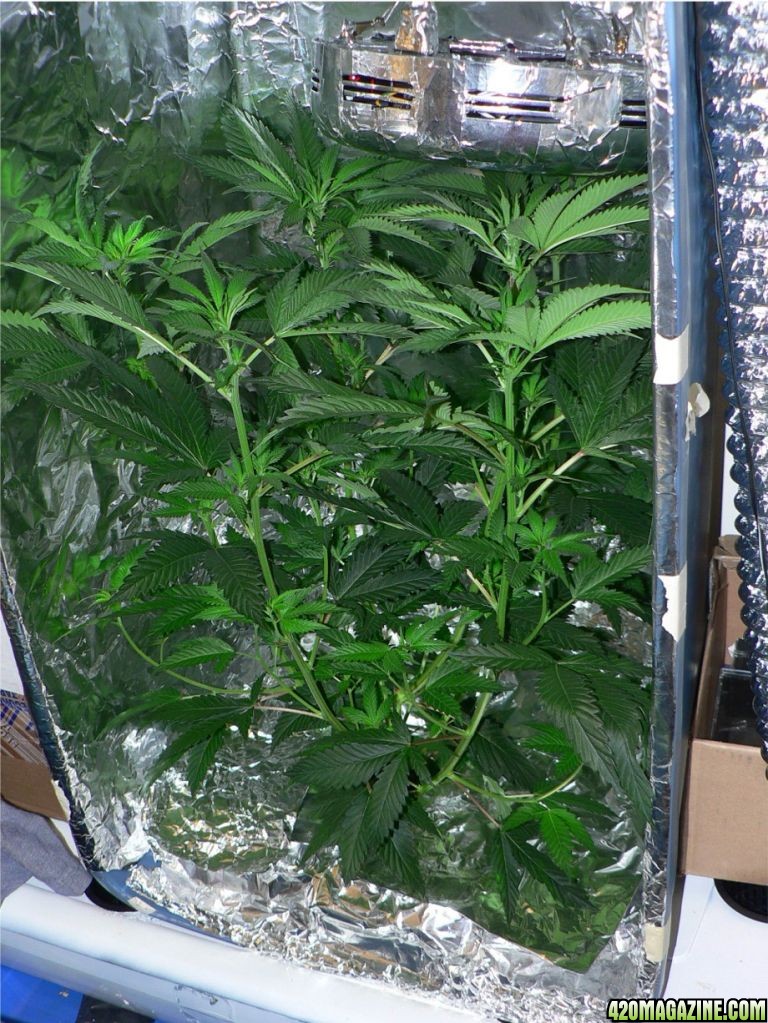
April 13, It is starting to grow out of control.
April 27; Day 27 of flowering
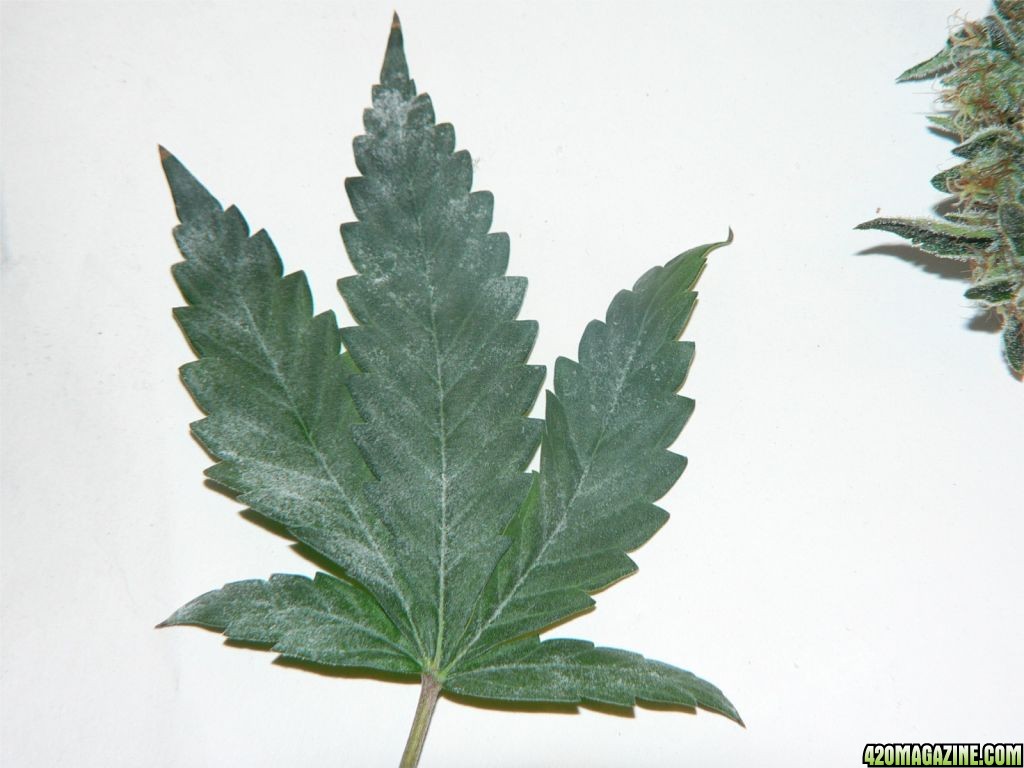
Typical flower today May 5 or day 35.
I am still rather new to all this. The whole setup is basically just thrown together from parts I founds around the house as much as possible. It was cheap but I tried to make it as efficient and maintenance free as possible. I have run the ebb and flow for about a year on tomatoes and peppers just to get the feel of it and make sure there were no design flaws or leaks. I wouldn't even have to have ever touched the plant besides trimming it to make it more like a SCROG. It was on automatic. It has seven 4 inch pots but only one is being used right now for this setup. I made it small to maximize the light. The rockwool that the clone came from was too large for the pot. I had to very carefully tear it apart with my hands, trying to preserve all the roots I could until it was approximately equal the size of the pot so there is no hydroton or other medium in there. The temp of the room is around 70 and it has reached 75 a few times. You have to love the SoCal weather. Humidity is about 60% on average. It could be slightly higher since the air is also pulled through the hydroponics unit. I haven't measured the temp in the box but the fan moves so much air I doubt it is more than a few degrees warmer in there. It is strong for a PC fan.
Just an overview of the setup April 27th or day 27 of flowering
The ebb and flow is made from two plastic totes with one directly on top of the other. The tent is also made from a plastic tote box. The tank is larger and holds about 20 gallons. I used dry nutrients but found I had to use a mortar and pestle to help dissolve it. It seems to work well and I rely on the buffer in the nuits to maintain pH. I don't have a pH meter. I had some bromothymol blue indicator and that allowed me to add diluted phosphoric acid I prepared to our rather alkaline water to get the pH to about 6. You can't get lower on that indicator but it seemed like it should be close enough to me, again me counting on the buffers to set it. I was hoping it would remain stable and there doesn't seem to have been any problem there. The first month was set at about half the recommended rate of fertilizer for vegging. I didn't change the water or fuss with the water the first month. It was then almost to point of not filling the upper tray. I filled it up with an equal mix of a quarter the recommended amount of the veg fertilizer and about half the dose recommended for the flowering fertilizer. I just poured the dissolved solution into an exposed hole in the lower plastic tote. It is timed to flood for 15 minutes every 2 hours when the lights are on. The timer for the pump is only on when the lights are on so no water goes to the roots until morning. They are actually off about 13 hours. I have never moved the plant or the homemade tent at all. It is braced in there so it can't move and it is tied from the top. Obviously I should have made it a bit larger but the plant grew very fast. Next time I plan on making a larger tent but I can still make this work well enough by trimming the plant as much as I hated to do that. I have some of the very heady buds from early so it isn't all bad since I am still in the learning phase. I need to practice and to figure out how to cure it even though I have read plenty of examples. That is something that probably requires experience so I will practice with the top colas that I had to cut off. Some were growing into the UFO. I am not really that interested in yield or efficiency right now. It is more about maximizing quality as much as possible and owning an exotic pet that needs a little care. This is my first pet that eats light and produces something that I actually want. It is a little smelly and I might have to increase the carbon filtration or add some air freshener. It seems to be producing pretty well but I won't know how much until about another 25 days. I may keep it alive longer and try to revegg it and see how that works.
The plastic tote is cooled by a PC fan. The main light is a 135 watt flowering LED UFO. I added strips from some aluminum tape to make it far more reflective. It isn't black anymore. That makes a huge difference at first but less as the plant gets larger. It is very bright in there when over 95 percent of all surfaces are covered with aluminum foil. I realize that I could have used mylar but I don't think the slight improvement would be worthwhile with my design. I have it basically designed where the amount of light is nearly maximized and the cost is almost nothing. I don't mind the several hours it took to get the absolute most reflective surfaces possible. The light is going to reflect on average about 6 or 7 times so that is how much brighter it will be. If the reflective index of aluminum is about 90 percent, that average increase should be improved. There is no risk of hot spots when it is reflected so many times. There is a lot of misinformation about this subject out there. Some people get very passionate about their reflective mylar. Mylar is primarily reflective because of the aluminum so the argument that it is so much more reflective seems like nonsense to me. I was going to get a light meter to measure the improvement but I can see the improvement so there was no need. The only way something slightly more reflective would help is if you eliminate the last few percent of areas not covered by foil. The amount of area not covered will increase as the plant grows so any differences are likely to be minor and short lived. It is very worthwhile to have especially bright lights at the beginning though. They were just two CFL's at the beginning by the way. The bottom was made completely reflective by using squares of aluminum with the edges folded so they aren't so sharp. That allows the air to be drawn from below them but they still reflect most all the light. They can touch the plant as long as it is on a folded edge. The unfolded edge of the foil looks like it might cut a plant. Folding it also makes more space for the air to flow up from underneath when the box is closed. The front is just aluminum foil spread over the opening. The suction from the PC fan helps keeps it on and I just fold it on the edges. It hasn't fallen off yet but it is dark enough even without that being true. I used the metallic tape to make the gaps between aluminum sheets much smaller.
Closeup
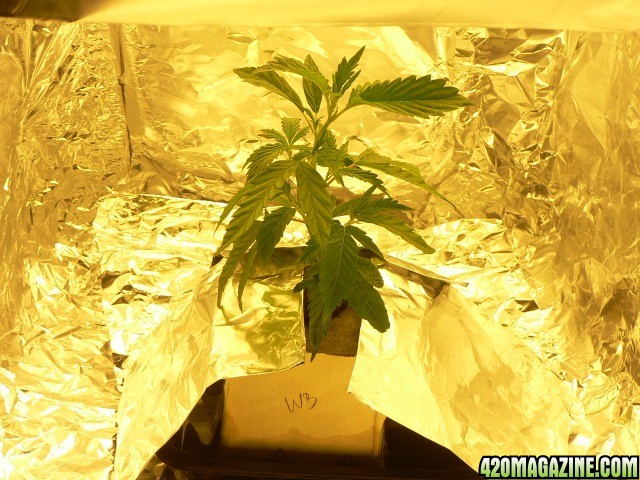
about Day 1, March 19
I used a CFL until the LED came a couple weeks later.
March 25
March 30
April 5; day 5 of flowering
April 7
April 13, It is starting to grow out of control.
April 27; Day 27 of flowering
Typical flower today May 5 or day 35.