V'spec Power Cube - Empowering the Artform

vspec

New Member
Well, im sure the DIY forums will be a common hang out for myself. By the look of it, plenty of creative people onsite. Should be good.

Anyways, Thought you guys might enjoy seeing a project im currently working on.

Never being content with what the system provides the masses, As always, im caught pushing the envelope.

Im also assuming its only 6 photo's per post, so i'll start with that & go from there.

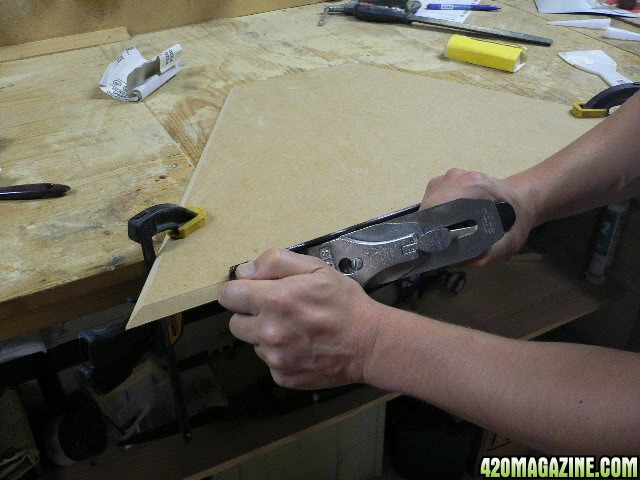
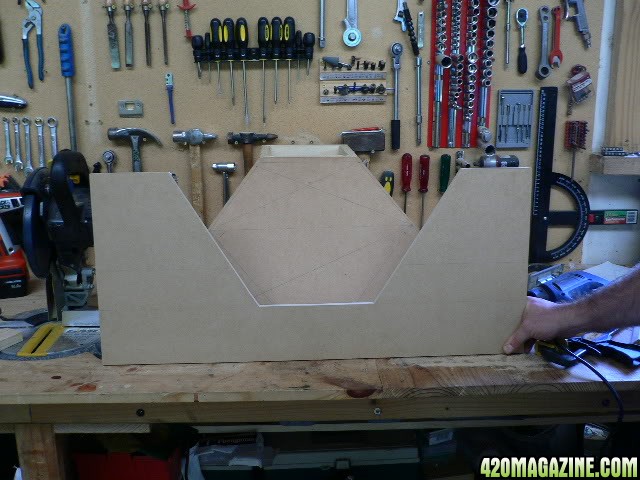
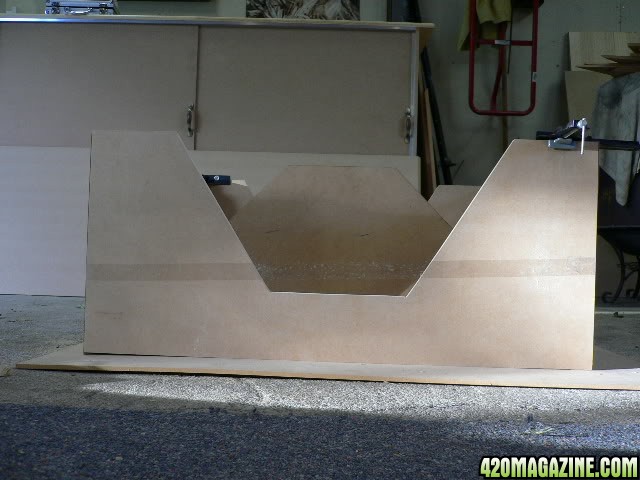
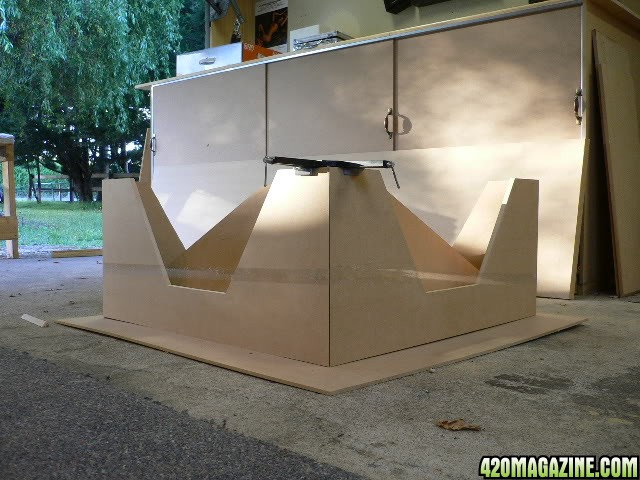
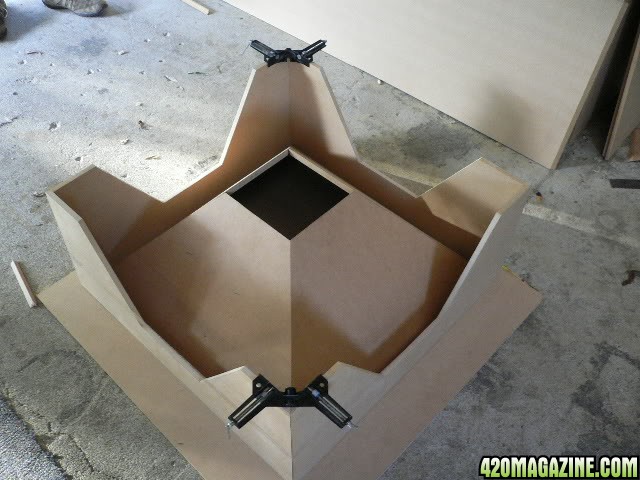
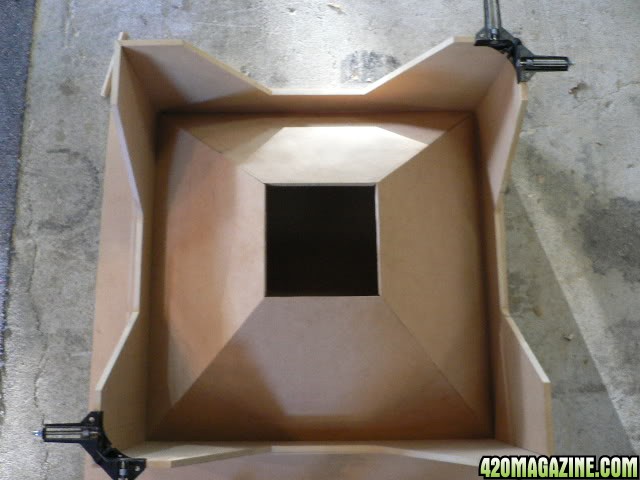
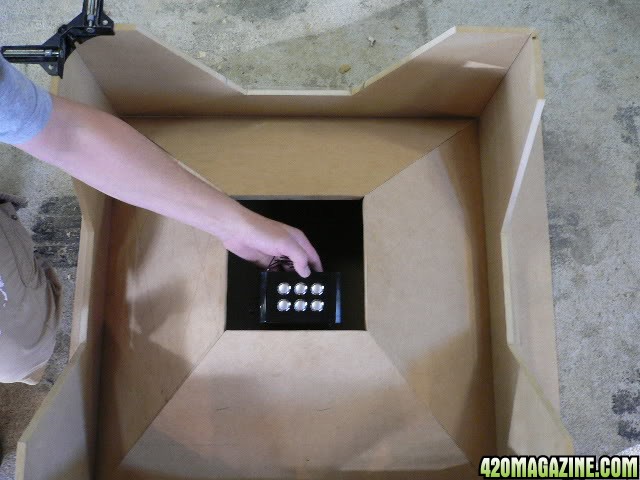
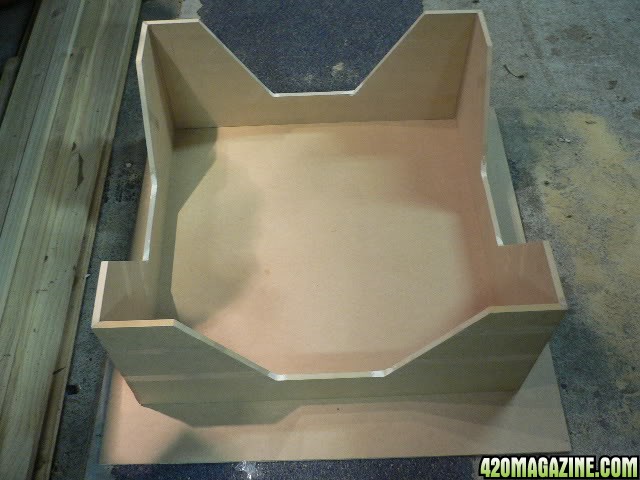
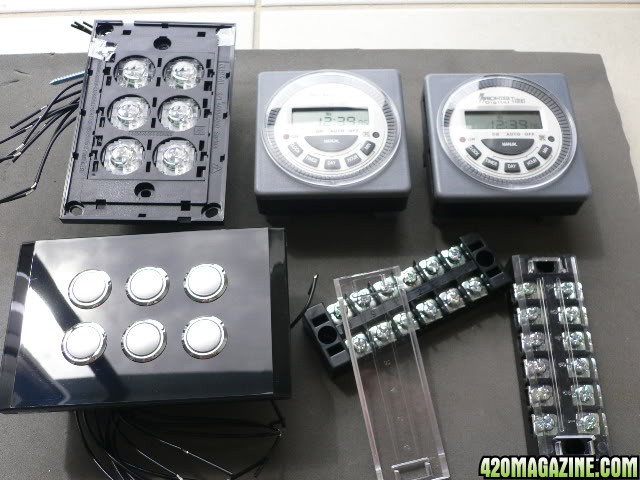
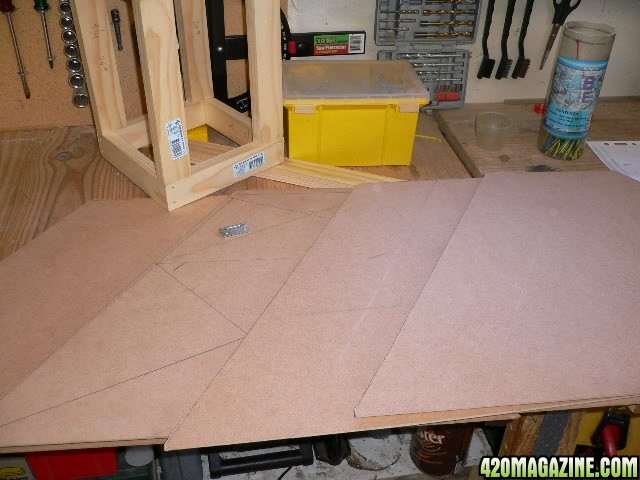
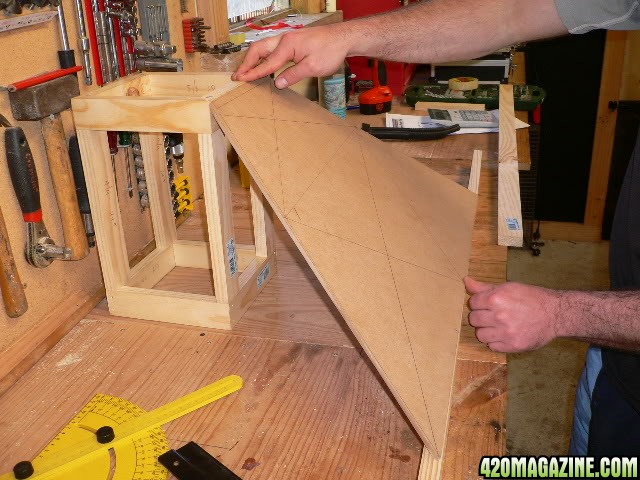
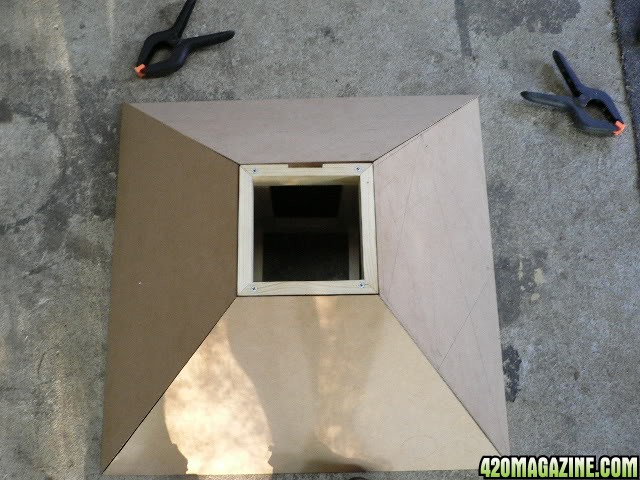
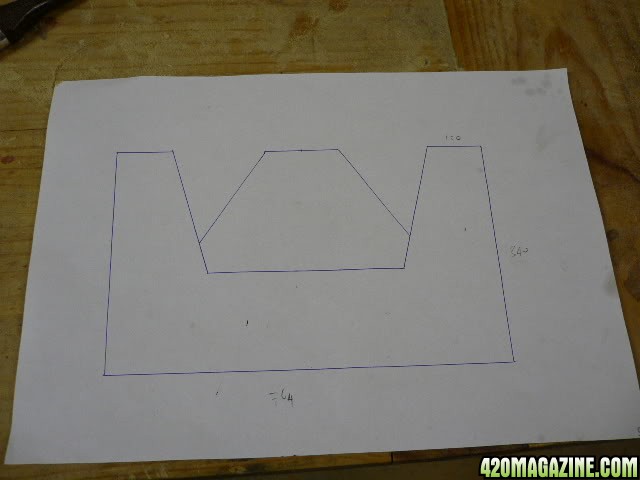
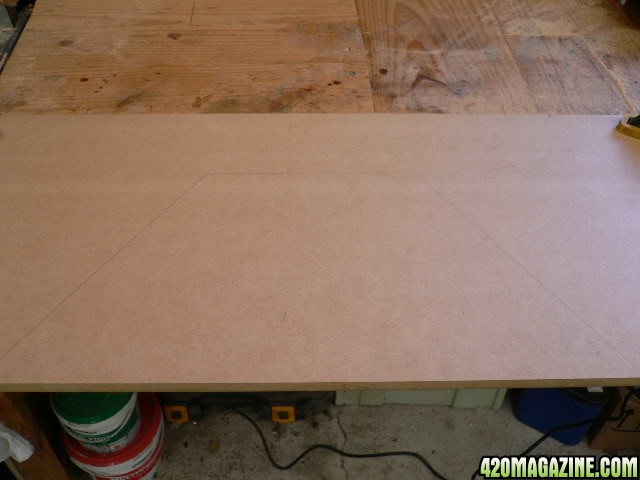
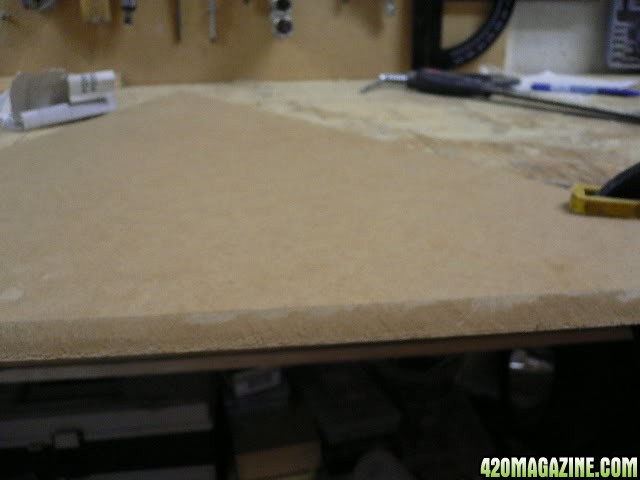
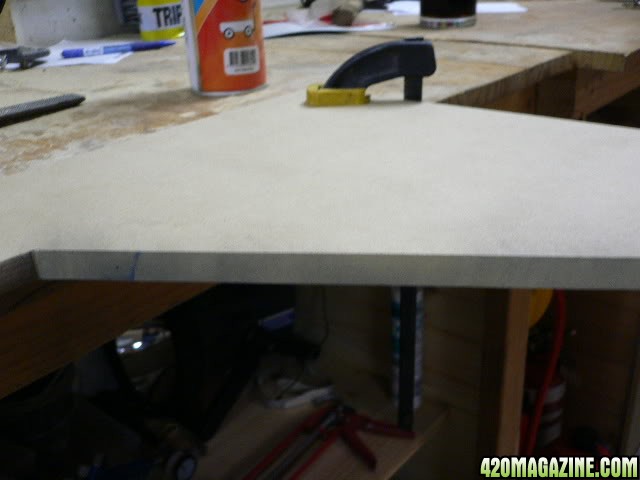
Progression series shots of the buld up process. Currently bout 75% complete.

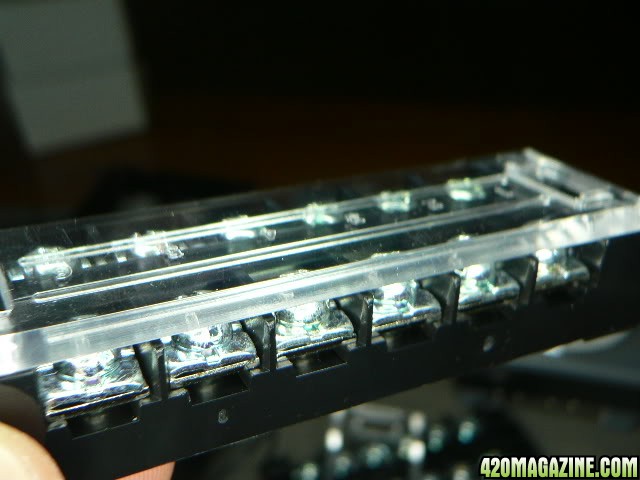
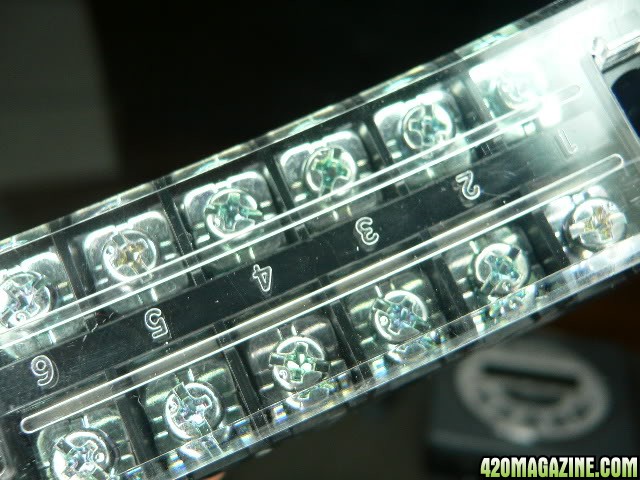
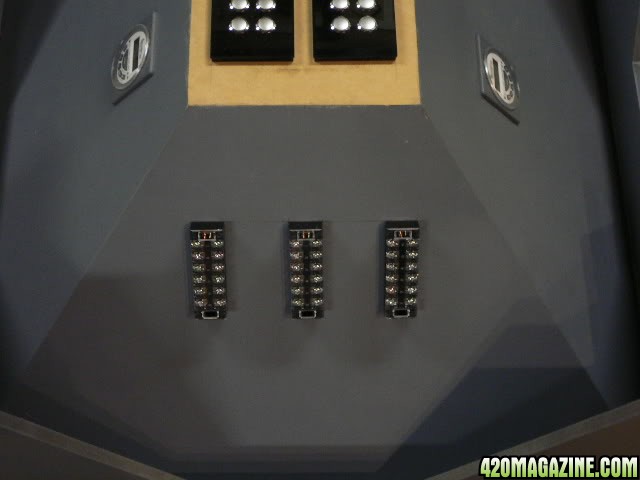
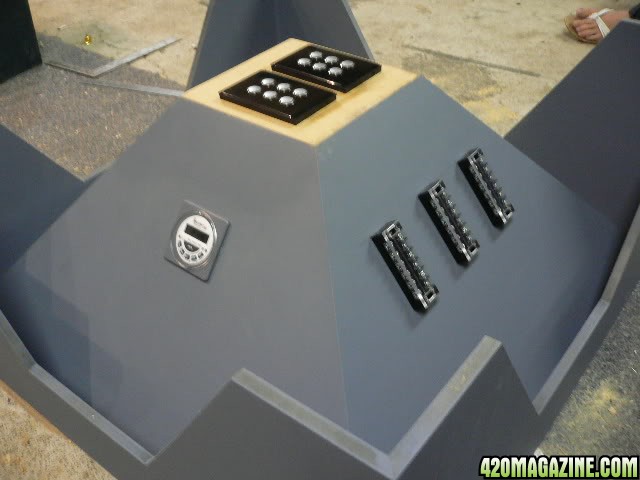
Welcome to my Power Cube.

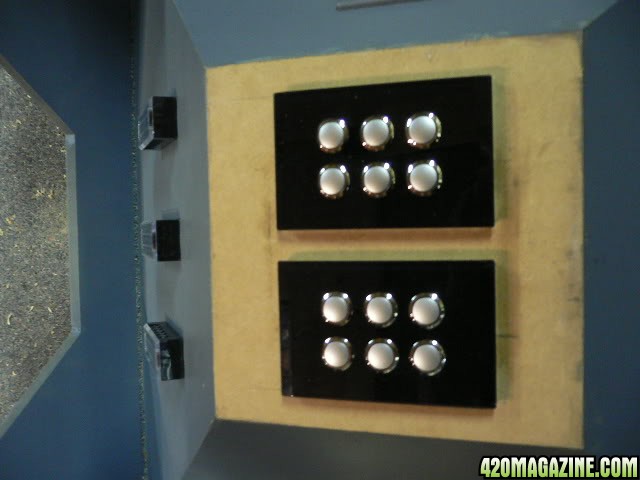
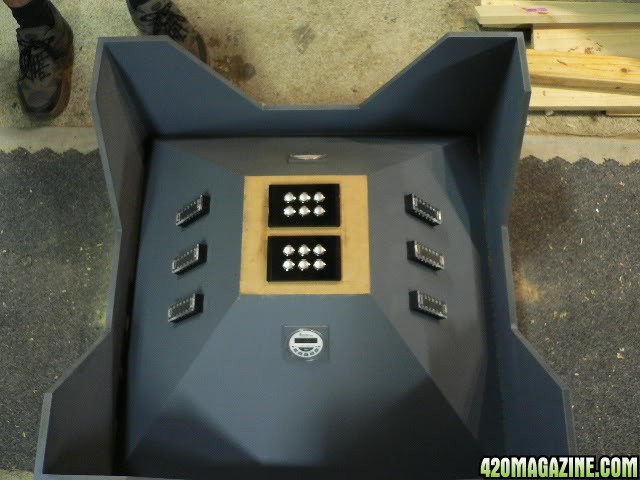
  • 12 gang LED switche control
  • 10 component input (Potential hard-wired in my case)
  • 6 x 600w rated visual power rails (positive, negative & earth)
  • Twin Timing units ( Hardcore enough -capable of running museums )
  • Temp Guage (pending)
  • RCBO or RCD kill switch.
Welcome to the mind of a mental patent.
P1040130.jpg


P1040128.jpg


P1040114.jpg


P1040125.jpg


P1040123.jpg
 
martydoingsomeactualwork.jpg


P1040113.jpg


P1040120.jpg


P1040122.jpg


P1040115.jpg


P1040117.jpg
 
so, as you can see, the progression is taking shape. This thing is 31inch cubed..lol So massive in other words, but what can i say, its a work of art.

As always - Im enjoying the build process, my mate generally thinks im nuts, however he enjoys seeing my querky projects come to life.
He's got more tools than i do, so more often than not i'll retreat up into the hills, bottle of jack daniels under one arm, & building material under the other & a new arsenal of laughable sledging comments to use during the night. Kinda like a productive catch up so to speak.

P1040119.jpg


P1040124.jpg


These are the power rails. I specificly got these in from overseas for this project. They will be placed on 2 walls, & the whole unit will be sealed in clear perspex anyways with access to the switches. But i wanted to get these, A) cause they looked the part, & B) Its just that added safety of an extra perspex casing over the rails.

P1040133.jpg


P1040134.jpg


P1040137.jpg
 
Opps, skipped some development shots. This was working out the free standing components. This real version doesn't have a box core.

I wont kid you, geometry is a head f$%%

P1030583.jpg


P1030581.jpg


P1030582.jpg


P1030596.jpg

P1030582.jpg
 
Ok, so this is where Im up to. The unit is primed only. It is still pending an orsome automotive paint job, however due to some extra drilling for wires & the pending temp guage set, its something that cant be rushed.

Components are trial fitted & fit nicely actually. Ive offset one of the timers alittle so the temp guage can sit below it, so its definatly pushing into my OCD barrier on placements. Im hoping once everything is in that unbalance will even out.

The unit is currently awaiting a sparky to hook everything up & certify it.
This is a 2 part process, its intial fit, then ive got to pull it all apart in prep for the spray booth, then i have to get everything hooked up again.

*sigh* Such is life!

P1040155.jpg


P1040151.jpg


P1040153.jpg


P1040154.jpg


And the journey continues...... More to follow when time comes availible ok.

And to think, only cause i wasn't content with a boring power board..lol
 
Thanks bud. Sorry if im alittle random, i kinda still meant to be working so my attention isn't 100% on the ball.

Christ, costing,...... everything is top notch quality, so component wise factoring everything , its prob just short of $400.
as mentioned, im expecting sparky fee's in the near future. We have kinda strict laws here if you burn your house down from DIY methods. & thats on top of giving you the d^ckhead of the year award...lol

Then, after the sparky, ive got to build a perpex lid so slightly more $$. That will have the opersite design as the outer walls so it makes a box. & as mentioned leaving a square free so the switches.

Speaking of switches. This is an example of what they look like. Just mine will be x12.
dimmer.jpg


Painting will be free, as my fair skinned english mate you see in the shots, is a painter. Outside shell will be gloss black, & i wanted to go altas grey for the inter slopes, but he's trying to talk me out of it. So considering the switches are blue, i might swing towards a nice shade of that instead.
 
um, basicly the worlds most expensive power board. But if your going to build something, why not do it in style I say!

Originally I was designing it for inclusion into my fish tank network, as thats been the backbone of my money sink for as long as i can remember..lol

However from a uses standpoint it can be used for anything & everything that requires power.
 
um, basicly the worlds most expensive power board. But if your going to build something, why not do it in style I say! ]

Originally I was designing it for inclusion into my fish tank network, as thats been the backbone of my money sink for as long as i can remember..lol
Im not exactly running toy gold fish ether bud, example being this 50cm (19") Mangrove Jack

However from a uses standpoint it can be used for anything & everything that requires power.


And V'spec....you already know how anal retentive I am. I LOVE more power, and am always searching for bigger, badder and better built than what men have made available to the masses. Looks like you've designed the most anal-retentive power strip on planet earth...LMAO!:nicethread:
Now, what I really want to know is if your plumbing some Tesla into the mix...looks like your cube just MIGHT handle it...:bravo:

As usual, I'm going to enjoy reading (studying) your thread and will probably enjoy it almost as much as you did creating it.:popcorn:
Peabody IS impressed
 
Thanks bud, means alot.

Narr, was thinking a flux capacitor instead
back-to-the-future-flux-capacitor-replica-2.jpg
 
Back
Top Bottom