Boxpipe's blueberry/hawaiian & Afgan Grow Journal

boxpipe

New Member
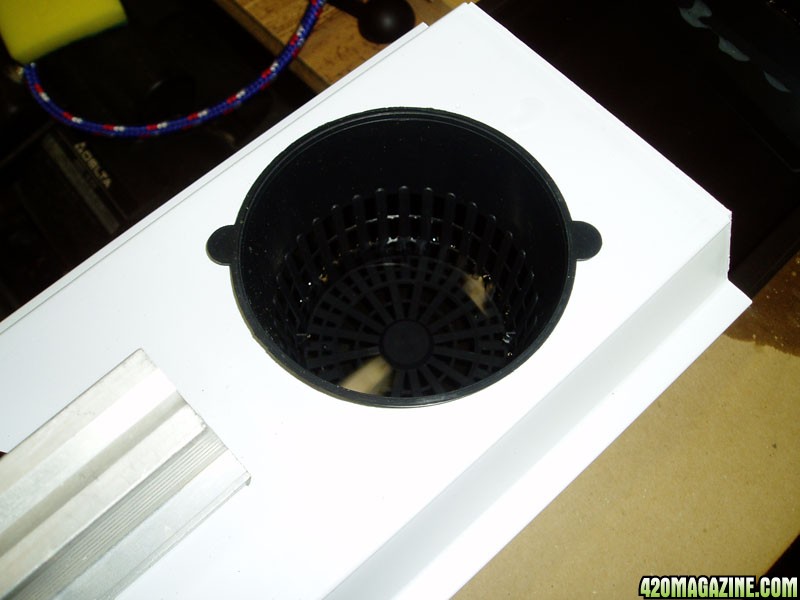
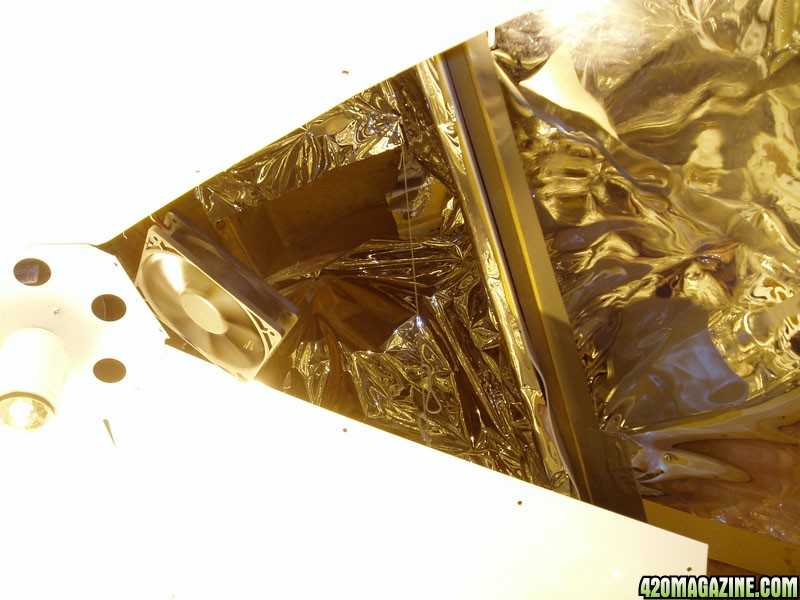
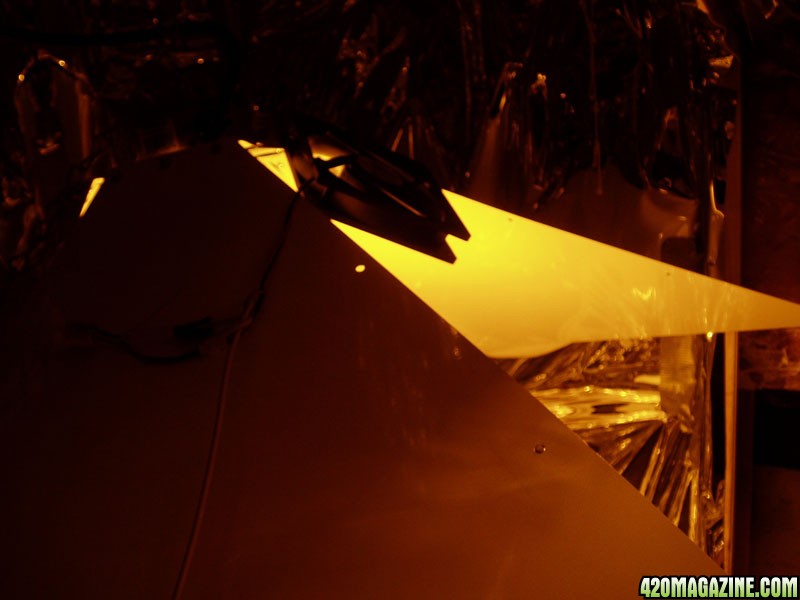
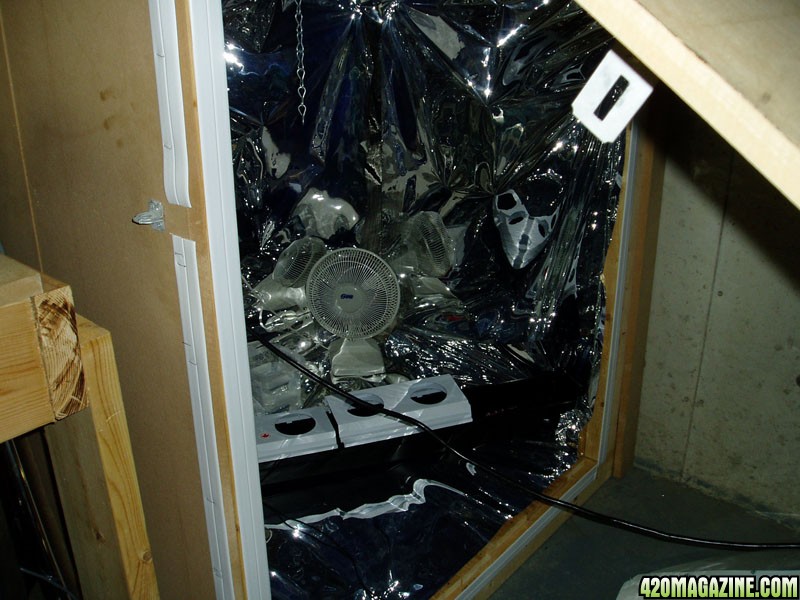
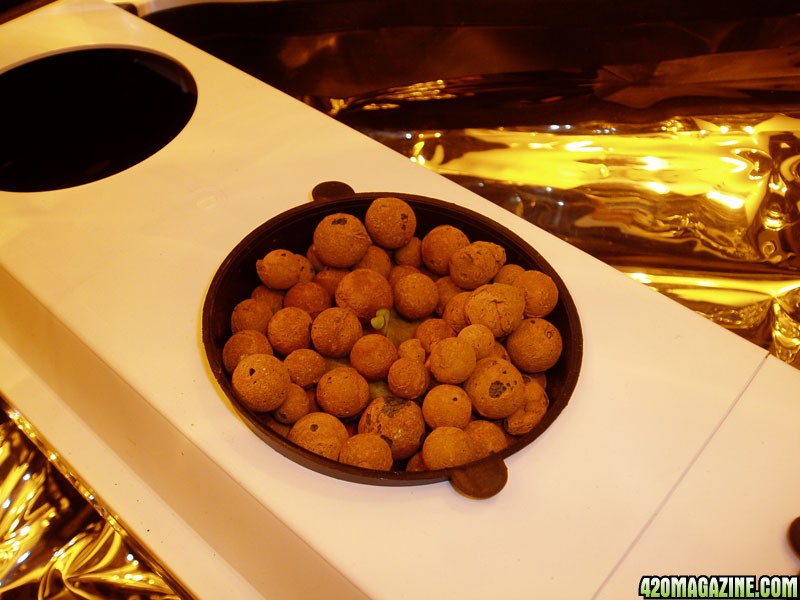
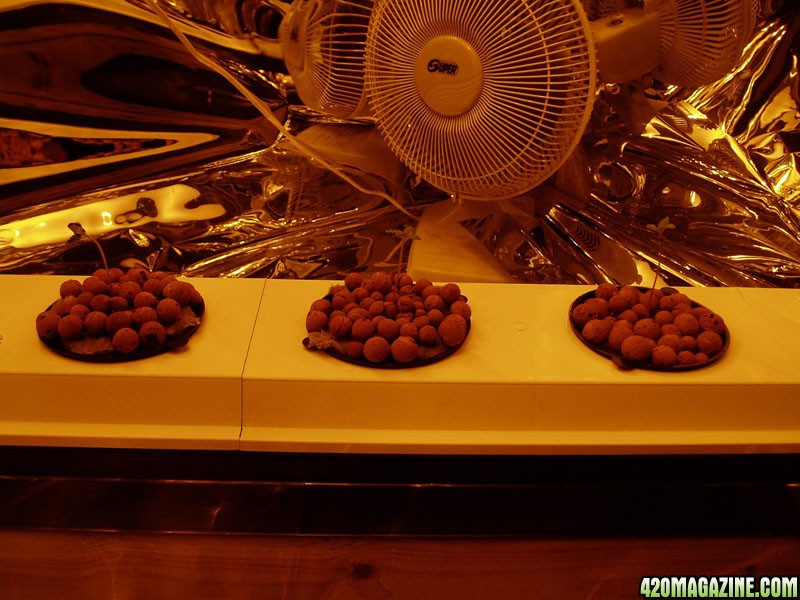
Here is my first full grow. It’s done. Finished. I started on August 3, 2006 and ended 113 days later on November 22, 2006. I wanted to go through the whole thing on my own without any help and without telling anyone.

I haven’t spoken with anybody how to do this. 100% of my knowledge has come from the internet. 95% has come from reading the FAQ, Grow Room, and Journal forums here. There were maybe 2 questions that I didn’t find answers to but I was able to google them up. I also followed whatever advice came with my equipment. I have asked no questions… Anywhere. As you can see, this is my first (oops, second) post.

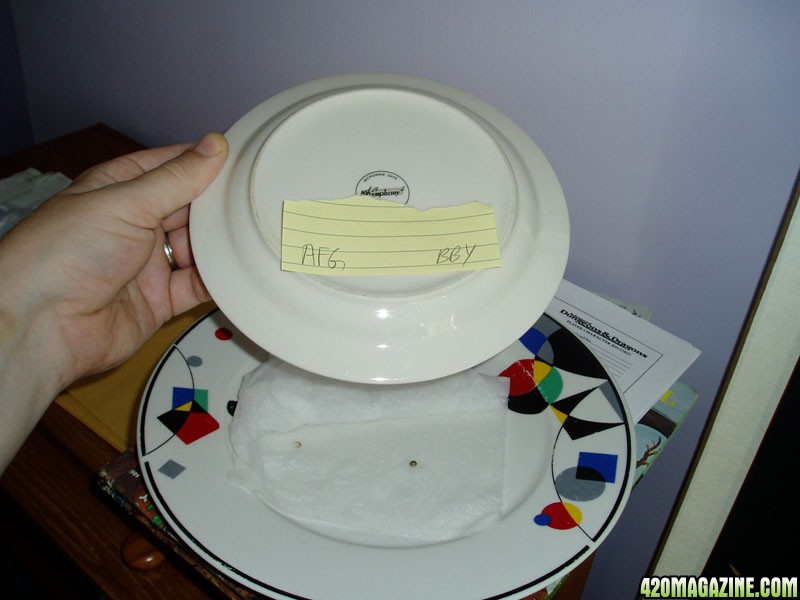
I am not an expert. This is not a “how-to” thread, don’t mistake anything I say here as “advice”. These are my experiences, good or bad. These are my decisions, good or bad. I followed the journals and posts from PlugJug, Urdedpal, or MadameCrash and a few others, they were very very helpful (not sure if these guys are still around, haven't checked).

My intent is to post all my journal entries one day at a time, that way I’m not overwhelmed trying to get the pics uploaded and into place. How did it turn out? You have to tune in to see!

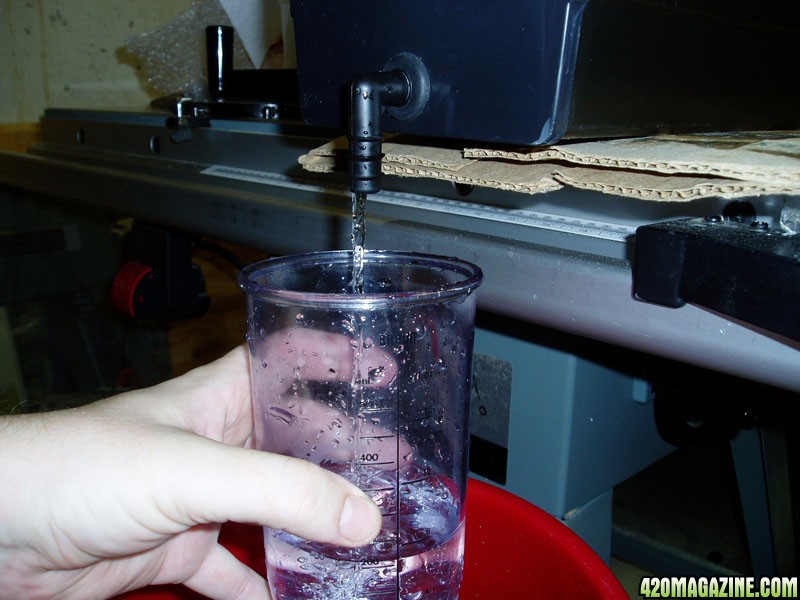
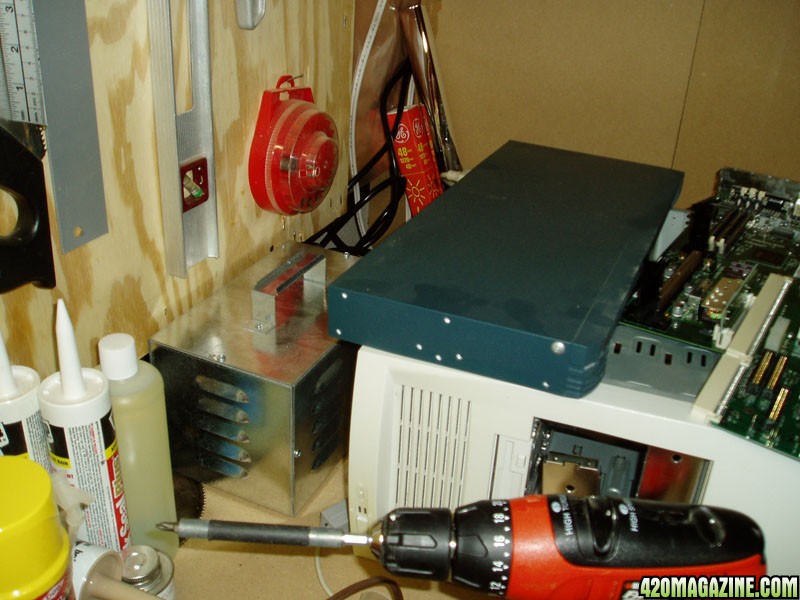
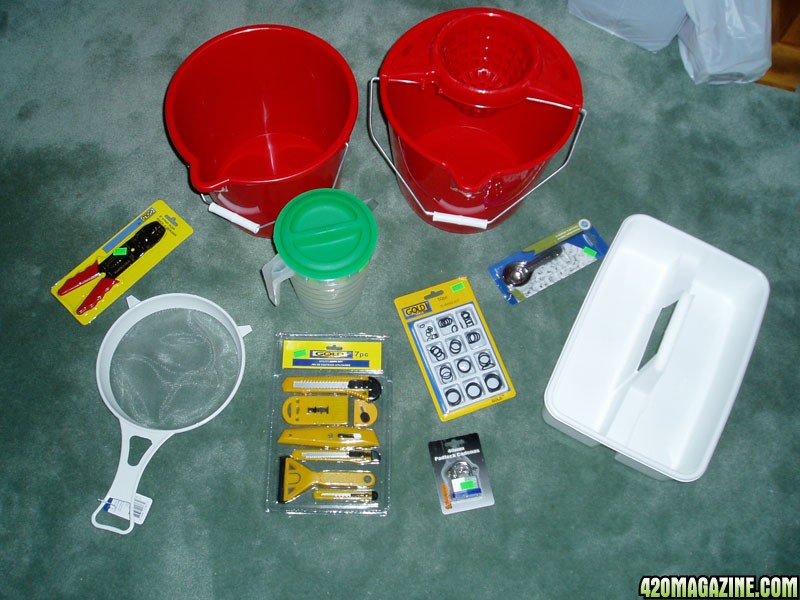
My estimate on how much money I spent… $1500.

PS: It's all gone. Whatever I ended up with and most of the equipment, gone. I figured it would be a lot safer to wait until now to post the journal.
 
August 3, 2006
Day 1
This is a very small personal grow.

Background: I built a grow room in my basement and tried a small grow under flouros that didn't turn out so well. Everything looked great until the end. I started with 4 seeds, one went obviously male on flowering so I burned it in the fireplace (heh). I'm not sure what happened to the other 3. They didn't look at all like they were supposed to, and by pics I've seen online, I don't think they went hermie. But they're long gone so who knows.

After my first miserable failure I was disillusioned so didn't try again for at least a couple years, until now. I still had some seeds left (purchased from a reputable source) and they'd been sitting in their original package in the top drawer with my socks and underwear.

Goals: the cabinet must be undetectable to the casual observer. Ie: no light or sound coming out of the cabinet. (I don't need my mom seeing it when she comes to visit. She wouldn't understand) 2) To grow 2 or 3 females right to the end, then start over with new seeds and 3) try to keep the cost as low as possible (which I totally blew).

The grow cabinet is in my basement in the corner of an area that is my workshop. There are several advantages to doing it here (and I considered lots of places, such as my attic, which would have been perfect for noise/light because nobody goes there but me. But do I really want to climb a ladder everytime I check my grow? Sigh). Two main advantages for my workshop: 1) No one goes in my workshop. It's frickin chaos. But it's my chaos and I love it. 2) I can work on it after everyone goes to bed 'cause it's nowhere near bedrooms. 3) the basement is cooler and I have heat problems.

I take all my pictures on an Olympus Stylus 300 Digital camera. I resize them with Adobe Photoshop to 800x600 which I figure should fit most computer resolutions. Average file size should be around 150kb. I've written a batch action in Adobe so I can convert an entire directory of pics at once.

August 3, 2006
Day 1
- Set 6 seeds to germinate between pieces of wet paper towel placed on a plate and covered 95% with a D&D Monster manual. After a few minutes I start wondering exactly how much bacteria has accumulated on a book that's over 10 years old and sitting on my bookshelf. Too late, I figure. Oh well. See Day 4 for a pic.
- I need to renovate my grow room so I figure I'll have a few days to work on it. (wishful thinking)
- 3 are blueberry/hawaiian sativa, 3 are Afgan pure indicas (in/out). I will almost certainly have to top the sats to keep them short. I don't advise growing both types under a single light, but meh. This will be an experience.
- Started into renovating my grow room. This is what I'm working with:
day2a.jpg


- Another pic, I took this day 4 or 5 after the light went in.
day2b.jpg
 
Day 2
- AFG 1, 2, and 3 have a tiny root sprout showing. Nothing on the indicas. (Sorry, hadn't started taking pics yet.)
- I go to the hydroponics store and buy a ton of crap. 30 feet of mylar in a 4' roll. A hydro kit complete with: 4' plastic tray, 3.5" plastic mesh pots, Part A & B nutrient formulas from DNF, an air pump and stone, a water level, a PH tester, PH downer, test tube, eye dropper, 1" rockwool starter cubes, and a bag of heydite growing medium. The hydro kit was about $120cdn. The mylar $1.50/foot. I bought a temp/humidity gauge with indoor/outdoor sensors and min/max feature. Extremely handy. I like being able to check my temp and humidity from outside the grow room and also being able to compare the temp with the general basement temp. $30cdn:

day3d.jpg


- The hydro kit is a cross between NFT and Deep Water Culture. It has the look and feel of an NFT, but the water doesn't get pumped through, it just sits there. In fact, it's the Hydro Harvest on this page: Hydroponic Gardens, Grow Lights and Nutrients | Homegrown Hydroponics (** this link no longer appears to work. Oh well, I'm sure you can google it up somewhere).
- I also bought a 400W HPS lamp with a circular reflector. About $300cdn. Yes, I know you got one cheaper. I don't care. The HPS will do me throughout the complete veg/bloom cycles. I may look into a MH/HPS converter at some point, but I've already spent way too much money. Odd that I don't have a pic of it. It doesn't fit perfectly in my grow room, in fact it takes on a more oval shape when I close the door on it.
- It takes forever to put the circular reflector together, and it's tricky.
- More purchases at Canadian Tire: 4 feet of 1" chain to hang the light on. Other stuff that I'm forgetting. Duct tape?
- I'm a person of extremes. I went from way too little light to (possibly) too much. But whatever.
- Before I put the HPS light in, I duct-tape (in some places using tin foil) up anywhere light is showing outside the room, then hang my mylar, which is tricky. I should have just painted the walls white, but 2 of the walls are outside walls of my house and since my basement is unfinished, there is only brick and insulation behind the mylar. If I was to do it again I'd put up plywood or something then just paint the damn thing white. Mylar is a bitch. Like putting up wallpaper.
- (This post is conspicuously naked of photos. I promise all future posts will have lots and lots of pictures).
 
Day 3
- I check the seeds in the morning. AFG1, 2, and 3 are sprouting big tap roots. Awesome. I think I can wait another day before sticking them in the rockwool. At end of day I check again. Holy shit the AFGs are going crazy. Two of the indicas have split but no root yet. I decide I better get these babies in the rockwool.
- Step by step:
- 1) Wash everything with normal dish soap. I typically have available: one of the mesh pots for straining stuff, a set of measuring spoons, a test tube, an eye dropper, a 500ml measuring cup and a spare plastic cup for miscellaneous dumping.
- 2) I filter the heydite in normal tap water to rinse off the sediment. There's a shitload of it, the water runs brown.
- 3) I soak the heydite in tap water with PH adjusted down to 6:
day4f1.jpg

- 3) I soak the 1" rockwool cubes in PH adjusted water. I forget to let the water sit to let chlorine evaporate :
day4g1.jpg

- 4) I stick the AFG 1, 2, and 3 in rockwool with root up (as recommended in manual that came with system). I have no idea how to do this, so I insert a steak knife into the rockwool to make an opening, then use my fingers to drop it in. Doesn't look right, so I yank the rockwool apart and let the seeds drop in further, then mush them together again afterwards. But they don't stay together. Fuck it, I stick the rockwool in the mesh pots and surround them with heydite to try and force them shut. Now I'm all paranoid that I've fucked up. The rockwool is still wet from soaking so now I just let them sit.
- Here is a picture looking up at the ceiling of my grow room. I didn't bother covering every square inch with mylar (but damn near):
day3b.jpg

- In the previous pic, you can see the chain I purchased (plus one bent C-shaped link that I use to attach the top of the light to the chain). Also, note the sole electrical outlet. I put this in myself but I recommend getting someone who knows their business. If you don't want them to see your business, then get them to mount close by and move the receptacle after they're gone.
- I installed my receptacle by leeching off this box that is feeding a regular basement fluoro light:
day2d.jpg

- I turn everything on and close the door tight. I immediately notice two things: 1) it gets hot. Temp jumped up to 106F. 2) It's almost impossibly to get zero light or sound out of this thing.
- I install 2 computer fans. I sacrifice a 12V power supply and wire them both up. I even get clever and put in a 83 cent switch so I can turn them on and off easy. (There are TONS of websites with instructions and pictures on how to wire stuff like this. Just google them up).
- I install 1 fan down low and 1 up high. In this picture I'm trying to hide the upper fan with some piece of plastic I picked up at Home Depot (in this picture you can see that my door flips up. I prop it with a 4x4 when it's open):
day2a1.jpg

- Light seeps out from cracks which I can probably minimize. The fan noise is something else.
 
I promised lots of pictures....

Day 4
- My AFGs look wrong. The roots haven't figured out how to turn down. In a paranoid fit, I carefully take the seeds out then stick them back in, root down. Now 2 of the rockwool cubes are barely holding together.
- Two of the indicas have cracked and the root tip is just emerging. I decide to stick them into the rockwool now. I do a much better job. Here is a pick of the 5 pots:
day4e2.jpg

- Unfortunately, this seed never went anywhere, but this is the plate I used. I lined them up indicas on one side, sats on the other:
day3a.jpg

- The AFGs are looking great:
day4b1.jpg

day4d.jpg

- (Bah. I can see the water in these previous pics is already starting rust stains on my table saw. See Day 9 for more info)
- I start getting the hydro tray ready, step by step:
- Wash everything I will be using. I adjust all water to PH 6. I should let the water sit for a few hours, but I forget again. Plus I need to get this sucker going.
- 0.5) I sit the tube on my table saw because I need a nice level surface. But it's not as good as I hoped, so I use my level and make sure it's almost perfect by wedging up one end. All measurements during this first run are crucial.
- 1) I fill the tub (tube) with water to the 2" mark, as the instructions say. Then I check to see how much of the mesh pots will hit the water. Nowhere does it say exactly how much of the rockwool should be submerged, or if any. I eye this sucker up and guess that this water level will just hit the bottom of each 1" square (surrounded by heydite):
day4i.jpg

- 2) I let the water run out and carefully measure using my 500ml cup. I count 13.5 500ml cups, or 6.75 litres of water. I'll need this number when I start adding nutrients:
day4k.jpg

- 3) I poured all the water into a bucket as I was draining the tube, so now I mark the water level on the bucket with a black marker. Now I know exactly how much water I need to fill up my tube.
- 4) I then notice there are markings on the bucket. Thankfully, it looks pretty close to 6.75 litres. How 'bout that!:
day4m.jpg

- 5) This is what I use to test PH with, it came with the hydro system. Bad pic, I'm sorry. But you can buy this stuff at any gardening store. Make sure it's for hydro systems and not a soil tester:
day4o.jpg

- 6) Now that I know exactly how much water will fill my tube, I very carefully test the PH and add a drop of PH down at a time and test again. Once I figure out exactly how many drops it takes, I won't have to measure so accurately next time (good thing about tap water is that it's consistent):
day4p.jpg

- Here's a pic of the nutrients I will be using. It's an A + B Gro formula from DNF. None for the first 2 weeks:
day4j.jpg

- The chart I am sort of following is this Hydroponic Gardens, Grow Lights and Nutrients | Homegrown Hydroponics. It's almost identical to others, including Urdedpal's: (Neither of these links work now, of course, oh well)


- Temperature thing is really giving me problems. I get it down to 98F with both fans running, but that still sucks.
- I go to a hydroponics store and buy a fan. $22cdn. It looks like a big computer fan except it's made of medal and plugs directly into a 110V outlet. No specs on it, but I'd guess it moves twice as much air as the fan I had in there before (my room is close to 4 x 3 x 6, or roughly 72 cubic feet). The one on the right is the new fan:
day4a1.jpg

- I also bought some 3" rockwool cubes with 1" holes in them for transplanting:
day6c.jpg

- I set about making a better hole in the wall. I do an amazing Red Green impression as I lift my router up to the hole... and meanwhile I get sawdust everywhere... in my hydro tube, the water I set out, all my instruments... everywhere. I toss out the water and fill the bucket again. Good thing I marked that line huh?
- With new fan in, temperature runs at 96F. What the friggin hell?
- I take the ballast out of the room and stick it on my bench with a bunch of computer equipment (yes, I had to rewire the ballast). It makes noise but you'd have to be a real techie to figure out what it is and that it has nothing to do with the computer equipment. I stick an old router on the table too and plug some wires in. It makes noise too. I can't get rid of my grow room noise, but I can hide it!:
day2c.jpg

- My room drops to 94F. I sit there trying to figure it out, then I realize, my probe is directly in the light. I put a piece of plastic over it. I also try removing one of the blades from the circular reflector on my light. Then, in a flash of brilliance (literally), I take my spare PC fan and screw it to the light. Genius, no? First is from the bottom, second is from the front/side:
day8a2.jpg

day8b2.jpg

- The temperature drops to 87F. That'll have to do.
 
Is anyone reading this? I'm beginning to think it's a waste of time...

Day 5
- At some point, and it isn’t today, but I dropped the tray into the room to see the fit. I know it’s not going to be perfect as my space is a little short of 4 feet. But it works diagonally. I can live with that, but the drainage tube will be hard to get at:
day3c.jpg


- Here’s another view:
day5c.jpg


- My babies need light so I drop the mesh pots into the tub:
day6b1.jpg


- I make sure the rockwool is wet. I fill up my bucket and set it aside.

- I put up some duct to hide light and re-direct air flow. Unfortunately I think it will hamper it slightly, but it’s gotta be done. I bought a can of expanding foam stuff to seal it. Messy. I’m paranoid about getting the “stuff” in my fan. It’s really sticky and expands by 50%.
day5a.jpg


- I am the king of invention. I needed to seal my door a little tighter:
day5b.jpg
 
Sorry for the hiatus.

Day 6
- My babies:
day6a1.jpg


- I PH adjust the water I set aside and fill up the tub (this picture doesn’t actually show me pouring it in). From left to right: BBY1, BBY2, AFG1, AFG2, AFG3:
day6b1.jpg


- I have no idea when to transfer the 1” rockwool cubes into the 3” cubes, but I can see a root tip coming out the bottom of AFG3. I decide to transplant this one now. I forget to soak the rockwool in PH adjusted water: Here are the cubes:
day6c1.jpg


- Transplanted. It just barely fits in the mesh pot (with a little squishing):
day6d.jpg


- Where do I put the heydite now? Anywhere I can, I guess:
day6e.jpg


- I need to adjust the tray somewhat. I need clearance for when I drain water and it’s also not balanced very well. I stick it on a 4x4 block of wood. You can’t see it in this picture, but there’s a very small length of hose that attaches to the drain on the right. There’s no way it will reach a bucket on the floor, so I’ll have to buy something or find a length of hose I can cut. I will jury rig anything and everything if I can. When that fails, I go out and buy stuff:
day6f.jpg


- Since I’m looking at this pic, I’ll add it here. Forget which day I took this on: Shows the door perched open, the white strips I tried to use to create a seal. I lock my door with a padlock. Had the oscillating fan kicking around at home. It’s cheap, maybe $12cdn?
day3c.jpg


- In the above pic I can see some sawdust. I tried a few things for cleaning the mylar such as paper towel, cloth, something else blah blah. The only thing that worked, and it worked really really well, was a refill cloth from a swiffer floor duster. Dust clings to it like crazy, even though mylar can get real staticy. This thing is amazing. Also good for cleaning glasses.

Everything up to this point was all written on Day 6 and mostly from memory. So I may actually be off a day or so on exactly when I did things and the order of the pics. I’m sure 90% is accurate.
 
Day 7
- My hydro tub has a leak in it. Fucking grrrr! I'm tempted to just leave it because it's a slow leak, but it'll bother me until I deal with it. I know how to fix it but it'll be painful. Grrr!
- AFG3 is doing great so I decide to transplant AFG1 & AFG2 into the 3" rockwool cubes. As I do AFG2, I see that the root has emerged from the bottom. Good sign:
day7b2.jpg


- I remember to soak the 3" rockwool in PH adjusted water, but I forgot to set the water out the night before so it's going to be chlorine heavy. Hey, if it doesn't kill them at least it will ward off algae:
day7c1.jpg


- I did AFG 1 & 2 a little different. As you can see, my rockwool barely fits the mesh pots, leaving little room for the heydite. On AFG3 I shoved the 3" cube in and put a layer of heydite on top. For AFG1 & 2, I put a single layer of heydite on the bottom first, then put the rockwool in, then I added a layer on top. The top layer is very precarious, I had to do it stone by stone and every time I bump the tub, a couple heydites fall off. I'm such a genius! By putting a layer on the bottom, I figure it will help anchor the roots. I'm guessing a layer on the top will help stop the light from toasting the rockwool:
day7d1.jpg


- It's hard to see from the above pic, but AFG3 is the tallest. BBY1 & 2 aren't doing squat. I'm sure I've done something wrong. Perhaps too quick into the light:
day7e.jpg


- I needed some stuff so I went to the local dollar store. If you're about to start a grow room and have a list of stuff to buy, I recommend checking out a good dollar store first. I bought all this stuff for about $19cdn:
day7f.jpg


+ Two buckets, one with a little strainy thing on top. To be used when filling/draining tub. I'll have to fill one with 6.75 litres of water and mark it. PS: you can never have enough containers. Keep them clean, cover them when not in use.
+ White container with handle. Probably use this as a temporary holder for the plants when I go to fix my tub. Tub has to be completely dry to seal then sit for several hours for the sealant to cure.
+ Strainer. I use strainers a lot, especially when I've just washed something and need to sit it somewhere to dry.
+ Box cutters. I like cuttin' stuff.
+ A new padlock. Dropped the key for my old one in a place that's almost impossible to get to. (grr)
+ Juice container. I want to keep utility water on hand all the time. I'm always looking for PH balanced, non-chlorinated water whenever I'm doing something.
+ Pack of various sized o-rings. (I just needed some anyway)
+ Pack of measuring spoons.
+ Wire cutters (also just needed it anyway)

- I also wanted to get an eye dropper, test tube, and a medical scalpel but they just didn't have any. Should be able to get these things at a drug store. I have one eye dropper that I use for the PH tester fluid, but I'd like another one for dispensing PH balancer. And the test tube that came with the Hydro kit... I've broken it twice already. Thankfully both breaks were near the rim of the tube so I still have half a tube to work with.
- I washed everything with dish soap. I did all surfaces, inside and out. I filled my juice container with water and stuck it somewhere out of the way. It has a (ordinary) dispensing lid so will keep most dust out, while letting chlorine evaporate. I'll let it sit overnight then PH balance it tomorrow.
- Somewhere around Day 4 is when the AFGs first sprouted. I'm going to give them 2 weeks with zero nutes then crank it up as recommended. If the indicas ever decide to come out, I may adjust the timeframe.
 
Fascinating journal with lots of DIY porn!

Relating your journal retrospectively like this is extremely cool from the aspect of being able to second-guess your choices and tell us what you would have done differently.

I'm trying really hard to not subscribe to more journals because I think I'm subscribed to like 30 or something, but I can't pass on yours.

You've created too much suspense, LOL!

+rep!
 
Hey guys, welcome to my journal.

Fascinating journal with lots of DIY porn!

Wait til I get going. I build a whole new chamber at one point and pretty much wreck my work shop.

Day 8
- BBY1 came up!
day8c2.jpg


- I hope BBY1 is a mommy because BBY2 is still a no show. BBY3 is still sitting in the paper towel; I have little hope now that it will germinate.
- I checked the water level this morning in the tub and it was down a little bit, so this is the first time I’ve had to add water. I used water that I had set out overnight but I forget to PH adjust it. Later in the day I remember, so I check PH in the tub, and it’s around 7.5! Yikes, I add some PH down and test again until I’m around 6.
- I went to an aquarium store to pick up some aquarium sealant, and while I’m there I see they have PH testers and PH downers in squirt bottles, which will be perfect for dispensing. Then I get them home and notice the PH tester only goes down to 6, and the PH downer says “NO PHOSPHATE” which is different than the PH downer that came with my hydro kit which is labeled “PHOSPHORIC ACID”. Ok, I don’t know if it will make a difference or not. I’ll probably take both back then look for some empty squirt bottles to buy. I hate using the eye dropper. I’d like to get an electronic PH tester, but I’m waaay over budget.
- AFG1, 2, and 3 are doing fine. This pic makes it look like the fan is blowing AFG1 over, but it’s really just fine. AFG2 is about the same size as 3.
day8d1.jpg


- One more thing: I take a few ¼ teaspoons of water from the tub and drop them right on top of BBY1 and BBY2. I’m paranoid that they’re not getting any water. I’ve pretty much done this everyday since putting BBY1 and BBY2 under the light.
 
Day9
- Clean up day. Finally. I clean up my workshop area.
- I've been using my table saw as a work bench and today I realize that putting wet stuff on it has left great big rust marks. Bah! My table saw is the most valuable thing in the work shop! I scrub it with an SOS pad then wipe a fine layer of WD40 on it.
- BBY1 is coming up slowly, BBY2 nothing. I've been tempted to germinate another BBY seed for better odds at getting a mom (if 1 seed is 50%, can anyone do the math and tell me what my odds are with 2 plants?) but I only have 3 seeds left. I decide to do it anyway. And now that I look at both sets of seeds, I'm wondering if I got the labels mixed up. Well fuck me, good time to be thinking this. I'm sure I didn't mix them up but it'll nag me for a while. So I decide to germinate 1 of each just to be sure; 1 Afghan and 1 Hawaiian/Blueberry:
day9b.jpg


- I have 8 pot slots in my tub, but I don't plan to use one at each end, so I'll have no more than 6 plants total. I don't want the plants right in the corners and I also need 1 or 2 open slots to add water and test PH. I have 3 AFGs, 1 good BBY, 1 BBY in a cube that isn't growing, and 1 BBY that never germinated. That gives me 4 slots in use, therefore I can afford to plant 2 more. Just some of my reasoning why it's ok if I germinate 2 more seeds.
- The water level in the tub is down again, so I add some water that I set out last night. I remember to PH adjust it too!
- I put a few ¼ teaspoons of water directly on BBY1 and BBY2 again. AFG1 is now the tallest! Crazy.
- Incidentally, with two plants I have a 75% chance of getting at least 1 mom. If the math is beyond you, figure it out by looking all possible outcomes:
- Case 1) Dad, Dad
- Case 2) Mom, Dad
- Case 3) Dad, Mom
- Case 4) Mom, Mom
- If I assume a 50% chance of getting a mom, then 3 out of 4 times I will get at least 1 mom, or 75%. That's completely irrespective of strain properties. If the strain yields moms 80% of the time, well you figure it out. It's not that hard.
- My tub only leaks when it's right full. But I don't plan on filling that full once the roots grow past the bottom of the pots, so I may leave it after all. Plus, the instructions on the aquarium sealant say it needs 48 hours to cure. Ridiculous!
- Bought some more stuff at Canadian Tire. I happened across canning jars. I got 12 jars size 250ml. I had no idea what I'd use in the curing stage but this solved it. $5.99.
- Bought a plastic dispensing bottle meant for oil. Around $2.00. I found a small dispenser in my bathroom that's perfect, but it's full of some kind of cream. I'll ask the wife to sacrifice it for me. I'll use it for the PH tester liquid, then I won't need the eye dropper anymore.
- Bought a small squeeze bottle of nutes because I liked the look of the bottle. Around $4.00. If you're looking for small plastic bottles, check out the camping section of your local Canadian Tire. You can get a package of 4 or 5 pretty cheap.
- I looked wistfully at fans. Mine is just too loud and I will have to do something about it.
 
Is anyone reading this? I'm beginning to think it's a waste of time...

Day 5
- At some point, and it isn’t today, but I dropped the tray into the room to see the fit. I know it’s not going to be perfect as my space is a little short of 4 feet. But it works diagonally. I can live with that, but the drainage tube will be hard to get at:
day3c.jpg


- Here’s another view:
day5c.jpg


- My babies need light so I drop the mesh pots into the tub:
day6b1.jpg


- I make sure the rockwool is wet. I fill up my bucket and set it aside.

- I put up some duct to hide light and re-direct air flow. Unfortunately I think it will hamper it slightly, but it’s gotta be done. I bought a can of expanding foam stuff to seal it. Messy. I’m paranoid about getting the “stuff” in my fan. It’s really sticky and expands by 50%.
day5a.jpg


- I am the king of invention. I needed to seal my door a little tighter:
day5b.jpg

People are watching for sure.:nicethread:
I have literally stood in the hardware store trying to think of something to get my door to close tighter and you just solved my problem. Thanks.
 
Back
Top Bottom