Deep Water Culture/DWC DIY Creations

^^ Yeah man, that's actually what got me thinking about the design - tangled roots!

Males, hermies, crazy banana popping females - just pull the tube!

Good for a perpetual harvest too. Thanks man!
 
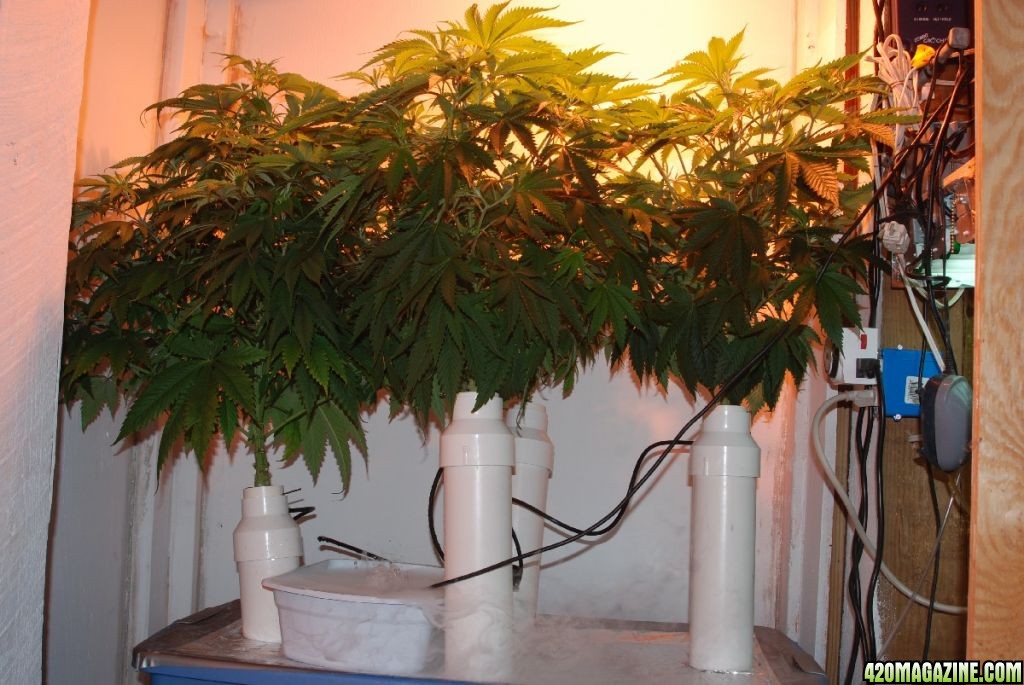
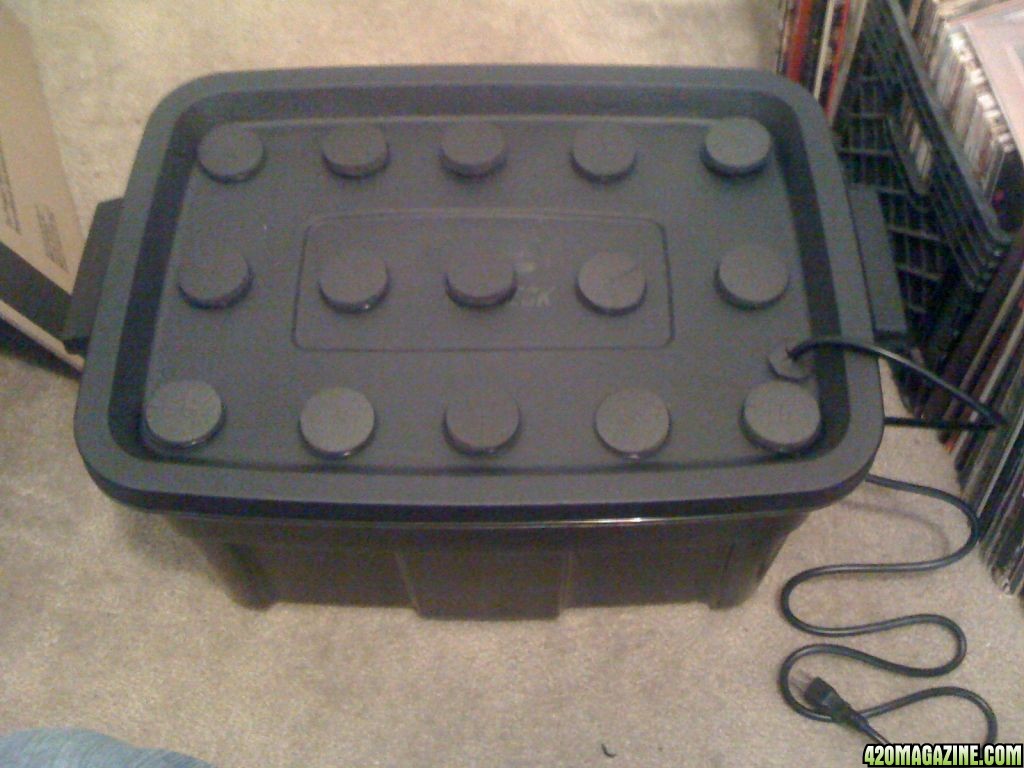
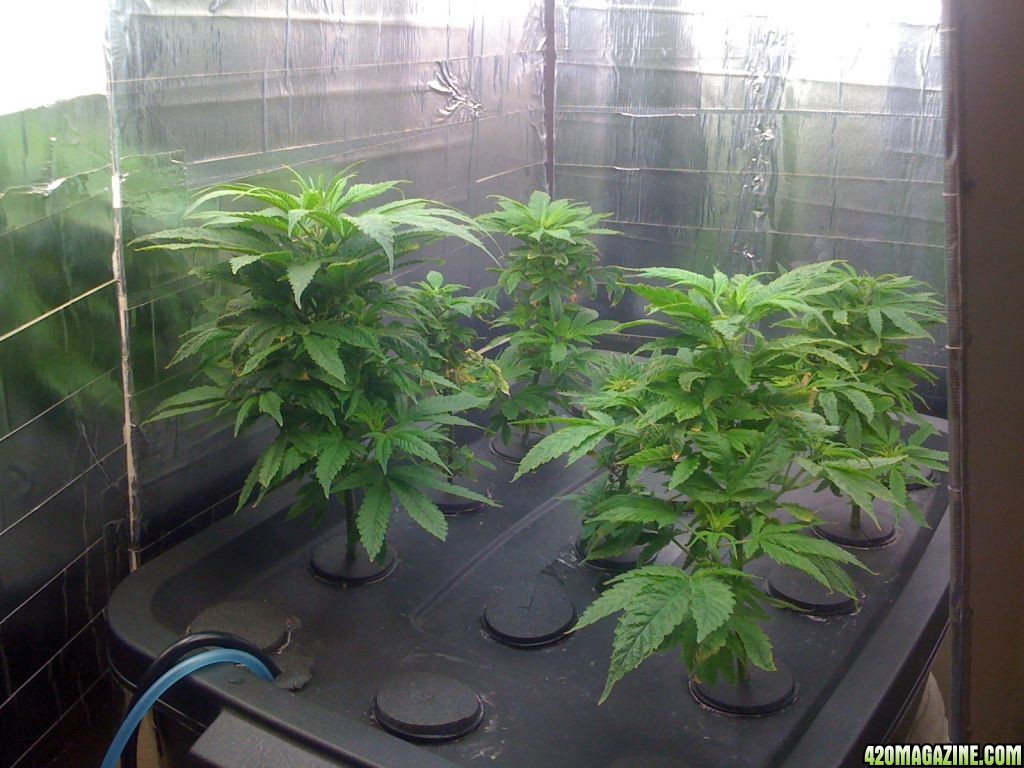
Here's my creation:

system.jpg


system_2.jpg


Just using PVC pipes, 3"x30", to hold the roots - all the rest is just like a Deep Water Culture system.

It would be great if you could provide a parts list and instructions, that is real sweet system design Bro. I like it.

Doctor Who:bong:
 
Yes great info Doctor! I used these plans to build my cloner and it was not only fun, but I have had a 100% success rate so far. You will have to purchase a cycle timer for the aero pump, which is about $50.

Here is a link to the PDF plans with parts list as well. Makes it a breeze to make your own. $300-400 for an ez-cloner, I think not! Try $80 for a homemade cloner that is just as good.

新利18luck网站-18luck新利手机版-18luck新利app

Also for anyone interested in aero, there are plans for a cool veg unit and flower system here:
StinkBuddies.com


Bubble2_174.jpg


Bubble2_169.jpg


Bubble2_166.jpg


Bubble2_380.jpg

Thanks for posting the lnks that will veryone greatly, I meant to post it, but was a little worried about the site policy on providing links.
 
It would be great if you could provide a parts list and instructions, that is real sweet system design Bro. I like it.

Doctor Who:bong:

Thanks Doctor! I'll try to put something together on a new thread with pics on building one - parts wise, top to bottom for each tube, it's:

2"Neoprene collar (ez clone type)
1" of 2" pvc pipe to fit inside the
2"to3" pvc adapter
30" of 3" pvc
all friction (dry) fitted together

a 3 1/2" holesaw makes a perfect tight hole in the tub top

drill a small hole in the 1" piece of 2" pvc pipe at an angle to the tangent so you can insert a nail through the neoprene to hold it in place without hitting the trunk of the plant

drill another small hole in the 2"to3" adapter just below where the neoprene will sit for the drip line - you want to find a drill bit exactly the same size as the drip line, so it will stay in place with just friction.

insert the plant with the collar on, put the nail in to hold it, push the drip line in until it is touching the stem, and use 15min/hr timer cycles.

I use a 45 gallon tub, and fill it with about 12 gallons of nute solution. The pipes just sit on the bottom.

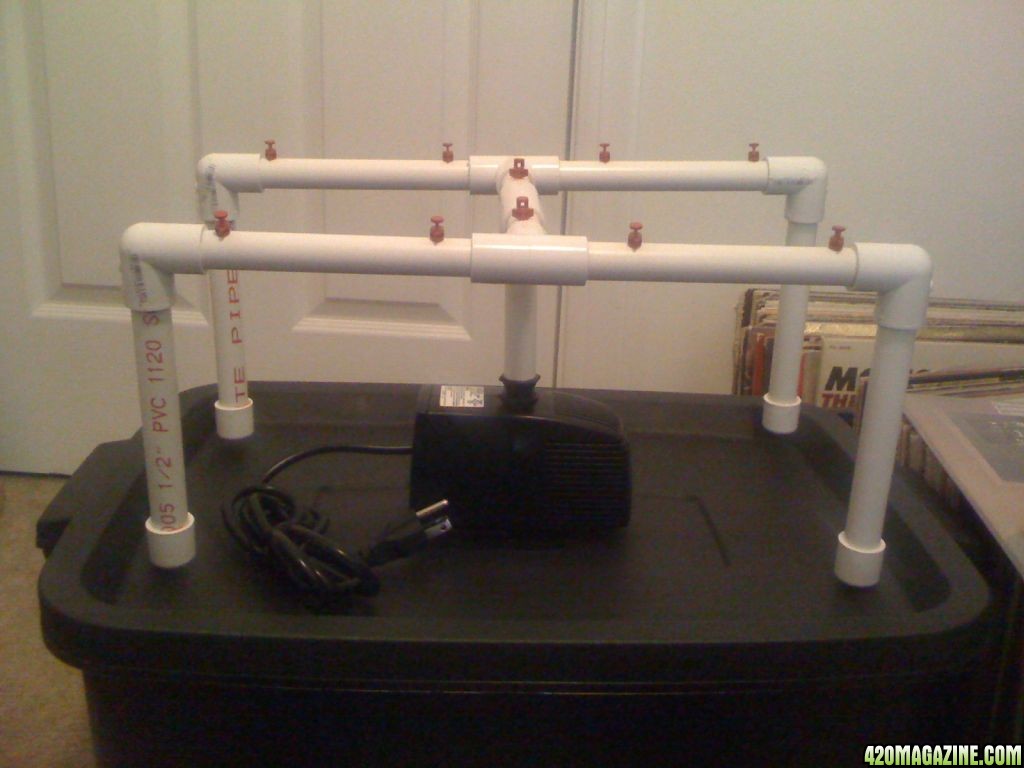
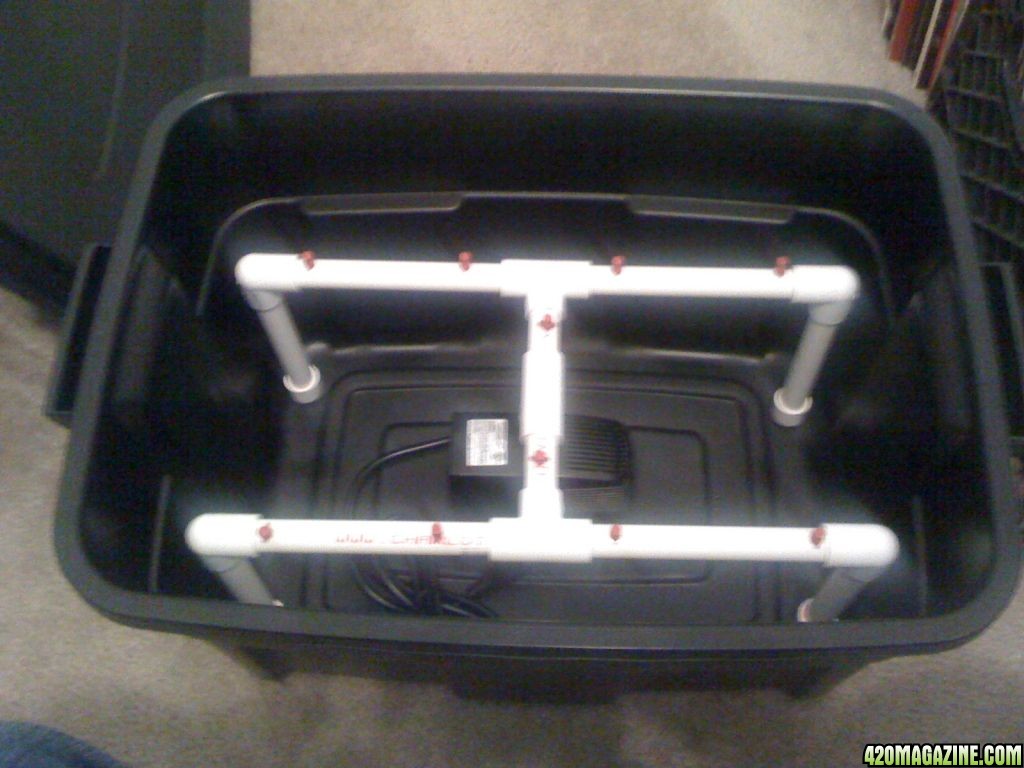
Two airstones, pump should be a 400 GPH or better to be sure it can manage the head, but a 160 gph will work, regular landscaping drip line manifold, 1/2 feeder and 1/4 drip line is about it.

I also use a 3 site ultrasonic fogger to foliar feed.

I started the plants from seed in dirt, washed them and vegged for a bit in 2" pipes, but clones from an ez cloner would work perfectly as they are already growing in a similar way.

Hope somebody finds this useful!
 
Here is just a lil something i thought up to puncture those lil 12gram c02 cartridges. i let off about 3 a day. not sure if thats enough but im just trying something new. As you can see its simply a clamp with a screw through the rubber cap on one end. then i melted the other cap to conform to the shape of the cartridge to kind of hold it steady. works quite well though. my buddy fricken punches through the top of the cartridge wit a screw driver . releasing a huge spray of c02. my way you can get a controlled releasing.
DSCN2627.JPG
 
Thanks Doctor! I'll try to put something together on a new thread with pics on building one - parts wise, top to bottom for each tube, it's:

2"Neoprene collar (ez clone type)
1" of 2" pvc pipe to fit inside the
2"to3" pvc adapter
30" of 3" pvc
all friction (dry) fitted together

a 3 1/2" holesaw makes a perfect tight hole in the tub top

drill a small hole in the 1" piece of 2" pvc pipe at an angle to the tangent so you can insert a nail through the neoprene to hold it in place without hitting the trunk of the plant

drill another small hole in the 2"to3" adapter just below where the neoprene will sit for the drip line - you want to find a drill bit exactly the same size as the drip line, so it will stay in place with just friction.

insert the plant with the collar on, put the nail in to hold it, push the drip line in until it is touching the stem, and use 15min/hr timer cycles.

I use a 45 gallon tub, and fill it with about 12 gallons of nute solution. The pipes just sit on the bottom.

Two airstones, pump should be a 400 GPH or better to be sure it can manage the head, but a 160 gph will work, regular landscaping drip line manifold, 1/2 feeder and 1/4 drip line is about it.

I also use a 3 site ultrasonic fogger to foliar feed.

I started the plants from seed in dirt, washed them and vegged for a bit in 2" pipes, but clones from an ez cloner would work perfectly as they are already growing in a similar way.

Hope somebody finds this useful!

No problem Bro, information is good, please feel free to post any and all plans an instrctions here on this thread but only if you want! no one lays claim to someone else's creation with the bubblhead that's why it was created for fast an easy access to plans, instructions and access to the people who created them or added them to the thread for DIY, and a question & answer forum on those posts.

Good deaal though Bro, looking foreword to getting one together soon.

:goodjob:

No problem, I'll definitely post here too - just thinking a separate thread would be easier for q&a, and didn't want to jack this one.

I've got no problem helping anywhere I can to grow our favorite plant.
 
Nice tutorial on the cloner Dr. Who. I was gonna build a fog cloner, but a few ppl have suggested the aeros work a lot better, I just like the simplicity of a bubbler with a fogger. But hey, i've got some free time coming up and I need to take like 10 WW clones for my journal so I'll give it a try and let you know! Keep up the good work!
 
Thank you Roseman hope you've been good my friend! but I can't take any claim to these creations posted here! these are individuals with creation they have found built an used or created and want to share with the rest of us, even mine are found and posted for everyone who wants to try build one an use.

So remember my friends share the love.

Doctor Who lays no claims to your creation(s) they are posted by you here! for everyone's use.

I advise If it can be marketed I would suggest not posting til you have a patented.

Sorry if anyone disagree's with that.
 
DIY CO2 Generator

I came a cross this little simple way to distribute CO2 on an indoor grow using a few around the house inexpensive parts.

You can use a one gallon plastic container, 1 pound of sugar, enough water to dissolve the sugar, a packet of yeast, and some 1/4" air tubing.

To begin drill a small tight hole in the jug cap, then pass a small lenght of the 1/4" air tubing through it, just enough so that it hangs inside the bottle.

Next the other end of the 1/4" air tubing should be placed near your plants, preferably behind a fan that will evenly distribute the CO2 through out the grow area.

Next fill the your container with the 1 pound of sugar,add the warm water and stir or shake until completely dissolved, make sure you leave an air space at the topof the container so th tubing don't go under water, add the packet of yeast, put the cap with the air tube through it on the container an stir or shake. CO2 will be released gradually as the yeast begins to digest the sugar, recharge your "CO2 generator" with fresh water, sugar and yeast once per week.

I used
  • 1 gallon plastic jug.
  • 3' feet of 1/4" air tubing.
  • Cap to container
  • Drill bit that is just a lttle smaller than the 1/4" tubing and glue gun
  • Store brand pure sugar 1 pund box .89 cent each.
  • Packets of yeast $1.99 each.
Drill hole in cap, insert tubing, poor sugar an shake well, add yeast an shake again, place in grow area by a fan blowing on your plants.

Okay I built it and am already trying it out and will post the results good or bad. But this is so cheep .89 cents for a lb of sugarit an $2 for yeast! can't hurt to try it out right.

But I got to tell you that I am trying this system in a different way! I have put the end of the tubing in the top tank of the drip system to feed more CO2 to the root system! Now I don't know if it will help the palnts or not, but it's an experiment right! and we will see! results will fallow in a day or so.

Now where did I find this information, it come from one! of a few grow books that I have collected and the info on the DIY CO2 generator came from one of the writers readers.

001232.JPG


I can't say what it will do for the plants in the tank, but thinking logically it would have more of a impact on the plants if use on the roots?

I am building a 2 gallon generator for my other grow after I have some results from the current experiment withthe 1 gallon CO2 generator.

Please feel free to post your comments to this post.

Have fun with it! Doctor Who.
 
Re: DIY CO2 Generator

I can't say what it will do for the plants in the tank, but thinking logically it would have more of a impact on the plants if use on the roots?

I am building a 2 gallon generator for my other grow after I have some results from the current experiment withthe 1 gallon CO2 generator.

Please feel free to post your comments to this post.

Have fun with it! Doctor Who.

Sounds good, except I think roots need O2 more than CO2, so I'd keep it in the canopy. :nicethread:
 
CO2 in the tank will create acidic conditions. CO2 + H2O -> Carbolic acid? I think that's the acid it creates but I know it creates acid. It's rotting out the coral reefs all around the world by increasing the oceans pH. Might be OK if your pH goes up often. :popcorn: :peace:
 
CO2 in the tank will create acidic conditions. CO2 + H2O -> Carbolic acid? I think that's the acid it creates but I know it creates acid. It's rotting out the coral reefs all around the world by increasing the oceans pH. Might be OK if your pH goes up often. :popcorn: :peace:

It's a drip system, the top tank does not have nutrient solution in it, just roots an air! nutrients are below, the top tank is plants and the root system only with the feeder tubes feedng them nutrients in the upper tank then flows back down that into the bottom tank.

Does that change you thoughts on this any?
 
Your Co2 device will work well Dr. Who. +rep

We've used the Co2 from our wine making in times past but I totally forgot about using bakers yeast and simple sugar and water. Da ! This is the easiest way to generate Co2!

I would suggest having your release Co2 hoses at top of garden as Co2 is heavier than room air. The fans would negate a free fall of Co2 but the placement above the garden might be a better location inwhich to release Co2 gas into/onto the garden.

(I still can't believe I forgot to remember the simplest way to generate Co2. Nothing like over thinking a problem to the point of missing the obvious. I deserve a neg rep.)
J
 
Thank you both for the qick reply on this subject, I am going put as disigned for with the fan blowing it in the plants.

Thanks
Labrat & Proverbs

Done deal.
 
Like Proverbs said, no CO2 in the nute sol'n. As long as CO2 gets in the solution, no matter where it starts it's not good. CO2 is drawn into the stomata on the undersides of the leaves and utilized there with water, nutrients and O2 from the root zone to form sugars and other compounds needed for plant growth. As long as there is good air circulation, IMHO, the CO2 can be released wherever it's generated. It mixes nicely with the air. No fan tho and excess would sink to the floor. I started a 5 gal jug a couple of days ago to add CO2. Poked a hole in the bottom of a garbage bag and covered it to keep the light out. When it's done I'm gonna fire up the still and get close to a gallon of 95% ethanol. Or what is known as "Bug Juice" or Vodka. Then the party starts! :bong: :peace:
 
Like Proverbs said, no CO2 in the nute sol'n. As long as CO2 gets in the solution, no matter where it starts it's not good. CO2 is drawn into the stomata on the undersides of the leaves and utilized there with water, nutrients and O2 from the root zone to form sugars and other compounds needed for plant growth. As long as there is good air circulation, IMHO, the CO2 can be released wherever it's generated. It mixes nicely with the air. No fan tho and excess would sink to the floor. I started a 5 gal jug a couple of days ago to add CO2. Poked a hole in the bottom of a garbage bag and covered it to keep the light out. When it's done I'm gonna fire up the still and get close to a gallon of 95% ethanol. Or what is known as "Bug Juice" or Vodka. Then the party starts! :bong: :peace:

Place your C02 tube above your canopy, that fogger needs to be going to the roots if its fogging your nute solution, they will love that.

Thanks guys I here you, though the tank with the plants have no solution in, it's the plants are drip fed from the bottom tank, so the roots are fed 24/7 by the feeders and the solution rolls down the roots to the botton of that tank then down to the bottom tank, bottom tank has air sticks and water pump.

I seen a bit of a jump in the plants growth since building and place the plants in it.

Thanks again for the advise.
 
Back
Top Bottom