My First Time Growing

Ok. I'll spraypaint the basin then.

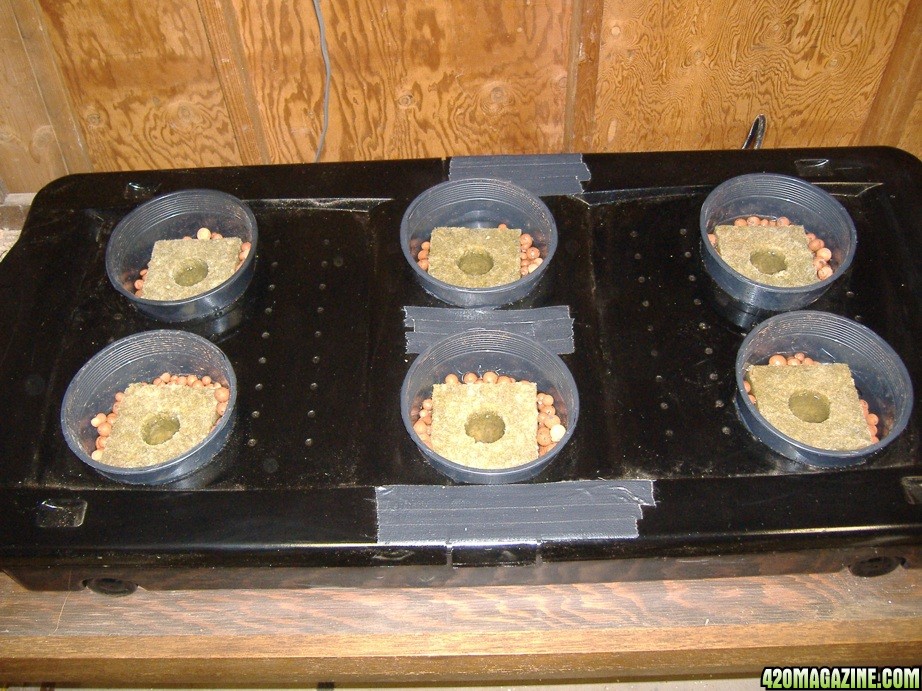
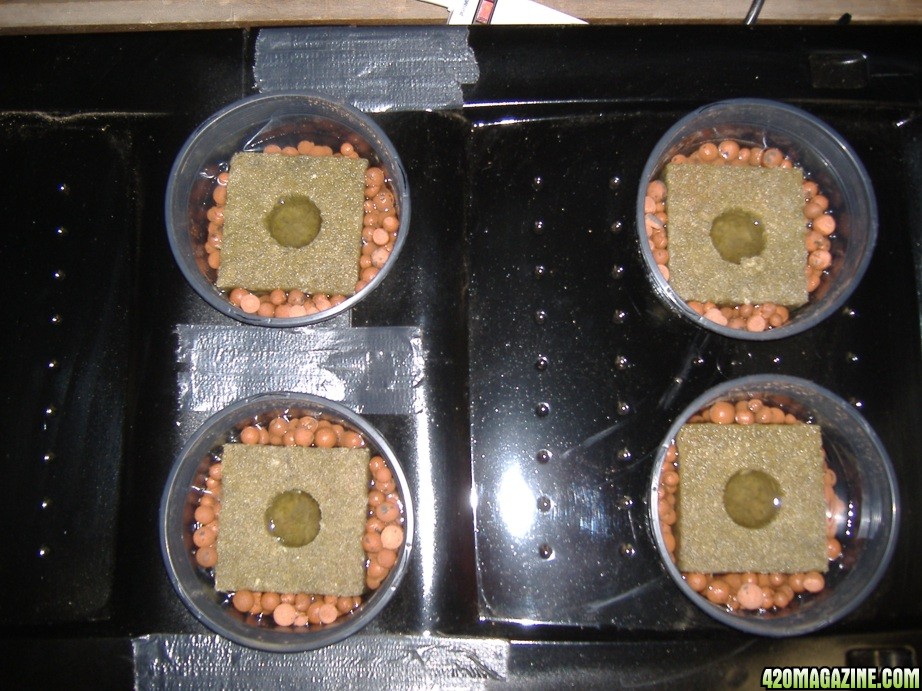
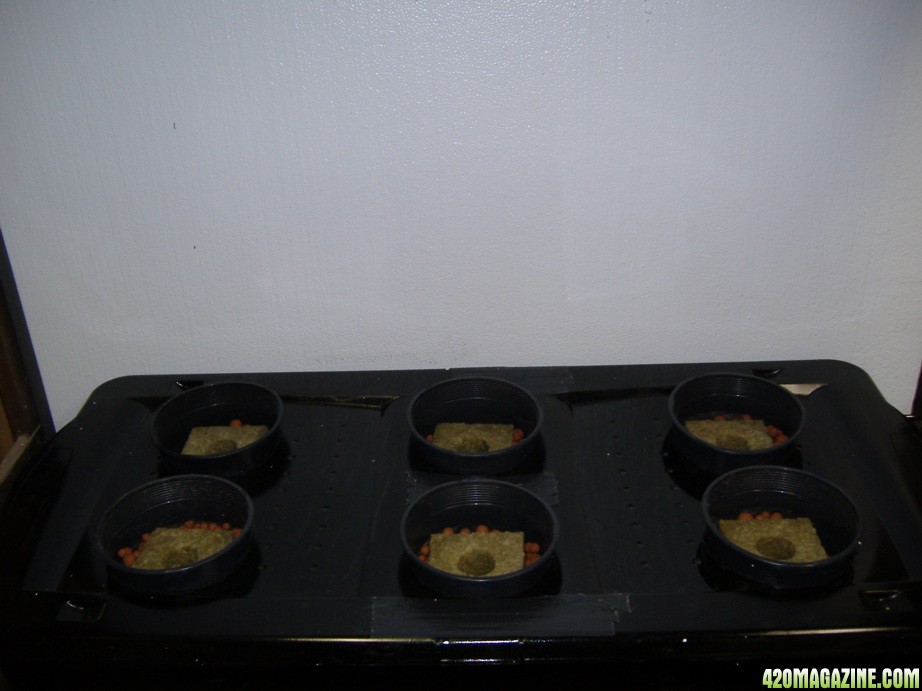
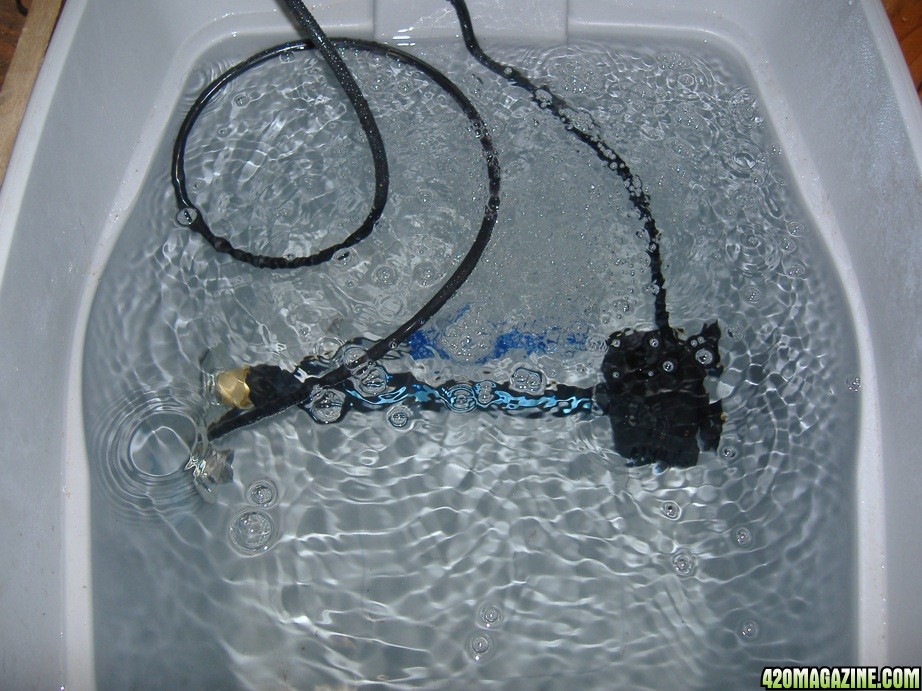
So, here's what I came up with:

fittingmaterials.jpg


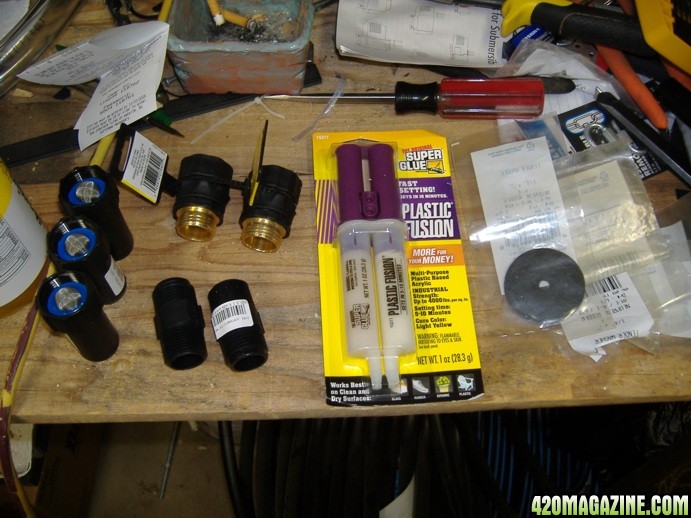
Keep in mind i'm using toro 1/2" blue strip irrigation line (i have over 200 feet left over from the garden irrigation) so this application is a bit unique.

I also wanted something so i could quickly and easily detach the hoses from the reservoir so it will be easier to take it outside and dump the water, and hose it out.

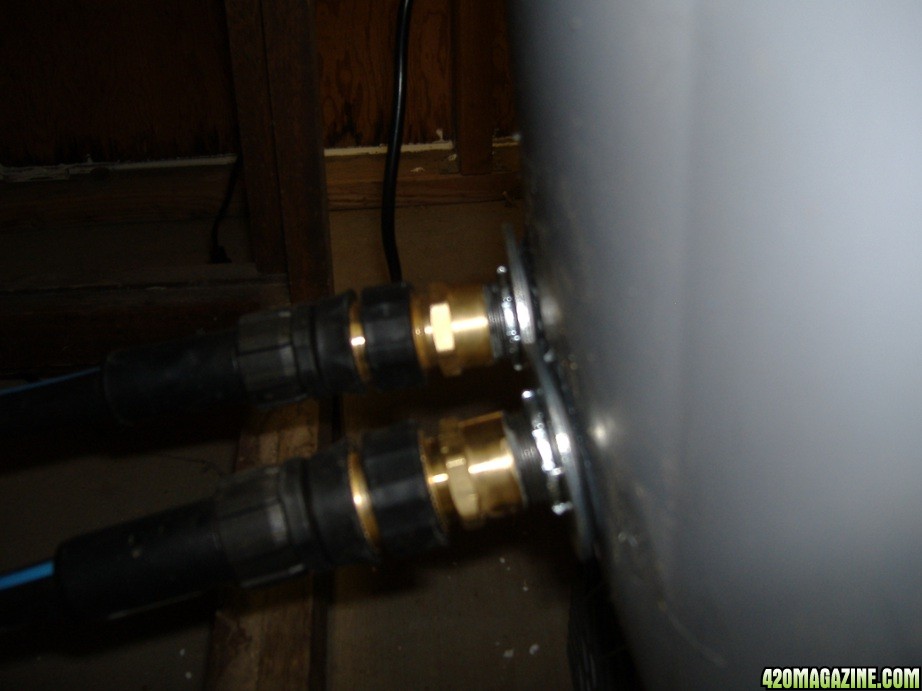
That's what these are for:
quickdetach.jpg


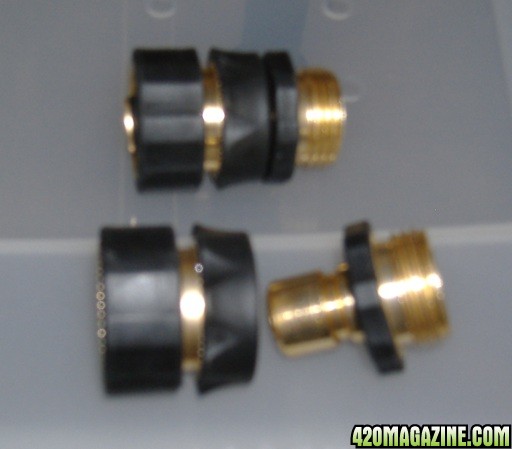
They have the standard garden hose 3/4" threads... Which is perfect for the 3/4" toro part:
fittins.jpg


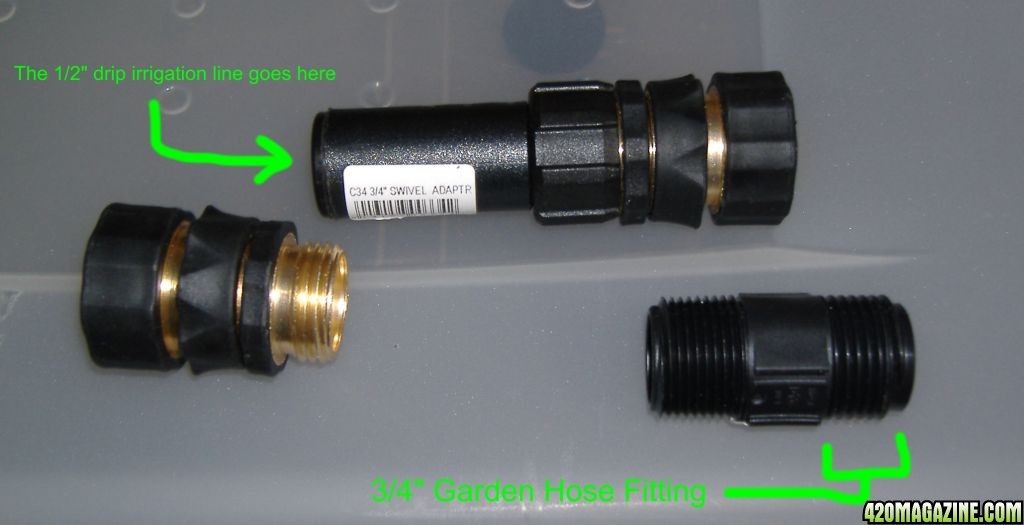
the other short plastic piece goes into the actual reservoir:
fittingsinreservoir.jpg


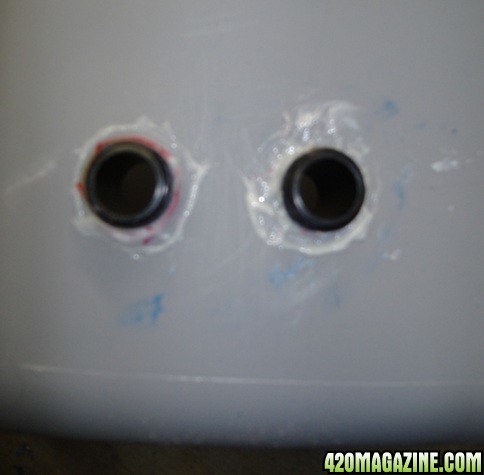
The goo in that picture is the "Plastic Fusion". This stuff is GNARLY. It rivals PVC primer / cement in toxicity (and flammability!!!) Put out that cigarette before you screw with it.

MAKE SURE if you are doing as i did, that the 3/4" hose threads are ON THE OUTSIDE of the res. It's the threads I noted in one of the above pictures. I threaded them through the holes i cut, from the INSIDE.

I really want to test this shit out, but I am going to wait until tomorrow to give the plastic stuff at least 12 hours to dry and setup.

More pics and details tomorrow :)
 
i'm not sure that it'd be toxic after it dries... It looks like regular plastic already. I could probably apply a heavy coat of silicon over top to seal it from the water... Would also ensure against leaks.

Thanks.
 
I think I want to use these in the top of the table... Will it be enough for 6 plants or so? I think they're all 40 watts
Feedback much appreciated!
A friend of mine just vegged 15 plants using basically the same setup you have, six 4' 40watt flouros. They grew to very well under those lights and hit 14"-15" before he moved them under his HID light.

I really like the idea of using flouros to veg and would have probably went that route myself, had I known they how well they worked when I started. I had originally planned on using a single grow area and light, swapping from a MH to an HPS bulbs but quickly realized that I needed separate veg and flowering areas to keep a perpetual grow going.

I don't know if I have much confidence in using flouros to flower but I haven't really tried (except as supplemental lighting). From what I've read, many don't think flouros are nearly as good as HPS for the flowering phase but I've saw where others have gotten good results. You can always try the flouros for flowering to begin with and move to HID if needed. I just wonder about the penetrating power of the flouros. Maybe a scrog would be best, so you have a nice even canopy and the ability to get the flouros right down on budding sites.

Looks like you're preparing properly before you begin, which is a smart move for getting the best results.

+++luck :smokin:

I know you said the cab was 4x2 but what are the heights of your top and bottom shelves?

:peace:

Harry
 
I'd really like to try the scrog, but i'm not sure if this papaya strain is suited for it? Or is that a technique you can use with pretty much any strain?

I just finished getting the stuff all sealed with silicon... It says 24 hours to fully cure but i'll try it after a couple hours. Still got some more spraypainting to do ;)

I'll get the measurements for the table here in a few minutes and post em.
 
ok, lets see...

The bottom shelf is 7 inches off the ground. then the actual table is 16" above the bottom shelf. The top of the table is 37" from the table.

The pots I am using are about 7" tall, so figure I have 2 feet of grow space (37 inches - 7" pots - ~6 inches light fixtures = 24 inches (2 feet)

I could probably fiddle with the lights and get a few more inches of grow space. One of my ballasts is bad so i will need to replace that (perfect time to rethink the light fixtures)
 
Well, that's smaller than I had envisioned from the pix. 9 inches is not much height to work with on the lower shelf but if you're looking at a 2' growing area, you're not gonna need much in the way of vegging, if any at all.

I believe Boss mentioned to me that going 12/12 from seed would produce around a 2' plant. Too bad the middle shelf can't be removed and the entire area used for flowering. It would gain you almost another foot. Then again, it may not help that much.

I really know nothing about scrogin' or which strains might be best.

Maybe Boss, SG or others can weigh in on that and the best design for your cab.

:peace:

Harry

SOunds like i will try a 12/12 veg cycle then, and see what happens. The bottom shelf does come out (it's out right now) so that an extra 7 inches or so for the bottom area, if i need it.

still workin on the reservoir... it's leaked the past couple of times i tested it so that's a slow process. but like doctor dread said earlier, don't rush it ;)
 
Ok, finally got the reservoir all squared away. I ditched the method i had, and used 3/4" metal pipe with washers and locknuts, and a bit of silicon. no leaks now =)
(i can go into details upon request)

I also got a new ballast for one of the lights (it was going bad... had the lights on while i've been working to make sure they're ok) that i gotta change.

Pickup 2 timers and i'll be set and ready to watch the babies grow =)
 
Got pics of it all put together?

I'll take some today after i get the timers, and replace the ballast (gotta double check the wiring also, going to re-strip the ends of wiring replace all the caps... who knows how old they are)
I did buy a new plug for the lights, which i noticed was NOT grounded after i got home.

I did do a test run with the pump, it takes about 8 minutes or so to fill up to the overflow, let it run 15 minutes, then turned off... It all empties back into the res like it should =)

BTW, thanks for +rep Harry Red =)
 
Dude I'm starting for the first time myself and I'm kinda lost. There are sooooo many different ways and techniques that it is blowing my mind. I'm like you I like to scavange from old projects. Good Luck!!
 
Dude I'm starting for the first time myself and I'm kinda lost. There are sooooo many different ways and techniques that it is blowing my mind. I'm like you I like to scavange from old projects. Good Luck!!

Hey bro i know the feeling, i was there a couple weeks ago ;)

I'd say the first thing you have to figure out, is if you're going to do hydroponic or soil (and, inside or outside).

Once you narrow that down, it gets easier to figure out what to do.

Good luck to you also!
 
Oooo! Great! I can't wait for pics!

Well Ms. Fox, these are for you =)

basinwithwater.jpg

The basin with the pump running, it's full of water

basinfullwater.jpg

closer pic of the pots w/water in em

basinwithback.jpg

I added the big piece of styrofoam insulation (mold resistant, insect resistant) in the back, and i will be putting two sides on as well. The front i will probably use plywood and make some sort of doors

resfittings.jpg

This is my solution for the reservior quick detach (with NO leaks!!)

insideres.jpg

The inside of reservoir with the airstone going


So i'm getting realllly close to planting. Only a couple little things left...
The plastic part that holds in the bulbs... one of them broke while i was takin out the bulbs to replace a ballast... So i'm going to get new ones for all the lights, i figure if one broke they all might be fragile.
Cut the other side styrofoam pieces (which i'll probably do tonight)
Make a door for the front (not critical, can start w/o that)
germinate seeds and plant!!
Then....

:rollit:
 
Back
Top Bottom