Virgin Grower, Pink 2.0 & Sour Diesel Clones, Indoor, Soil

P2-3_BWK-3_75.jpg

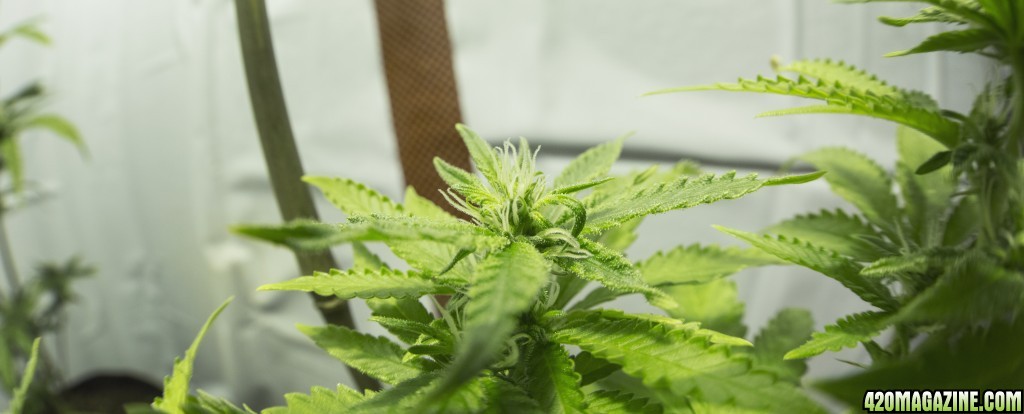
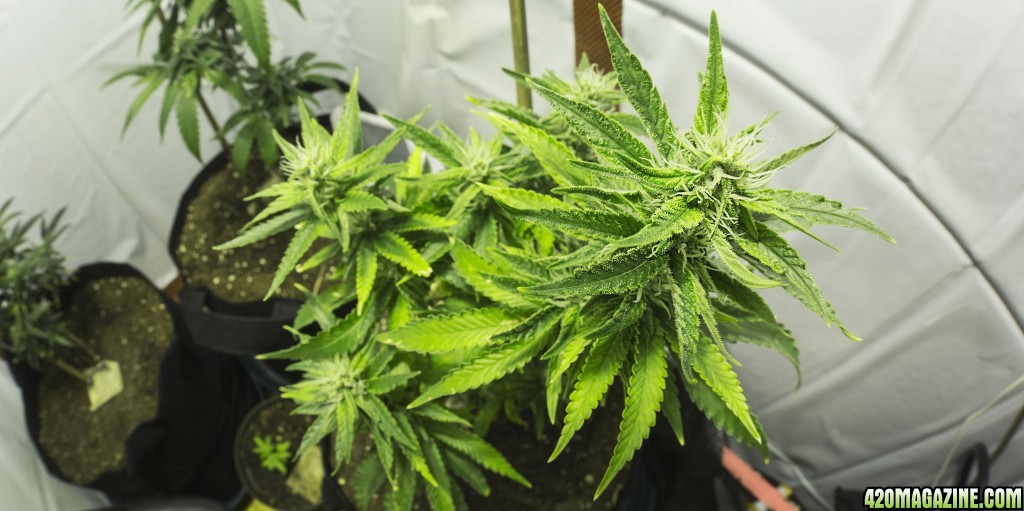
Bloom Week 3.75: Pink 2.0 Clone #3
SD-2_BWK-3_75.jpg

Bloom Week 3.75 Sour Diesel Clone #2

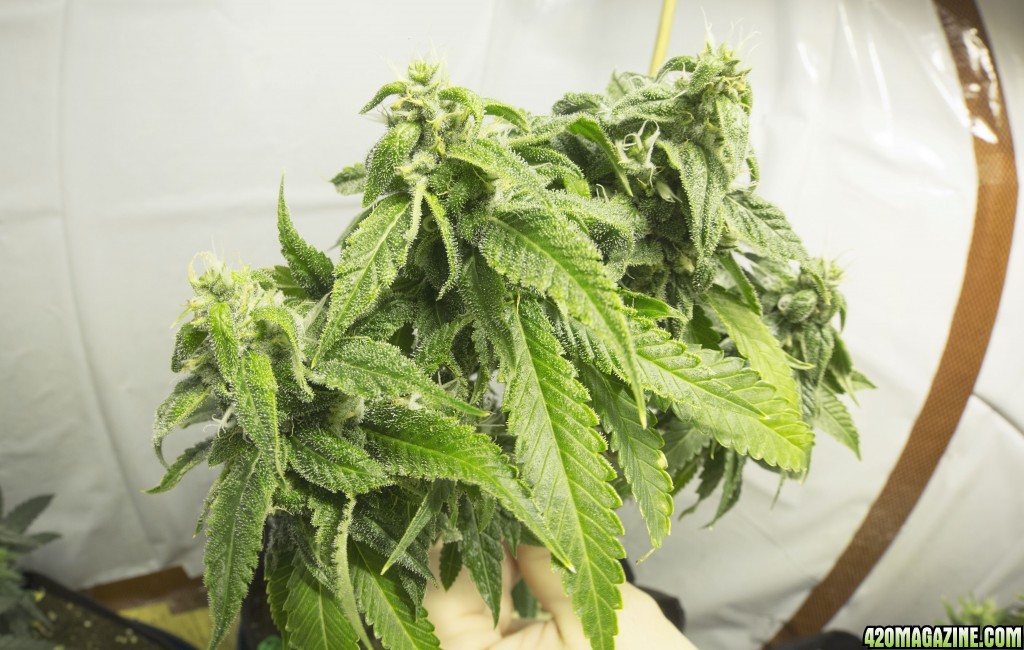
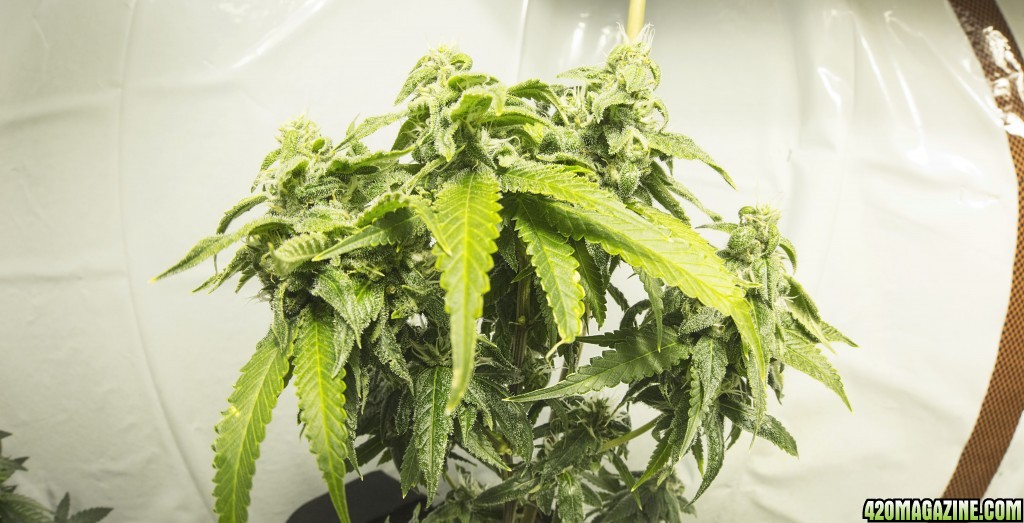
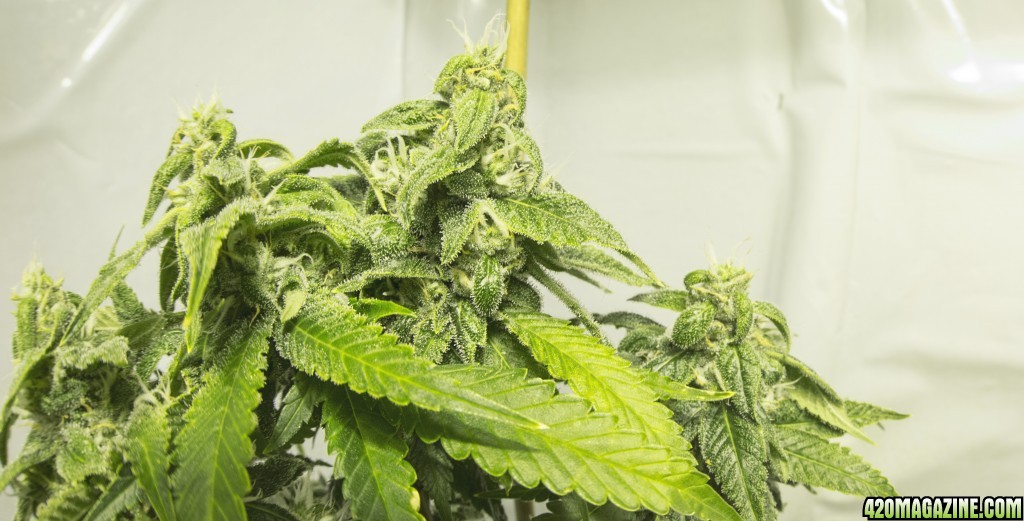
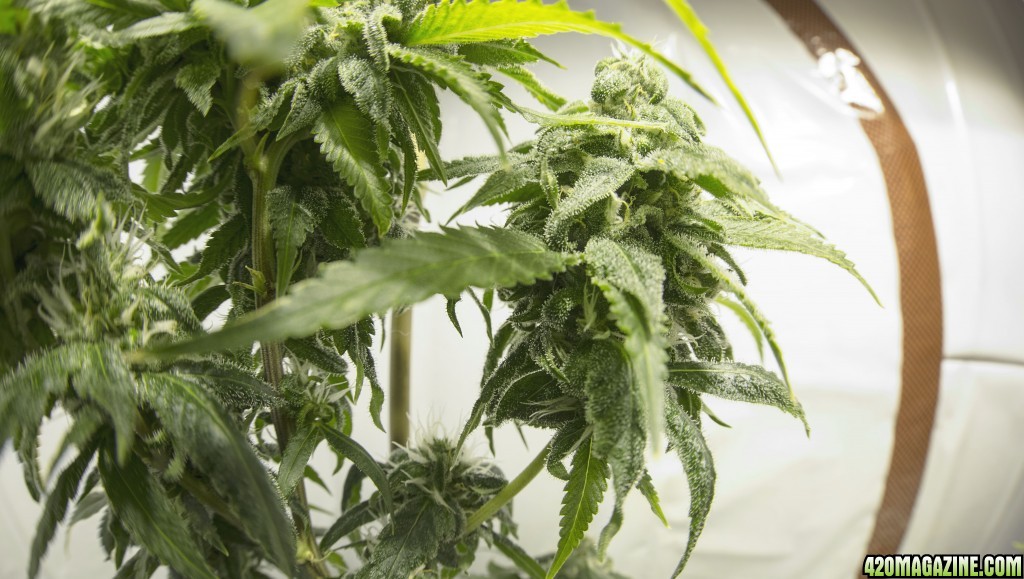
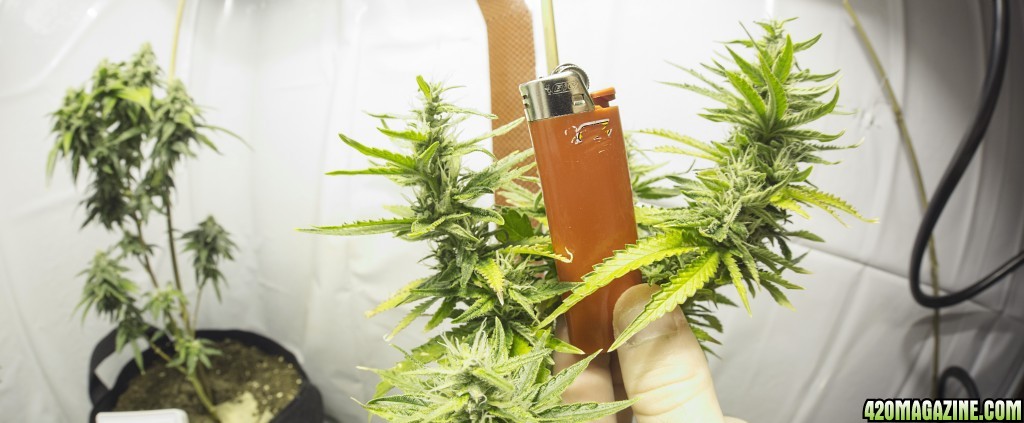
Bloom A - Week 4 Complete

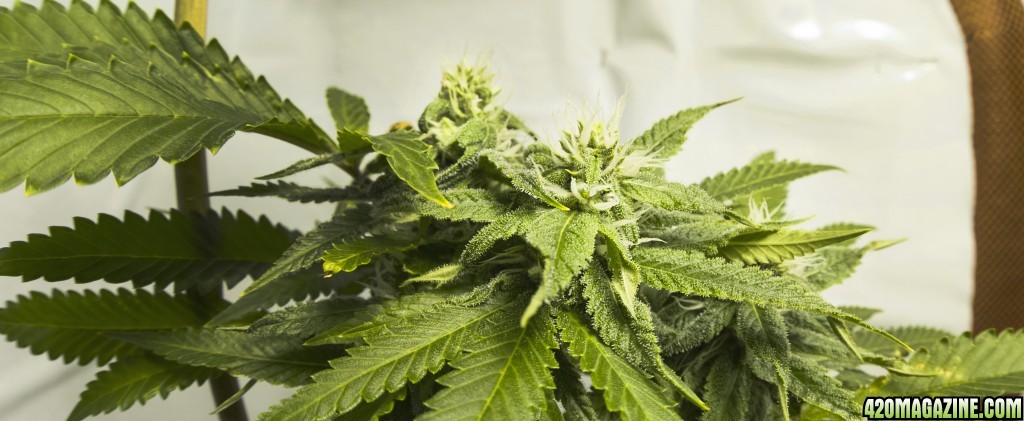
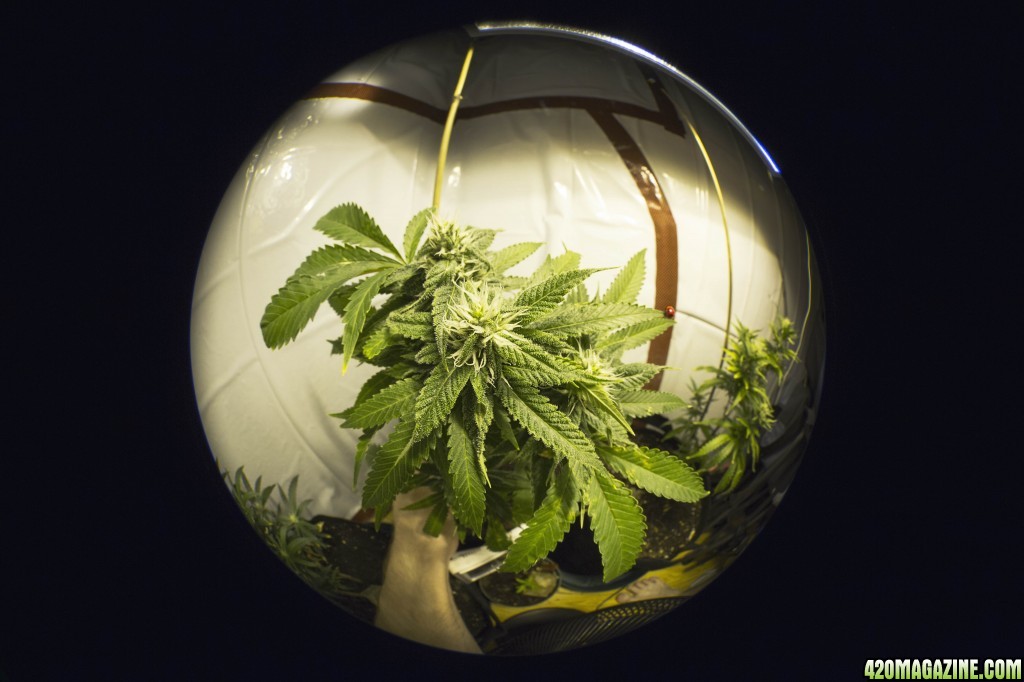
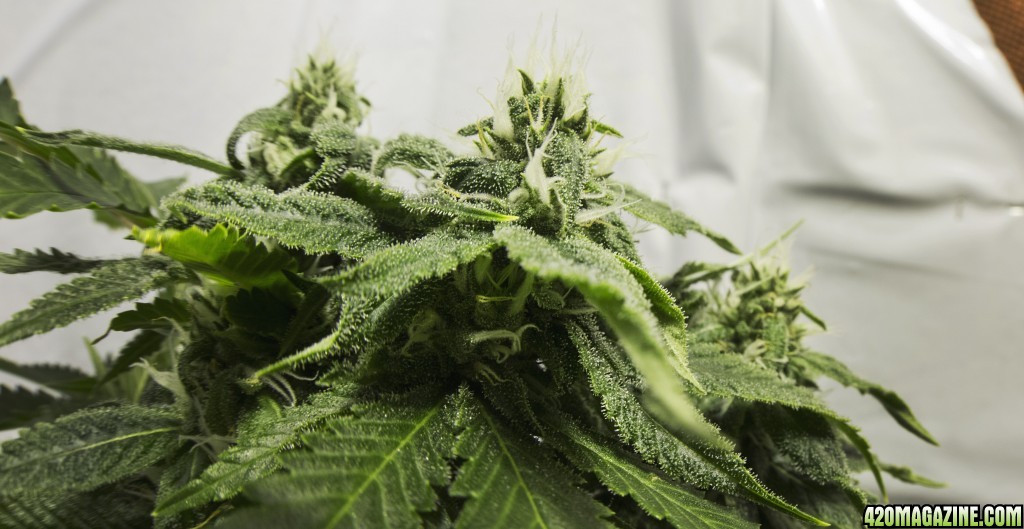
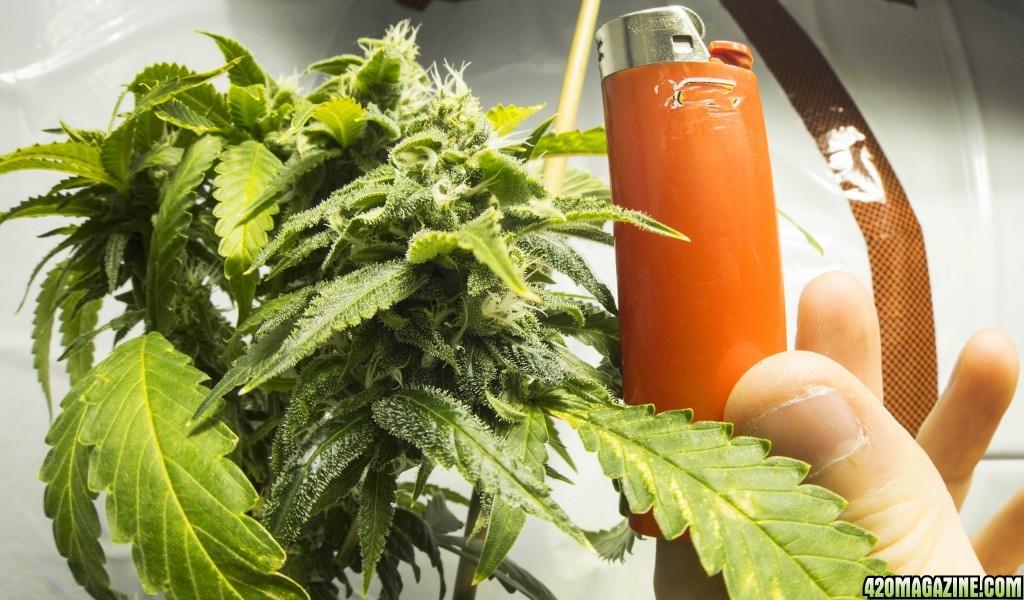
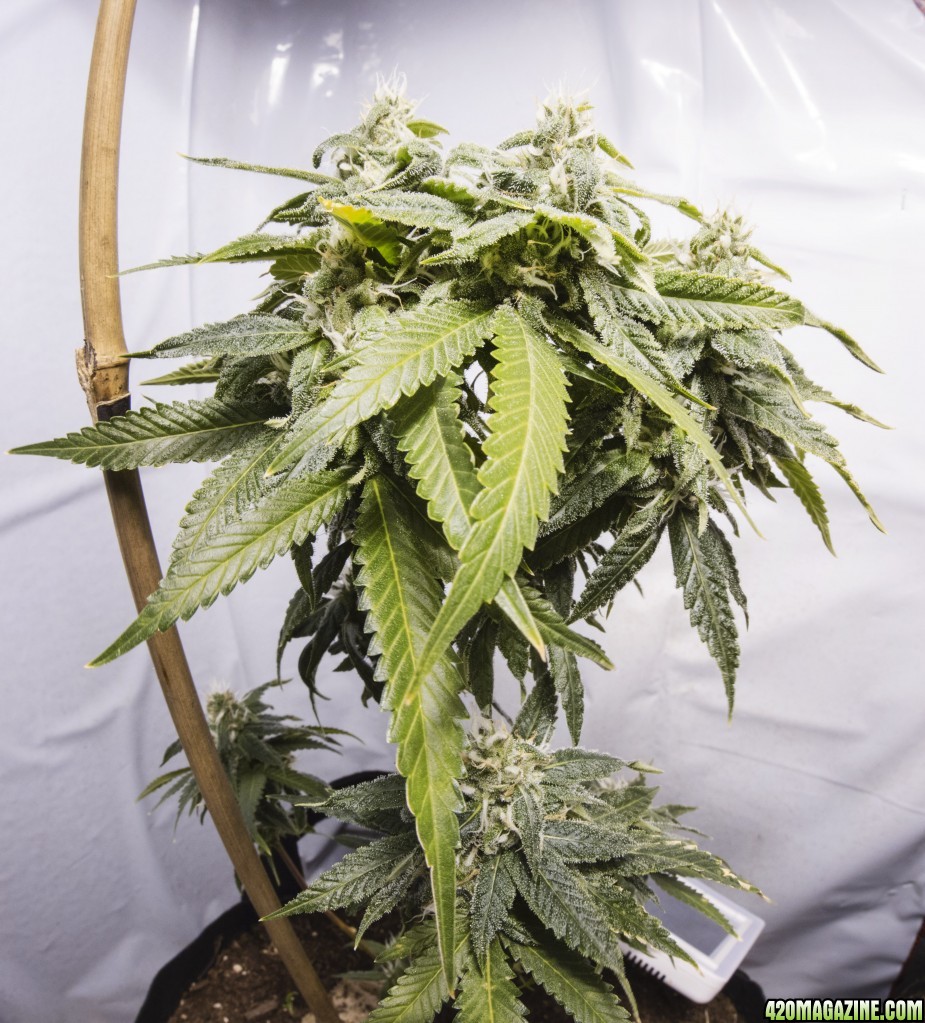
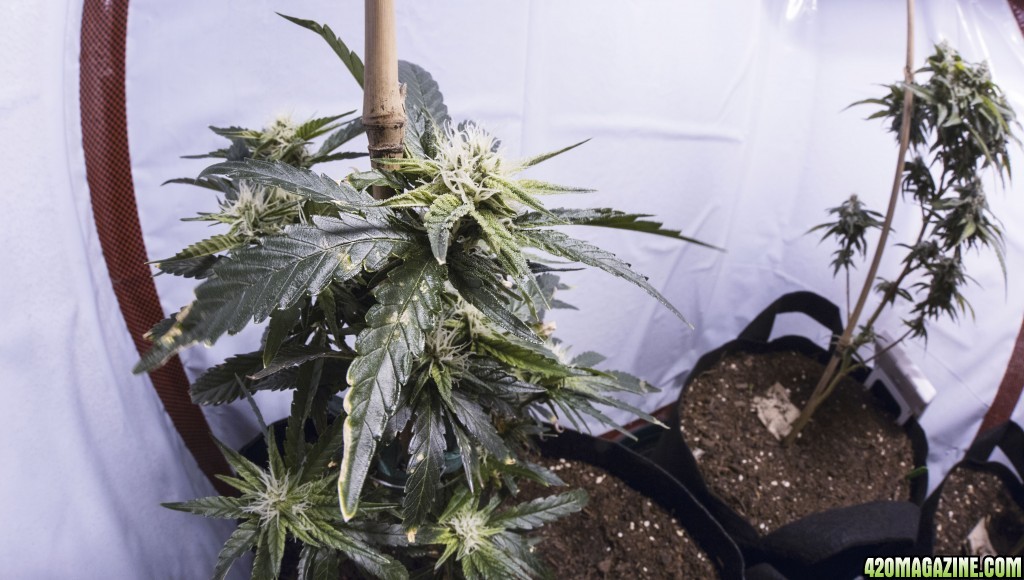
Week #4 is finally at an end and many physical changes have occurred with the plants. Their flowers are swelling and the color of the foliage itself is an intensely rich green.

Upgrades:

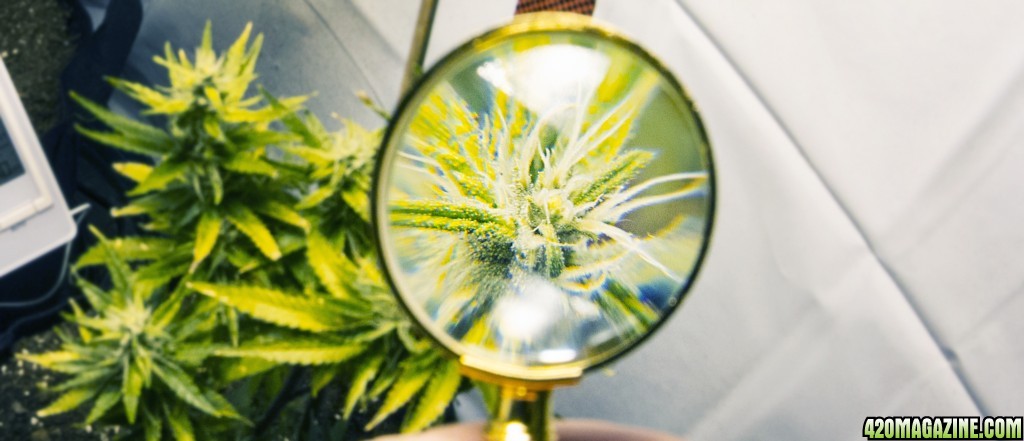
I added Great White Mycorrhizae formula to all of my plants this week. In addition to this I've also purchased Organic Heavy-Brix Molasses, Organic Calcium Carbonate, Organic Worm Castings, a Liquid-Brix Refractometer, 150 Lady Bugs and 40 Earth Worms. I am planning on adding one or two earth worms to each pot in the Bloom Room, and I also will be setting Ladybugs in all of the growspaces. Beyond this, the plants have all been given a heavy dosing of Fox Farms Big Bloom at each feeding this week; during one of the feedings I also added a store-bought Organic Grow Formula with Kelp/Guano/Blackstrap Molasses to gently boost the overall nutrients, not just the Bloom Nutrients. After that, I have only stacked Bloom Nutrients on the plants. I would love to post larger photos but I don't think I am allowed.
 
Virgin Grower - Pink 2.0 & Sour Diesel Clones - Indoor - Soil

Last night I took four cuttings from the blooming Sour Diesel Clone #2 and two cuttings from the blooming Pink 2.0 Clone #3. Each cutting/branch was near the bottom of the stem and only 2-3 inches long apiece. They are budding, but they definitely weren't getting enough light to produce large nuggets, as they were in the darkest of the shadow from the terminal colas above. I believe this will help the rest of the colas to swell even larger, and I will begin re-vegetating the clones from these flowering plants.

I cut them 1/4" above the node point on the terminal stem, leaving a small nub instead of shearing the whole branch directly from the Clone. Cloning is so much fun that I have already filled all twenty-four cloner slots with cuttings from the other Vegetative Clone Cabinets. You can follow my Thunderdome Journal link in my signature to observe all of the strains that I've taken cuttings from.


Sent from my iPad using 420 Magazine
 
Where did you get your mantis and how much was he? Do you have a background in writing? If you do it shows .

You are an awesome person! Have a dope day.

I use Amazon for my bugs. I think I'm going to get another set of mantis that are older, since the others committed strategical suicide trying to escape. I figure that if they are too big to get out, the less likely they are to try and escape their confinement. I read a lot and have also written some short stories, but I did not major in English; thank you for the compliment, though.


Sent from my iPad using 420 Magazine Mobile App
 
So I was tightening up my LST's hold on Sour Diesel Clone #1 when it got a dose of High Stress Training; the main stem just snapped right in half! I decided to cancel the Flowering Stage Clones in Thunderdome so that I could take their available space, then I chopped the rest of the plant up into clones and saved it by putting the cuttings into plugs. Now let's see if any of them survive.
 
SD-2_Week-4_5.jpg

SD-2_Fisheye_BWK-4_5.jpg


Bloom A: Week 4.5

I can't get enough of Sour Diesel Clone #2, that thing is becoming a monster. It is definitely the most sizeable of my Flowering Clones; 2.0 is covered in way more hairs, but the bud-sites are much smaller. Between the two, I think the Sour Diesel will be the heavy bloomer with large top nuggets and the Pink 2.0 will be a more thoroughly covered plant. I love the way it looks during Bloom!
 
SD-2_BWK-5.jpg

Sour Diesel Clone #2 pictured at Flowering Week #6.

SD-2_BWK-4_Top-Colas.jpg

Sour Diesel Clone #2's five top colas have begun filling out the stems below the initial flowering point, pictured here in the midst of Flowering Week #5.5.

P2-3_BWK-5.jpg

Pink 2.0 Clone #3 is pictured here with her hairy arms at the beginning of Flowering Week #6; her top colas aren't as large as Sour Diesel Clone #2's are, but she is covered in pistils from top to bottom and the stems are beginning to swell.


The Bloom Room: Updates

-Each of my flowering clones are looking incredibly healthy. I've administered High Brix Molasses to help feed the beneficial microbial life as well as promote plant health with lovely carbohydrates. I will be making a High Brix Soil Mix for my next plantings; after reading about the process, this path just seems substantially beneficial considering the success others have had.

-I've been using a tea for my flowering clones that consists of: 5.5-6.5 pH'd tap water, a strong dose of Fox Farms Big Bloom at a rate of 2 Tablespoons/2 Quarts, 1-2 Tablespoon(s)/2 Quarts of High Brix Molasses, .5 Teaspoon/2 Quarts of CalMag and a splash of Great White Mycorrhizae. I administer 1.5-2 Liters of this tea to each plant every other day, and they seem to be thoroughly enjoying it. I have had zero burning since I started using it last week, but I water with standard 5.5-6.5 pH water only on the days in between.

-I lowered my air-ducted 400W HPS to an 8"-10" bulb distance from the top of each plant; at this distance and wattage, the top colas of the plants are now receiving an amount of light equivalent to 125%-150% of the power of the sun. I've managed to get the lamp this close to the plants while maintaining 79°-84° Fahrenheit in the Bloom Room, and that is maintained even with a staggered timer for my Air Conditioning Unit that resides in the outer office. The more light, the better, and considering that my buds are about the size of a tear-drop shaped golf ball now I would say it is working pretty well.
 
Be careful not to lower the light to far.Plant tops might start turning yellow otherwise looking very good in your garden.

Word, thank you for the input. I am making my adjustments based on a mathematical graph of light distribution that calculates wattage effectiveness (comparable to sunlight) vs the light distance; the plants have yet to be discolored or burned and I lowered the light to this distance of 8"-10" about two weeks ago. The Thermometer/Hygrometer Probe is set to the height of the plants' top colas underneath the bulb; it reads 79°F when I have the Air Conditioning going and 83°F when it's off.

All of the Growing Handbooks that I have read state that the closer you can get your Air-Cooled High Pressure Sodium or Metal-Halide Lamp, the better for finishing; they mention that if both the air underneath your lamp and the light-bulb itself are cooled to the target room temperature, they will not burn your plants and will provide a more effective source of light. I wondered if this is 100% true, so I began reading a bit more online; I saw that some people started getting problems like you're talking about with lights so close to the tops of the plants; even though it's temperate at that position and you get extremely high measures of LUX, you're right it can discolor your plants or cause issues with the plant drinking its water and nutrient supply too quickly because 100% sunlight promotes them to consume at a higher rate.

I am probably going to back the light off until it's at the 100% sunlight equivalent in LUX instead of shooting for 150%; I think this will be the best compromise in distance for the plants. That said, I have noticed from my own experience in these past few weeks that countering the intensification of the light with excessive watering/nutrient has proven to be successful in allowing them to flower without yellowing, light burn or heat burn; the only other thing that I will say about this counter-compensation of over-watering for the extra-bright light may only be delaying the problems you spoke of. I would love to experiment with this more, but I think I will wait until I have a harvest in my hands to try this with another plant.
 
Photo Update:

SD-2_BWK-5_5.jpg


Sour Diesel Clone #2 has started tacking on more bud during Bloom Week #5.5. My mason jars also just came in the mail, and now I'm just waiting on my Old-School Magnifying Glass (for taking photos through, I have a pocket microscope also). I'm going to re-read Ed Rosenthal's curing process at some point this week; I like feeling prepared to handle what is going to happen next. I think this plant will start giving me some really solid nuggets soon, each of the canopy bud-sites are about the size of an egg and have a decent trichome coverage.
 
Nice frost! Not bad at all for a first grow!!! :goodjob::bravo:

Thanks LLH! I am trying my best to spoil them with the small amount of experience that I have under my belt. I've been reading all day for four days straight to soak up everything that I can regarding my next steps in the process so that I can be ready for harvest.

I'll also be ordering Doc Bud's High Brix Kit in the next few weeks to begin cooking for my soil conversion.


Sent from my iPad using 420 Magazine Mobile App
 
Greenhand-2.jpg

Sour Diesel Clone #2 - Bloom Week #6

Greenhand.jpg

Sour Diesel Clone #2 - Bloom Week #6

Greenhand-3.jpg

Sour Diesel Clone #2 - Bloom Week #6

SD-2_BWK-6.jpg

Sour Diesel Clone #2 - Bloom Week #6

P2-3_BWK-6.jpg

Pink 2.0 Clone #3 - Bloom Week #6


Bloom A: Week #6.0 Complete

The Sour Diesel Clone #2 has a total of ten top-colas, with the terminal colas being the best given their advantage in position under the light. The five terminal colas at the head of the clone have egg-sized buds and a number of the trichomes are just now starting to turn cloudy. I have only seen two total trichomes that have turned amber on this plant, so I have a good while before I have to worry about harvest. I'd say this particular clone will yield 1.5-2 ounces at best.

The Pink 2.0 Clone #3 has colas that run the length of each branch, all the way down to their junction node on the main stem. They are super skinny right now, and I personally think that this plant will take the longest to finish flowering in comparison with the Sour Diesel; the buds are long but they are so skinny/airy right now, they have awhile before they start fattening up. If it does fatten up a decent amount, this plant will yield .75-1.5 ounces at best.


Harvest Preparation

Washing: I'll be using Doc Bud's Budwash for this round of clones.

Drying: I'm converting the top shelf of the Bloom Room into a hanging area; I will be using Velcro on the corners of another piece of plastic tarp to create a light-flap for this hanging area that lets the plants breathe without being in direct light. By hanging it here, I'll also be able to control the smell more easily during both the drying and flowering processes; it should also make the work much lighter, given that I just have to stand up to hang them when I'm done cutting and washing each plant. These plants will remain here for two to three weeks.

Perpetual Conversion: After cutting the harvested clones, the old root balls will be thrown out and the soil salvaged for the next batch of bloomers. I am considering flowering only two plants at a time from here onward. Pink 2.0 Clone #2 will move in to a new position under the light, and one of the aerated pots will have my next Sour Diesel Clone #1 as its inhabitant. By using the head-start that I have from Pink 2.0 Clone #2's time spent in 12/12 already, I will be able to stagger each harvest from here onward every four weeks, allowing me to continuously produce bud every month.

Curing: I have a total of twelve Single-Quart Mason Jars that are ready for me to place dried bud into for the start of the Curing process. I will unseal the lids each day for a total of six hours over the course of five to six weeks. I'll be doing a standard division of trim and bud to different jars, but I will not be making hash with any of this batch.
 
Your dry and cure time seems a bit long to me but I trim before I dry, I dry in cool dark space depending on size and strain, most of my 4" long buds dry enough in 5 days to start my cure. If I dry too long, the cure isn't as effective. I cure only for a week and then until it's gone LOL. You have obviously done your research and have a more advanced understanding of the technicalities than I ever want to! Your first run is definitely a success, now you can work on getting even better! I hate the available research, there is soooo much misleading and frankly wrong information out there. For every important bit of information I find, I exhaust my research to make sure it is the concensus because too often there is a debate over one thing or another. :goodjob:
 
Your dry and cure time seems a bit long to me but I trim before I dry, I dry in cool dark space depending on size and strain, most of my 4" long buds dry enough in 5 days to start my cure. If I dry too long, the cure isn't as effective. I cure only for a week and then until it's gone LOL. You have obviously done your research and have a more advanced understanding of the technicalities than I ever want to! Your first run is definitely a success, now you can work on getting even better! I hate the available research, there is soooo much misleading and frankly wrong information out there. For every important bit of information I find, I exhaust my research to make sure it is the concensus because too often there is a debate over one thing or another. :goodjob:

Thanks man, I appreciate your advice a lot. Your post has had me reading quite a lot about this part of the process, both in my books and across the internet. I'm starting to agree with you about my drying time being lengthy; between drying and curing time overall, my allotted drying space is probably going to be too warm, meaning it will dry my bud faster. I have considered converting my Propagation Chamber into a temporary drying rack, but I don't think it will work because the smell will get out. I may look to a 3-7 day hang-to-dry method in the space I've already staked out in the grow room. I think that the curing time is something I won't be able to be as lenient on, but the drying time seems to be based on the environment that you let them dry in; I will definitely be keeping an eye on the buds during the short stretch of days after harvest for this reason. I will do my best to avoid letting them dry out too quickly, making my cure more difficult.

One obvious realization of my current Bloom Room's environment is that the temperature went up when I went to the 400W setting on my ballast. My original ballast fried in a power-outage because a surge protector that I bought wasn't actually protected by an additional fuse, so it wasn't a surge protector.

Since this is a back-up ballast that isn't exactly the right choice for my replacement, it can only go down to 400W. If I get another 250W/400W Dimming Ballast that runs my light at 250W, I believe that I can substantially lower the temperature of my growing room from 79-85 Fahrenheit to a much more manageable 70-78 Fahrenheit. I've purchased one, and tonight I'll be moving the 400W ballast out for my brand-new 250W ballast to fix the problem.

With the temperature under control in the Bloom Room, I believe that my hanging/curing environment within the Bloom Room will be perfect. I am going to try for a long cure, but I am going to shorten my drying time still like you had talked about. I can't wait to try it out!

You have a really good point about all of the contradictory research available online. I have read many articles about different parts of the whole process that seem to be based on preference, even though some authors try to preach about one's viability over another. Personally, I like taking bits of everyone's processes and mixing them together to figure out what works best for me; I feel that experimenting is the only way to truly understand what you, as the grower, need in order to produce a crop because of this. Besides that, any direct advice from people like yourself who have had the experience already is quite a gift.
 
Back
Top Bottom