A Beginners Grow Guide Featuring - BCPineWarp & Autos - Outdoor - 2015

LedLWCFogPon

New Member
This is a step by step grow journal for brand new growers but with some intermediate level grower tips all based on personal tried and tested methods. Originally I had no experience growing any plants at all I just threw myself out there; it took a couple tries and then it happened!! fresh aromatic above all FREE weed!!! This was an amazing concept to me and all it took was a little work, practice, patients and the belief in myself that I could do it. I have many years worth of growing exp. (mind you off and on) mainly outdoors and one major 75 plant Op with Skunk #1 and Super Skunk (which basically was num. 2); from seed I obtained way back in the days of Mark Emercy seed co. (the original online mail order seed company).

Background:

I had attempted (started) to grow at a pretty young age but didn't even get far into germination :p (the

successful sprouting of seed). An hey at least I tried, even tho I was not successful I did learn a thing or two and

that's what really matters as a first time grower regardless of how far you get in the process. I had eventually

completed my first grow in very early adulthood from seed to flower (bud) to harvest. Now this was back in the

early 90s how I wish the net was even around to consult with especially sites such as this full of experienced,

knowledgeable, and above all very helpful respectable honorable growers. I had and have always started seed

indoors and began growing weeds (and plenty of times) until maturity (budded-end of life cycle) outdoors, a

few times indoors, and dabbled slightly into hydroponics although I am fairly up to date on the subject and

methods. (ill continue this asap in some hours subscribe and check back later I have content ready to put up

but no time to edit at this minute so stay tuned....)
 
re: A Beginners Grow Guide Featuring - BCPineWarp & Autos - Outdoor - 2015

Please note that I have a separate thread for my introduction (in the member intro section of the site) which contains info regarding my grow Journals (future ones as well) and I will be updating it time to time for any recent changes or happenings (announcements). For those who are even newer then me on here just click on my name it will get you to my profile and you will be able to click and access my profile threads through there.

I just want viewers to be aware that I am not an expert (or necessarily a total professional) grower but I do have more then enough practical knowledge on various topics and procedures to growing weeds :p. I will be glad to answer any questions at any point of my grows (BUT please if you can try to personally message me so I do not fill up the grow guide for viewers who want to see straight content; unless I feel the question is a really good one for beginners but I will then mention that in my guide!!). Also experienced grow journalist I am looking for feed-back or advice at anytime BUT please, as well, send me a personal message I would appreciate that, and thanks ahead of time.

Lastly I do not encourage illegal grows (but I cannot stop anyone from doing so and well that is your choice

and who am I to really say so). I also discourage youth (even tho I had begun at that age) from doing this in

fact even smoking weed for that matter!! PLEASE RESPECT my personal opinion on this also. Just be aware

that even tho I agree it can be fairly harmless as compared to alcohol or other way worse substances that it

is not the best for young developing brains. Note that I do have a background and am educated on Mental

Health and psychology. I do know what I am talking about as well from personal experience. Sometimes It

can be helpful to someee!!! (but remember that it only helps to mask emotional problems not to cure them

as of yet) and to others I have witnessed it can be damaging. Yes it is a natural plant but it still has narcotic

effects if it is not processed for various medical aliments. I just encourage you to do two sided research

before using and growing. I want to leave you all with a great saying I read in my vary first grow book from

years ago "Remember - Loose Lips Sink Ships." Be extremely careful of who you show or even tell about your

grows to. Now that is out of the way (hope I was not a buzz kill to some as well :p) lets get GO...rowing!!!
 
re: A Beginners Grow Guide Featuring - BCPineWarp & Autos - Outdoor - 2015

Oh, before I get started (and no more delays after this I promise ha!); I would not mind likes at all!! as it would help me, of course, to know that my content is likeable or agreeable. Do not all of us enjoy them in either case? Again PLEASE keep in mind this journal is a grow guide (content based as a beginners guide, for the most part) I want to provide info rather then receive advice for this one!!! I will tho in all other future journals encourage comments unless I state so. Personal Message me (PM) your questions and comments or debates there only.

Stage 1.
Planing & Prep. before selecting/ordering seeds

I highly recommend planing ahead of time before even begging to germinate (to get your seeds open aka

pop/crack and sprout) your seeds or you may run into problems right away or later on. Planing is more

important then some may realize; it can make the difference between ongoing success or failure, in some

circumstances. In my experience I have regretted not planing enough and buying everything!!! I needed days

or even one full week ahead of time many times. Also if you are purchasing your seeds from an online source

no matter how great their rep and service is it is a vary wise idea to order them at leassst 4 full weeks ahead

of time before you plan to start sprouting them (germinating, aka for short - germ. or germ'd) you just never

know what might happen along the way of shipment; or if seeds do not work out, you may need time to

order new ones (but this should not be the case with good seeds from a reliable company) ifff you were

not able to afford back up ones upfront. Here's a good example from recently.... I had ordered my seeds

approx only 3 weeks ahead of time from a new company I have not ever dwelt with before but direct from

the producer to save a bunch of money. First they had a mishap with their payment processing (which I was

not told about and only found out on my own by calling them luckly!!!). After I had contacted them they even

had a hard time finding my shipping details. Eventually one whole week went by then finally my payment was

processed and seeds finally were shipped; but the damage of not ordering more sooner was done and I

did not get them until 3 weeks plus later which may effect a better end result at the end of this season (by

not getting to start them sooner). Note: I receive seeds from my usual source within a week sometimes just

in a few days even. On top of this the seeds were not the best quality (I had germinated them on two

separate occasions, as I had issues with a old heat pad on my first batch but even on my second batch with

near perfect conditions a bunch did not work out) I only ended up with 7 out of 12 popping (seed cracking

open and main root showing) and all are sooo delayed/behind in usual vigor (sprout growth) then were they

should be at already. That's approx. a 60 percent germination rate and is not great at all providing I had near

top notch "conditions" (moister levels, water type/source, and temp. at correct levels). Now maybe!!! this

was simply bad luck on my order but the seeds should have done better.... BUT I am taking into

consideration the number of seeds I only needed to pan out (in my case) and great savings of purchasing

them over my usual source. I will be giving them one more chance and assume some risk; but if I get not

good/great quality seeds again I will not deal with them again. So plan ahead by reviewing and researching

strains (weed breed types/names) to ones of your preference and the company as well (note choose a

company that has been around at leassst 5 years already). Look into their reputation which I may!! have

made the mistake, I admit, of not doing for the new source I decided to try. Also plan to get or obtain/have

all the tools (items) you will need for the second part of this stage, I suggest, days or pref. a good week

ahead of time before your seeds arrive. The list is included on the next post. One last thing regarding this

stage: choose strains (breeds/type of weed) that is appropriate for your growing location/environment i.e. if

you are growing indoors choose a indoor variety and, this is even more important, choose almost strictly an

outdoor dominate strain for outdoors esp. in cooler climate regions. If you do not choose a strictly outdoor

based plant (IF!!! you live in a cool/colder climate area; but not so much of concern for hotter/warmer

climate areas) you will risk that the plants will start flowering (begin the early stage of budding) way to early

in the season; this will set your whole plant growth back by near 2 weeks. As they will realize it is not time

(short enough days) to continue with budding yet and they will end up wasting precious energy on reverting

back to vegetation growth (leaf growing stage/pre-buding/flowering) when they should have been focusing

strictly and only on that stage of growth still!!!, the whole time, until fall. This will ultimately reduce/affect

by (usually for non auto plants) temporarily slowing down vegetation (veg. for short) growth rate of the

plant; impacting (lowering) your yield later on in the end. There will be more on this later (what makes

plants flower pre-maturely/too soon). Next step... as related to this stage continues below....
 
re: A Beginners Grow Guide Featuring - BCPineWarp & Autos - Outdoor - 2015

One thing I wanted to mention in regards to selecting the appropriate weed strain (breed) is: the type of weeds you should know or be familiar with. Sativa: which grows relatively tall in height with thinner smaller buds over all; this also maybe a concern if you need to keep them hidden from potential thieves. Indica: a short but very wide plant in general with larger generally fatter buds; you will require to space these out even more so they do not grow into another. Ruderalis (aka Autos): now these plants grow mini sized and are great for concealing them. These mini plants have downfalls as well, which includes: much lower yielding per plant, vary short grow life, and you cannot manipulate them as much or transplant (leave in containers too long at all or your yield will be enormously reduced) you may end up with F*%k all (next to nothing amount wise). Anyway I suggest reading up on these kinds before selecting your indoor or outdoor seeds either way. Lets continue....

Stage 1.5
Planing & Prep. before starting seeds

(seeds which will become seedlings after they are in the begging stage of sprouting)

Now that your seeds are in the process of coming your way.... (note you may get them in just a couple days

even so be ready ifff you are doing outdoor and rely on a seasonal grow (which is a limited time frame) to get

your plants as big a possible before budding begins. This will make a tremendous difference on whether you

get a smaller yield or a bigger yield. The longer time a plant has to vegetate the more buds and bud weight

total you will end up with). It is a good time to gather materials you may need. Here is a list of items you

should have before!!! you even begin the germinating process of your seed, below

- Containers (preferably glass: as it has a thick bottom - useful if you require the use of a heat pad).
Coffee mugs are ideal as they hold warmth longer and the fact that they are not clear aids in keeping light
from getting in through the sides.

- Clean paper towel (you do not I repeat you do not want to use dirty ones as this could possibly
infect seedlings with containment's such as mold spores. Additionally stay away from dyed pattern based
ones as the chemicals could mess with the seeds).
 
re: A Beginners Grow Guide Featuring - BCPineWarp & Autos - Outdoor - 2015

Darn ran out of time the list continues here no biggie!

Stage 1.5 cont.

- Peat Pellets or Rapid Rooter Plugs (highly suggested) To plant your germinated (sprouting seeds) into. R.R. Plugs are much more expensive but they have quite an advantage over Peat Pellets (explained later).

- Plant Tray (pref. with humid dome/clear top but not necessary) To hold your Pellets into. Note you will require a special tray that is designed to hold Rapid Rooter Plugs (R.R.P for short) if you choose them. (This is another cost consideration if funds are too tight for you. This is why I listed the Peat Pellets also rather then R.R.Plugs only).

- Very clean or pref. New Plant Spray Water Bottle This one should be obvious but anyway you will need it to spray seeds and seedlings with water (it provides much more control then free pouring from a water jug).

- 1 gallon sized plant pots (preferably square ones if you can get them; explained later). To put soil in of course for planting your seedlings (baby plants) into not long after they have started growing in their pellets or plugs; (they will only be able to stay in them for 7 days after sprouting up out of the surface max I highly suggest sooner even and def. not longer or you will slow down their growth and development).

- Potting,seeding,or Nursery Plant soil Aww... to put into the plant pots of course to grow the plant-lings (baby plants/seedlings) in duh!!! :p

- CFL Light bulb/or Grow Light Note Cfl's work great for the seedling stage I have always seen surprising with these cheap things (very important to get the cool kind that has a high blue light based spec. another thing I will be explaining later).

Now, something I want to add about the light options for your seedlings to be grown under.... If you are

growing indoors you will for-sure (well suggested lets say) want to start plants under Cfl's or a grow light

(wait to read what I have to say about the grow light as well. There is something really important to know

about them for seedlings in particular). If you are putting them outdoors after you have the option to use

either a decently sunny window area to place seedlings instead of grow light for outdoors if you have that

(note must be a well insulated/with absolutely no daft/cold air that comes through it; explained, you guessed

it, later :p). With this said ifff you have a suitable (warm and sunshiny) window area to place them in I

suggest to use that then, as it will more ready the young plants (they will be already pre-adapted for the

most part) for direct sunlight; more on this later.

End of Prep & Planing before receiving seeds/ready to get going. Stage 2. next (is where the real fun and journey till buds begins!!! the actual starting of sprouting the seeds and transforming them into seedlings; its magical)....
 
Intermediate/more advanced grower tip: I have created my own secret seed boosting formula :p. Now we all know that you do not need (in-fact rather not) to supply your seeds/seedlings with anything but H2o as seeds contain their own nutrients and hormones inside of the seeds shell which provides more then what they need for the first two weeks. But if if something fails/go's wrong with your seeds/seedlings I find my brew can help get them going; also I get faster germinating rates esp. getting some to sprout up even sooner out of the dirt after planting. Note that I have not been sure a bunch of times if this really made the difference or if it was just simply the results of good conditions and or the seedlings genetics? Here is something to consider tho as some evidence of its effectiveness: I also am growing tomato plant seeds (yes!! actual tomatoes :p) and pepper plants for my garden this year. If you know or read up on pepper seeds they can take up to 4 weeks to sprout (that's up to meaning possibly but of course they can sprout much much sooner still). The last two years in row all my pepper plant seeds took at least 3 weeks to get germinated and sprouting. I decided to try my seed spray formula on booth of them and to my amazement a lot (in-fact most all) are already coming up after only barely approx one week!!! I have honestly never seen this before. Also my tomato seeds came up 2 whole days ahead of time then I normally have got them to in the past. I think that is evidence of effectiveness. Next post will have the ingredients for the recipe if you are curious to know or perhaps would like to try it yourselves. I will back later to post it and continue this guide. I just put this up quick before I ran out of time to edit this post (which was an announcement earlier).
 
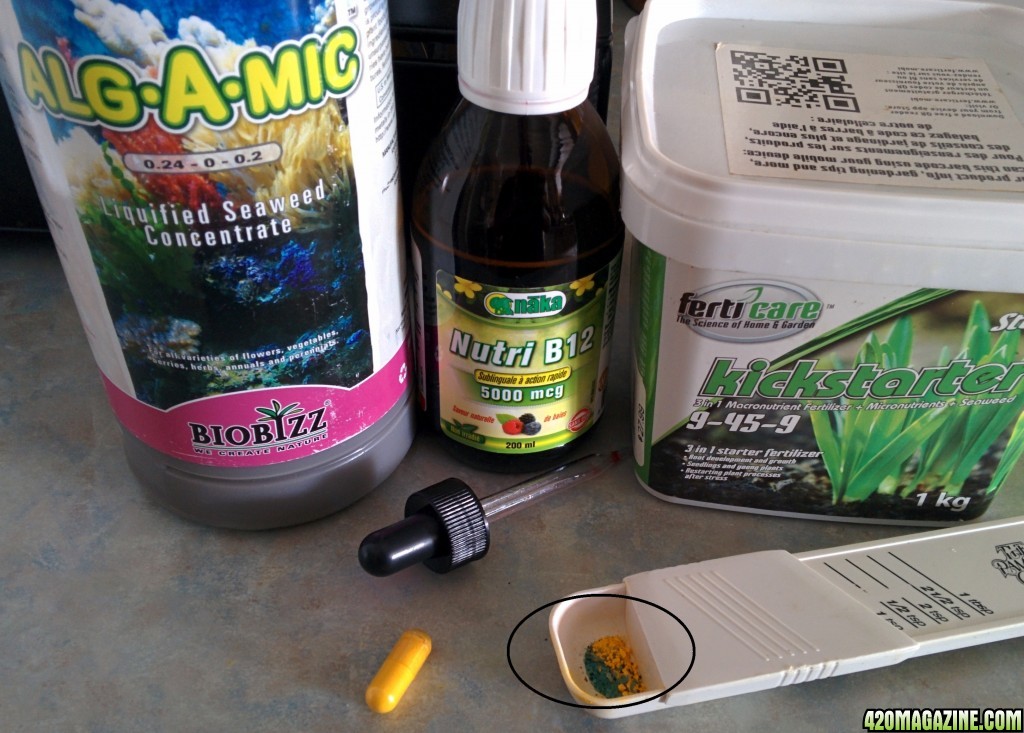
Back peeps, Sorry had more to do in the office yesterday and today then I thought. Anyway without further a due here is my seed/seedling booster concoction.... (Note: beginners! only use this a last resort if your seeds/seedlings are far behind or developing real slow (I will tell you about this later so you know when that is the case). It is very easy to stress, harm, or kill seedlings if attempting to use any type of fertilizer's before they are 2 weeks old. Just a warning) Pics finally being introduced and I will attempt to add visuals to each post for now through the rest of this journal. I do not suggest this for beginners at all!!

Here is the ingredients to my Booster Solution:

Distilled Water (H2o) Approx. 1.5 liters

Vitamin B-100 Complex Capsule form (real fine powder an easy to mix). Break open the cap. and set aside two bigger pinches worth

Vitamin B 12 in sweet liquid form Use a dropper (which liquid form comes with) and drop 6 drops worth only into the distilled water

Kick Starter Fertilizer (Low N - Really High Phos. - Low Potash. with micro-nutes.) Mine is 9-45-9 (ONLY two smaller pinches worth)

Liquid Kelp (seaweed) I like the Bio Bizz verison. I use about 1/4 teaspoon worth per 1 and a half liter

Directions:

Add your (2 big pinches) B-100 complex (if you can find liquid that maybe better) and your kick start fert. to

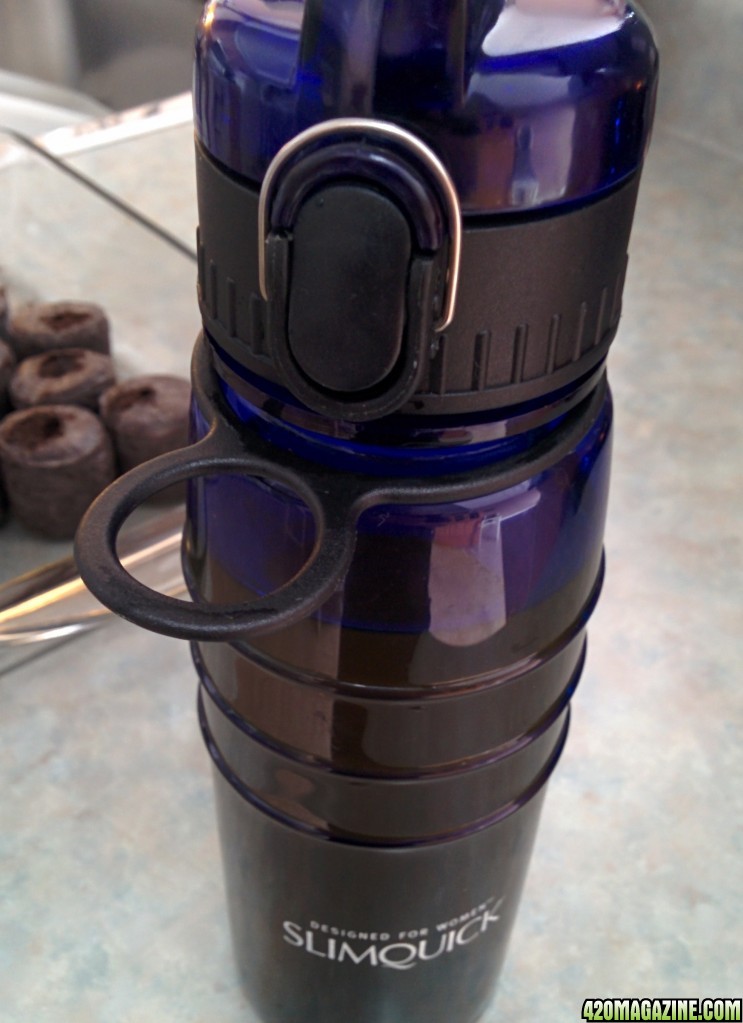
a shaking container (I use my wife's slim fast mixing bottle :p shh!) with the liquid B 12 in it and add your

1/4 tsp. liquid kelp (seaweed). Now you will need a really tightly sealed container for this mixture. Add your

distilled water (to the slurry mixture of ingredients inside your bottle; pic's below). Now shake the hell out of

it for 5 solid mins. Yep!!! 5 minutes, this will be your workout for the day. :p Now that the solution is well

mixed pour this into a plant based spray bottle remember to shake your spray bottle up before every use

to prevent the ingredients from settling to the bottom. Since I spray my pellets somewhat often to keep them

consistently moist (I don't like them to dry up at all in peat pellets as I find it damages the roots that are

emerging out the sides of the pellets) I use it for about 4 days in a row when ever I lightly spray then I use

straight distilled water thereafter for the next 3 days then back to the solution again for another 3 days

tops!!! as you will want to get back to straight water to flush them at least 3 days before starting your full

fertilizer regime on the 14th day of your seedlings. Pic. of results below as well take a look. Pepper seeds

sprouting only after 6 days of germ. amazing!! Tomato seedlings at only 6 days old, as well, usually I don't

even get them germ'd until 6 days later; more so that is.

Pic of the ingredients
IMG_20150326_140354.jpg


Pic of the ingredients together inside a bottle before adding the H2o
IMG_20150326_140952.jpg


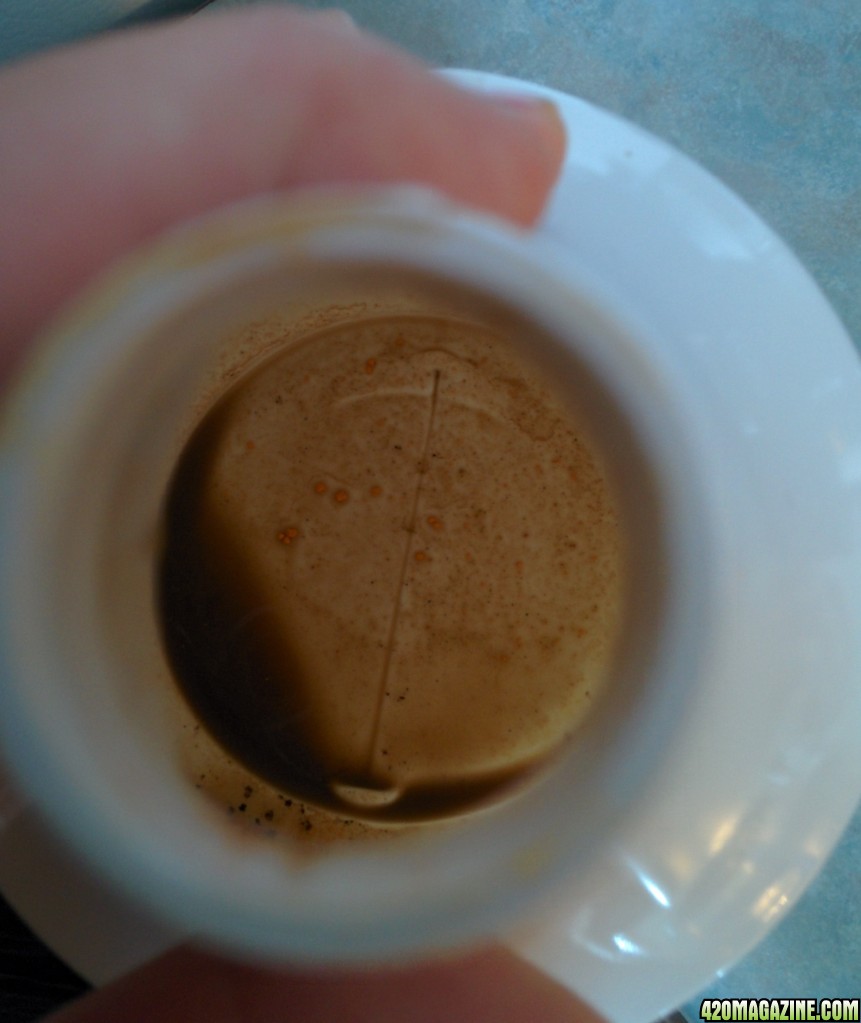
Solution freshly mixed up after the 5 mins. of shaking like a mad man!!!
IMG_20150326_142835.jpg


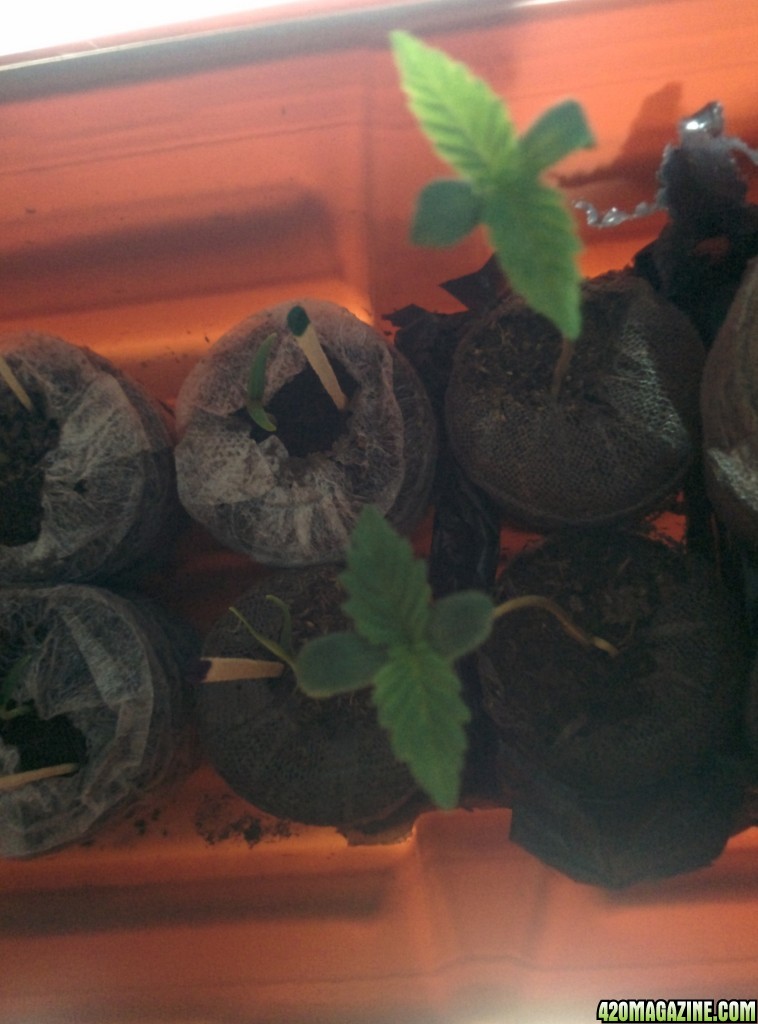
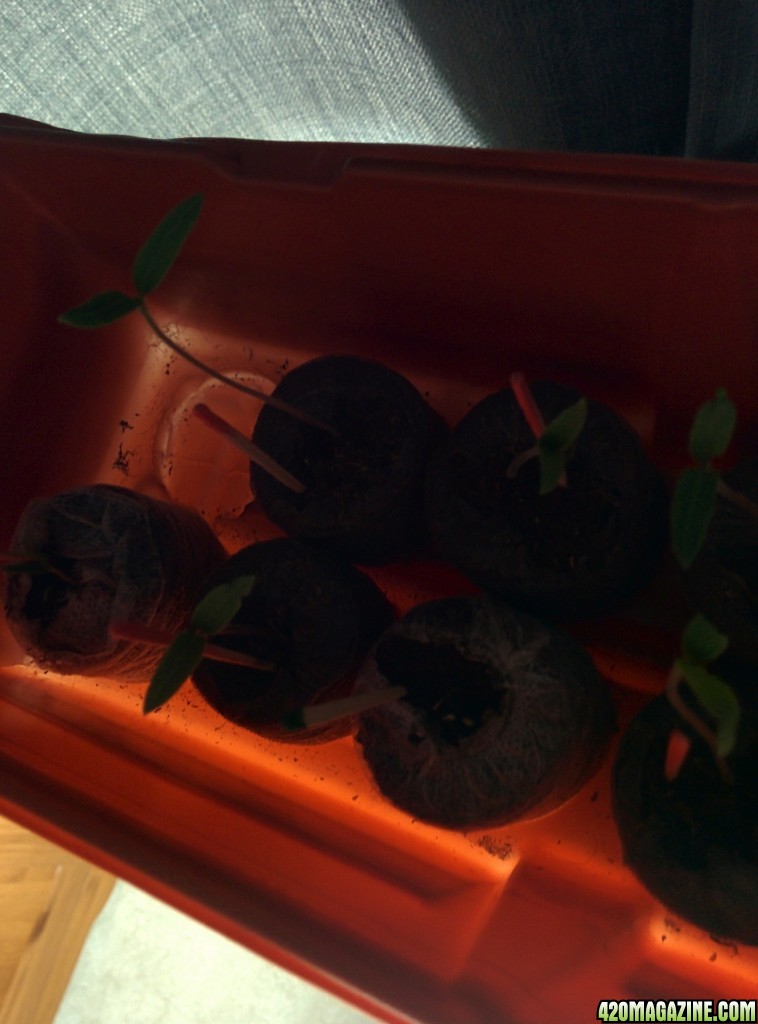
Pepper sprouts side by side to 9 day old seedlings (the pepper had been starting to spourt 3 days prior to the weedlings). Unfortunately the weed seedlings are still behind in growth (there will be details about why, later, IT IS NOT because of the solution I assure you; the reason for solution was because they were lagging way behind in the first place).
IMG_20150402_195518.jpg


Tomato sprouts at 6 days using my seed booster solution
IMG_20150402_200016.jpg


Try this formula for yourself! you could maybe play with how often you use it or use it more but I started
getting very minor and I mean very minor leaf ridge tips turning upward so I stop on 4 days straight just in-case, as this of course can be a sign of too much of the good stuff (fert/nutes). Although other reasons can cause this as well; but my air flow is good, I am not over or under watering, and the light source is not too close for cfls (I believe anyway). If you have any questions about the formula send me a personal message!

Lets get back on track here. I just wanted to provide a intermediate grower level tip since I had not yet!!

Next will be stage 2. Planing before starting your seeds (germinating). Then finally!!! after that will be stage

2.5 were we begin the germination process including: how to, things you need to know about it with my

directions, methods, and tips/advice regarding this very sensitive and delicate step.
 
Back!!! Very quick update (and final lengthy delay on this grow guide/journal). I apologize to any possible ongoing or curious viewers and to let it be known this is not and will not be abandoned. I Have been way too busy (workload,new business related including veg garden prep.) also additionally I had felt I have not been perceived to well yet even at 200 views as I have seen many as new as me or newer obtain wayyy more (but this could be the case of lack of content/more eye appealing yet not included). The more so main reason is I have had a couple experiences with attempting to offer, what I thought was very sound, advice/tips to some newer growers who blatantly ignored them including a question or two. Now I found this to be slightly annoying and left me discouraged from desiring to attempt to assist others as I went out of the way for these characters with my own precious time thinking I would at least be appreciated enough. I finally decided I will not let a couple of ungrateful seeds detour me from taking time out of my busy schedule to carry on with this Journal. I am sure this will be useful to someone or two at the vary least, I also feel I made a commitment to provide this info as well. So I will at the vary least carry on with weekly updates (bare min. regardless of my schedule) but I can arrange time to post much more frequently. Continuation cont. within the next 24 for those still interested. I will do what I can and def. be chipping away until completion including Autos to be introduced within 5-6 weeks as well, which I will provide as a beginners Auto guide pretty much as well so stay tuned!!!
 
After you have obtained all your materials/items from the list from stage 1.5 you may need to consider some additional items. Additional items may include a temperature reading device and a heat pad.

Stage 1.5 cont./end
Planing & Prep. before starting seeds

Before you begin the germination process (getting your seeds to sprout/crack/pop) you will want to decide

where you will place them. You preferably want to place them in a darker/dark warm area to anywhere from

12 hours-40 time period. Now you temperatures here will be crucial. If you have a thermostat in the same

room you will be starting your seeds in and are confident in its readings then you will be fine without using a

temp. reading device providing your rooms temp. is consistently over 72 degrees very preferably 75-85 id

say tops. Now if you do not have control over your internal temps (temperature settings inside your

home/room) you will then require a temp. reader. Place your temp. checking device in the exact place you

will be starting your seeds (darker area) for 30mins or so and make sure it reads at least 72 degrees and if

so and you know your temperature will stay at this temp and not ever more then 80ish then you will be ready

to place them there for the 12-40 time period. If your temperatures are lets say 68 no less then you can get

away with placing seeds on-top of a video game system, dvd player, or anything that produces a bit of

warmth. But if your temps. are under 70 and you do not have something that stays warm to start

them on/in then you will require a heat pad (only use if you have no choice as they can fluctuate or heat up

too high even on their lowest settings unless you use a plant based heat pad which is set to a max temp for

seedlings.) If cost is no issue or if so but you can purchase one used I would say get a plant based heat pad

then. I have often had issues plenty of times with regular heat pads even on lowest settings which always

requires me to even place a folded towel over top to ensure temps do not go into the mid to high 80s you will

then risk baking your seeds. Basically I would say 75-78 is optimal or ideal range to sprout most seeds. This

is when hands on experience will help you to decide what temp ranges you find work best for you some have

great success on the higher end some on the lower. 68 (if can be placed onto a item that generates warmth)

- 85 tops id say. I myself also often had issues in the 80s range with lower/not quality seeds so I pref 75-78

has been best for me on average. Lastly I highly recommend re-checking your temps approx. 4 times

throughout a 24 period or so to ensure your temp will remain and be at ideal range before you start (esp. if

you will be using a heat pad and make sure your temp. reader is sitting on-top of it to see if you will require a

towel if its too high.)

Next onto the germination of you seeds.
 
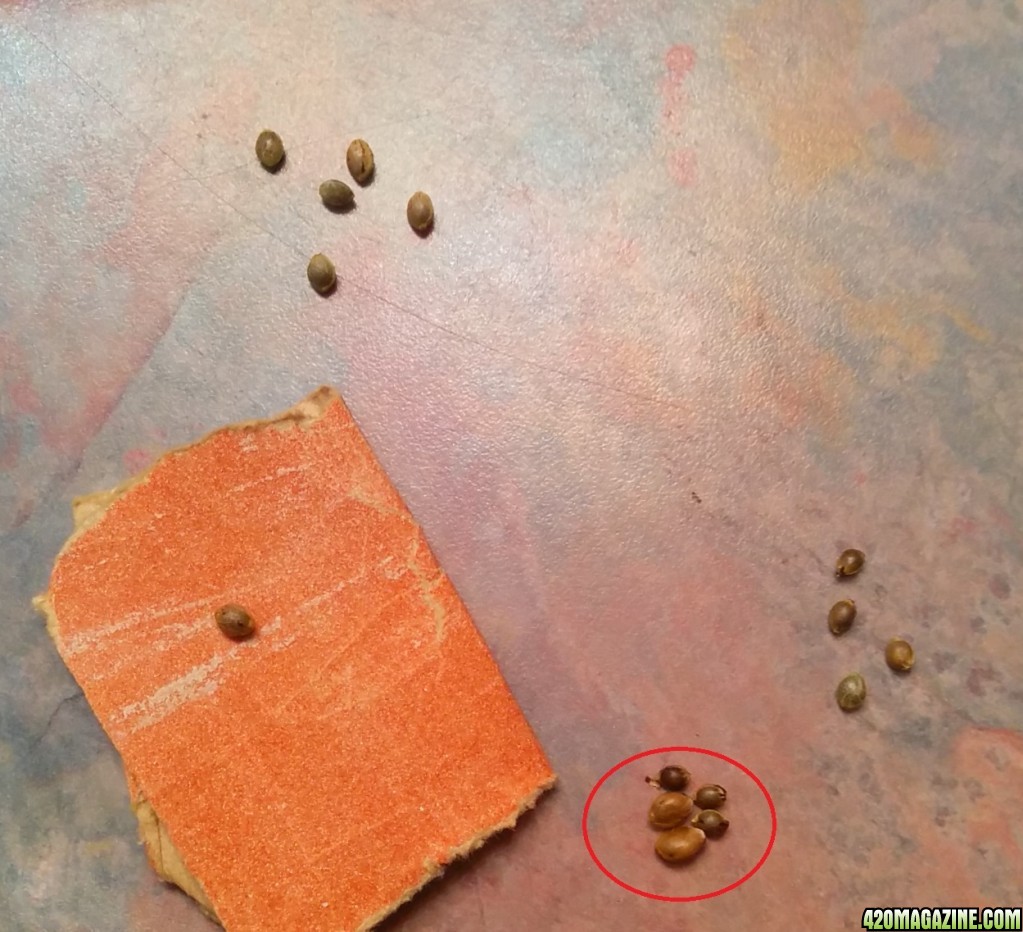
Intermediate/more experienced grower tip: I heard about "seed scuffing" back in the 90's which someone had told me he had heard about. He told me that he heard that if you sand your seeds it will make them open (crack) faster; so I decided to try it a couple years later (when I had plenty of seeds to mess with) to see if it was true. The first time I tried it I did have faster then usual germination success with quite a few while others did not turn out at all. Later on I decided to do a little experiment using this technique. I wondered if sanding them to hard or too much may have caused a bit too much damage on some the first time I had tried. To get to the point, I barely sanded some (very, very lightly), others I sanded somewhat firmly (lightly with very slight pressure/but next to none), and another bunch I sanded longer with even more pressure (yet not too much). I had discovered that not only did the "somewhat firmly" ones crack open faster but they had actually completed germinating slightly faster then all other seeds I had sanded. The ones I sanded harder either did not germinate (crack) or the few that did took much much longer and were many days behind in sprouting progression. Over the years I have used this method off and on and have noticed faster germination rates which lead to faster sprout growth times on many occasions. I normally have done this when I had plenty of seeds (more then double what I needed); that way if I accidentally sanded too hard It would not have been a big deal. There is also another very similar tec. called "seed scarification," were you actually cut a tiny portion of the seed shell; but this is something I have not tried myself. For those who wish to try this method it works just as it sounds. You take your seed and hold it down gentle over a piece of used 220 or 240 (fine grit) sand paper and you very, and I mean very, gently hold your seed down onto it and rub approx. 2 or 3 times over the paper on each side of the seed. Its that simple. Note I do not recommend this for beginners of course; unless you have plenty of seeds to practice with and possibly waist. It is your decision in the end of course but as a beginner I believe its best to stick with the vary basics until you have experienced growing first hand so you know what to expect with your own germinating success. The seed scuffing method basically slightly damages the shell (making it more porous) and allows the seed to absorb water/moisture faster which enables the seed embryo to receive moisture sooner giving it a faster start on development. Give it a try and see how it works for you!

My seeds with 220 grit sand paper I had previously used on wood!!
Seed24.jpg
 
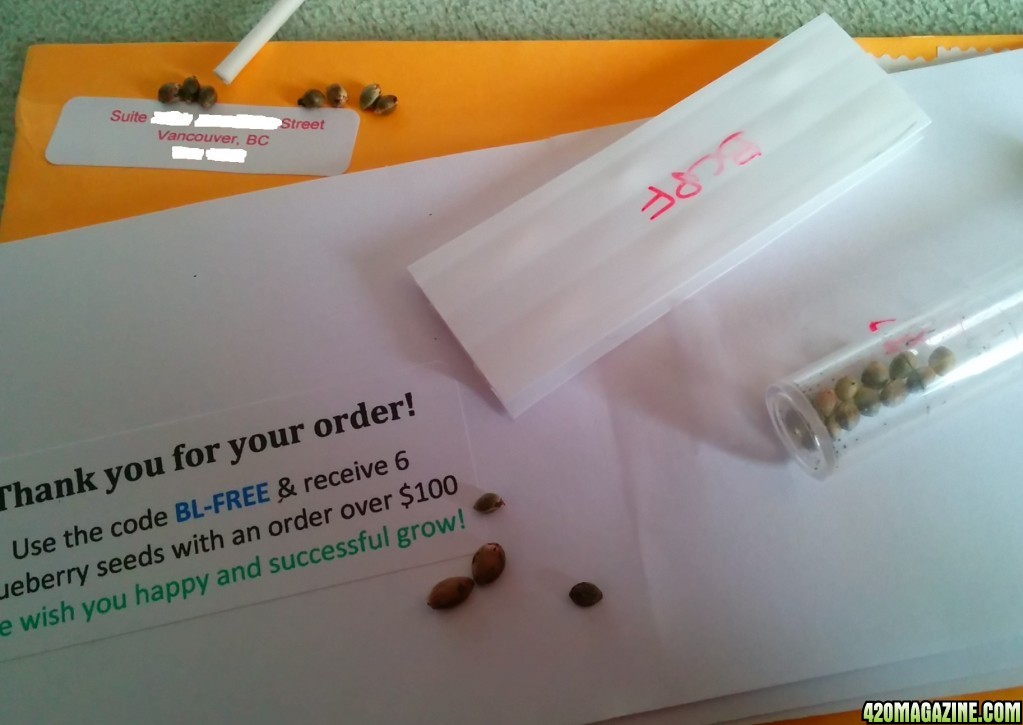
Aw... the seeds have arrived 3 weeks ahead of time (an ideal situation) plenty of time to set up!

Seeds_arrived.jpg


But since I am itch-en to get going I'm gonna drop these babies now since I got what I need from the list (stage 1.5) anyway!!

Stage 2.0
Germinating your seeds

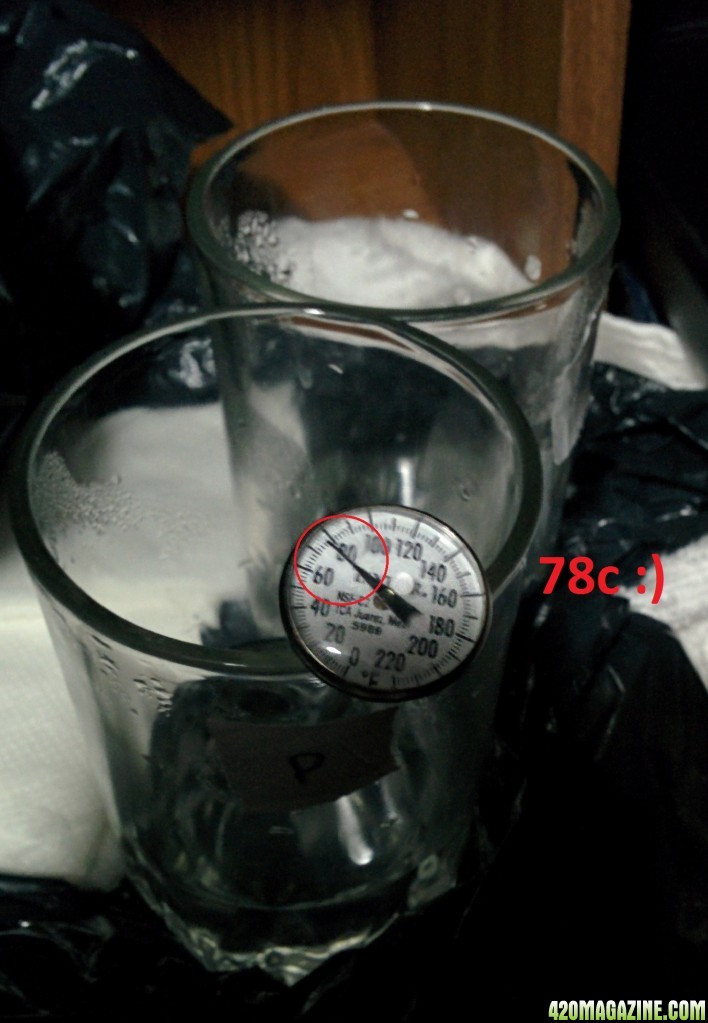
Now that your temps. (temperatures) have been consistent, I will boldly say, between 75-78....

IMG_20150326_021150.jpg


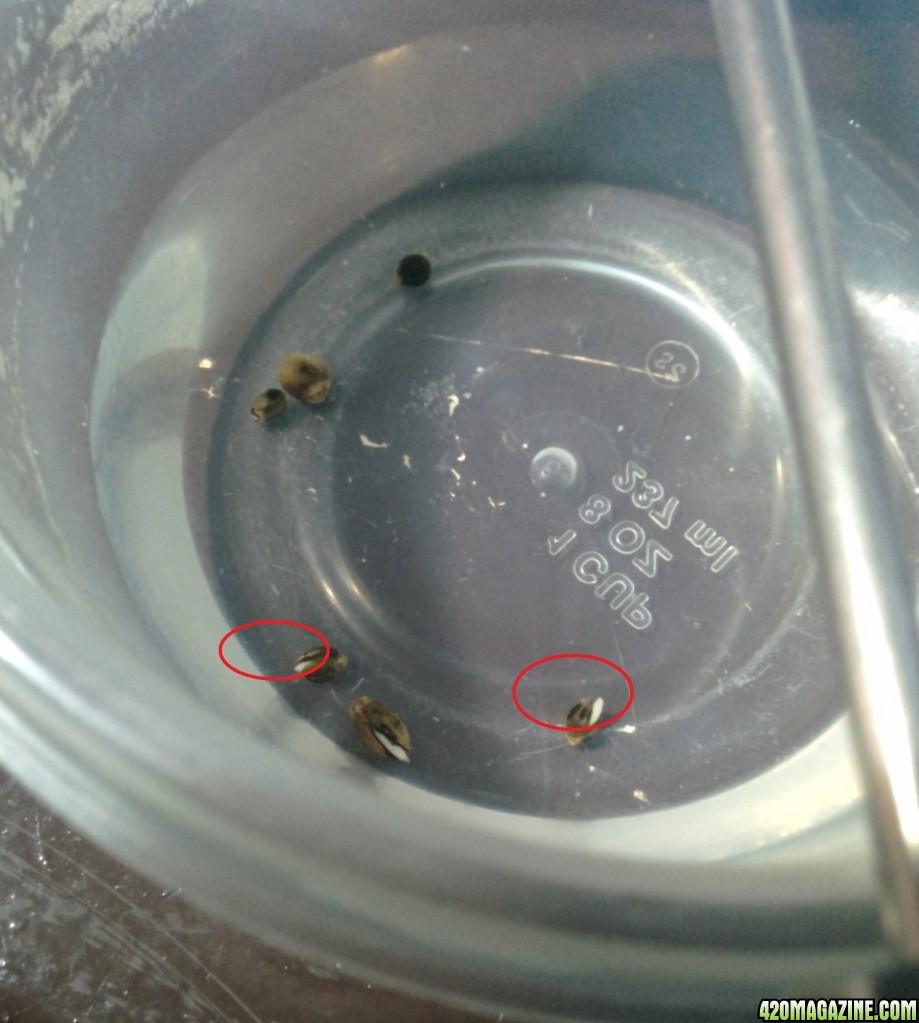
(best for beginners I feel is on lower end) you can fill your coffee mug up with some good ol (although vary

nasty for drinking now) tap water diluted with some filtered or distilled water (50/50)!! You may notice a

label on the glass in the picture! this is how I keep track of what seeds are what if I am dropping different

types (strains) at the same time. Of course do them in separate glass's to keep them separated from another.

Some may cringe at the sound of tap water because it contains chlorine of course; levels which differ from

area to area unless you have a cistern/softened treated water which is a big No!, No! as it contains

sulfur/salts. Back in the days this was more of a concern then it is now as seeds were not as adapted to

chlorine as exist in town/city water supplies as now over the years. Cutting the tap water, as a safety

precaution, helps to ensure the chlorine is not too much at the same time the small amount can aid in

preventing any possible fungus or disease that the seed may have come into possible contact with during

handling. Then put (drop) your seeds into the water in the mug and place in your warm (darker) area or

on-top the heating pad if you absolutely required one. Now leavee! them aloneee!! Even I still get tempted to

peak at them before the 12 hour mark but I have found it best to not disturb them and let the darkness and

water do its job. After the 12 hour mark do check on them to see if any or if your really lucky all have opened

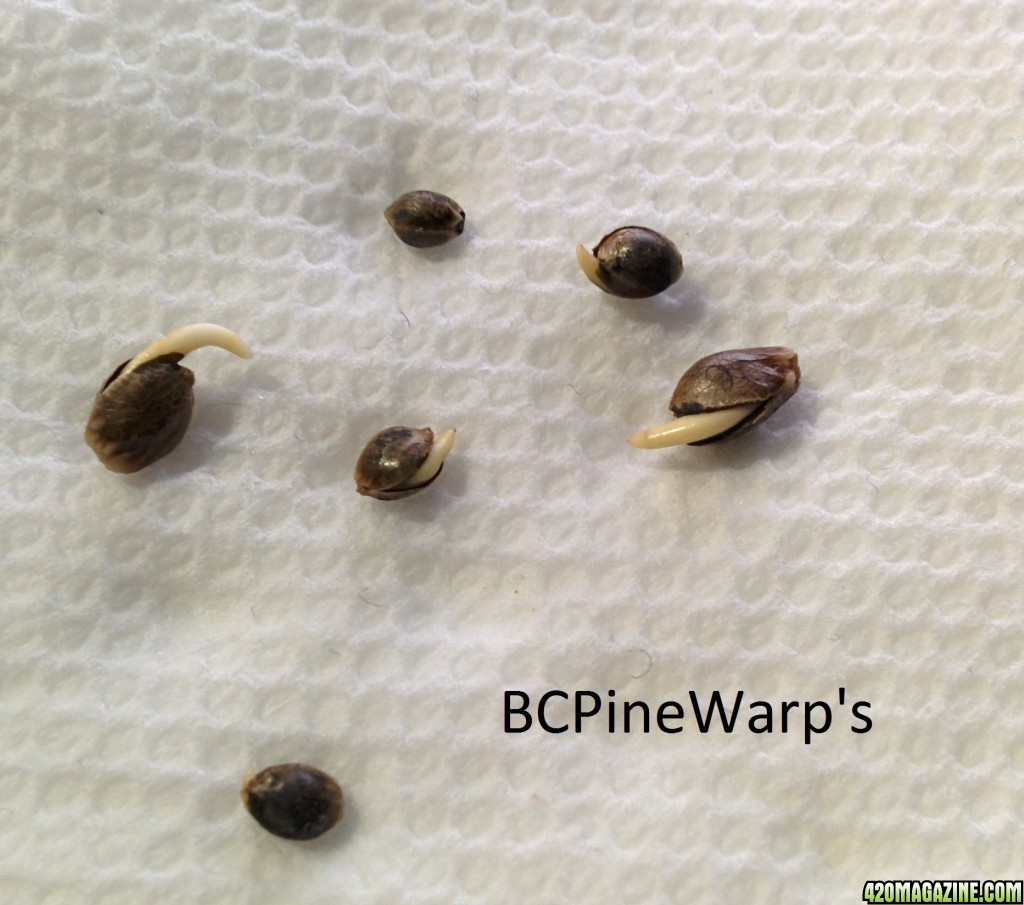
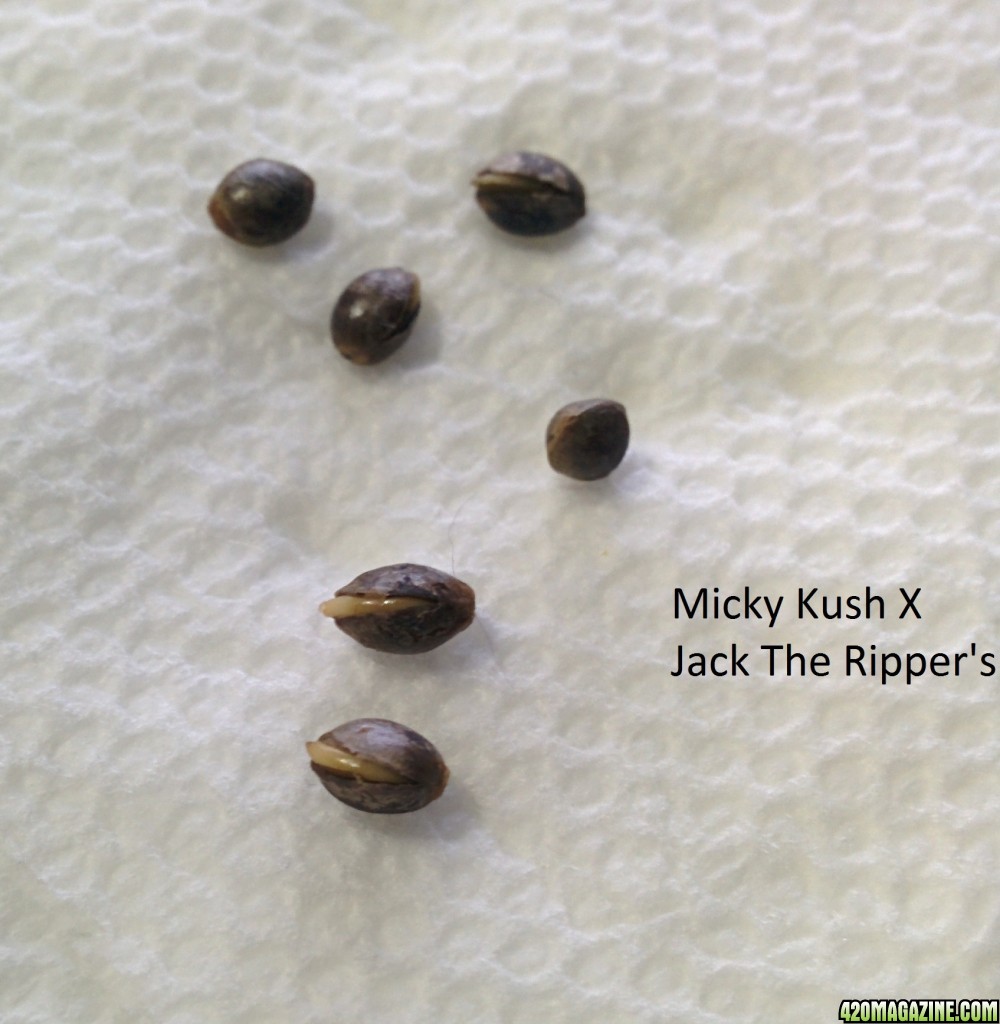
up and revealed a tiny white seedling root tip. Inserted is a photo of what you are looking for.

Seed71.jpg


If you see this you will now move all the ones showing their root (tap root) onto a clean paper towel

(moistened,yet not dripping wet, with pure tap water as this will prevent the paper towel from getting mold

spots). Note! Never handle these sensitive begging seedlings with dirty hands to prevent contaminating

them. This is vital when using the paper towel method to continue the sprouting of seeds as they stay warm

and moist constantly. If you ever happen to notice black or pink spots (blotches) forming on to the paper

towel this is a sign that it has been infected with mold. If this is the case you will immediately want to

transfer all seeds onto a clean piece and hope that they have not been damaged. For any that have not

cracked and shown a white root tip you may leave them in the glass for another 12-24ish hours (=40 hours

id say tops!! to avoid drowning them). After you place them on the moist paper towel (in the same warm

dark spot) you will want to check it 12 hours later to see if any have rooted more dramatically. A good tip to

keep the paper towel moist is to place it on a plate then place another plate over top of that one with the

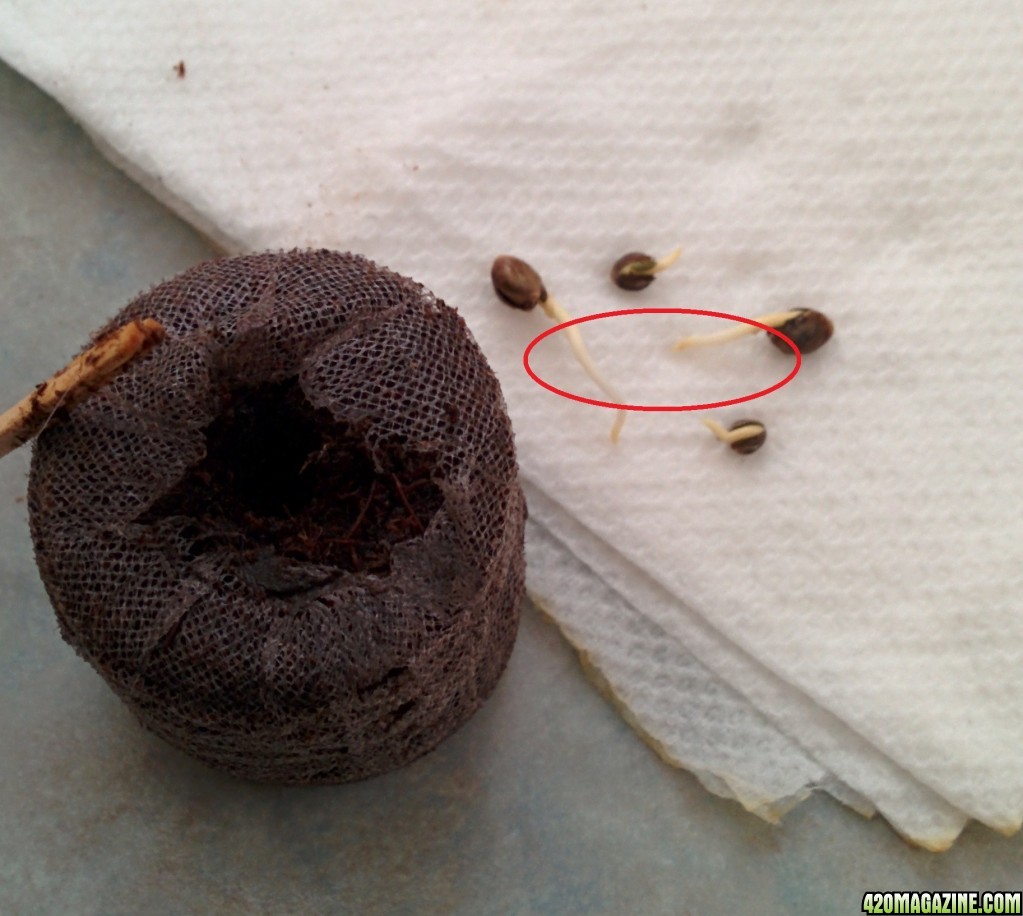
paper towel with the seeds between them. Here is a pic. of the ideal growth of root that you will then be

ready to actually plant them into your peat pellets/or rapid rooter plugs. These are my Pinewarp rooting.

IMG_20150326_020719.jpg


If nothing has happened then once again leave them alone for an additional 12 hours. This usually happens

(with good seed) from anywhere around 1-3 days but some could take up to a week plus. In some rare

cases it could take up to 14 days you may want to give up on these ones before hand unless you only had a

few seeds to begin with then you may decide to wait until then to give up totally. It is vary ideal to plant

them when they have not rooted too long as it will be much more challenging to plant them with long tap

roots which can easily be damaged. Stage 2.5 will show examples of this next.
 
Back at this again. Time reallllly got away on me; I have unfortunately gotten way busier then thought. Can't even believes it has been two weeks plus already since last post/guide progress. Anyway this will get done and caught up eventually just hard to stay motivated with not too many viewings for the most part yet as well; but maybe it will catch on later still with others recommendations. The juicy stuff (plant pics & pruning/ cutting/slight training demo's) are coming soon at least.

Stage 2.5
Germinating cont./seed sprouting

(per-planting)

In additions to the various time frames that your seeds may take to pop/crack (seed open showing and

developing "tap" root) I should note reasoning's that cause delays or why they may not germinate altogether.

Factors that are out of your control: some seeds may be used to being produced at (germinated) a certain

temperature by the seed producers that of course you will not know at which, some what similarly some

seeds genetics are climate sensitive (but more rare, e.i. where/ have been grown originally or mainly in a

colder or hotter region and have not yet been grown commercially enough yet to have adapted to various

sprouting temperature ranges), or the seeds you have obtained are too old. Ideally you want to use seeds

that are only 1-3 season (years) old (2 seasons tops! being ideal) unless the seeds had been stored in a

freezer they can last longer and make them viable up to 5 years max for the most part. Just know that

the fresher the better and older seeds will tend not to germinated as well. Also one more reasons that would

be out of your control is that they seeds simply were not mature enough in the first place. Generally the

darker the seeds the better black spotted included as well. Factors of your control/or wrong doings: As I

mentioned you do not want your paper towel to be dripping wet for the most part; as this not only what is a

factor of producing mold but it is how you can drown (seeds basically lack of air/oxygen and can die), over

watering is the biggest mistake most common mistake for not only beginners but more experienced growers

as well (over watering is also the number 1 most common problem for seedlings/plants as well). On the

opposite end is when the paper towel has dried out too much causing the root to dry up as well and die or

become severely damage if not. So do not allow the paper towel to ever dry out or too much and always

make sure it is moist but not ever soggy dripping wet (note some excess water drops wroth is totally fine

still). A good way to know if your paper towel is too wet is if there is standing water surrounding it; if not test

it by lifting it up off the plate and if it drips more then 3-4 drops or so off of it, it is then too wet still; you

should carefully remove the seeds and squeeze the paper towel until it drips only one or two drops. Below

first is a picture of healthy (white) sprout/seedling roots and then next are seeds that have suffered from root

rotting from over watering or too high temperatures or booth from booth issues.


Healthy rooting seeds (nice white in color at time ranges 2-3 days vary ideal- 4-8 days tops!!! ideally or
vary rarely 9-14 day)

IMG_20150326_144456.jpg


Unhealthy rooting/stunted in seed (ugly brownish from either excess heat, over water, or booth)

IMG_20150326_020932.jpg
 
Hope all is well in your world.

Is this grow still alive?

We would love to be updated with some pictures and info.

How about posting a 420 Strain Review?

If you need any help with posting photos, please read our Photo Gallery Tutorial.

I am moving this to Abandoned Journals until we get updates.

Sending you lots of love and positive energy.

:Namaste:
 
Back
Top Bottom