Deep Water Culture Tutorial, SH Kit & DIY

Re: -------'s Deep Water Culture Tutorial, SH Kit & DIY

All of the 26, 42, 65, 85 and 105 watt bulbs I have discussed here have regular sized sockets and the bulbs fit into any normal socket.
200 watt CFLs and larger have a much larger socket, called a mogul socket.


8' Power Cord with Mogul Socket

Mogul_Cord.jpg

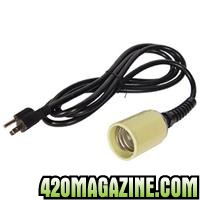
If you use a 200 watt CFL bulb or larger, you will need a Mogul Socket.


This is a Mogul To Standard Bulb Adapter
mogul_adapter.jpg


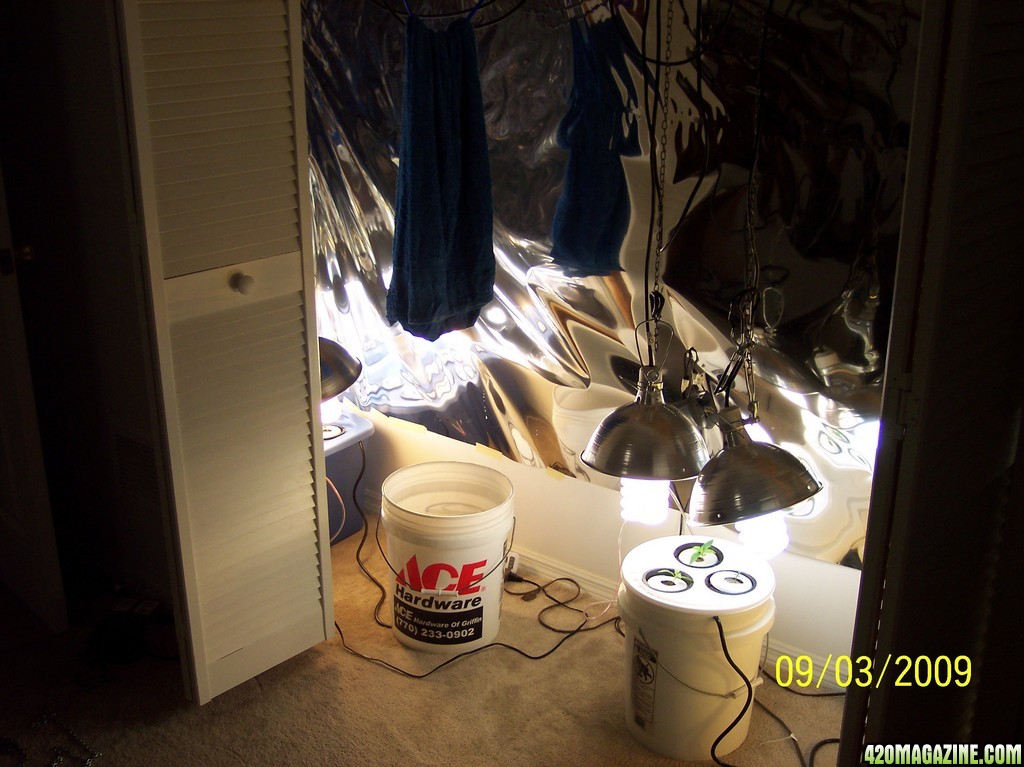
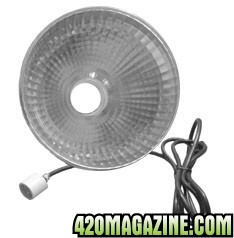
I can not find the words to accurately describe those Parabolic Reflectors, except to say they are AWESOME! The MYLAR does not reflect nearly as much light as a Parabolic Reflector, and I've never seen any reflector that compares. They just fit the base of a 105 or 200 watt CFL.
They are huge and yet lighter in weight than any reflector I have ever seen.
Here you see one with a Mogul Socket and cord:

Parabolic_Reflector_adn_cord.jpg
 
Re: Roseman's Deep Water Culture Tutorial, SH Kit & DIY

Temperatures, Humidity


The temperature is the hardest factor to take control of to me. When confined to a small space, ballasts and HID lights can push temperatures sky-high in no time flat. That is why I use CFLS, to avoid venting heat. This is especially true during hot summer months when outside temperatures reach the highest temps. Nighttime (LIGHTS OFF period) temperature can be just as difficult to regulate during cold winter months. Most gardeners are aware that temperature in the grow room plays a major role and can greatly affect the growth of plants and the quality of the finished crop. Most gardeners do not know how controlling the temperature of their garden in very specific ways can achieve a superior crop. Drift too far from these ideal temperatures and watch your plants and crop suffer.
Before getting started it is highly recommended that every indoor garden has a Max/Min thermometer. (Digital $4.95 at Walmart)


TnRH-meter.jpg


This product allows the gardener to see exactly the fluctuations in temperature within their garden, day and night. Without this useful tool there is no accurate way of knowing the different temperatures between daytime (lights on) and nighttime (lights off). The difference between the two temperatures is very important to plant growth. Anymore than a 10F-15F difference between daytime and nighttime temperatures and you risk shocking and stressing the plants. You want a 10 degree difference between LIGHTS ON and LIGHTS OFF temps. In general the optimal daytime temperature for plant growth is between 70F -75F. Drift to far above this range or too far below and growth can be severely affected. Daytime temperatures exceeding 90F or under 62F and plant growth will be slowed and stunted. Plants do thrive in Afghanistan's 110 degrees, but they momentarily quit growing at that temp. If the temperature drifts higher than 95F the plant's enzyme production will drop off and the plant will begin shutting down. At temperatures above 92 - 94, high photosynthesis shuts down due to the stomata in the leaves closing down to conserve water. At normal temperatures the stomata will be open, taking in CO2 and sweating water to keep the plant cool and allowing for transpiration.
Ideal temperature varies depending on whether or not CO2 is being introduced to the environment. A more suitable daytime temperature when the air is being enriched with CO2 is 80F-85F. This temperature range promotes the exchange of gases between the plants and the environment. Also, it can speed up the process of photosynthesis. Plants in an environment at 86F can perform carbon extraction from CO2 twice as fast as at 68F. It is still recommended that the nighttime temperature drop no more than 15f from that of the daytime temperature.

There is another relationship between temperature and the absorption of gases by plants that many hobbyist growers are aware of. That is the relationship between the temperature of the water in your reservoir and the amount of oxygen the water can hold. The best range that your reservoir can be between is 60F-75F. Ideally the reservoir temperature should be at 65F because this level optimal for processing oxygen. Also this temperature will help control transpiration (the act of drawing up nutrients by evaporating water throughout the leaves), and humidity levels. Buying a simple aquarium floating thermometer will allow you to know where you fit in this range.

thermo_meter.jpg


Another great reason for regulating the temperature in your grow room is that biological processes can be speed up exponentially by every degree. This is true for your plants as well as the potential pests that may invade your grow room.
Pests such as spider mites can reproduce up to 10 times faster with every degree the temperature rises.
These pests can destroy a garden in no time flat! You really do not want to make it any easier for them. Spider Mite Eggs and webs can screw up the buds so bad, they can not be smoked. With a daytime temperature at a steady 72F - 75F and a nighttime temperature of 65F is much easier to control and destroy spider mites, thrips, and many other pest populations.
The same principal can be applied to the prevention and control of fungi, molds, mildews, and bacteria, which can spread more rapidly when temperatures in the grow room or reservoir exceed 90F. Also, the warmer the air, the more water it can retain which means humidity levels can easily go beyond the recommended 40-50% for Vegging. (You want high humidity for VEGGING, and low humidity for FLOWERING.) This high humidity coupled with lower nighttime temperatures can cause condensation to form on leaves. This will invite molds, mildews, fungi, and bacteria to take over you grow space. With high temperatures the likely-hood of losing control of the problem, such as powdery mildew, is very high. Once control is lost your plants may be the next to go.

Temperature is also very important when it comes to starting seeds and getting cuttings to root. Placing seedling trays on a heating mat will reduce germination time dramatically. Speeding up germination time usually leads to stronger and healthier plants. Also, less time spent between crop cycles makes a garden efficient. More harvests provided in less time can equal big bucks in the pockets of professional growers.
The ideal temperature for sprouting or cloning is 80F. Any higher and you risk burning the roots. Also, many seeds simply will not germinate at temperatures over 90F. The seeds will become dormant and never sprout.
The same principal used for seeds is used on cuttings to coax roots out quicker. The sooner cuttings can establish roots, the better. If roots can be forced quickly they will grow strong and stay strong. A bottom temperature of 80F-85F, roughly 10F warmer than the air, will speed up rooting time and help to jump start those roots once they do begin. Let the temperature get too high or too low and roots growth will be hindered or they will never grow at all. Using the proper technique and the proper temperature for bottom heat not only can rooting time be speed up from 2 weeks to as little as 3 days, but the survival rate of your cuttings will drastically improve.

On the topic of roots, there is an ideal temperature for the root zone after the plants' roots have been established. Roots are working 24 hours a day and constant attention is required concerning temperature in and around the root zone. The ideal temp for this root zone is generally 65 to 75 degrees F. At this temperature the ion exchange between the roots and the environment around them is at its absolute best. This means that the plant's root system can take up more macro nutrients, more micro nutrients, and more oxygen at this temperature than at any other level. This makes a plant more efficient and a plant working efficiently will provide a superior yield.

Amazingly, some growers grow successfully with no thermometer for the air or water. But for maximum efficiency, you got to take control of temps.

HUMIDITY? that is more simple to me. Get the Humidity VERY high for VEGGING, and VERY low for FLOWERING.

in Vegging, I mist MINE daily, like a tropical forest rain. I do raise the lights up, to be careful with my bulbs getting wet and breaking. And when it rains outside, it also gets cloudy and the sun's rays are blocked, so I block my light during mistings. Plants in outdoors, in nature do get an occasional rain shower or thunderstorm. Do you let it rain on yours? I do, but artificially by MISTING.
 
Re: Roseman's Deep Water Culture Tutorial, SH Kit & DIY

My 420 grow-buddy Jonnybtreed says


A cheap stick-on aquarium thermometer is a great way to check the temp of your system without checking pH, taking a water sample or even as a backup for your digital. Those cheap digital probes get off calibration a lot easier than you'd think. So for .99 I certainly suggest one of these .

New_grow_006.JPG
 
Re: -------'s Deep Water Culture Tutorial, SH Kit & DIY

HUMIDITY? that is more simple to me. Get the Humidity VERY high for VEGGING, and very low for FLOWERING.

Have you ever seen how an outdoor plant loves a rain shower? In Vegging, I mist them daily. I mist with plain distilled water and i mist with a foilage spray too. I do raise the lights up, to be careful with my bulbs getting wet and breaking. And when it rains outside, it also gets cloudy and the sun's rays are blocked. Plants in outdoors, in nature do get an ocasional rain shower or thunderstorm. Do you let it rain on yours? I do, but artificially by MISTING.
AND, I bought a cheap humidifier.


Cheap De-Humidifier for closets and tents
$40 at amazon.com

Amazon_40.jpg


Cheap Cool Mist Humidifiers from Walmart:

26_Humidifier.jpg
$26


Graco, Cool Mist Humidifier, 1.5 Gallon $29.96
Graco_29_98.jpg


Ultrasonic Humidifier With Light $28.97

Ultra_Sonic_28_97.jpg


I must say I quit using the Humidifier. Discovered something cheaper and easier.

I roll up newspapers, like a cigar, and put them in a wide mouth quart jar full of water, like a wick, and they help raise humidity.

I lay saucers and bowls of water and 12 ounce styrafoam cups full of water around my reservoir tanks, to raise humidity.

I roll up face clothes like a cigar, (pics will follow) soak them in water and lay them on the lid in between the plants, to raise humidity.

I hang a soaking wet, dripping wet bath towel over a bucket in my closet, and it raises humidity.

I guarantee you that 3 or 4 of these tricks will raise the humidity in a closet by 15%, to 20%.
 
Re: Roseman's Deep Water Culture Tutorial, SH Kit & DIY

Contributed by Dystopia, an old grow buddy from somewhere else.


Temp Control
It is much easier to heat a cool room in winter, than it is to cool a warm room in the summer.

Here are some tips and tricks for controlling reservoir temps, especially in a hot room.

First, insulating your res really helps stabilize the temps. Wrap mylar or insulation around it.
I used to put blue ice bags in the res if the temps started to rise, but I can no longer recommend putting ice in the root zone. During my last grow I did this, and the plant closest to where I put the ice definitely didn't like it; it ended up stunted and there was a bald spot in the root zone where the ice went. And as the root mass grows there's generally not enough room to stick ice bottles in the res anyways.

If you want to use ice to cool the res you might want to try the following ideas:

I rigged some quart and half-gallon jugs using drip line and a drip-line shut-off valve. What I do is freeze them overnight and then stick the line in a hole on top of the res in the morning This serves a few purposes: 1) provides a slow flow of cold water to the res throughout the day, so the roots aren't shocked by a rapid change in temperature; 2) keeps the res topped off; and 3) serves as a ghetto A/C for the grow area. The main disadvantage is condensation; I have to keep a rag under the jug to soak up water.

I built a semi-recirculating DWC for my latest grow - a separate res allows you to easily do maintenance without disturbing the plant reservoirs; 2) I'm planning on doing a ScrOG - once the plants are in the screen lifting the lids becomes problematic; 4) more water means that things like temperature, ph, and nutrient concentration are more stable; and 3) if I need to cool the reservoirs I can put ice in the shared res without worrying about the roots. The main disadvantages are complexity, size of system, and more nute usage.

Some other ideas:

1. Put your air pump in a cool area. It seems like most people put their pump on top of the reservoir under the lights. If it is hot where you put the pump, then you're going to be pumping hot air into the res. I try to put mine outside the grow area if possible, or as close to the inlet as possible.

2. Direct some airflow from the inlet over the res using a fan.

3. If you use a humidifier like what Roseman recommends try directing the air from the outlet over the res using a fan. Acts kind of like a swamp cooler; I've found it lowers the temp over my res by about 5 degrees.

4. Running a water pump continuously in the res will cause the temps to rise. I think I have a good idea how the stealth hydro system works, for instance, and I can certainly see the advantages of it during the early stages of growth. However, once the roots are in the water I'm not sure if running the pump continuously is necessary after the roots are deep in the water. I put the pump on a timer and run it kind of like an ebb and flow once the roots are in the water - like for 10 minutes 5 times a day.

Of course, like Roseman says, the best way is to keep your room temp down if you can. 75* is out of the question for me, it costs too much to keep my A/C running all day at 70 degrees, especially since no one's home anyways. I keep my A/C at 80, and my grow room at 85.


Contributed by Dystopia, an old grow buddy from somewhere else.
 
Re: -------'s Deep Water Culture Tutorial, SH Kit & DIY

Air Circulation


Oscilating Fan

Oscilating_Fan.jpg


An oscilating fan is an absolute necessityto me, in growing.
First it cools the area. Moving Air is cooler Air. Consider in nature, outdoors, plants get breezes and strong winds blown on them, for a reason.
Second, you know how to strenghten a muscle, or make it larger, or stronger or grow faster? You exercise it, you MOVE it.
To strenghten a plants stem, stalk or branch, or make it larger, or stronger or grow faster, you MOVE it too, with an oscilating FAN blowing on it.

Fans help with Temps, Humidity Control, Moisture Control, etc.

Air movement is very necessary for the health of your plants, but too strong of a fan can cause wind burn. Direct your fan toward the tops of the plants and toward the lights. Never position the fan blowing strongly downward on the leaves or you can get wind burn.

I do ocasionally blow the fan directly on my plants in VEG, and everytime after I MIST them, but only for a short while.

I bought a 2nd fan, like above, but on a three foot tall stand and I use both now, one blowing up and over, and one blowing down and low.
 
Re: -------'s Deep Water Culture Tutorial, SH Kit & DIY

I took the largest beach towel I could find, actually two of them, and soaked them in the sink, and hung them in my closet, over a bucket, one in each end of the closet, on a clothes hanger, to raise my humidity. I will use more wet towels and more cups of water laying around when the plants get a little larger.


2009_Grow_00212.jpg


2009_Grow_00311.jpg
 
Re: Roseman's Deep Water Culture Tutorial, SH Kit & DIY

Notes:
One of my feeder tubes got disconnected for about 12 hours while I was away at work, before I noticed it and the two inch tall baby plant just dried up to a crisp and died.

I had 5 duds that did not sprout, so I replaced them with seeds I had germinating in the wet papertowels. But that means 6 of the plants are 5 days younger than the other 9. That is OK, with STRETCHING, (explained later) they will all look about the same size in two weeks at max.

That will explain the pics I am about to share.

So far, I have been limited to using 1/4 dose of nutes, causing me a slower start. I have sprouts big enough for a full dose of nutes, but in the same tank is one or two babies NOT ready for full nutes. Oh, well, fecal matter occurs sometimes!
A few days ago, I put 1/4 packet of GROW nutes and 1/4 package of MICRO nutes in both tanks and in the 5 gallon bucket. It was a small feeding, but the plants were not ready to eat a full meal and none of them were the same size in each tank. Here you see me preparing the SH powdered nutrients, I pour them through a tea strainer to make sure they are disolved.


2009_Grow_00123.jpg
 
Re: Roseman's Deep Water Culture Tutorial, SH Kit & DIY

One thing for the new Deep Water Culture grower to be aware of is the water flow from the six port manifold. IT MUST BE A SLOW TRICKLE!!
This is what happens if you have too much flow.

Bubble2_632.jpg


I had mine turned way down and this guy still got overwatered(only 1 of 4 seedlings in same tub). I turned that tube off overnight and it perked right back up.

IT MUST BE A VERY SLOW TRICKLE!!!
 
Re: Roseman's Deep Water Culture Tutorial, SH Kit & DIY

Today, I drained and replenished the two tanks and bucket.

I found one air stone not working as powerfully as it should, because the air line was crimped and folded at the end. I and all of us need to check our tanks inside daily.

I also found one tank had some hydroton dust in it, making the water slightly brown. It is from adding more hydroton later and not rinsing it good enough.
Draining and Replenishing will fix that.

You should always drain and replenish after the first ten to 14 days, and then every week, once a week. I am draining on Day 5, because of the Hydroton Dust.

To drain my tank, I use a 1/2 or 3/4 inch clear plastic hose made for aquariums, and an extra 5 gallon bucket. I lift the lid about 4 inches, with both arms in the tank, I disconnect the irrigation hub from the water pump. I use my fist as a coupllng, and put my fist on top of the water pump and stick the hose in my fist.
The pump pumps the tank empty within one minute into my bucket. I empty my tanks leaving only an inch or two in the bottom of the reservoirs.

Here I am holding the hose in my bucket and the other end is stuck into the top of the pump, emptying my tank.


2009_Grow_00213.jpg


Here I am draining the bucket.

2009_Grow_00312.jpg


If you buy the Drain Plug for the tank, remember to use some plumbers tape, or teflon tape, or some plumbers putty or glue, or it will leak. To use the Drain Plugs you also have to have the tank elevated and not at floor level. I am planning on some TALL plants, so I have my tank sitting on the floor.

I have friends that use a wet vac to drain it and I know several growers that bought a DRILL PUMP at Lowes or Home Depot to drain it. A Drill Pump attaches to a hand drill, and is fast, only costs about $12 to $15.
I also have friends that use a syphon hose or an aquarium vacumn hose to empty their tanks.


You should always have a two inch air pocket inbetween the bottom of the grow cups and the top of the water line.

When you do the 2nd Drain and Replenish, about the 14th to 21st day, you will see a growth spurt the next day, of two inches in height. Every week, when you do the Drain and Replenish, you will see a growth spurt. It is because of the AIR BATH the roots get while being out of the water. This AIR BATH can last up to ten minutes safely with absolutely no harm to the roots or plants. They love it. My roots are barely in the water and the Feeder Tubes are substaining them very good.
 
Re: Roseman's Deep Water Culture Tutorial, SH Kit & DIY

2009_Grow_0057.jpg


2009_Grow_0067.jpg

Up above you see two pics of the same tank. The plants are 6 days behind the other tank, but they will catch up. In 4 weeks, no one will be able to see or notice any difference. That is also the tank on 1/4 nutes. That tank is almost one week behind the other tank because I swapped some sprouts around. One tank has sprouts almost two weeks old, and the other tank has sprouts almost one week old. The bucket has three sprots three weeks old.


The bucket is 6 days ahead of one of the tanks.

2009_Grow_0076.jpg

I went back and added more lights, placing three bulbs over each tank. I used one 105 watt 6500K, one 85 watt 4100K and one 85 watt 2700K over each tank.


2009_Grow_0086.jpg


I 80% drained the two tanks and the bucket, I added back a full dose of nutes in one tank, 1/4 dose of nutes in one tank, and 2/3 packet of nutes into the bucket.
As I added the nutes and water to each reservoir, I added 1/6 teaspoon of pH down to my gallon jug thatn was poured into each tank.
I then pH tested my three serervoirs and found 6.7, 6.4 and 6.2.
I went back and added 1/6 teaspoon of pH Down to each container and got it down to where I wanted it in all three, within 5.9 to 6.4.


2009_Grow_0096.jpg


2009_Grow_0117.jpg


5.9 pH ! Close enough for me. I always remove a sample of water and test it in my little cup or glass. FOR A BETTER MORE ACCURATE READING, DO NOT TEST IT IN THE TANK.

2009_Grow_0047.jpg
 
Re: Roseman's Deep Water Culture Tutorial, SH Kit & DIY

Feeding my babies

I use nutrients that have ground-up sea shells and bone meal in them. No matter how much they were pulvarized and ground up, they do not disolve well in water. I put my nutes in a quart jar, add 1/2 jar of warm water, and stir them briskly in the jar. Then I add them to my gallon jug, pouring them through my tea strainer. If I see any clumps in the strainer, I smush them with my finger and wash them through my tea stariner again. I fill up my jug with cool water, and pH test it and adjust the pH accordingly before adding it to my tank.

2009_Grow_00123.jpg
 
Re: Roseman's Deep Water Culture Tutorial, SH Kit & DIY

FEEDING

If you are using the SH Deep Water Culture System, or a DWC grow, be it a store bought or a do it yourself homemade, this will help you learn more about feeding your babies and plants. Here I am discussing a 8 gallon reservoir using 6 gallons of water.

When a new born baby comes out of the womb, he comes out hungry! Same thing applies to puppies and most mammals. But you do not give them an 16 ounce T-Bone Steak and a giant baked potato to start.

You give them a weaker smaller feeding, with no spices, no onions, no large amounts of salt, and not too acidity.

Well, the same theory applies to your new pot sprouts.

When your seeds have germinated or sprouted or cracked, or been added to the tank, then about a week later, (much sooner if you pre-soaked the seeds) you will have your first node of leaves. A "node of leaves" means two opposing leaves, one directly across from the other. Do not count those first seen round leaves, called seed leaves or cotyledons.
When the second node first appears, meaning the 3rd nd 4th leaf, it is time to introduce the GROW and MICRO Nutes, also called the VEGGING and MICR nutes.
If using the SH premeasured nutes, add 1/4 packet or 1/4 dose of nutes (Grow and Micro nutes) to a gallon of water, pH adjust that one gallon and add it to the tank. As I said, new born babies are born hungry, but not ready for a full meal deal.

If you are using other brands of nutrients follow thier directions or use 1/4 recommended dose.

Once a day, every day, you check the water level and pH. It will be 2, maybe 3 weeks before they start drinking a half gallon a day that needs to be replaced.

As they grow, about every other day to every 2 days during the second week, you add another 1/4 packet, until you have used a full dose or full packet of nutes.

I use 1/4 dose when I see the 3rd and 4th leaf appear, no matter how small they are. (Again not counting the round seed leaves called cotyledons)

After the first 14 days, drain out 5 gallons, and add one gallon at a time, that is pH balanced, adding 5 gallons back. In the 5th gallon, add one full packet of GROW and MICRO nutes, shake and stir it good, before adding it.

After approaching 3 weeks, they will start drinking one half gallon a day. Around the 4th to 5th week, they will be drinking a full gallon a day.

Every 7 to ten days, you DRAIN AND REPLINISH. I prefer every 7 days to give the roots that much needed air bath that they love. If I find extra time, I do it every 4 days, but I put the drained water back in the tank on that EXTRA Drain.

FEEDING IF YOU DO NOT HAVE A PPM METER.
You will daily add one gallon of pH water TO REPLACE THE ONE GALLON MISSING. (Or 1/2 gallon daily earlier in the grow, clsoe to the 3rd or 4th week) If the water in the tank tests a pH of 7.0 (too high for example) and you know you want it lower, make one gallon of 5.0 water, and it will make the tank about 6.0 or in that neighborhood. ALSO, in that one gallon of water added daily, add 1/6 packet or dose of new nutes. One gallon or 1/6 of the tank was drank or absorbed, so you need to replace 1 gallon of water and 1/6 of the nutes.

Or in other words, if they drank 1/6 of the tank's water, they ate 1/6 of the nutes, so you need to replace that 1/6 that was consumed.
IF the grow area is VERY HOT, add back a little less than 1/6 nutes, the plant is just drinking and needing lots of water.
If the grow room is cool, or NOT VERY HOT, use the full 1/6 dose.


DRAINING AND REPLINISHING

First two grows I did, I syphoned the water out into a 5 gallon bucket with an Aquarium syphon hose. That was really a chore!

Then I learned to prop the lid open about three or 4 inches, STILL LEAVING THE LID ON THE TANK, BUT PROPPED UP ON ONE END and I reach in and take the Irrigation Hub off of the pump. I jsut lift it up. Then with a 1/2 or 3/4 inch hose, I use my fist as a coupling, I sit my fist on the upward pump tube with the hose half way in my fist, on top of the pump, and let the pump.....pump the water out into a 5 gallon bucket. It works good for me.

AFTER I remvoe the pump, I still use it to draint he tank, by removing the filter and filter cover, and lowering the pump back in, from a corner of the tank.

You can also use a WET-VAC, to drain it.

Let me add here again, I can not emphasis enough, that Roots love the AIR BATH they get during a Drain and Replinish. This is a very important step. The more often you can do it, the faster the plants will grow.


Remember what I am telling you here.

Pot plants sprout with two round leaves, called
cotyledons . Do NOT count those as leaves, they are really the inside of the seed.
AFTER 2 full leaves appear and the 3rd nd 4th are starting to be seen, tiny as they are, use 1/4 dose of nutes.

When you start a new grow, and AFTER the seeds have sprouted, and you have done one feeding, you do a Drain and Replinish at 10 to 14 days, then every 7 to 10 days.

AFTER the first week, the water is still fresh, and you may have only added 1/4 packet of nutes or 1/4 dose of nutes to the tank at the end of the first week IF you saw two full leaves, besides those FIRST two round ones, the cotyledons .

During the 2nd week, you probably added 1/4 DOSE OF NUTES 2 more times 3 or 4 days apart.

AFTER 14 days from germination, you do the first DRAIN AND REPLINISH. Then, again, every 7 to ten days you DRAIN AND REPLINISH. I do a complete DRAIN AND REPLINISH weekly, every Saturday afternoon.
BUT, every Wednesday, half way through the week and if I have the extra time, I drain the tank into a bucket, pH test the bucket and adjust it, and then, after ten minutes of having an empty tank AND LETTING THE ROOTS GET AN AIR BATH, I add it right back to the tank. That way I did not use ANY EXTRA NUTES or too many nutes, but I did give the roots an air bath.
You will see a RAPID GROWTH SPURT the very next day.

Let me say this again.
IF you do not have a ppm meter...........
and you do a DRAIN and REPLINISH........Try to think in term of SIXTHS. You got 6 plants, and 6 gallons of water in the tank. AFTER ABOUT the first two weeks, you are going to come home from work one day and find the plants drank half a gallon of water, and need to add half a gallon of water back. Half a gallon is half a SIXTH, so add back half a sixth of a packet of nutes back and half gallon of pH adjusted water.

Later, AFTER about three or 4 weeks, you will check the plants and they will have drank one whole gallon of water in one day. ONE gallon is 1/6 of the tank's water, and if 1/6 of the water is gone, then 1/6 of the nutes are gone, so add back one gallon of pH adjusted water and 1/6 does of nutes.
AFTER 3 or 4 weeks, you will find they drank two gallons in one day. Then add two gallons of water, (1/3 of the tank's water) so also add 1/3 packet of nutes.


IF you got the drain plugs, (little black faucets for the tank) make sure you use some plumbers glue or teflon tape or they will leak. The problem with using the DRAIN PLUGS is most of us have to sit our tanks on the floor, making it very difficult to drain the tank that way.

I'm often asked do I drain it out 100%? NO, I don't everytime, IF they are healthy, I always leave about 1 inch of water or half a gallon. I'm too lazy to get it all, and it doesn't seem to matter.

IF THEY ARE SICK, THEN I DO DRAIN IT 100%.

I'm often asked do I clean the tank when I drain it?
No, I don't let it get dirty to start with. I do not use nutes that color the water or roots, until about the last few weeks, I do use some Liquid Karma the last 2 or 3 weeks as a catalyst IN VEG. But I still do not let trash or any thing foreign into the tank to have to clean it out.

The airstones can become slimey or snotty. The Water Pump can harbor trash. Either can cause pH problems, and if I am having a pH problem, I do clean the airstones and water pump, or remove or replace them.
 
Re: Roseman's Deep Water Culture Tutorial, SH Kit & DIY

Why do I get different advice from different Deep Water Culture Growers?

Because feeding babies is a difficult question to answer because Strains vary, the system you grow in makes a big difference, (Plain DWC, or Feeder Tubes, or DRIP or Aeropinic) ) and there are 3 inch tall CLONEs with three roots like hairs, and there are clones ten inches tall with roots like a mop. Also sprouts are often different sizes.
And the nutrients you use make a big difference.
I always try to give very safe advise that will not harm or kill your plants. If I told you to start clones on full nutes, and you have clones only two inches tall, with two hairs for roots, it wouLD kill them, and you'd be upset with me.
If I tell you to start 1/4 dose and increase it every two days, (to be safe) and you have clones 18 inches tall with roots like mops, then you're going to be starving them, and again, be upset with me.
You have to play it safe, expecially when giving advice or when money is involved for expensive seeds or expensive bought clones.
And you alone can determine whether to play it safe or whether to feed them the full meal deal.
 
Re: Roseman's Deep Water Culture Tutorial, SH Kit & DIY

If you use a ppm (TDS - EC) meter, you should first read and follow the instructions on your nutrients.

When I first start a new grow I start with 1/4 dose nutes to be safe. A day or two after I see the second node or 4th leaf, (two sets of two leaves, not counting those first two round leaves, the cotyledons), I introduce 1/4 strenght nutes. I increased them to half strenght, or a 2nd dose of 1/4 strenght nutes two days later when I see the 3rd node. I could safely do this with the Stealth Hydro Nutes. They are not too strong to cause damage at that strenght because they are designed for CFL grows. HID light users can and should use higher NPK nutes, or stronger strenght nutes.
A day or two later, I see a 4th node, and increase the strenght of the nutes again by adding another 1/4 dose, bringing me to FULL-Strenght nutes.
That is when I measure my ppm, but by then, the plants are eating the nutes too. My ppm is only 200 to 300 then, and 75 to 100 of that is my well water. (I am still in the Feeding Sprouts Stage) In no way am I saying that is what your ppm should be too. I am just telling you what mine normally is. I try for a weaker strenght feeding to make sure I do not burn them up and get nute burn. In past grows, I did use more nutes, strongers doses, more often. And consequently, I always get some nute burn, although I never killed any.

After the first two weeks pass, I do a Drain and Replenish. I add back a full dose of nutes and my ppm is 280 to 350, telling me my target ppm to stay at the same level during the late Sprout Stage or Early VEG or GROW cycle.
As I daily added a half of gallon of water, and a 1/12 packet of nutes, my ppm grows to 350 to 400, or bounces between 250 and 350 as they eat. (Before the feeding, it is 220 ppm, after the feeding it is up to 350)

By the time I am in my 3rd week, and they are drinking a full gallon of water a day, and I am adding back 1/6 dose of nutes, my ppm is between 360 to 440 daily. But that number is not important to me or you. What is important is tracking it, writing it down daily, to determine how much more nutes I should add or not add. Let me rephrase this.
Do not worry about the exact ppm number, or any number from a chart or from me and my grow. Instead watch, record, and track how it rises or falls from day to day. The differences between what you have in there on one day, and the readings you get the next day will tell you how much your plants are eating. Of course, you do this daily, at the same time of day.

And remember, just because a gallon of water is gone, does not mean they also ate 1/6 of the nutes. Maybe you had HIGH HEAT and they were very thirsty but not as hungry. They can drink he water and not eat the nutes.

First, determine the ppm of your water sourse. Say it is 100 ppm. Then fill the tank with the proper amount of water and a complete dose of nutes and read the ppm. Say it is 350 for example. If tomorrow a gallon of water is gone, and the ppm says higher than 350, or is still close to 350, then they did not eat and they do not need more nutes, they only need more water. Your reservoir's water and nute solution is more concentrated, telling you to add more water only to dilute the concentration.

If the ppm went down to say 250 from 350, and a gallon of water is gone, they need a gallon of water, plus enough additonal nutes to bring the ppm back up to 350. And that is the real purpose and use of a ppm meter, to determine that need and how much.

No one can tell you what your ppm should be PRECISELY OR EXACTLY. It will vary from garden to garden, to Different Sources of WATER, and vary from different nutrients too.

If your plants are very happy, and drinking and eating at the same level, then the ppm will remain the same daily.
If for example, 1/8 of the water is gone, and 1/8 the nutes are gone, then the concentration remains the same and the ppm will remain the same.

I would like to offer a ppm chart as a rule of thumb or ball park target ppm, but each grow or garden is going to be different.

These numbers are based on EC readings, .500 readings, TDS readings converted from EC or the common Hannah Chart:

Seedlings, Early Sprouts 100 to 250

Early Vegging 300 to 400

Full Vegetation 450 to 700

Early Blooming 750 to 950

Full Mature Blooms 1000 to 1600

(this excludes the ppm of your water)


PPM-EC-C.jpg


According to the chart, I am under feeding them in my examples, and my grow could handle a stronger dose of nutes. But I am playing it safe because I get tried of getting Nute Burn when I tried to step it up a notch.
 
Re: Roseman's Deep Water Culture Tutorial, SH Kit & DIY

Tell me more about Feeding IF I do not have a ppm meter.

Feeding Without a PPM Meter


I did half a dozen grows without a ppm ppm meter, enough that I do not rely on it now that I do have one. You have to just use common sense.
I often read "you need a 1200 ppm nutritonal solution
during VEG". Well, how does that 1200 ppm take into consideration what the ppm of my plain water is? If I have 7.6 pH water out of the faucet, and it is 100 ppm out of the faucet, and I add a half a teaspoon of pH Down and now it is 200 ppm, do I just add 1000 ppm of nutes to get to 1200 ppm? What if I use Distilled water that is 6.0 pH and 20 ppm, do I add 1180 ppm of nutes to get to the suggested 1200 ppm? And the person, book or chart that recommended the 1200 ppm has no idea what nutrients I am using to start with, whether they are high ppm chemical solids or low ppm liquid organics.
Again, you have to just use common sense.


When it is time to start the first feeding, you will see the seed germinate and show you the first two round leaves. Disregard them, and after you see 4 new leaves, start 1/4 dose of recommended nutes, for 6 small sprouts in the tank. After I see a total of 8 new leaves, I add 1/4 dose again. I want to be cautious not to get nute burn by over feeding. I wait two days and add a 3rd 1/4 dose, and wait two more day, (usually the 7th to 9th day, and add the last 1/4 dose, looking at plants that are little bushes about 4 inches tall.
AFTer 7 to ten days later, I Drain and Replenish with a full packet or full dose of nutes.
By then, they are drinking half a gallon a day, and EVERY OTHER DAY, I add 1/6 packet when I add a half gallon of water. Then, after two weeks, into the 4th week, I am seeing them drink a full gallon daily, and when I add a gallon back, I add 1/6 packet. I watch the tips and if I see any yellow tips on the upper 1/3 of the plant's leaves, (not the lower ones) I skip two days of nutes. I stay on the schedule of adding 1/6 every day to every other day, depending on if the six plants drink a full gallon. After about 5 weeks of VEG, I am adding 1/6 daily almost every day, but ocasionally skipping a day.

Then I start 12/12, the Flowering Cycle. I stay on VEG nutes for two days and start replacing them as they are eaten and drank with the BLOOM nutes, adding 1/6 packet daily. I strongly believe in a gradual change.

WHEN I remove 3 males, and only have 3 female plants remaining, I back off and reduce feedings. It is just common sense. 3 plants eat less and need less than 6 plants. (many growers argue with that theory, bu I go by it)
If and when I have 3 large plants, say over 18 inches tall, I can still feed a full packet. I adjust the nutes to the number of plants and size. After I have some larger plants, say over 24 to 26 inches tall, I might add a packet and 1/6 extra, and watch them closely. If I see yellow tips, I remove a gallon and replace it with plain water AND skip two days of feeding.
UNDERFEEDING is much better than OVER FEEDING.

AFTER A WHILE, YOU JUST GET A FEEL FOR IT, watching for those yellow tips. Again, it is better to under feed, than over feed.
IF you have some giants, like 3 Flowering, add a little extra and watch them closely. If you only have two plants, do not use a full packet. It is just common sense and getting a feel for it.
 
Re: Roseman's Deep Water Culture Tutorial, SH Kit & DIY

This is something, a simple tip, we all need to remember. It is not absolute gospel, but it is a good rule of thumb to go by.When you over feed a plant, the leaf tips curl downward or curl UNDER and YELLOW at the TIPS FIRST or RUST, or get SPOTTY, and eventually get crispy.
When a plant is HUNGRY and being under-fed, the leaf tips Curl UP and turn brown.


That just about almost completes the first two full weeks for the bucket and one tank, and one full week on the 2nd tank that I had to start all over, after I robbed it of sprouts for the other tank.

I am not going to discuss ppm and ppm meters here a lot, I do not beleive in letting the ppm meter boss me about my plants and grow. My ppm meter is just a guide to me. I've done several grows without it.

That completes my SET-UP, and I am ready to answer questions here and share the thread as my grow journal with anyone that visits.
I will be adding info on growing and speeding up the grow, increasing trichs, problem solving, etc and sharing my tips and advice.
Please feel free to ask me what is not already answered here.
Please do not hi-jack this thread and attempt to change it into a chat room. If you do not know how to start a thread of your own, or post pics in YOUR grow journal, then ask me.

I hope this thread helps all the new growers just starting out.
 
Re: Roseman's Deep Water Culture Tutorial, SH Kit & DIY

What about feeding clones?

Feeding babies is a difficult question to answer because Strains vary, the system you grow in makes a big difference, (Plain DWC, or Feeder Tubes, or DRIP or Aeropinic) ) and there are 3 inch tall CLONEs with three roots like hairs, and there are clones ten inches tall with roots like a mop.
And the nutrients you use make a big difference.
I always try to give very safe advise that will not harm or kill your plants. If I told you to start clones on full nutes, and you have clones only two inches tall, with two hairs for roots, it woudl kill them, and you'd be upset with me.
If I tell you to start 1/4 dose and increase it every two days, (to be safe) and you have clones 18 inches tall with roots like mops, then you're going to be starving them, and again, be upset with me.
You have to play it safe, expecially when giving advice or when money is involved for expensive seeds or expensive bought clones.
And you alone can determine whether to play it safe or whether to feed them the full meal deal.

I urge you to follow the Instructions on your nutes, for clones, or just start slow and gradually.
 
Re: Roseman's Deep Water Culture Tutorial, SH Kit & DIY

Your best friend MostlyCrazy appears to be an expert and he told me something different about feedings. Then I asked PurpDaddy, and he told me something different.


When giving advice, all of us prefer to play it safe. MC, PurpDaddy, and I do not want to advise you, and the plants die from us giving bad advice, so we play it safe.
MC and Purp use a lot stronger nutes than I use. The SH pre-packaged nutes are made for CFL growing and are a little milder in strenght than most growers use.
As a rule of thumb, for all purpose growing, for any nutes in any system, wait until you see 4 full leaves, although they might be 1/8 inch long, not counting those first two round leaves, and when you have 4 full leaves, use 1/4 dose of nutes.

I have two tanks, one is one week ahead of the other one. One tank has 6 plants two weeks old, with 6 leaves on 5 of the 6 plants. In that tank is one runt. I took a big chance of killing that runt, by using full strenght nutes in it for the other 5 plants. I, nor MC, nor Purp or anyone wants to advise you to take a chance of killing a baby plant.

In my 2nd tank, i have 5 plants with 2 full leaves, so I started 1/4 nute, again , taking a chance of killing the runt. I did not buy my seeds, I did not buy clones and if I kill one, well ca sara, ca sara. I'll start over.

I do not drive 55 mph, and I love to speed things up and I will take a chance often. Everyone else is not like me, thank God. I have promised myself on this grow NOT to overfeed. We'll see how I do.
 
Re: Roseman's Deep Water Culture Tutorial, SH Kit & DIY

Roseman, I have a plain DWC system, and no feeder tubes.

Lots of people grow in a plain DWC system successfully, by starting clones or sprouts with roots already present. Starting a seed in a DWC is not so easy, and YES you can water the cubes by hand frequently, like every two hours and it can survive. You can also make a simple DRIP system, but poking a hole in the bottom of a large plastic coke bottle and letting it drip out, or secure a tube in the hole, running to the grow cup.

There are lots of successful DWC growers here on this site, and they can better advise you.
 
Back
Top Bottom