

- Thread starter
- #241
Skybound
Well-Known Member
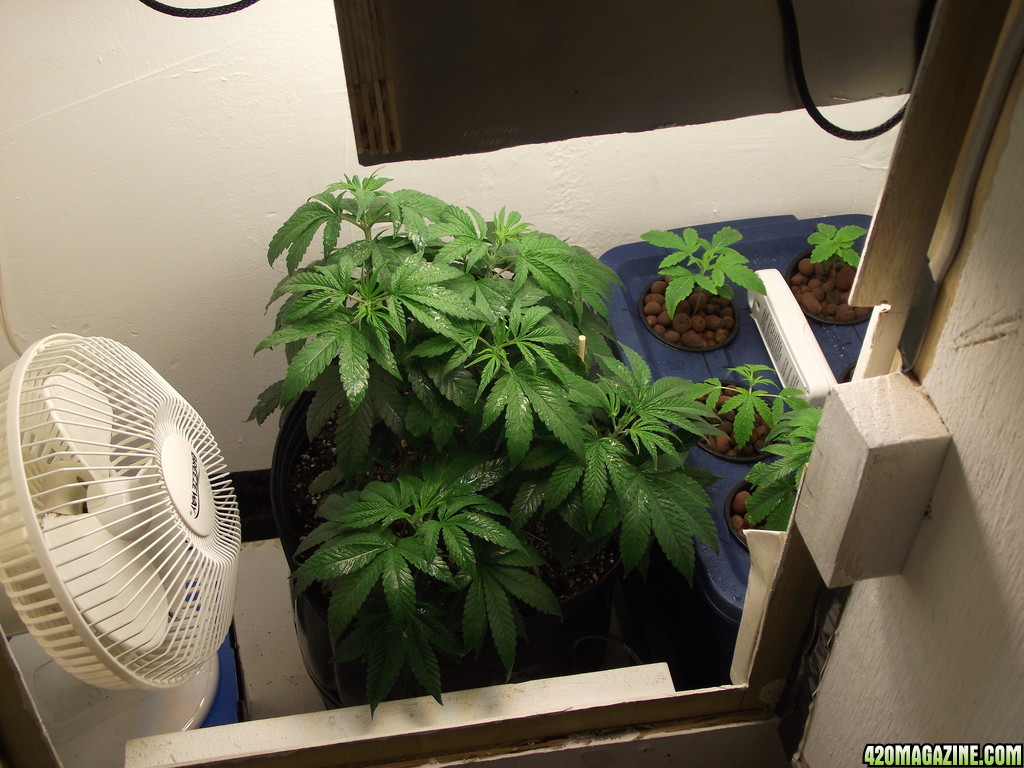
All righty then. gimme a few minutes to snap and upload.
How To Use Progressive Web App aka PWA On 420 Magazine Forum
Note: This feature may not be available in some browsers.

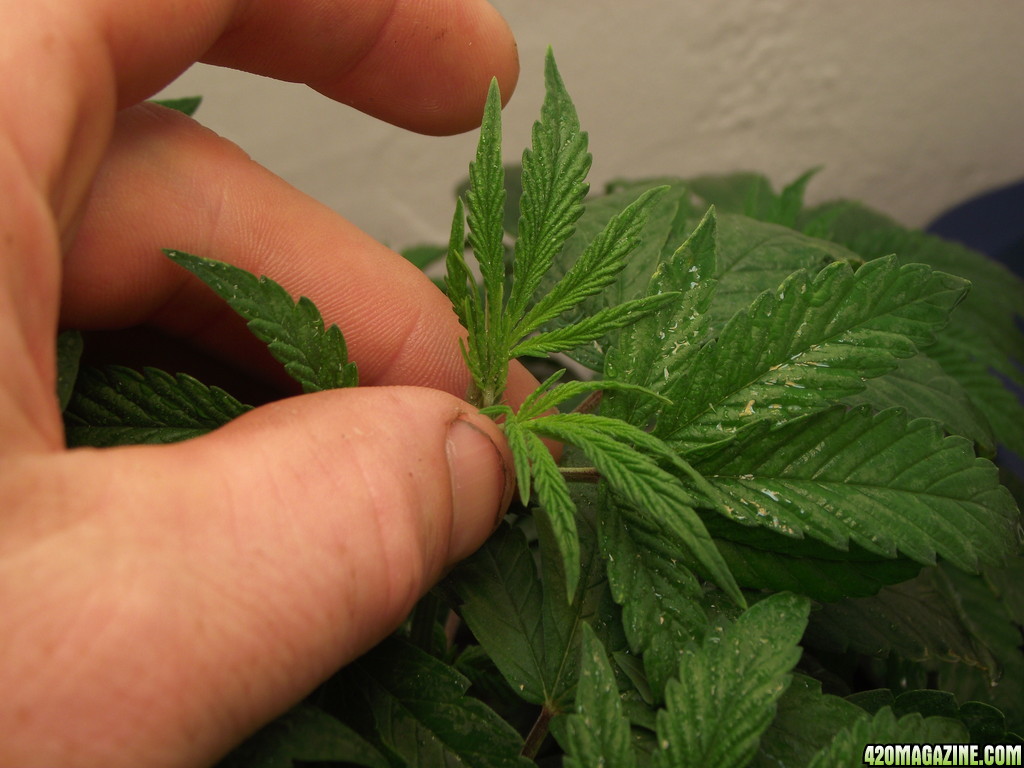

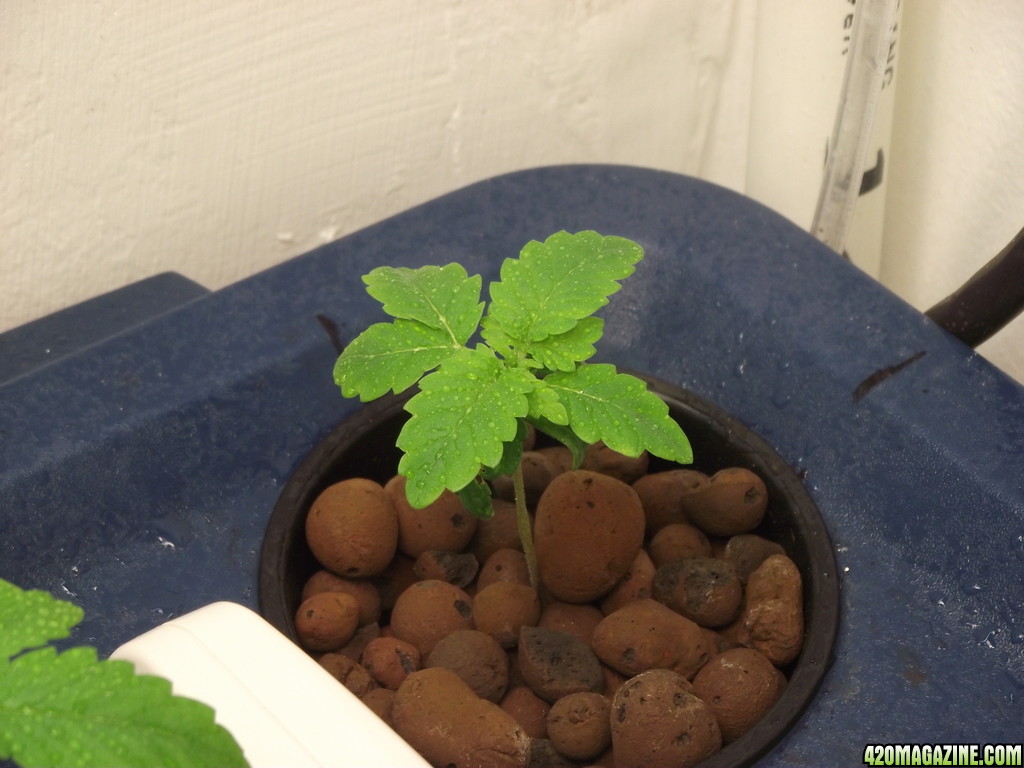
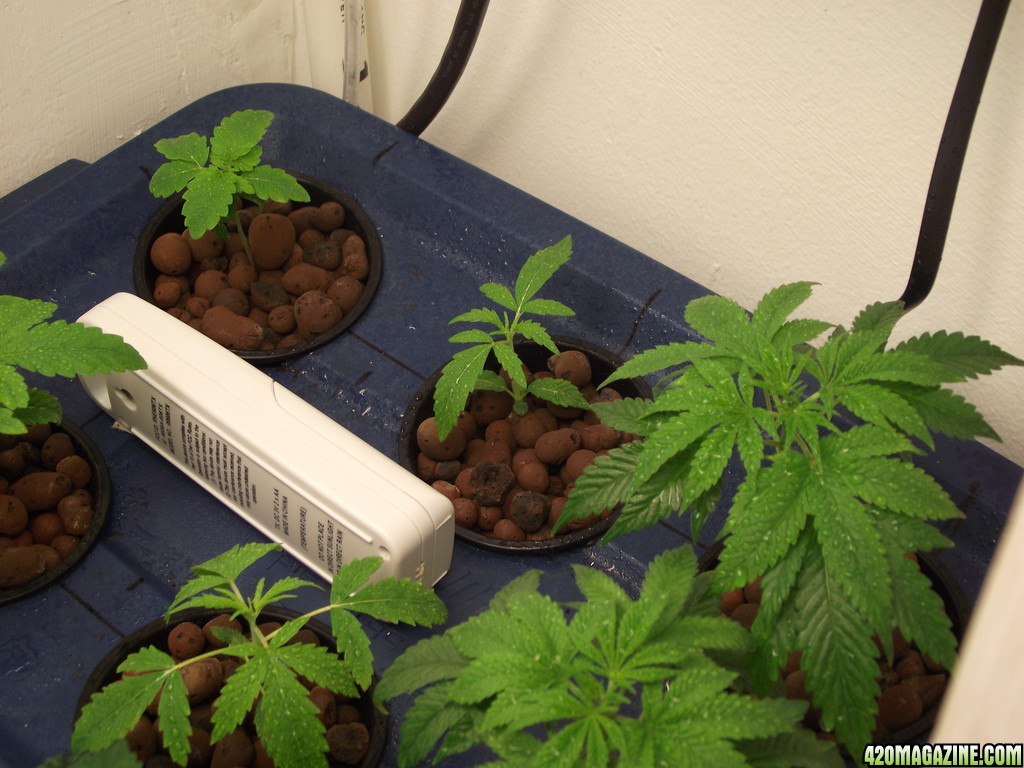
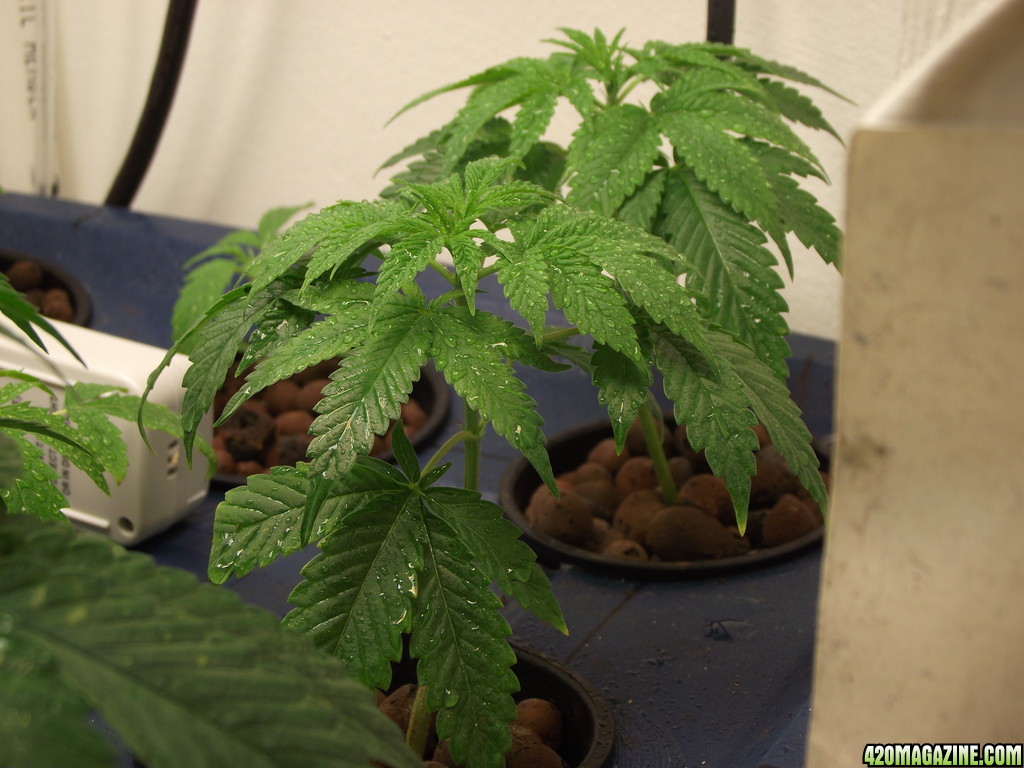
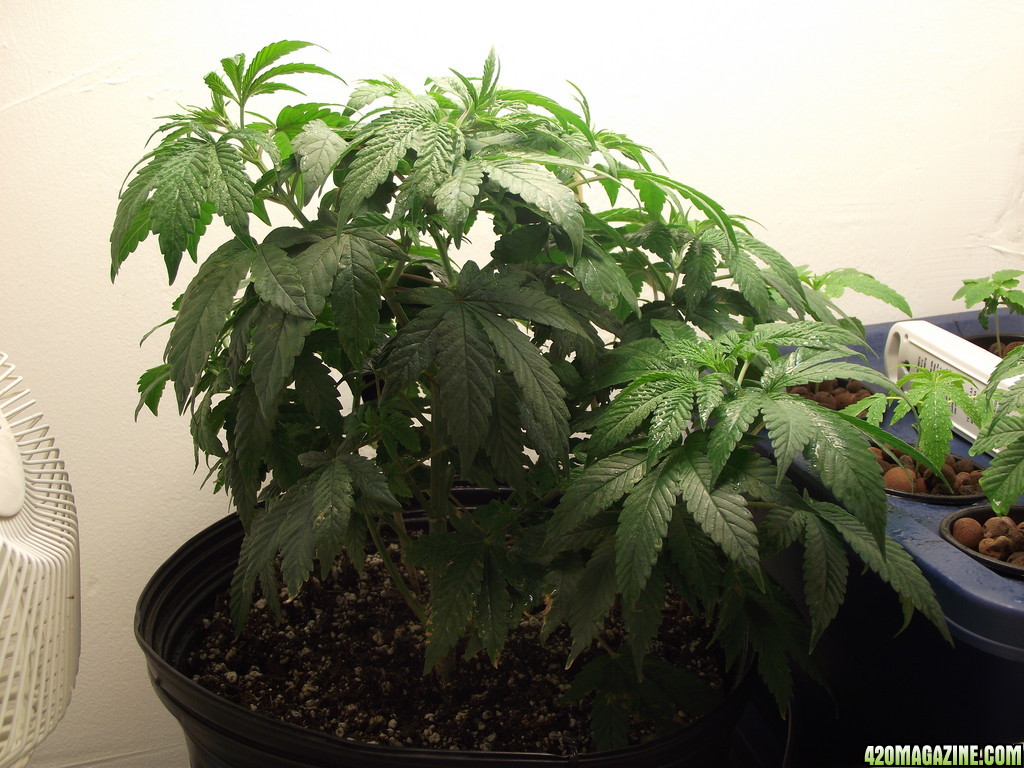


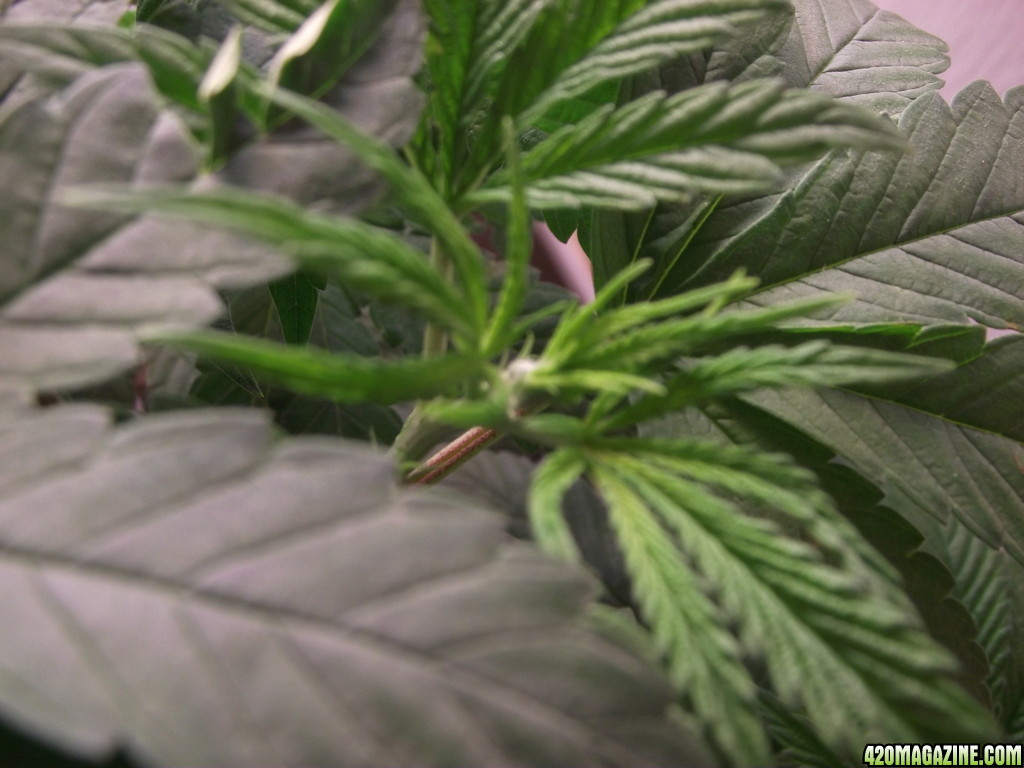
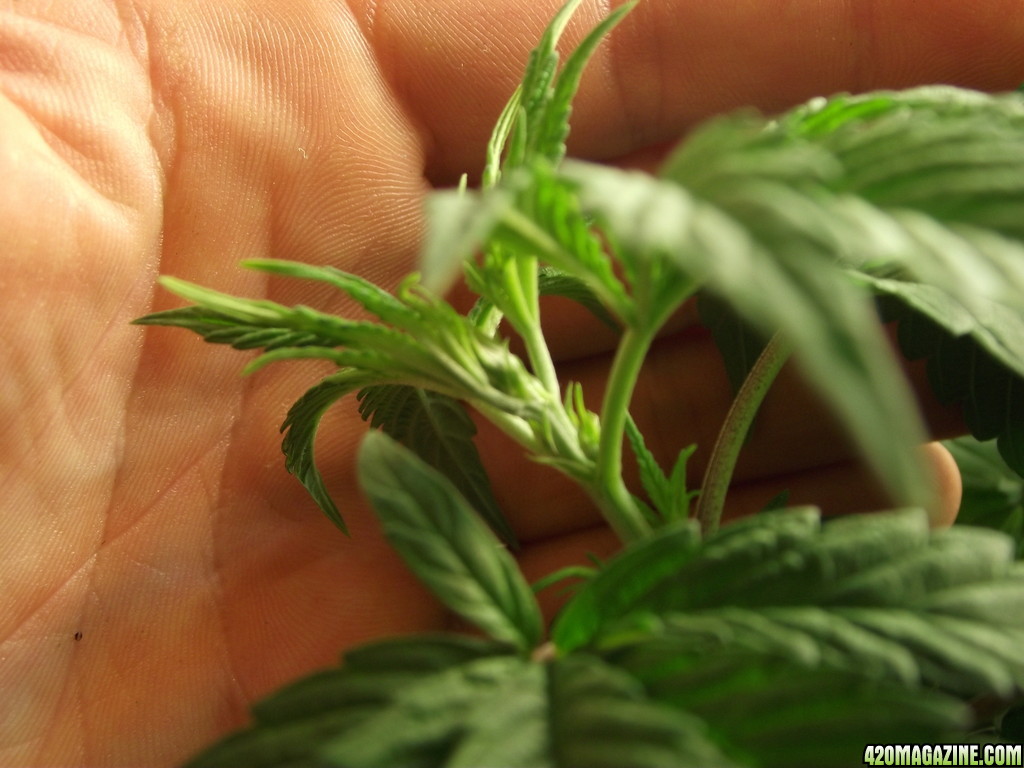
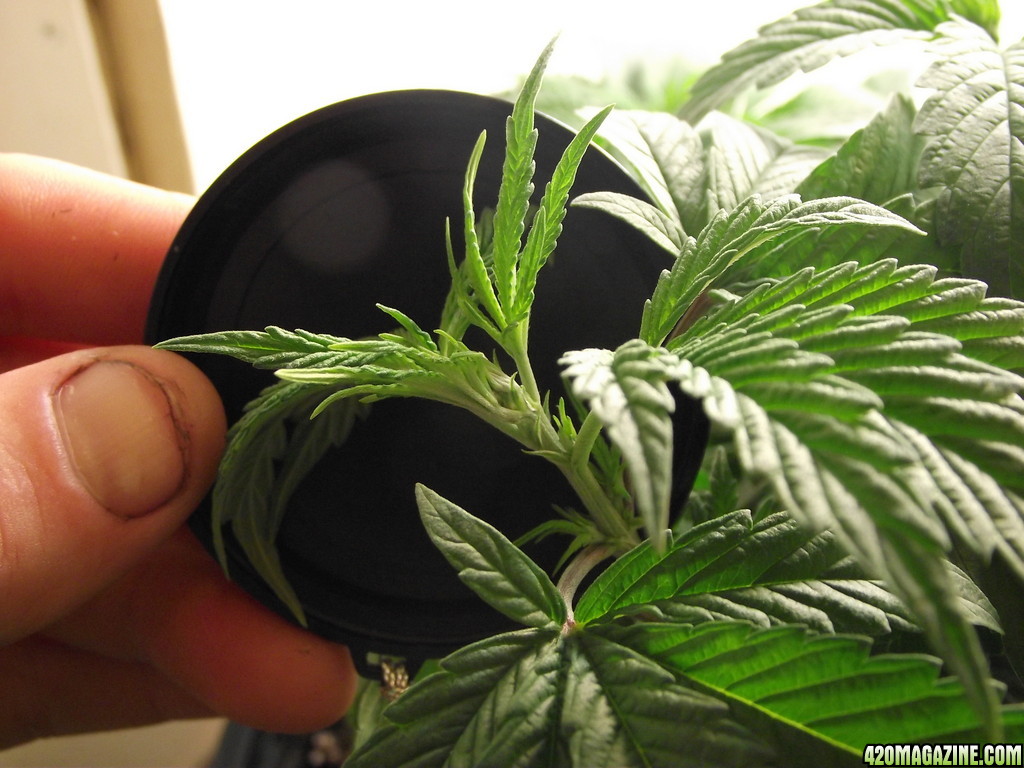
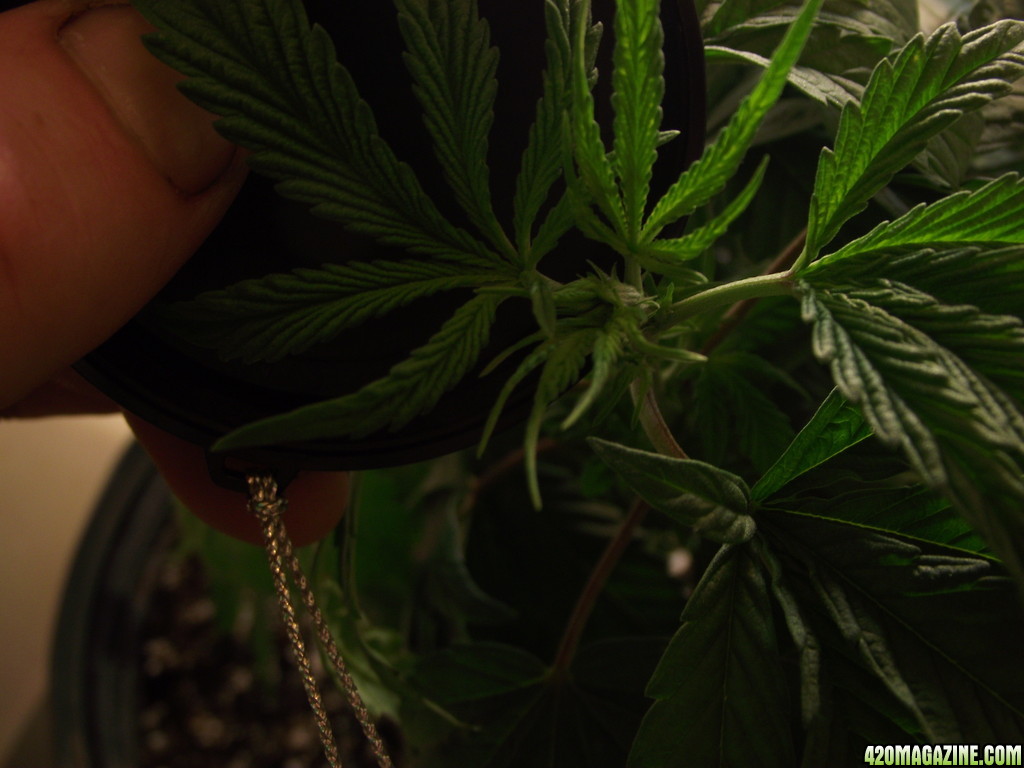
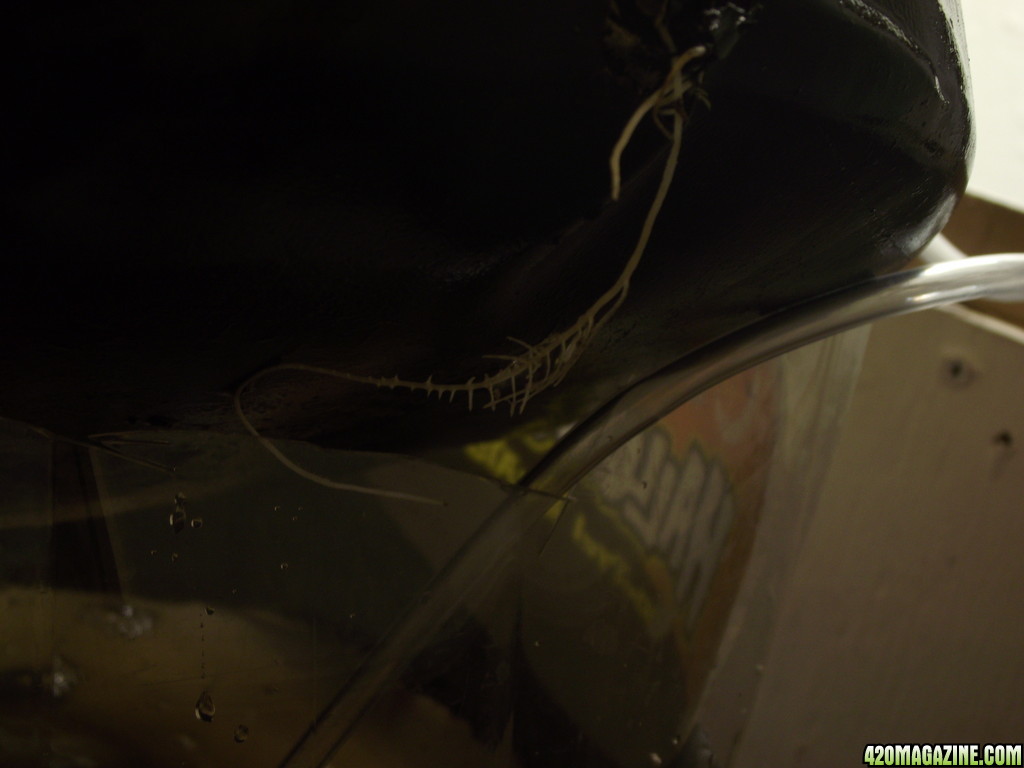


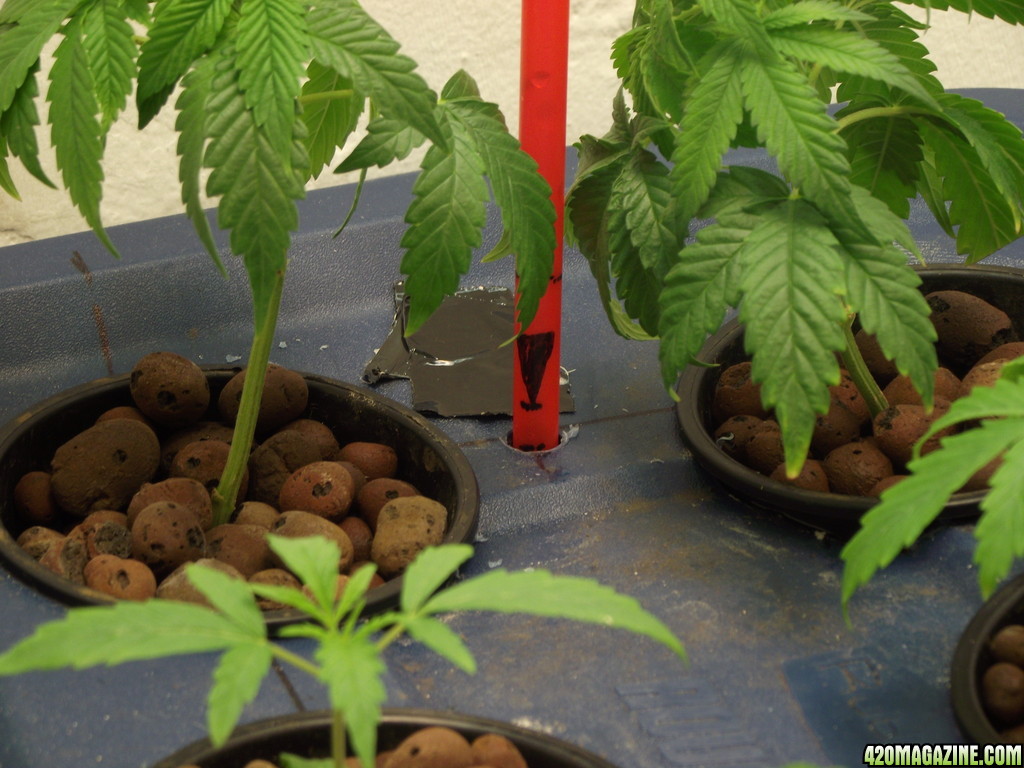
Any thoughts of what type this is?
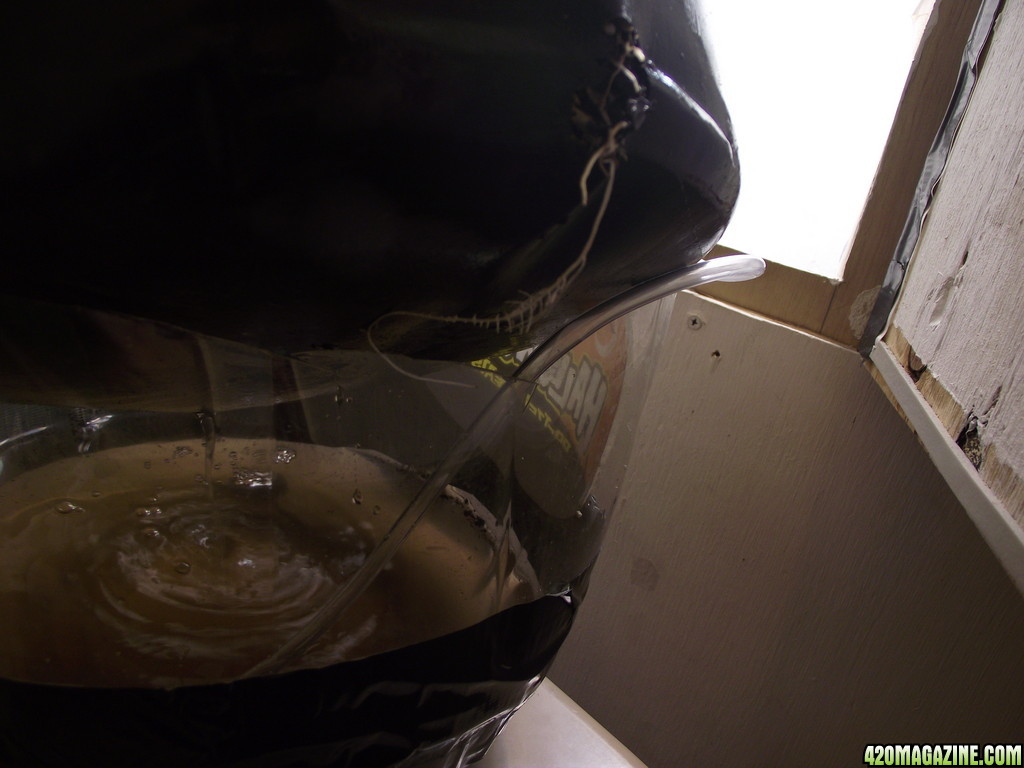
") I think your plants will be fine, maybe you can set up a reserve tank with a float, just in case? I am sure you will be on it now though. The plants look like they will bounce back to me. How do the roots look? With little h20 getting through the plants system the most ideal thing for it to do is to lower the angle of nutrient distribution to the rest of the plant. When you start to see yellowing of lower leaves and of new growth you should then maybe start thinking of the next strain of bean you are going to put into the soil!
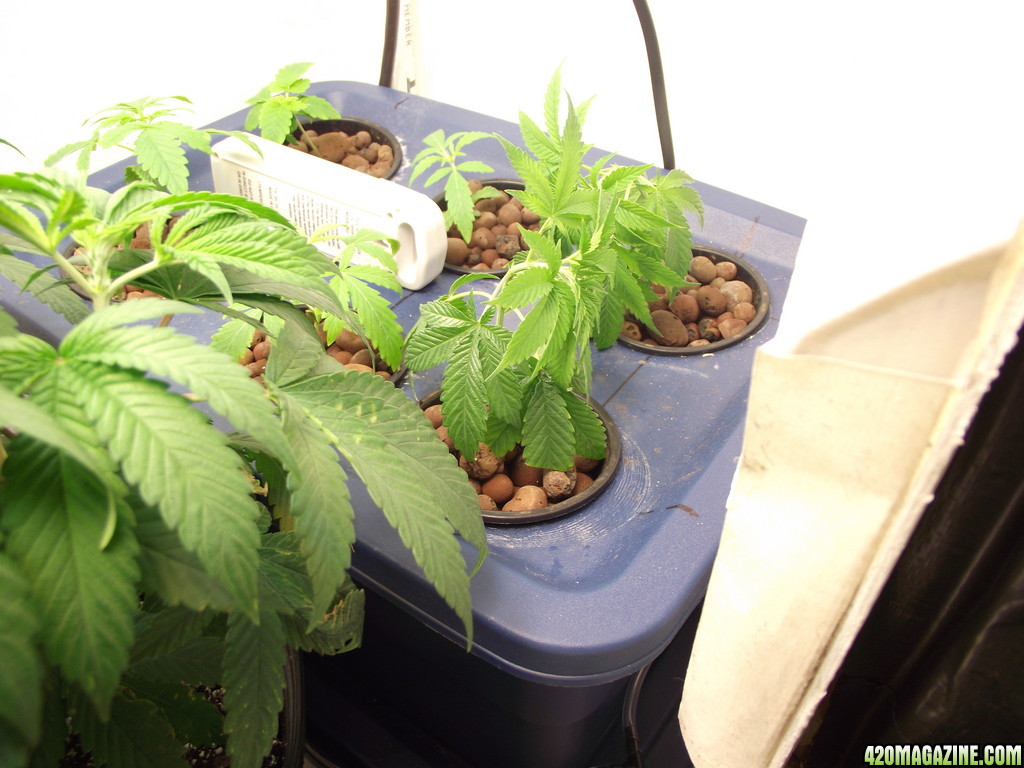
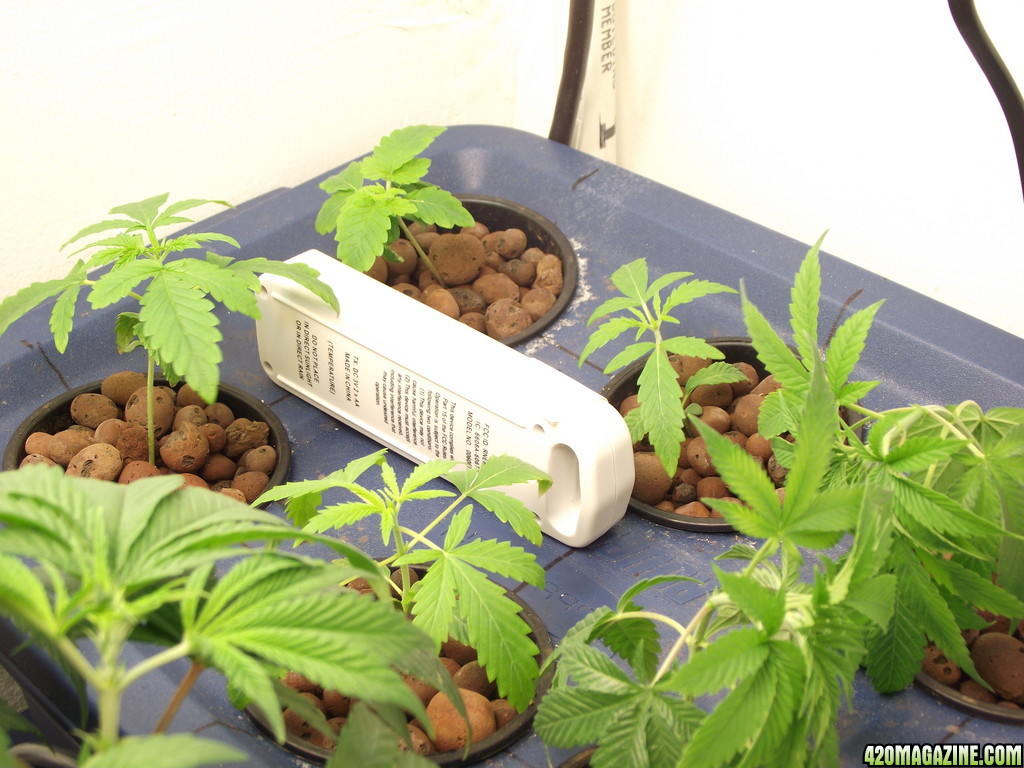
I think your plants will be fine, maybe you can set up a reserve tank with a float, just in case? I am sure you will be on it now though. The plants look like they will bounce back to me. How do the roots look? With little h20 getting through the plants system the most ideal thing for it to do is to lower the angle of nutrient distribution to the rest of the plant. When you start to see yellowing of lower leaves and of new growth you should then maybe start thinking of the next strain of bean you are going to put into the soil!") ) The first thing that comes to my mind when I see this plant is 'Duck's Foot'. And yes this is a strain of weed that has predominantly rounded, webbed leaves that resemble its name. HERE'S a link to a thread on 420 forums
) The first thing that comes to my mind when I see this plant is 'Duck's Foot'. And yes this is a strain of weed that has predominantly rounded, webbed leaves that resemble its name. HERE'S a link to a thread on 420 forums 


I'm sorry to hear about you having to shut down. That happened to me 3 times within 9 years before I finally got it to be stealth and totally hush. I was really hoping you would be able to showcase my secret method. Hey, lets not rule it out. You could always get yourself some new digs in the future to make that possible. I'm actually certain that you will. This is just a delay in your game.
You know what they say...when one door closes another one opens. Now you have the time to think up a new set-up (possibly at a new place if you want to do that in the future, this way you have less heads seeing what's cooking) and you will be all the more adept. Matter of fact, if you are able to go bigger than a closet next time around, I will see to it that you are a Supreme Lord Jedi Master of this craft. Here's what I could enable you to do:
1.)Multiple container DWC with no connected water circulation plumbing whatsoever yet a central multi-zone auto top off system that is made possible by a soon to be Patent Pending (yet not for sale anytime soon, I assure you, I will only give the fully hidden and encapsulated sensors and controllers to one person, you...at least for now) control module and auto top off level sensors. There is one sensor for each container and it is infinitely expandable with one additional interface module for each 36 containers and chaining additional 4-zone control modules. Imagine a multitude of containers without any connected circulation plumbing to get clogged with roots yet they are all topped off separately from one RO unit.
2.)No water pumps are ever used for circulation because they are not necessary.Only for filling during water change (even then it is not 100% necessary but thats another topic for another post) Water pumps heat the water much, much more watt-for-watt , for the same amount of oxygenation and surface agitation that an air pump would do just the same but with much less wattage.Using very large 8" diameter fish farm air stones will create vicious surface agitation (readxygenation) with very little heat induction, and plenty of bubbling for the cloner/seedling stage. 100 watts of air pump can create enough oxygenation for 12-20 gallon containers. If you only use a 4 site system, you could probably get away with a 25 watt pump! Even better still, make a small intake air hose (through a small carbon filter forced through a low cfm fan, pulling air from outside) to bring in cooler clean lint free air for the air pump that would cool your water during cold months and even preclude the need for a chiller during warm months. Best thing about those 8" stones is that they last forever if you valve them up properly and give them a good cleaning after each cycle. That's one 8 inch stone per container, not just one in an auxiliary res.Heck, my system doesn't use an aux res anyway. Those were never necessary to begin with.
3.) No need to have walking space around the plants. Even though it is perceived by many that you need some space to walk around flowering plants, I assure you that having empty unused footprint under the lights is the wrong way to go. With my method (this bit of advice is not dependent on the controller, yet the way that you put them into flowering) you simply put clones (or a seedling in a small peat pellet) in a small hole in a foam disc that sits in your bubble cloner (or just use the same DWC flowering container as a bubble cloner because the 8" air stone creates perfectly popping bubbles above the water surface when you adjust the valve properly) and when the vegging plant gets so big that it tips over (it will do that because you don't use media for support except for a small peat pellet if its a seedling and that doesn't give support in late veg anyway) that is when it is time to put it into flowering and you tie it down at just a few points along the main stem so that it remains at a full 90 degree tilt when in the flowering room. This enables you to veg longer without having to worry about a 3x stretch , just a moderate stretch upward, and you get the same benefits of LST without having to go back in the flowering room after Day 1. You can use the entire footprint of the room. No need to go back in for water changes either.
4.) Water changes are very fast and can also be few and far between. Each container has a 1-1/2" vacuum manifold inlet that goes down right to the very bottom of the container. You cut the inlets to the exact length needed for your particular container (I'll explain how the containers are provided later). If you are doing DWC properly and have at least a 20 gallon Rubbermaid Brute Tote (tote is good for low height requirements) or 20 gallon Rubbermaid Brute round trash can, then you will have at least 13-15 gallons of useable water inside the container even when the root ball is at its biggest. For this reason there is no need to do too many water changes. I will explain why this enables you to do fast , right down to the very bottom water changes with a wet vac, without ever harming roots (this was my method for 5 years mind you). The vac is set-up on a table above the container level(outside the room) with a valve in the drain hole for easy emptying via connected hose to a toilet drain or by fixed in place means. Way faster and more reliable than a water pump. No chance of getting roots tangled in an impeller cavity or clogged basket screens.
When you first set up your clones or seedlings in the container, you will not need to change water for another 10 days or even up to 3 weeks if you have a slow rooting variety ( mine always rooted within 8-12 days). Even though you will have small roots by the time you need to add nutes and adjust pH, they wont be so long that they get sucked in by the vac. Remember the manifold inlet stays at the bottom of the container far away from new roots anyway. By the time you need to do the second water change ( which will be at least 3 weeks away because of the 13:1 gallon/plant count ratio, the roots may very well be at the bottom of the container, but the root ball is going to be so massive that it doesn't matter if it gets caught at the inlet of the wet vac manifold. It will not stop the wet vac from doing its job. It will not harm the roots either. No more clogged pumps, no more clogged pipes. Did I mention that the separate vacuum outlets for each container are outside of the room? Out of the way of the plants. Although, if for some reason you want the thing inside, you can do that to. Everything is very easily adjustable.
4.) You provide the containers yourself. Think about it, why would somebody want to get a container delivered that they could easily pick up at home depot, lowes or the local hardware store. Your containers don't have any plumbing holes. No bulkheads, no uniseals. You simply drill 4 holes in the lid yourself to accommodate the RO hose, the level sensor, 3/4" air stem and the vacuum manifold inlet. I'm sure everybody that does this hobby has a drill. That shouldn't be a problem. Only you know how much headroom you have below your lights. It is best to optimize the amount of usable gallons by providing the containers that best suit your needs yourself.
5.) This system comes with an auto top off controller that is un-defeatable. Can't malfunction because the device is not being used for anything even close to its cycling potential. Float switches are unreliable so they are not part of this system. Ball cocks are even worse. I use a switch that is immune to any of the conditions you could throw at it. You could turn the water surface into a hellish wave pool by putting the full force of your air pump through one air stone and simultaneously set the de-watering vac to blow through the water column (instead of sucking) and still the level sensor does not get faked out, harmed or even give a shit. It does not degrade over time either. You and the next generation born the very day you start using the system will be long gone and the controller will still work. Doesn't get mucked up over time, it's that simple. It is not a sensitive electronic printed circuit board device. It is part and parcel of a reliable electromechanical relay switchboard that is fully encapsulated to be preserved for your entire life.
6.) Because of my system, for the first time in history, it is possible to do a multiple container DWC tree grow ( a la vertical lighting) with a central auto top off with no connected plumbing and a lazy susan pail caddy under each tree. This eliminates the problem that is encountered when 4 trees are grown in a diamond configuration surrounded by 5 vertically hung lights. That problem being one side of the plant facing the wall and not getting as much light as the other three sides of the tree. You can spin the trees around periodically to avoid a dead leaf side without upsetting the crucial re-circulation plumbing of a connected dwc tree grow. Although, you cannot leave the horizontal portion of the vacuum manifold connected while spinning it around (or the air pipe but it is very easily removable and put back in with less than a minute of twisting a thread here and a union there, not a hindrance whatsoever) but it's not an issue at all.
7.) There is an optional water change module that aids in automatic or semi-automatic water changes if that's what your into. Think about it. Even if you like to do this step manually ( which I like personally) wouldn't it be nice to use a hand-off-auto switch to fill each container (after quickly emptying with the wet vac) and have the filling pump stop automatically when the exact desired level is achieved? The same level/auto top off switch that establishes the auto top off level also stops the filling pump so that the auto top off level and water change filling level are exactly the same and in tune. The timer relays associated with the water change module are known to work with 120 volt DC circuits (the harshest control voltage there is) for upwards of 25 years in the harshest industrial treatment facilities. Think about how long it will last when your just using it for 24 and/or 120 volts AC (AC is much less taxing on equipment than DC).
8.) I don't provide any parts that you could get at the Hardware store much cheaper than what it would cost for me to buy it myself and pay shipping. That wouldn't make sense and it would be an insult to the abilities of the operator who is going to use the system. I simply provide you my unique technology (that cannot be provided by someone else) and you go down the road to the hardware store to pick up the stuff that can be provided by so many others.What kind of inventor would I be if I was trying to give you some 13 gallon kitchen size wastebaskets connected with pvc?? I give instruction on how to layout and custom build for your particular room. This is the only way you will be able retrofit the system to the exact full footprint of your room. Your available grow space should always be the determining factor in how the containers are laid out. This is the only way to get the most GPW harvests possible for your space. That is an inconvenient truth for manufacturers who sell systems with connected plumbing. All too often a compromise has to be made because the room will sometimes need to be re-structured according to the available system configurations they offer. There is no set configuration with my system and no plumbing to cause the great flood of 20XX. FLOODPROOF as long as you do the little bit of RO connections properly and to be honest I can't see how you could mess that up. Roots cannot cause a flood the way they can with a pre-manufactured connected system.
9.) Did I mention that with each container ,being its own separate reservoir,you are able to run as many different strains as you have containers, the same way that you would in an individual soil container garden? 7 week, 8 week, 9 week , 10 week, 11 or 12 etc.. Doesn't matter because each plant is a separate entity. No other multiple zone system has ever been able to achieve that without poking a hole into the side of a container which could (and sometimes does) cause a flood. None of those systems offer an included foolproof auto top off either.
In short... In the past there were pros and cons with every growing method. No cons here. So, are you in?
P.S. I also have a clever way of not making the lighting above the containers heat up the water. That's for another post.
P.P.S. I don't mean to irritate anybody by saying this but it actually is the truth. My system makes RDWC pointless, inefficient and obsolete. Not to say that RDWC is not a great producer. It certainly is. But it is the predecessor to this system. I've since made leaps and bounds above that method. I'm probably just drawing the ire of so many members right now and doing the opposite of what I intend by saying that but it's simply the truth. I just need someone to show it in action to prove it. If I show it, everybody will think I am biased and lying to support my claims. That's why I need a total stranger (like you) to test it in the open forum.