DIY CO2 Generator, by: jandre2k3

DIY CO2 Generator
by: jandre2k3

What You'll Need:
2 2Liter Bottles (Label removed and glue cleaned off)
Enough 1/4" Hose to run between the two bottles, and into the Flower Box and round the inside of your grow space.
1/4" Check Valve (I got mine from the aquarium section of my pet store near the air pumps)
1/4" Barb-type "T" coupling.
Thumb Tack
Caulk
15/64" drill bit
Drill
2 packets of Active Dry Yeast (4.5tsp)
4 TBSP sugar (1/4C)
1 Cup warm water (Brewer Bottle)
1L of cold water (Treatment Bottle)
Zip Ties


Preparation:
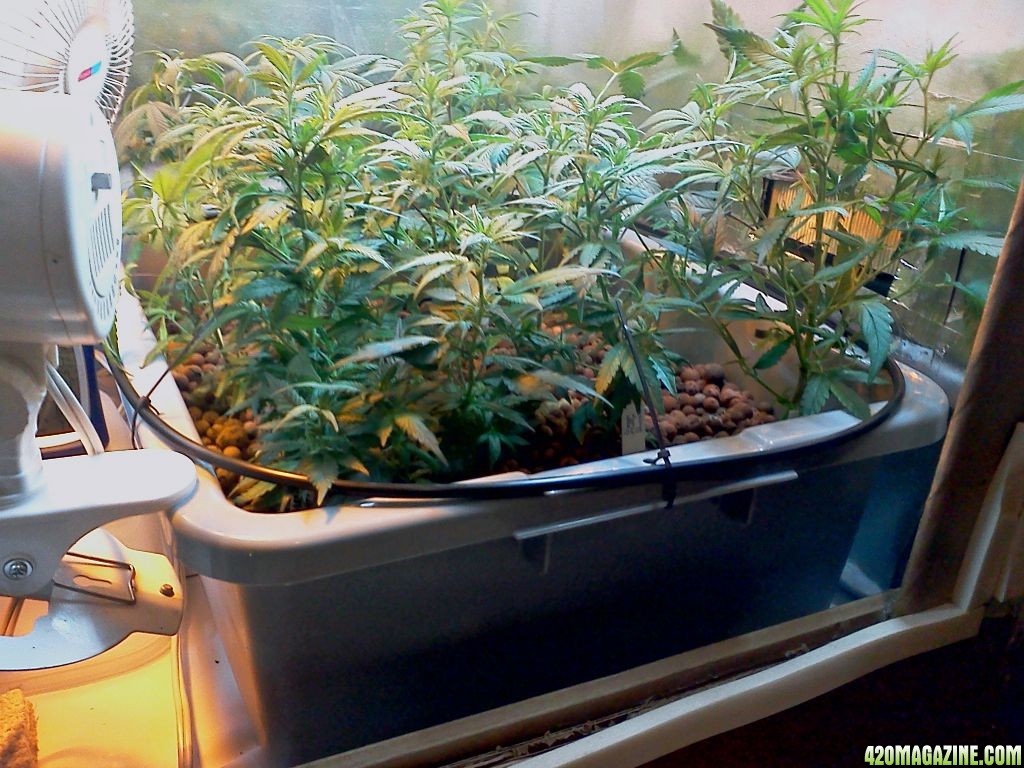
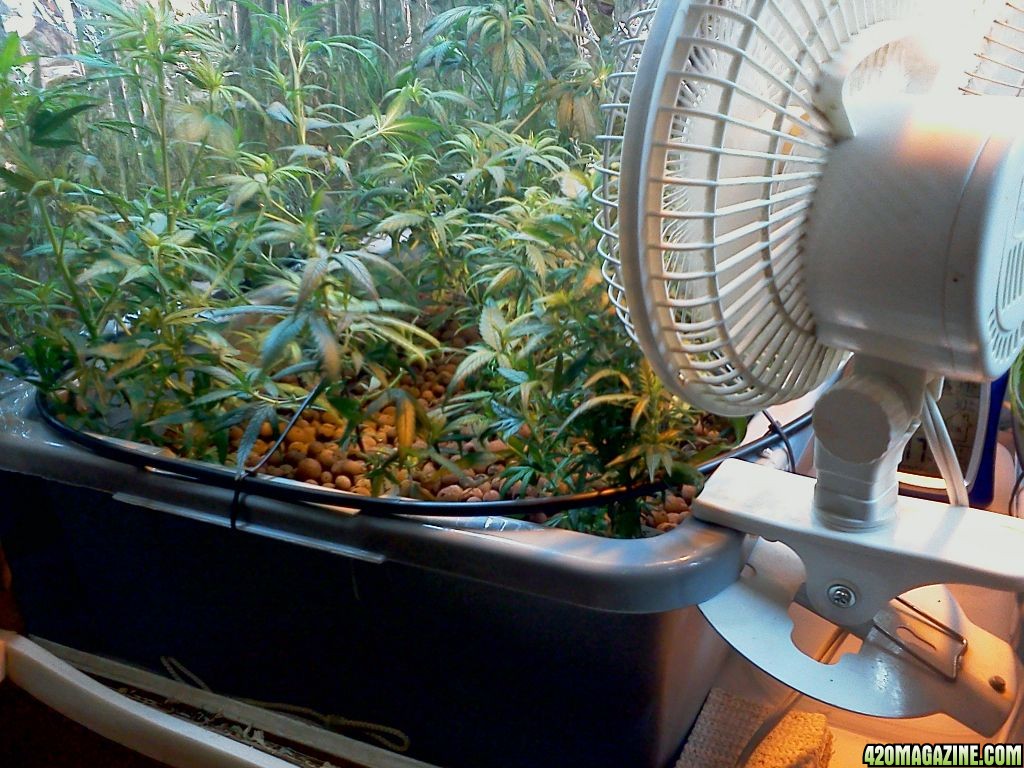
First measure out how much tubing you'll need INSIDE for your grow space. Measure around the inside walls of your grow space, or around the top of the bins your plants are in. (For this demonstration an Ebb&Flow system is used so the measurements were around the tops of the bins.) Just make sure there is enough tubing to go around the plants.

Measure out and cut that much 1/4" tubing.

Next, cut your length of tubing IN HALF making two equal lengths. This better ensures that the CO2 will reach the end of the tubing as the generator runs.

note: Pressure in the tubing will drop as it gets toward the end of the tubing. Running two lines from the main will increase the pressure in the shorter tubing a little bit to give a batter chance of running the escaping gas all the way to the end.

Next, measure out the space your 2 Liter pop bottles will be and cut enough tubing to run from the top of the first bottle through the cap, to the bottom inside the other bottle and cut a length so that your tubing makes a loop between the two.


Let's Get To Building!


The Reactor:

Drill 3 holes each 15/64":
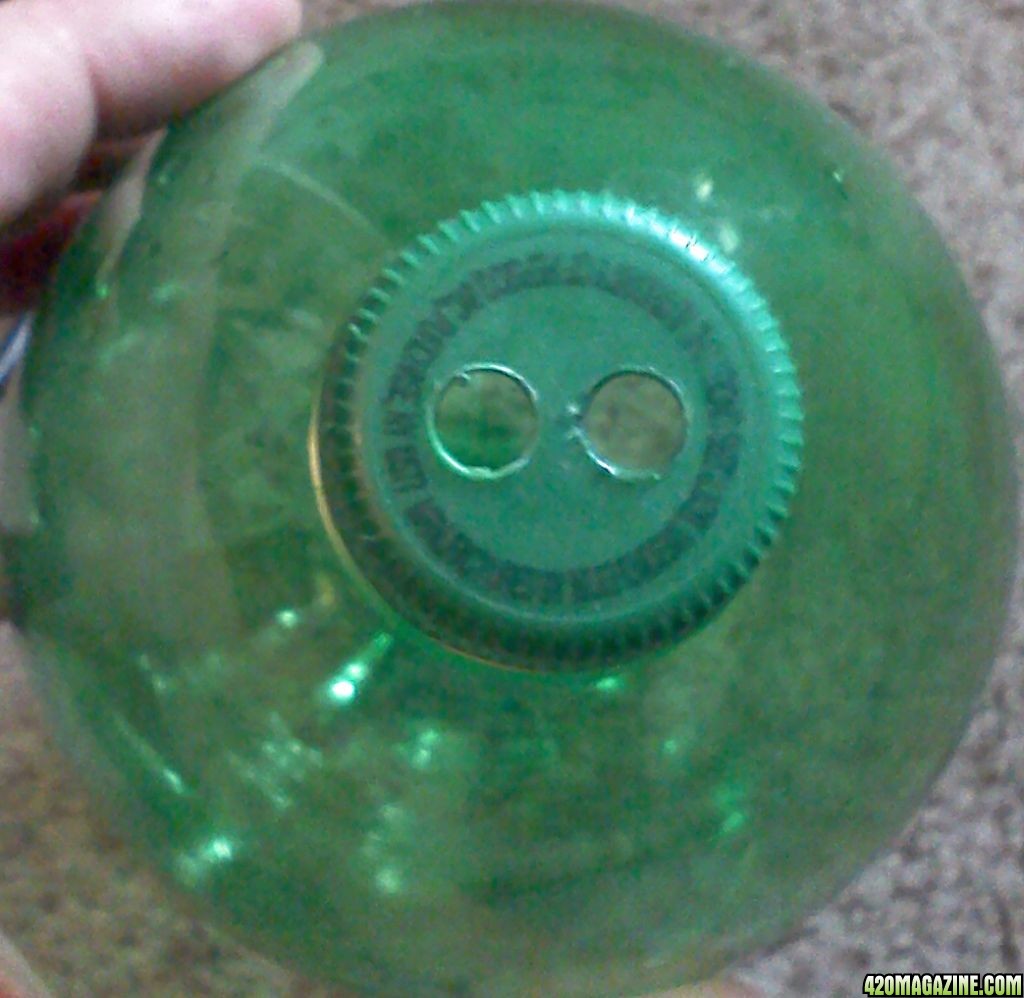
1 hole in the center of cap for the first bottle and 2 holes in the cap of the second bottle.

Note: We are drilling slightly smaller diameter holes than that of the the diameter of the tubing to make a tight seal around the tubing so no gas leaks around the holes in the cap.

(You can optionally caulk the hoses into place.)


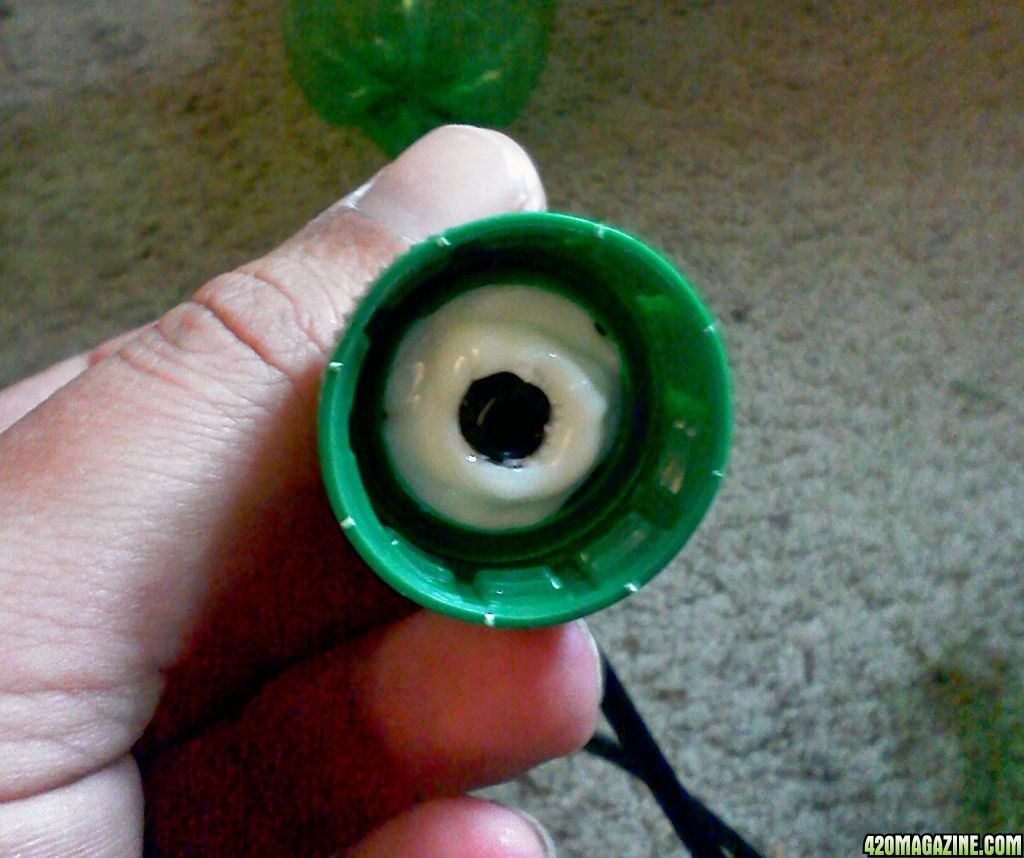
Next install the tubing for between the bottles into the first bottle and cut it at about 6".
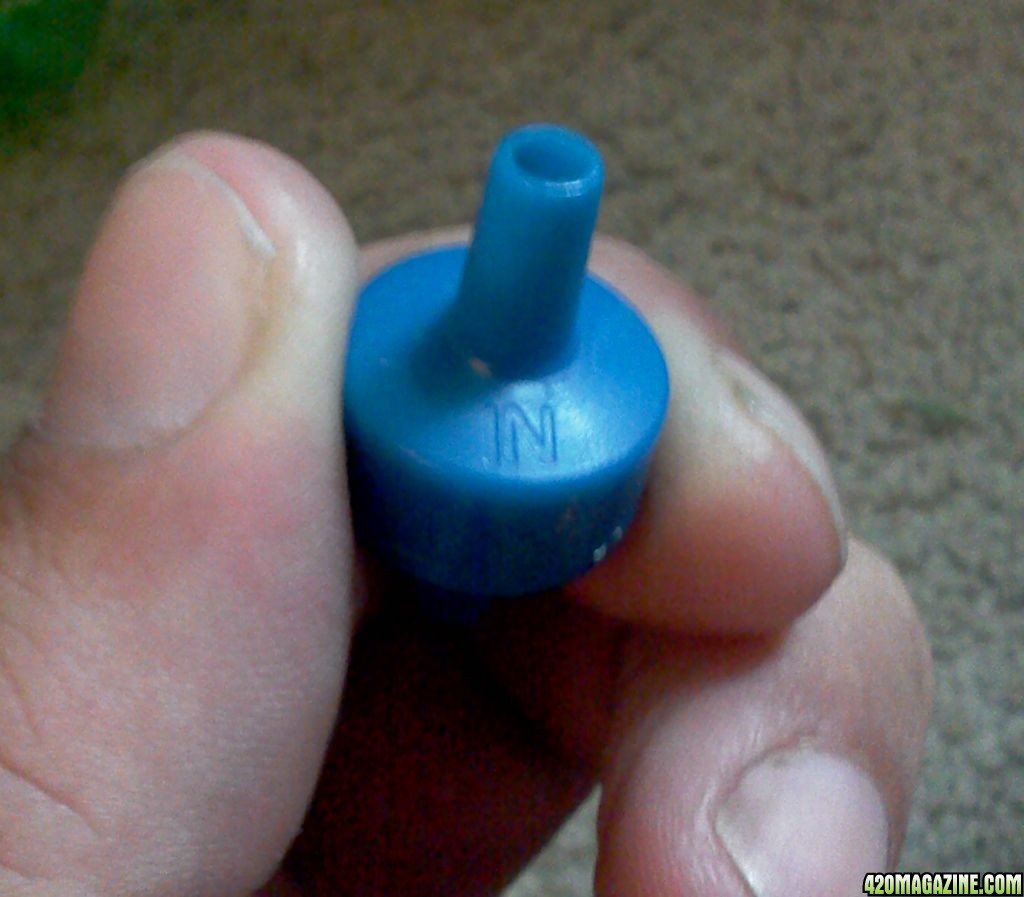
Get your check valve,


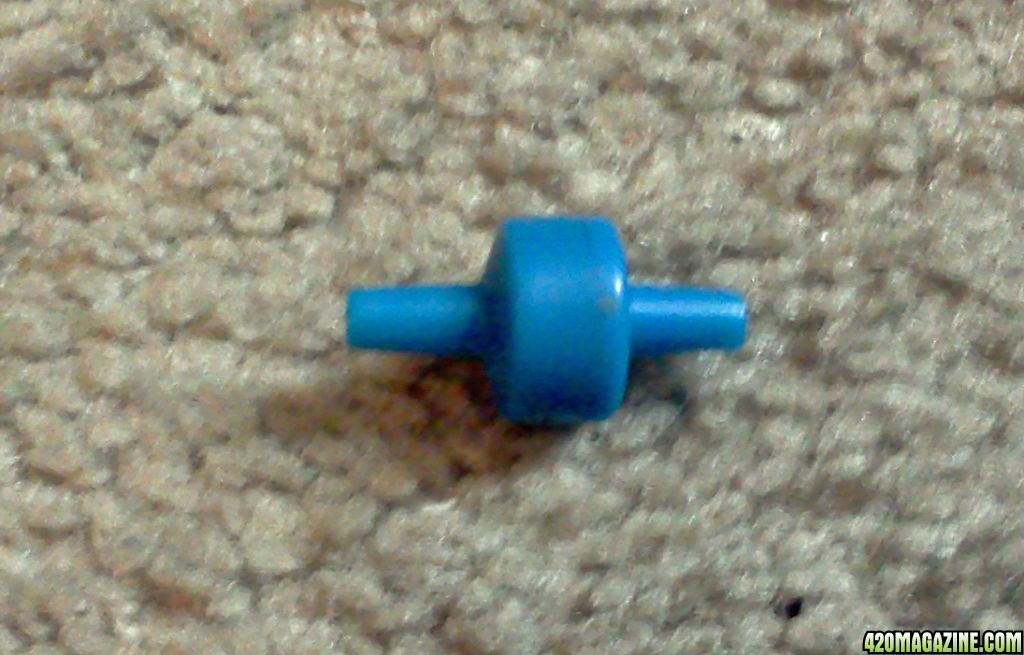
notice that one side says "IN":


and the other side says, "OUT"


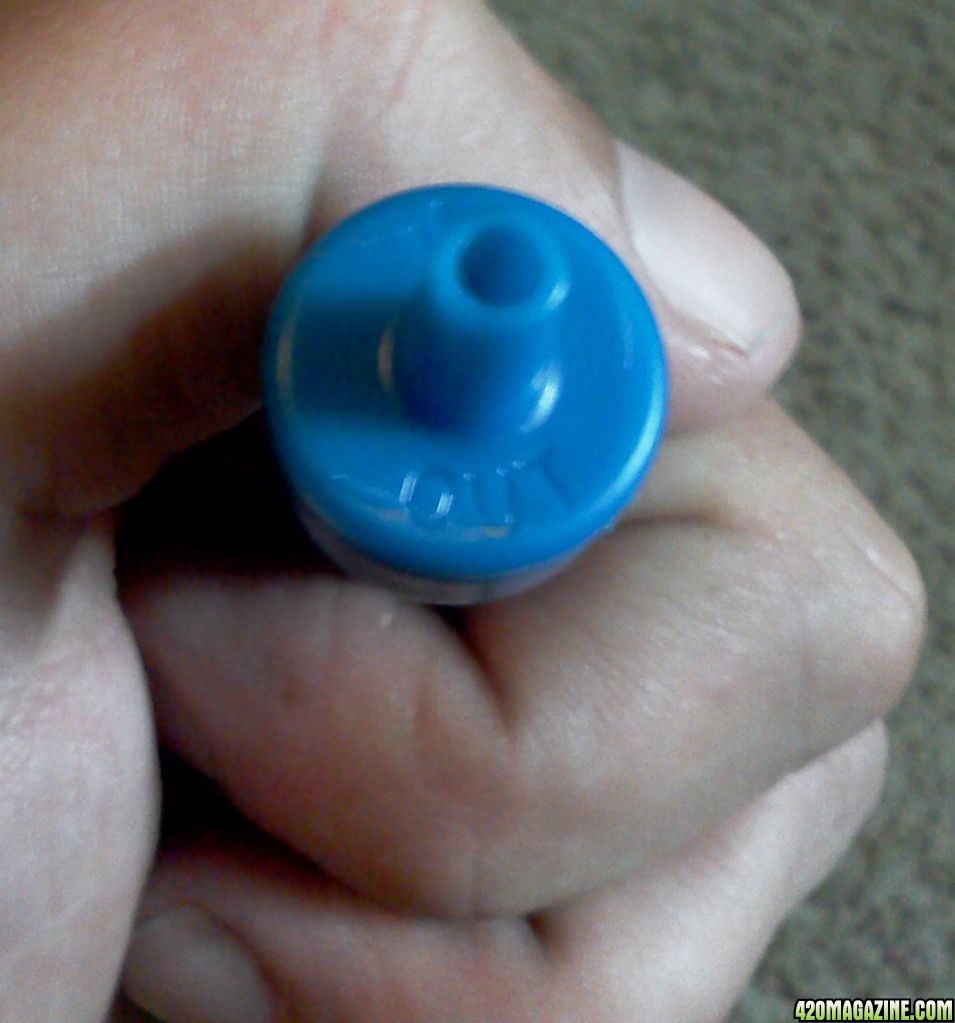
Place the "IN" side into the short tube you just cut off from the main length coming from your first bottle:


Then attach the rest of the tubing you just cut the the "OUT" side of the check valve.


This will ensure that no water flows back into your first bottle from the second.

Cut the other end of the tubing at an angle.


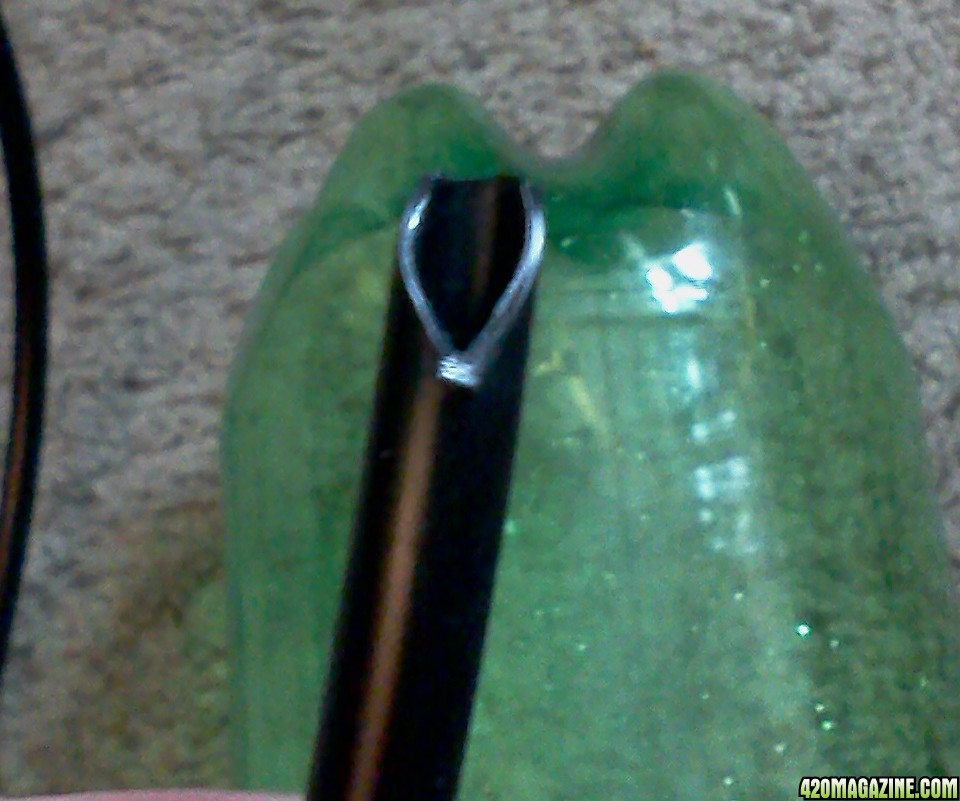
and insert it through one of the holes in the second bottle's cap all the way to the bottom.

The bias cut will make a larger opening to allow gas to escape easier, and also to keep the tube from being blocked if it is pushed all the way down and against the bottom of the bottle.


The Supply Hoses:

Now we need a way to get the CO2 to the plants.
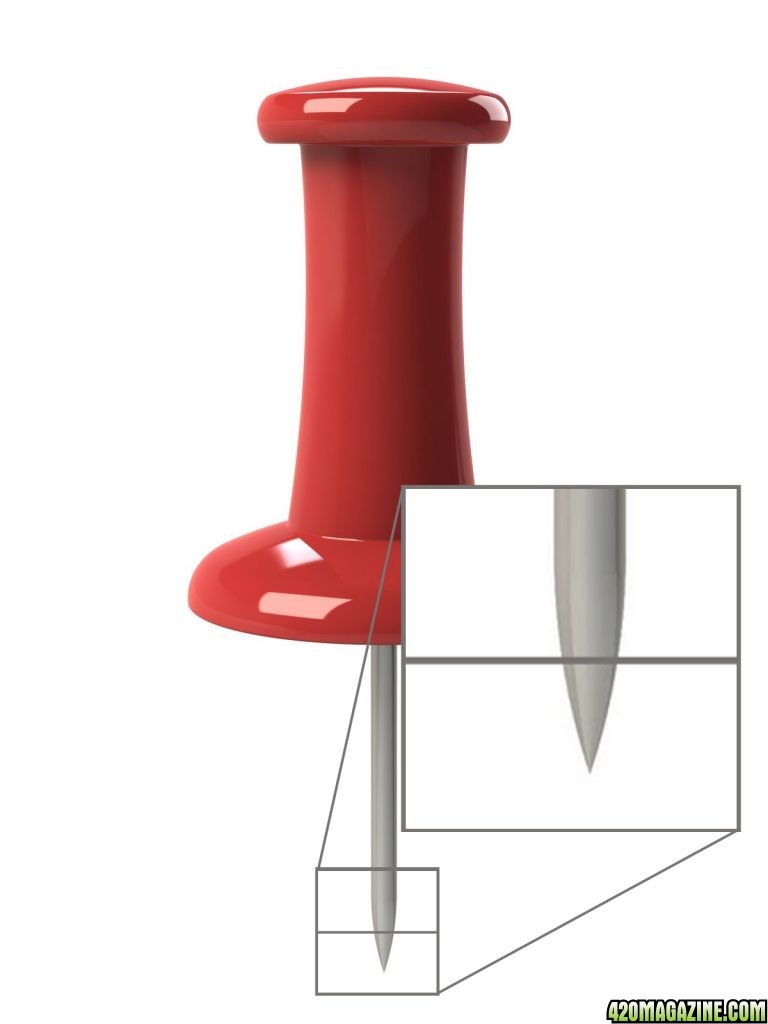
Take those hoses we cut earlier from the measurements around the grow space and use the thumb tack to put holes into the tubing at 6" intervals. DO NOT press the tack all the way through the tubing. We're aiming to make the smallest hole possible so make sure you only push the tack through just enough to make it through to the inside. Half way into the tubing just through, and only half way up the taper of the point. Try not to go all the way up to the shaft of the pin itself. Just to the line in the picture below.


Remember: we're going for the tiniest of holes so we have good gas pressure all the way through the lines...


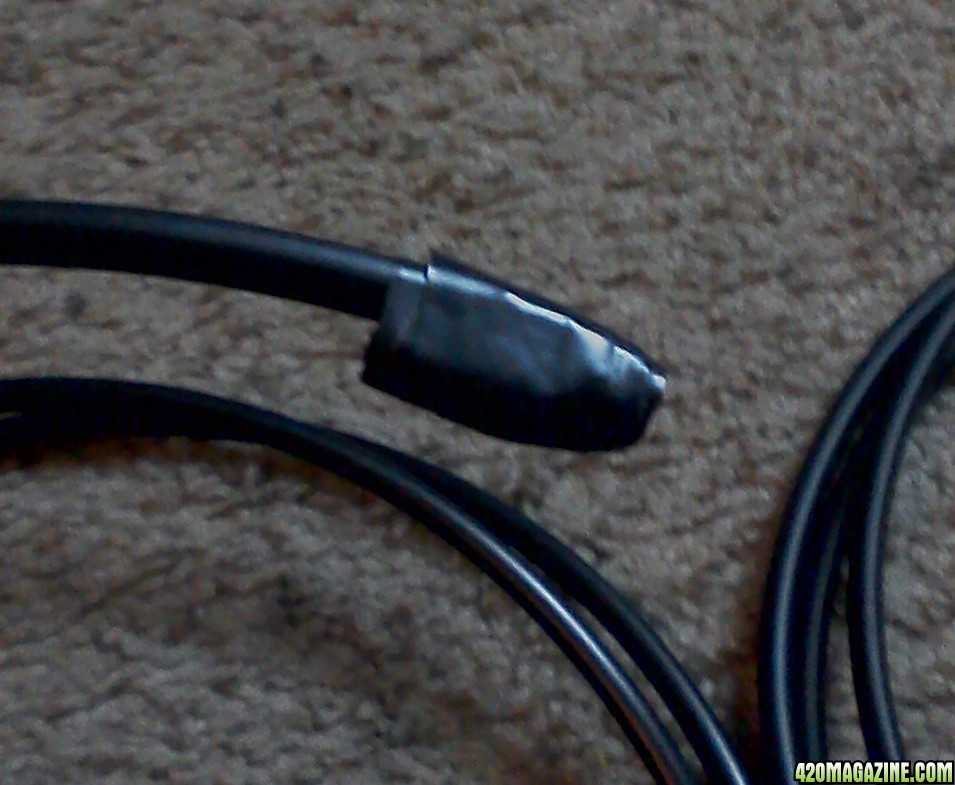
Now, fold the end of each tube and secure by wrapping several times with bare wire with no plastic (non-insulated type), and then with tape, to make sure it does not leak, or unfold.


Installation:

Now we're ready to put it all together!

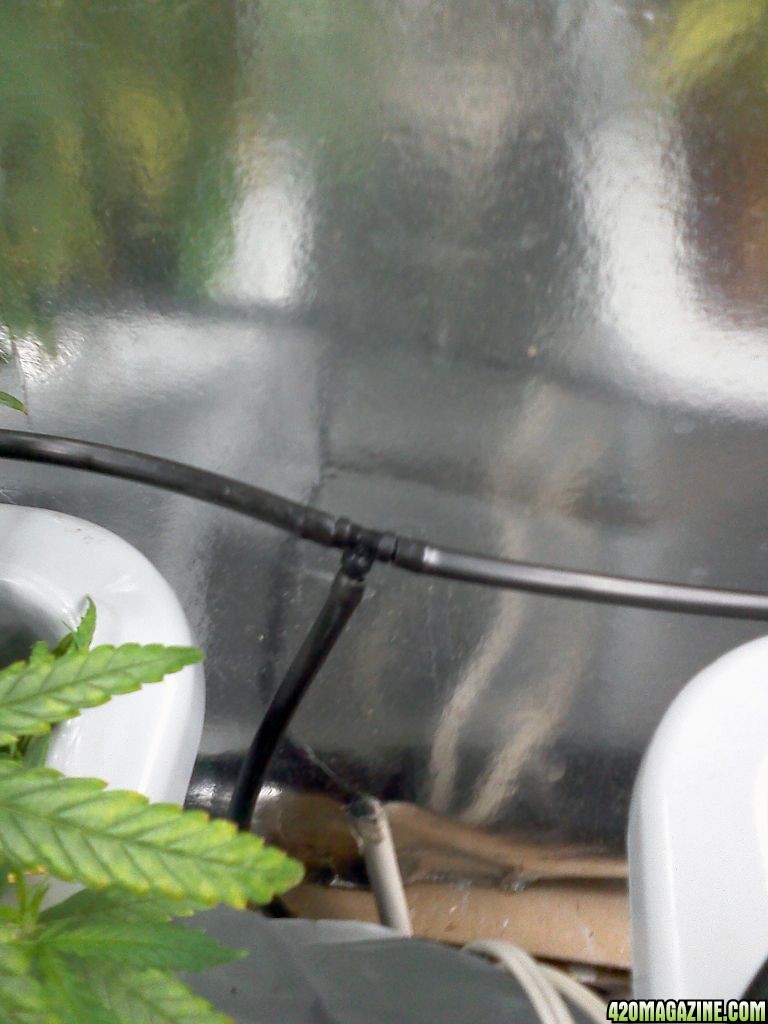
First install the lines into your Grow Space, and secure with zip ties.


Next, attach the lines to the "T" coupling.


Now run line into your grow room and attach the end to the "T".


Measure down to the location for the second bottle, leaving a loop and cut off. Remove the cap from the second bottle and attach to the looped end of the supply line we just dropped out of the grow space.

Installation COMPLETE!!
Now we need to set up the reactor and get it brewing.


Set-Up!

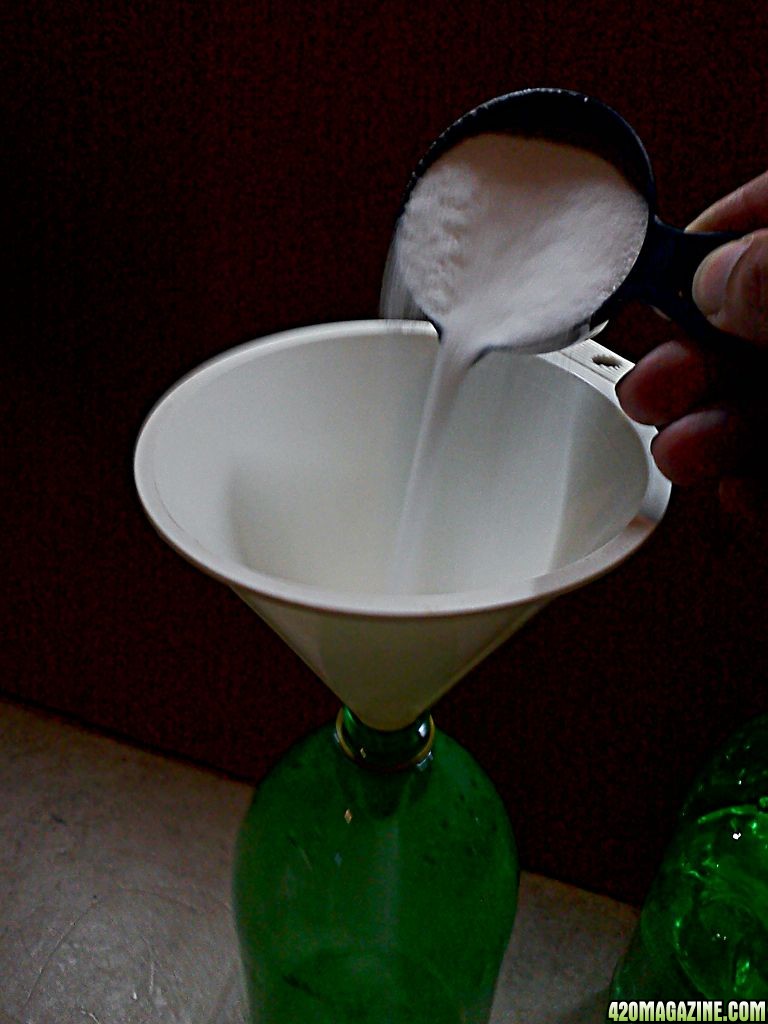
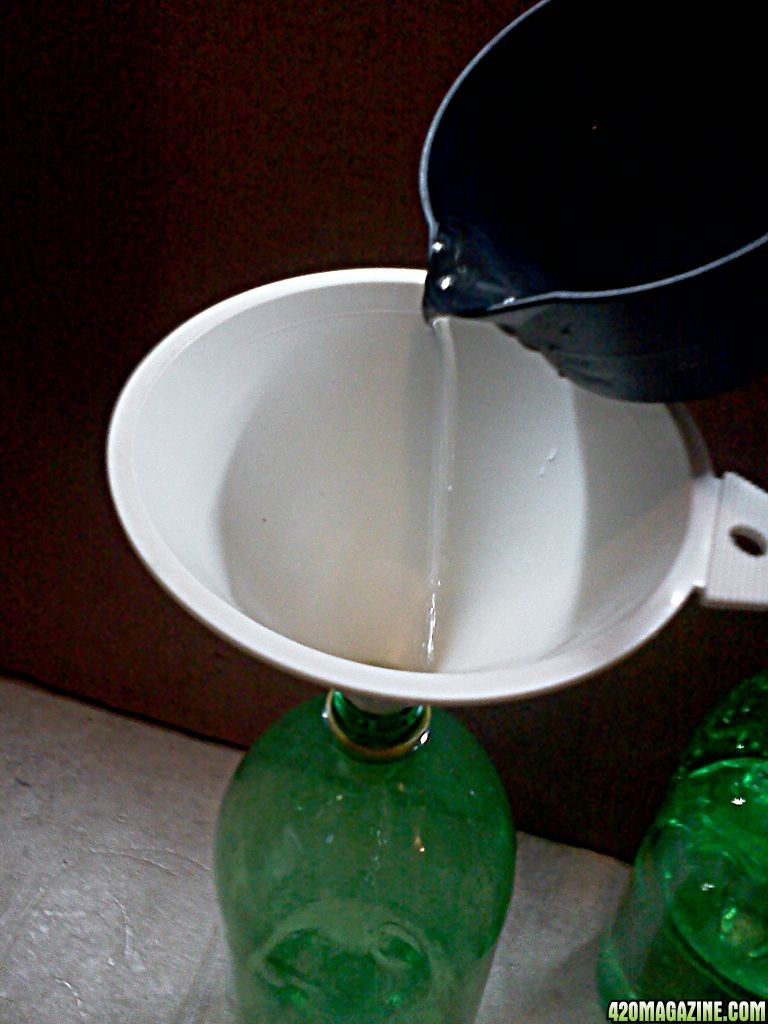
First get together all your ingredients for both bottles


1 Liter of cold water goes into the second bottle, and the rest goes into the first bottle.
The idea behind the second Treatment Bottle is to remove the "beer smell" produced by the yeast.

To the Brewer Bottle, add the 4-1/2 tsp yeast:


...and the 1/4 Cup of sugar:


And now the warm (110*F) water.


agitate for 15 seconds to mix:


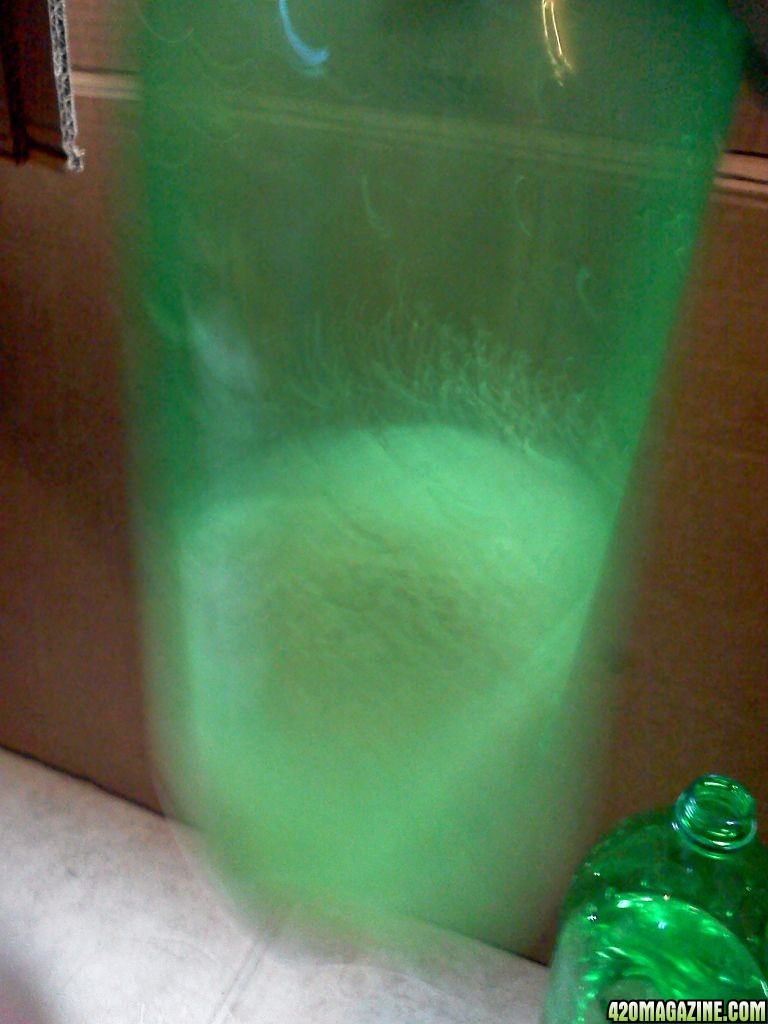
It should be a brown messy goop inside the Brewer Bottle now.


Now, cap your bottles. Single tube cap on the first bottle, and the double tube cap on the second bottle.


You're DONE!!


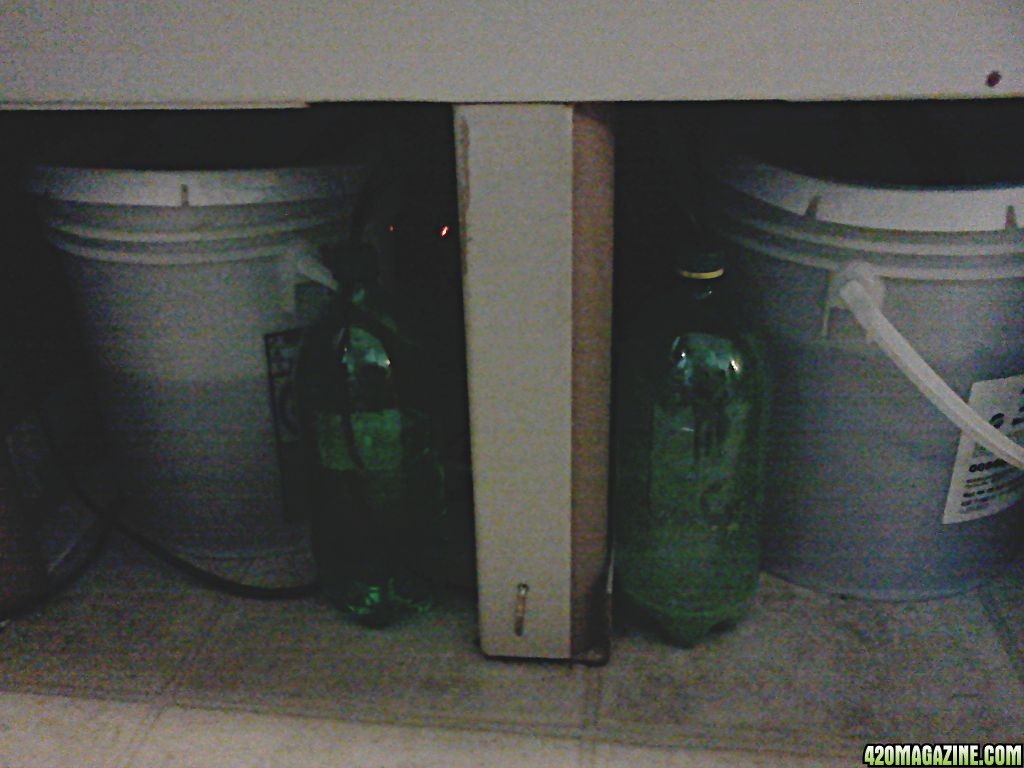
All you need do now is place the bottles is a nice dark place and let them work.


After a few minutes you will see bubbles coming through the clear water in the second bottle:


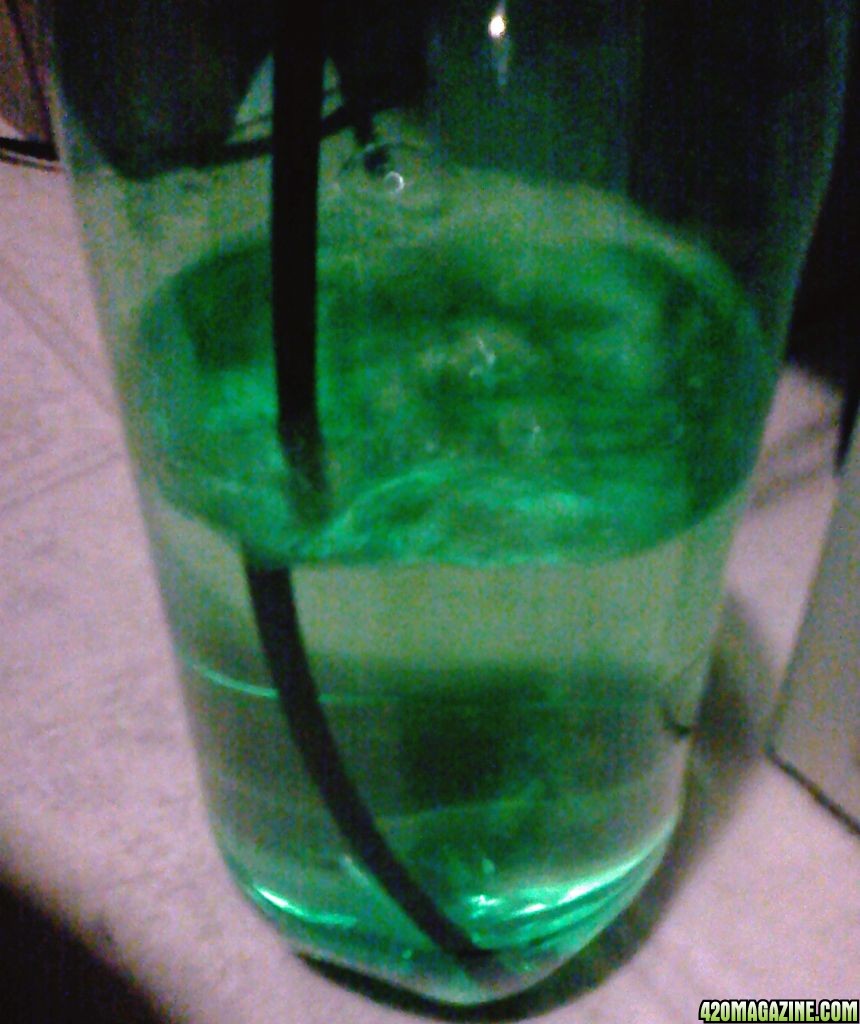
So now you know it's working and doing its thing.


Maintenance:

You will need to do a few things to keep your reactor in good working condition.

First 2 hours:

When you first set your reactor, the yeast will be overly active as they all come out of stasis and start to feed and multiply.
You will notice after about 15 to 30 minutes that there is a foam rising in your brewer bottle:


For the first hour or so, this will be VERY THICK and will over flow into your treatment bottle (NOT GOOD!) if something is not done.

Simply pick up your brewer bottle and tap in on the floor a few times until the foam settles out again:


KEEP AN EYE ON IT! This will need to be repeated 2 or 3 times in the first 1 to 1.5 hours... After that, there will still be foam, but it will be much less viscous and the bubbles will break inside and will not rise to the top.

Twice a Month:

Twice a month it is a good thing to add a little water, and another 1 TBSP of sugar. Yeast is a Non-photosynthetic algae. It requires 2 things to live, grow, and multiply. Sugar and water. Keep these two things in good supply and you should never have to dump and refill your Brewer Bottle and start over ever again. This is the same basic principle in a Sourdough starter. There is a bakery in San Francisco that has had the very same sourdough starter since 1909. It survived an earthquake and is still alive today by receiving a little care and maintenance. That same strain of yeast from 1909 is what gives the baker the signature San Francisco Sourdough flavor. Given the same care, and attention, your reactor should last you a lifetime.

Every three months, dump 1/2 to 3/4 of the liquid (NOT ALL) and replace with pure water and 1/4C sugar.This keeps alcohol from getting too high and killing off the yeast.

Thank you for reading, I wish you all the best. Enjoy your CO2 Generator! Keep'em Green, 420Mag readers!

Comments

Because of the way you plumed this device, you can really loose the check valve. The water bottle (second one) is doing the same thing, as long as the foam doesn't make it to the original supply line out. Guess the loop is a god idea after all. Also, a check valve will rob you of precious pressure, especially important in a low pressure device such as this is. Even that loop is slowing you down. Just my 2cents worth...
 
Last edited:
Another "food for thought", back in the day, I used to use this same device and had really decent and noticeable results in my closet grows. I did however, use a different source for my sugar. I used Karo brand corn syrup. It is high in sugar content, is already dissolved and is made directly from corn (lots of booze is made from corn) and then infused this solution with fresh peppermint while the "brewing is on". Made great tasting Peppermint Schnapps after being distilled down to about 150 proof. This with the addition of an ounce of buds made for some super tasting, super stoney Peppermint-Cannabis infused Schnapps. Soak the buds in the alcohol AFTER you've distilled it down to the desired strength, and leave alone for at least 30 days; age it more and it'll be better and will mellow out the bite a bit. Can even age this stuff in your choice of barrels. Without the proper tools, you'll not be able to measure the proof of the alcohol, BUT a proper* distillation part will yield 190 proof dripping out the cooled end. The peppermint leaves should be taken out before you distill all the way down (about 3/4 the way through). You can get a glass* distillation coil inside an outer sleeve for running cold water through it, available through most lab. equipment suppliers. May look expensive but if you were to use a copper coil, there are health hazards as well as the cost too. The glass thing is much faster and more efficient; just a plumbing issue. Do it all in Lab Glass and you'll have a much cleaner environment. Figure a gram+ per lightweight (in a shot's worth) so an ounce of bud needs to have 28 ounces of distilled alcohol. For more severe results, allow 3-4 grams per ounce and it'll blast you into the abyss. Trust me, I've done it many, may times. Another benefit is tha, depending on how much gas you are kicking out, you'll destroy a lot of internal smell from the dank you're growing and by simply mixing these odors, it will mask a lot. Enjoy!
sfttailpaul
 
Last edited:
sfttailpaul;bt3861 said:
Because of the way you plumed this device, you can really loose the check valve. The water bottle (second one) is doing the same thing, as long as the foam doesn't make it to the original supply line out. Guess the loop is a god idea after all. Also, a check valve will rob you of precious pressure, especially important in a low pressure device such as this is. Even that loop is slowing you down. Just my 2cents worth...
The check valve keeps water from the treatment bottle from siphoning back into the brewer bottle.

The loop is there to catch distillates from entering the treatment bottle as liquid and ruining the "Freshener" effect of the water. This will eventually evaporate off between cycles of inactivity and be pushed out of the system. Plus, this allows for a little flexibility in positioning between brewer and treatment bottles.
 
Last edited:
sfttailpaul;bt3862 said:
Another "food for thought", back in the day, I used to use this same device and had really decent and noticeable results in my closet grows. I did however, use a different source for my sugar. I used Karo brand corn syrup. It is high in sugar content, is already dissolved and is made directly from corn (lots of booze is made from corn) and then infused this solution with fresh peppermint while the "brewing is on". Made great tasting Peppermint Schnapps after being distilled down to about 150 proof. This with the addition of an ounce of buds made for some super tasting, super stoney Peppermint-Cannabis infused Schnapps. Soak the buds in the alcohol AFTER you've distilled it down to the desired strength, and leave alone for at least 30 days; age it more and it'll be better and will mellow out the bite a bit. Can even age this stuff in your choice of barrels. Without the proper tools, you'll not be able to measure the proof of the alcohol, BUT a proper* distillation part will yield 190 proof dripping out the cooled end. The peppermint leaves should be taken out before you distill all the way down (about 3/4 the way through). You can get a glass* distillation coil inside an outer sleeve for running cold water through it, available through most lab. equipment suppliers. May look expensive but if you were to use a copper coil, there are health hazards as well as the cost too. The glass thing is much faster and more efficient; just a plumbing issue. Do it all in Lab Glass and you'll have a much cleaner environment. Figure a gram+ per lightweight (in a shot's worth) so an ounce of bud needs to have 28 ounces of distilled alcohol. For more severe results, allow 3-4 grams per ounce and it'll blast you into the abyss. Trust me, I've done it many, may times. Another benefit is tha, depending on how much gas you are kicking out, you'll destroy a lot of internal smell from the dank you're growing and by simply mixing these odors, it will mask a lot. Enjoy!
sfttailpaul

Karo is a really good source of fructose a high-energy carbohydrate and will last longer. I was afraid that with only 1C warm water in the brewer, that it would spur the yeast into higher activity, and faster reproduction, causing a quick buildup of alcohol in the small amount of liquid and therefore causing a collapse of the yeast population inside. Maybe I'll do another one with a 3L setup and Light Karo and see what happens.

Hehe, and trust me, I'm from the south, I've seem my share of "Corn Sqeezins" but had never placed the dissolution of THC into alcohol with a still. Hmm... good idea, but would require more heat than ambient to get a good amount of distillates. And I LOVE the mint leaves idea... we always used strawberries, or blackberries in Texas...ugh....or muscadine grapes... ((shudders)) bitter little things...
 
Last edited:
Jandre,

Awesome DIY!!! For larger plants do you think it would be a good idea to run a 1:1 plant/co2 generator??
 
Last edited:
Yeah....that's good....but why not make even more use of that fermentation? Hmmmm. Homebrewing! I do it! And my next batches have a date with my girls!

:thumb:


Seriously though, great write up. Thank you!
 
Last edited:
sfttailpaul;bt3862 said:
Another "food for thought", back in the day, I used to use this same device and had really decent and noticeable results in my closet grows. I did however, use a different source for my sugar. I used Karo brand corn syrup. It is high in sugar content, is already dissolved and is made directly from corn (lots of booze is made from corn) and then infused this solution with fresh peppermint while the "brewing is on". Made great tasting Peppermint Schnapps after being distilled down to about 150 proof. This with the addition of an ounce of buds made for some super tasting, super stoney Peppermint-Cannabis infused Schnapps. Soak the buds in the alcohol AFTER you've distilled it down to the desired strength, and leave alone for at least 30 days; age it more and it'll be better and will mellow out the bite a bit. Can even age this stuff in your choice of barrels. Without the proper tools, you'll not be able to measure the proof of the alcohol, BUT a proper* distillation part will yield 190 proof dripping out the cooled end. The peppermint leaves should be taken out before you distill all the way down (about 3/4 the way through). You can get a glass* distillation coil inside an outer sleeve for running cold water through it, available through most lab. equipment suppliers. May look expensive but if you were to use a copper coil, there are health hazards as well as the cost too. The glass thing is much faster and more efficient; just a plumbing issue. Do it all in Lab Glass and you'll have a much cleaner environment. Figure a gram+ per lightweight (in a shot's worth) so an ounce of bud needs to have 28 ounces of distilled alcohol. For more severe results, allow 3-4 grams per ounce and it'll blast you into the abyss. Trust me, I've done it many, may times. Another benefit is tha, depending on how much gas you are kicking out, you'll destroy a lot of internal smell from the dank you're growing and by simply mixing these odors, it will mask a lot. Enjoy!
sfttailpaul

sounds like a great idea. thanks OP for the DIY, and thanks sfttailpaul for the distilling idea. Pep-Can Schnapps sounds amazing.
 
Last edited:
I just made one for my veg area. My delivery method is different, but still the effects can only be positive. Thanks jandre2k3!
 
Last edited:
:bravo:jandre2k3 excellent valuable information Im going to the store right now!!! OMG! how I as a former sous chef, never thought of this and put 2 and 2 together holy shit. I feel like a total space case!!
 
Last edited:
galzuck;bt5142 said:
hello there
i was wondering would it be better to use baking powder or soda
with vinegar ?????
same set up
now that will produce much more CO2
but for shorter time


https://www.420magazine.com/community/threads/first-indoor-grow.184313/post-1677837

Hello,

Excellent question! Baking Soda and Vinegar do give off CO2 as their reaction takes place, that part is correct. However the reaction is so short lived, that it would get prohibitively expensive to keep the reaction going to provide the same amount of CO2 over the same amount of time. The reaction is over and all gassing has completed in a very short time; seconds, in fact, to a few minutes, depending on the rate at which the soda is introduced into the vinegar.

Also, the reaction is so violent that most of your gassing would be lost to open air before you could get the cap on the "brewer" bottle. If you did somehow manage to keep a lid on the reaction, I fear that the foam created under a compressed situation would end up blowing through the line, and into your "treatment" bottle, thus losing effectiveness of the reaction taking place for losing your solvent into the water bottle. Further, if the treatment bottle was removed from the lines, I'm pretty sure that the plants in the grow chamber would get sprayed with the vinegar/soda solution as the foam reached its critical point.

If you did somehow manage to slow the reaction down to a trickle of gas, by some physical barrier between the two, there is still the problem of opening the bottle every few minutes to add more soda to keep the reaction going, and releasing all pressure built up into the open air. Also, your 1L of vinegar, as a solvent would become spent after an hour, up to a few hours of adding baking soda, you'd have to replace it with a fresh liter every day to continue the reaction.

With the above in mind, I'm sure that you have better things to do than fill a vinegar bottle every day, then sit by it and keep adding baking soda every few minutes for as long as you'd like a reaction to take place.

I think the best use of this reaction would be as a PPM boost to kill off any mites, or other infestation that has happened, as a 1-time treatment. Much like the full release bug bombs, this would be better suited for a quick boost added into the system: Pop-it, Drop-it, Lock it in.
 
Last edited:
Awesome, easy, simple, long lasting, low maintenance. Definitely see my self doing this once i get my first grow going.
 
Last edited:
I honestly thought this wouldn't work when I first heard about it but now I'm getting more interested in trying this out to get some great buds! Great DIY, very thorough "fool proof" instructions. :thumb:
 
Last edited:

Blog entry information

Author
jandre2k3
Read time
5 min read
Views
293
Comments
16
Last update
Rating
5.00 star(s) 3 ratings

More entries in Member Blogs

More entries from jandre2k3

Back
Top Bottom