Hello everyone and welcome to my 8th Grow Journal!!!
Sponsored by Intelligent-Gro LED Grow lights.

I am Icemud and have been growing now and a member at 420 Magazine for 3+ years. I am a indoor soil grower who as of now have successfully completed 7 harvests over the past few years and as of now grown over 20-25 strains. I have used many different soil mixtures and recently have been on the quest for High Brix, as well as I have used many different types of lights from HID (CMH, MH and HPS) and recently converted over to LED to save on electricity, as well as give my plants a better quality light.
I recently found Intelligent-Gro as one of our new Sponsors here at 420 Magazine and found that Danky Dave of Intelligent-gro was seeking active members to test out and showcase their cutting edge technology...With fingers crossed I wrote to Danky Dave requesting to be considered as one of the testers and luckily enough, I was chosen as one of a few to feature Intelligent-Gro LED lights here on 420 Magazine.
I am so happy to be one of the testers, and I will cover all the details very thoroughly as well as give a 100% honest opinion and review of the lights, their performance and physical specs.
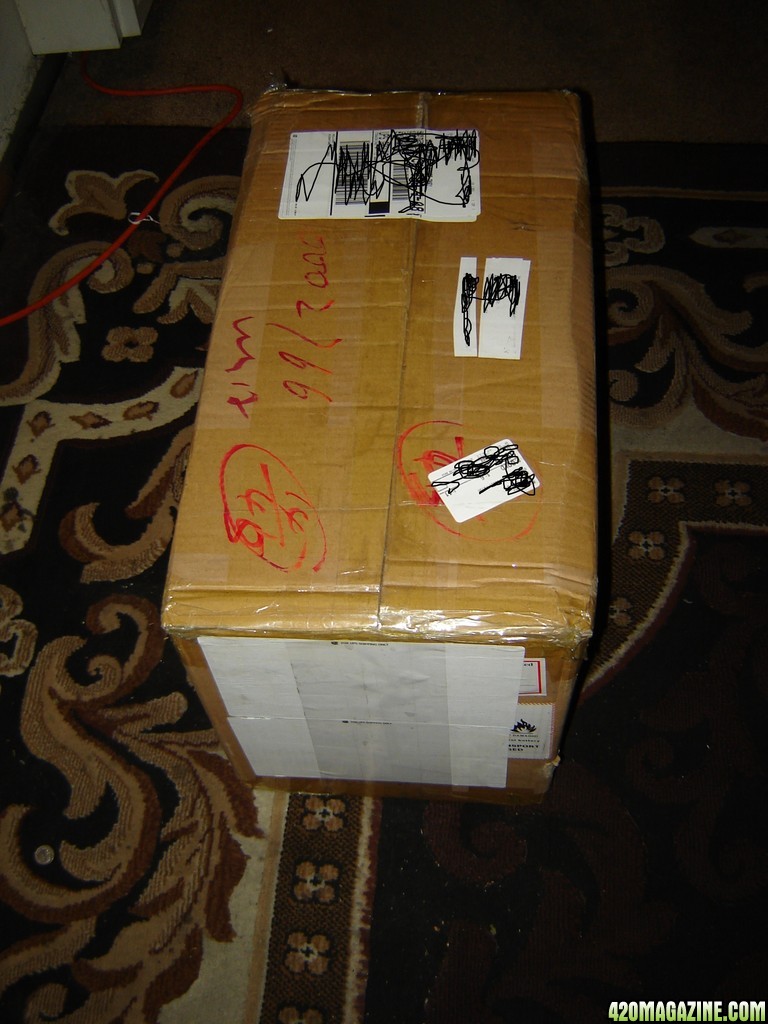
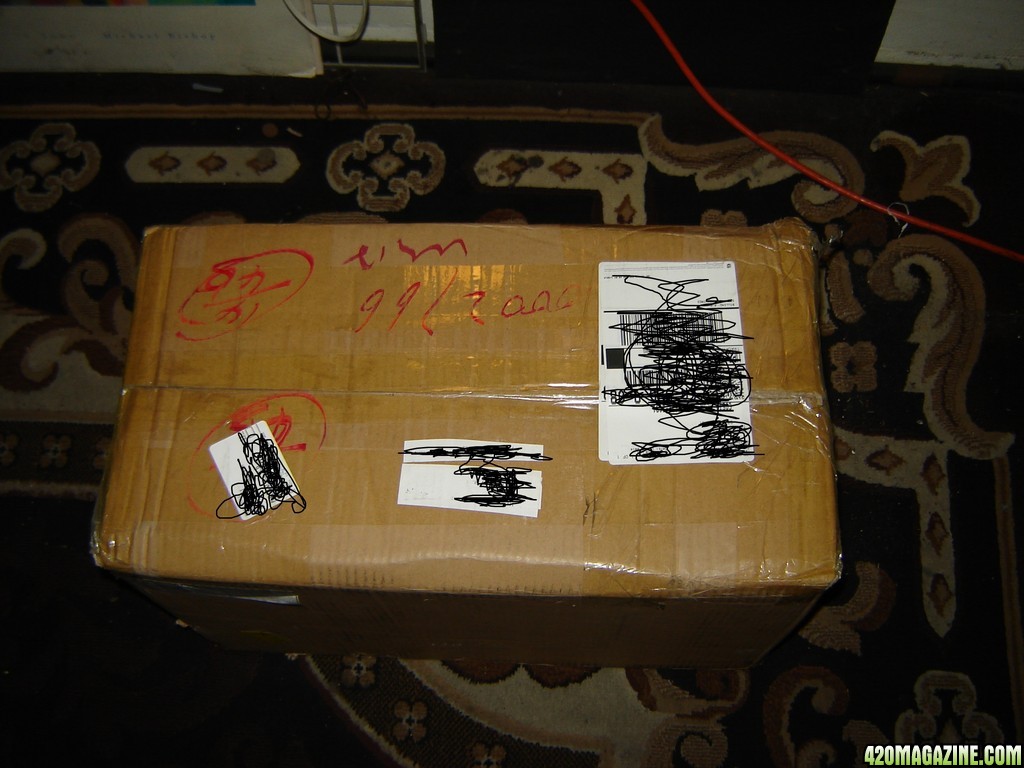
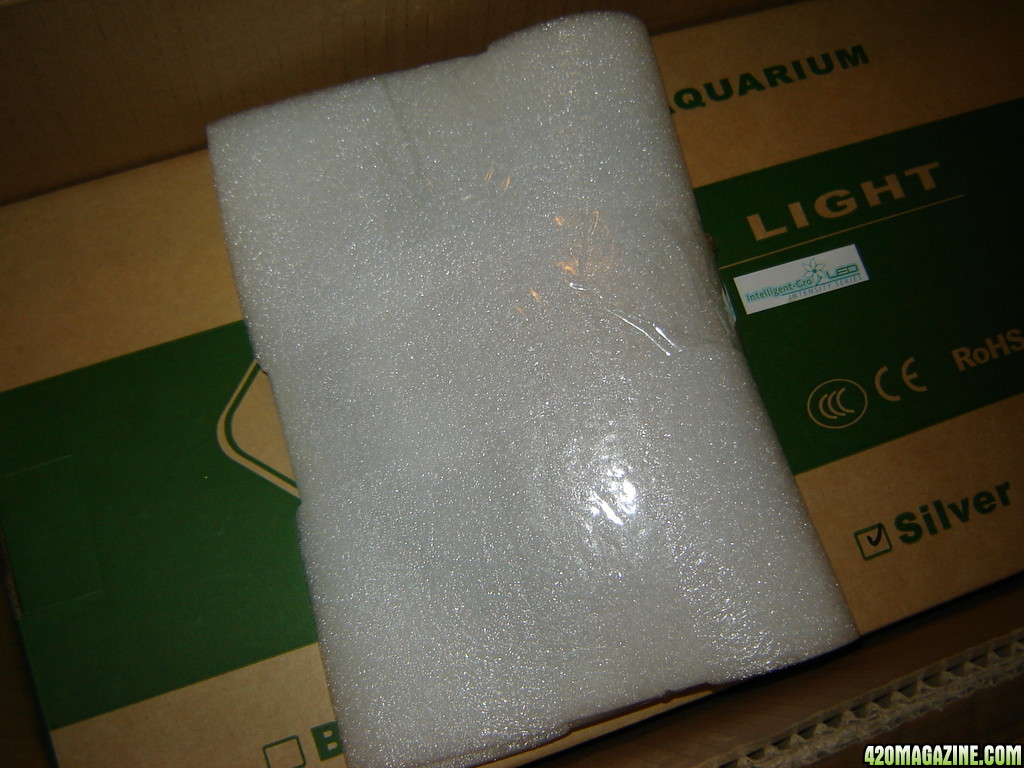
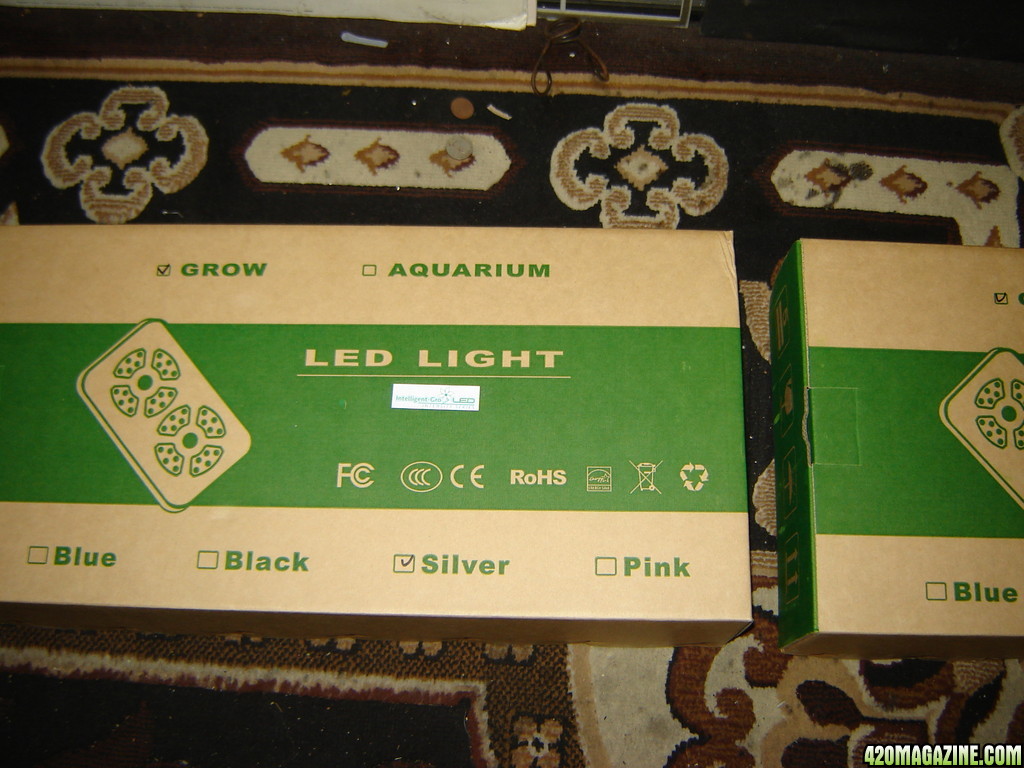
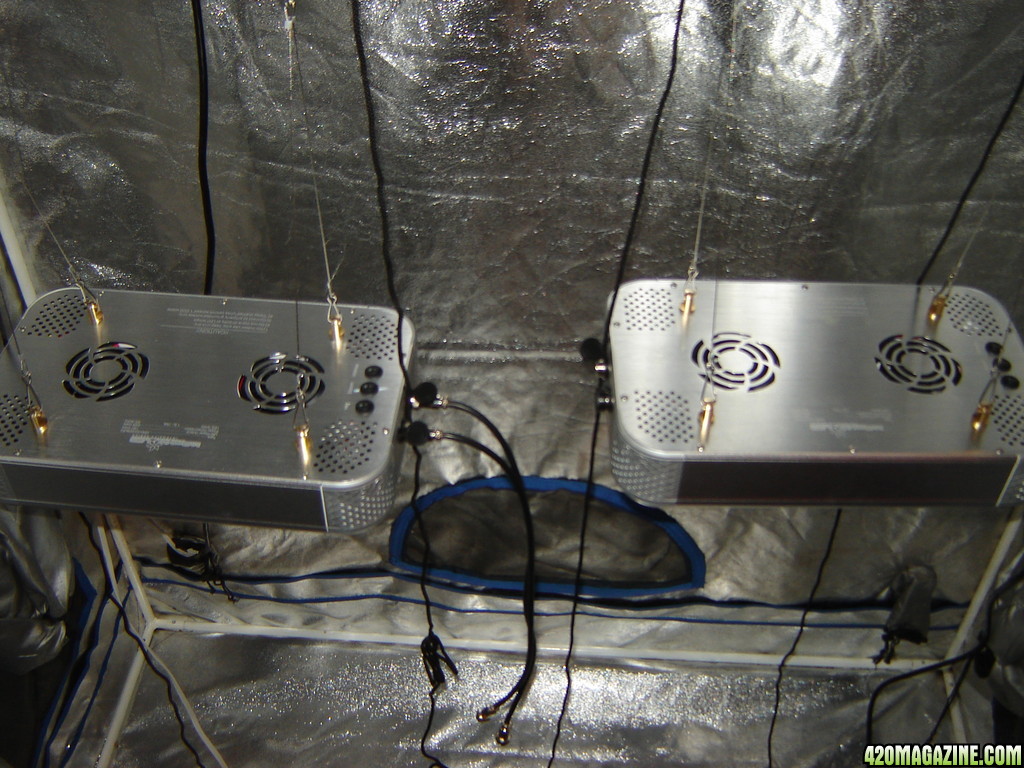
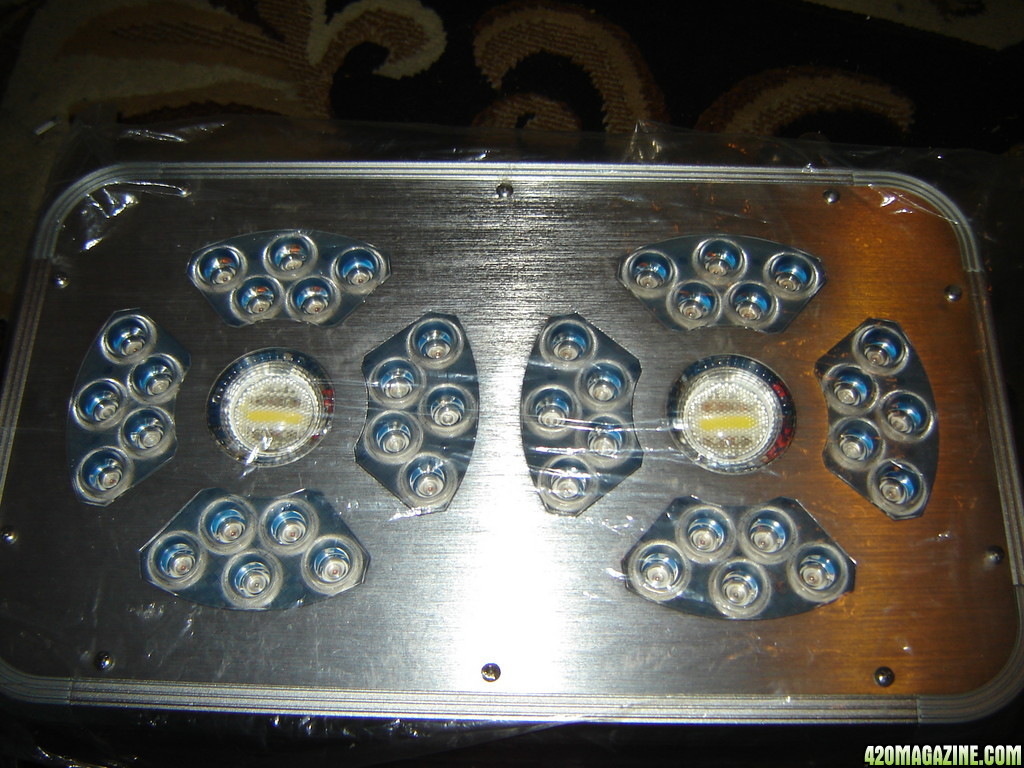
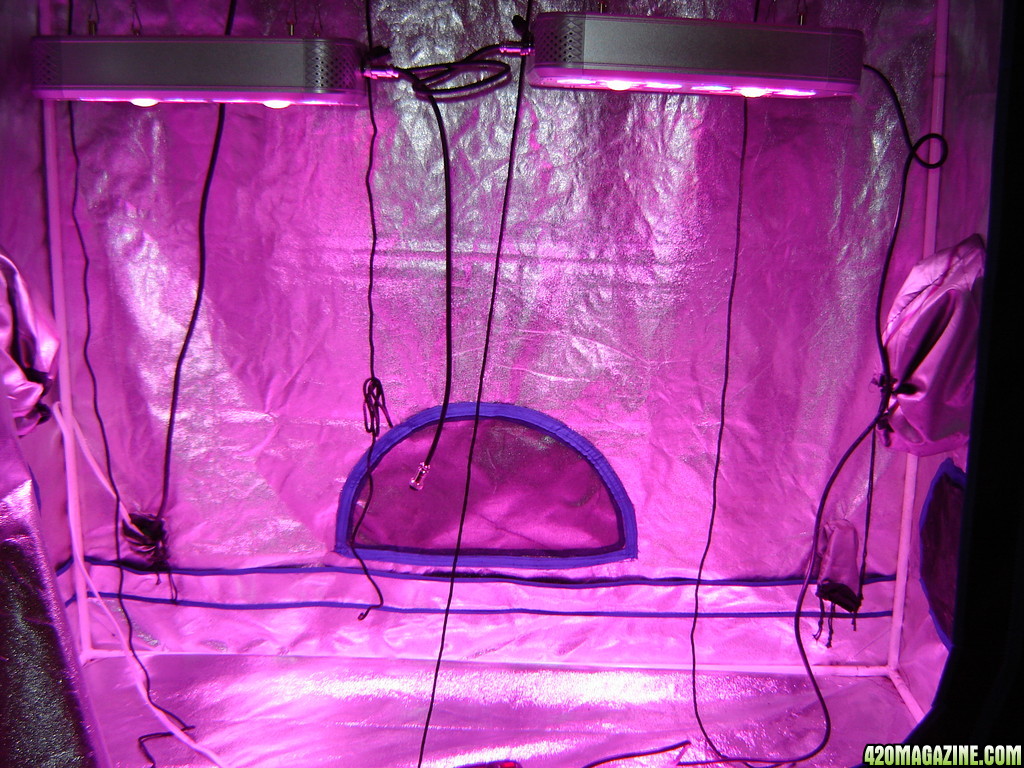
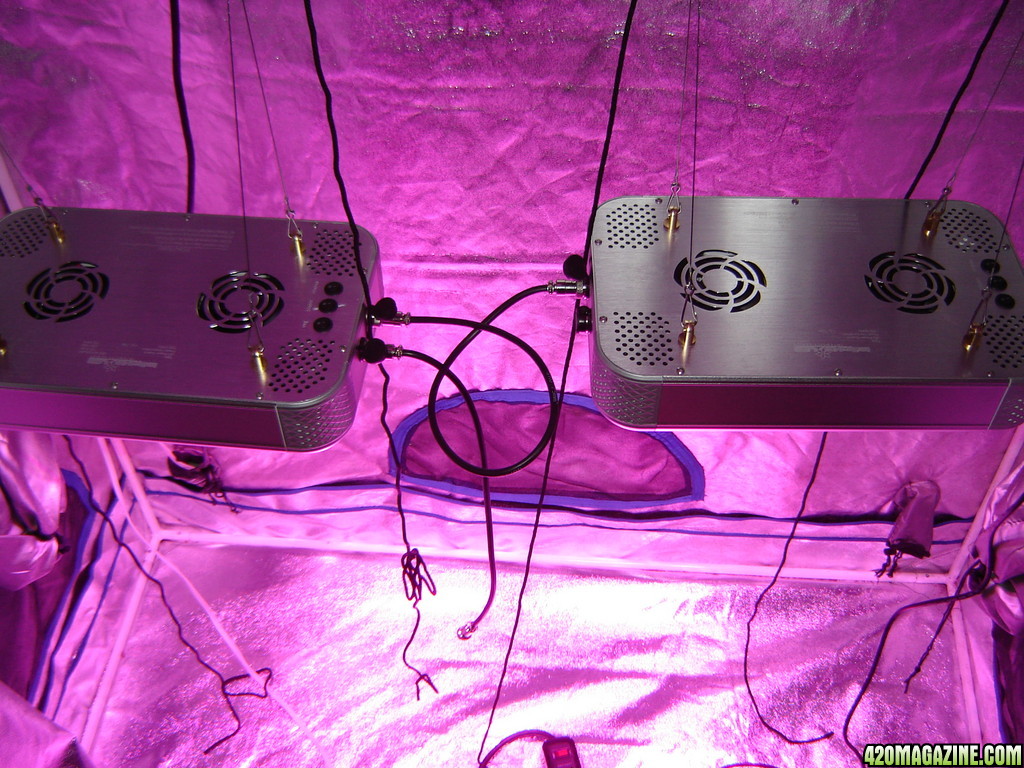
I welcome all to join along as I test out 2 of the brand new INTELLIGENT-GRO 228w LED GROW LIGHTS (IGRO-228LED)
First I will cover the lights and the details and then I will get into the details of the grow, plants, medium and other details.
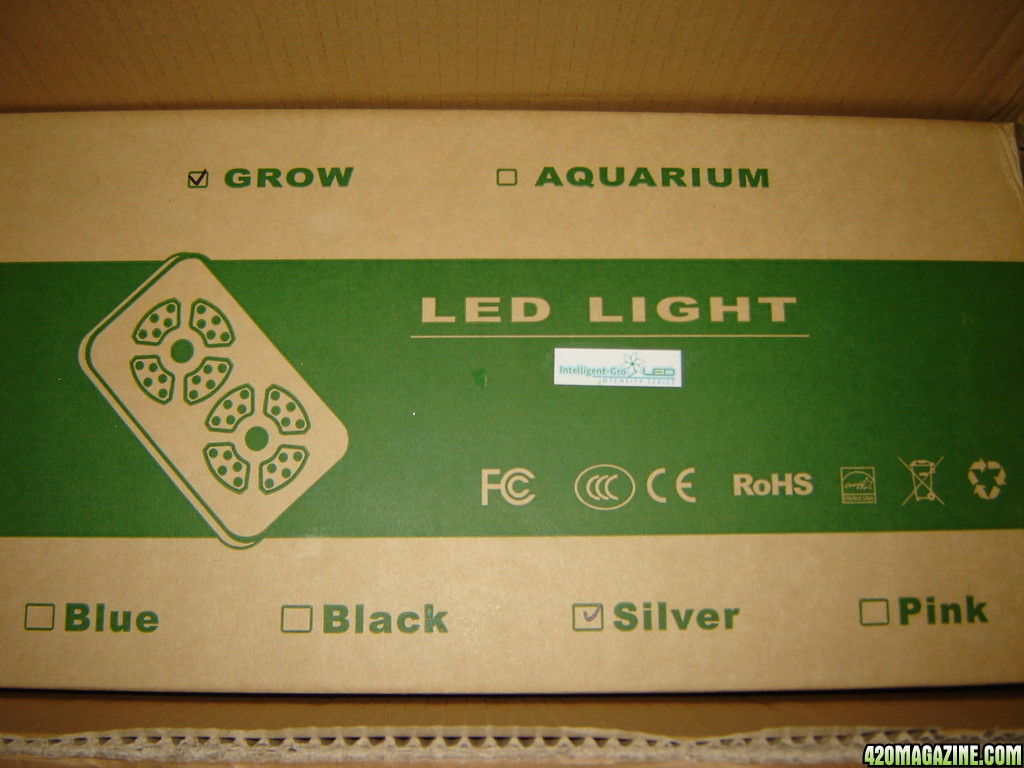
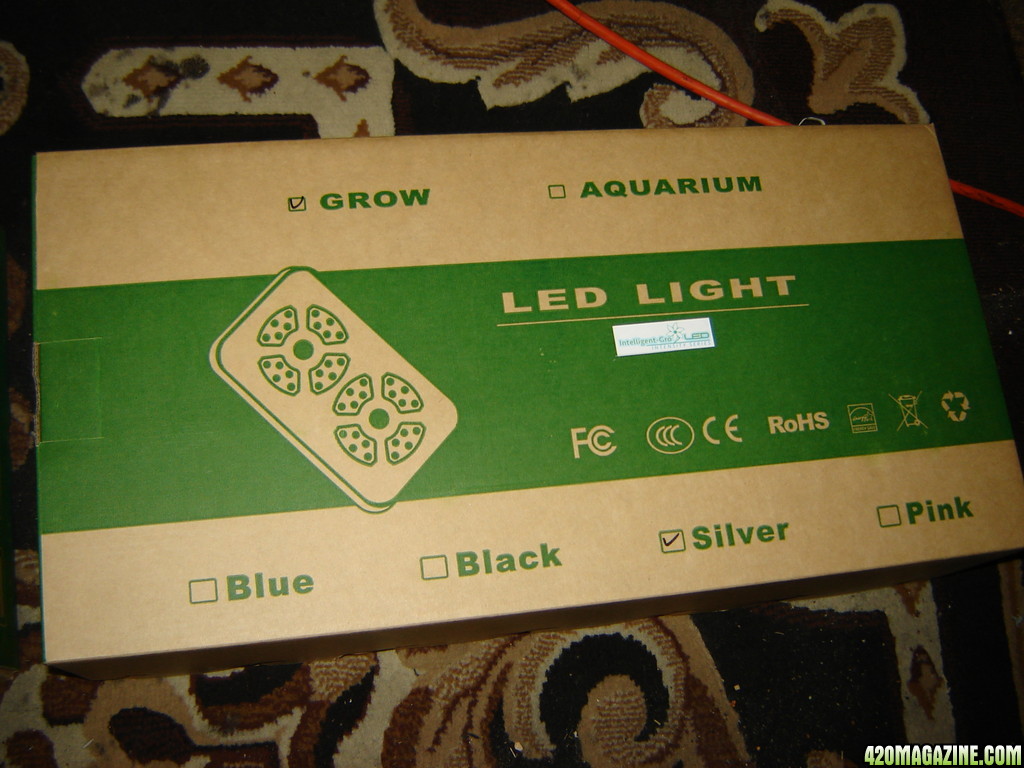
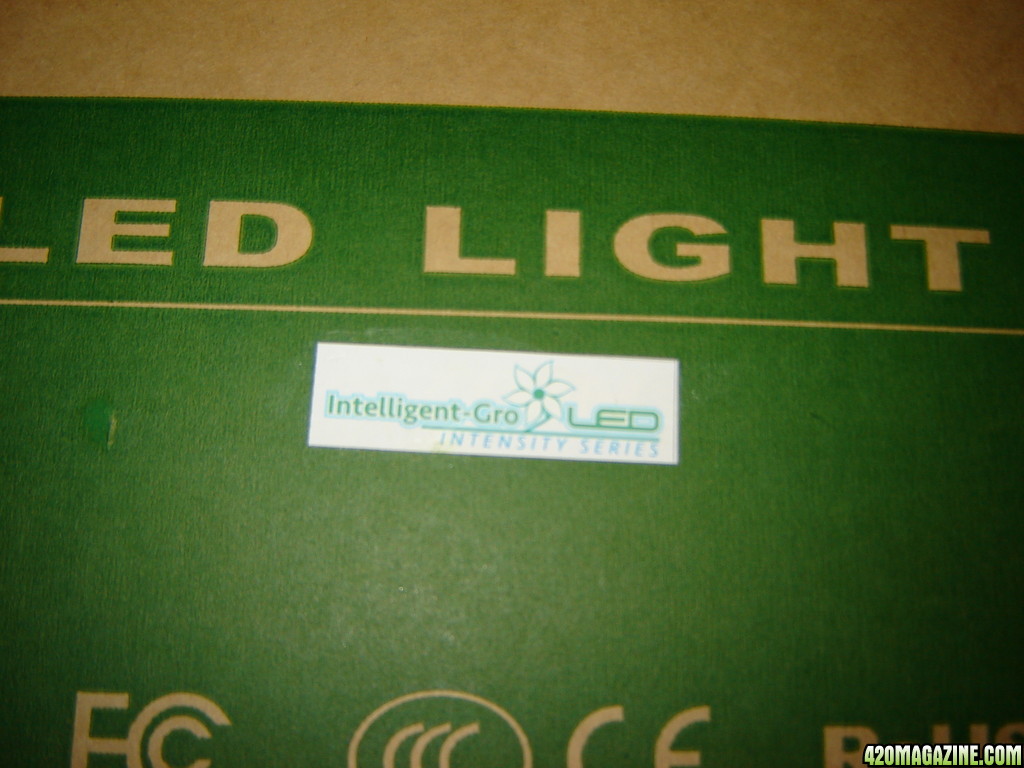
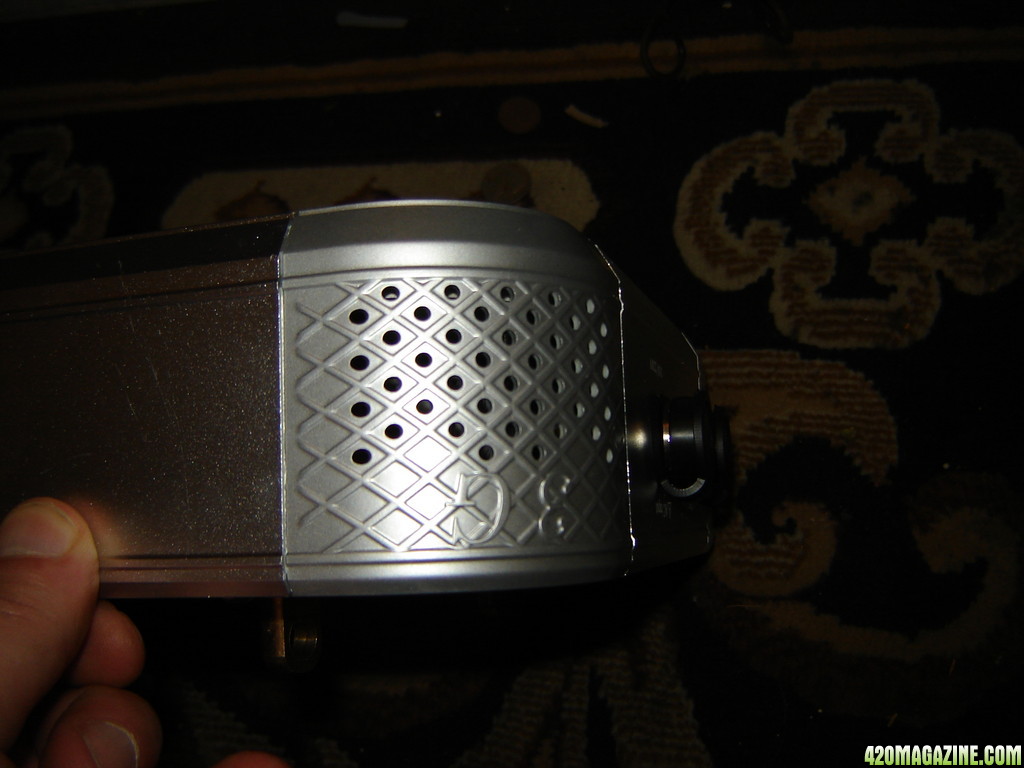
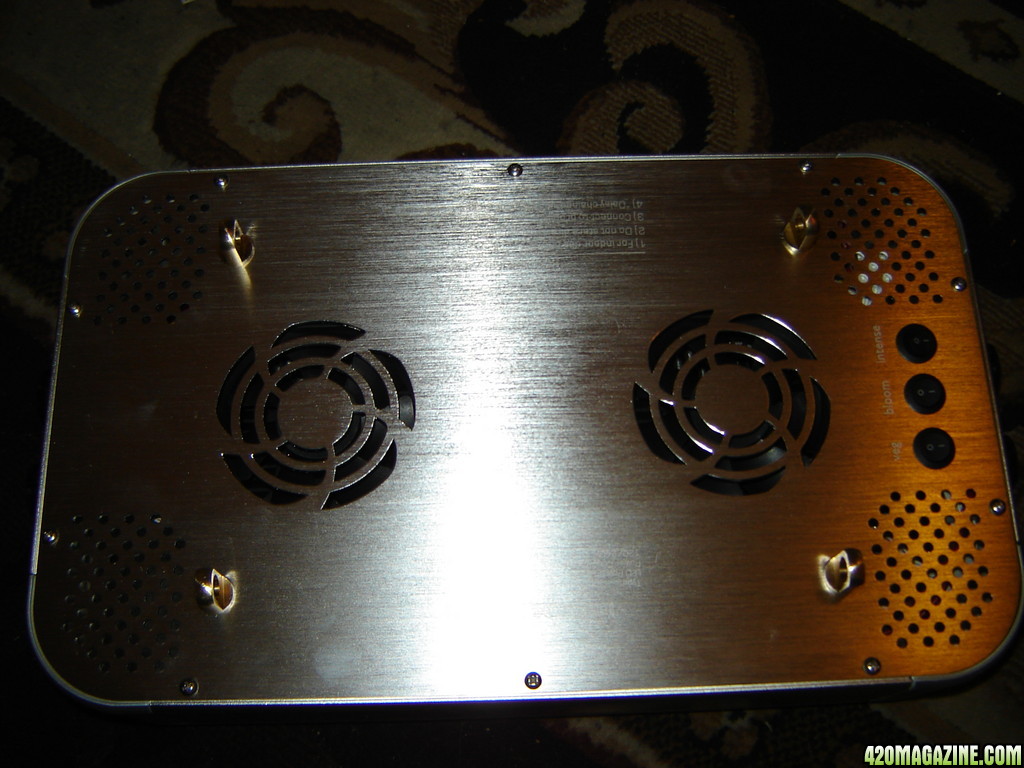
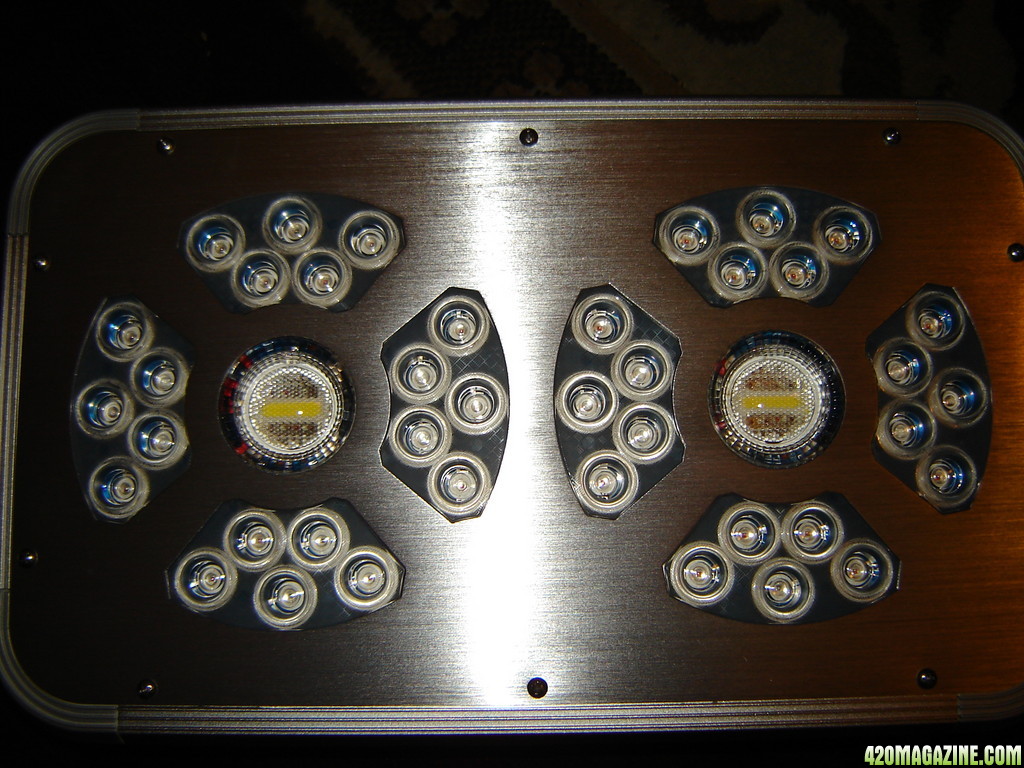
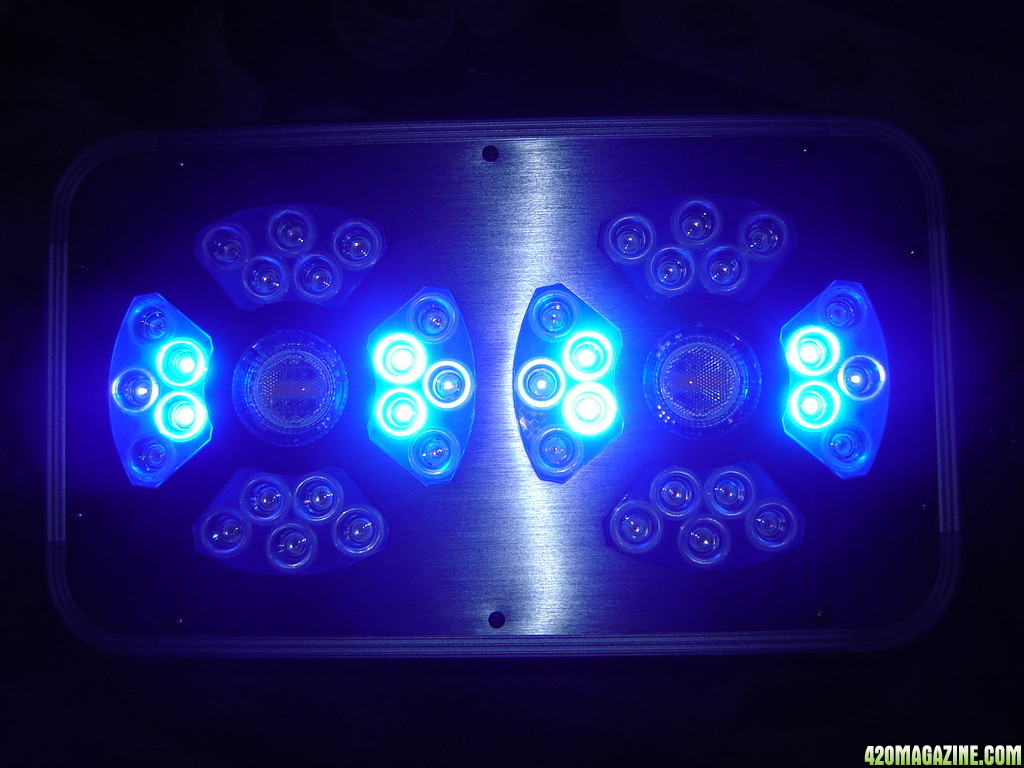
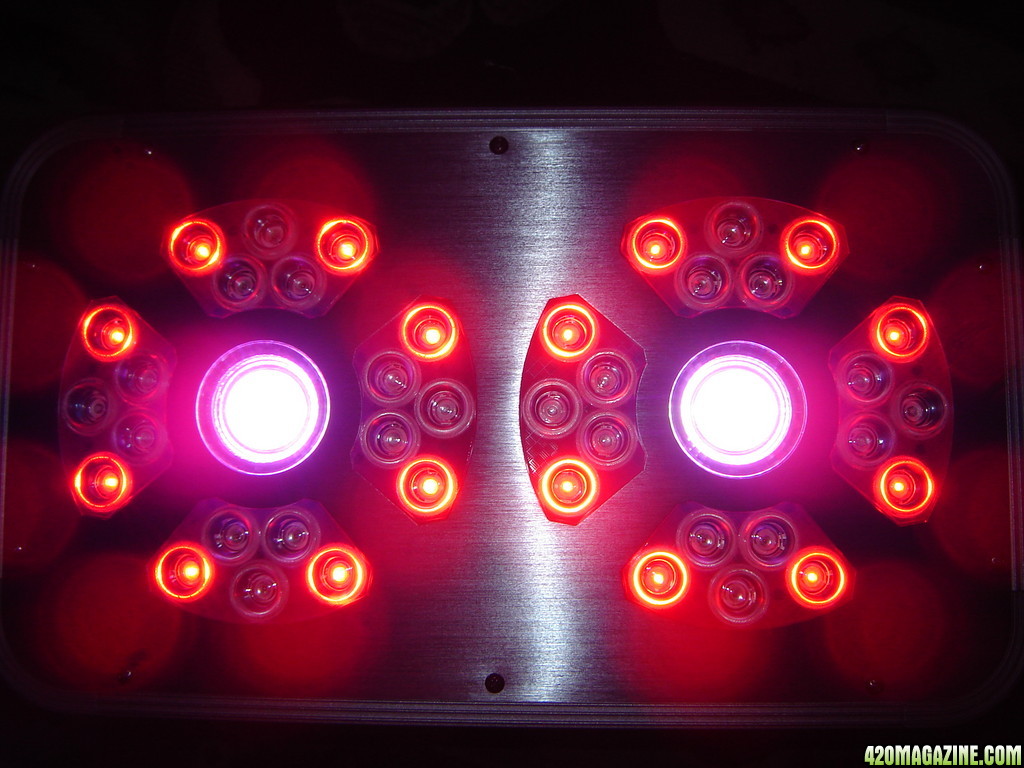
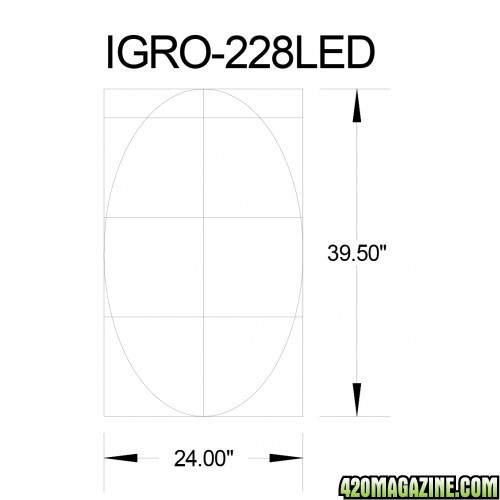
Introducing the Intelligent-Gro 228W LED Grow lights (IGRO-228LED)


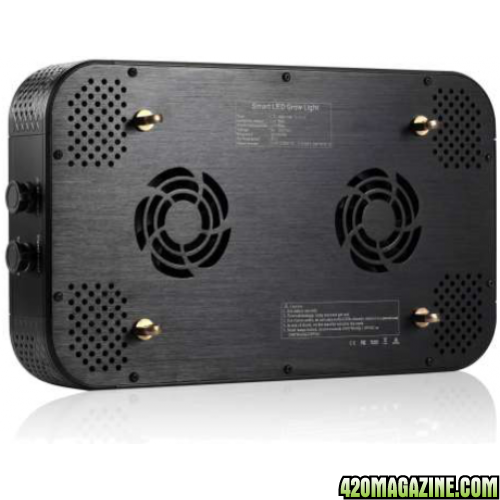
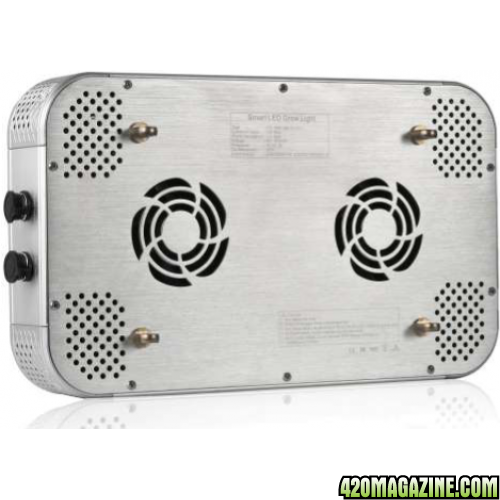
This I-Gro Intensity Series LED light coverage area is 24" x 39.5" at a height of 24 inches.
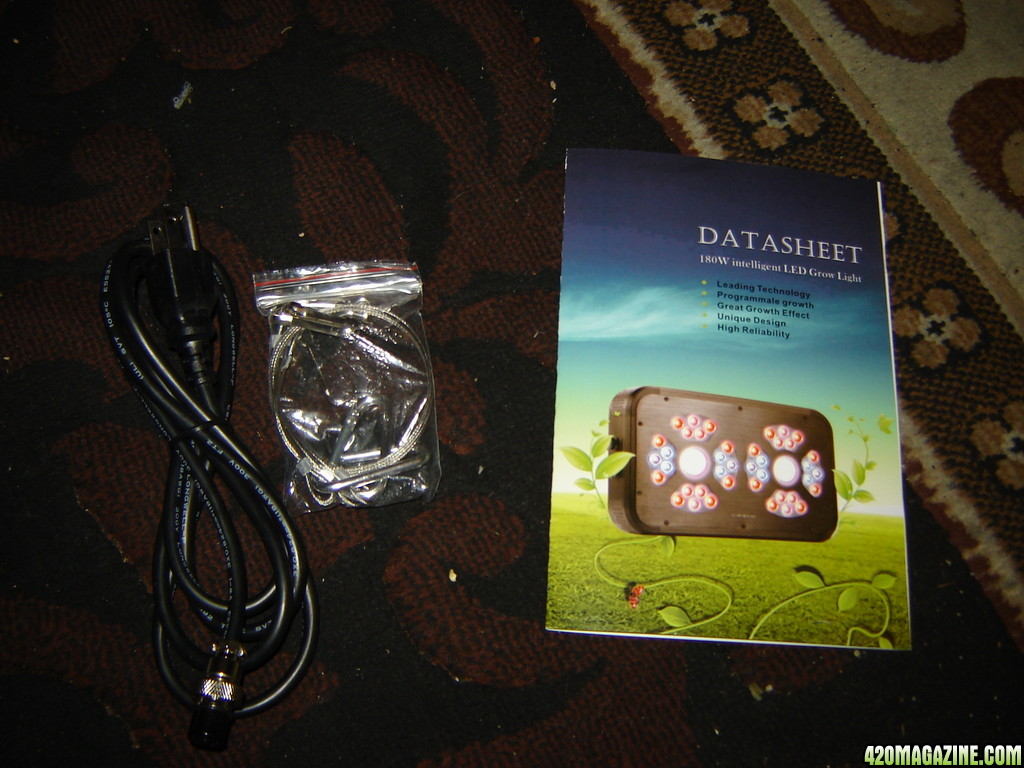
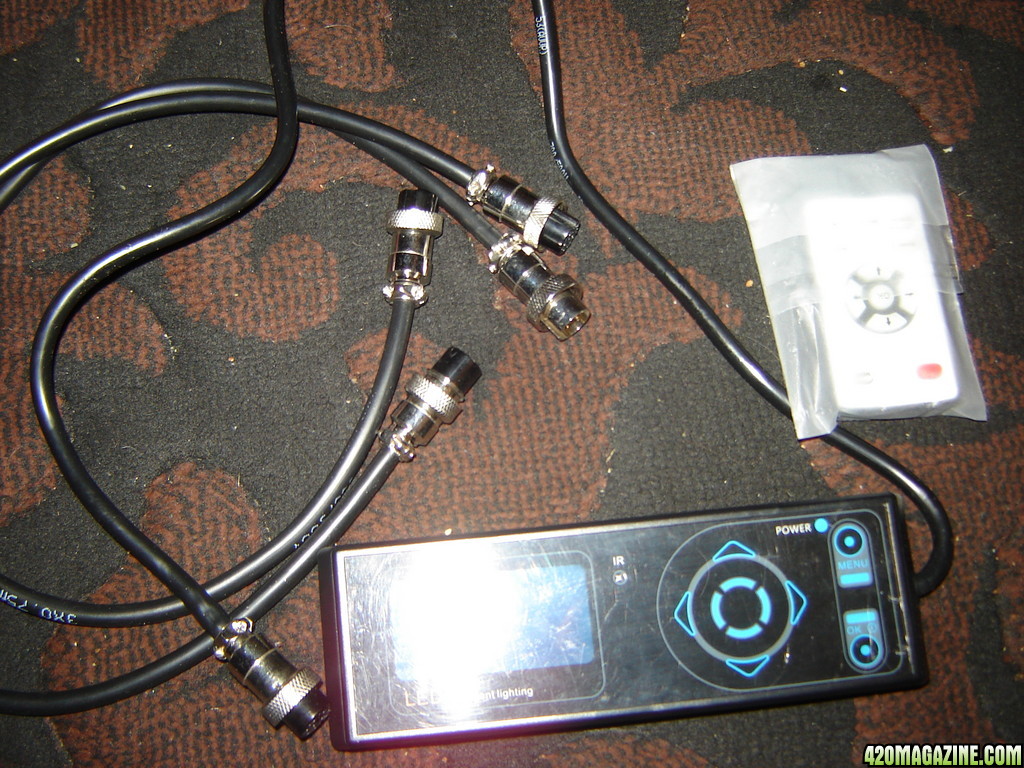
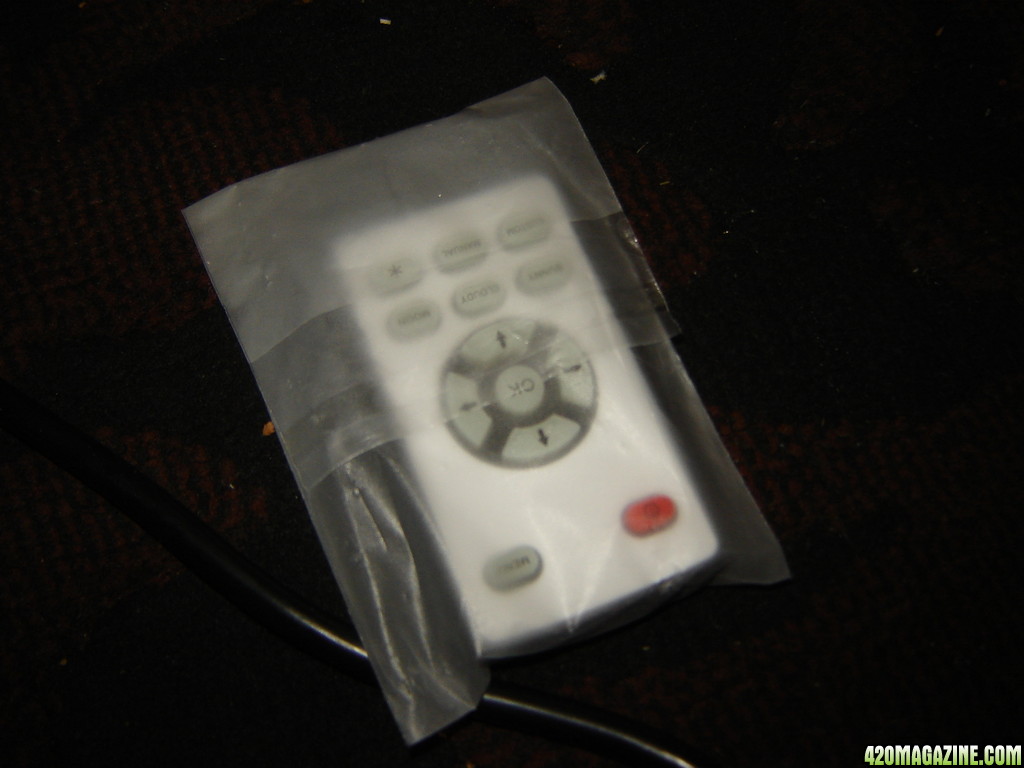
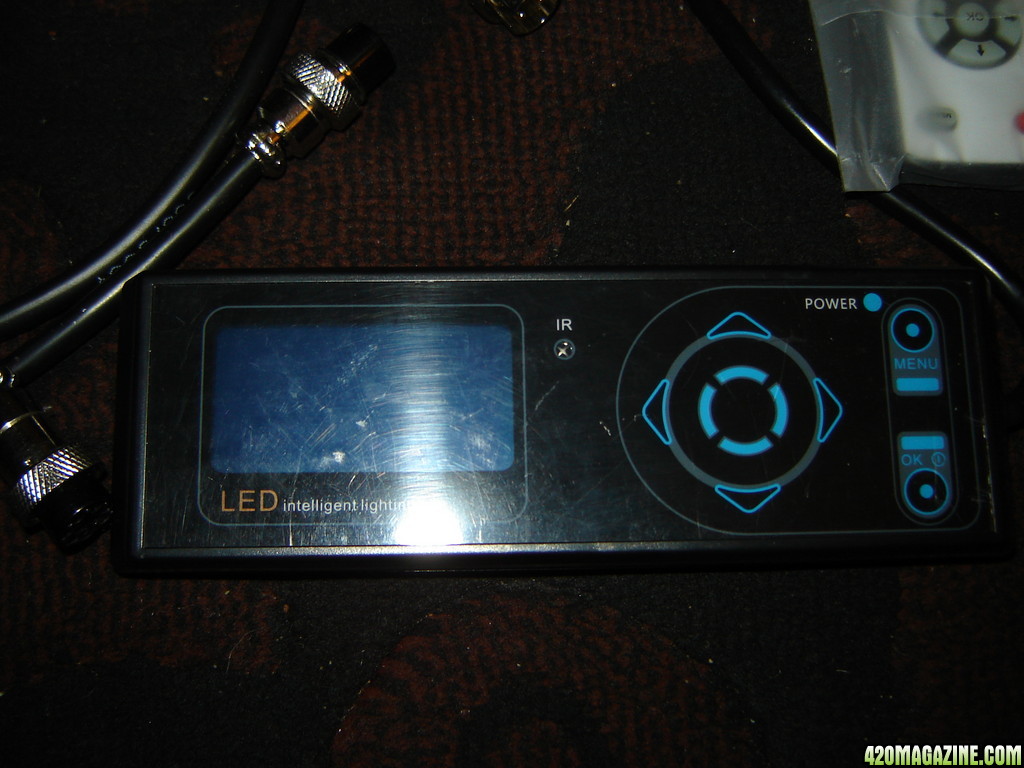
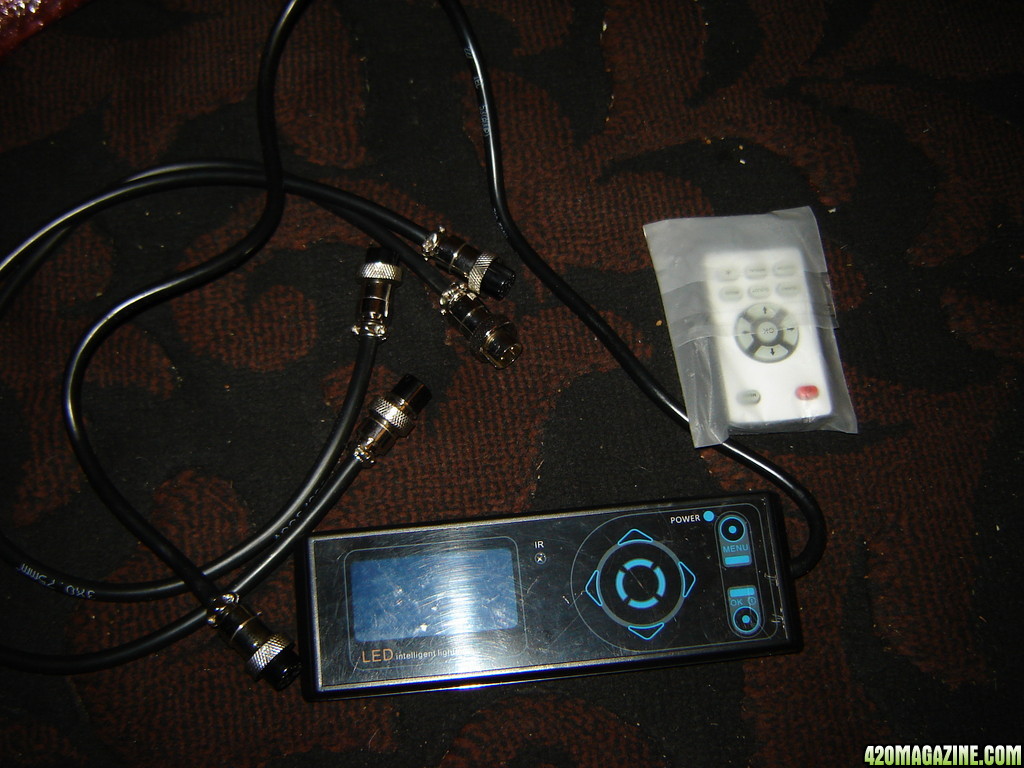
(Each order comes with one free Intelligent-Gro Controller *additional controllers sold separately)

Key Features:
Modularized design:
- Easy and fast production
- Easy maintenance and repairing
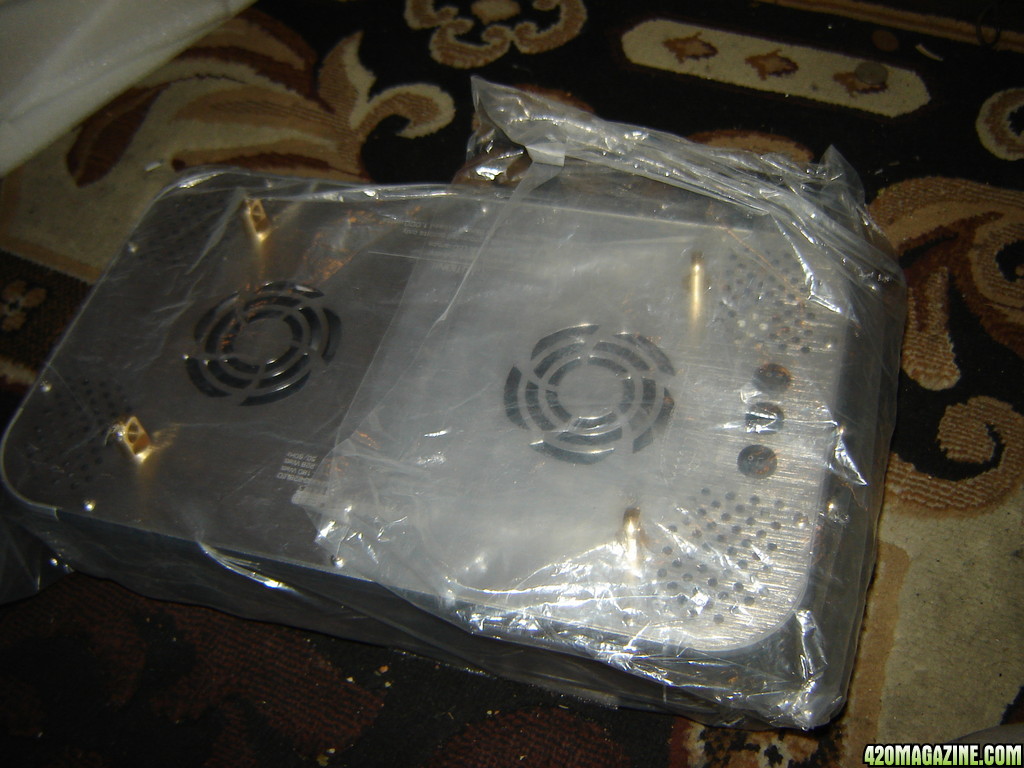
Full aluminum housing:
- Light weight, cost saving for delivery
- Anti-rust, anti-corrosion
- Good heat dissipation, long life time
- Smart design, elegant shape
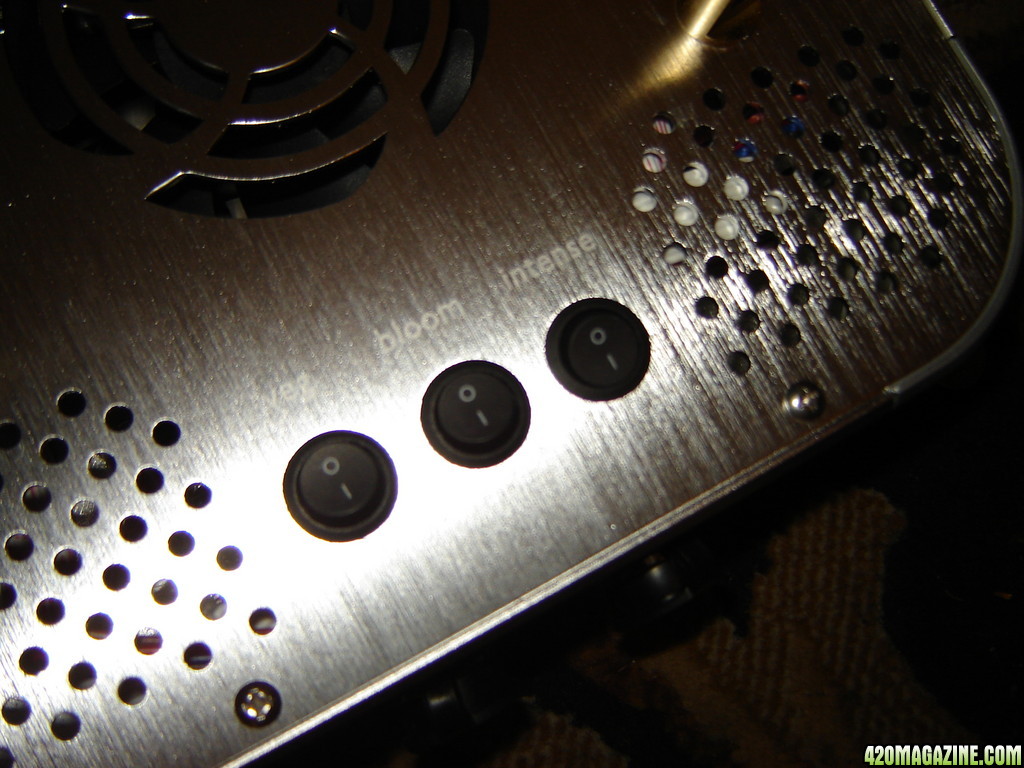
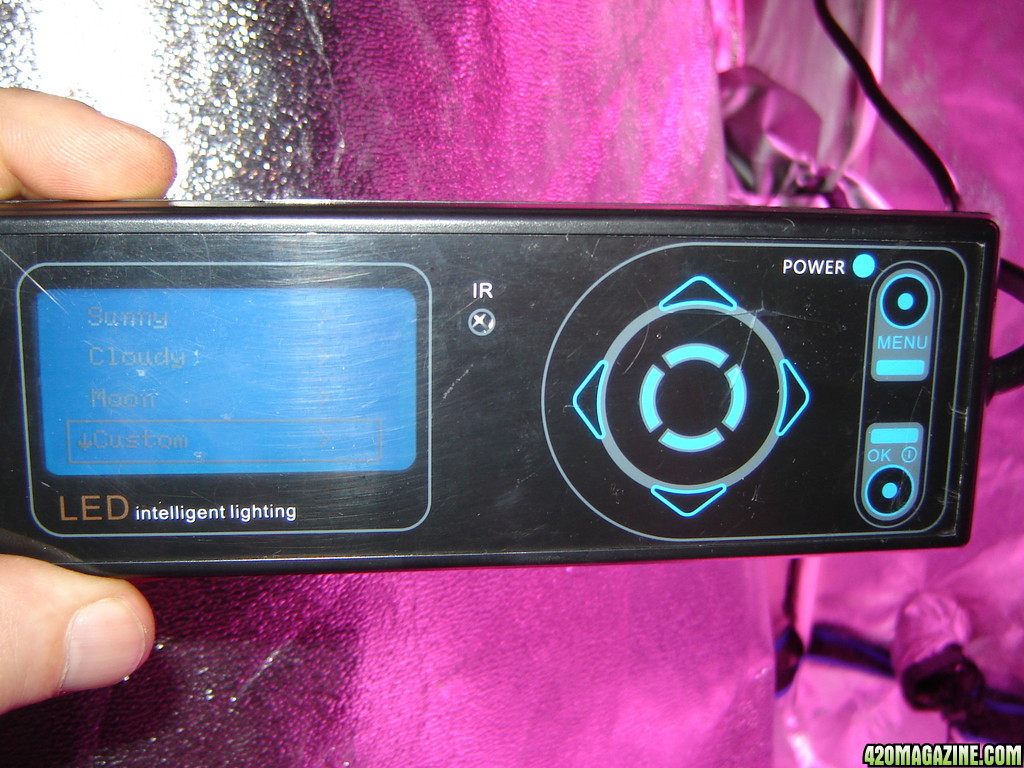
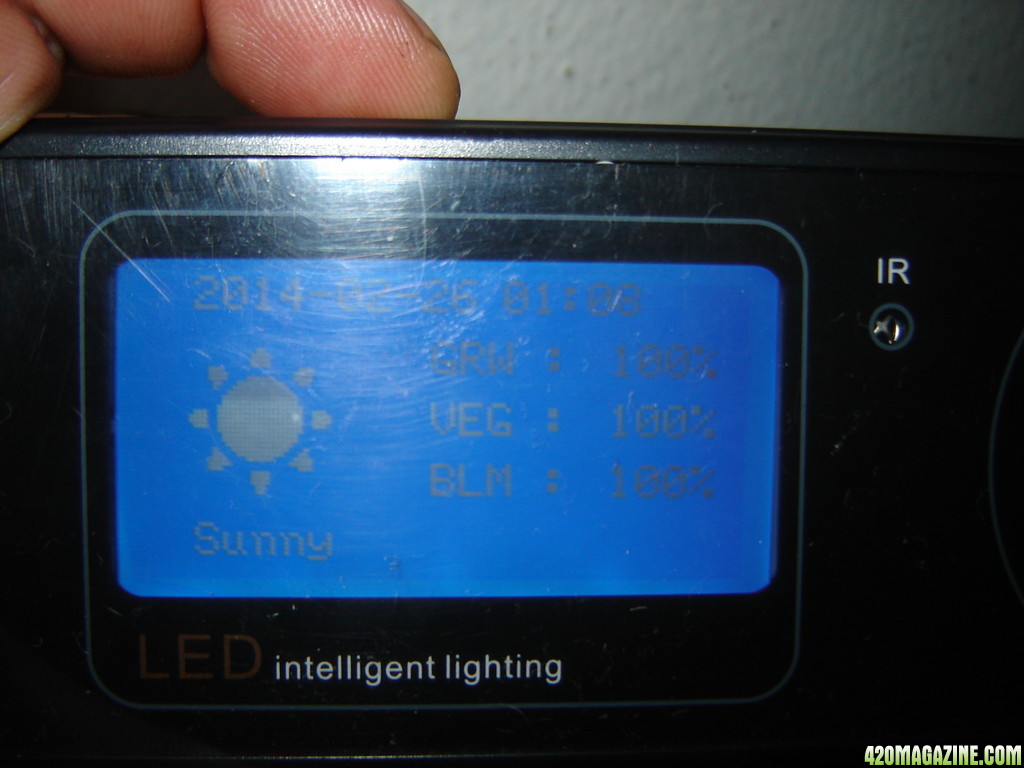
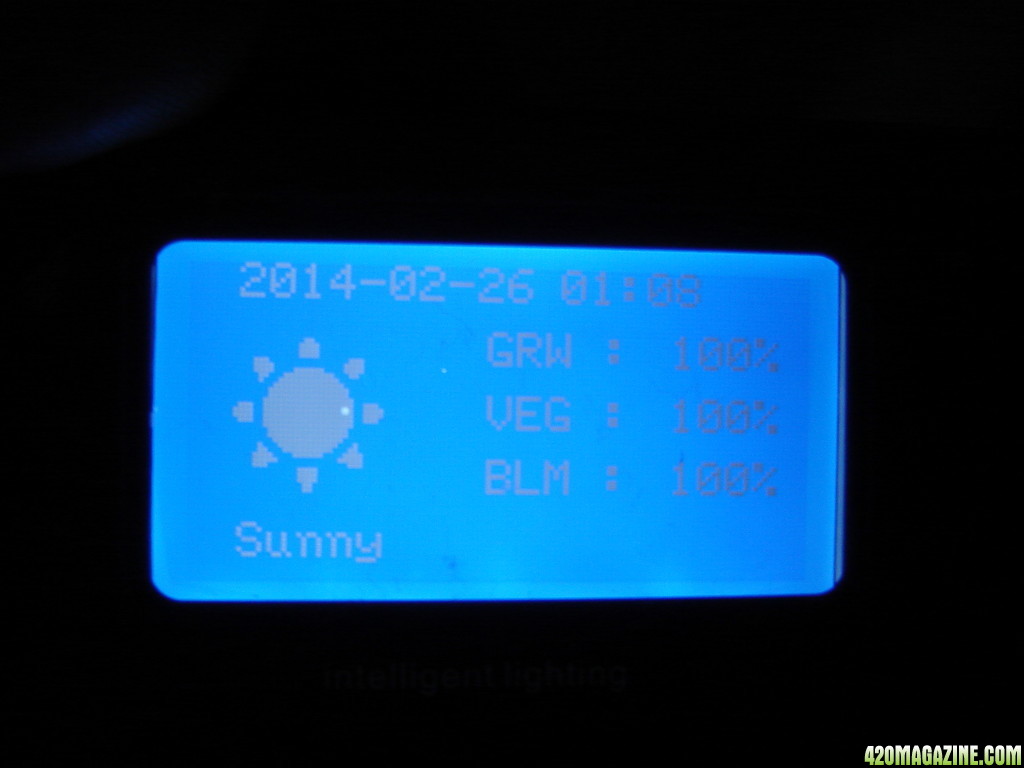
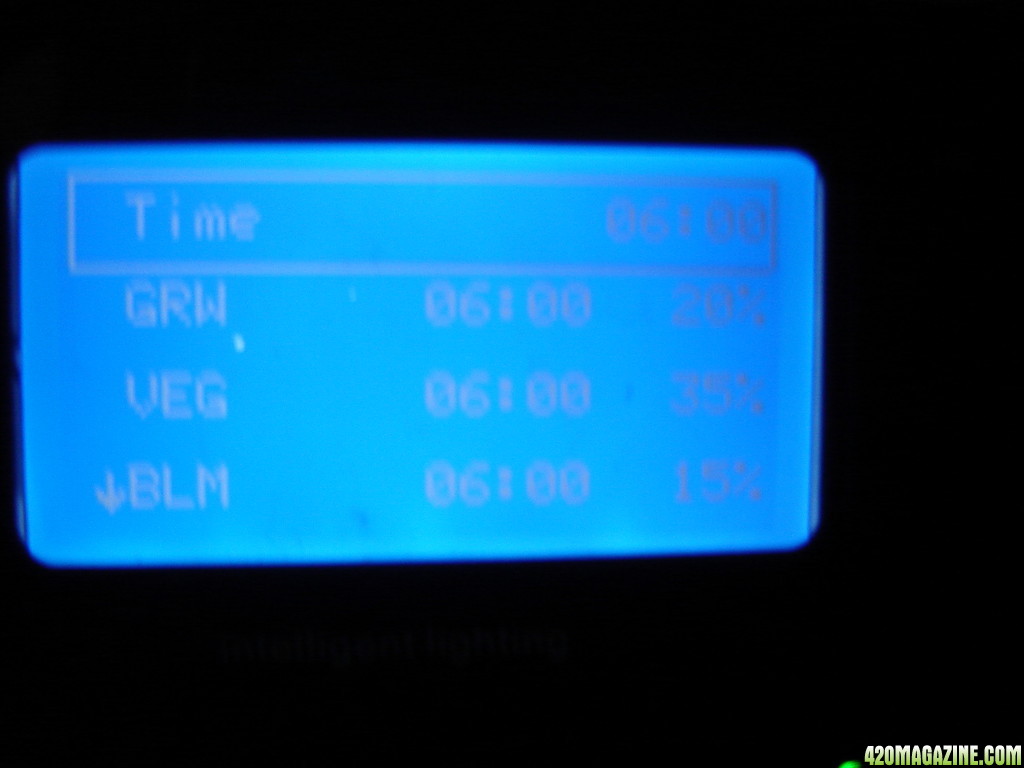
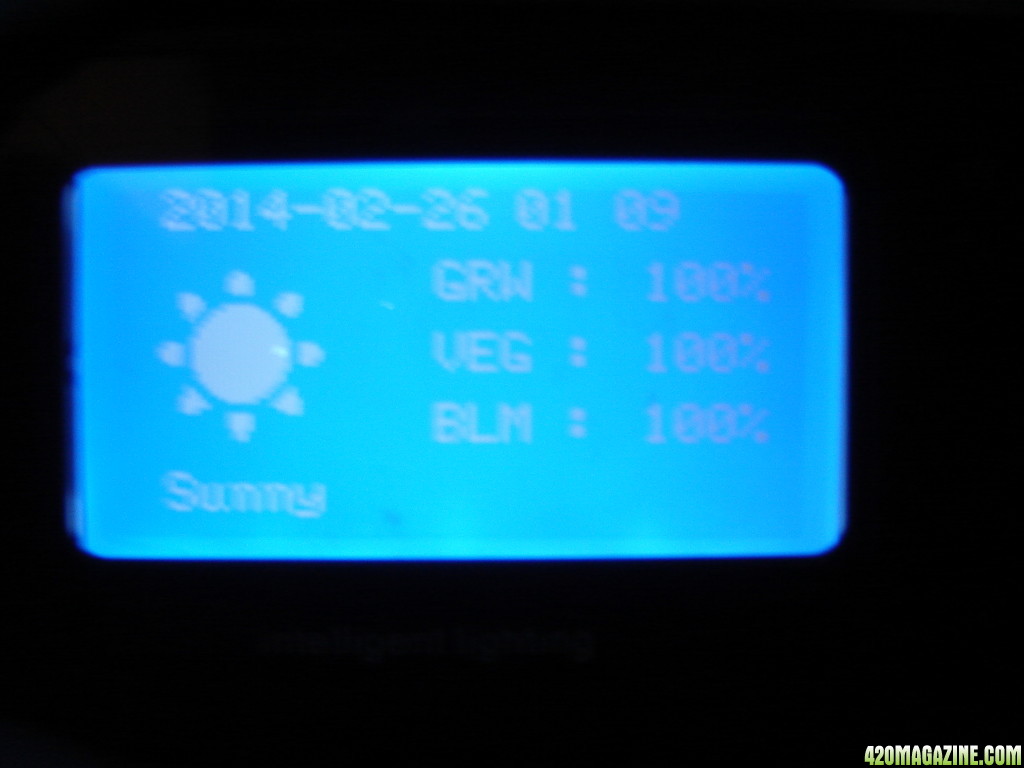
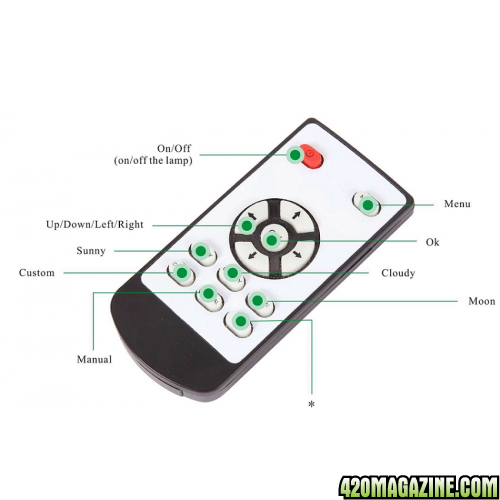
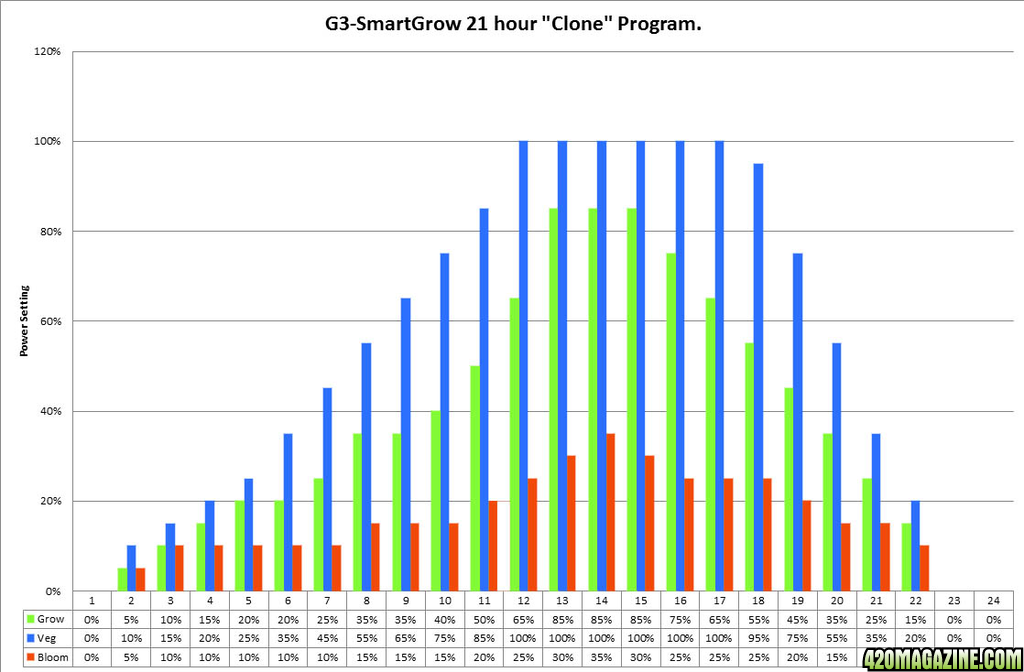
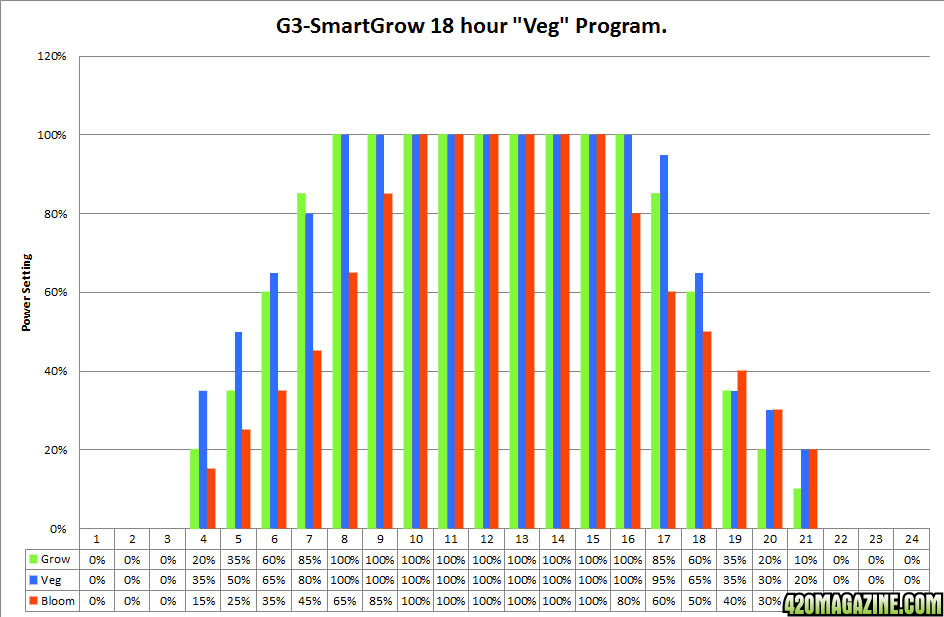
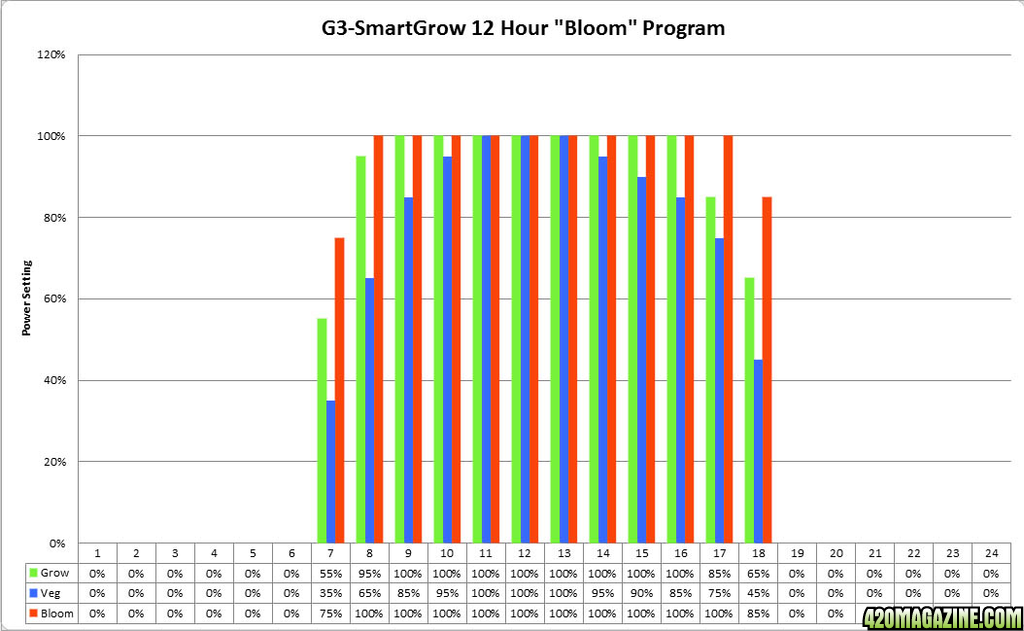
Three Programmable LED channels:
- Independent channels for Growing, Vegetation, Flowering
- Mode setting for sunset, sunrise, sunny, cloudy, 24 hoursrecycling
- Customized setting for each channel in each hour, 24 hours recycling
- More energy saving with controller
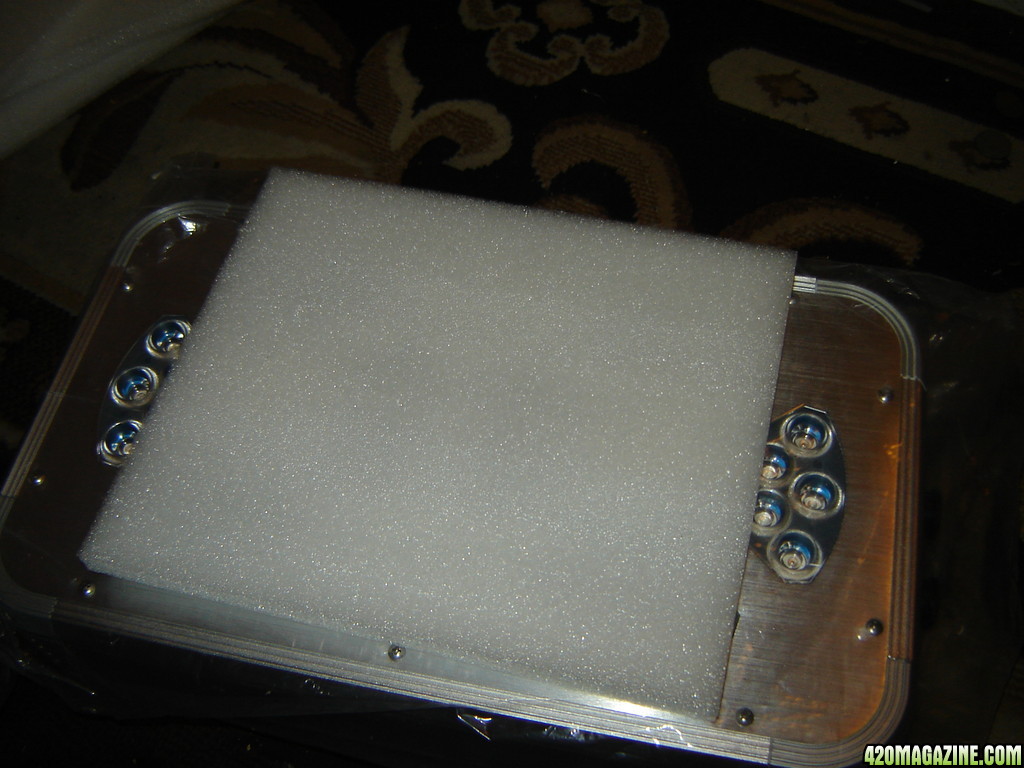
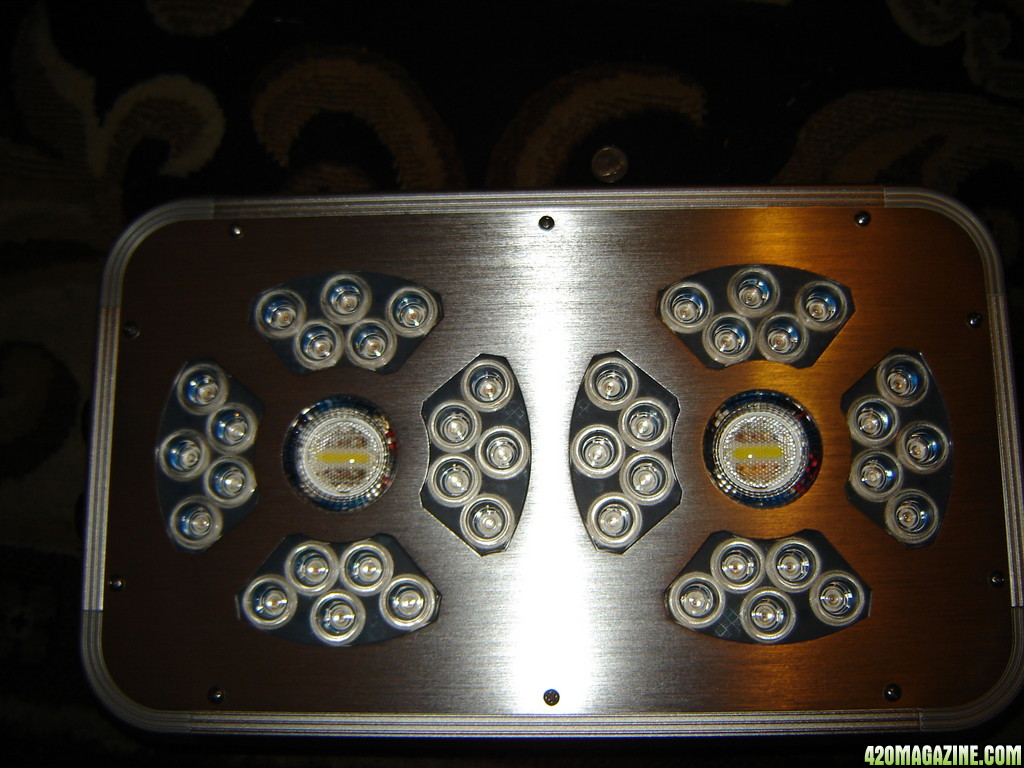
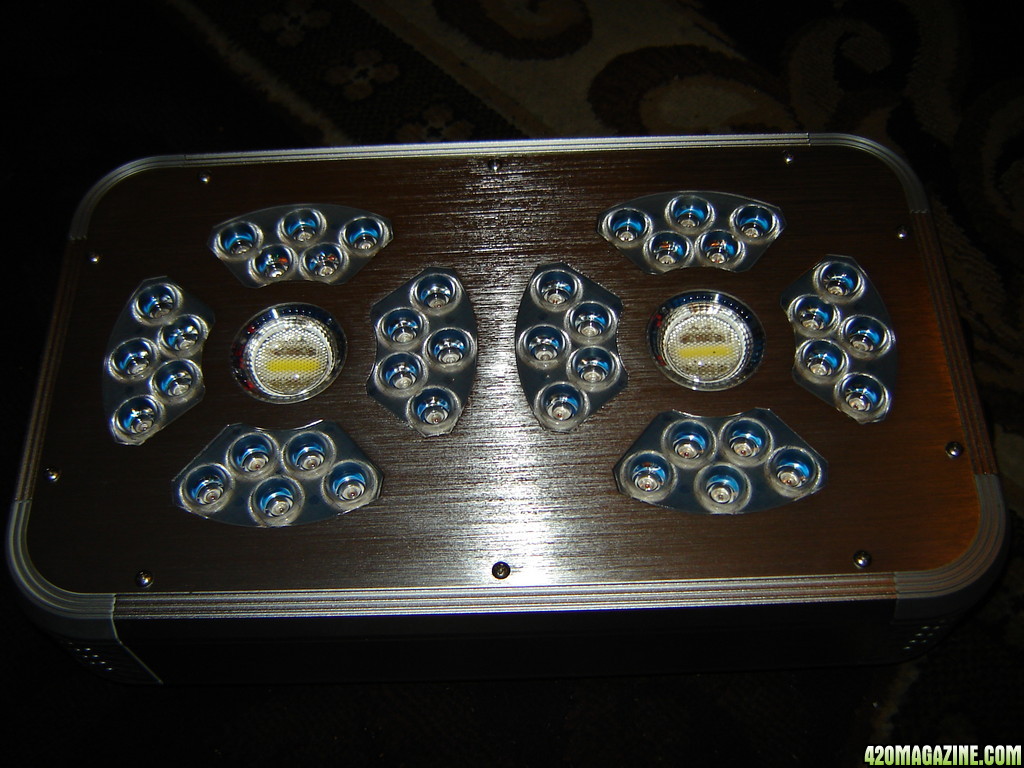
54W High power center (105°beam angle) + 3W LEDs surrounded (78° beam angle):
- High power penetration
- Even LED light coverage
Daisy chain control:
- One controller can support 10 lamps
- Synchronous control
- Saving cost for controller
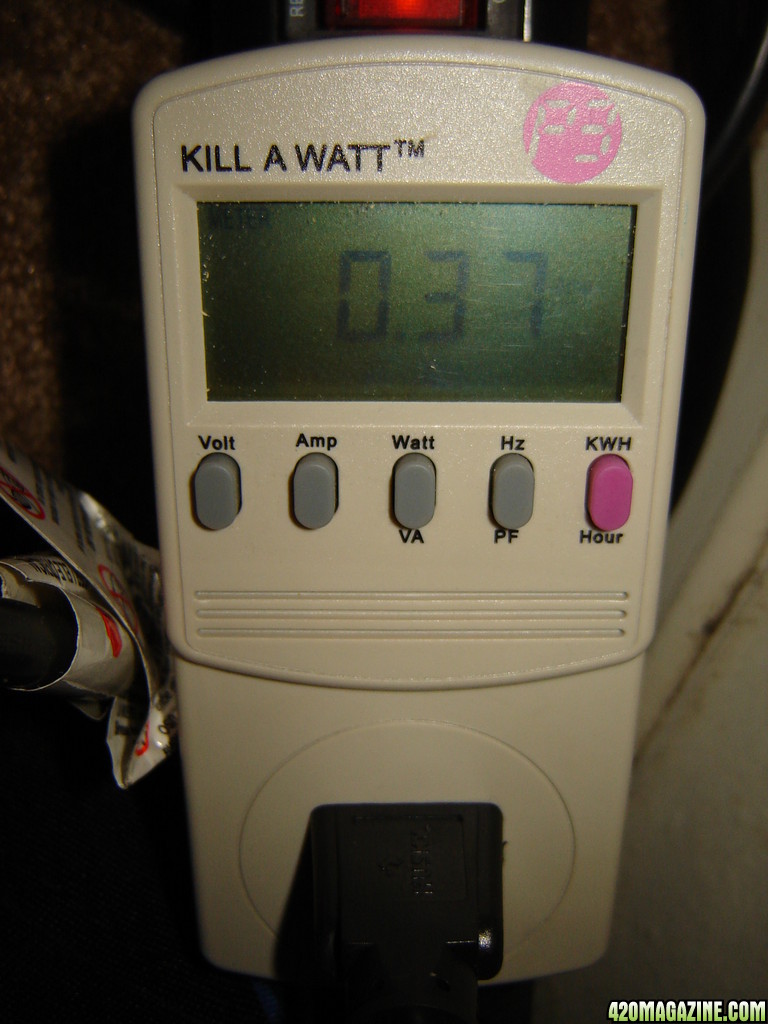
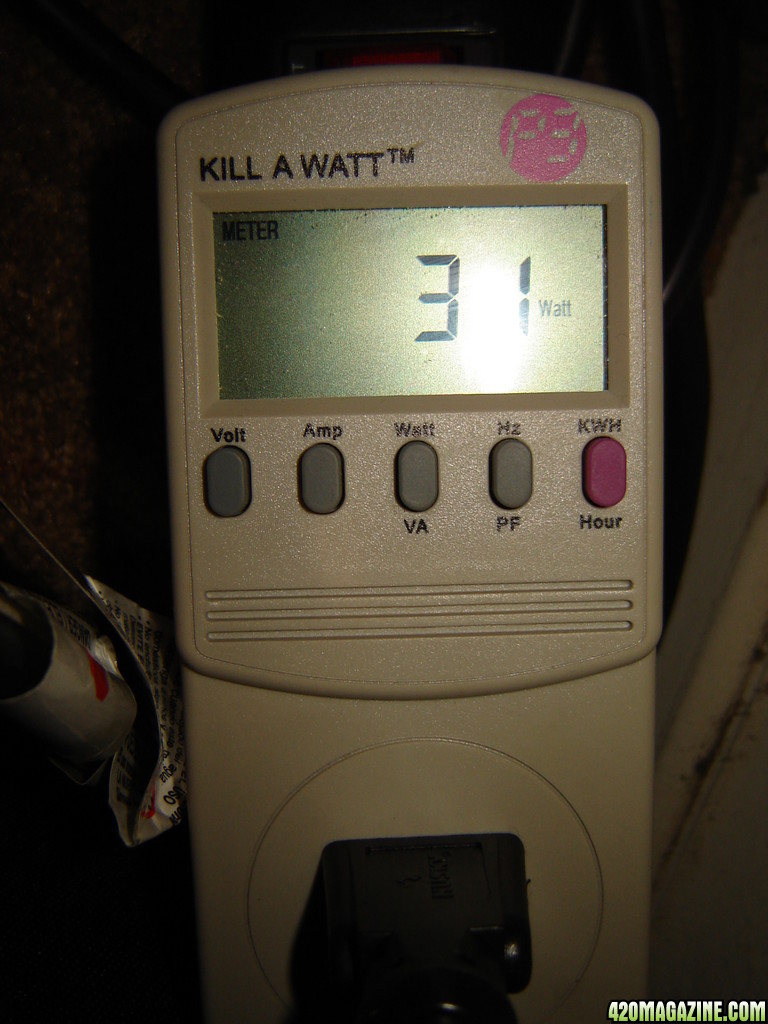
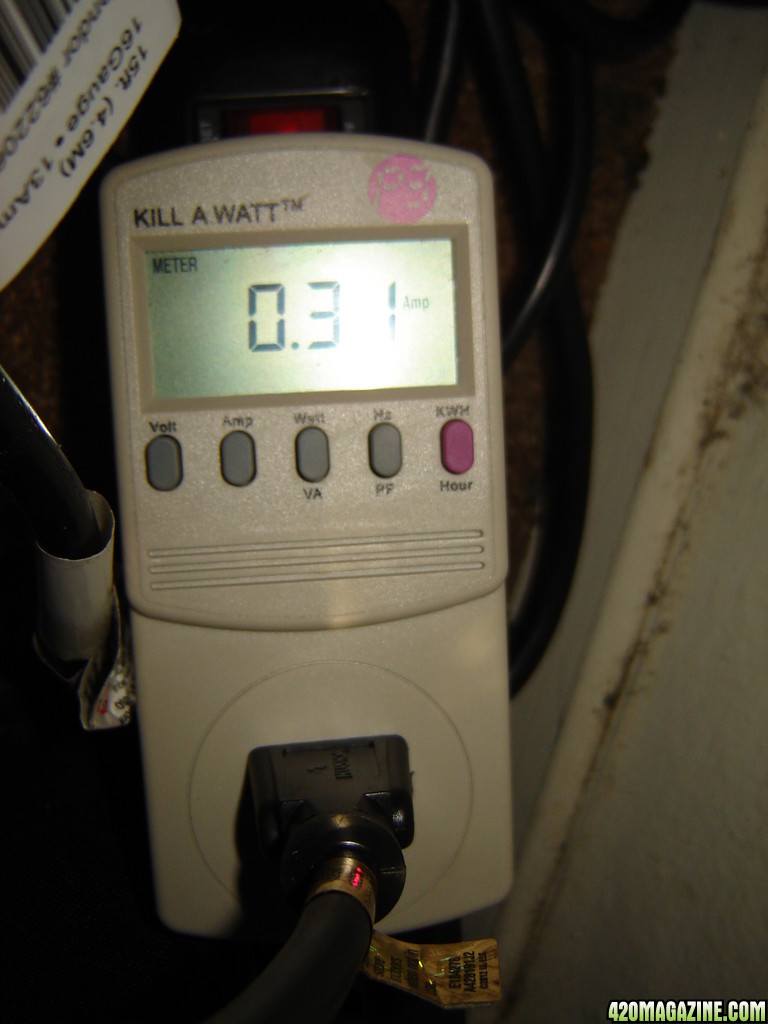
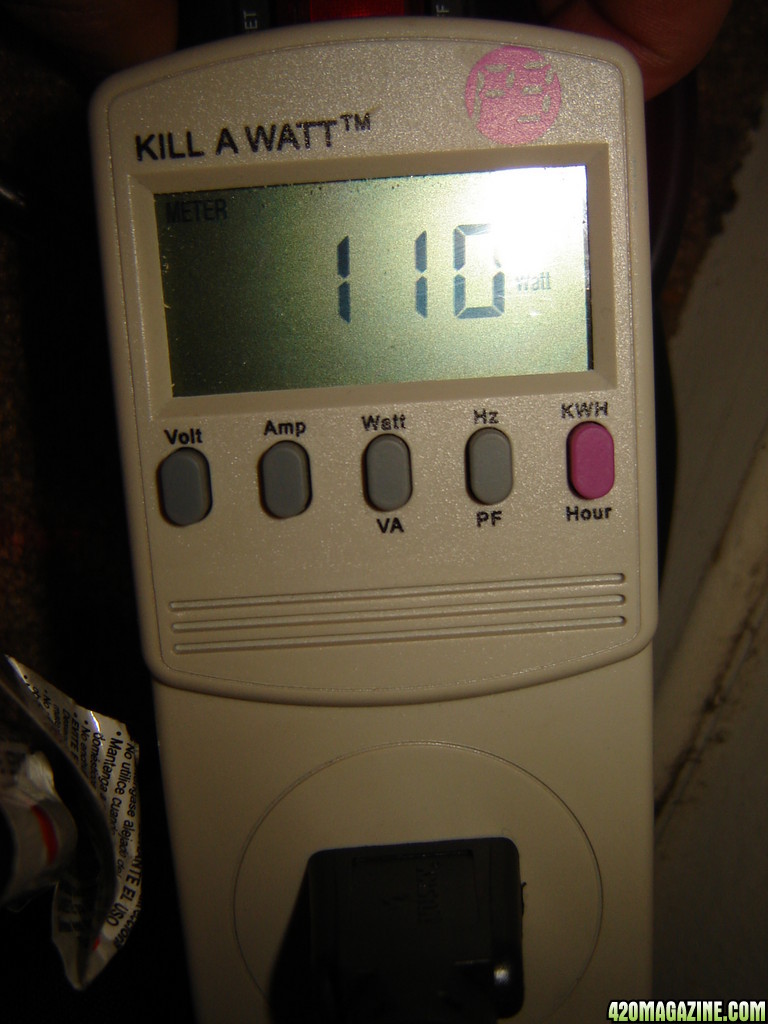
High energy-efficiency:
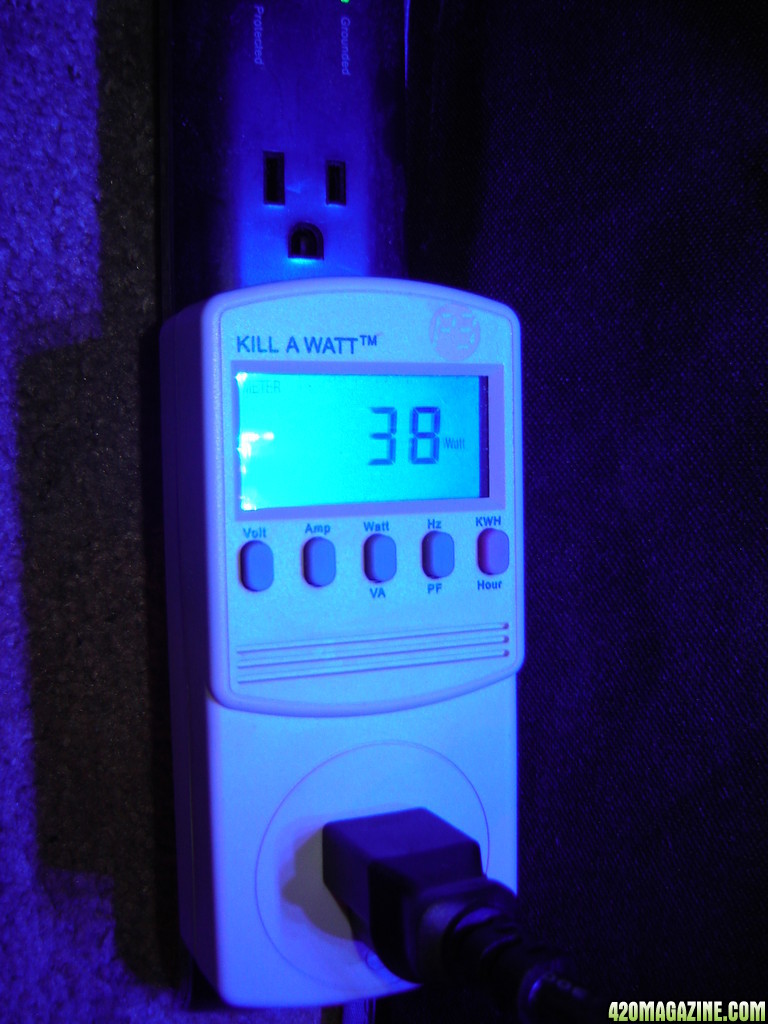
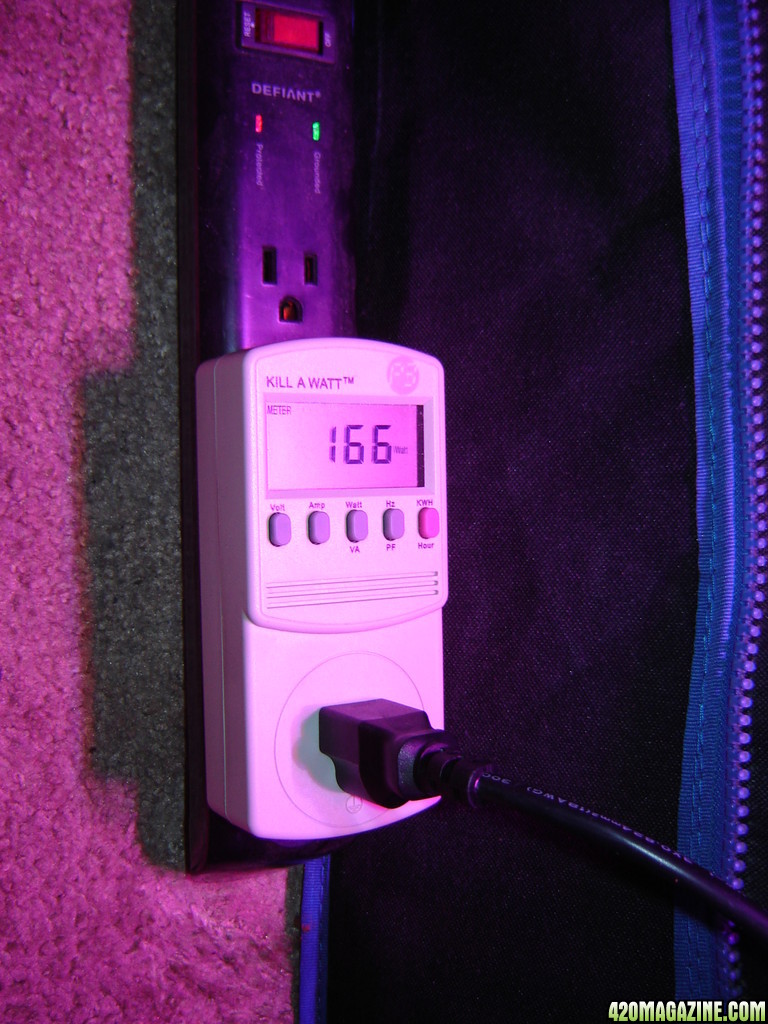
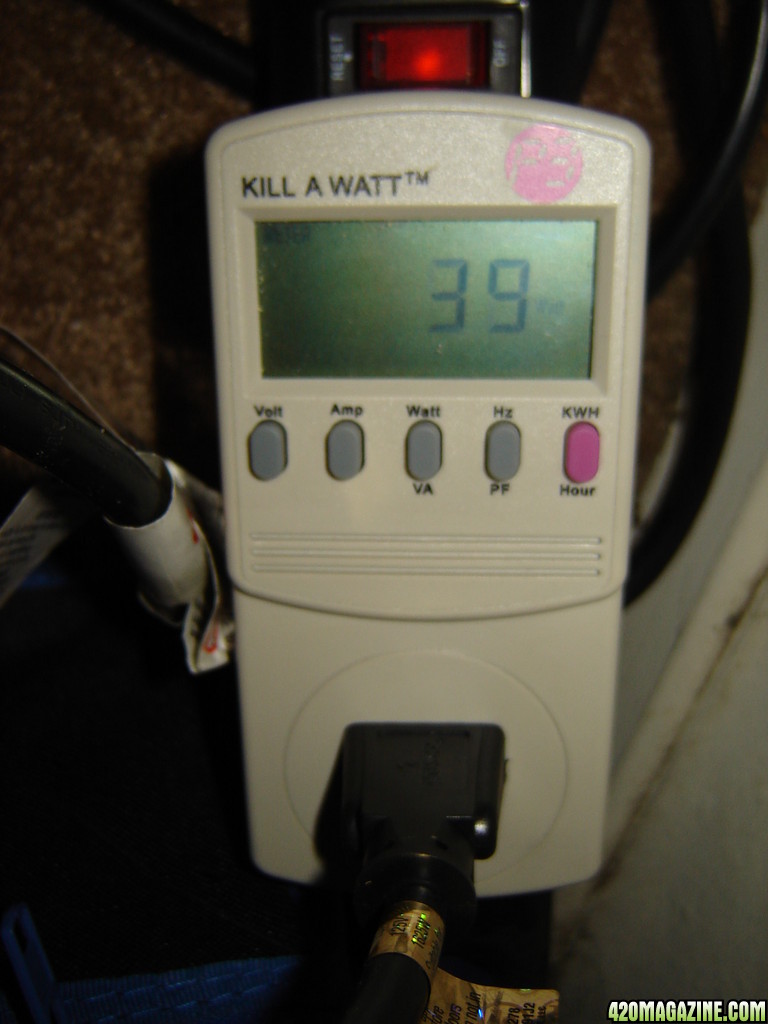
-Intelligent-Gro LED Grow Lights cost between 40% - 70% less to operate compared to HID lamps
Application:
- Commercial Greenhouses
- Indoor and Vertical Farms
- Nurseries
- Research
Certificate:
-CE and ROHS
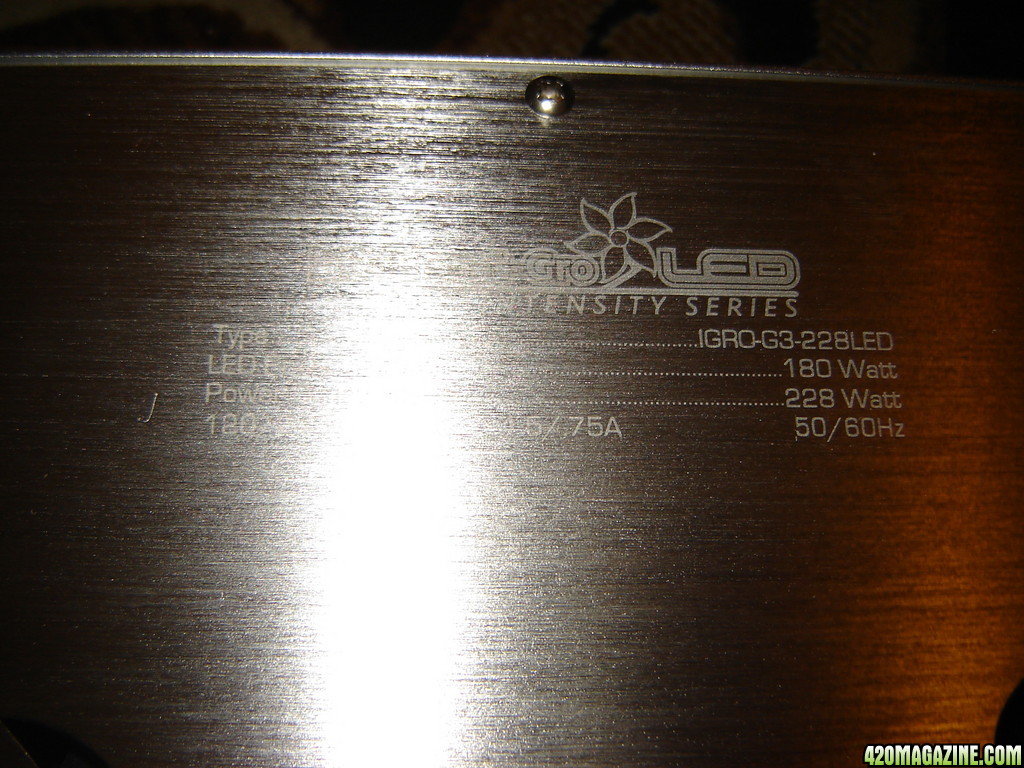
Specifications
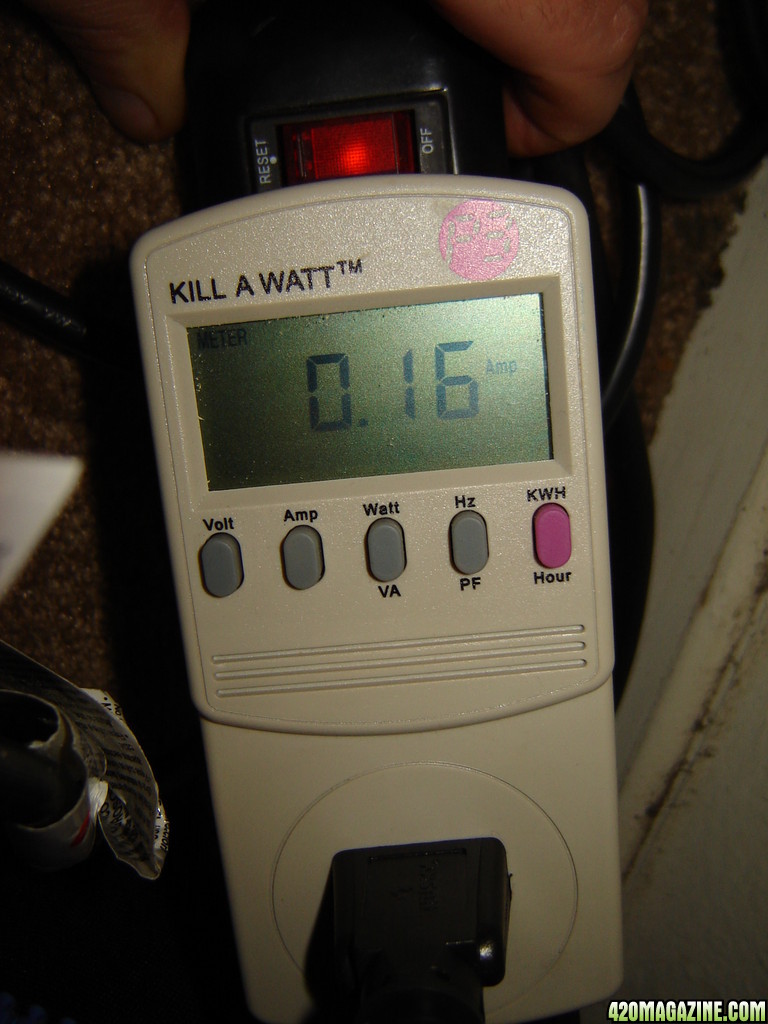
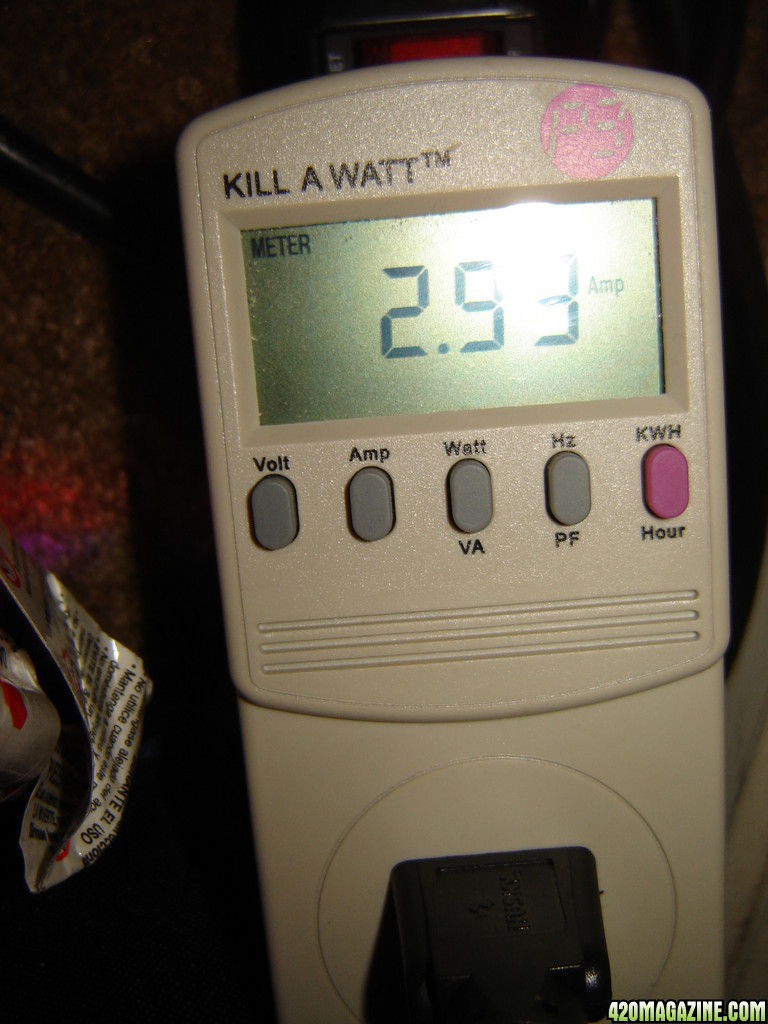
AC input 85V - 265V / 50-60Hz
AC plug standard Customized
Auto-Grow Programmable
Beam angle 105° +78°
Color options Silver
Daisy chain Support 10 units / controller
Gross weight 3.78kg
Housing material Aluminum
LED channels Growing/vegetation/flowering
Life span 50000 hours
Modularized design Yes
Net weight 2.98kg
Packing size 510mm"256mm"106mm
Par reading (30cm) 690 UmolCO2 m-2.s-1.
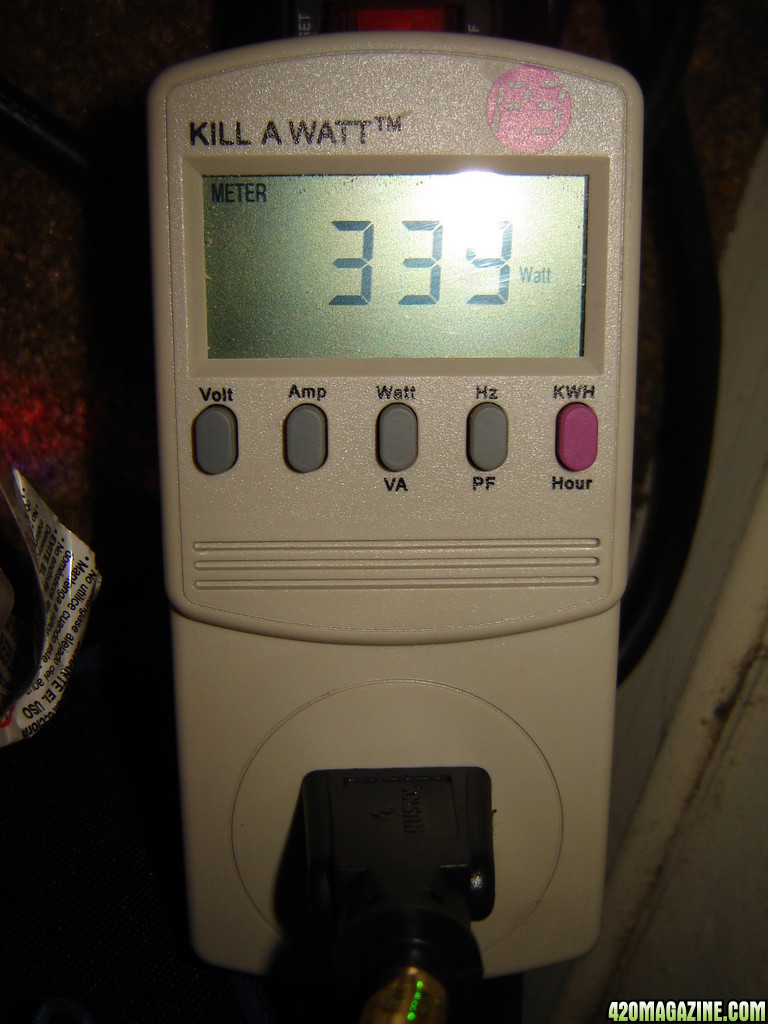
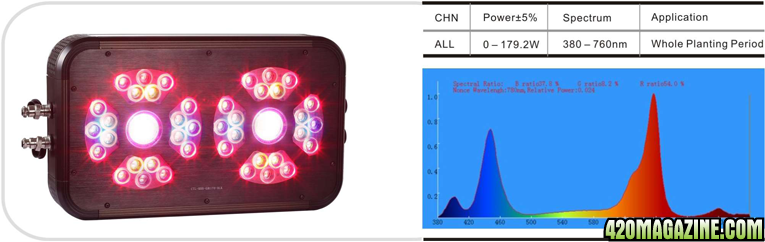
power 228W
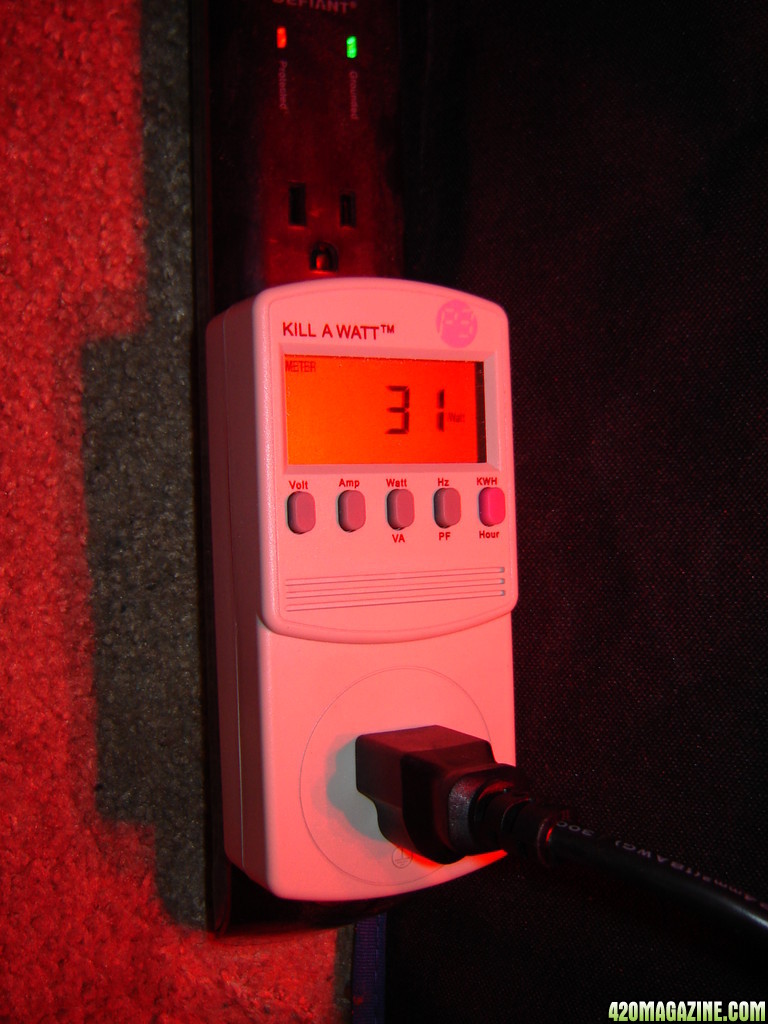
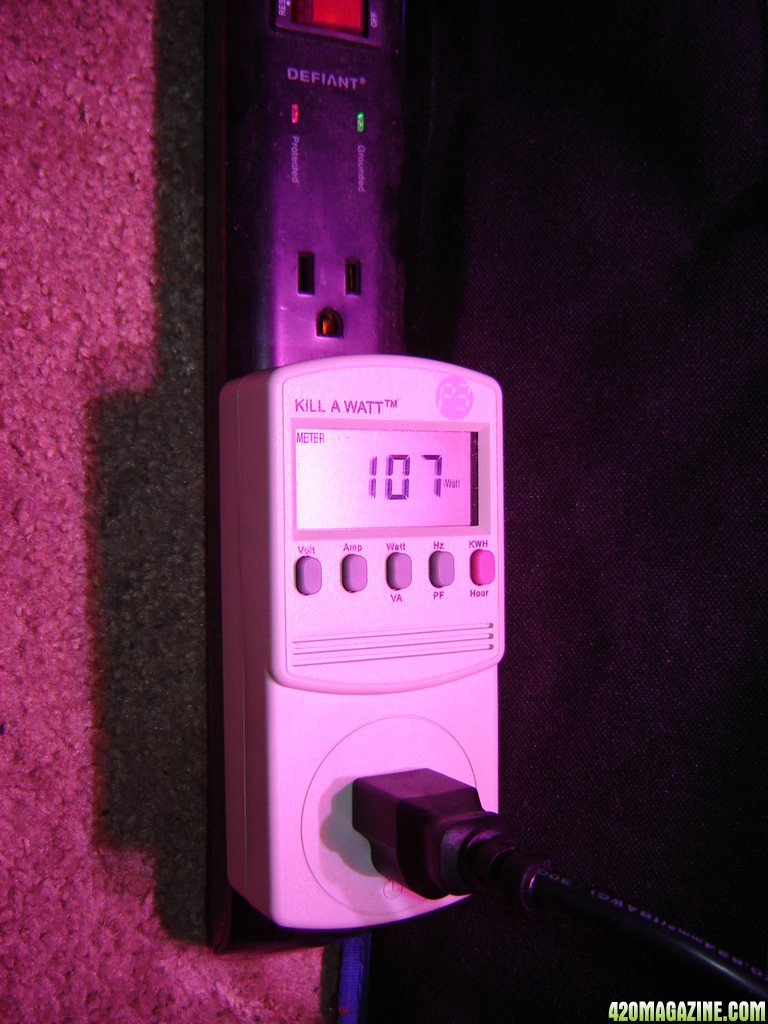
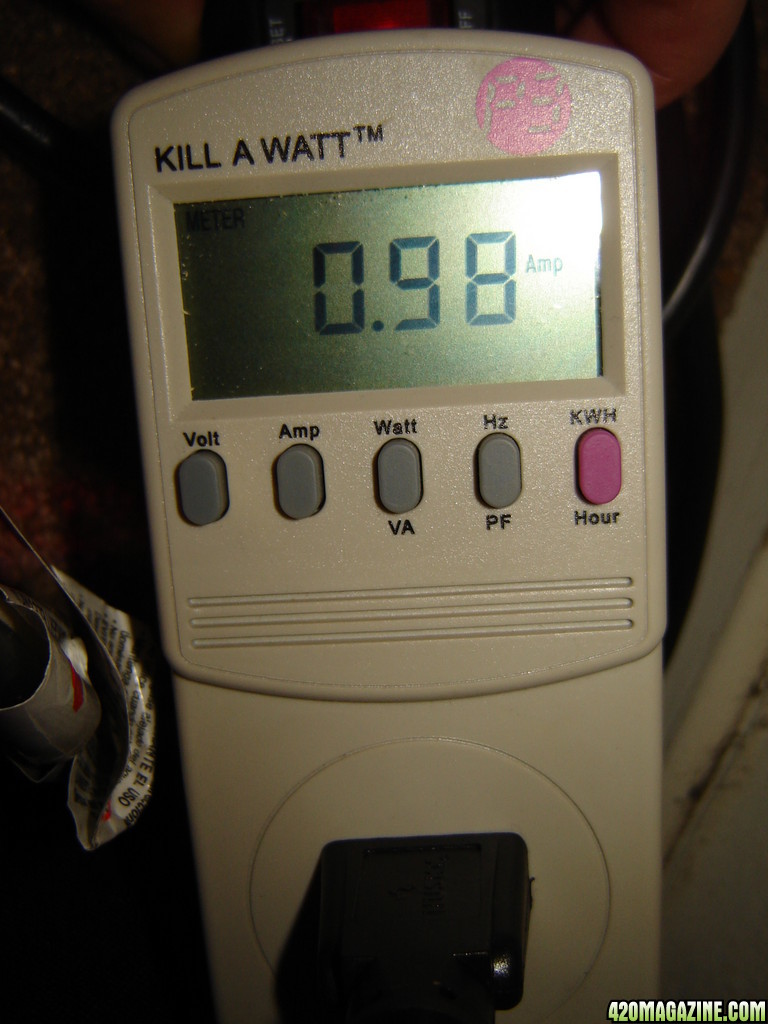
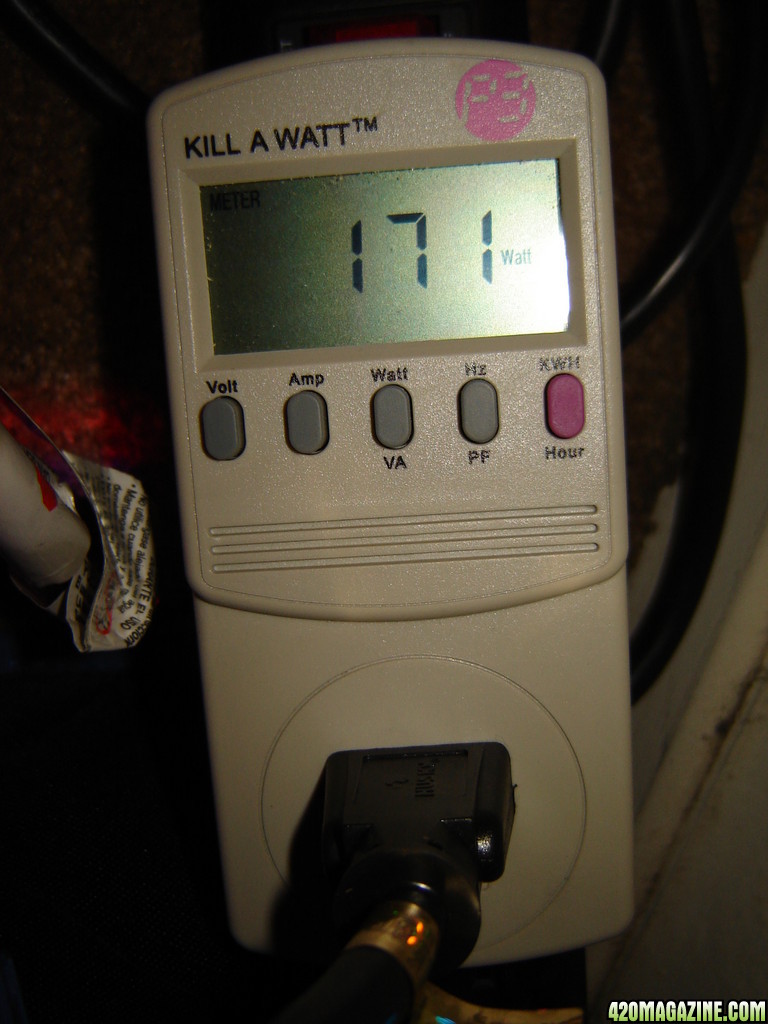
Power consumption 180W
Power efficiency >85%
Product size 370mm"220mm*70mm
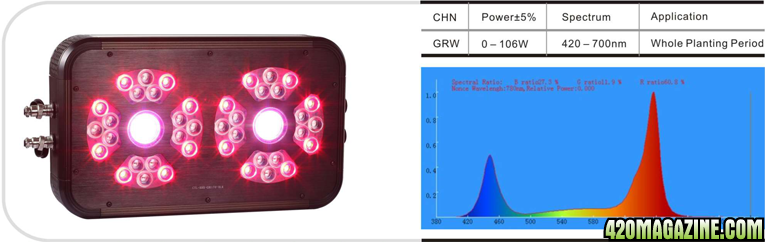
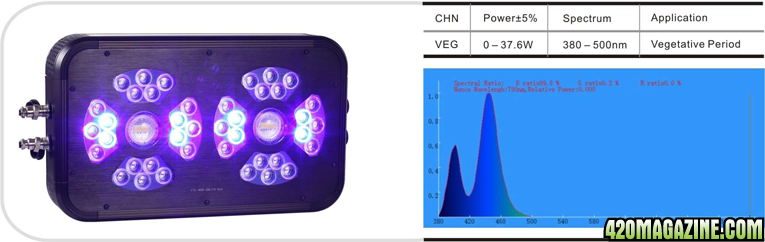
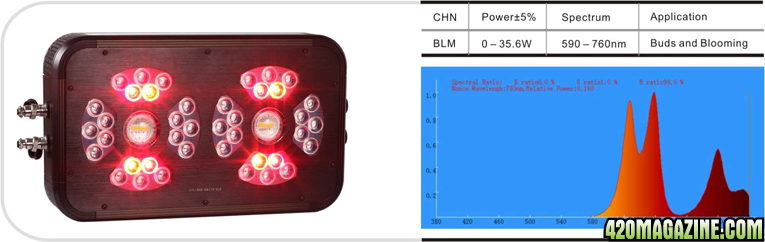
Spectrum 10 Bands with UV&IR
What strain is it?
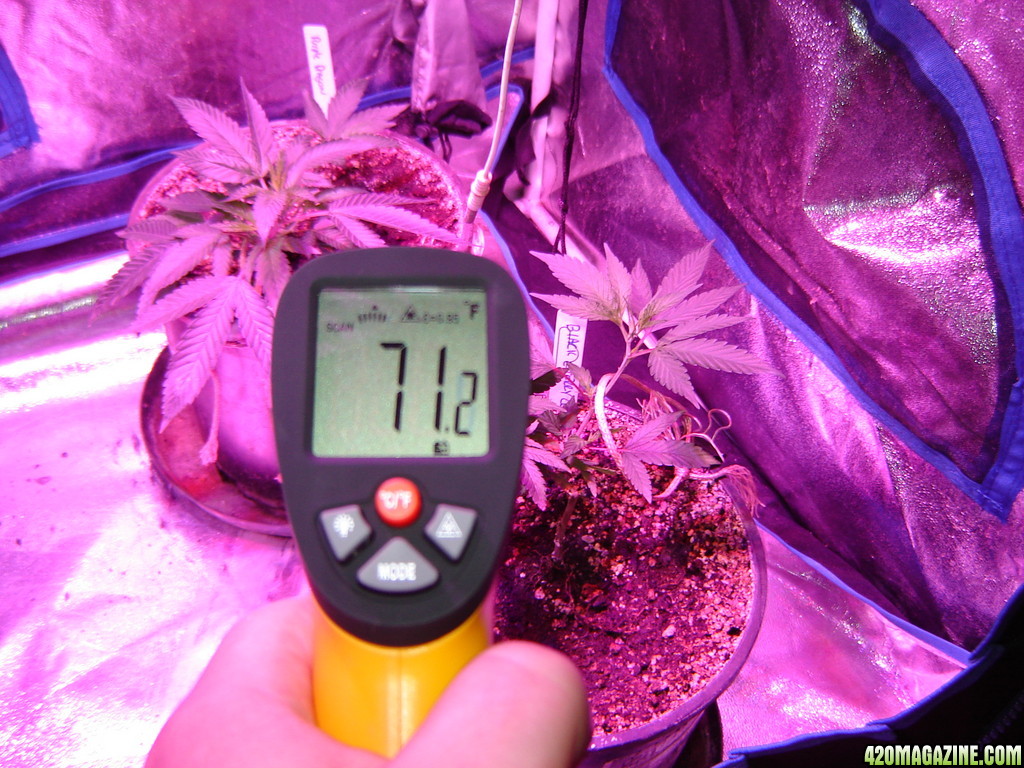
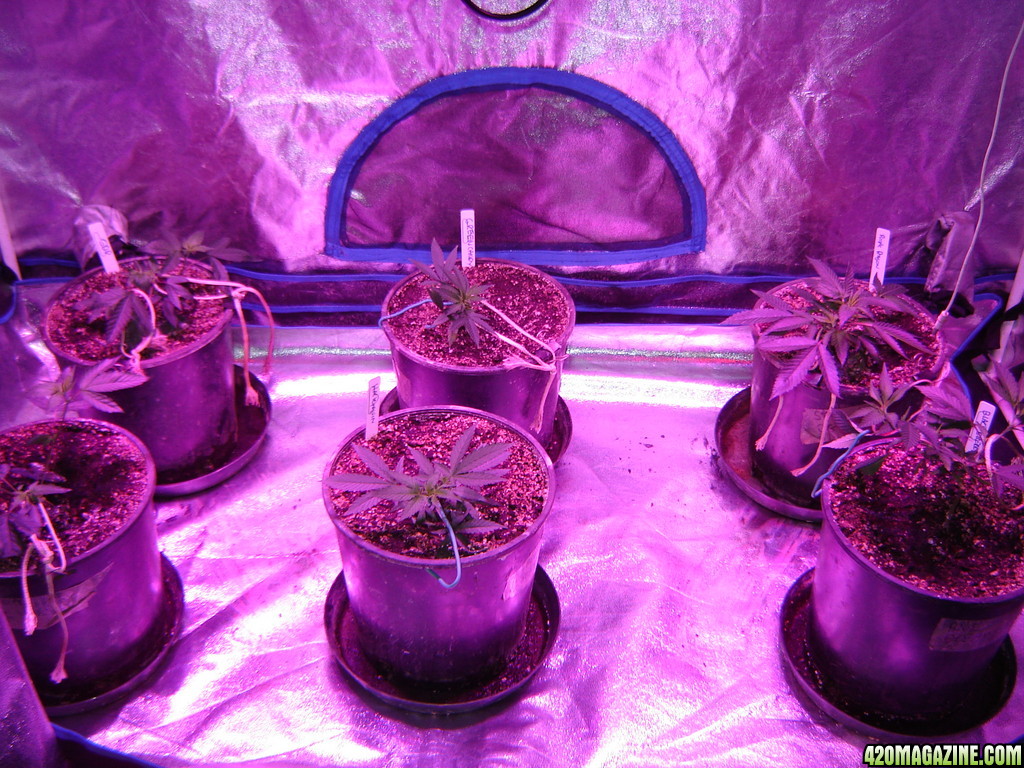
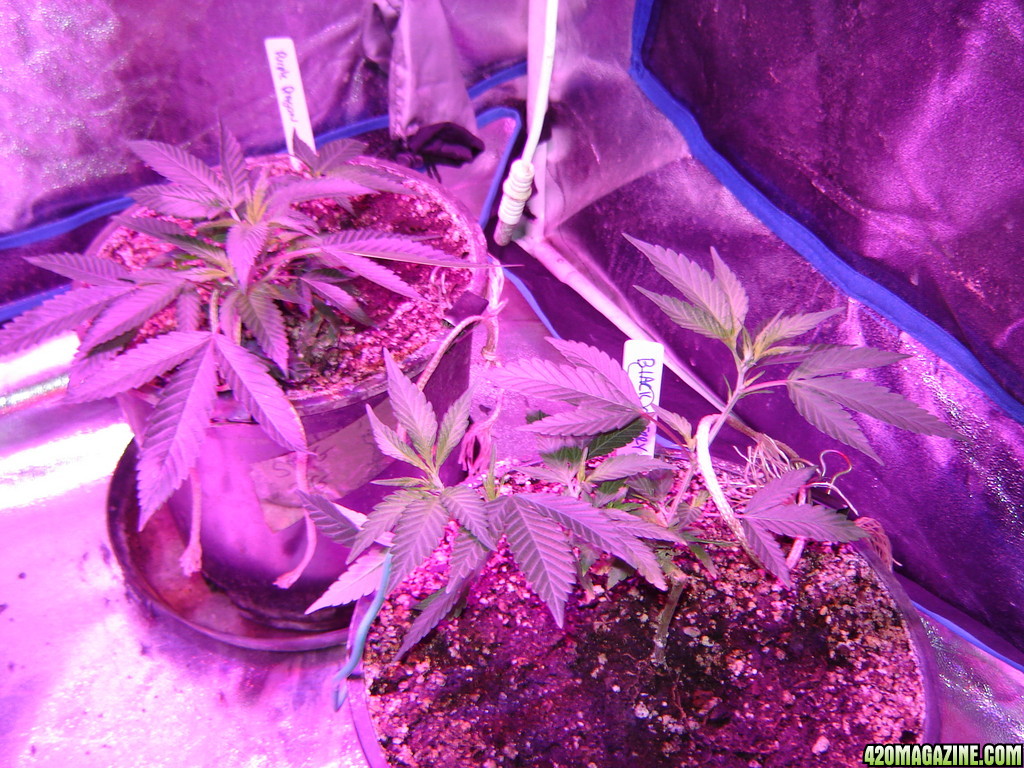
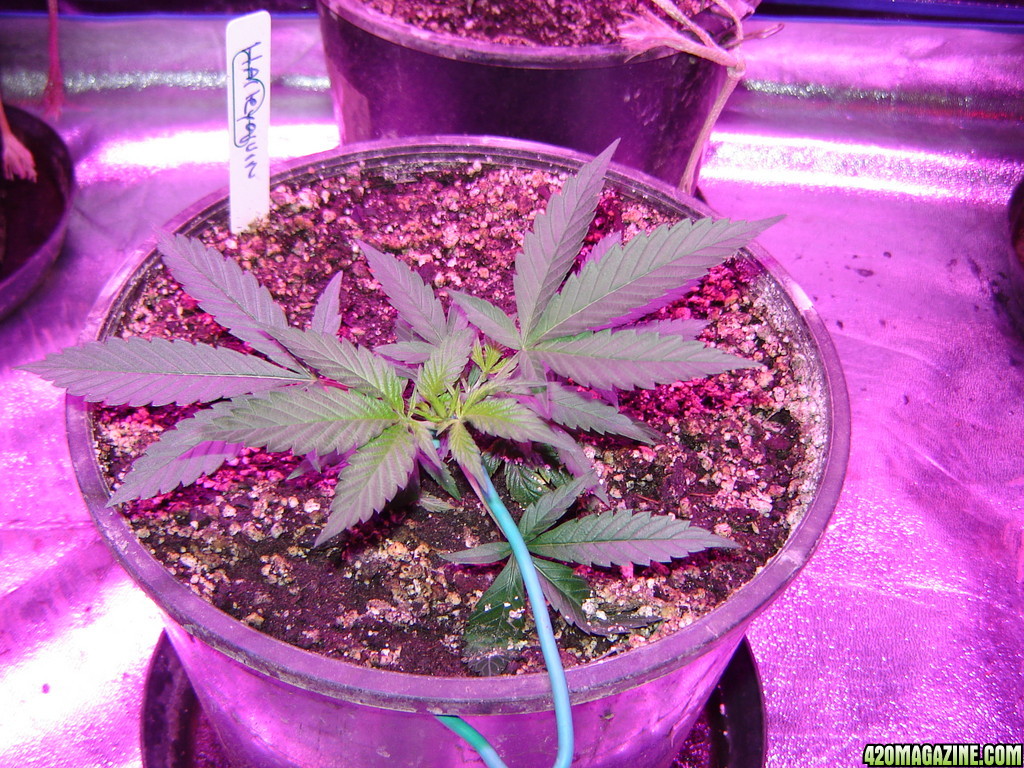
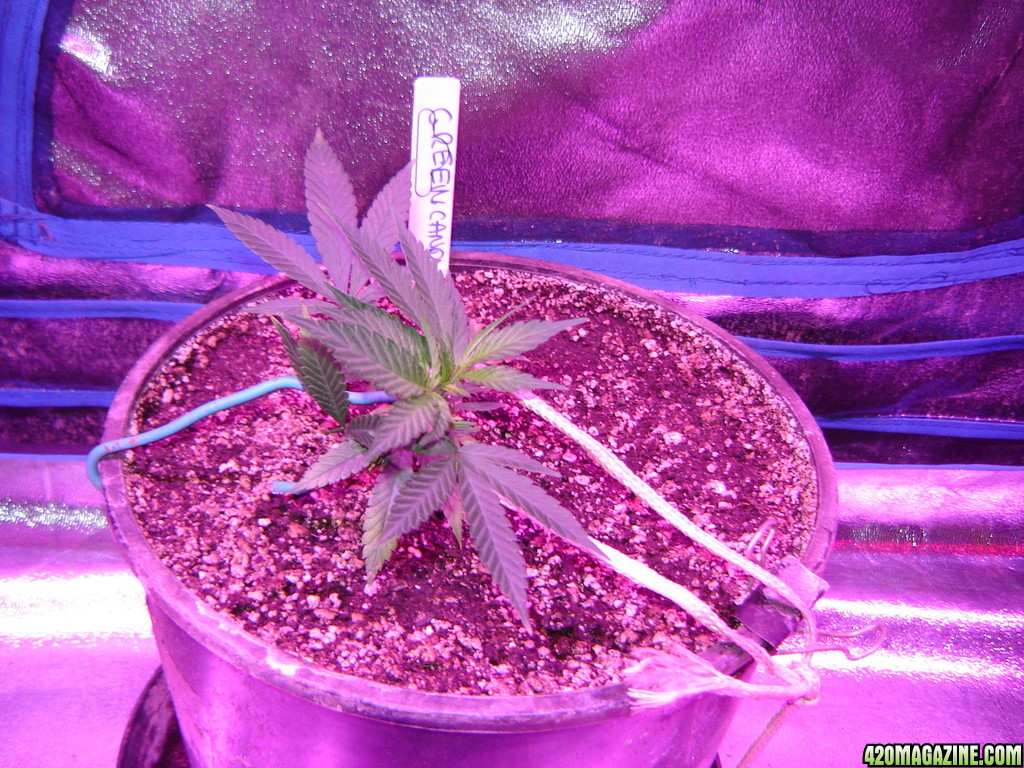
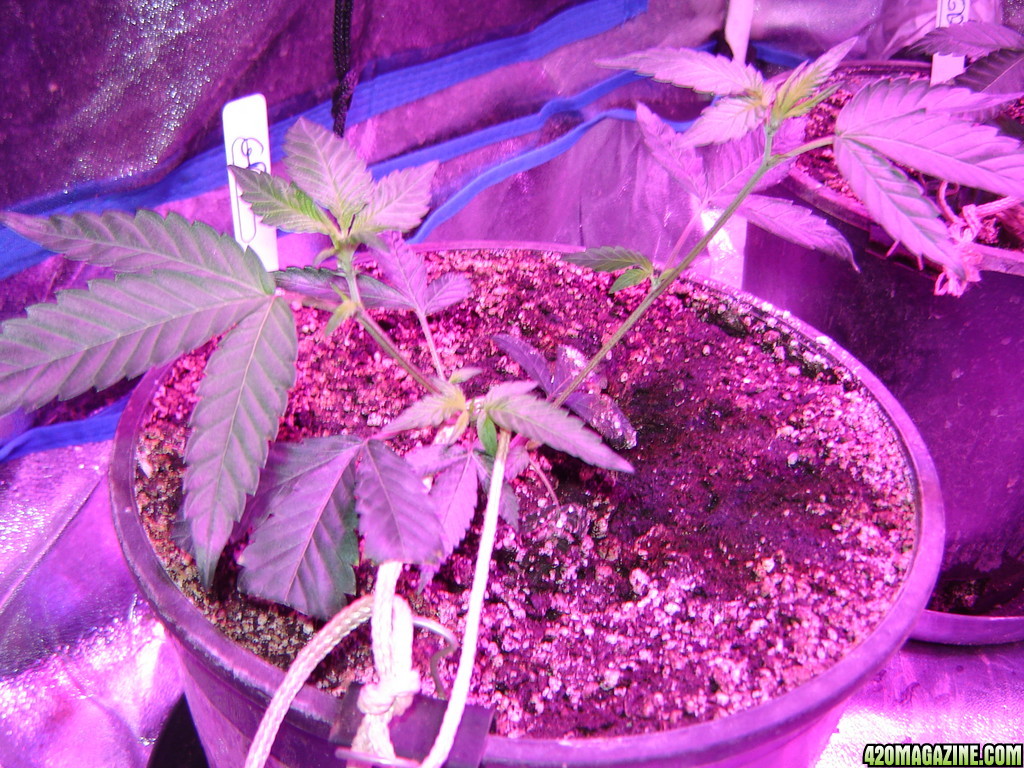
Black Cherry Cola: not exactly sure what the genetics are but found this on one website "Airborne G13 X Ortega x C99 x Blackberry x Cherry AK-47 — 20% Indica/80% Sativa"
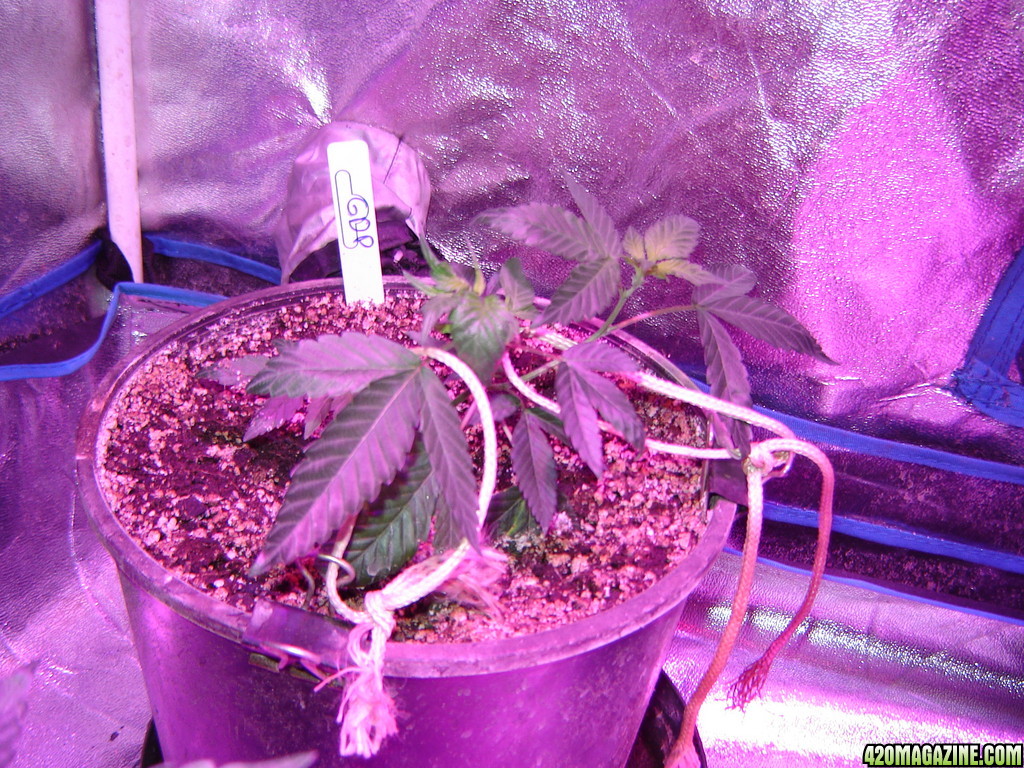
GDP: Supposedly Big Bud x Purple Eurkle, this is one of my favorite strains. I am excited to have 2 of them Definitely going to have to keep them around for a while.
Harlequin: A High CBD strain that gives about a 1:1 ratio of THC/CBD, great for the medicinal effects without a full blown high. About a 75%/25% sative/indica and typically produces 4-6% CBD or higher I couldn't find the details on the genetics but the sativa side is supposedly from a columbian gold and a strain from switzerland and the indica side from a Nepal strain.
Purple Dragon: Purple Urkle x Blue dragon (Sour Diesel x Blueberry)
Green Candy OG: Green Cr@ck x Candy Kush (OG x Trainwreck)
Is it in Veg or Flower stage?
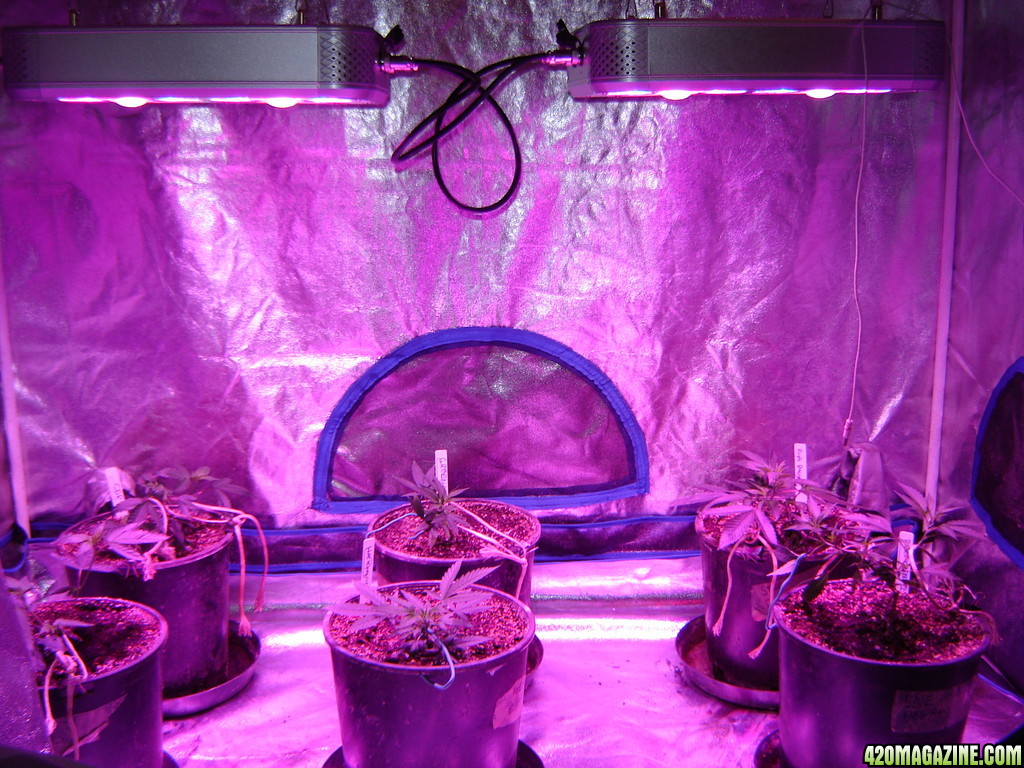
Newly transplanted clones I received from a local clone dispensary.
If in Veg... For how long?
These plants were clones that I purchased a few weeks ago from a local clone dispensary and they say that all the genetics are verified. The clones were transplanted into 3 gallon pots about a month ago and vegged under LED. Now that I am using Intelligent-Gro LED, I will be using the 18-6 veg schedule with custom settings recommended on their website.
Indoor or outdoor?
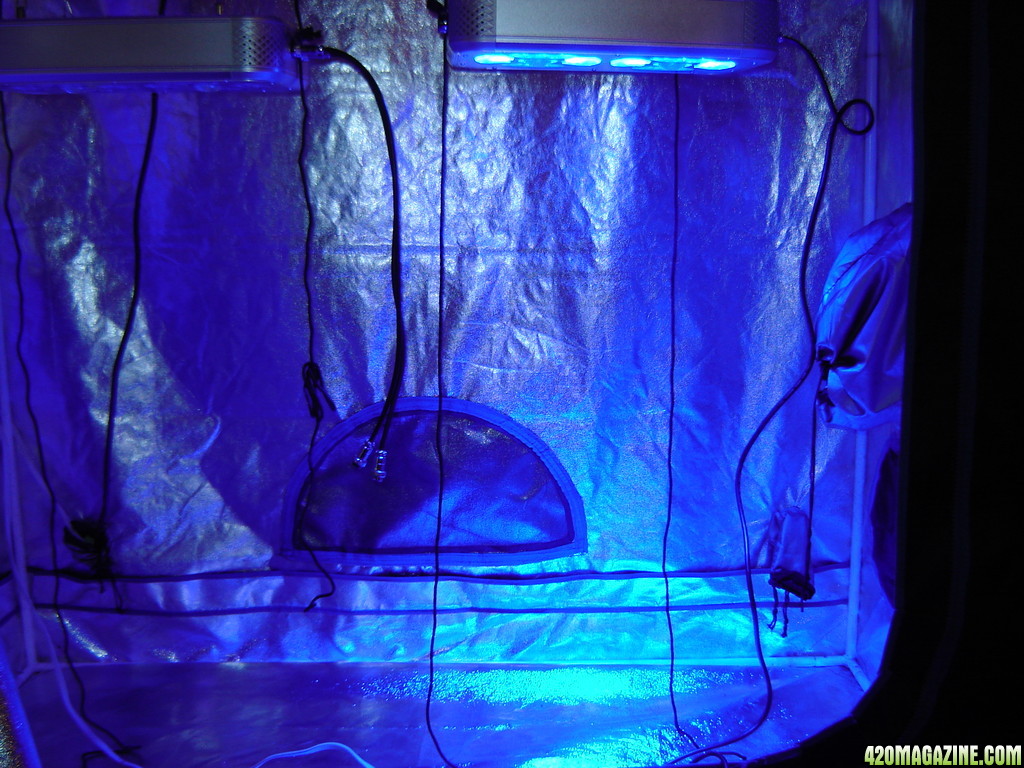
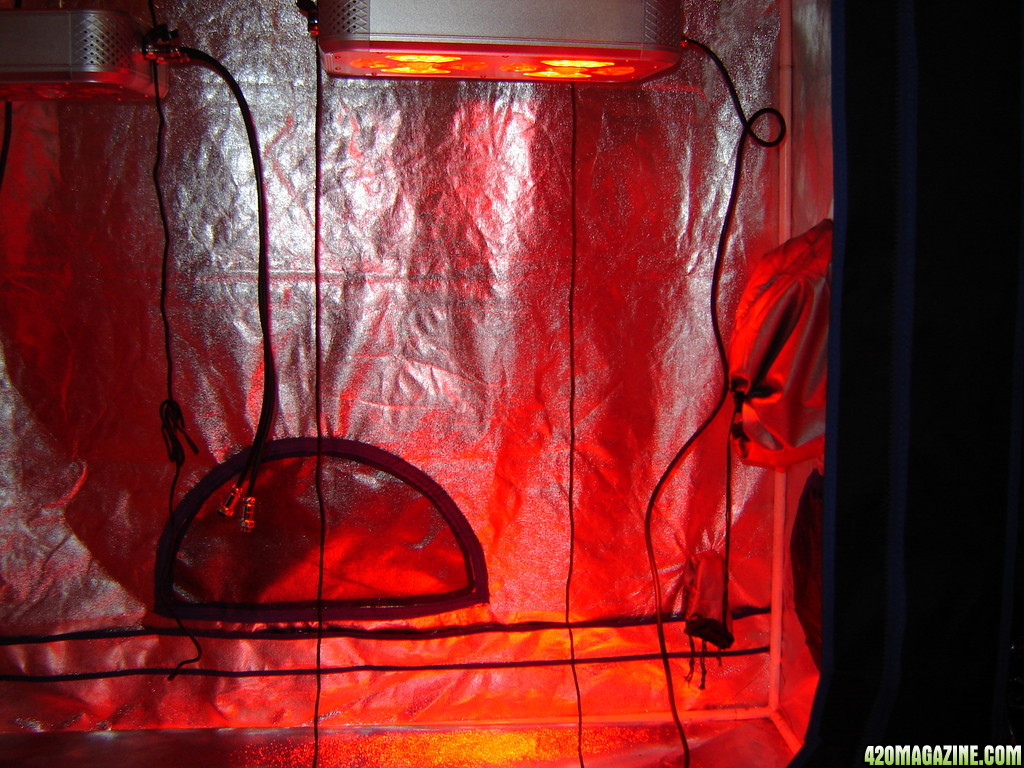
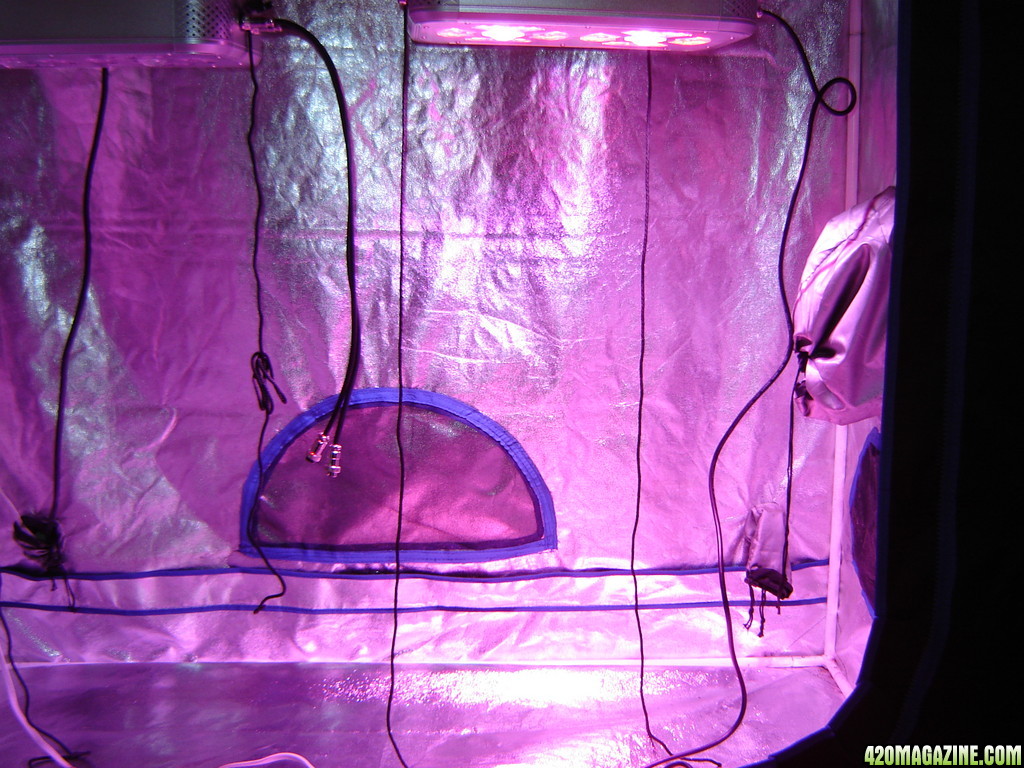
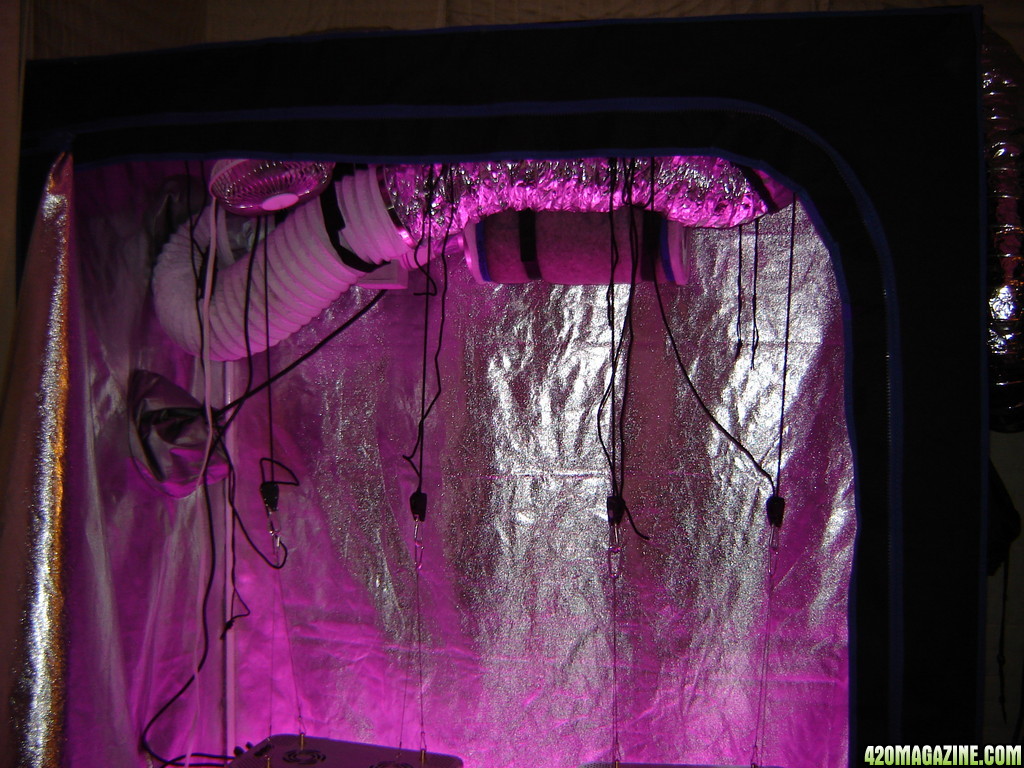
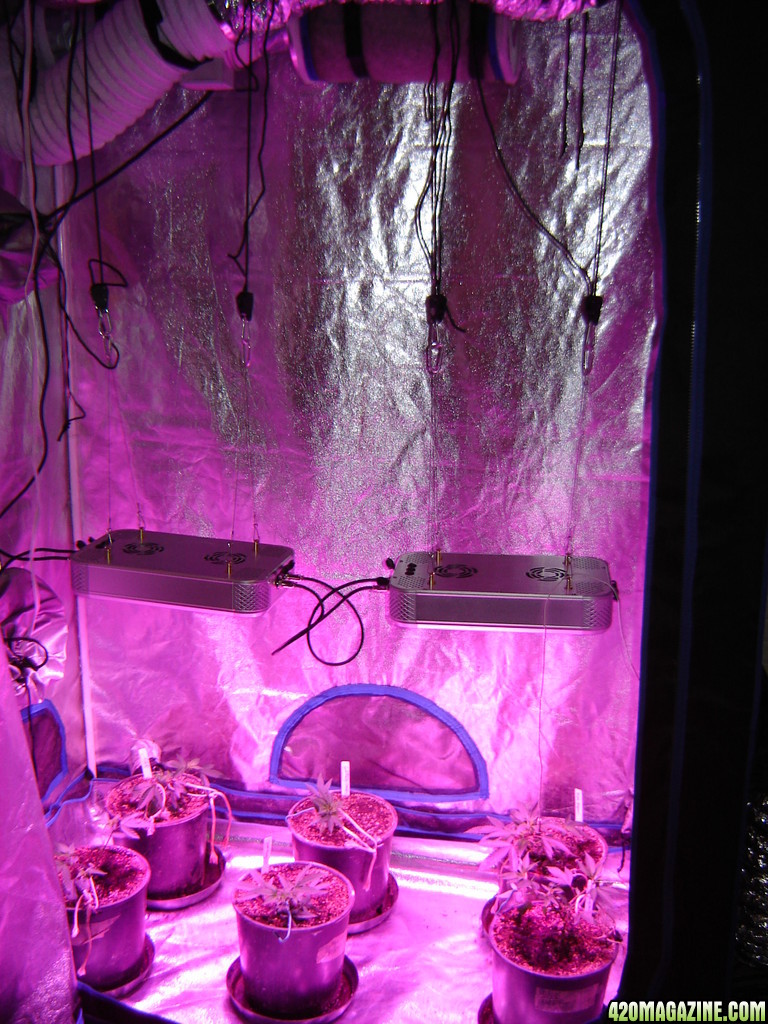
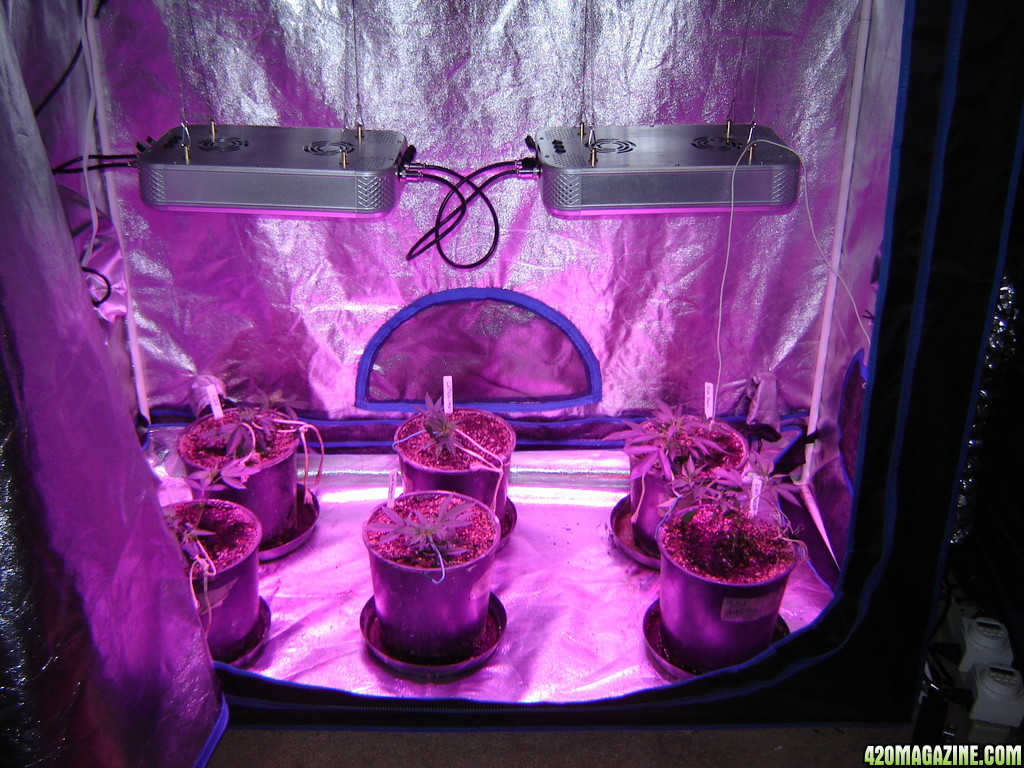
Indoor using a 2x4 Hydrohut Silver Edition (Actual Measurment 55" x 28" x 78"),
Soil or Hydro?
Soil
If soil... what is in your mix?
I am running the soil from my last grow, mixed with about 20% new soil that has cooked for a few months. Both were amended at the same time with the following amendments. Upon re-use, I did not add anything to the mix.
The Base Soil Mix:
Each of these equaled about 2 1/2 (2gallon) pots.
So a total of 5 pots of premixed soil was used
8 (2gallon pots) of ProMix HP
2 (2 gallon pots) of FF Ocean Forest
2 1/2 (2gal pots) of Worm Castings
1 1/2 (2gal pot) of Volcanic Pumice
2 (2gal pot) of Alaskan Forest Humus
The Amendments: Make up 15% of my total soil mix
1 1/2 Cup of Azomite (trace minerals and micronutrients)
4 Cups of Calcium Carbonate Powder 97%
3 1/2 Cups of Soft Rock Phosphate (Collidal Clay with high phosphorus and CEC value)
1 1/3 Cups of Gypsum (Calcium Sulfate)
2 Cups of Crab Meal 2-3-0 23% calcium(also a P source and source of chitin a hormone/growth regulator)
1 1/2 Cups of Fish Bone meal. (3-18-0) 24% Calcium
1 1/2 Cups of Lava Sand (adds trace minerals and supposedly adds paramagnetic value to the soil)
2 Cups of Crab Shell Meal 2-3-0 23% Calcium
2 Cups of Kelp Meal (also has growth hormones and PGR's, plus trace minerals)
1 Cup of Alfalfa Meal. (2-0-3) (contains Trichontinol which aids in plant growth and health)
1/2 Cup of Powdered Humic Acid (Adds Carbons to the soil as well as trace minerals and aids in chelation of minerals)
1/2 Cup of Humboldt Myco's Maximum (Beneficial Bacteria and Mycorrizae Fungus)
1/2 cup of Epsom Salts (Magnesium Sulfate)
1/3 Cup of Greensand (0-0-3) (Trace Minerals)
1/2 Cup of Dry Molasses (1-0-3) (Energy for the Microbes)
If soil... What size pot?
3 gallon round plastic for veg, before flowering transplant into 5 gallon plastic square pots.
Size of light?
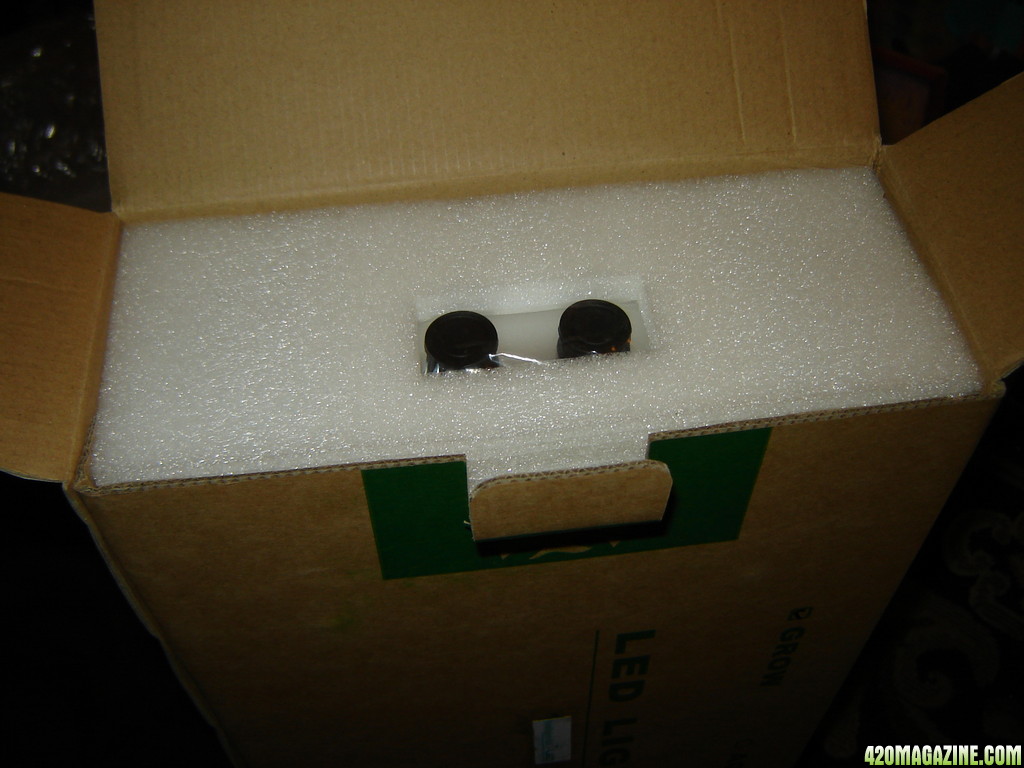
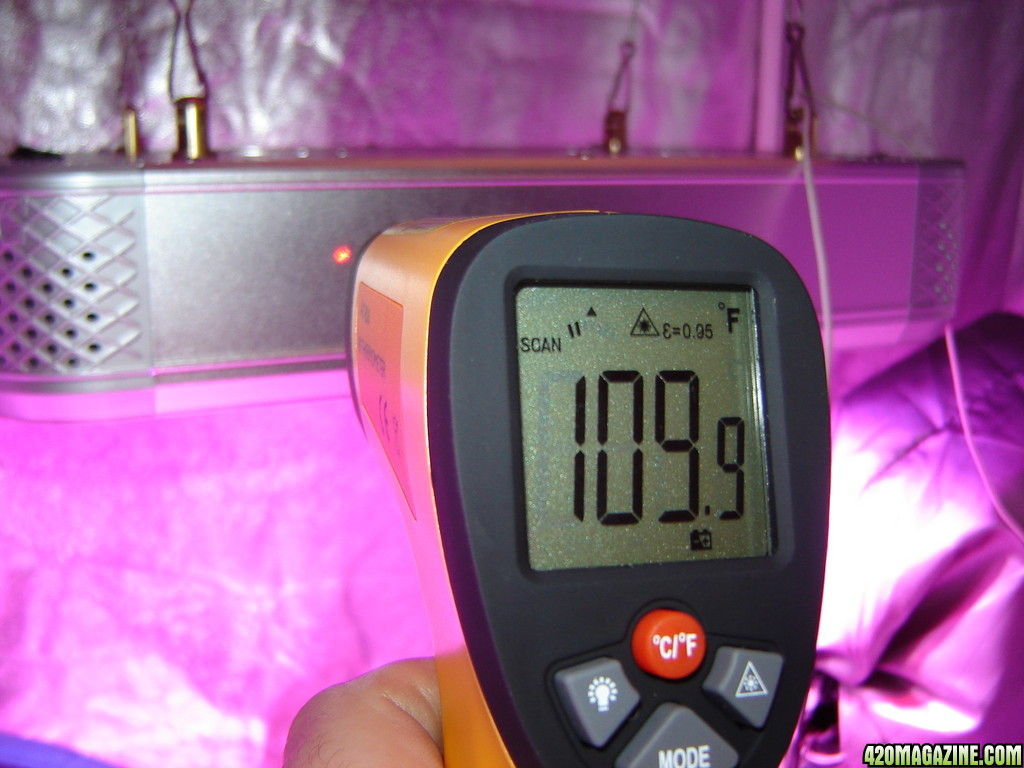
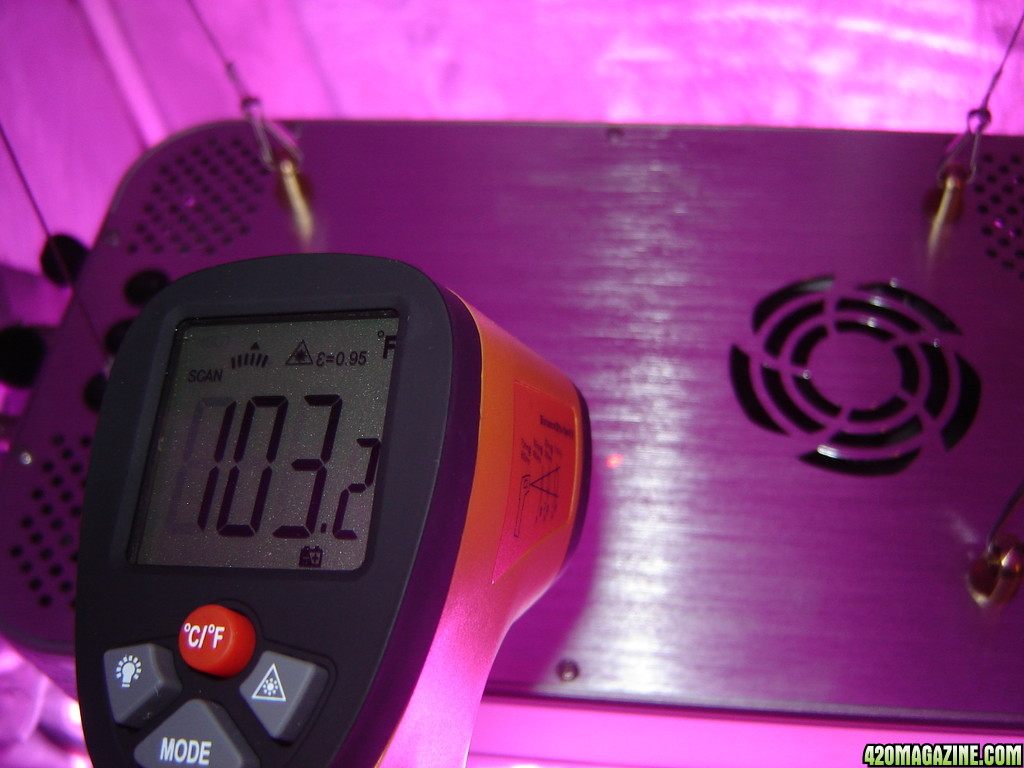
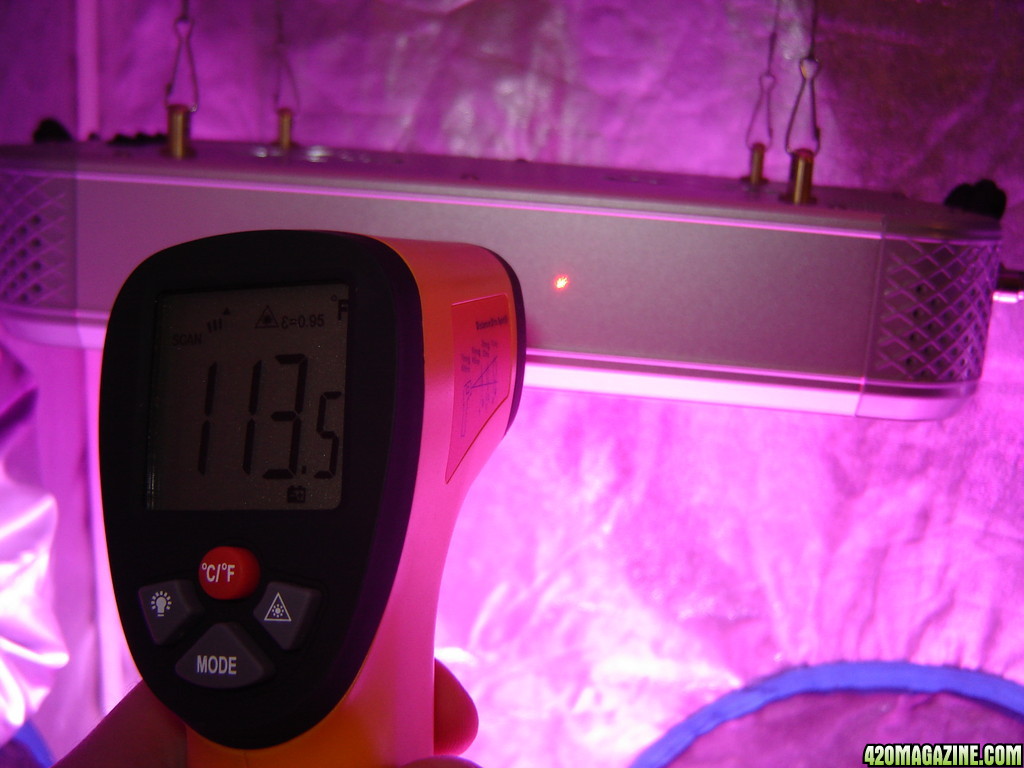
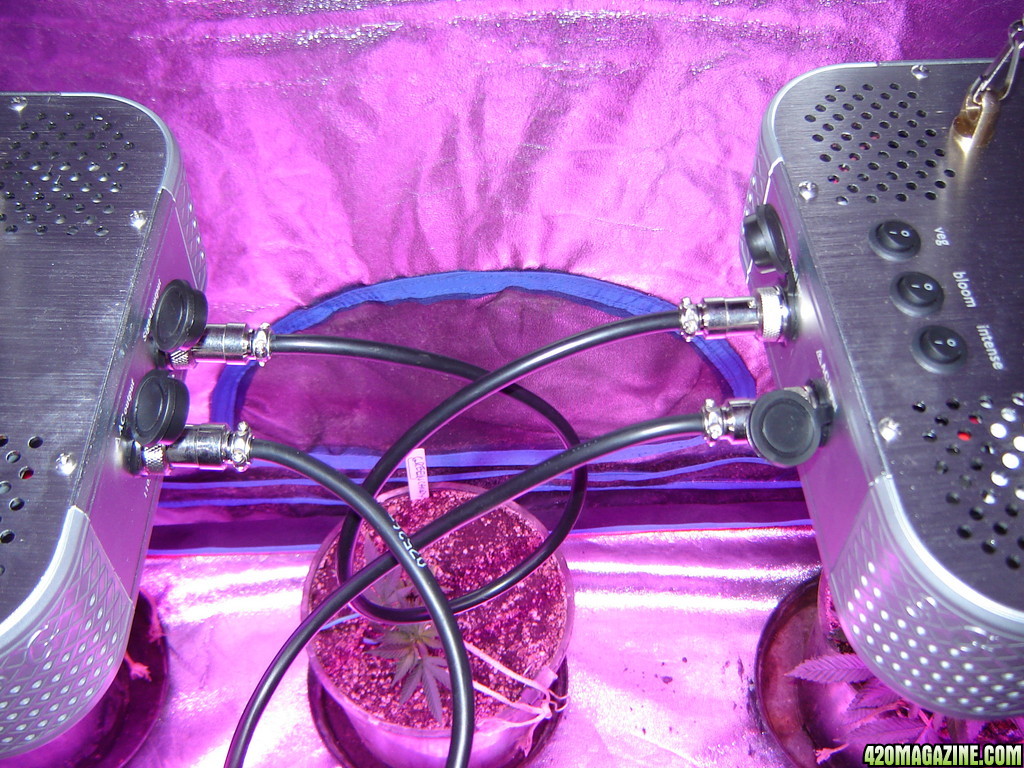
(2) Intelligent-Gro 228w LED Grow lights (IGRO-228LED)
Is it aircooled?
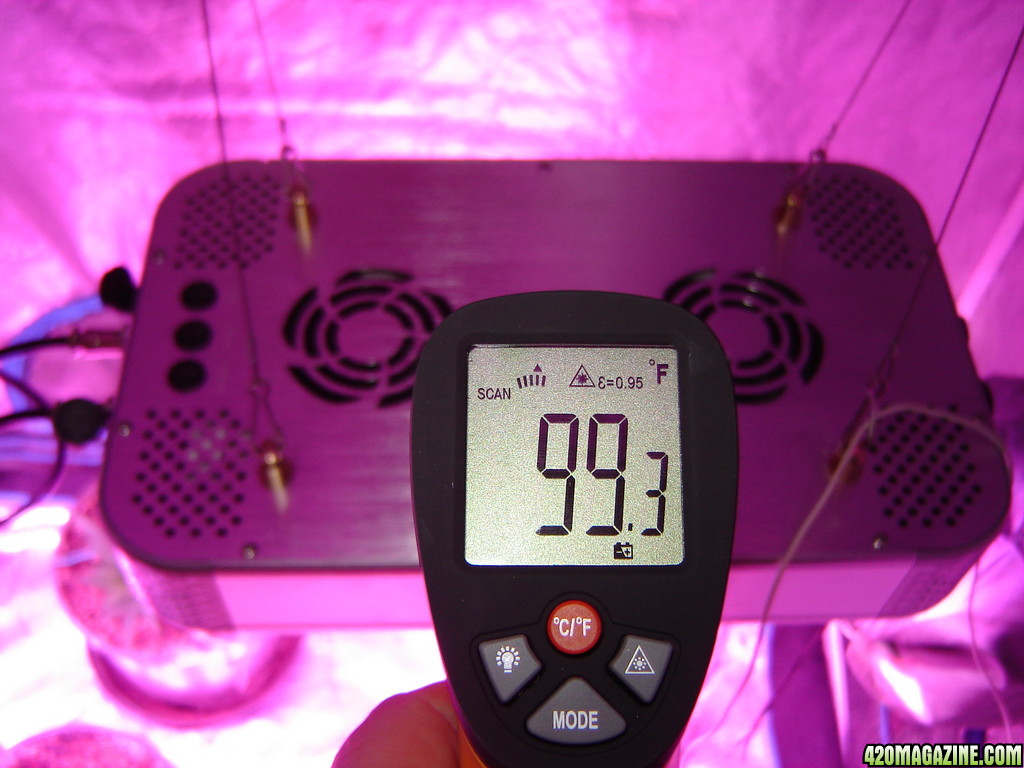
The tent is yes, the lights are vented and cooled with internal fans.
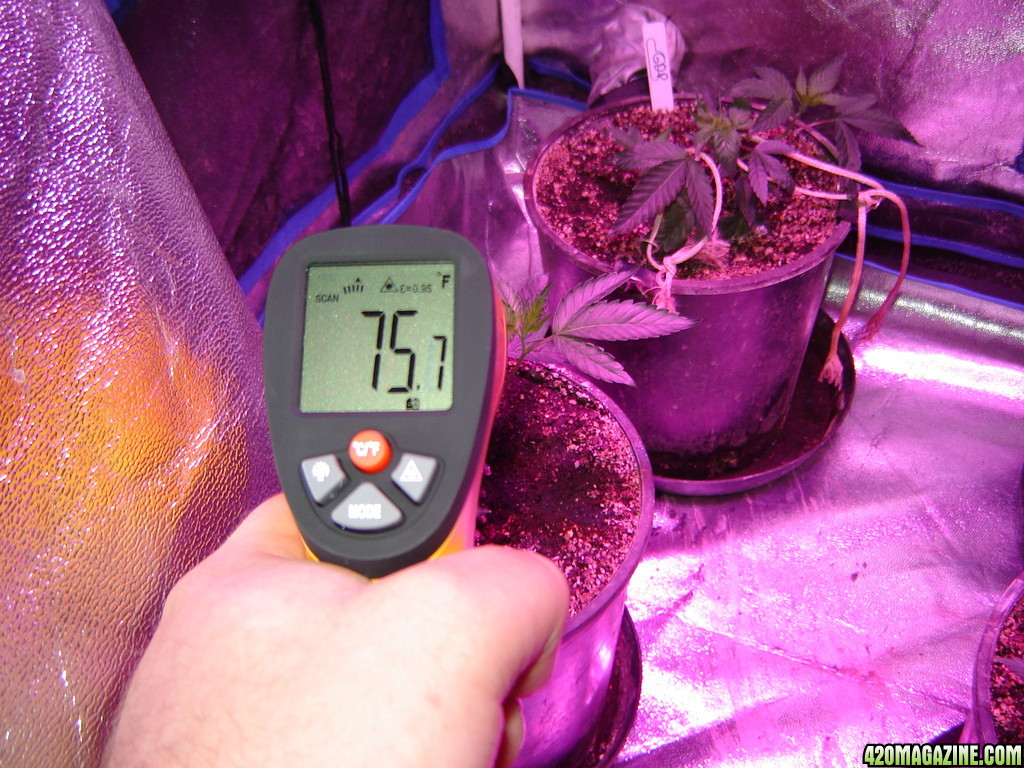
Temp of Room/cab?
Ranges between 64F-75F in Veg Tent
Between 73-82F in Flowering Tent
RH of Room/cab?
Generally between 40-50%, humidifiers are available if it dips with offshore breezes here in Socal.
PH of media or res?
I don't check it, its soil.
Any Pests ?
Not any currently, I use Spinosad, SNS and other preventative measures to keep it that way
How often are you watering?
Young vegging plants about 1x every week and a half
larger Vegging plants about 1x per week
flowering plants early flowering about 1x per week
flowering late about 1x every 4 days.
Type and strength of ferts used?
Using foliar products including Bloomit, Amaze and PGR.
I also will be using Tand J enterprises tea and bio-minerals
about 1x per month I will be giving a soil drench of earthjuice
Other nutrients on hand include and may be used:
occasional additive include advanced nutrients: carboload, organic b, fulvic acid
occasional additives include general organics: bioweed, cal/mag, hydrolyzed squid, florablend tea, bioroot
bonide liquid fish 2-4-0...love this stuff!
SNS pest products for prevention
Spinosad by bonide
I welcome everyone to my journal and feel free to ask questions, chime in with advice or just enjoy the ride as we put Intelligent Gro 228w LED's to the test!
I ask that you please do not ask questions regarding other LED manufacturers here, being that this is a sponsored grow by Intelligent-Gro, keep LED questions relating to their products only please. Thank you and enjoy the show!!
Sponsored by Intelligent-Gro LED Grow lights.
I am Icemud and have been growing now and a member at 420 Magazine for 3+ years. I am a indoor soil grower who as of now have successfully completed 7 harvests over the past few years and as of now grown over 20-25 strains. I have used many different soil mixtures and recently have been on the quest for High Brix, as well as I have used many different types of lights from HID (CMH, MH and HPS) and recently converted over to LED to save on electricity, as well as give my plants a better quality light.
I recently found Intelligent-Gro as one of our new Sponsors here at 420 Magazine and found that Danky Dave of Intelligent-gro was seeking active members to test out and showcase their cutting edge technology...With fingers crossed I wrote to Danky Dave requesting to be considered as one of the testers and luckily enough, I was chosen as one of a few to feature Intelligent-Gro LED lights here on 420 Magazine.
I am so happy to be one of the testers, and I will cover all the details very thoroughly as well as give a 100% honest opinion and review of the lights, their performance and physical specs.
I welcome all to join along as I test out 2 of the brand new INTELLIGENT-GRO 228w LED GROW LIGHTS (IGRO-228LED)
First I will cover the lights and the details and then I will get into the details of the grow, plants, medium and other details.
Introducing the Intelligent-Gro 228W LED Grow lights (IGRO-228LED)
This I-Gro Intensity Series LED light coverage area is 24" x 39.5" at a height of 24 inches.
(Each order comes with one free Intelligent-Gro Controller *additional controllers sold separately)
Key Features:
Modularized design:
- Easy and fast production
- Easy maintenance and repairing
Full aluminum housing:
- Light weight, cost saving for delivery
- Anti-rust, anti-corrosion
- Good heat dissipation, long life time
- Smart design, elegant shape
Three Programmable LED channels:
- Independent channels for Growing, Vegetation, Flowering
- Mode setting for sunset, sunrise, sunny, cloudy, 24 hoursrecycling
- Customized setting for each channel in each hour, 24 hours recycling
- More energy saving with controller
54W High power center (105°beam angle) + 3W LEDs surrounded (78° beam angle):
- High power penetration
- Even LED light coverage
Daisy chain control:
- One controller can support 10 lamps
- Synchronous control
- Saving cost for controller
High energy-efficiency:
-Intelligent-Gro LED Grow Lights cost between 40% - 70% less to operate compared to HID lamps
Application:
- Commercial Greenhouses
- Indoor and Vertical Farms
- Nurseries
- Research
Certificate:
-CE and ROHS
Specifications
AC input 85V - 265V / 50-60Hz
AC plug standard Customized
Auto-Grow Programmable
Beam angle 105° +78°
Color options Silver
Daisy chain Support 10 units / controller
Gross weight 3.78kg
Housing material Aluminum
LED channels Growing/vegetation/flowering
Life span 50000 hours
Modularized design Yes
Net weight 2.98kg
Packing size 510mm"256mm"106mm
Par reading (30cm) 690 UmolCO2 m-2.s-1.
power 228W
Power consumption 180W
Power efficiency >85%
Product size 370mm"220mm*70mm
Spectrum 10 Bands with UV&IR
What strain is it?
Black Cherry Cola: not exactly sure what the genetics are but found this on one website "Airborne G13 X Ortega x C99 x Blackberry x Cherry AK-47 — 20% Indica/80% Sativa"
GDP: Supposedly Big Bud x Purple Eurkle, this is one of my favorite strains. I am excited to have 2 of them Definitely going to have to keep them around for a while.
Harlequin: A High CBD strain that gives about a 1:1 ratio of THC/CBD, great for the medicinal effects without a full blown high. About a 75%/25% sative/indica and typically produces 4-6% CBD or higher I couldn't find the details on the genetics but the sativa side is supposedly from a columbian gold and a strain from switzerland and the indica side from a Nepal strain.
Purple Dragon: Purple Urkle x Blue dragon (Sour Diesel x Blueberry)
Green Candy OG: Green Cr@ck x Candy Kush (OG x Trainwreck)
Is it in Veg or Flower stage?
Newly transplanted clones I received from a local clone dispensary.
If in Veg... For how long?
These plants were clones that I purchased a few weeks ago from a local clone dispensary and they say that all the genetics are verified. The clones were transplanted into 3 gallon pots about a month ago and vegged under LED. Now that I am using Intelligent-Gro LED, I will be using the 18-6 veg schedule with custom settings recommended on their website.
Indoor or outdoor?
Indoor using a 2x4 Hydrohut Silver Edition (Actual Measurment 55" x 28" x 78"),
Soil or Hydro?
Soil
If soil... what is in your mix?
I am running the soil from my last grow, mixed with about 20% new soil that has cooked for a few months. Both were amended at the same time with the following amendments. Upon re-use, I did not add anything to the mix.
The Base Soil Mix:
Each of these equaled about 2 1/2 (2gallon) pots.
So a total of 5 pots of premixed soil was used
8 (2gallon pots) of ProMix HP
2 (2 gallon pots) of FF Ocean Forest
2 1/2 (2gal pots) of Worm Castings
1 1/2 (2gal pot) of Volcanic Pumice
2 (2gal pot) of Alaskan Forest Humus
The Amendments: Make up 15% of my total soil mix
1 1/2 Cup of Azomite (trace minerals and micronutrients)
4 Cups of Calcium Carbonate Powder 97%
3 1/2 Cups of Soft Rock Phosphate (Collidal Clay with high phosphorus and CEC value)
1 1/3 Cups of Gypsum (Calcium Sulfate)
2 Cups of Crab Meal 2-3-0 23% calcium(also a P source and source of chitin a hormone/growth regulator)
1 1/2 Cups of Fish Bone meal. (3-18-0) 24% Calcium
1 1/2 Cups of Lava Sand (adds trace minerals and supposedly adds paramagnetic value to the soil)
2 Cups of Crab Shell Meal 2-3-0 23% Calcium
2 Cups of Kelp Meal (also has growth hormones and PGR's, plus trace minerals)
1 Cup of Alfalfa Meal. (2-0-3) (contains Trichontinol which aids in plant growth and health)
1/2 Cup of Powdered Humic Acid (Adds Carbons to the soil as well as trace minerals and aids in chelation of minerals)
1/2 Cup of Humboldt Myco's Maximum (Beneficial Bacteria and Mycorrizae Fungus)
1/2 cup of Epsom Salts (Magnesium Sulfate)
1/3 Cup of Greensand (0-0-3) (Trace Minerals)
1/2 Cup of Dry Molasses (1-0-3) (Energy for the Microbes)
If soil... What size pot?
3 gallon round plastic for veg, before flowering transplant into 5 gallon plastic square pots.
Size of light?
(2) Intelligent-Gro 228w LED Grow lights (IGRO-228LED)
Is it aircooled?
The tent is yes, the lights are vented and cooled with internal fans.
Temp of Room/cab?
Ranges between 64F-75F in Veg Tent
Between 73-82F in Flowering Tent
RH of Room/cab?
Generally between 40-50%, humidifiers are available if it dips with offshore breezes here in Socal.
PH of media or res?
I don't check it, its soil.
Any Pests ?
Not any currently, I use Spinosad, SNS and other preventative measures to keep it that way
How often are you watering?
Young vegging plants about 1x every week and a half
larger Vegging plants about 1x per week
flowering plants early flowering about 1x per week
flowering late about 1x every 4 days.
Type and strength of ferts used?
Using foliar products including Bloomit, Amaze and PGR.
I also will be using Tand J enterprises tea and bio-minerals
about 1x per month I will be giving a soil drench of earthjuice
Other nutrients on hand include and may be used:
occasional additive include advanced nutrients: carboload, organic b, fulvic acid
occasional additives include general organics: bioweed, cal/mag, hydrolyzed squid, florablend tea, bioroot
bonide liquid fish 2-4-0...love this stuff!
SNS pest products for prevention
Spinosad by bonide
I welcome everyone to my journal and feel free to ask questions, chime in with advice or just enjoy the ride as we put Intelligent Gro 228w LED's to the test!
I ask that you please do not ask questions regarding other LED manufacturers here, being that this is a sponsored grow by Intelligent-Gro, keep LED questions relating to their products only please. Thank you and enjoy the show!!
")