Need Help

small420

New Member
Picture_7_-_Copy.jpg
Picture_6_-_Copy.jpg

Picture_8_-_Copy.jpg

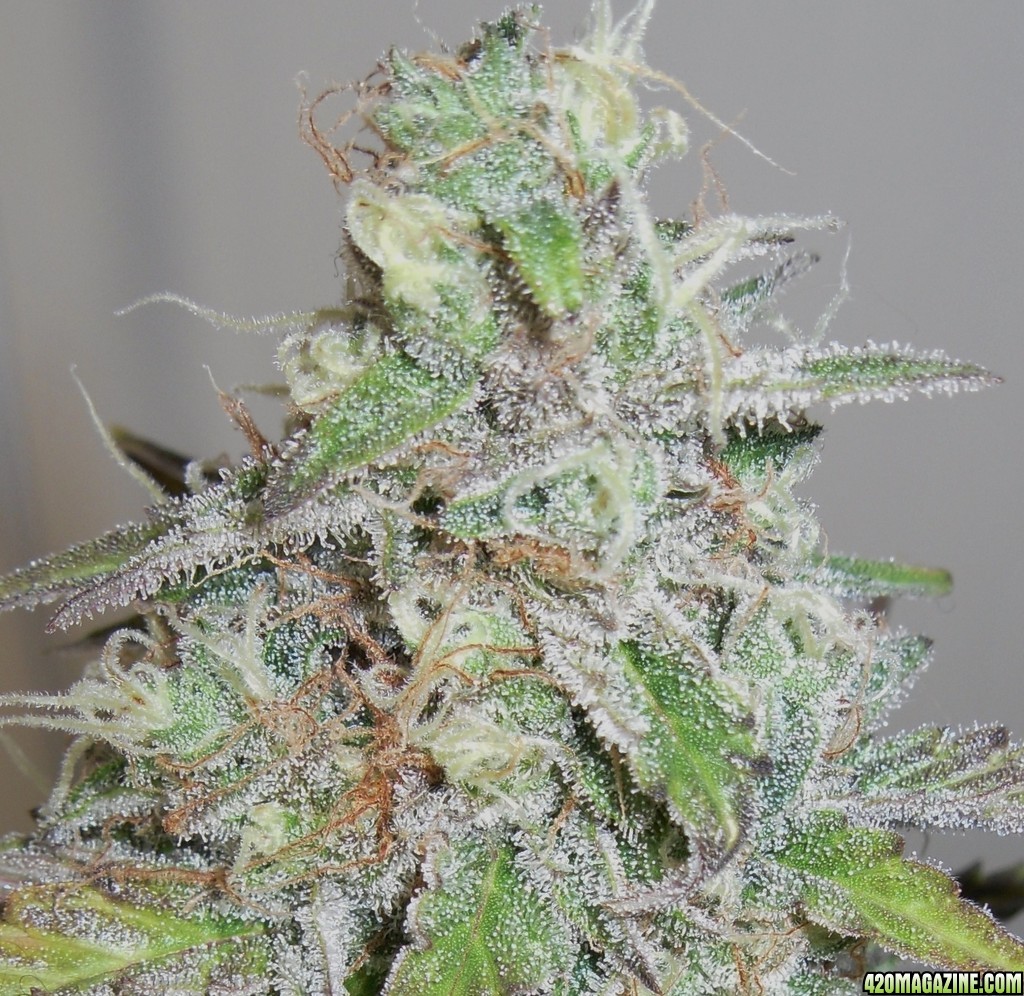
What Strain is it? unknown
Is it Indica, Sativa or Hybrid? What percentages? ubknown
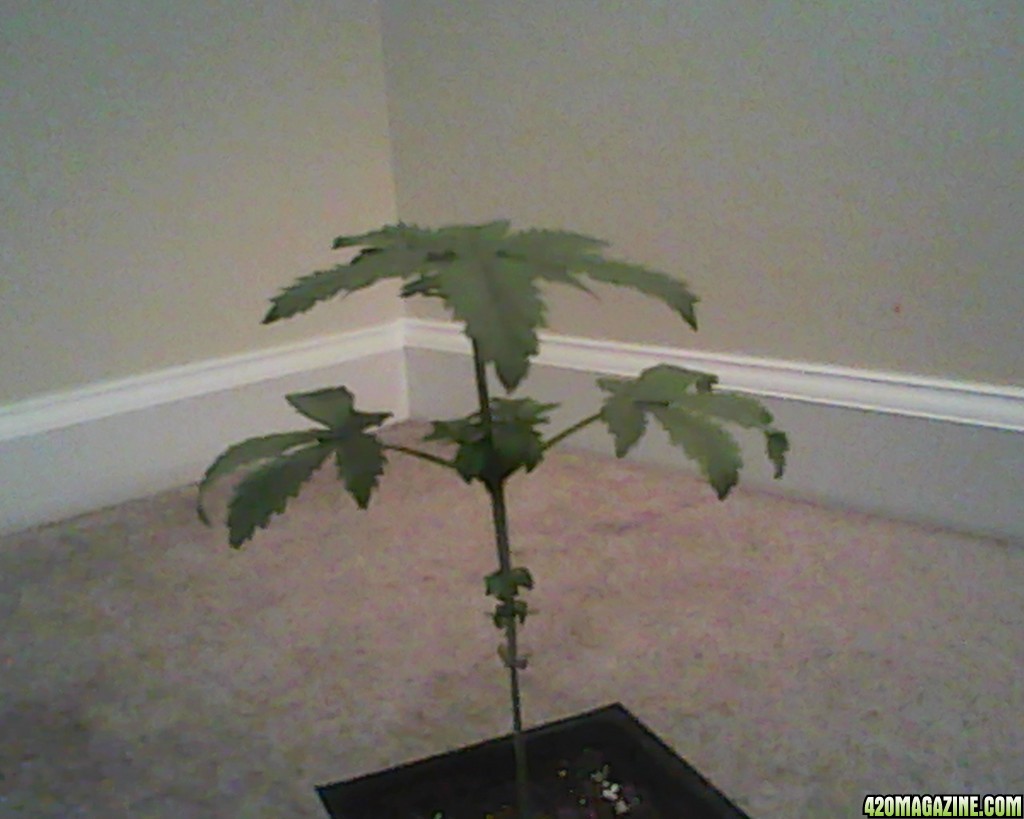
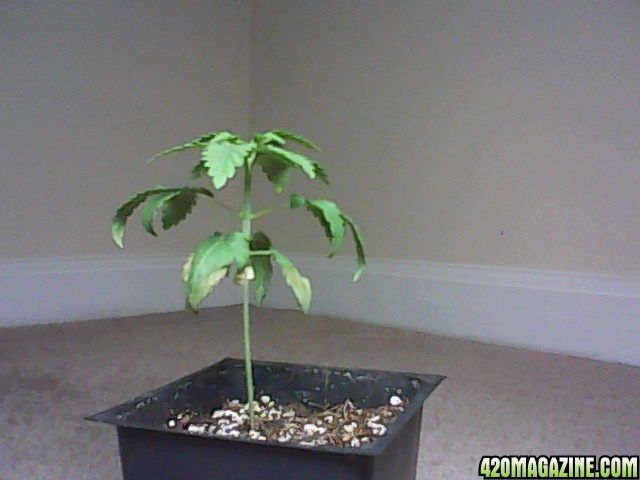
How Many Plants? one
Is it in Vegetative or Flowering Stage? flower
If in Vegetative Stage... How Long? none 12/12 from seed
If in Flowering Stage... How Long? 2 weeks
Indoor or Outdoor? indoor
Soil or Hydro? soil
If Hydro, Reservoir size? n/a
If Hydro, Reservoir Temperature? n/a
If Hydro, what type of Medium? n/a
If Hydro, what type of Setup? n/a
If Soil... What is in your Mix? 3/4 root organic mixed with 1/4 miracle grow organic
If Soil... What Size Pot? small
Size (Wattage) of Light? How Many? 400w hps
Is it Air Cooled? yes
Temperature of Room/Cabinet? 78
RH of Room/Cabinet? 25
PH of Medium or Reservoir? 6.5
Any Pests? no
How Often are you Watering? 2 or 3 days
Type and Strength of Fertilizers used? earth juice (very light)
Size or Square Footage of Room? 4x4 tent

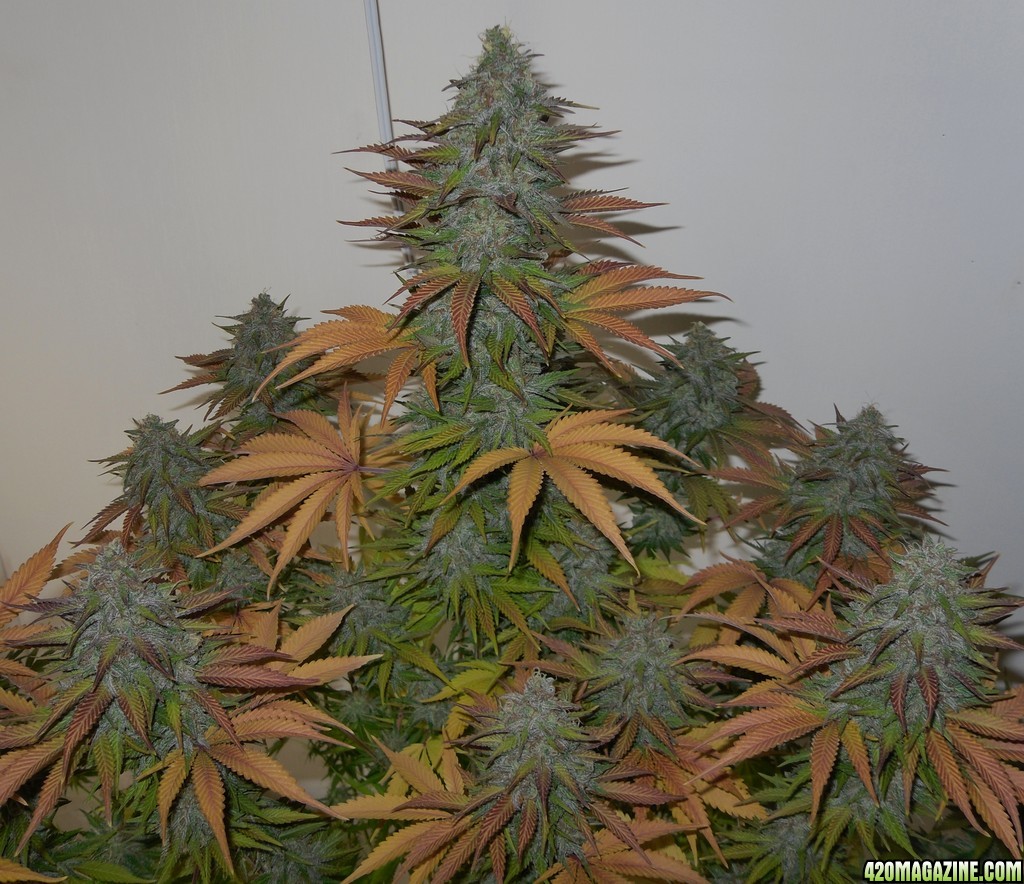
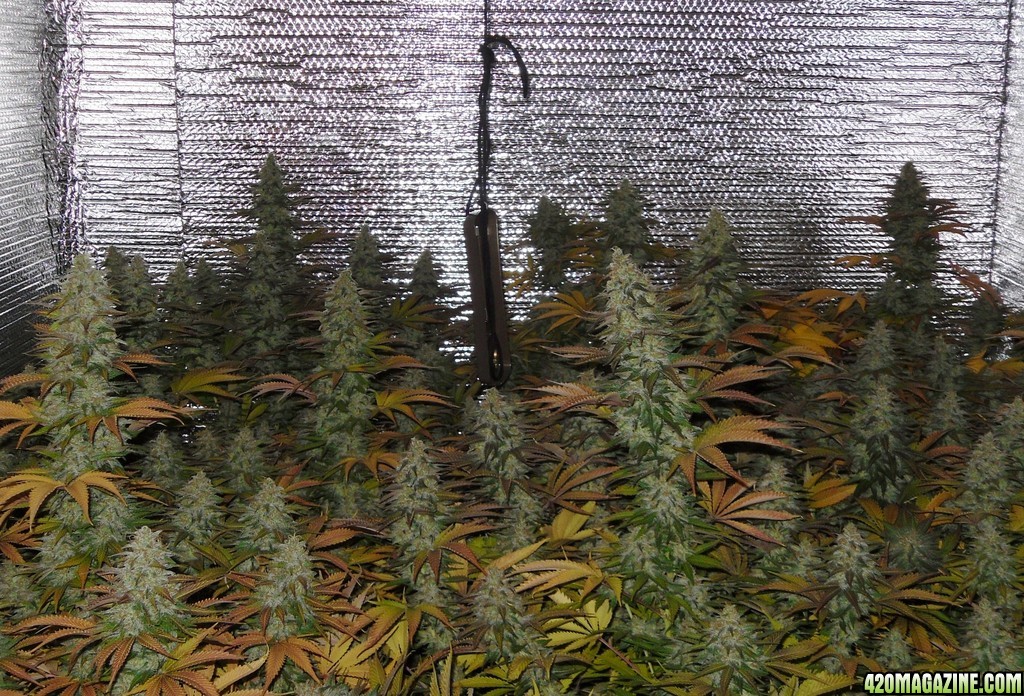
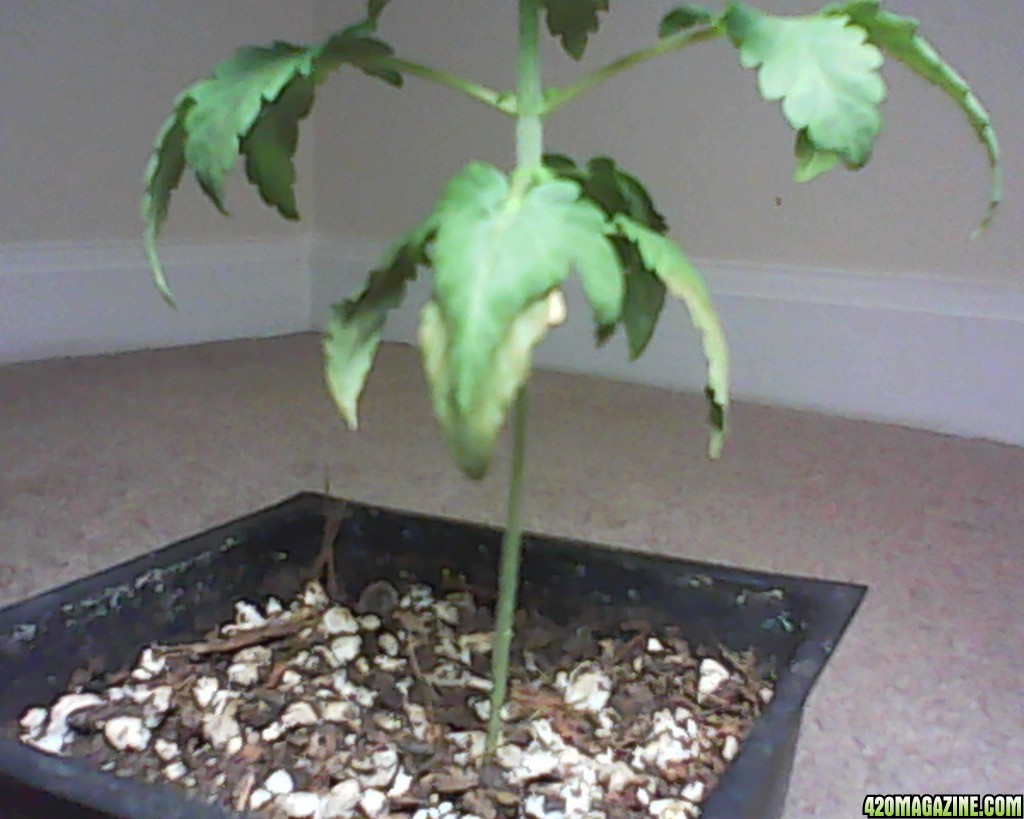
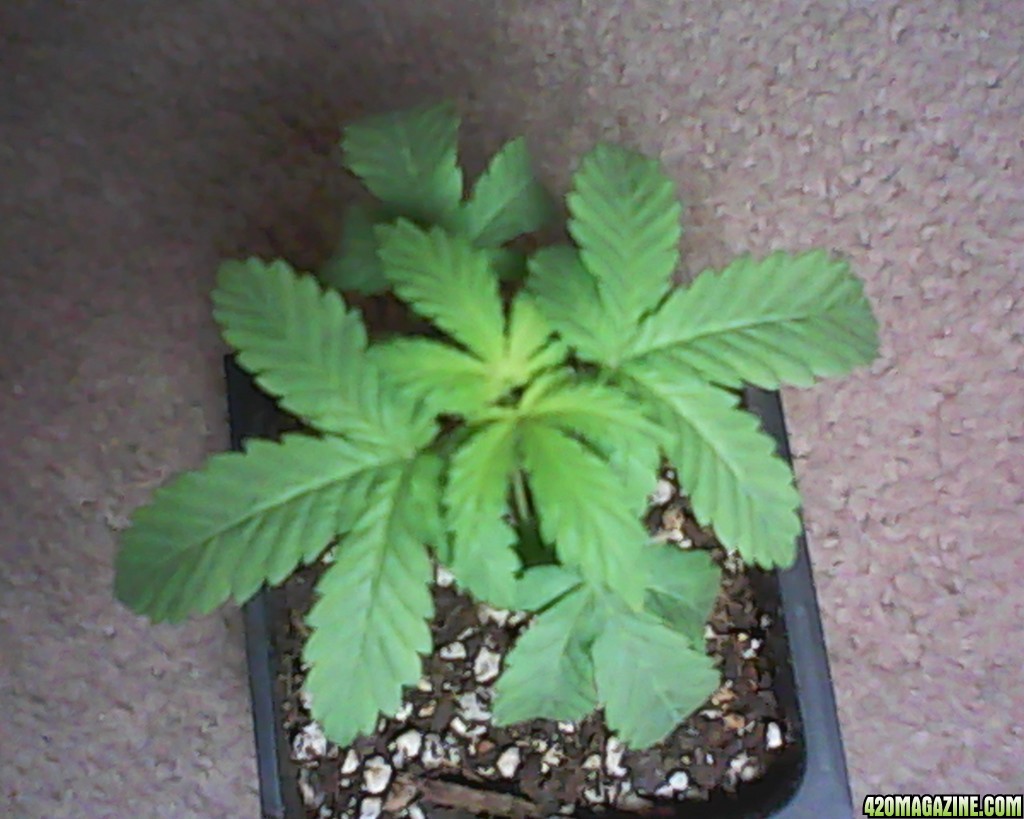
Without trying to say anything to influence you comments: The soil is flushed after use on previous grow. This is only second grow with this soil. Have done 4 grows in same mix of soil before and this problem started to show. Dumped that batch and bought new. This problem showed at the end of the first grow this time. Did a lot of flushing during the first grow and when it finished. Could this be salt build up from tap water flushes? Plus I should say that soil ph always tries to drop, so I must always ph up (earth juice). Could this be caused from that?
Thanks for looking :peace:
 
It LOOKS like nuteburn. Ur Ph sounds fine.
Looks like a indica leaning hybrid. Also looks kinda lanky and male-ish. (Of course there's no real way to know visually until mature)
 
Well mate going 12/12 from start makes me think, have you been adding nutes to flower it or just regular watering?
Going to 12/12 from seed will give slow results IMO, Unless youre using the GLR method.
Mate, I grow 1 plant per grow and my last would have pulled over 13 oz dry with a 400w MH/HPS combo, no Co2 or supercropping, just an adaptation of LST which I find kinda hands on, but effective.
I like to use a 100% organic HUMUS SOIL which naturally makes n,p,k and other nutes as it breaks down. I feed with seaweed extract, and a Powerfeed version of this, but now Im just into flower im adding bit more P,K..
Have a look at my first COMPLETE Journal below in my signature, Cindy was her name, there is a TONNE OF GREAT INFO IN there and even in my current which Im growing nearly the exact way. Just in a shorter period this time.
Hope you get it sorted, but just be careful adding nutrients to a hot soil mix or a plant that is too young for them.. GODSPEED - SMOKEMUP;)
 
Thanks both for your replies. Cannasensei, I admit it looks like nute burn but this soil has been flushed thoroughly before starting seedling and was worried I flushed too much and now have deficiency.
Hey Smokemup8 havent had time to read your journals yet but seen you post before about the humus . I dont add nutes till after the first month, then just 2 doses of 1/4 strength bloom a week apart then back to plain water. I grow 12/12 from seed and start a new seed every 2 weeks. I have been thinking of starting a veg room, but need to figure what Im doing wrong first.
 
If you have used nothing but earth juice for nutes in the past and present I highly doubt it is a build up of nutes especially if you flushed it reg. Earth juice is organic with no salts to build up. It does look like nute burn but it looks like an old problem. Like when the roots hit the roots organic soil it may have been a little hot for the baby. I would not sweat it too much seems to be fine now. Your humidity is pretty low a humidifier would be helpful. If you don't have one a bunch of wet towels in your grow area changed out daily would help a bit.

Also how far is your light from your plant? You can get a 400 pretty close if its air cooled even if its not it can be place at least 18 inches. 10 if it is air cooled and your temps are in check.

Here is something that helped me out a bunch! grow in (big containers!) at least 3.5 gallons 5-7 is ideal. This gives you a little more wiggle room for your soil to adjust it's ph on its own. I grow with a mineralized super soil and feed the soil microbes via compost teas.
It makes growing fun again you won't be in this forum asking questions any more. you will be answering them!

Here is the recipe I use it would work good with the roots organic too.


Soil used in my grow..... McEnroe
Premium Organic Potting Soil
Premium Organic Potting Soil is the original mix we have been using at McEnroe Farm since we started. This potting soil is excellent for making soil blocks, potting seedlings, and transplanting. It is fortified with organic nutrients and has excellent moisture retention and drainage. As with all our mixes, our potting soil contains an ample amount of our own organic compost which helps create a favorable rooting environment. It continues to be our most popular blend and is used by certified organic growers throughout the Northeast. Our Premium Organic Potting Soil is available in 22-quart bags, 1/20-cubic yard bags, 1-cubic yard sling bags and bulk.

Premium Organic Potting Soil OMRI Certificate
The grow shop I got this from said this soil is fortified with chicken litter and stabilized with soft rock phosphate.

I used the following minerals.
6 parts CaC03 This is a high calcium lime (90% calcium or higher)
5 parts soft rock phosphate (not super phosphate or triple phosphate)
3 parts of Gypsum

Grind all these up and mix well. set them to the side for now.

Next step is to make a microbial tea.

This is the recipe I used to activate my soil with.

2 cups alaskan forest compost
1 cup wiggle worm castings
4 tbs High brix molasses ( just a brand name)

I put 2 gallons of chlorine free water in a 5 gallon bucket.

I add the molasses to the water and let it bubble with 2 air stones for 30 minutes.

Then I add the dry ingredients, stir rapidly and let bubble for 24hrs. you should see a lot of foam building by this point. this is a sign you have life in your tea. I then fill the bucket up the rest of the way with chlorine free water. Tea should smell good not foul. Start over if it stinks!

Then pour this in your soil. Make sure to use a container big enough to hold it and enough room to stir the soil properly you don't want your soil to be soggy just really moist. Now cover the soil and let sit in a place that is close to room temp for at least 30 days. ( Around 72 f. warmer side would be better than colder side) Also don't let the soil dry out the goal is to keep the microbes alive and active so they can eat the soil and make lots of poop for the plants to eat. If the soil starts to dry out then just add some water a cup at a time until it's moist again.

After 30 days the soil will be ready to use.

I used clones that were rooted in jiffy peat pop ups and were vegged for a little while in regular un cooked soil.

Now is the time to add your 6-5-3 rock powders to your soil. Apply @ this rate: 1 cup per 1.5 cubic feet of soil or 1/3 cup per 1.0 cubic feet
of soil.

I also added azomite @ a rate of: 1/3 cup per 1.0 cbf and 1/2 cup per 1.5cbf.

I also added a healthy dusting of Mycorrhizae to the root ball at time of transplant. I missed this on some of the plants and some were slightly larger than others might of had something to do with it IDK.

I did not have to feed these plants another tea for quite a while so be careful just let them tell you when they need something.

I also let the plants dry out during veg until they were almost drooping. Doing this lets the roots search out water and thus filling up the container. This will give the plants some big legs to stand on which in return gives bigger buds in theory.

Once the growth started to lag I gave them another tea (same recipe as above) this got them back growing.
I got greedy and gave them back to back tea and the microbes gobbled up all the energy and the plants began to yellow from the bottom up. I then had to put some energy back in the soil. So I used some hydrolized fish fertilizer and top dressed with a high calcium chIcken litter called chickidee doodoo. This got them back green again for about a week. Ever since I gave them too much tea it was a constant battle with them yellowing so don't get greedy if the plants are constantly growing don't feed them just water them.
I had a couple of moments in the grow where I felt like the plants were going to lose their leaves if they didn't get a quick shot of nutes
I didn't have any big bloom on hand or any other organic nutrient on hand that was chelated with amino acids like bpn so I cheated a little and gave them some fox farm tiger bloom, cal mag plus, snowstorm ultra all @ 1/4 strength.

That seemed to help and I then top dressed the plants with more rock powders and some more chicken litter. Then I got the microbes back by giving them some strong teas for the next couple of waters. This is where we stand in the garden to date. Oh yeah I also gave them some cold pressed sea weed in the last two tea's and 4 tbs of big bloom in the last one That was not really necessary but I could not control my urge for bigger buds lol.

I also looked back at some dates to give me an idea of flowering times for this strain and I let the mother plant that was bloomed out doors go 76 days She was definitely ready at 70 days though. (just wanted the buds to purple up more.)

So if it takes 70 days to finish that will put the harvest date at dec 25th lol not going to happen but thought that was cool since it will be my birthday and Christmas. MERRY BIRTHDAY TO ME!

I hope this helps some one grow some nice cannabis to help your aliments or you can really do it the easy way and get Docbud's kit
and grow some connoisseur grade high brix buds. After half assed following his organic mineralized soil recipe, I have no doubts that his new kit is going to give very special ground breaking results. Thanks Docbud!

I almost forgot to add I did not ph anything, but the synthetics in this grow. I only used the ph down so it didn't kill the microbes ( I think) as bad as if I had to use the ph up acid.

This is how they turned out.
016318.JPG
0011114.JPG
019228.JPG


Only my second inside grow it was super easy!
 
Yeah well the results speak for em selves.. Things can get confused and sometimes theres things applied that dont need to be.
So keeping it simple can be best at times..Lots of good info and suggestions on here hope it sorts out. Goodluk buddy. Smokem
 
Thanks Gittergreen! I think thats a great idea on reactivating the soil. I will be trying this for sure. Till then I will be re-potting in new fox farms soil to see what all the fuss is about.
:thanks:
 
Ok things are looking better. I started watering with store bought distilled water. New growth looks good and damaged leaves seemed to have stopped getting worse. I think its the water leaving salt in soil. Is this possible? I think this because, as this problem started to show itself, I would flush and it would only get worse. I was leaving tap water out 2 days before use, but we have chloramine and I dont think it goes away. So am i stuck using distilled or buying a RO filter? I use tap water for my fish tank with no problems. So it cant be that bad. I will post pick when lights are on. Still hasnt shown sex yet, I guess from all the stress. Its definitely going to be a small one for sure.
 
3_weeks3.jpg


I removed old leaves, top dressed with fox farm light warrior and ocean mixed. Will repot in a few more days when soil is dry. Thanks all for your replies. :peace:
 
Back
Top Bottom