PotPie's Grow Cabinet Construction

PotPie

420 Plant of the Month: 2nd Place Winner
Hey 420 Growers. I am in the process of building a grow cabinet to raise my plants in. I have been mulling over the design for a while while getting some great ideas here from other members. I haven't really written much of this down so I don't have any drawings to share. However, I hope to be taking many pictures to document construction and maybe get a few suggestions as I go.

I would like to have the cabinet in my garage most of time but I'm not sure I'll be able to regulate the temps during the hotter months. That being said my first design criteria was to be able to fit it through the door and into the bedroom. I am renting the house I'm in now so my next design criteria was to be able to take it apart to save space when I'm not using it or when I move.
I live in California and my wife is an MMJ patient so I am not as concerned about stealth. However, I don't want to advertise the fact to friends and neighbors either. Right now the cabinet looks a lot like a large shipping crate. I am leaving myself open to the option of making it look more like a wardrobe when I am finished with wiring and controls. More on that later.
The main purpose of the cab is for flowering because I need to control light. I am currently vegging 12 plants in my closet and I'm ready for a little darkness in my room at night. I have the ladies on an 18/6 schedule now just so I can get some sleep. I want to be able to flower 6 plants so that was my next design criteria.
I also would like to have a space for a mother and some clones and maybe a little storage.

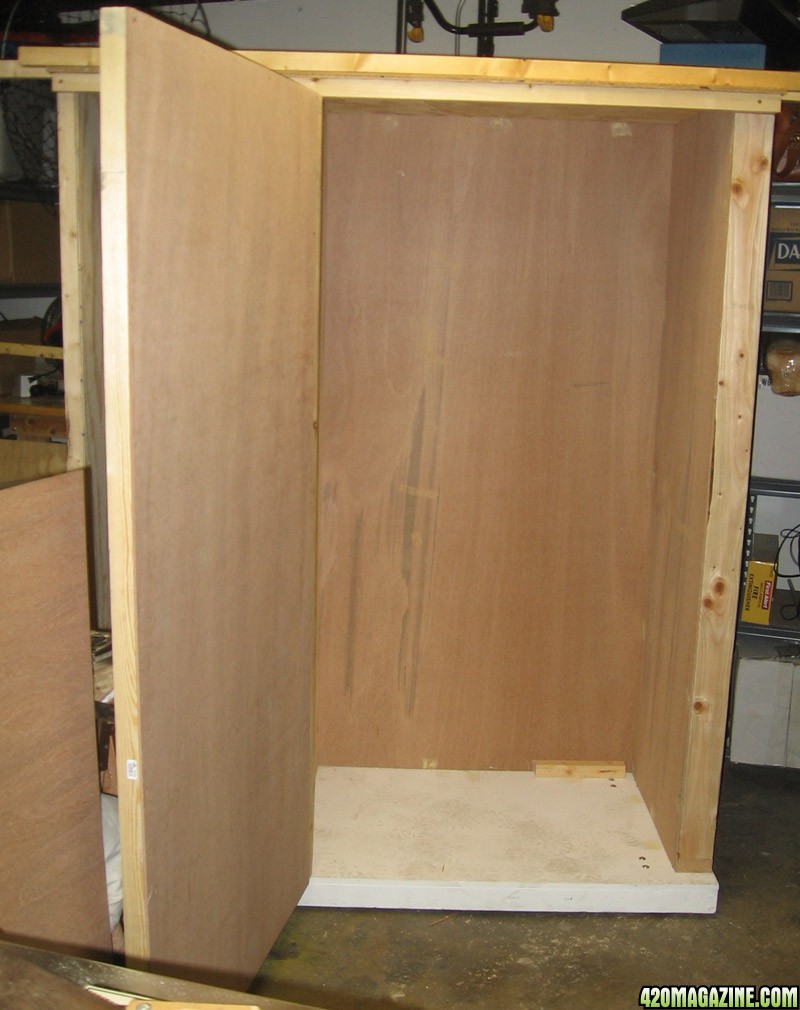
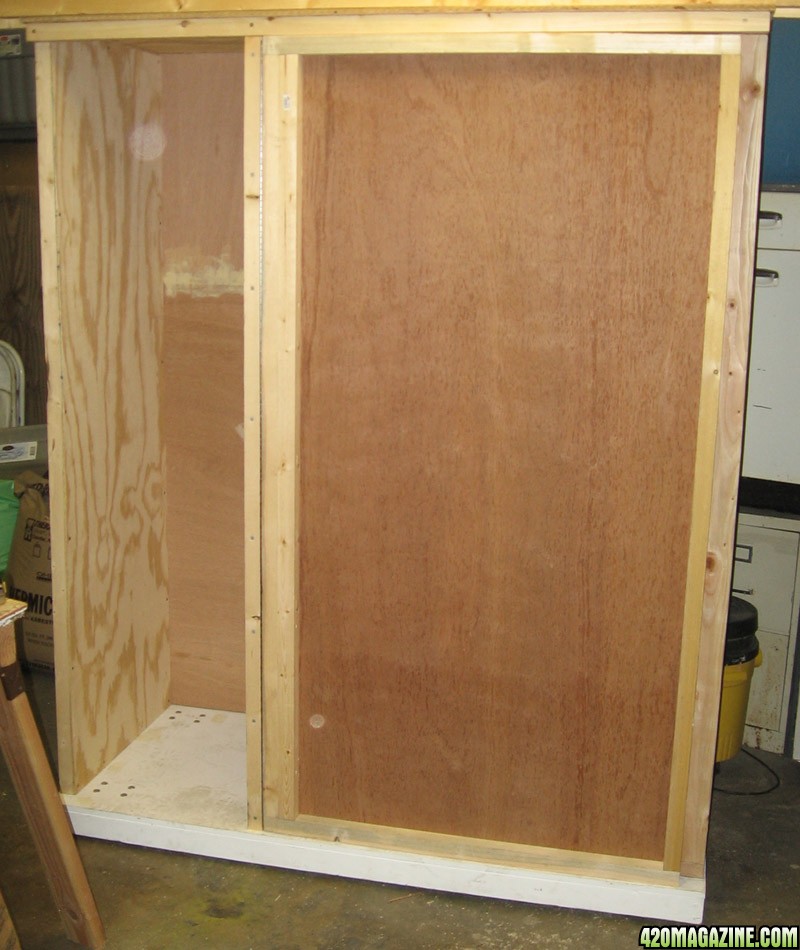
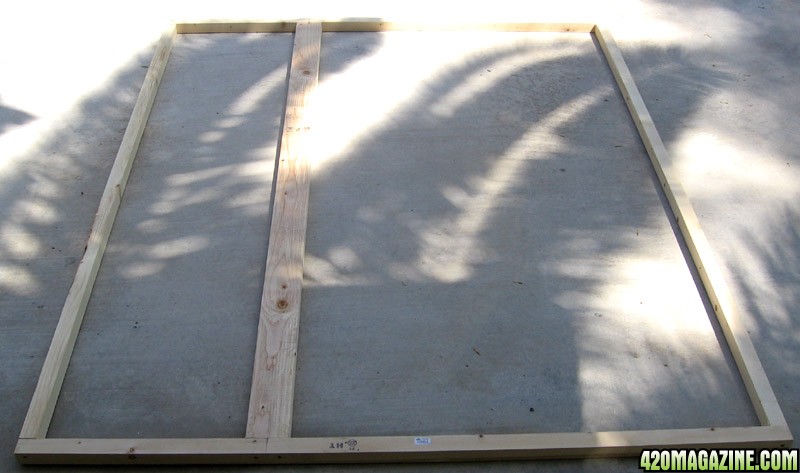
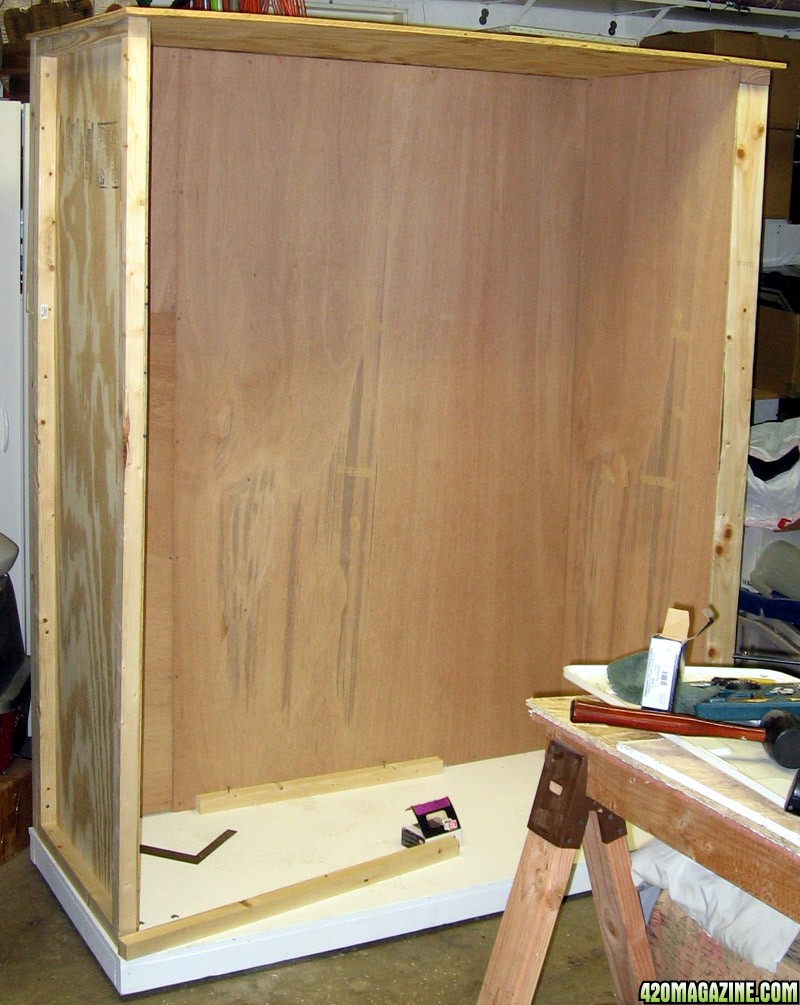
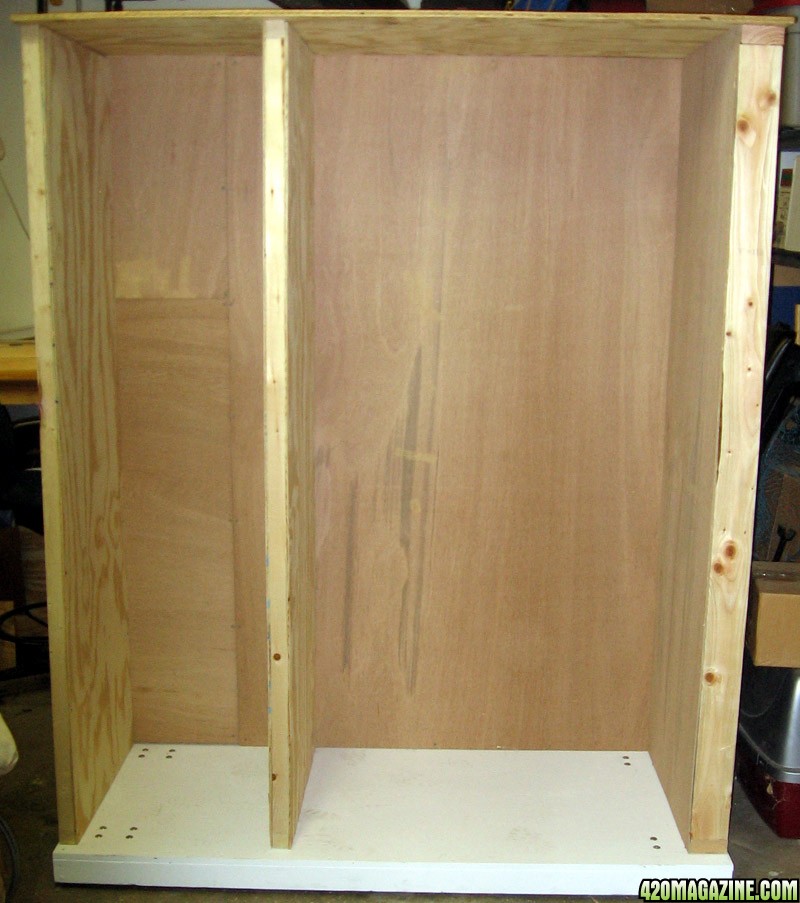
The outside width is 28" because my narrowest interior door has 29" of clearance. The length is 62" This is a slightly arbitrary number but I came by it after calculating my desired interior dimensions. The inside of the flowering chamber is 24"x36". This size will allow me to flower 6 plants in either 3 gallon or 5 gallon containers. I am a soil grower right now but I would like to try hydro in the future. I think I have left myself enough options to do this.The inside of the veg/mother/clone chamber is 18"x24". I decided to make the inside height of the cabinet 6'. That will hopefully give me room to grow some nice plants with a decent yield. I will divide the smaller side (clone) into two or three different areas within that 6 feet.
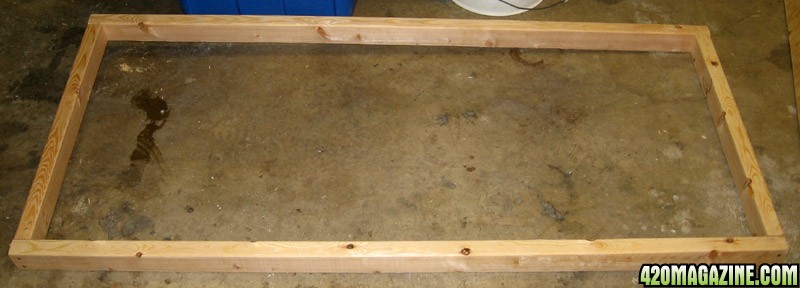
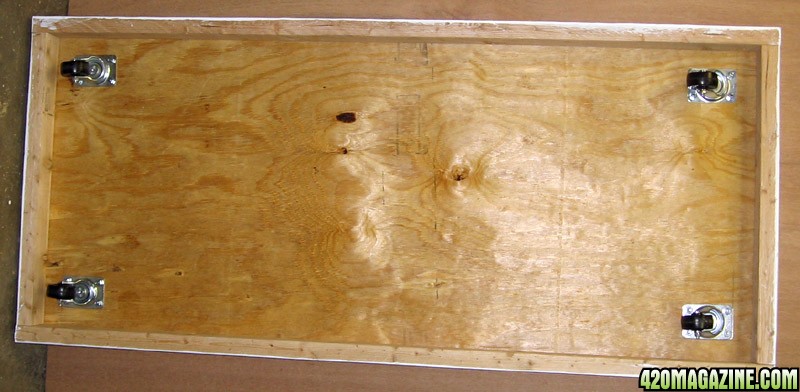
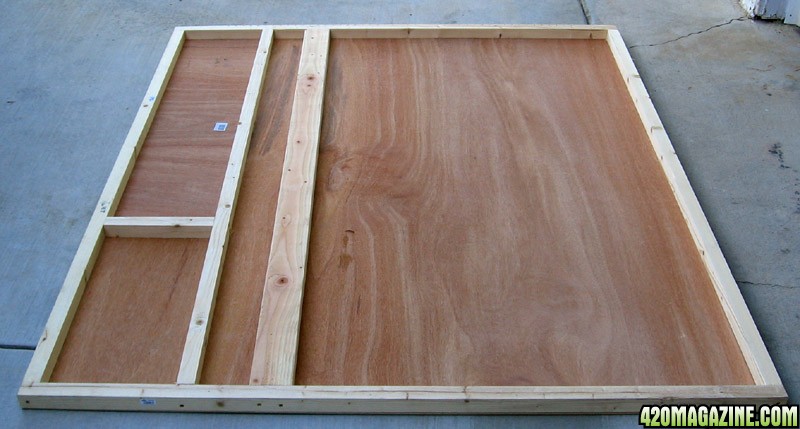
That's about it for now. Here are a couple of pics of the base under construction. I am already well past this stage so I'll be putting up some more pictures shortly to bring this up to date with where I am now. I went ahead and added casters to the base already since I don't feel like horsing this thing around any more than I have to once its finished.

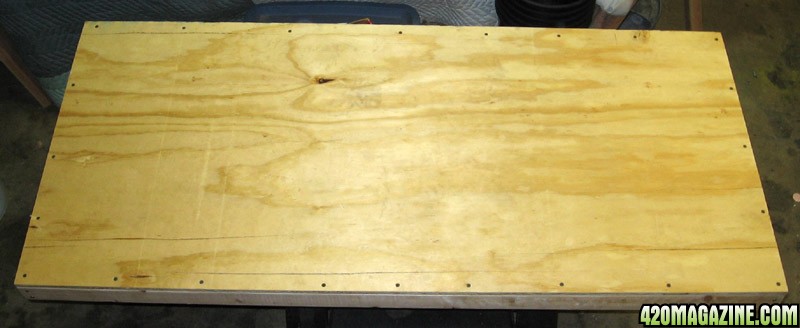
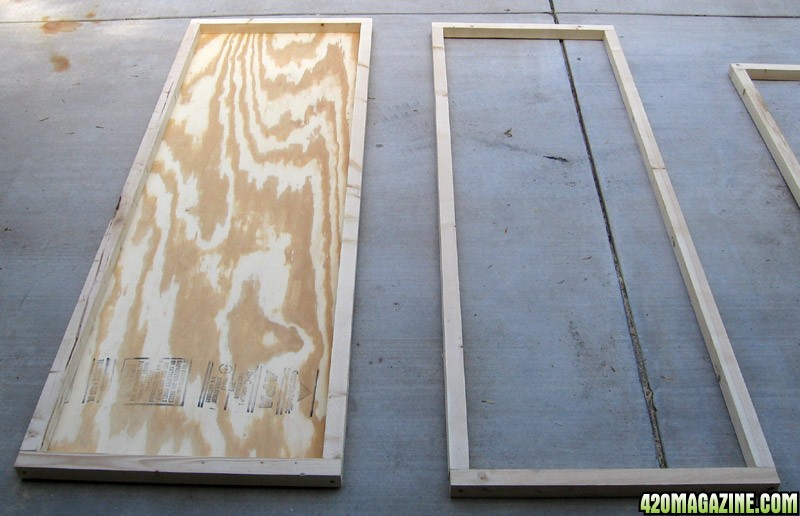
I framed the base with 2x3's to stiffen up the 5/8" plywood that I used for the floor.
01538.jpg


01438.jpg

turned over with the casters visible
00963.jpg

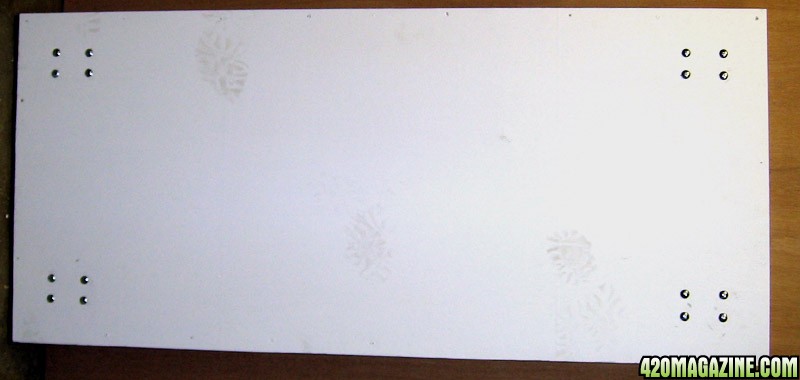
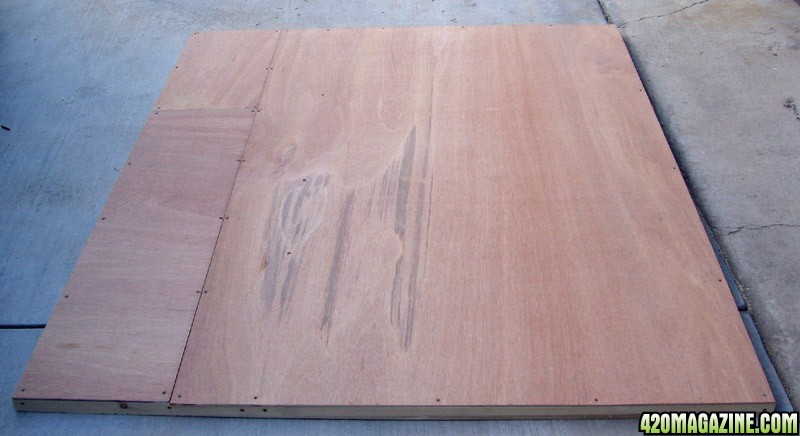
Right side up with 2 coats of primer and 2 coats of flat ultra-white latex paint
00878.jpg


Thanks for looking. Feel free to offer comments or suggestions.
 
Love to see home-built stuff!
 
6 x 5gallon plants may get mighty cozy in that space. I did a similar grow and got really good results but the middle / lower portion of the plants did not do as well since 0 light was penetrating the canopy. I now keep it at 4 5gal plants in the same area and so far much better over all bud development 5 weeks in. Just sharing my experience with you. I also vegged for 5 weeks or so from flowering clones that were LST'd to the extreme and had 6-8 main colas per plant.. very bushy plants.. My area was 32 x 59 inches so failry close to what you have. Mine was a tent whcih gave me a few extra inches in tent flex at the canopy.

But try it out each way see what works best.

Try to do a sog grow with smaller square pots 2 gallon or so. You probably get great results that way.
 
Love to see home-built stuff!

Thanks TS. I like your new sig. Very helpful info.

good idea making it rolling
Thanks Acn. I can't imagine having to hump this thing around without wheels when its finished. I got the wheel idea here, I think from stratlogic's thread.

6 x 5gallon plants may get mighty cozy in that space. I did a similar grow and got really good results but the middle / lower portion of the plants did not do as well since 0 light was penetrating the canopy. I now keep it at 4 5gal plants in the same area and so far much better over all bud development 5 weeks in. Just sharing my experience with you. I also vegged for 5 weeks or so from flowering clones that were LST'd to the extreme and had 6-8 main colas per plant.. very bushy plants.. My area was 32 x 59 inches so failry close to what you have. Mine was a tent whcih gave me a few extra inches in tent flex at the canopy.

But try it out each way see what works best.

Try to do a sog grow with smaller square pots 2 gallon or so. You probably get great results that way.

Thanks for the info McBudz! I'm looking forward to trying a SOG or Scrog next time around. I think you're right, it should work out well with the space I have available. I would like to get better at this and have a continuous grow going. Some meds in the medicine cabinet, some plants in flower and some ready to go into flower shortly after harvest. Hopefully I can make this work for the wife's needs and mine too. How many plants in smaller pots do you think I could have for a SOG grow in this space?

OK Back to Construction.

After I got the base built and painted, I started on the walls.
I framed the left wall and center wall (divider) with 2x2's and covered them with 1/4" plywood.
01253.jpg


I framed the right wall with 2x4's and covered it with Lauan (LEW-on). Lauan is a thin (little less than a 1/4") plywood. If you have cheap hollow core interior doors in your house, they are probably covered with Lauan. I got this because it is light and a lot less money than AC or BC plywood of the same dimensions. Unfortunately, I forgot to take pictures of the right wall under construction. I made the right wall with 2x4's because I wanted the opportunity to hide the wires inside that wall and mount standard electrical boxes for switches and other controls.

I started on the back wall next. More 2x2's and Lauan. In order to have support at the seams I backed the seams with 2x2's I put a 2x4 behind where the divider wall is going to be for additional support.
01349.jpg

01063.jpg

01151.jpg


That's about it for now. I post some more pics up tomorrow. thanks for looking.
 
Hey everyone, Thanks for your comments and good wishes. I know I promised more pictures sooner but I have been crazy busy with work, family and tending to my grow. Sorry for the delay.


LoL...hmmm sounds like someone's been in the service

Mmmmm, could be. Hu-ah!

I've made a little more progress but for each step forward I feel like I'm taking one or two steps back. All in all this has been a good and rewarding experience but it has also made me realize it will be a long time before I am a master carpenter (if ever). I have the wall and the top on and I have been working on the door. I got the walls on last week but this past weekend I realized I had a gap where I made a crooked cut. So I took it apart and trimmed the wavy part and put it back together. The gap was causing things to be enough out of square that I thought I better fix it now rather than be chasing my tail for the rest of the build.

Here's the cab with outer walls and the top. The 2x2 in the back is just a cleat that I had in there temporarily to help me position the walls correctly. It has since been removed.
00777.jpg


Here it is with the dividing wall in place. The left side has interior dimensions of 18" wide x 24" deep. The right side is also 24" deep but 36" wide. the inside height of the cab is six feet.
00596.jpg


That's it for now. I got the grow side door on this evening. I'll try to get some pics of that up soon. Any comments or questions are welcome.
 
Hey 420 Growers. I am in the process of building a grow cabinet to raise my plants in. I have been mulling over the design for a while while getting some great ideas here from other members. I haven't really written much of this down so I don't have any drawings to share. However, I hope to be taking many pictures to document construction and maybe get a few suggestions as I go.

+REPS for building it yourself for a (relatively) few bucks instead of spending hundreds on a tent or thousands on a cabinet AND for documenting the process with pictures to show others how easy it is.
 
Hey Everyone, Thanks for your compliments and comments. I appreciate them. I really appreciate the reps TS and Jessi. :thanks:
Greetings, Mr. PotPie:
Too bad I didn't stumble upon your thread earlier.
Truer words were never spoken! Where have you been hiding?lol. I think you have some great ideas.
Best bet is to sit and sketch everything out before you begin and dimension it properly, You should have sheets and sheets to constantly say "Where is that damn sheet I made of this side I was going to make?"
Unfortunately, my ADD usually kicks my OCD's ass.
I don't want to seem to criticize your endeavors, but offer suggestions, please accept this as just helpful hints. First, your framing. IF I was to build this, I would have gotten 1/2" Sheets of Styrofoam and 1/4" Lauan (approx. .200" thk.) and 2x4" lumber. Hopefully you have a table-saw. Rip your 2x4's into 2 pieces lengthwise (again 1 1/4 x 1 1/4" sq.) for the support framing on all sides. Then dado the lumber to slide the Lauan into it, sandwiching the Styrofoam between the Lauan for a steady temperature to help with control. The side's should be bought down to help form the bottom of the base for greater structural integrity. Make a separate panel for each section. Then the sections can each be screwed together.
I really appreciate your suggestions. I take no offense whatsoever and will say again I think you have some terrific ideas. I quoted your idea for panels above so others will read it again. I think if one has access to the necessary tools and wants to build out of lumber this would be a great way to go. Unfortunately I don't have a dado cutter for my table saw but if I do something like this again you can bet I'll find the money to get one. I do love tools.;) BTW, I noticed I was the lucky recipient of your first post. Welcome to 420. there's a lot of good folks with good info here. +reps.

I got the door built and hung and that's about all I have accomplished in the last week. I used a 72" continuous hinge (or piano hinge) to hang it. I have to cut about 1-1/2" off to get a proper fit. This is because I screwed a 2x2 to the top front of the box to give me a little stiffness in the top and to have something help seal up the door and make it light proof. I screwed the hinge onto the door and then screwed the other side of the hinge to another 2x2. I had previously cut the 2x2 to fit where I wanted to hang the door. Then I drilled the 2x2 in about 4 or 5 places so I could easliy mpount it on the cabinet with 3" deck screws.

As I've mentioned before, I really need to get the flower side done. I have 12 plants that are past ready to go into flower. I am going to try and get the flower side done in the next few days and then worry about the veg side when my schedule isn't quite as crazy.

To finish up I need to:
-Put 2x2 strips inside to hang lights & power strips from.
-Paint the interior. I already have the paint and I really don't want to spend any more money than I have to right now. This is a bag seed grow this time but I will probably spring for the Mylar when I am ready to put some quality genetics in there.
-Put a hook or two on the door to keep it closed.
- Cut a hole for air intake. I was going to do this on the door but I think I am going to put it on the side to I can maybe build a little light trap in there. You'll recall that the right wall is framed w/ 2x4's.
-Cut a hole in the top or upper right side for an exhaust fan.
-Install lights, power strips, fans and timer.
As usual, here's a couple of pics.
02225.jpg

02621.jpg


Thanks for looking!
 
You don't 'need' a Dado cutter. As long as you have a table saw, your set to go. A Dado is nothing more than a slot in wood. Since 1/4 inch Lauan is .200" and a saw blade is .125" you just need to make 2 passes of wood over the blade, offsetting the second pass almost 1/8 inch. Your making Solid Core doors/panels with Styrofoam insulation within them.

Hey Perlite, thanks for the suggestions. I was thinking I needed to cut a wide dado to accommodate the lauan and the foam core. Once again, your way makes a lot of sense.:thanks:
 
Back
Top Bottom