OGDanimals 4'X2'X6' NL/Lowryder DIY All The Way Setup and Grow

OGDanimal

New Member
First let me say Hello:bitingnails: and Welcome to my FIRST!!! project and grow.:goodluck:

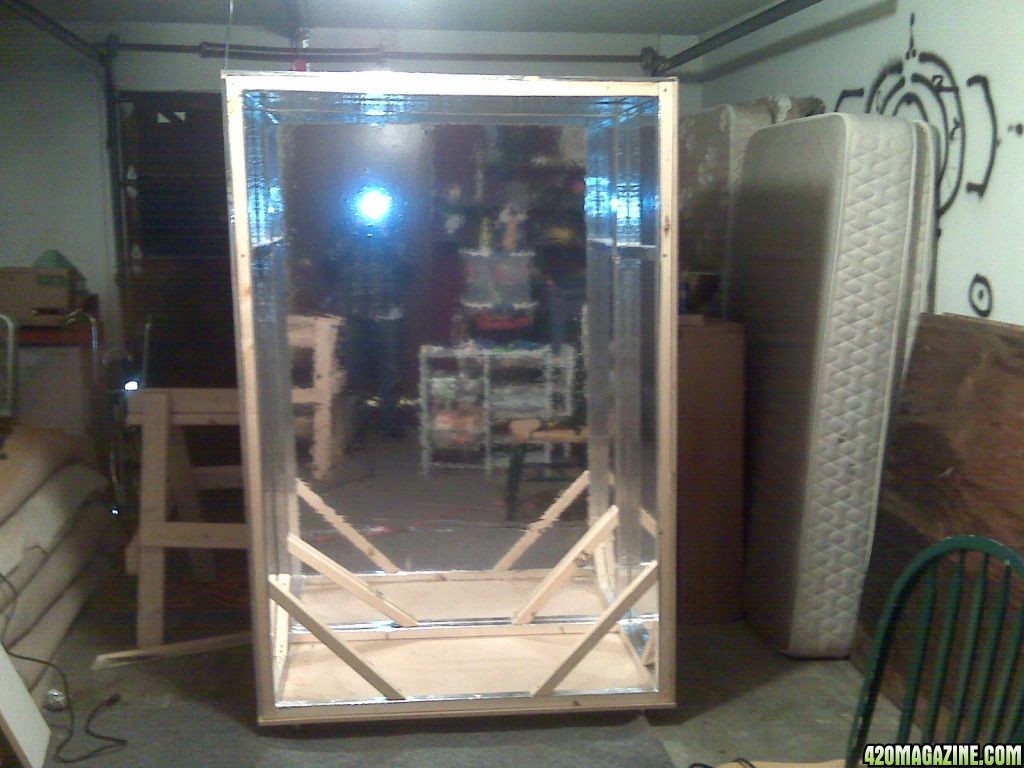
This project will document and show the building of a nice sized cabinet from small scale beginning of a veg to flower grow on CFL's including modification of box into a veg and flower chamber for further grows.

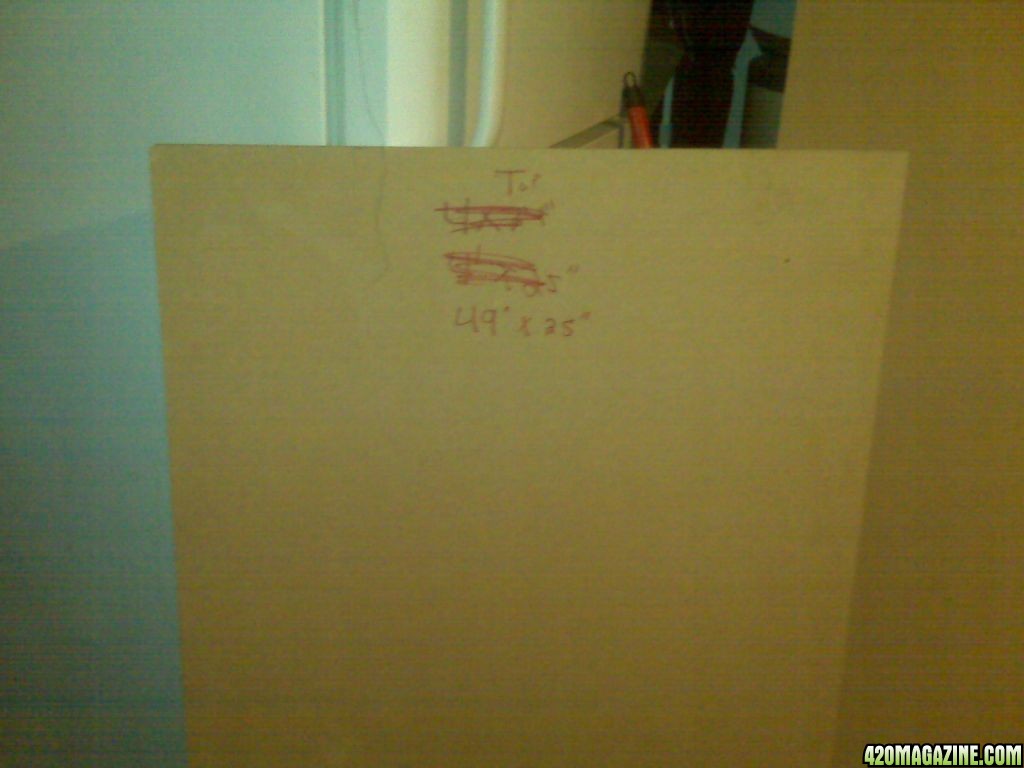
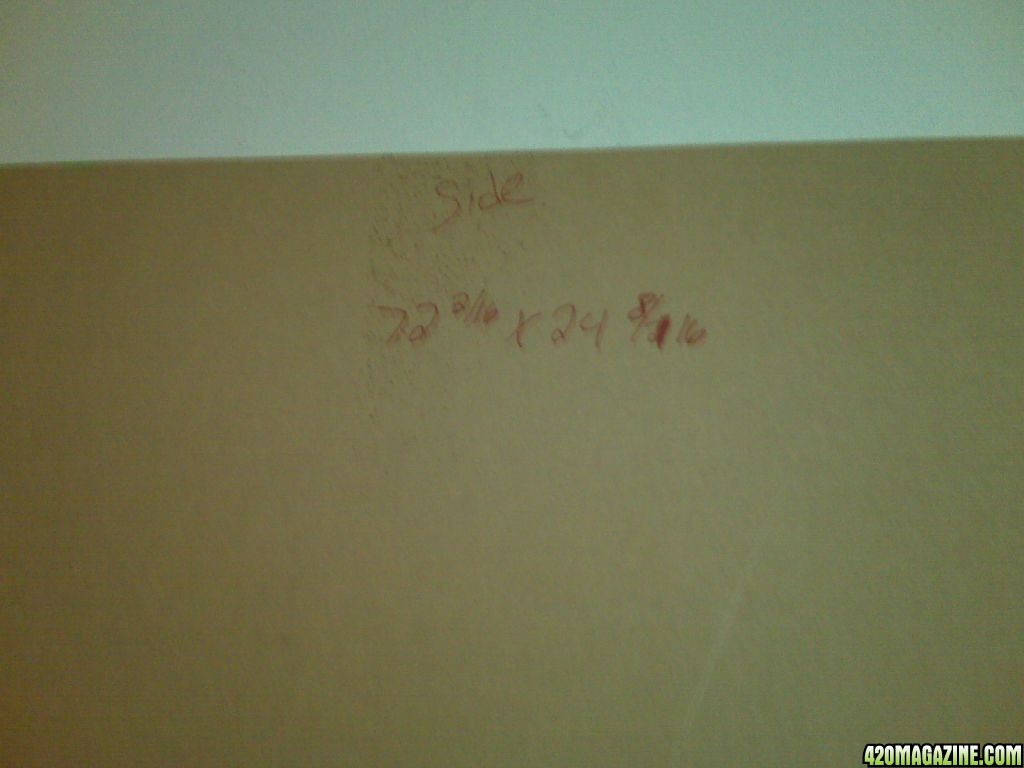
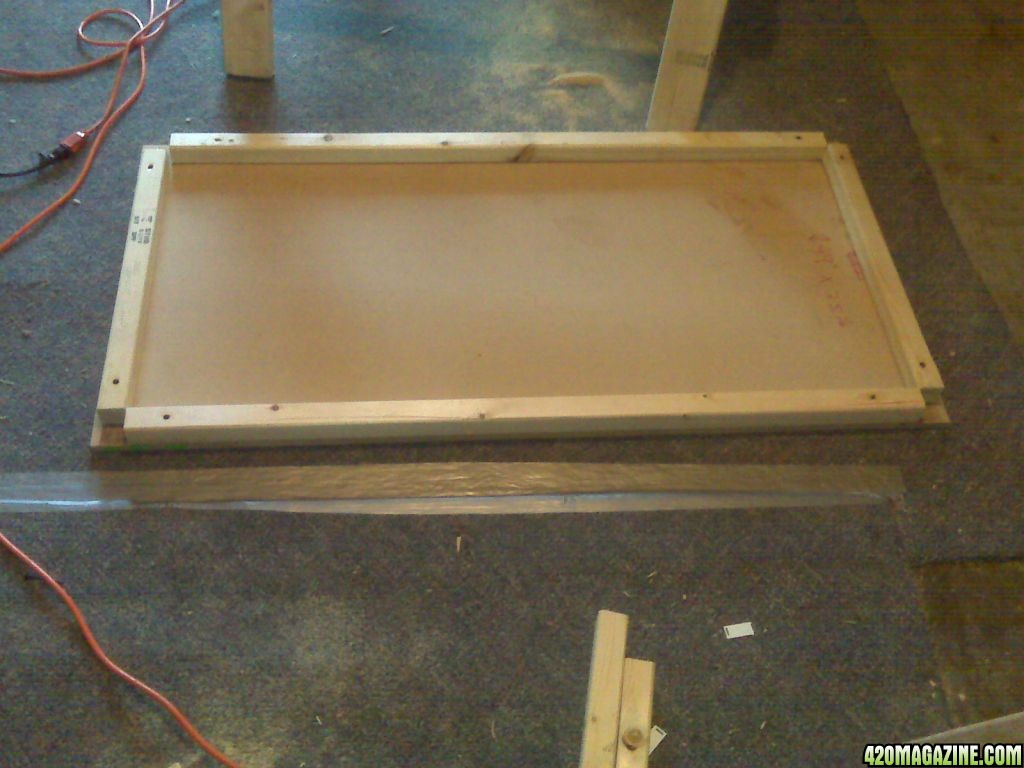
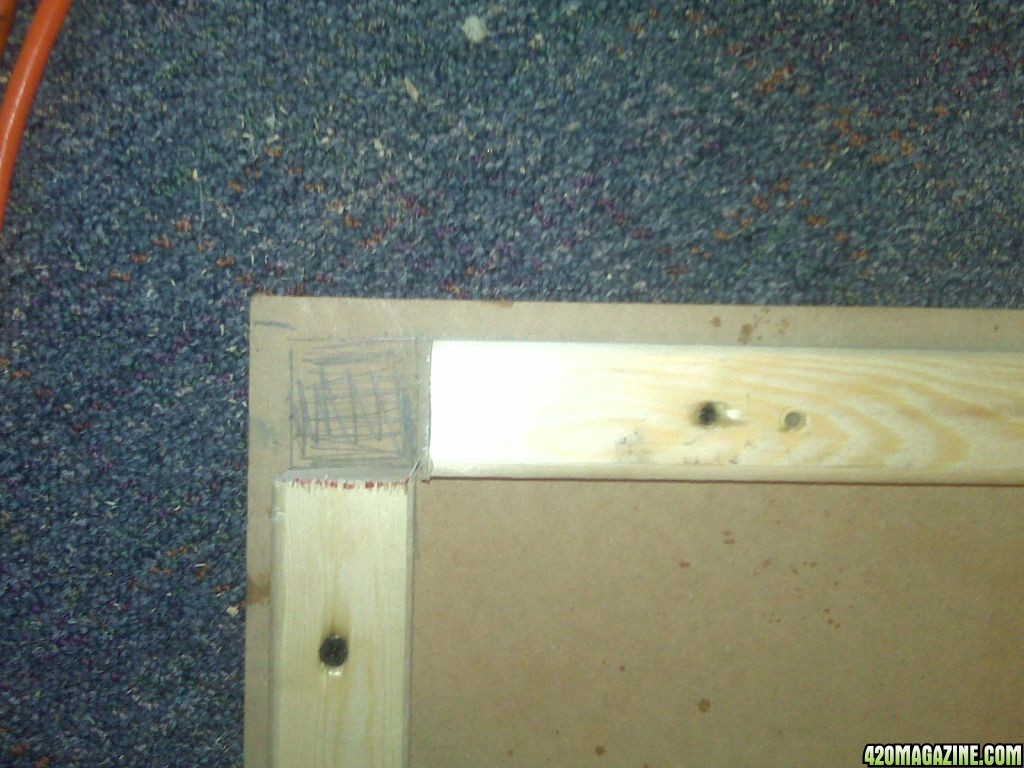
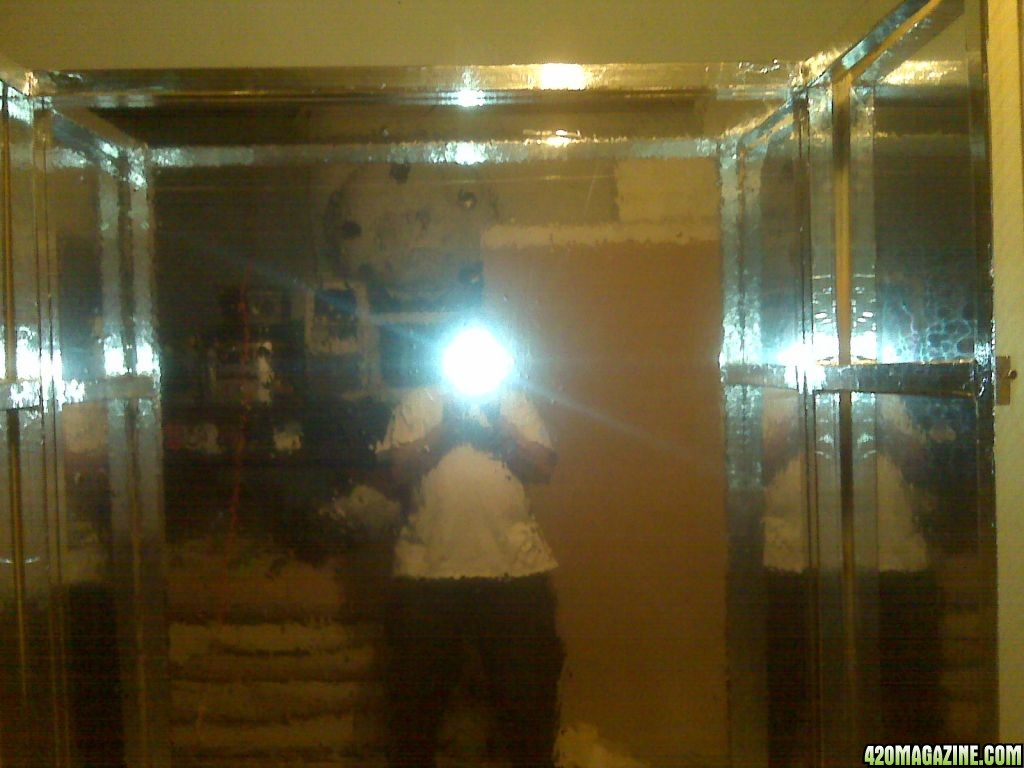
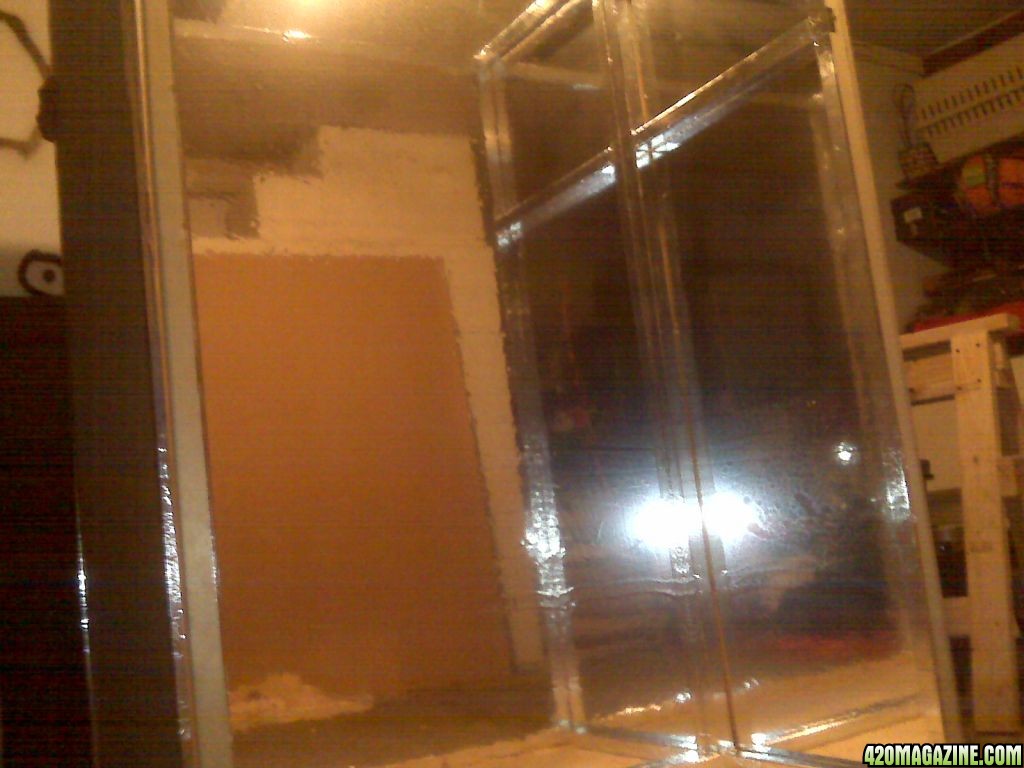
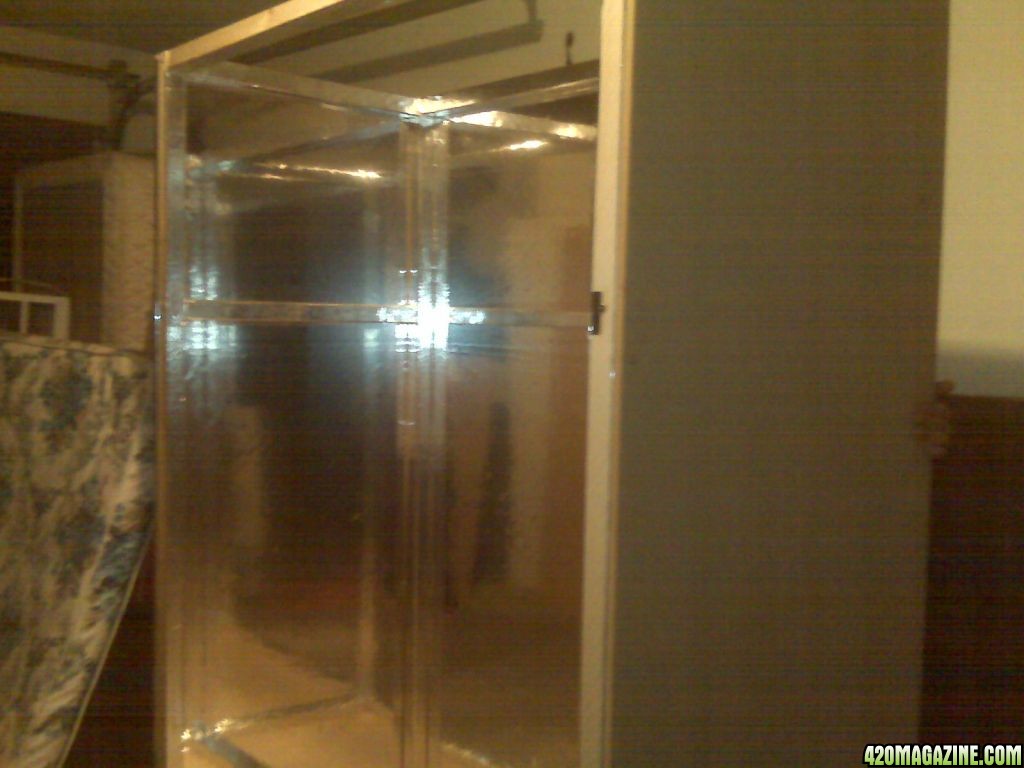
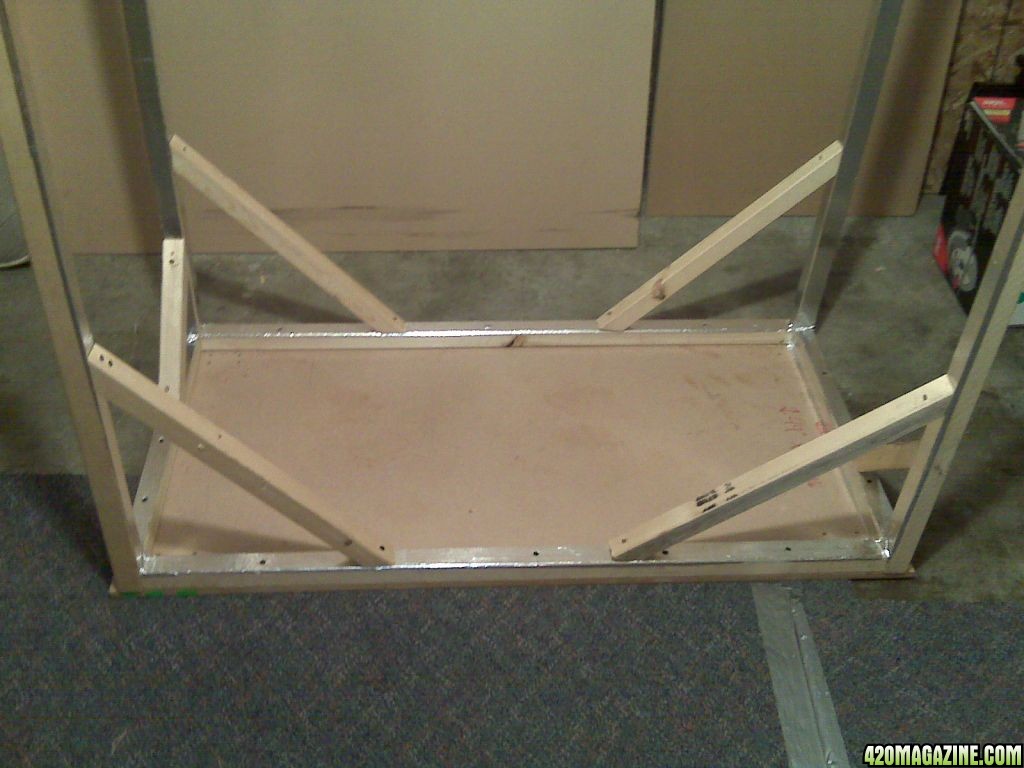
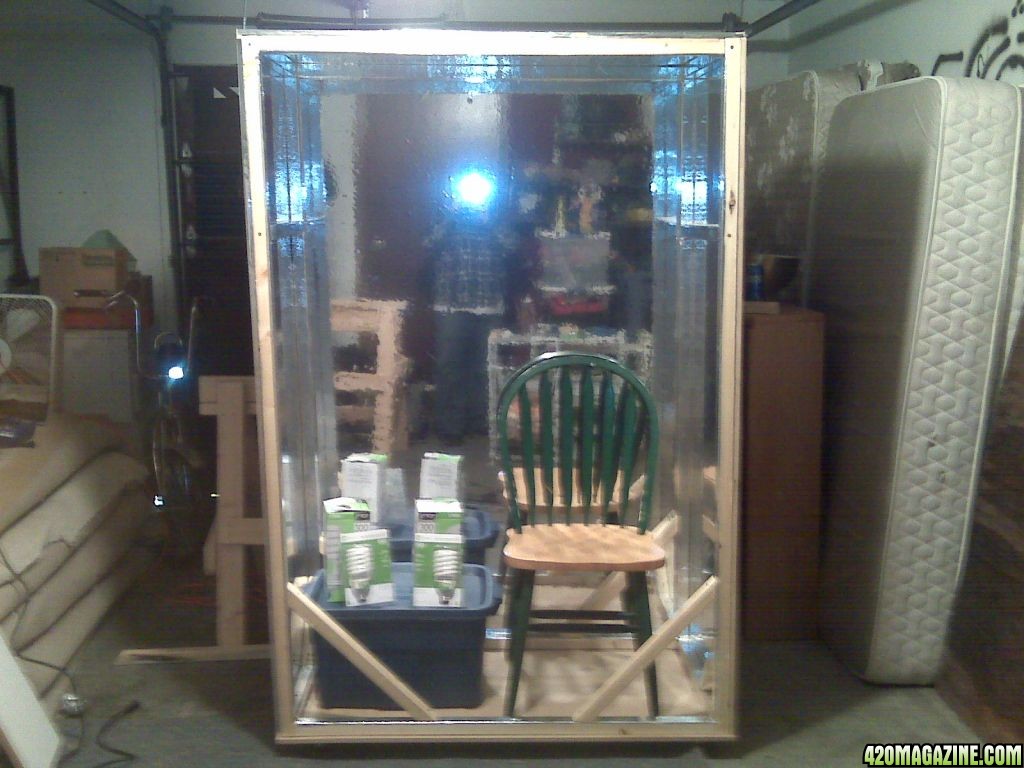
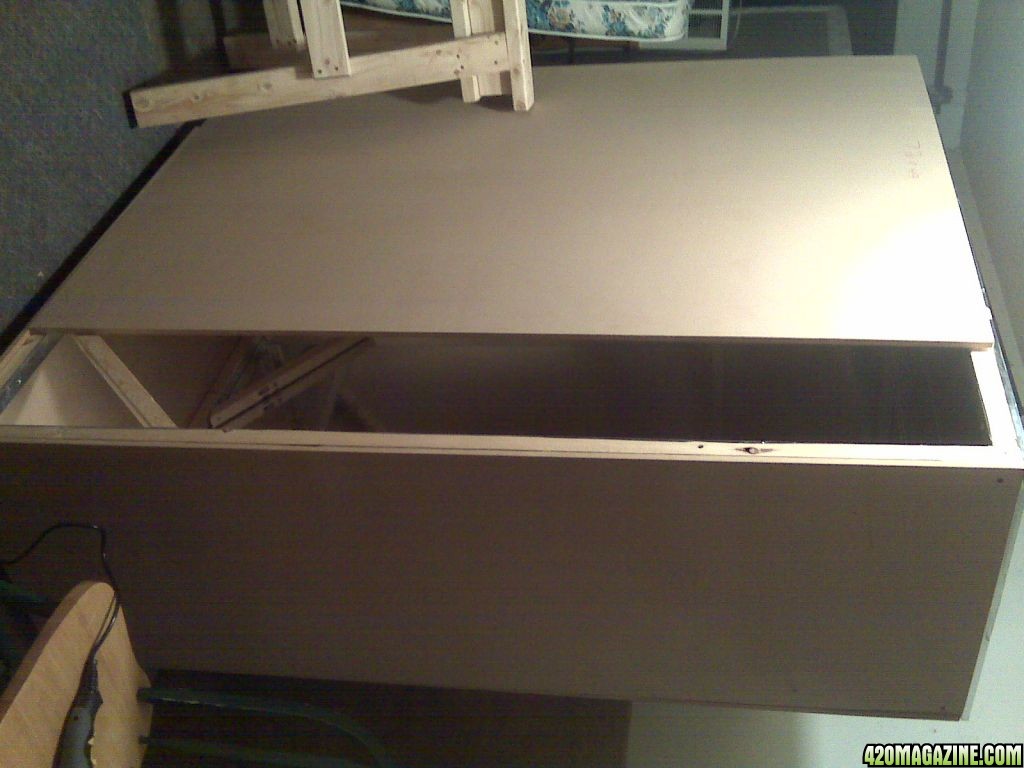
Here's the size specs:
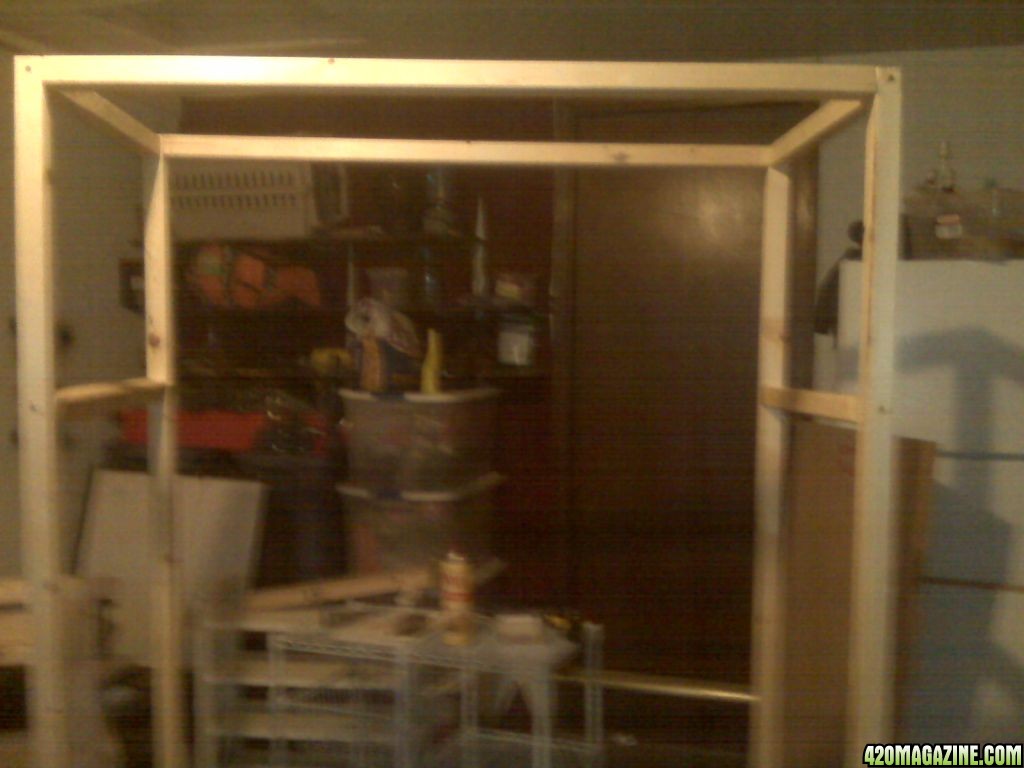
4' Wide
2' Deep
6' Tall
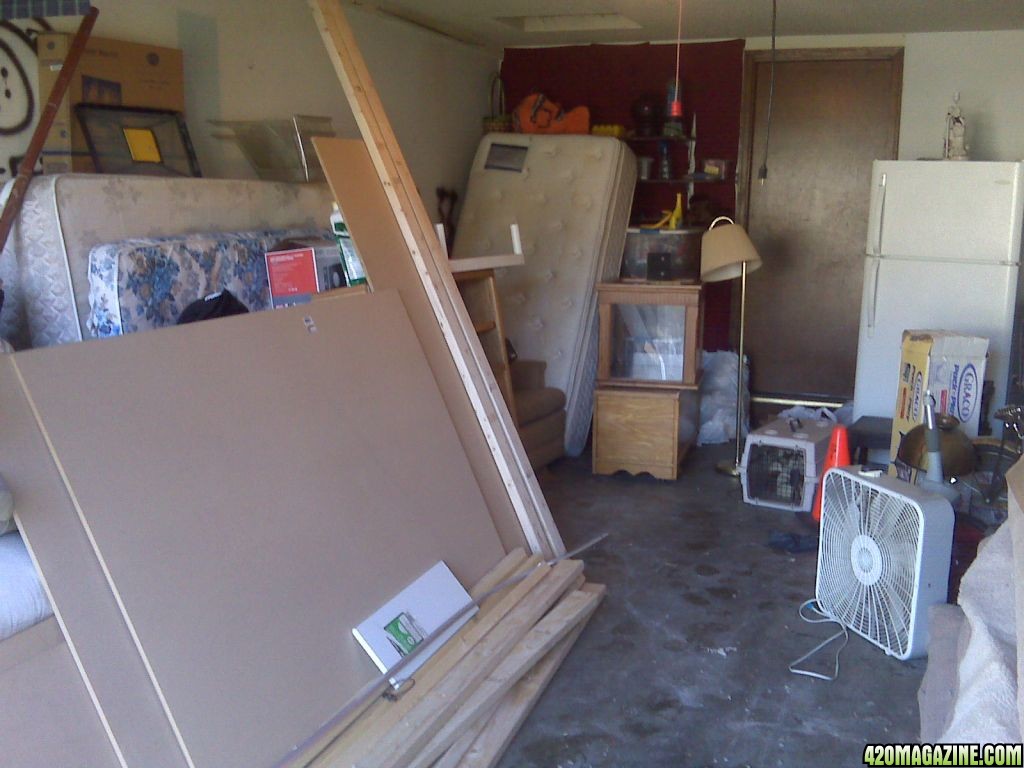
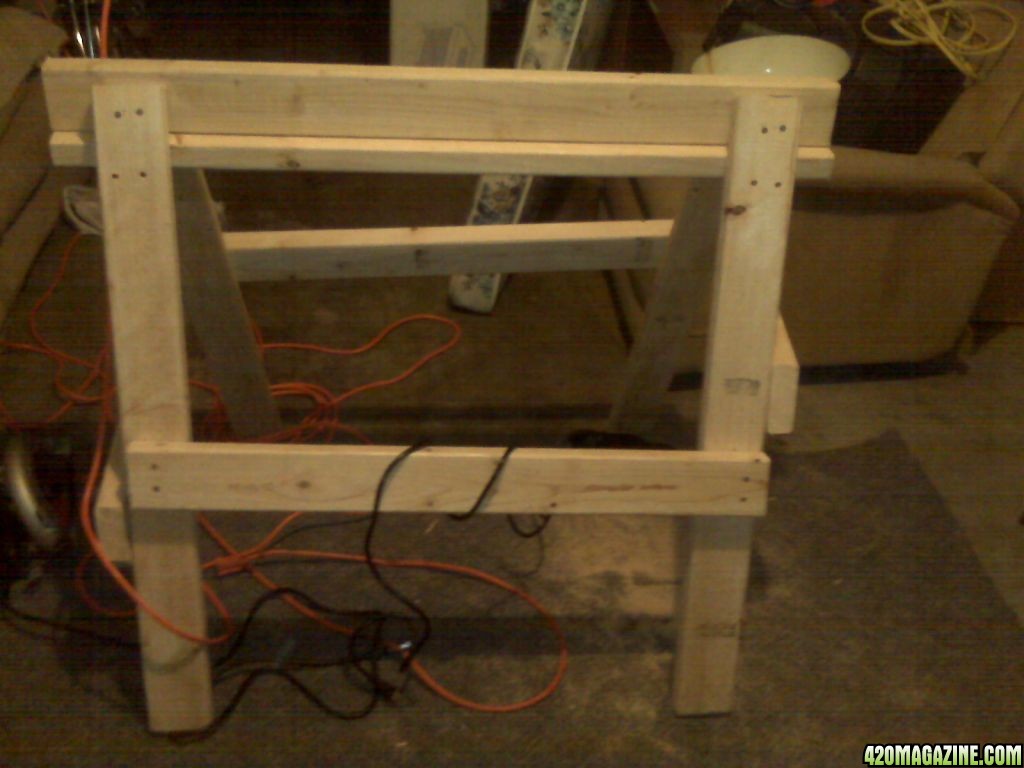
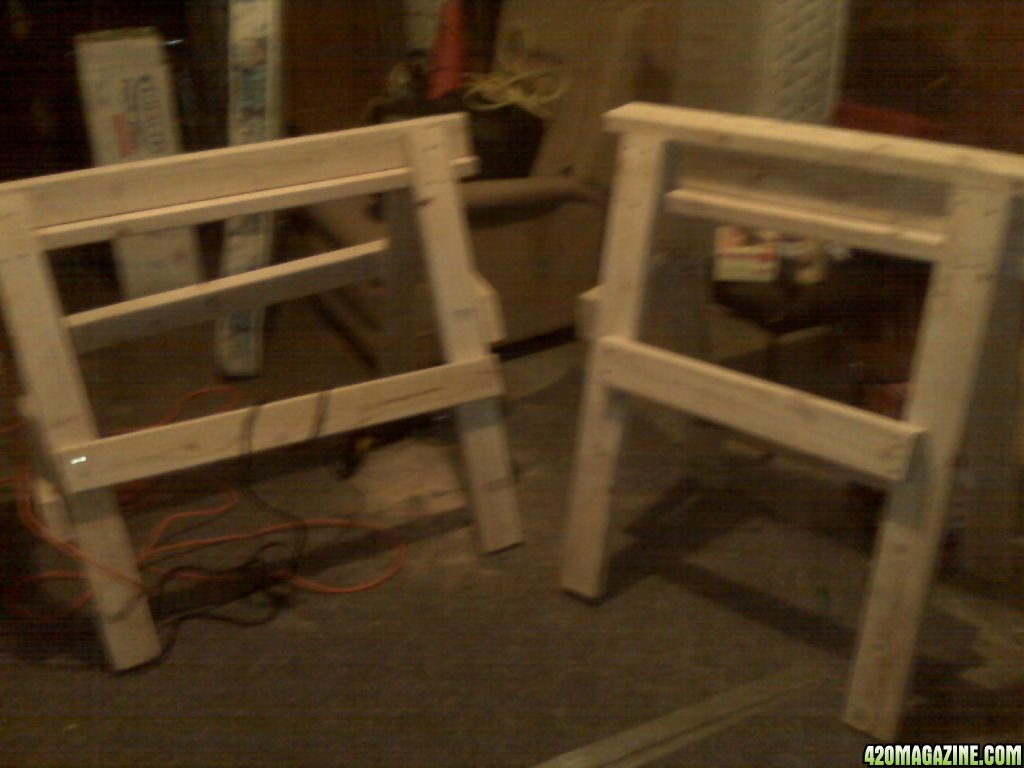
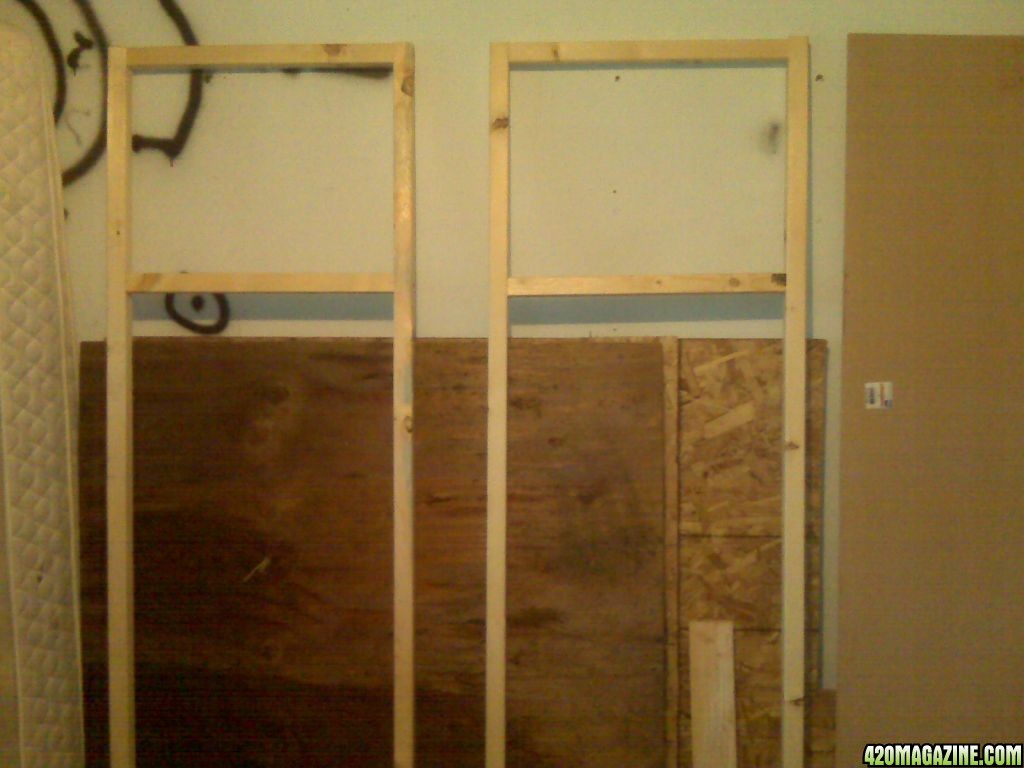
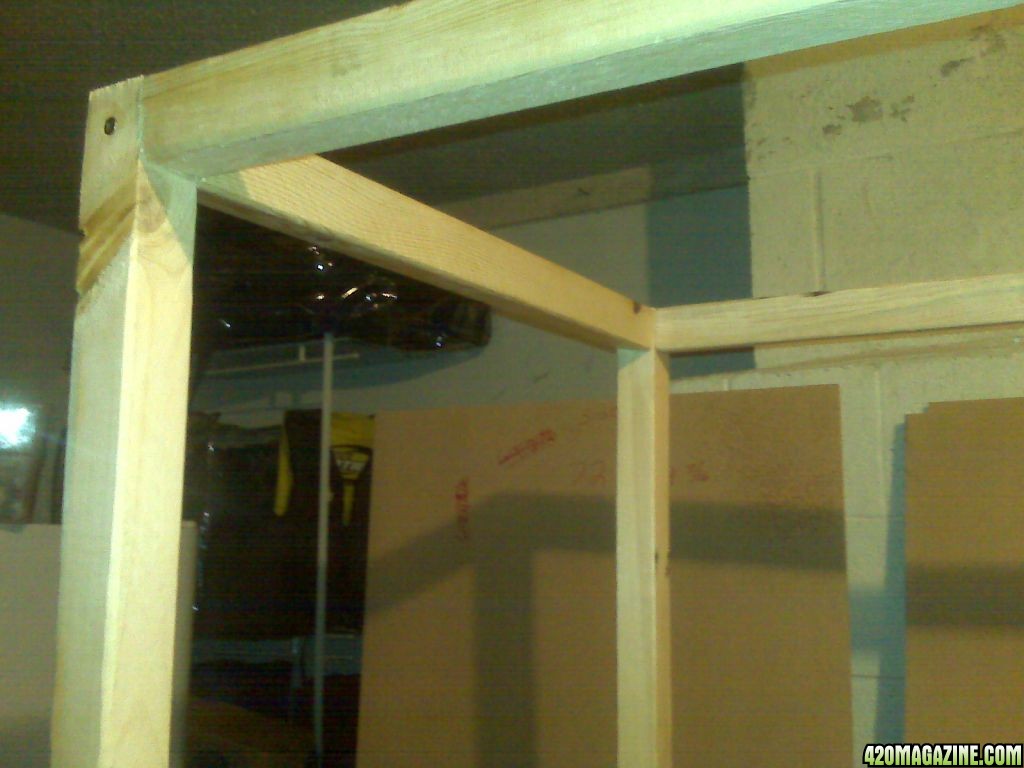
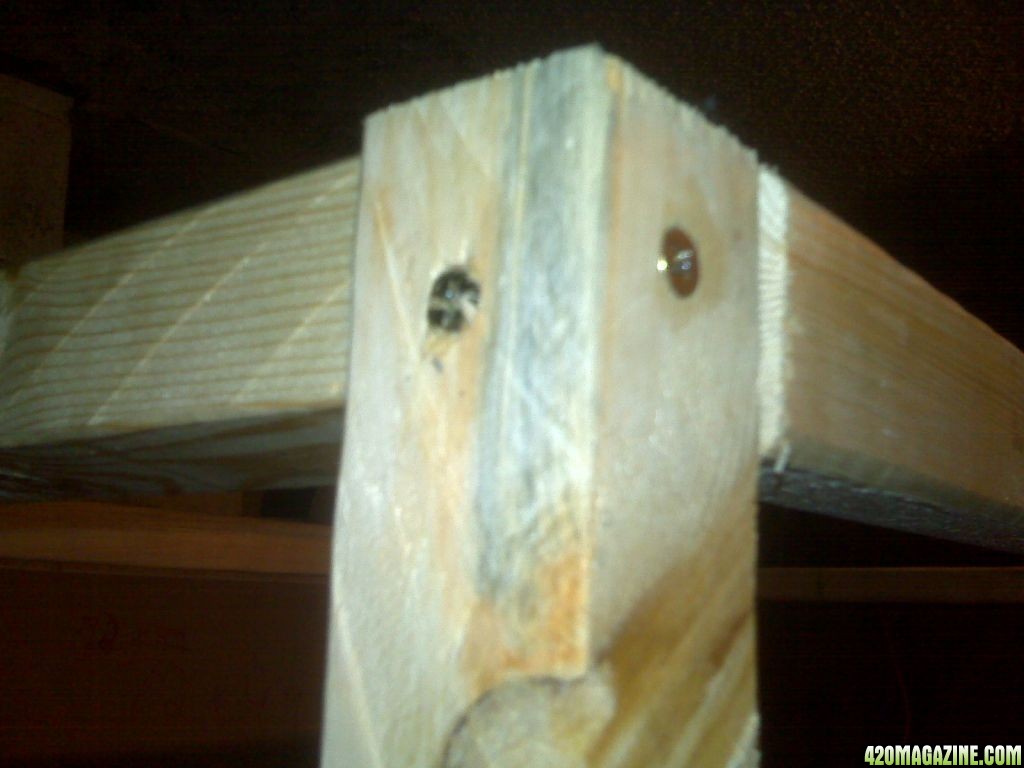
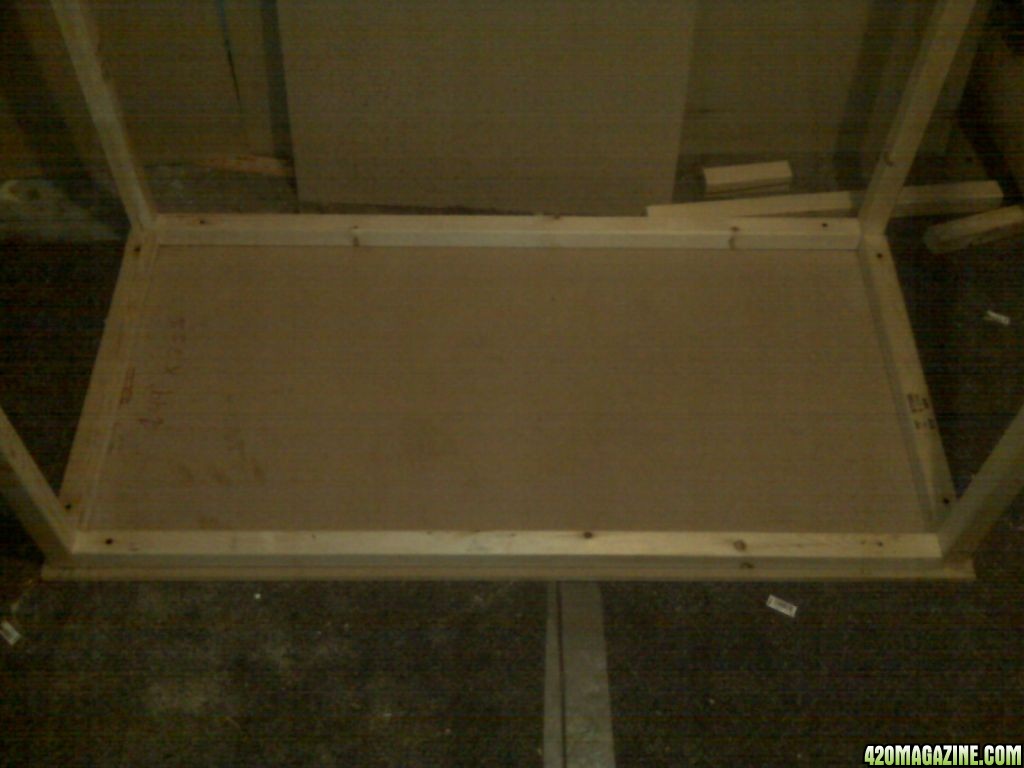
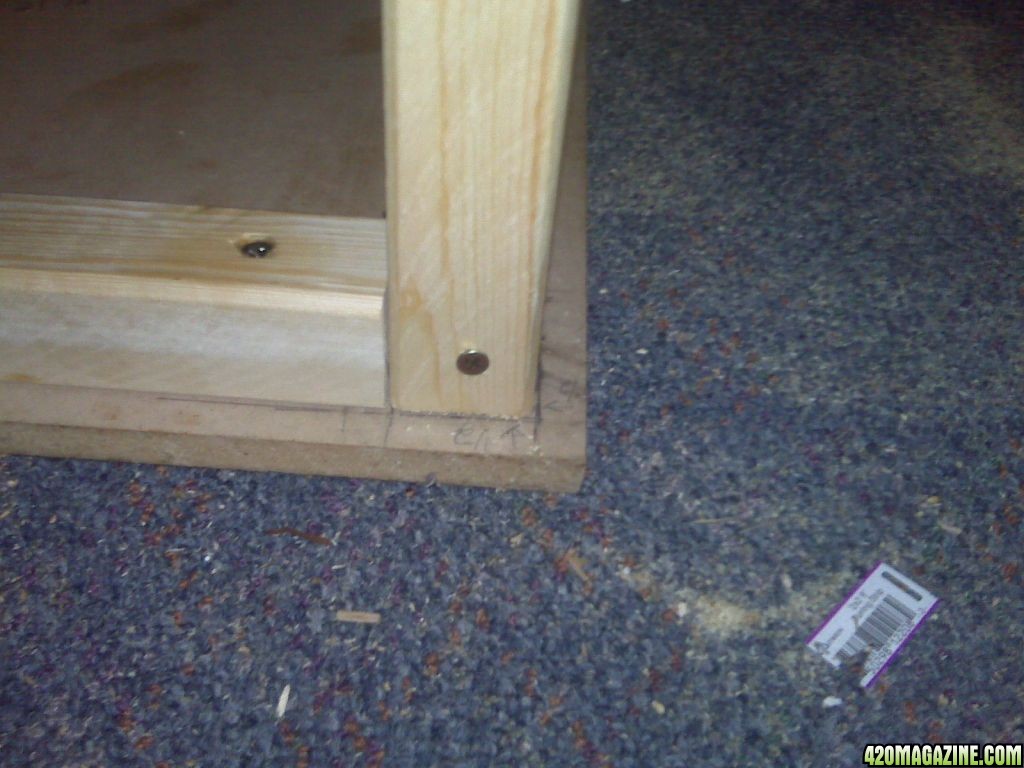
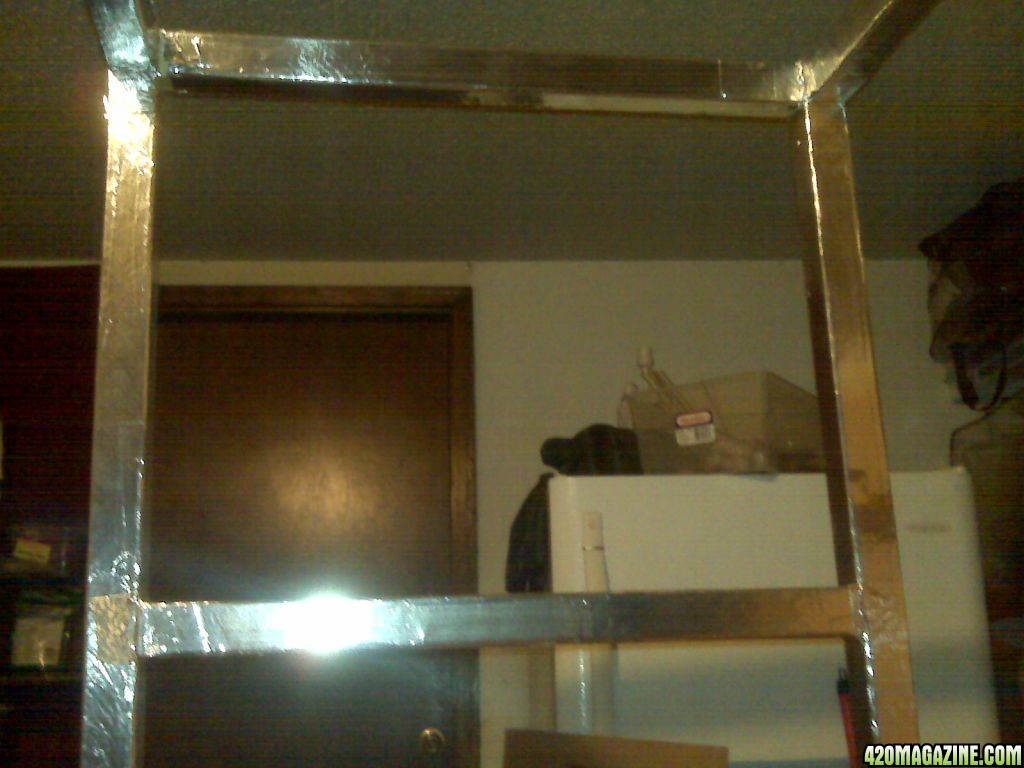
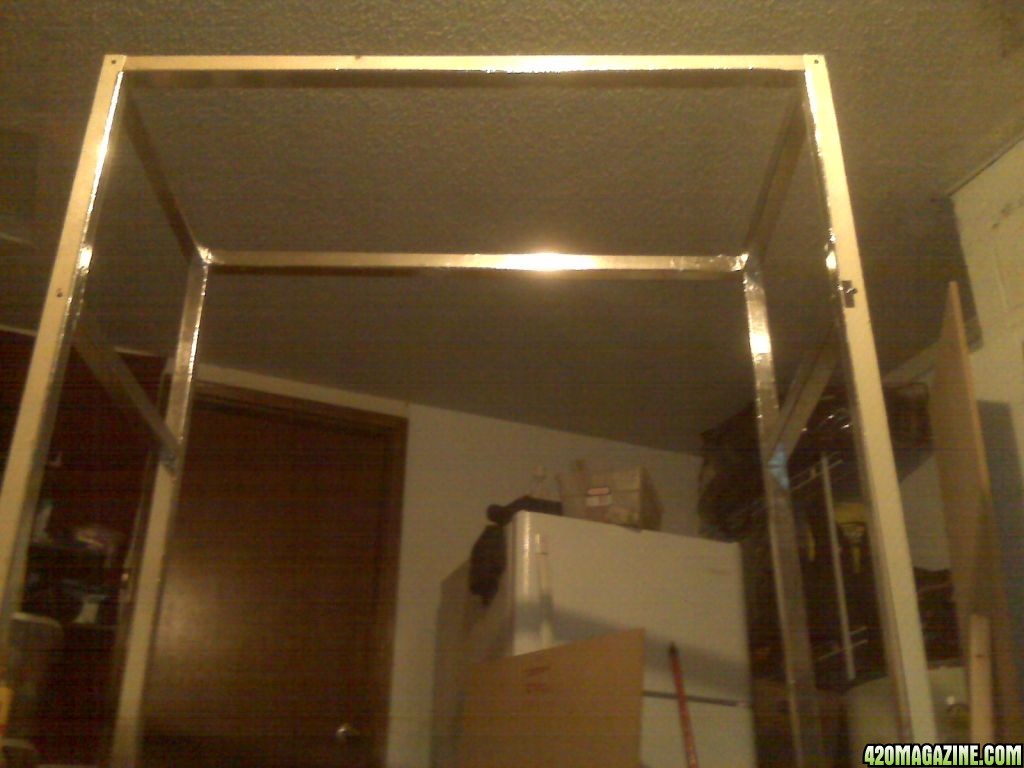
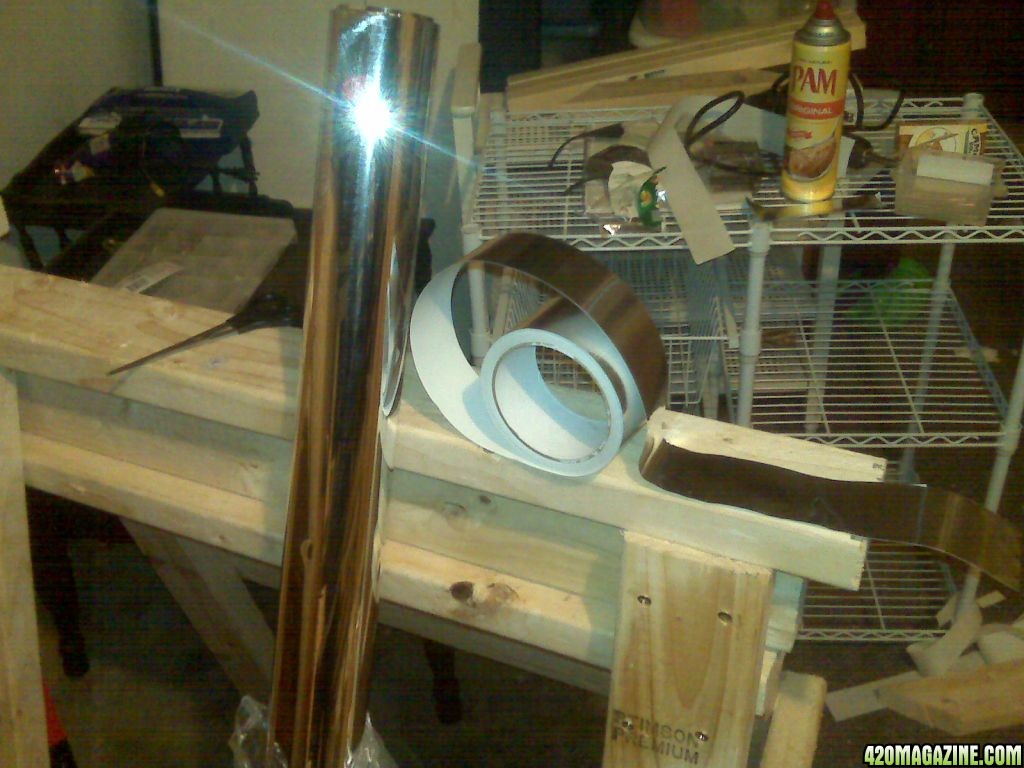
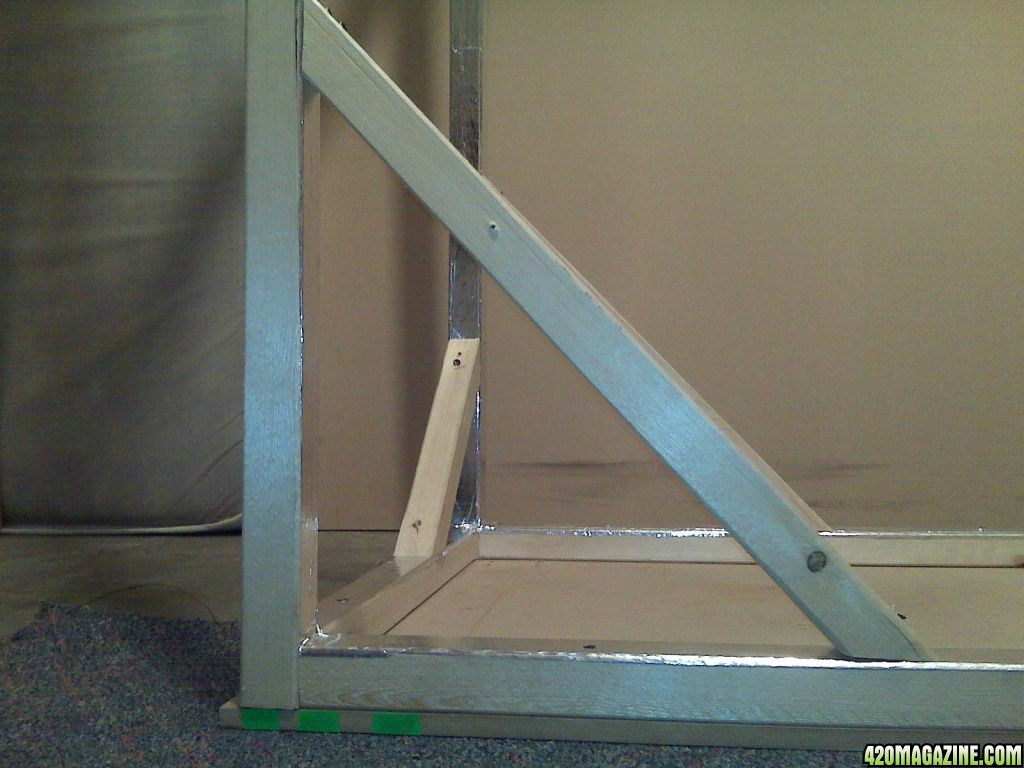
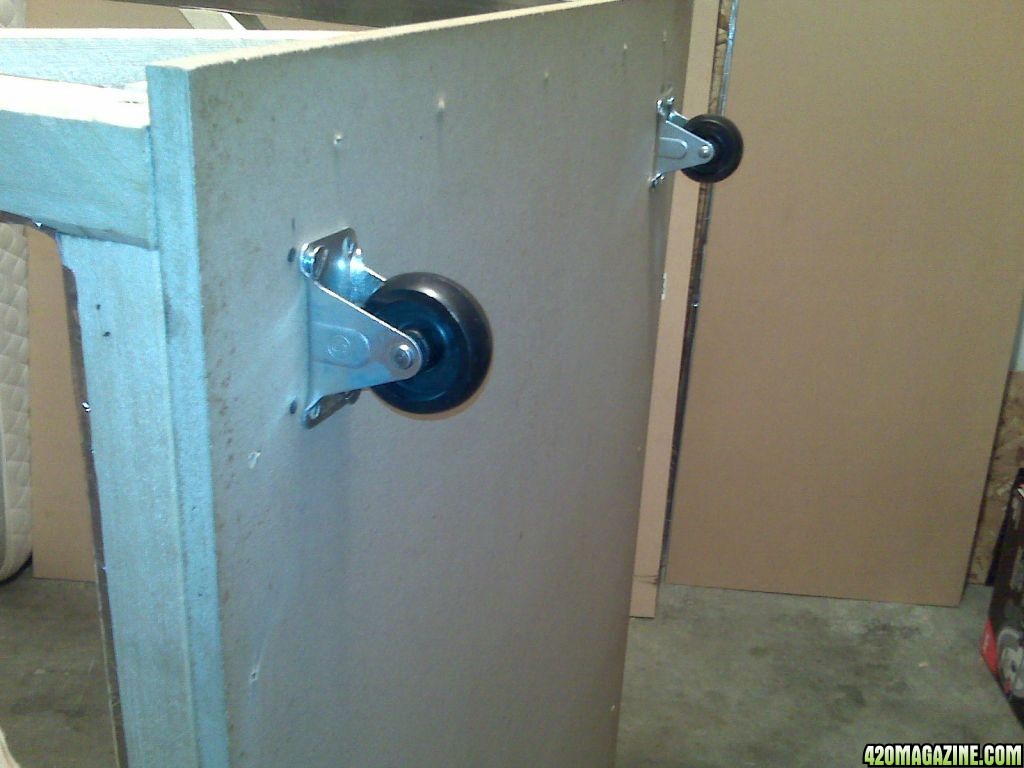
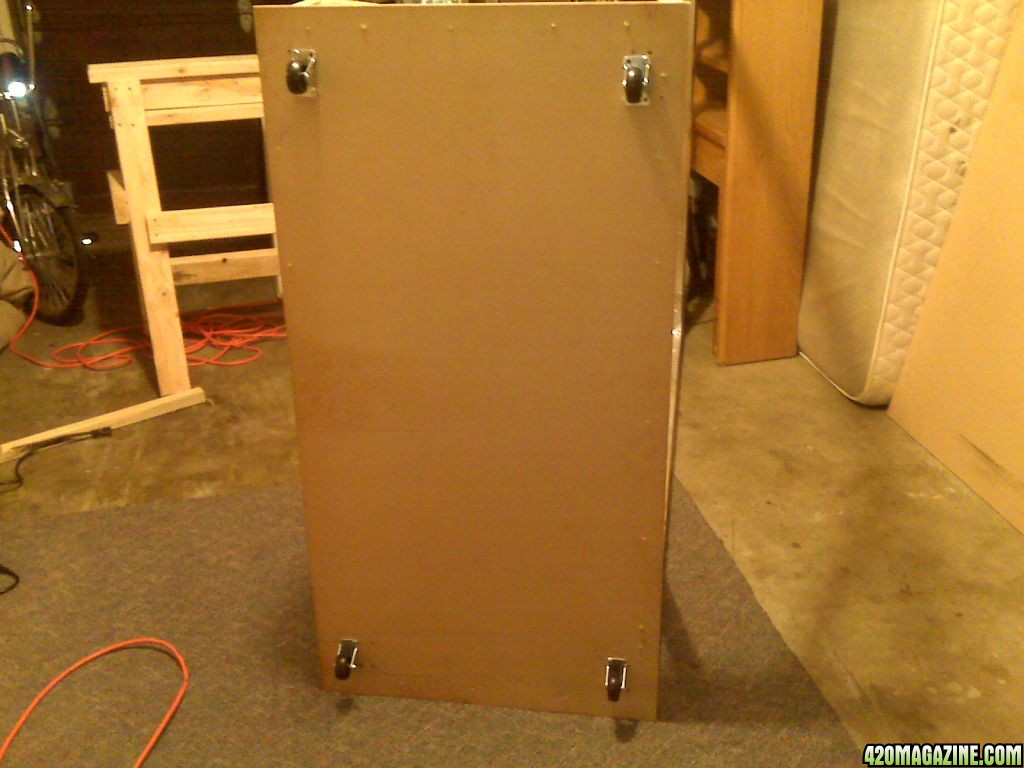
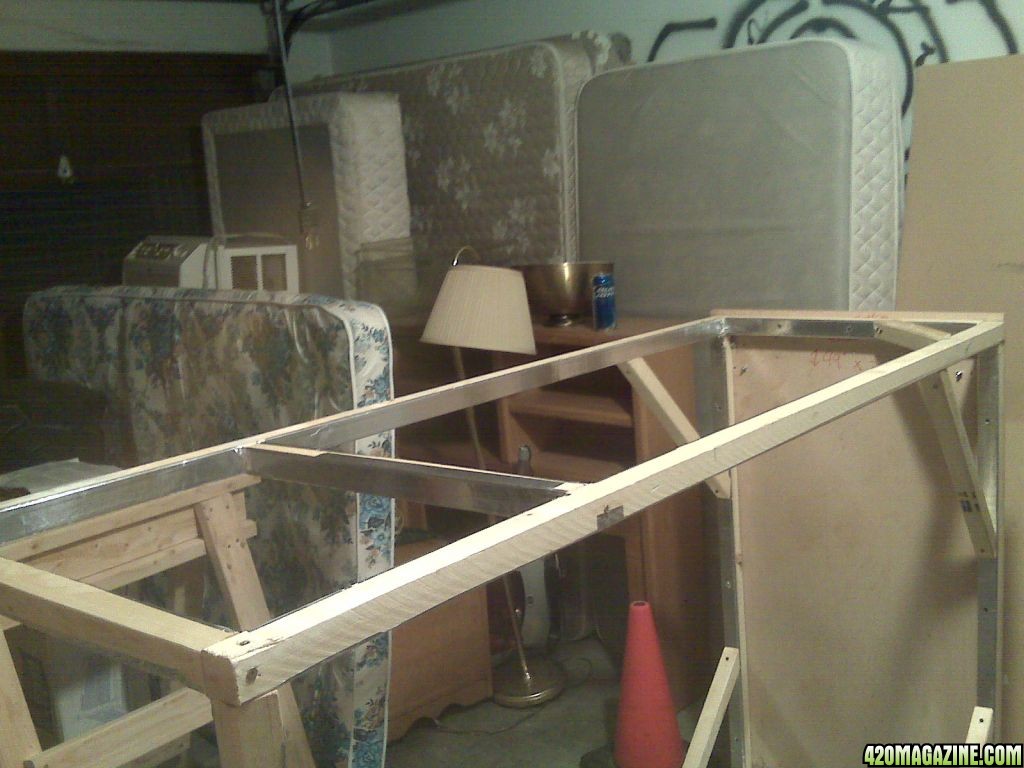
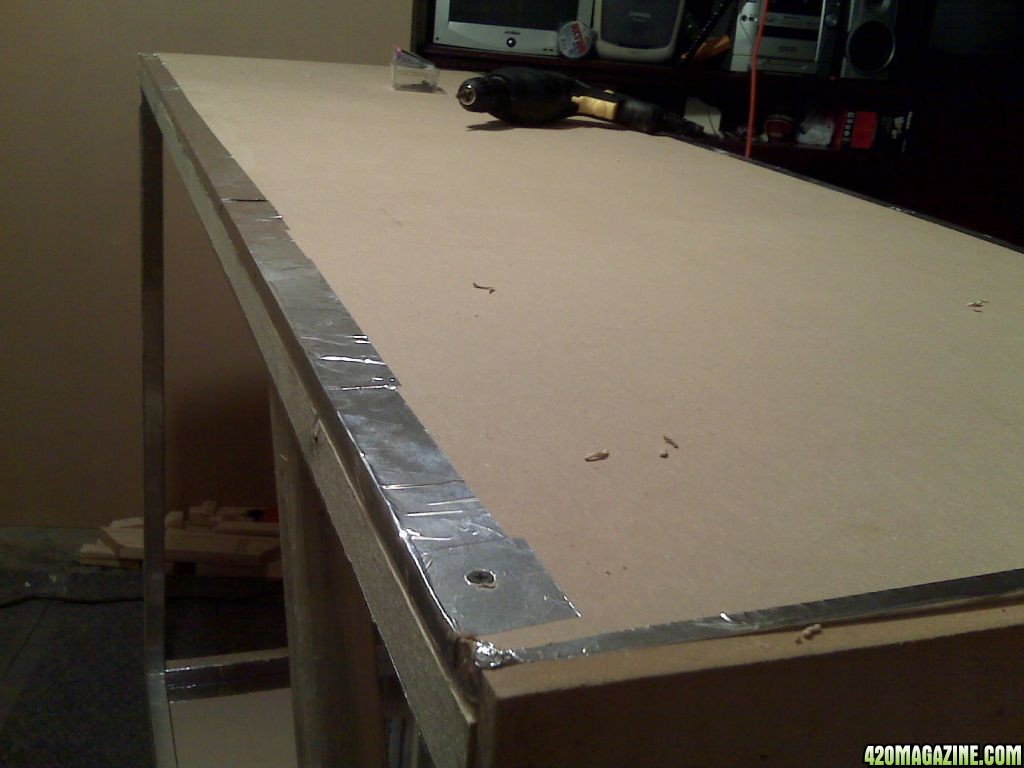
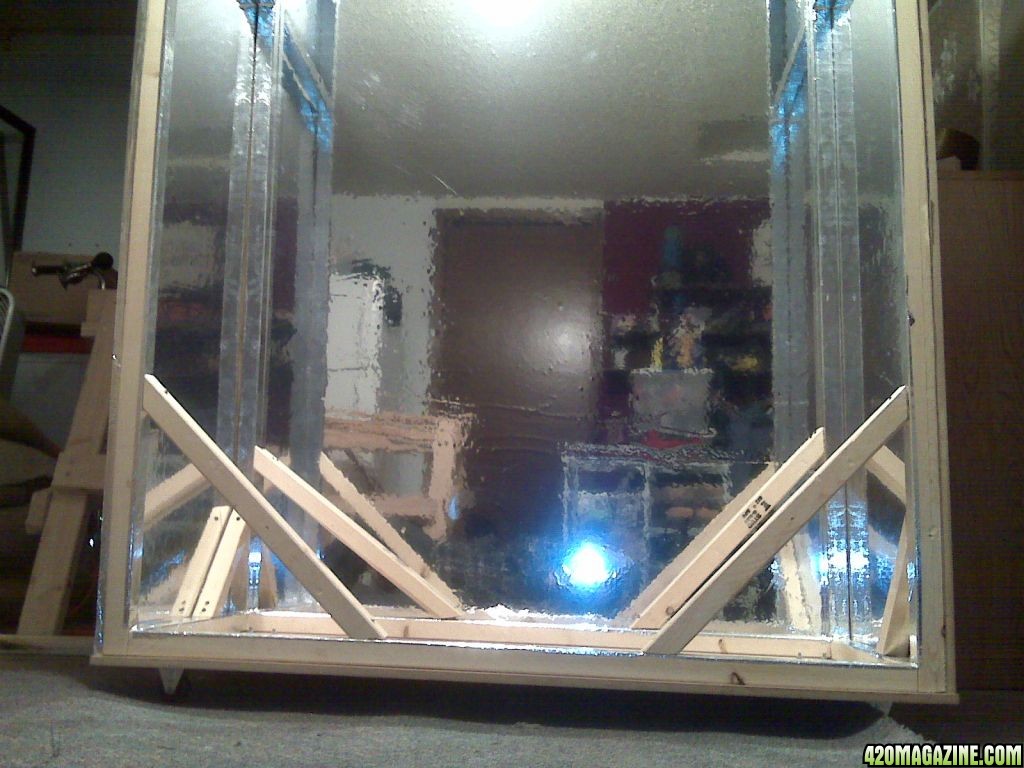
1/2 " thick MDF board on 2"X2" frame supported by shelf and corner braces. Platform will be on casters for easy movement in and out of closet for additions and modifications or as needed. MDF board is heavier and more sound resistant than regular particle sheet board and the box will be very heavy when done.

Containers&Medium:

1 DWC bubble bucket made out of a Rubbermaid container from infohere and here With 6 plant spots
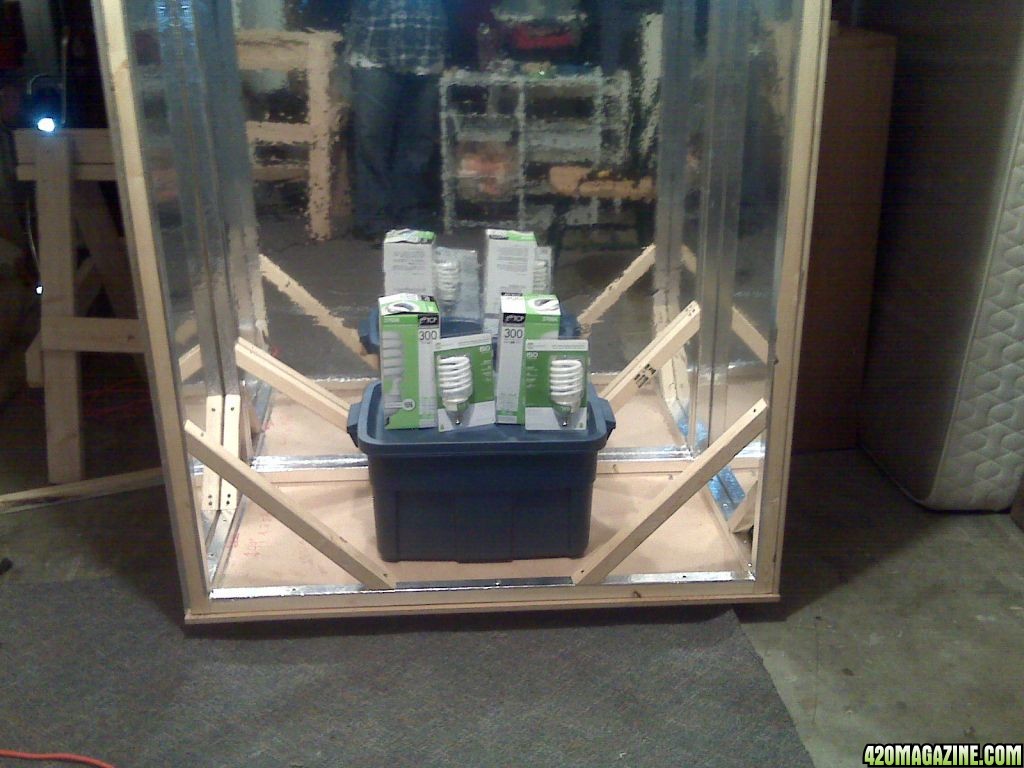
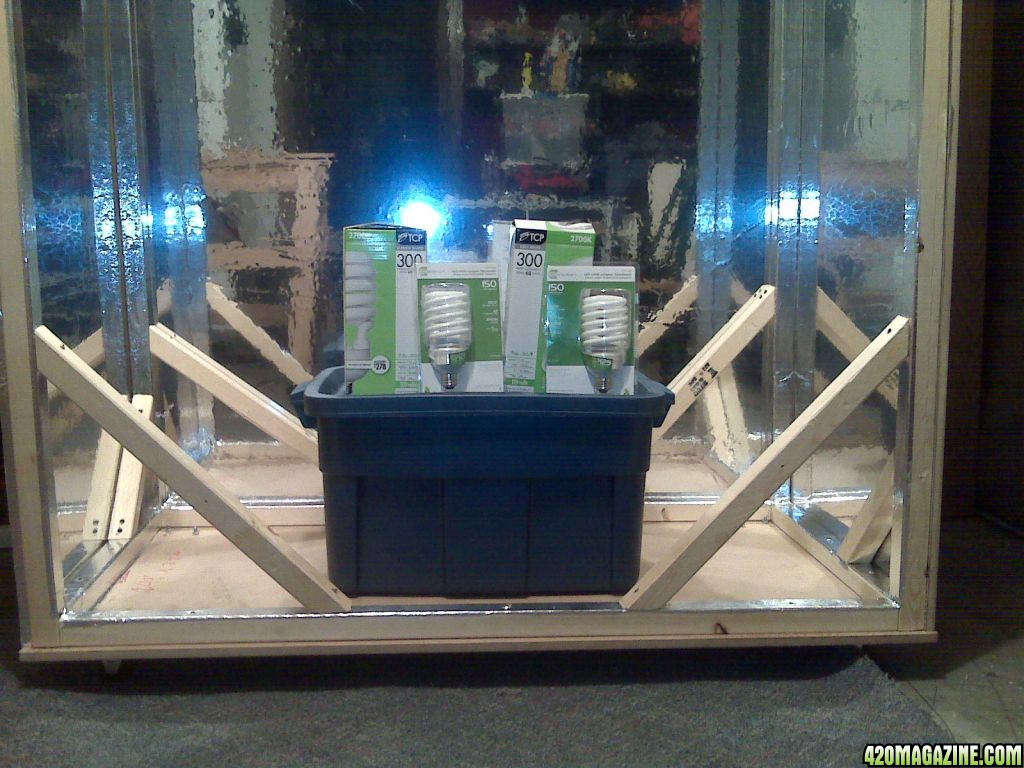
Lighting

I am worried about venting heat and setting up a HPS or MH light so I have choosen CFL's as I can start small and scale up as needed. And I can always buy a HPS with vented hood or make one in the near future.

Begin with 8 42W CFL bulbs in clamp reflectors for 20,000 lumen (2500/sq ft) mixed 2700k and 6500k directed at baby plants spread immediately over tops to just to get going.

Add 4 200WCFL for tops and 6-12 additional 42W CFL mixed color temp bulbs as needed in DIY PVC hanger hoods on sides vertically or where needed for a total of 10-11k lumen/Sq ft built by info found here and here

Venting

Passive intake scalable to active intake later
2 Active exhaust Computer fans attached to DIY carbon scrubber scalable to squirrel cage fan exhaust connected to carbon scrubber

2 small desk fans used for circulation inside cabinet

Nutrients

I'm going to go easy and get Nutes from Stealth Hydro's Deep Water Culture Grow, Bloom and Micro as there is a lot of good info documents on here about their use and results thanks to @Roseman. (and unmentioned others) Who's posts I have been reading like crazy

Plants

Northern Lights / Lowryder mix seeds or clones from a known reputable source so the genetics and life cycle is known.

Plants will be in Bubble DWC in middle of cabinet with enough space on the sides for added in CFL lights, wiring, tubing or for anything not foreseen as we grow. I know too many people have started off too big for their space so I have a big space and am starting small. We can always grow bigger next time if we have extra room this time (doubtful) can but you cant grow smaller once you are too large. Plus I will be partitioning the cabinet right before flowering to build a clone and veg chamber so the subsequent grows will harvest much faster!


So kick up your feet :popcorn: light up a spliff ;) and join me for a wonderful adventure.
 
Second day of build

re-posting the garage pics as the first ones we not loaded corectly.

Look at all this mess!

garage_5.jpg


garage_4.jpg


garage_11.jpg


can't build anything in here, I will need at least a 12" X 15 foot space because I will need some room to maneuver and cut the MDF boards..So time to organize...


Back to second day of build.

I am going to need a surface and edges to cute 1.5X1.5 boards and MDF sheet board..YAY time to build a sawhorse!

Built 2 saw horses (plans found by searching "fast sawhorse" on Google)

Since I am not very adept at building (but catch on fast) and wood working/cutting is not something I have done since shop class (18 years ago!!) it took me 2 hours to complete the first one but after building the first one the second sawhorse only cost me a simple 30 minutes to build it.

First sawhorse
saw_horse.jpg


Notice how uneven it is! AND it took me forever!

However the second one was MUCH faster
sawhorses.jpg


Now I have a good 2 sawhorses on which I can set the 1.5"X1.5" boards which will frame my sides, and rip cut and refine my sheet boards to exact sizes.

Before I begin cutting boards I need to go and measure my MDF boards to get the exact dimensions and ensure they are going to fit into my design.

I measure each one and write down the length onto each sheet so I will have it to easily see.
wood_1.jpg


LOL I started by measuring and writing feet and inches but after taking the measurements to my design draw up I found it difficult to add and subtract so I went back and measured to the inch and wrote that on the boards. It is much easier to use whole numbers in inches instead of feet and inches

IMG001805.jpg


Plus its easier to look at too

The MDF boards I bought from home depot did not get cut to the sizes I asked for and since I had to use a friends truck to haul them to my house and no longer have access to it I will need to correct the error myself.

Next Step....Fixing Home Depot's screw up

I wanted 6'X4' (or 72X48inches) Front and back MDF boards and I got 72X49
I ordered 2 48X24 boards for top and bottom and I got 49X25 and 49X25 &1/16
Needed 2 72X24 side panels and I received 72X24 1/2 and 72X24 5/16 sized panels

My design utilizes the frame and bottom style setup from This Guy's build

I wanted the sides to be flush to the ground and the front and back to sit on the bottom so there would be a nice seal between the walls. Now I only have room for only the front OR the back to fit on the bottom board. No problem...

I will set and attach the front and sides (attached to the frame) on the bottom board and hang the back panel a 1/2 inch off the ground attached to the back of the back posts of the frame. A Little mod to my build and I will have to use some weather stripping to make a good seal but it is doable and I will not have to cut the MDF boards any.

Well all of this took me most of the day to figure out so Tomorrow I will get to making the frame and taking photos to show how the walls will line up on the bottom board.

I also will post pics of how I drew a trace outline of the walls and bottom 1.5X1.5 boards out on the bottom to show how the frame and walls will attach for better understanding of how it will fit together.

That's all for today folks...Join me tomorrow when the frames get made!
 
Saturday Day 3
:yummy:
I would have worked on my box Saturday but I started the day with seeing auras and knew I was in for a hell of a day with a whopper of a migraine. I medicated after eating a small breakfast of a couple eggs and some bacon in a breakfast sandwich but the migraine I feared came on full force before I was done eating. I Laid back down and medicated with my super strength cannabis I had delivered and tried to fall back asleep. Ugh the neighbor kids playing next door are being loud and it's killing my head!!!!

Drifted back to sleep for a few hours. I woke up shortly before work, head still pounding but no auras or dizzyness so I gots to pay the bills... going to work...

I really need to get my box done and garden started so I can have my own medicine on hand ASAP without having to pay for it or worry about deliveries or driving with it in my car when I go to pick it up.

Day 4 Sunday 3-7-2010

Today I built the bottom support frame onto the bottom panel, side support frames and cross beams to support the side panels together width wise.

Wow!, my inexperience in wood cutting and working is quickly going away. At first I was worried that every cut and attachment had to be cut precisely exact down to less than a degree or less than a 1/16 of an inch. This worry prevented me from making serious headway into getting things rolling. After a few cuts and screwing the 1.5X1.5" support frame and attaching to the bottom board support frame I see that everything is going along nicely. My cuts might be a bit off (within a 1/16 of an inch) but after attaching everything together I see that the box will be just fine.

The screw up that I thought Home Depot made is not a big deal after all.

Onto the building

First I built the bottom support frame that the side frames will screw into by cutting 2 21.5 inch 1.5X1.5 boards and 2 45 inch 1.5X1.5 boards and attached them to the base panel with 2" screws.

I used 2" screws because the width of the MDF panels is 1/2 inch and the support frame is made out of 1.5" boards and that equals 2"

base.jpg


notice the 1/2 inch ledge the side panels will rest on when screwed into the bottom panel support frame.
base2.jpg

I have this little ledge on 3 sides of the base panel, both right and left sides, and the front. The back will attach to the side frame supports and at the top support.

Next

Time to build the side frames.

I cut 4 21.5 inch length 1.5X1.5 boards and 4 27" length 1.5X1.5 boards (the height of my box is 72")

I screwed in the 21.5" boards in between the 72" boards with 3" screws because the frame will support a lot of weight and the longer screws are more secure, AND they are going to be screwed into the ENDS of the 1.5X1.5 boards, to make 2 simple side frames

Here are the side frames assembled

sides2.jpg


After building the side frames I cut 2 45" 1.5X1.5 boards to support the width of my box.
View at the top
corner.jpg

I noticed that I do not have much room to screw in another screw on the other side of the 1.5X1.5 boards to attach the wide side support 1.5X1.5 boards

I overcame this by measuring and drilling my pilot holes just a tad above or below the other side screw

close_screws.jpg


If I had used 2X2 boards I would have had more room and not worried about splitting the boards or hitting another screw as 1.5X1.5" boards are a bit too small to work with when screwing in from the ends.

I attached the 45" 1.5X1.5 wide support beams in between the side frames at the top. This was a doozy to do by myself as I had to hold and maneuver and screw the frames together at the same time and this was difficult. I medicated and figured out to use my sawhorses (DUH thats what they are for!) and some support ties to hold everything together while I worked the wood. (lol I said work the wood)SorryI did not photo this MacGuyver move to hold the panels up while I worked the wood(Lol I said work the wood again)

Yes I am quoting myself and referring to myself in the 3rd person... once again YAY for being medicated!

Attaching Frame to Base

After having the support frame done all I have to do is attach it to the base
bottom21.jpg


I did this with 3" screws screwed in from outside of the side frame into the end of the interior base support frame 1.5X1.5. again 3" screws are needed because they are more secure and go in further.
bottom_2.jpg

Close up of one of the base panel corners with frame attached.
bottom_attached.jpg


Here is the frame completed in rough form.

top_frame.jpg


Some GREAT points points to remember.
1.) Use a drill bit a size smaller than your screws and drill pilot hole for all screws attachments.
2.) Using Pam non stick frying pan spray on your drill bit will make drilling easier.
3.) Using Pam non stick spray on your crews will help get them in fast and smooth
4.) 1.5X1.5 boards are too small to work with when screwing in from the ends or using multiple screws from different sides.
5.) Exactly Precise cuts are not necessary as the frame which is made of 1.5 X 1.5 gives you some wiggle room with which to attach the side panels
6.) Medicating can help you overcome a mental block and helps with anxiety
7.) This is getting easier and easier as it goes by

Well It's Monday tomorrow and I work 9-4 I will purchase my interior covering either Mylar, white paint or black/white plastic covering. I am leaning towards black/white plastic covering as I am going to go Hydro and the plastic will help prevent spills from leaking onto the floor OR Mylar as It is more reflective and is good at holding spills too.

Thanks for viewing, feel free to REPLY if you are following along or have any ?'s or comments!
 
Help with Question...

I Picked up some 2 mil Mylar 25" X 50' for $50.00 and silver metal reflective plumbers tape used on pipes and ducting for $6.00 on the way home which leads me to a question...

Please help answer/comment:


I have checked out my local towns Health Crafts store that sells Hydroponic equipment, growing lights and nutes, brewing equipment and other items for growing and items by by catalog. Check them out and some of their prices and let me know what you think. They have a web site but I don't think I can link it. Google search :City Olympia Store: Health Crafts.

The prices are about 30% more than same or similar items from online web sites. I want to support my local economy and businesses but with such a high mark up and cost why would I?

I am having a conflict of mind and morals regarding my pocketbook on this one.

What should I do? Anyone care to help a fella out with some advice and reasons for that advice? :hmmmm:
 
Day 5

With my purchase of 2 mil Mylar and silver reflective tape I am going to apply these to my interior surfaces to aid in maximizing every lumen put out by my flourescent lighting.

It is very shiny
silver_tape.jpg


I covered all the visible inside surfaces of my 1.5 X 1.5 frame. I used two pieces of scrap wood to smooth on the reflective tape so that I would get a good adherence of the tape and it would not have any crinkles or bubbles in it.

Here are the tools I used to smooth out the tape
smoothing_rods.jpg


I just applied long strips by hand making sure to keep it on straight and ran my hand over it once and then braced the frame with one hand and pressed down hard with the wood scrap and ran it back and forth against the tape and got out all the wrinkles and bubbles nicely.

taped2.jpg


Here are a few shots showing how awesomely it turned out.
See how shiny!
front_taped.jpg


YAY What Do Ya Think?
side_taped.jpg


Here is the my Mylar I will use tomorrow to cover the side panels.
mylar1.jpg


Well I Work 8-2 tomorrow and after work I will be putting Mylar onto the side panels before they are attached to the frame.


QUESTION:
What have you all used to put Mylar onto wood? Glue, spray cement, or tacks...and why? :scratchinghead:

Check me out tomorrow!
:rollit:
 
Day 6 of Build

Well if you are like me and everything has to be exact then I have some advice....give it up. You can fret, worry and cry about something not being EXACTLY what you intended but all that wasted energy and time would be better applied to ENJOYING an activity rather than suffering the whole time. Which leads me into applying Mylar to surfaces.

(Sigh) Once again I spent too much time worrying about how to apply and glue the Mylar to my side panels rather than just doing it. I was anguishing on ruining the shiny reflective surface, or if I got a spot glue on the reflecting side and I gave myself a headache over smoothing out the wrinkles in the mylar and f all things...fingerprints. FINGERPRINTS for god's sake!!!!

But I digress on to applying Mylar to the side and back panels.

Application and cementing/gluing of Mylar is very easy. All you need is some spray on glue.
IMG00218.jpg


It works very nicely!

I tried several ways to apply the Mylar I will list the top 3

(Easiest)
Step 1.) Sprayed glue strip about 1" wide at one end of the panel to hold the edge of Mylar onto then sprayed the glue onto the rest of the panel and simply unrolled the Mylar right onto the spray glued panel.
Step 2) used a wadded up sock and in sweeping arcs smoothed on the Mylar and worked out the bubbles working from one corner to the middle and then up the panel away from you.
Step 3) Used a razor blade to trim off the excess Mylar from the edges using the edge of the board as a guide to slice the excess Mylar right off

this method only worked for me after I tried several other ways and saw how the Mylar unrolls easily and the glue doesn't set for a couple minutes so you can work with the Mylar for a minute or so before its stuck

Method 2 Cut Mylar to the length you want to use and spray the glue onto the Mylar and have a friend help you. Both hold onto two corners and apply one side down to the board and then the other smooth on the Mylar with a wadded up sock as you hold up the other end slowly letting it go down onto the board. Use razor blade to trim excess.
Method 3 use silver reflective ducting tape to hold down one edge and wrap and stretch the Mylar onto the board like wrapping a gift box using the tape to hold the Mylar on the panel as you spray glue onto the board or back of the Mylar to get it to stick onto the panel and remove the tape as you go. Trim off excess with a razor blade


TIP: by applying the Mylar to the panels with glue and smoothing out with a sock to get rid of wrinkles or bubbles it will make it easier to cut holes for venting or wiring (or anything/reason you need to cut a hole for), nail, screw or modify the board with out ripping the Mylar as it has a direct contact with the panel and will cut with the board
QUIZ
In the following pics see if you can tell which panel used which method...

Front view
me4.jpg


Side View
reflections.jpg

No that is not an sheet board you see unfinished that is a REFLECTION of a sheet board laying against the opposite wall! That's how good it comes out!

Corner view
mirroe.jpg


SEE how shiny it is!
last1.jpg


This took me 3 hours to do most of the time was spent medicating and thinking of how to get it done! (Of course) and then 1 hour venting out the house from the spray on glue fumes!!!(gave me headache it smelled so strongly with the windows closed)


QUIZ ANSWER

You can't! they all came out very nicely with a highly reflective sheen that I could see with which to shave like a mirror! (Just use a sock to smooth out the Mylar after adhering it to the panel).

That's all for today Tomorrow I will put Mylar on the bottom and attach the side panels, op and back onto the box. Then I will show the simple and very effective light hood and lighting cage I dreamed up modified from the Simple CFL tutorial found on the forums here from @Roseman

The cage will cover the top of the plants with light and extend about a foot down the canopy and down the sides to provide under and side lighting. YOU'RE GOING TO LOVE THIS DESIGN I HAVE for my CFL Lighting !!!
 
Check it out...It's Everyone's favorite day!!!!!

Day 7:ganjamon:


WHEEL DAY!!!!!!!!!!!!!!!!! LOL
Attached some additional bracing and the wheels

Bracing is cut out of 1.5X.1.5 45 degree cut at the ends so it will fit in the corner of the wide sides.

Bracing will hold the cabinet stale from swaying forward and back, side to side by holding 2 sides to the base at the corners.

braces.jpg


side_braces.jpg


After this I attached Wheels to the bottom. Make sure you use wheels rated to support the weight of your cabinet and bolt them from the bottom to the inside so your bolt does not hit the wheel.
wheels2.jpg

wheels.jpg


Here's what it looks like on the inside
bolts.jpg


Tomorrow I will actually hang on the side panels now that the box is fully supported.

See y'all then!
 
Thanks for the props, I am glad you find this informative and easy to follow. If you have any detailed questions I will be glad to help answer them.

I am making a DWC bubbler using a Rubbermaid tub, aquarium tubing and an air pump from WallyWorld ( I hate WalMart but they got cheap stuff). After I am done hanging the panels today and hanging up my DIY light hanger made out of PVC pip (all will be documented) I will do these two steps.

For nutes I'll use Advanced Hydroponics 2 part grow and bloom. 1/4 strength to start and slowly increase the levels of nutes.

I Will post pics tonight of the panels and box. My seeds arrive in the next couple days and I need to have this box done!
 
Day 8 of build...Friday

I have only been working a few hours a day on this project as time restraints between 3 jobs does not allow for much time to build and I usually only have from 5-8pm to work. I cannot cut or hammer any later than that as I have neighbors.

Today I attached and screwed on all side panels, back panel, Mylar'd the top.

First I laid the box frame on its side to make screwing on the side panels easier.
on_side_2.jpg


With the box frame on its side I put the side panel on the top.

I noticed that now that the frame is all done my screws have bent the frame a bit and it is not 100% true or square.
Notice there is some over hang and the Corners are a bit off whack.
IMG00248.jpg


I used my partner to help hold down the side panels from the other end to keep it flush with the frame. You could also use a wood clamp but I believe hands are better as you can "feel" the corners and sides match up.

With my friend holding the panel down forcefully I screwed in the panel at two corners at one end, switched sides with my helper and did the same at the other end.

The sides are now attached on the frame by screwing in the 4 corners top and bottom of each panel.

NOTE. Only do the 4 corners first as LATER we will screw in the lengths of the panels to make an almost air tight seal against the frame and use weather stripping to assist with an air tight seal.

NOTE 2 The panels should be screwed in at the outside of the panel INTO the 1.5X1.5 frame at the corners but remember that there are already existing screws in the corners as the frame was built and screwed in at its corners so when you are making your pilot hole keep that in mind and screw a little under the frame screws so you do not hit them.

Here is a shot from the bottom showing the side panels screwed in

See how awesome and flush and square they are with the help of a friend holding it down when I screwed in the panels?
vbotom.jpg

You can also see there is a small gap between the panels and frame. We will later go and screw in the lengths to make a flush seal with the panel, then attach weather stripping to make sure it is air tight.

When I was attaching the back panel: since there was not an extra 1/2 inch lip edge to set the back panel onto like the side panels and front have I made sure the back was square with the TOP of the box and screwed in the top first and the bottom really does not matter as it will be screwed into the 1.5X1.5 bottom panel inside frame anyway and you wont be able to tell visually since its the back and will always be facing away from you visually

I then put Mylar on the top panel and attached that on the top.

To do this I got a step stool and actually put the top on the top of the box and squared it and then screwed it in.

Here is what the top looks like from the inside
IMG002591.jpg


The box is now ready to make the front doors!
done_almost.jpg


For grins I put in the DWC RubberMaid container to see what It will look like.
haha1.jpg

I could almost put in two of these, but I know I will need the extra space on the side as the plants will bush out ALOT as they grow and the extra space will be appreciated
IMG00264.jpg


I have alot of room!
big22.jpg


LOL this image is not rotated correctly but here is a shot with the front panel setting on the little extra 1/2 edge I created when I made the bottom panel just to see what it will look like all done.
rotate.jpg


Tomorrow I will cut and hang the front doors. That will be fun as I am not sure how to hang doors and this will be a learning experience. As always I will make notes of important things to remember as I went along so it will hopefully make it easier for you.
 
Thats a mighty shiny box you got there:thumb:
I think you are going to be able to grow some pretty descent size plants in there.
Love how you are documenting everything, very meticulous.

Grabbed some :popcorn: pulling up a seat, this looks like a well thought out plan.
Many famous roman commanders had the philosophy that if the planning was good enough the result was foregone conclusion. You have definetly planned well. You planning on doing any LST? Seems to me that you may have some extra room on the sides to bush em out a little. Though you said something about lining the box with lights. Kinda medicated getting ready for bed so ramblin... :peacetwo:

Edit to add:IDK what finances are like and also you already bought lights, but...A 8 tube T5 fixture would fit perfectly in the top of that box. Same dimensions. I got mine for like 260 at the local grow shop but you can find em quite a bit cheaper on-line. I love mine, it's a beast. And i can run in my veg closet with the door closed and nothing but a fan blowing air around in there and it never gets above 85. Maybe for the next grow with the money you save growing your own.
 
I am definitely going to make this box. It is exactly what I had in my head. Thanks for logging everything down as you go.
 
Back
Top Bottom