DIY easy LED grow light project

Maximo

New Member
First of all I wanted to make an LED light that is modular. Each individual unit will work on it's own or can be placed together with several other of the units to build a larger project. All components to be sourced from eBay and be easily replaceable and cost effective. After drawing a concept or two on paper I eventually ordered each of the parts to begin building a custom LED unit #1. Later I will build two other units and put them together in a frame 300mm x 400mm.

Parts list:
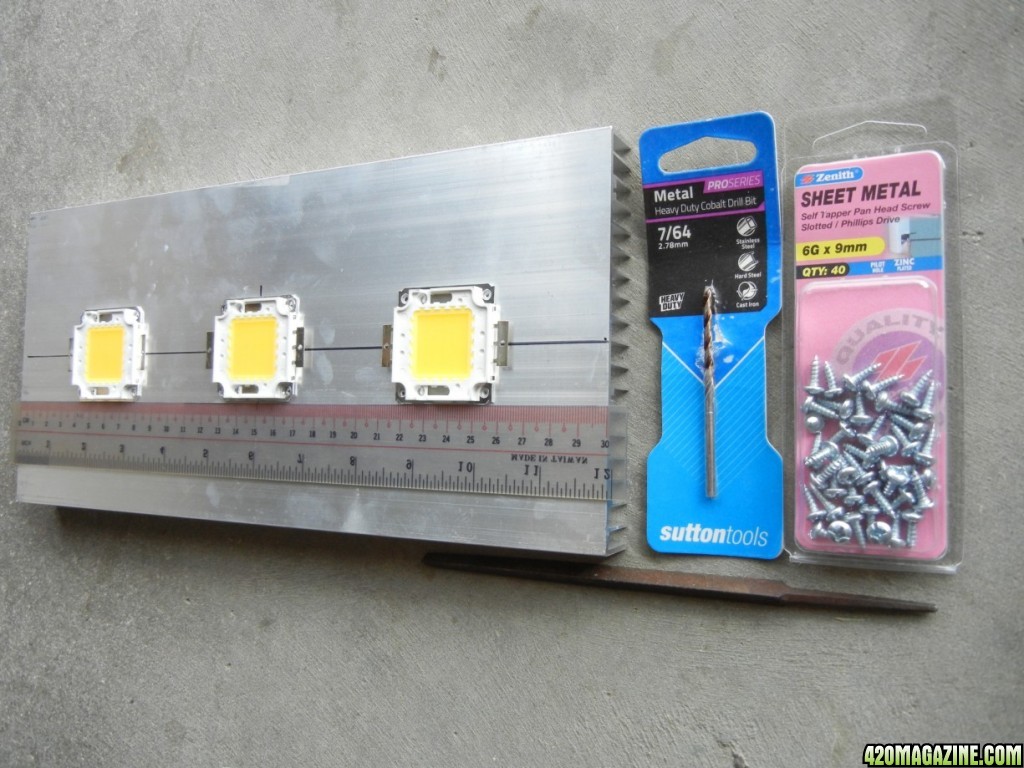
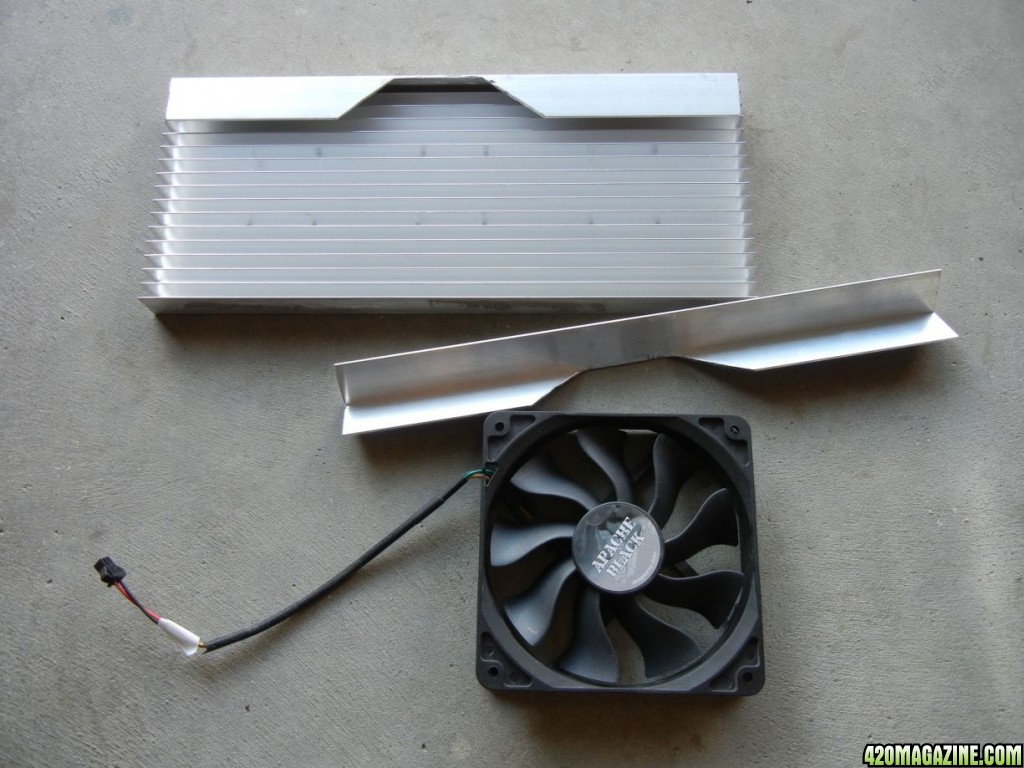
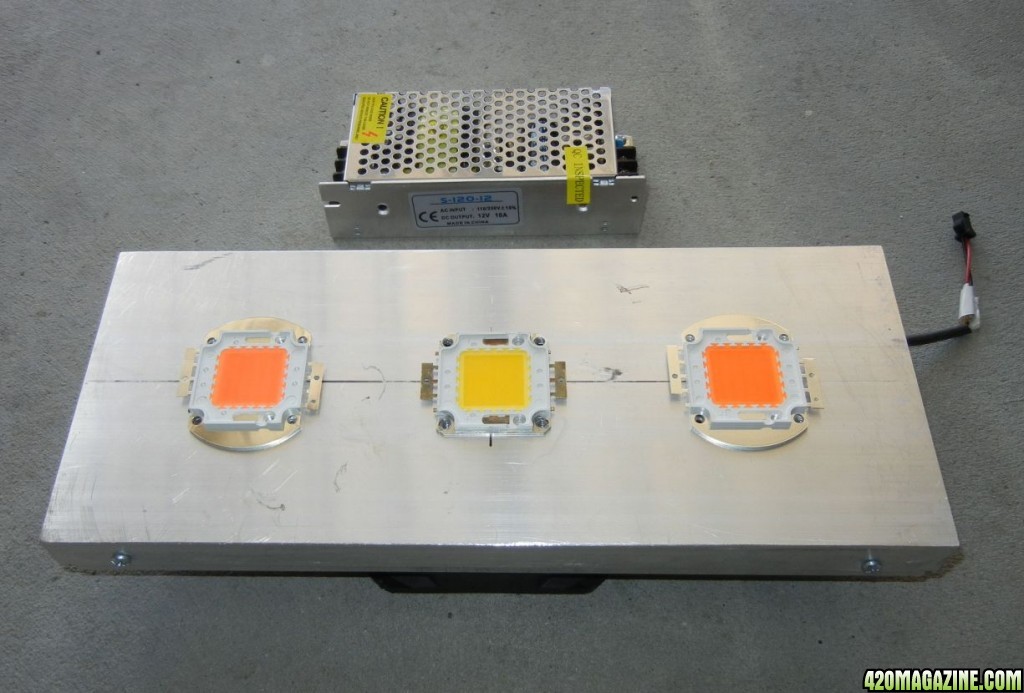
$24 Heatsink 140x300x20mm
$7 Aluminium angle 25x25x1mm
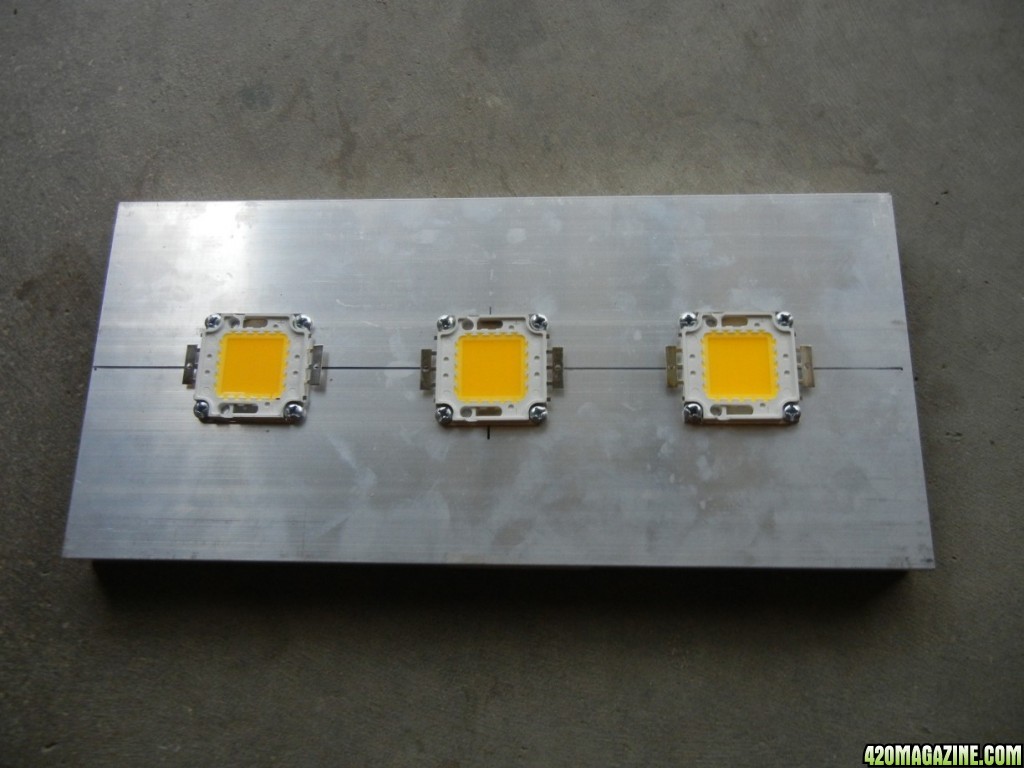
$3 One 50w Warm white cob
$15 Two 50w Grow chip cobs
$14 Fan 12cm/120mm
$15 Mini Power Supply 120w
$5 Power supply for fan
$6 6 gauge screws
$4 7/64 drill bit

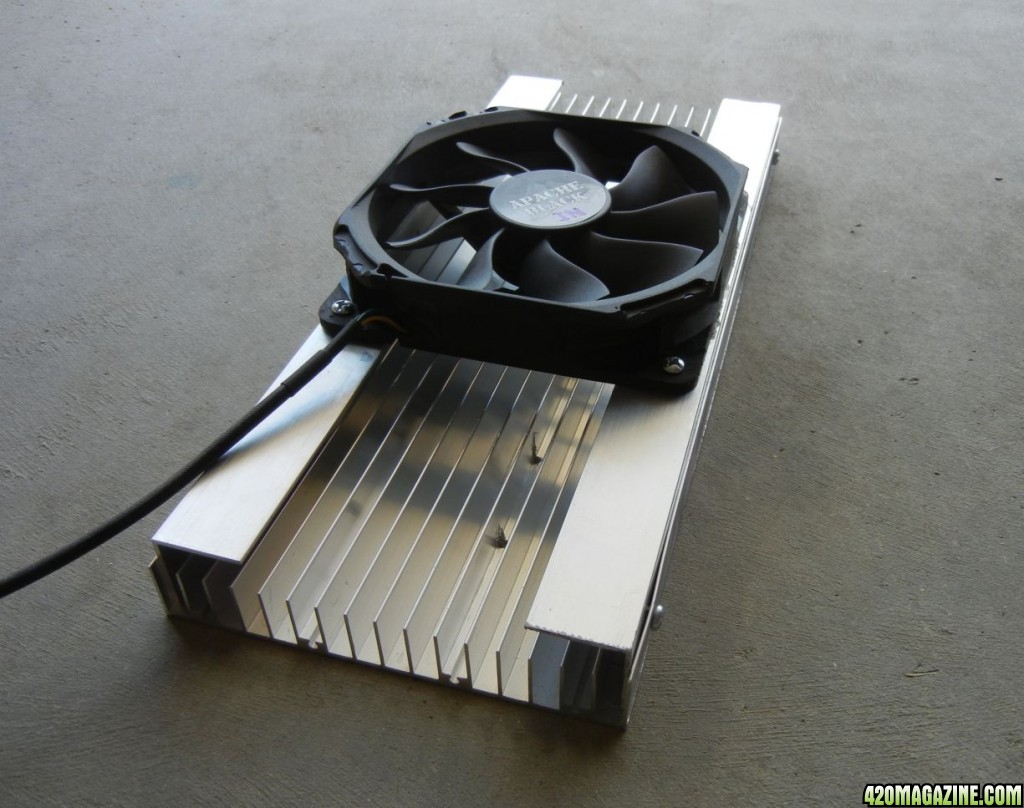
The heatsink turned out to be 20mm larger than my needs so I trimmed two of the fins to reduce it to around 125mm or close enough to the size of the fan.
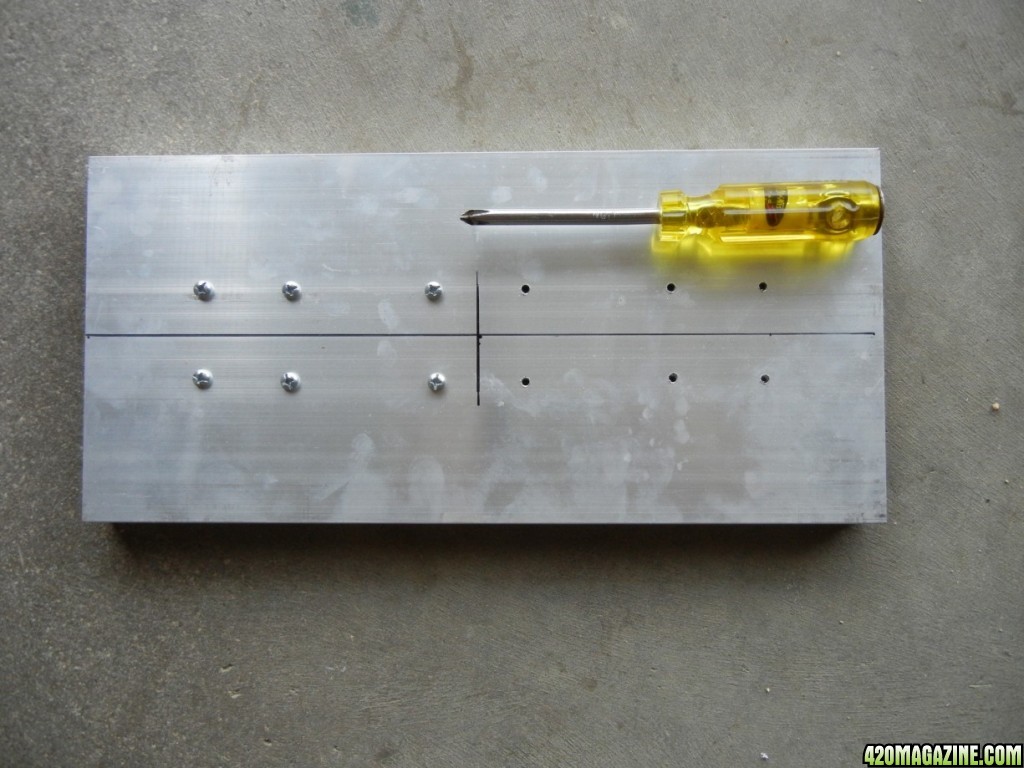
Then I marked the center and holes for each of the COB's using a hole punch.

LED_project_1a.jpg
 
After drilling the holes, work the screws through as straight as you can. Aluminium is soft, so a little pressure will usally work them through the first time.

LED_project_1b.jpg
 
There's a millimetre or less to spare around the COBs, so make sure they go in straight. I initially bought three warm white COBs for testing, but later decided to get two grow chips to better optimize the spectrum.

LED_project_1c.jpg
 
The work is done for the COBs, so remove them to prevent damage, turning the heatsink over to work on the platform for the fan and power supplies. Use a marker on the inner edge of the fan and add a few millimetres to that on the aluminium angle. Cut with an angle grinder.

LED_project_1d.jpg
 
Make sure the angles line up with your fan. Drill a couple of holes through the heatsink to secure the angles. I trimmed the top edge of the fan 'intake side' to allow marking and drilling holes to also secure the fan.
LED_project_1e.jpg
 
This is the stage where I'm at today. The two COB grow chips arrived and the 120watt mini power supply. Just waiting for the smaller power supply to arrive for the fan.
The chips are going to be driven at 40watts each or 80% of full rating.
LED_project_1f.jpg
 
The fan power supply arrived and I attached both PSU's using some clear silicon sealant and allowed that to dry for a day. Gathered the remaining bits and pieces for completing the job, like power wire, heatsink paste, and mains power cable off an old clock radio. I dialed up 14 volts on the small power supply for the akasa fan and that runs quiet with plenty of air flow. Next thing is, to wire the LED's up to the bigger power supply and dial up the voltage for them to around 33 volts.
 
Nice.

Have you considered boxing in the top of your heatsink (except for where the fan is) so that the air is forced to travel across all of it?
 
It will be mostly 'boxed in the top' as I've had to add a small boost converter to get the voltage to the required 33 volts.
It turned out that the main PSU range is only 10-15volts, which isn't even enough to light any of the LED's.
So I've had to order a small 200w booster costing $5, it also comes with a metal casing.
I've turned the small fan PSU around the other way and added the boost converter along side of it, which covers that entire end now.
Will update with a photo when it's done.
 
If you want to get away without buying those psus, you can reporpose an old pc psu or even buy an used one, it will almost always be cheaper since they're so abundent. To power up the pc psu without pc just need to bridge green wire to ground, will find guides on google easy.
They will be 12v so you will need a booster circuit with those aswell, on the plus side, it will also give u 5v and 3.3v for different DIY craziness stuff.
 
:tokin::tokin:Great DIY project, I am looking at COB led for my next light rig. Hope it works out for you. Let us know how these work out dude.
 
Everything works and runs cool. Peaked the light output using a pair of sunglasses, that allows detecting and adjustment of the brightness level to maximum. Attached a couple of 20mm square alloy beams and 4 eye bolts for hanging the light with.
Project completed!
 
Congrats on your build Maximo :bravo:

I just recently built some DIY lights myself too, nowhere near as good looking as yours and probably an electrician's nightmare but they work :) You can see them in my current journal if you're interested, maybe you could offer me some advice on how to improve them too as that would be appreciated. I look forward to seeing how your light performs, all the best :thumb:
 
Thanks Kriaze,

I decided to give it an upgrade with a 150w power supply. Wasn't satisfied with the brightness and it's much better now. Still there's better kits out there I think, and my next project will be with passive cooling. The passive pin heat sinks handle up to 50watts, which is a match for the chips I've been using. Less moving parts and wires. I'll post a video I found showing it's construction. I see other benefits like placing the chips further apart for better coverage as well.

The video of a kit using passive pin heat sinks.

 
I saw that video awhile back and it was those lights that I just built, they've made a marked difference in my veg tent in comparison to the split spectrum style LED's that I had in there. You can't go far wrong with the build either, the most wiring I had to do was wiring the plug :thumb:
 
Back
Top Bottom