GreatLife4All's DWC G13 C99 Grow Journal - 2013

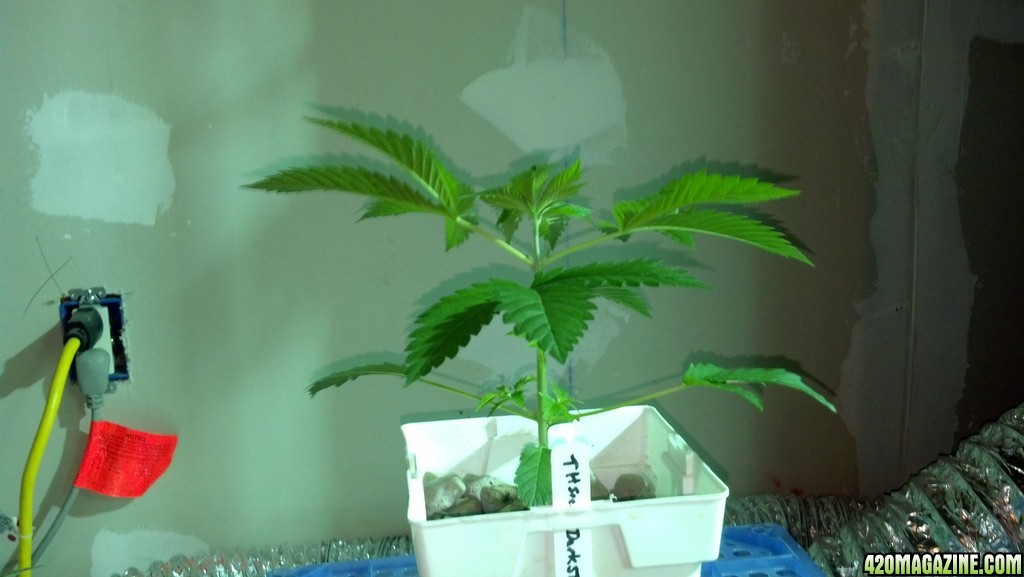
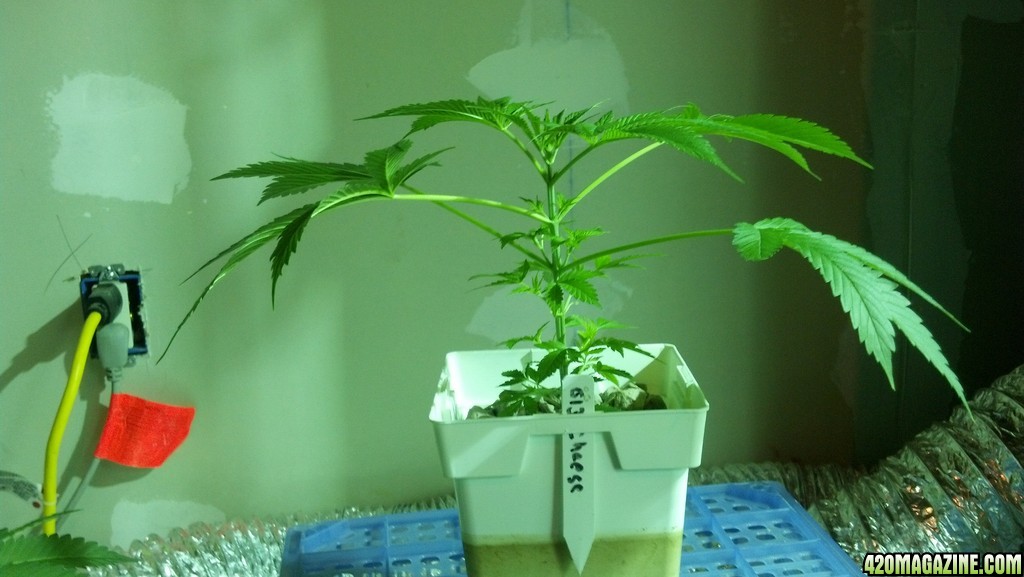
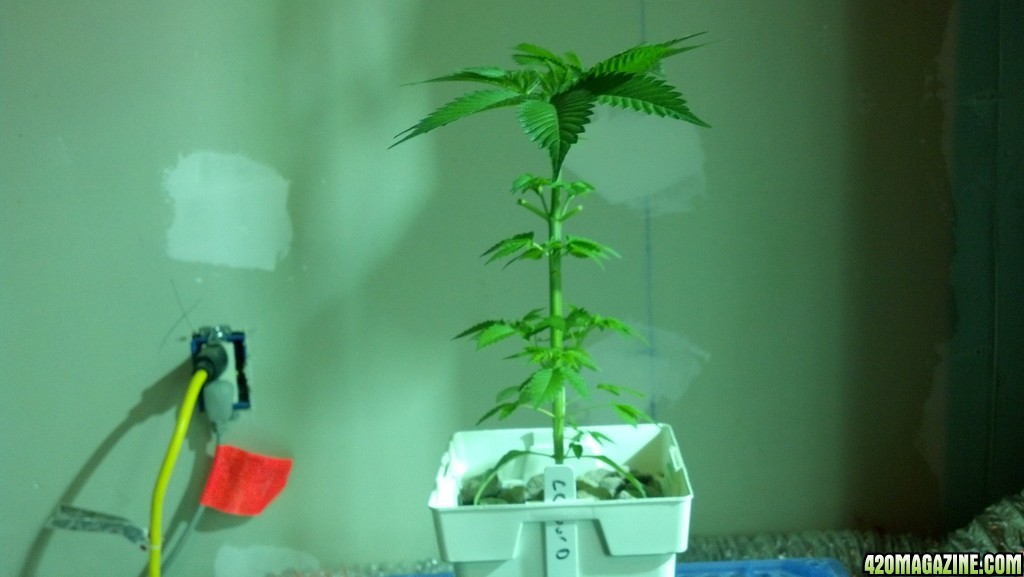
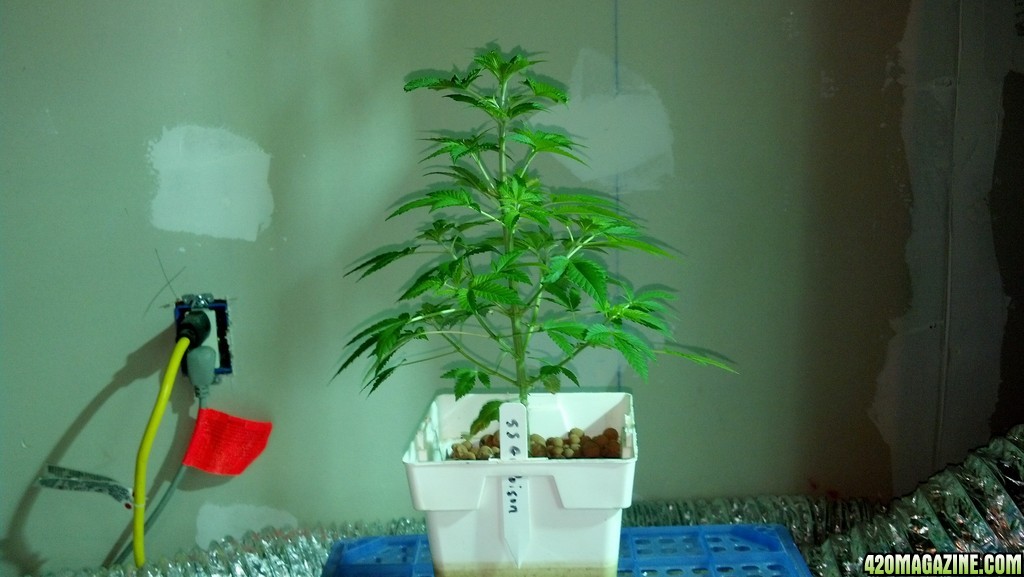
Ok. Time for the weekly grow update.

First, let's look at the modified schedule.

Seed_Schedule_-_Actual1.JPG


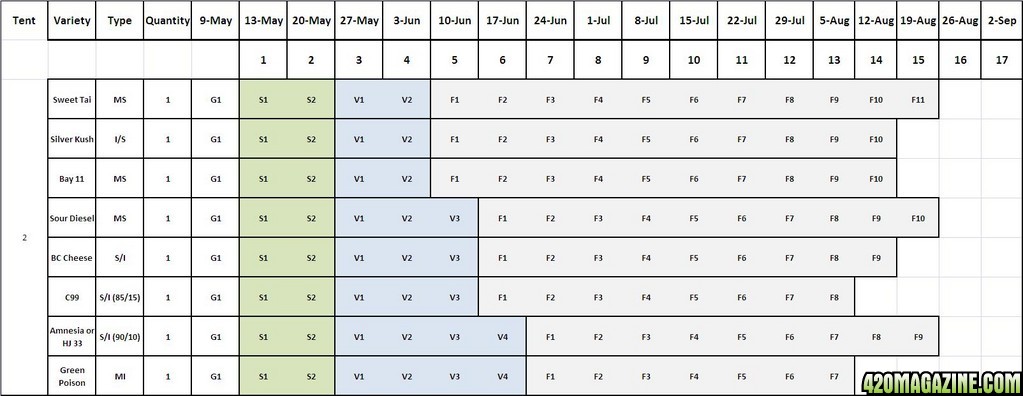
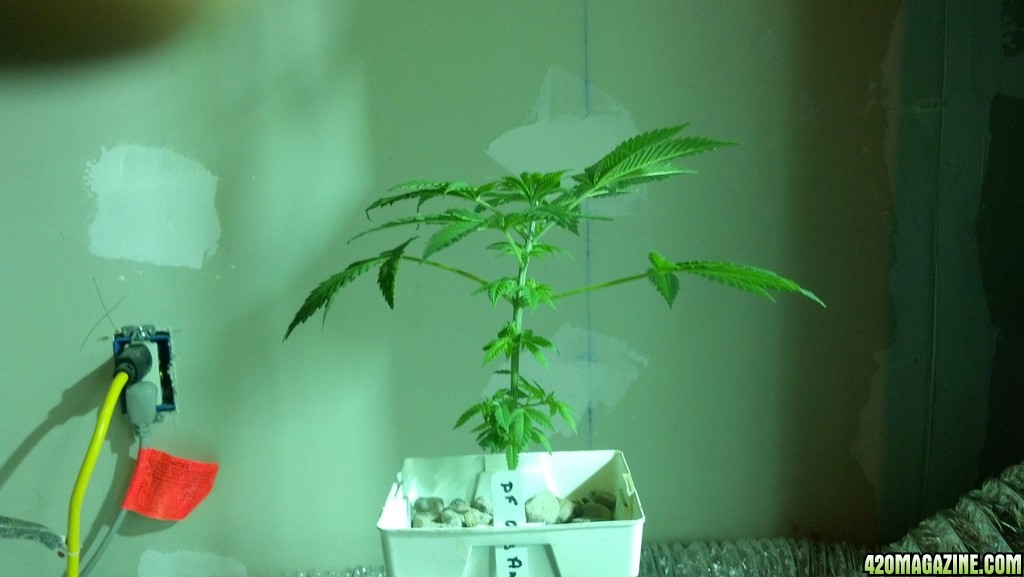
As you can see - I have made some additional choices on which plants get to move to the next round of competition. Three more spots have now been take - Sour Diesel (no suprise here), C99 (No surprise there), and BC Cheese.

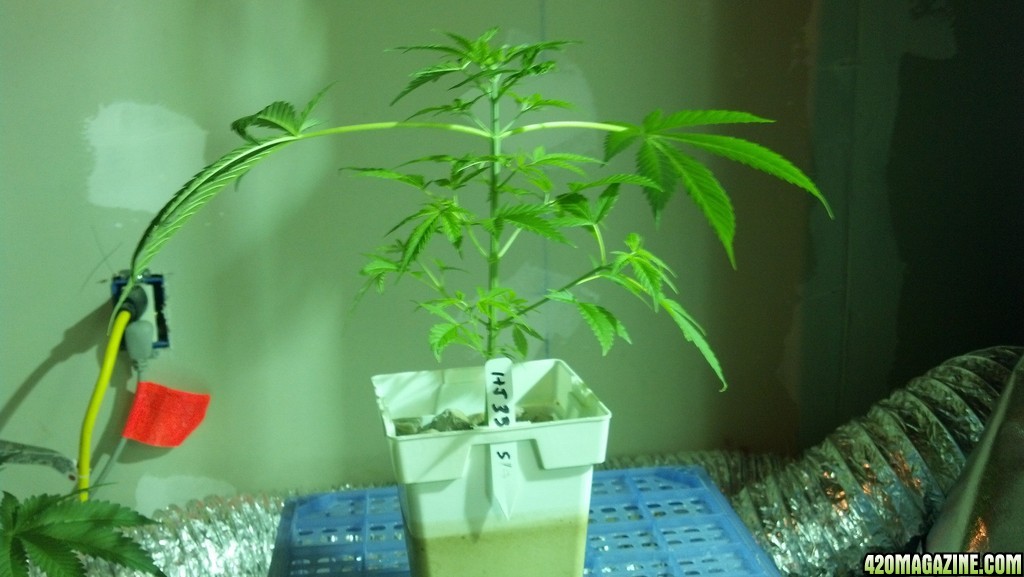
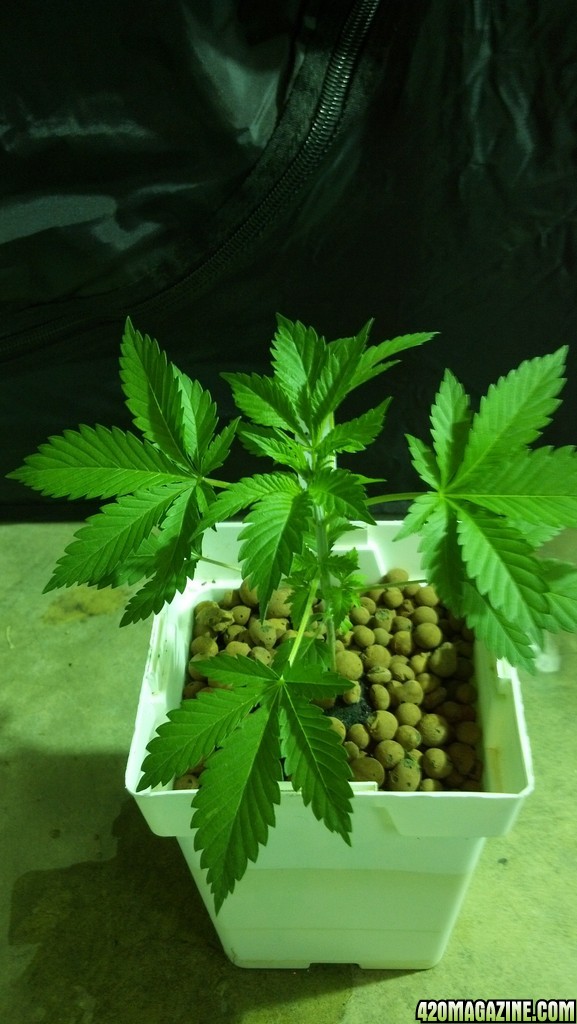
The BC Cheese has definitely beaten out the G13 Cheese. A much better, fuller looking plant.

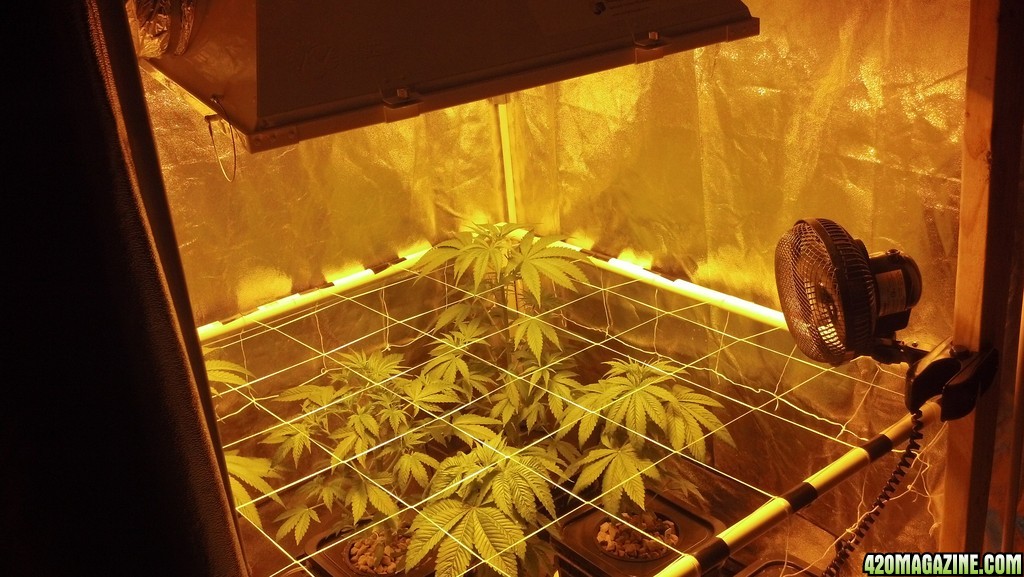
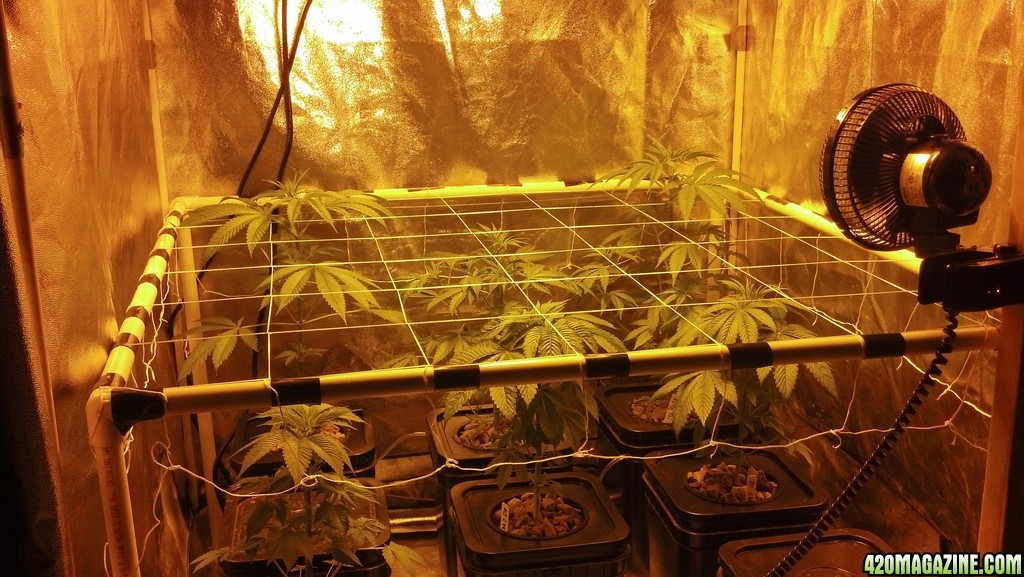
So there are now six plants in the flowering tent.

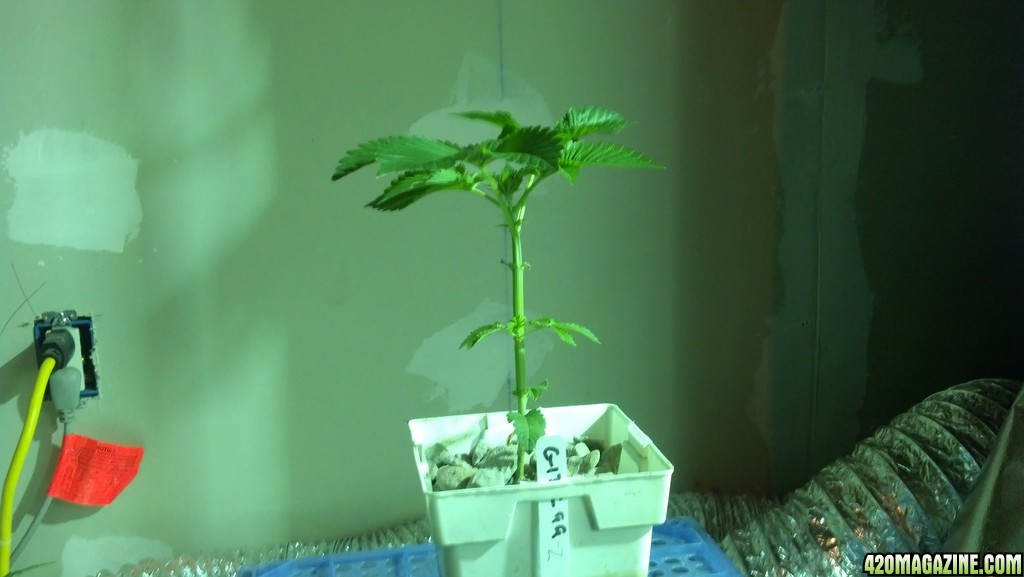
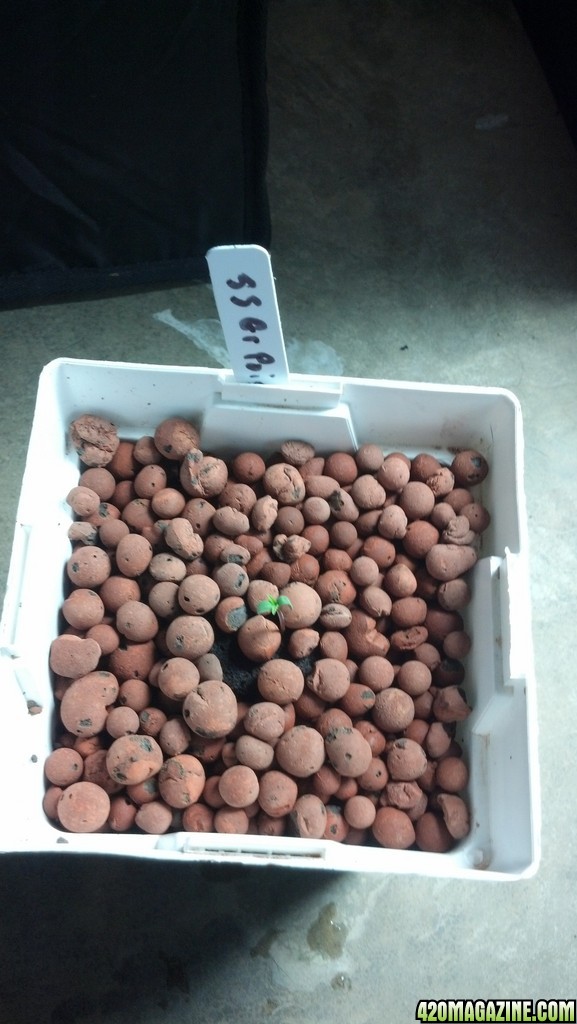
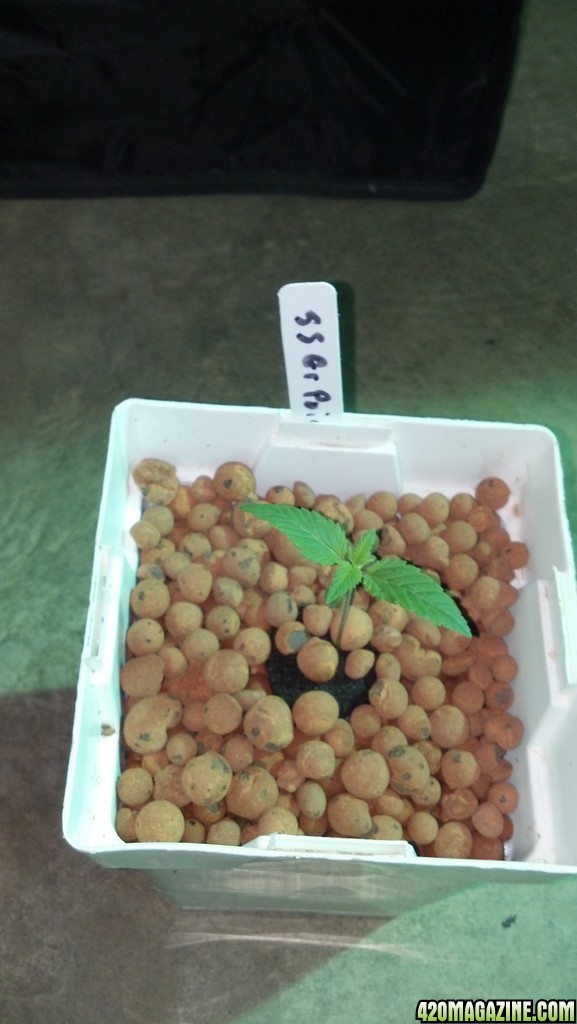
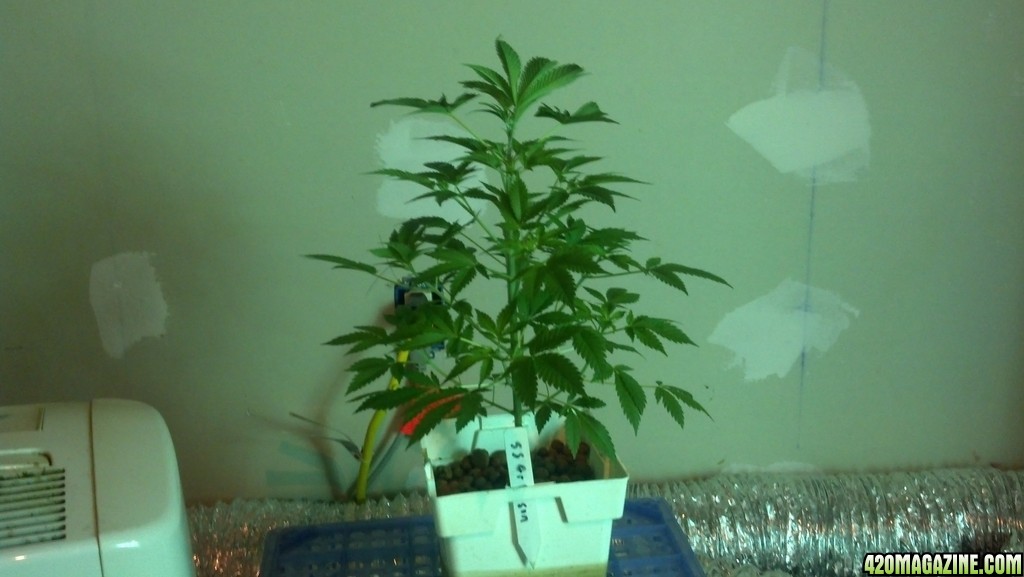
I have decided to give the Silver Kush another week. Had I had another plant ready - it would have gotten tossed back into veg. It did not like the defoliation at all - and has pretty much sat there all week doing nothing. I have other plants that are growing faster and looking better. If it doesn't straighten up this week - to the compost.

And this is NOT an indictment of Silver Kush - it might be the best weed in the world and I simply made a mistake in my treatment of it. It certainly looked very promising. And it still has a slim chance at staying in the mix...

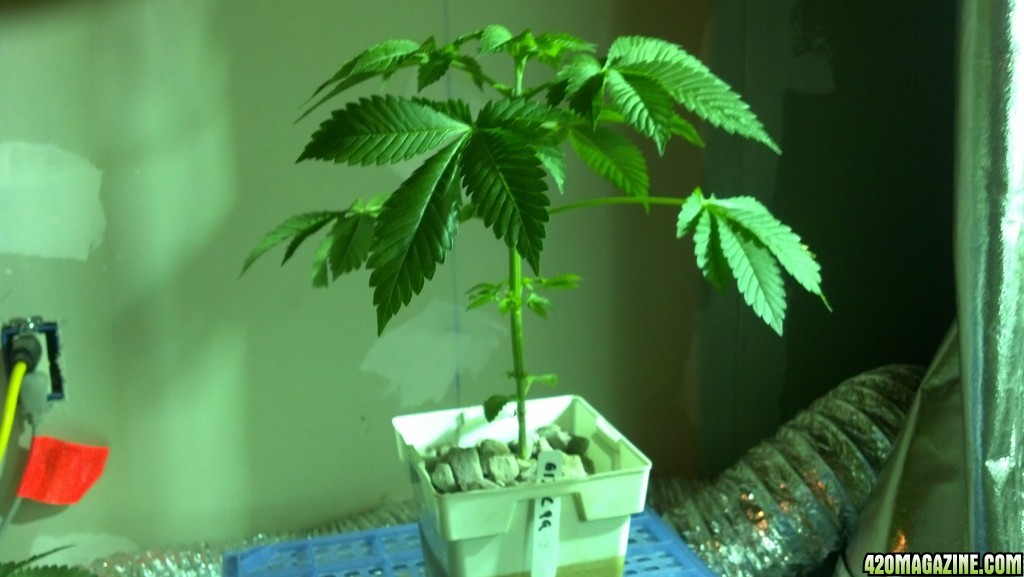
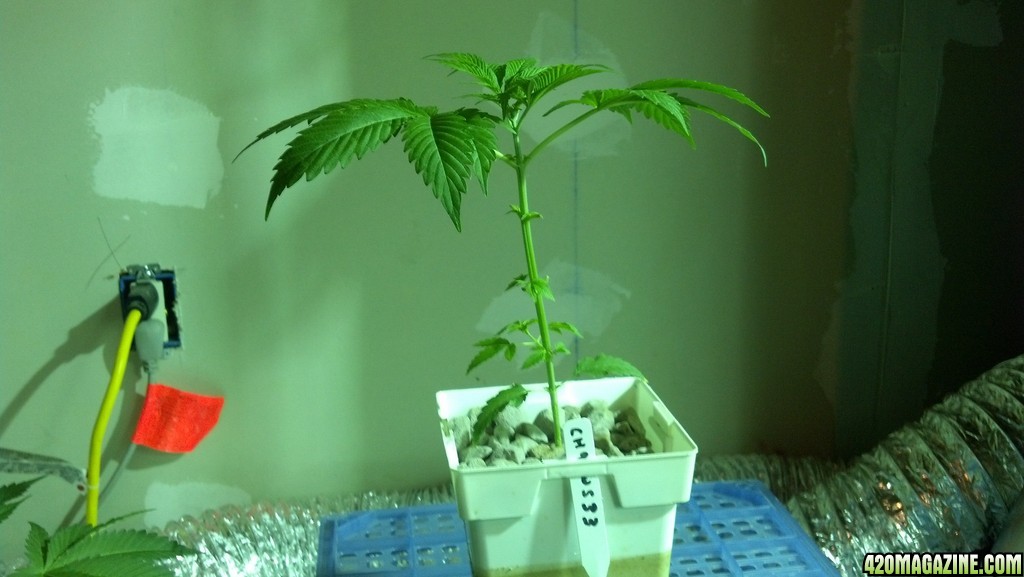
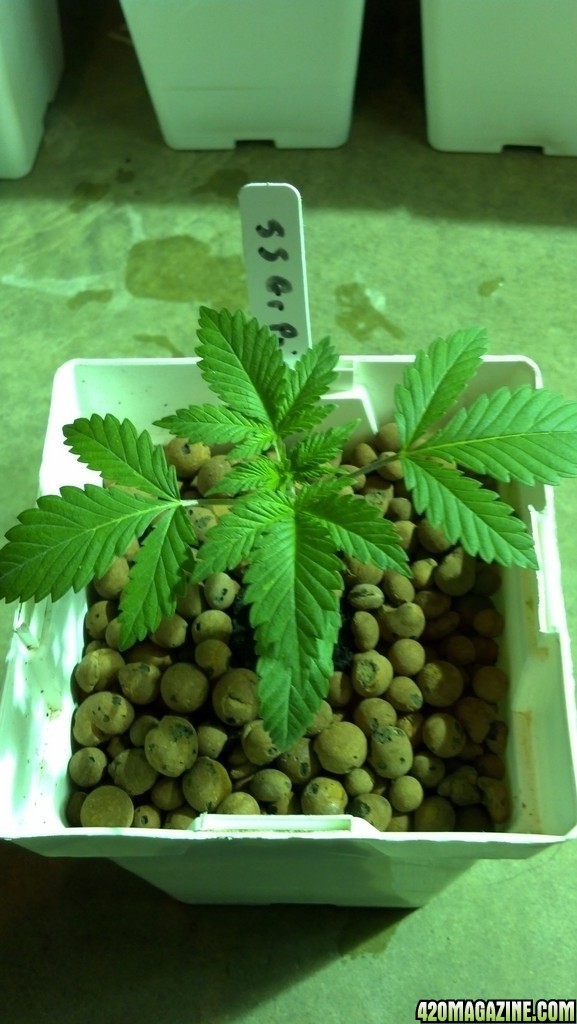
The Green Poison, HJ-33, and the WS-33 all need another week in veg. Due to their indica background - they shouldn't stretch as much during flowering. I would like them to be at least 12" - this allows for a stretch of 3x (the worst I have seen from an indica) and meeting my goal of 36" final height maximum.

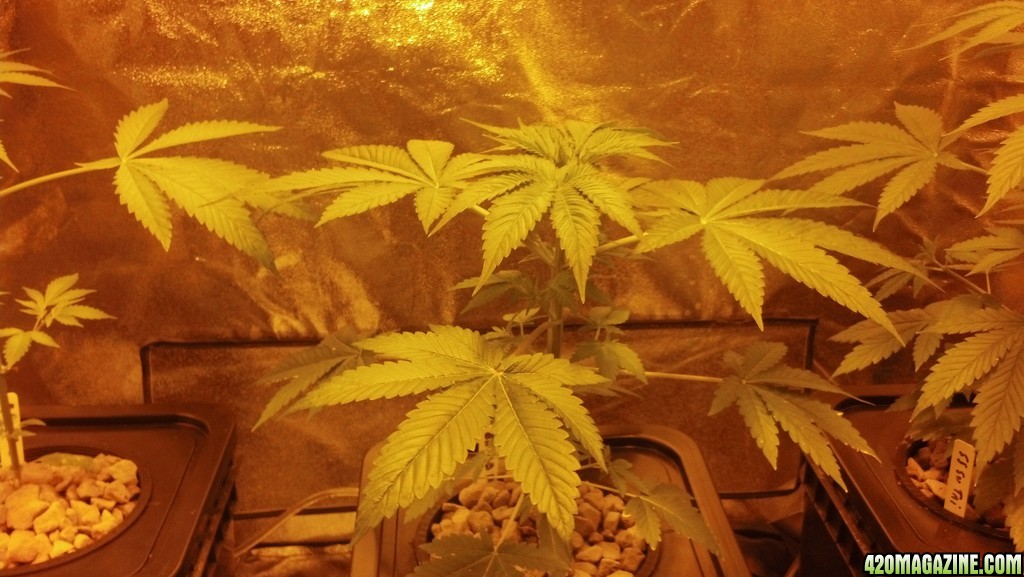
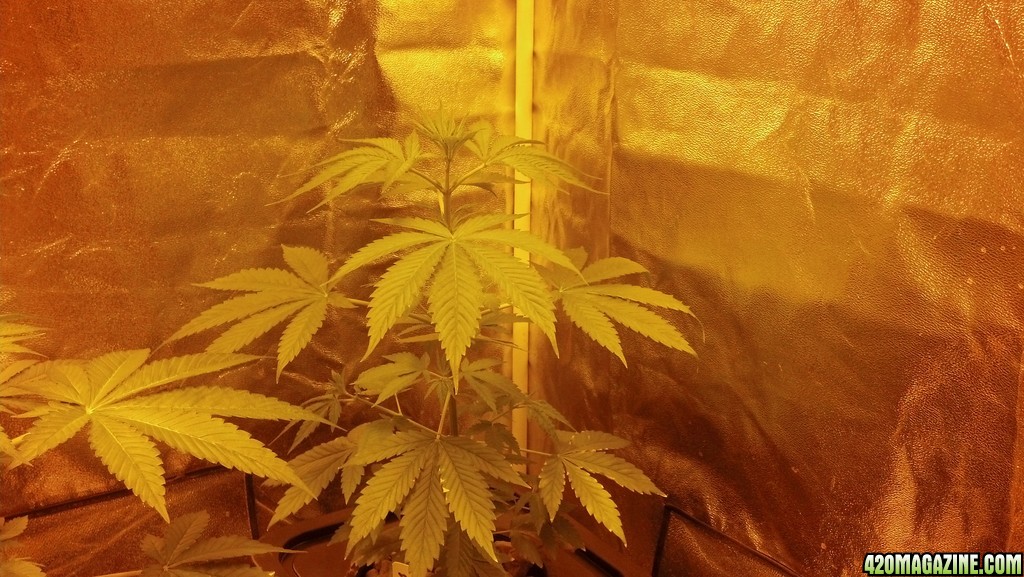
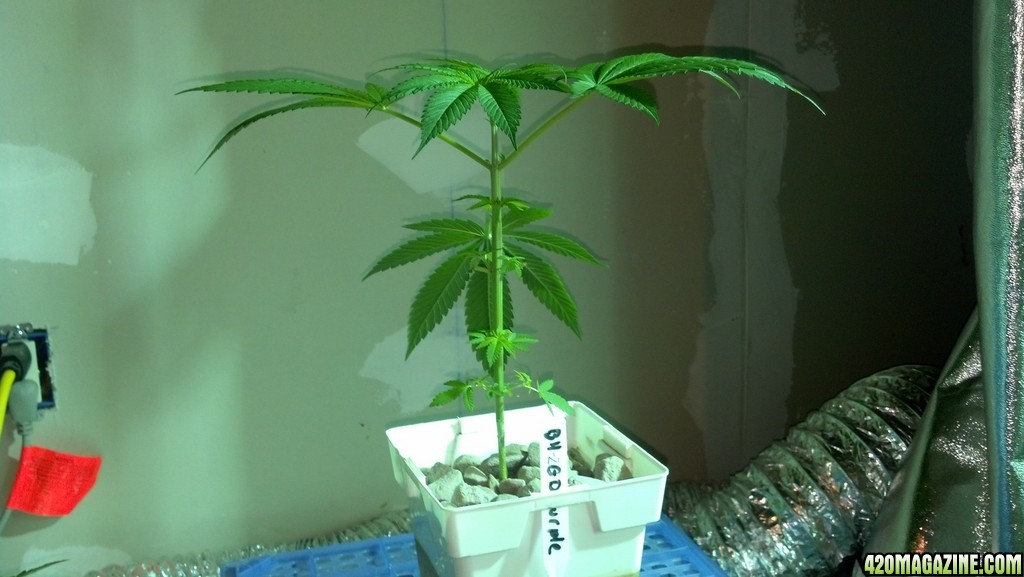
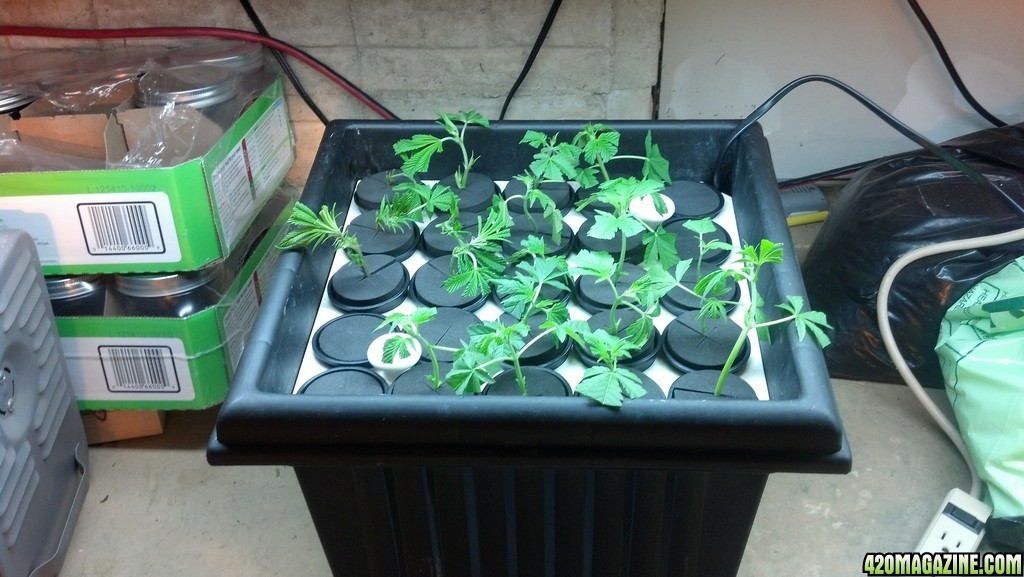
Enough talking - how about some pictures?
 
Pictorial Update!

Silver Kush. Not looking too hot this week.
IMG_20130618_243028_712.jpg


Bay 11 - Looking excellent.
IMG_20130618_243022_028.jpg


Sweet Tai - Looking excellent.
IMG_20130618_243014_726.jpg


C99-3
IMG_20130618_242003_088.jpg


Bay 11-2
IMG_20130618_241619_661.jpg


C99-1
IMG_20130618_241508_146.jpg


HJ-33
IMG_20130618_241349_142.jpg


C99-2
IMG_20130618_241235_577.jpg


WS - 33
IMG_20130618_241003_463.jpg


Dark Star
IMG_20130618_240901_948.jpg


G13 Cheese
IMG_20130618_240629_781.jpg


Sour Diesel
IMG_20130617_235825_012.jpg


Green Poison
IMG_20130617_235724_964.jpg


Original Amnesia
IMG_20130617_235616_244.jpg
 
And here is an update on the photo montage for the Green Poison.

Week 1
IMG_20130514_174649_147.jpg


Week 2
IMG_20130520_020532_862.jpg


Week 3
IMG_20130528_022423_498.jpg


Week 4
IMG_20130603_143826_748.jpg


Week 5
IMG_20130617_235724_964.jpg
 
excellent post on the Auto Pilot Digital Environmental Controller. when i have my grow room finally built i was planing to control my C02 with a recycle timer but was unsure how to time the fan to stay off during dosing while still maintaining proper temperatures. the Auto Pilot Digital Environmental Controller may be my solution as well.
 
excellent post on the Auto Pilot Digital Environmental Controller. when i have my grow room finally built i was planing to control my C02 with a recycle timer but was unsure how to time the fan to stay off during dosing while still maintaining proper temperatures. the Auto Pilot Digital Environmental Controller may be my solution as well.

Thank you.

The most surprising thing revealed by the digital controller is the fact that I was really having an issue with humidity. When I have the CO2 running - the plant transpires at such a fast rate that you can literally watch the humidity climb in real time. The display cycles between 3 different controls (temp, humidity, co2) and stays on each one for 2 seconds - so you get to see the humidity reading every 6 seconds. It is not unusual in that six seconds for the humidity to jump .2 to .4 of a point.

The higher the temperature - the faster the humidity climbs. The higher the humidity - the slower the humidity climbs.

But here is an interesting fact. The ambient air is 73F and 50 RH (Just moved that down by 5% this past week). During the daytime exhaust cycle - the tent quickly drops down to ambient humidity. It takes about a minute and a half to move the temperature down a full degree though (which is my current deadband on temperature). So while the tent is cooling - the RH moves around a little, but basically stays right around 51-52%. When the fan turns off - it starts rising again.

But here is the thing... During the plants night cycle, the relative humidity NEVER drops below 60%. As such, the fans run constantly all night long. The temperature hits ambient room temperature within about 10 minutes - but the humidity never gets there.

When the lights come on the next "morning" - the humidity drops back down to ambient room levels within a half hour or so.

Research indicates that plants only "drink" during the day - and my experience with Ebb and Flow bears witness to this. And yet my experience clearly indicates that the plants are losing more moisture at night than they do during the day. So it must be the case that plants drink during the day and store it - then expel that water at night.

This would be a neat explanation for why, when I check on vegging plants at night, that they always look "wilted." They are simply not "drinking" and yet "sweating" at a greater rate... thus losing weight and volume.

It might not be accurate - but it fits the facts quite nicely.
 
I'm in for the ride. I love the DIY and experimental process. We learn best by trying, albeit it's best to be try "after" researching/book-learning or at least thinking it out, but if we didn't try, we'd never innovate. +reps

I am glad that you could join me.

You will find that I am quite the experimenter. My goal is to always top the previous harvest with better quality meds.

If you see anything that I can improve - please feel free to contribute!
 
I will post pictures soon. Growth has been phenomenal this week!

The tallest plant honor goes to the Sweet Tai. It is now 19" tall, very leafy, and is developing a great structure. If you remember - it is in the flowering tent at this point. I did not defoliate this Sativa at all. In ten days of flowering - it has already more than doubled in size - as I started this at 8-9".

The second tallest plant goes to the Bay 11. It is now 18" tall, very leafy, and is developing a great structure (note the similarity in my report). It is also in the flowering tent for the same duration as the Sweet Tai - and started at the same height.

I may let the Silver Kush live. Or I might go ahead and clone it and then kill this one. It has blossomed this week - but no doubt that it is behind everyone else. I have plants that are much better waiting to go... If you remember, I heavily defoliated this plant. If I clone it now - I can give it another try in the next tent that opens. I am truly excited about this plants potential - but I blew the grow on this one.

I gave two of my babies to a friend for his outdoor garden. The G13 Cheese is a disappointment. It was one of the first to germinate - and at this point (week 6 of life) it is only 7" tall. I lightly defoliated this plant. The main shoots are less than 1" in length. I think I got a dud seed or something. I also gave away the TH Seeds Darkstar. It has lagged behind everyone else in the veg cycle. At this point - its growth has picked up nicely. But it is only 8" tall after five weeks. So it still has another week or two minimum in veg. After the long veg cycle - I would be faced with a long flowering cycle. I never defoliated this one. But I know that this is just not what I am looking for in an indoor indica. The agreement between my friend and I is that I get to tax his harvest - so I will get to sample some of these at the end of summer.

The Green Poison has the best structure - bar none. It has hit 12", and I wanted it at 12" for flowering (goal of 36" final height and assuming 3x stretch for all indicas). The next time you see her, she will be in the flowering tent with everyone else. Very, very happy with this plant so far. A little slower in vegging - but all indicas are.

The CH9 Female Seeds Herijuanna Jack 33 deserves special mention. She is now 13" tall - and has held her ground against the Green Poison as surviving the defoliation the best. A quick reminder of the description from the seedbank:


Some phenos with sativa leaves to expect ,leaning towards the Jack 33, delivering a dynamic indica buzz and cannbis seeds finishing quickly in 7 weeks.

I definitely have one of the phenos with sativa leaves - but it also has the sativa branching structure as well. The Green Poison is dense - with internodes everywhere at this point. The HJ-33 is taller and has about half as many internodes. They were both heavily defoliated. Neither one of them stopped growing or even seemed to care. They have both developed nice christmas tree shapes during this past week. Here is the thing... if the HJ-33 grows like a sativa and achieves a 4x growth rate... I am looking at a 52" plant by harvest - which will force the light well above the canopy... Which reduces everyone elses yield. Love this plant. If I don't grow it - then I will definitely clone it and grow it in the next open tent. I expect good things from this one.

And that leaves just the Amnesia. Hated the medium defoliation that I gave her. She is a "mostly sativa" variety. She has recovered way better from my abuse than the Silver Kush. Main shoots are two to four inches long - and she is just under 12". If the Silver Kush goes - she gets promoted. If the Silver Kush stays... then she will get cloned and then killed.
 
DIY SCROG Screen made from PVC

I also built a SCROG for use in this grow. Because of the mixture of plant varieties and my final grow height goal - I decided to build it 18" above the buckets. This puts half the plants above the screen. I will eventually clean everything out below the SCROG. The screen that I built in the other tent is similar - except that it has a bamboo netting with 3" square spacing. Six inches would be much better IMO. It is also a little hard to manuever plants because the bamboo does not bend. Holds the plants down very well though.

For this grow, I decided to try polyester trellis netting with a 6" mesh size. My equipment list is the following:

~$1,00 x 4 - 41" x 3/4" PVC
~$1.00 x 4 - 31" x 3/4" PVC (my buckets are 13" tall)
$4.50 x 4 - 3/4" 3 Way Corner PVC fitting
$5,95 x 1 - Polyester Trellis Netting w/ 6" mesh.

So... it cost me about $30 and 20 minutes of time to build this SCROG screen.

I used the 41" pieces for the top - final outside dimensions are 44"

I used the 31" pieces for a leg on each corner - final height 32"

I used the 4 fittings to attach each side to the next - and to also attach to a leg.

I did not use any PVC glue - as this will allow me to break it down later and re-assemble if need be.

Attaching the netting was a little more problematic. After thinking on it a day or two, I went ahead and used duct tape. I lined one corner of the mesh up with one corner of the frame. Stretched and taped down the first two sides. I then completed the other two sides by doing one side, then switching to the other side - as I tied the screen down. The untightened portion of the screen was an ever shrinking square - if you see what i mean.

This allowed me to tie the screen down evenly - and it ended up being very tight.

Very happy with this SCROG screen and would highly recommend this DIY build to anyone.
 
A good friend brought over some "new" weed for me to try today... OG Kush. I also have free seeds for OG#18 (a follow on breeding from the same parents) - and I decided not to grow this particular seed.

Probably a mistake cause... Damn that shit was good :love:

:thumb:
 
What no pictures??:peace:

I know... lazy bum! :rofl:

Didn't wake up in time this morning - and lights are off till tonight. I did take one crappy picture that I forwarded to my buddy last night after I got the trellis installed on the frame:

IMG_20130621_195453_231.jpg


On the positive side, my buddy who helps me stopped by late last night and was very impressed with the new SCROG. He helped build the last two and hated both... but admits they both worked. He does think that the trellis twine that I am using is too weak and won't properly support the plants - but in my defense it is made for use in a horizontal trellis. Or at least the package says so...

We went ahead and installed it in the tent. Since the tallest plant is 19" - and the trellis is at 18", it does look a little odd at this point in time - my two previous SCROGs were using the tie down method. Most of the plants are under the trellis at this point in time.

I did forget to take a picture of it once installed in the tent though. I will get one tonight after lights on.

Thanks for following along - I appreciate it.
 
Indica vs. Sativa Structure

And here are two pictures of plants that are ready to go into the flowering tent. They are both the same age, planted on the same day, germinated on the same day, and have been subjected to the same torture by me while growing. Both defoliated on the same day in the exact same way. So should be no environmental differences -just genetics.

The Green Poison is a pure indica - and it has a very "indica" like structure. Dense branching structure with lots of internodes that are spaced fairly closely together.

The HJ-33 is supposed to be a mostly indica hybrid with the possibility of getting a sativa phenotype. The one that i have has both sativa leaves and branching structure.

Sorry that the pictures are a little blurry. Damn camera phone... or maybe it is just me.

IMG_20130621_201101_641.jpg


IMG_20130621_201008_774.jpg
 
BPN Are Good Nutrients

And I also want to give a special mention to the nutrients that I am using.

I tend to mix things around and do my own thing. I have followed the guidelines on the BPN web site - and have changed my reservoir every week. I accurately managed my PPMs and pH within the guidelines that they established.

There are many different plant varieties here - undoubtedly with different nutrient requirements. But all of them have grown well. I have not had one yellow fan leaf. There have been no nutrient dificiencies. I have not burned any of the plants due to over-fertilizing.

I am not quite sold on them yet... but they did an excellent job for me during the seedling and veg phase. Now onto flowering and harvest!

But I would definitely be comfortable recommending Blue Planet Nutrients to a friend even at this point. They are the "real deal" and relatively cheap.
 
Ok... Lights are on and I took some pictures of the installed SCROG screen.

A picture from above.
IMG_20130623_012116_275.jpg


This picture also shows a recent addition to my tent. A Holmes Clip Fan available from Amazon. I have mounted it and the thermometer onto a 2x4 which is taped (Go Duct Tape!) to the top and bottom support pole of the tent. Because of the design of the clip - I have infinite adjustment up and down.
IMG_20130623_012012_693.jpg
 
Ok... Time for cloning.

I got out the cloning box as it is now time to preserve the genetics that are going into (or have been in) flowering. I do this to ensure that if I find a real winner - that I can get more of those plants. So these clones will all be tagged and put back for future use.

I also took six White Widow clones off of my mother - not sure how many of these I will use... but a very popular variety among my friends.

I don't use a humidity dome and I don't do foliar spraying. As such, the plants wilt for the first 24 to 36 hours - but always come out of it just fine if you leave them alone. This picture was taken when the plants were about 4 hours in:

IMG_20130623_012136_255.jpg


I have the plants under a weak, single tube T5 24 hours a day - and they will stay there for the next two to three weeks.

Here is a link explaining my cloning process: GreatLife4All RDWC WW 1000W Grow

And I will repeat the text here for completeness of this journal. The only real difference is that I am now using Great White in the solution and i took all the White Widow clones from the top of the plant. I also made my final stem cut "open air" and quickly dunked it into the cloning gel... I was in a hurry.


First, I take cuttings from the bottom of the plants - not the top. Lot's of opinions on this one.

I strip the bottoms - which gives me a great selection of cuttings to choose from. So I target shoots that are a minimum of 4 - 5" long with 3 to 5 nodes. This trip through, the tops were smaller and the roots larger - so the clones ended up 4" on the first cut. Most of them had 3 to 4 nodes.

Independent of the number of nodes, my bottom cut is done under water and it is always 1/4" under the node. I feel this is very important and will explain later. The cutting is then placed immediately into a pipette of the rooting gel. I cut as many as I can fit into the pipette and then start trimming.

Since 3 is the minimum - the middle fan leaves come completely off. The top set of fan leaves gets helicoptered to a maximum of 50% of their original length. I think this helps to ensure that I control the transpiration from the plant - since I don't use a humidity dome, this is likely a crucial step. When I didn't helicopter on the first cloning attempt, I spent the next two days doing so to keep the wilting in line. So just clip them right away.

If there are 4 nodes - then the middle two fans are completely removed and the remaining is helicoptered.

At 3" - I place an inch under the neoprene and accept whatever I have on top (about 1.5"). At 4", I place 1.5" under the neoprene. And at 5" - I put the stem all the way at the bottom. 5" clones definitely root the best at the finish line.

I place it into the cloner - but I don't turn it on till I am done. It usually takes me about an hour. So they sit absorbing the rooting gel for that length of time - I also believe this helps with the aeroponics - which washes the gel off quickly. Doing this, it tends to stay on for 2 to 3 hours before washing off.

Ok, you asked about solutions and I have provided a partial answer.

I mix the Clonex Rooting Solution at the minimum level specified on the bottle and I use R/O water. This gives me a very clean mixture.

I then adjust the pH down to 5.5. I know this is slightly low - but there is a method to my madness.

I then throw it into my veg tent at the beginning of the 18/6 veg cycle. I have also used various T5s and even a CFL. The CFL sucked. The T5s are very good. But I always plan to have an opening in the veg tent at this point - no need to waste electricity.

They will wilt overnight.

At this point - I don't open the box to look at them for a minimum of three days. Call me superstitious on this one - but I believe that you get faster roots if you keep it absolutely dark for the first three days. I have no real supporting evidence for this one - it is all anecdotal on my part.

They really don't seem too move much for the first 3 days. Typically the next set of new leaves will pop out - but not always.

On the second day, I go in during the dark cycle and I add a new round of Clonex Rooting Solution - but this time at the maximum rate. When I have checked - the water is fairly clear and the PPMs very low - so the boost doesn't get you to a dangerous level.

When I finally open the lid on the third day, the pH has typically risen into the low 6 range. I check the ppms and if it is below 600, I add more Rooting Solution to adjust upwards. Whatever it takes.

Thereafter, every two days I open the deck, adjust the pH, check the ppms, and adjust back to desired range. Typically I need to add the full rate of Rooting Solution.

Because we put a node under the neoprene - I get roots at that node first. They are always present within the first three or four days. Which means that cutting becomes very hard to kill at that point. If there is no node under the neoprene - it takes a minimum of 5 to 7 days, depending on the variety, to get roots. They come out from the sides of the stem - as you know. During the great self-imposed wilt on round 2, only cuttings with a node under the deck made it. That was very convincing to me.

I only use 1/3 of the cuttings in the box. Throwing away the ones that look the worst. This gives me a lot of lattitude to play around and not worry if I kill one or two.

I leave them in the box for 3 weeks total. Last time I developed a calcium / magnesium deficiency at the start of week three. So I added a small amount of Cal-Mag and they quickly got better. I don't remember the rate I used as I calculated it out. So... whatever it takes.

By the end of three weeks, the roots are large enough that I have to cut the bottom out of my net pot and push the plant thru. This also gives me long enough roots that I can hit the bottom of a 6" net pot. Thus I don't have to do any special watering or anything. I sometimes put them into square containers because they fit in the ebb and flow better. But from now on I will just put them into 6" net pots and save one transplant.

So that is pretty much the whole process, including the nutes. As you can see, the nutes are sorta integrated into the process.
 
A quick update.

The Bay 11 has some very nice buds on top now - it is the first to show flowers. It looks like the Silver Kush and Sweet Tai will be budding anytime now.

Did maintenance on the clones today and they are all healthy and have nice little roots showing now. The silver kush or bay 11 did best in the cloning box. They both wilted for about 30 hours, plumped up, and then started growing again. These two definitely have the best looking roots at this point.

I will get pictures up soon.
 
Well... Crap.

I went back and checked my order for free seeds. Thought that I had ordered nothing but feminized seeds... true enough. But I also have a mixture of regular seeds as well. Why would I check on that?

Well... I indicated that the Bay 11 had buds. It is in the back of the tent and I could see bud formation. When I checked upclose today for the first time... Damn, looks like balls. Hell... there are balls everywhere on this plant. Definitely male. Not buds... balls. To the compost heap... but I think I will keep one of the clones and put it into veg for now.

The Trainwreck, OG Kush, and Cinderella 99 that I have are also regular seeds. I am growing three C-99s - so at least one of those has to be a male. Only one of the C-99s is in the flowering tent - and it had a different structure to it than the other two (taller and lankier looking) - I am guessing that this one is a male. I will have to keep watching that plant to see how it develops.

I planted both of my Trainwrecks. Kept one and gave one to a buddy... statistically speaking one of us got a male. His is outdoors and mine is indoors - still in the veg stage.

Now that I know it is a possibility to have male plants - no problem. Know what to do. But I kept looking at the buds on that Bay 11 and thinking - man they don't look right. Sorta glad that it turned out to be a male - maybe I will use it to breed later on.

So now I have a hole in the flowering tent. I believe that I might just leave it empty. The silver kush is getting very big as is the Sweet Tai - I could weave those two into the open space. Will let you know what I do.
 
Bummer on bay 11, all in the love of the chase :rip: At least you are capable of cloning the girl sir might be a good treat later on down the road! I'm sure your girls are going to love the extra space to bulk up. Fingers crossed for the cindy being fem and just deceiving you by growing beastly :) Good growing Great!


:thumb:
 
Back
Top Bottom