JoJo's Hempy SOG 'n SCROG - LED - C99 - Northern Lights - NL99

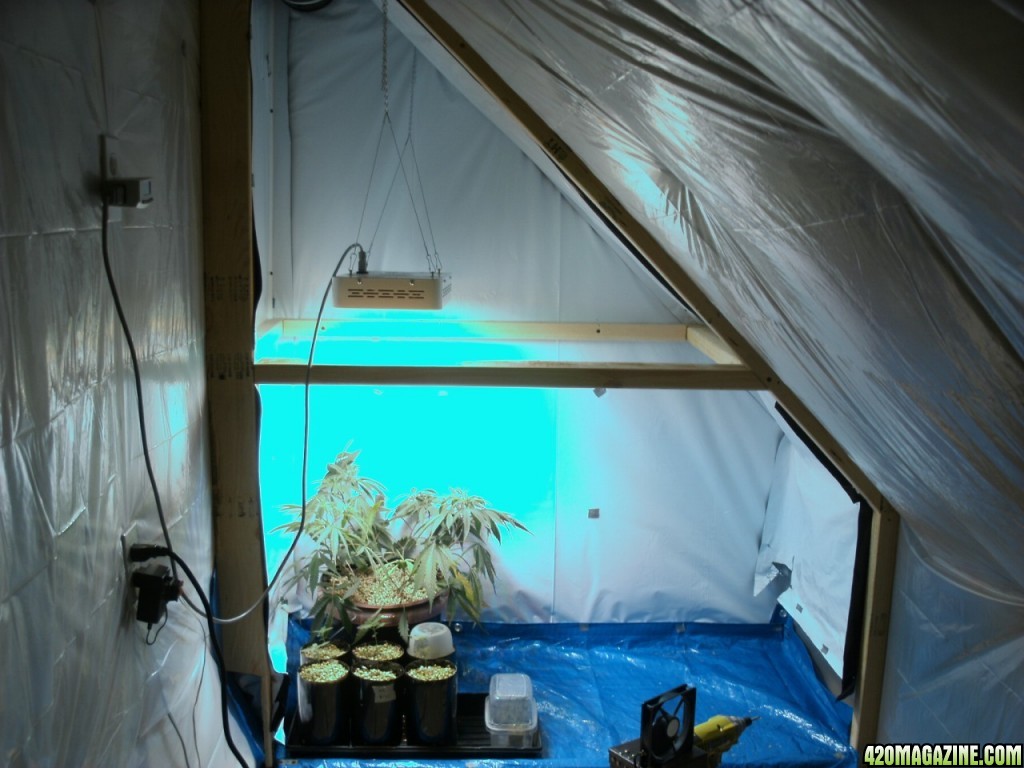
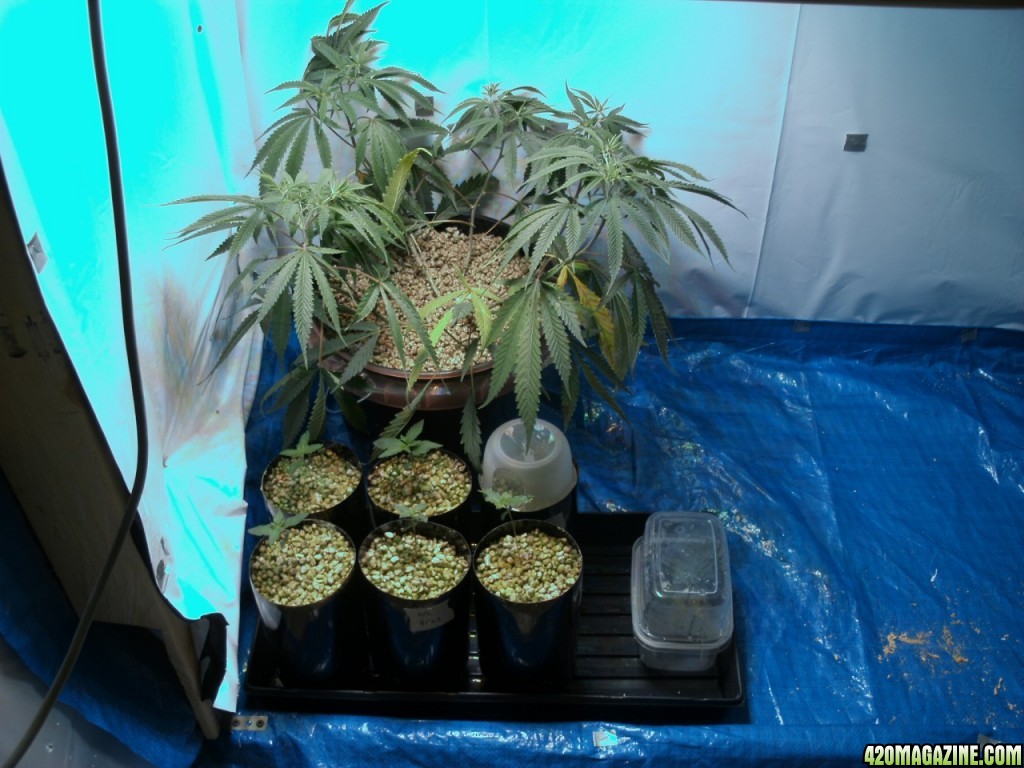
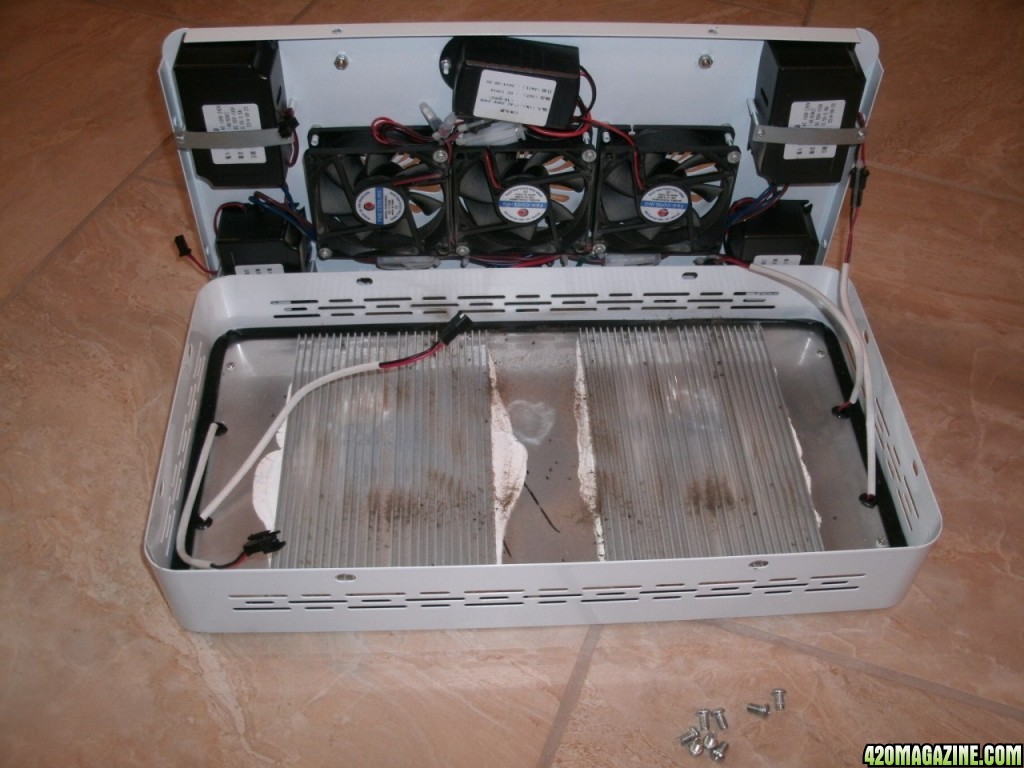
The reason I scrog is because I have an LED light. These typically have little penetration and the even canopy of the scrog is an efficient use of light. However, researching journals, it seems most folks wait too long to flip 12/12 and the screen becomes overgrown from the initial stretch. I'm still having a hard time envisioning the pipe-cleaner thing. That's a hybrid between a scrog and LST correct? I'm wait to see about 2" growth and just move the branch over to the next hole in the screen. Does tying the branch back help fill the screen faster? Thanks...

I tend to overgrow the screen before flipping but it just means more pot at the end of the run and that's a good thing. :)

Not sure what you mean about the pipe cleaner thing. I think I mentioned the use of them instead of twist ties to hold the branches down but it's the same thing. I bought a roll of twist tie that has a built in cutter so I can cut off just the amount I need. Most of the ties are only a couple inches/5cm long and I first stole all the ones I could find out of the kitchen which irked the wife but she got over it. lol

I tie the tips down continuously as they grow even for the first half of stretch so the tops only grow up about 4 - 6 inches above the screen by cropping time. Some still flop over from the weight but by then it's almost over.

L8r
 
Update (57/8 days old):

I'm not really sure how to title these updates, so I'll go with the age of the big plant first (57 days) and the age of the seedlings (8 days).

I transplanted again today, into the final container. It is a 3.5 gallon bucket with the inside painted black (it was transparent) and the drainage hole 2.25" from the bottom. The root ball looks sad but looks like it was starting to grow again... It was sitting in a thick layer of vermiculite, which separated when I tried to "float" the plant into the last bucket. All the perlite and vermiculite separated when it was soaked in water, so learn from my mistake! I should also note that the layer of vermiculite smelled bad... Not quite rotten, but the best I can describe it is that it smelled like brussel sprouts. Odd, but true!

You can see where I lightly scraped the stem with a razor blade and rubbed cloning powder on it. Hopefully this will encourage some more root growth, since the root ball is at the bottom of the bucket. I also buried a bit deeper this time (not on purpose).

transplant2_1_.jpg


transplant2_3_.jpg


transplant2_2_.jpg


I'm still working away at my new grow room - slowly. I have the main structure done, and you can see how the rooms separate: flowering on bottom and veg on top (less room and likely higher temps). We'll see how this plan works out.

transplant2_4_.jpg


transplant2_5_.jpg


The seedlings are still growing, albeit slowly. I think they're doing better since their last watering (2 days ago), but the one under the dome is still about dead. I'll keep trying to revive it though!

transplant2_6_.jpg


And the clone. Still no roots showing, but the stem is firmly seated in the rockwool, so I know they're growing. They should pop out any day now.

transplant2_7_.jpg


That's all for now. I'm trying to wrap the room up this week, and I'll share more design details if anyone's interested!
 
Yes - I am interested for sure. Because of light leak considerations in the flowering room, you will have to achieve a certain level of separation.
Are you going to have separate doors for the two rooms, or just one door and access veg only while flowering lights are on?


- I access my flowering room by going through the the veg room. Therefore I have to access flowering either when -both lights are on- or when both lights are off, using a green light. Sometimes I have to flip the veg room light off for a while, then go work in the flower room with a green light.
Understand my confusing explanation?
Easiest if you have two separate doors. But totally workable if you have only one- just more finicky.
EDIT- the more I think about my blathering the more I realize- making one door work would be sort of difficult - and probably it's two doors you will be going for....

What are you going to do for water drainage and safety issues with having one room above the other? Pretty easy to solve- just wondering....
Last question - I would have thought that with hempy you could leave it in one pot for the duration. Does it have to be transplanted?
Looking awesome JoJo.
I picked up some of the three part GH hydro nutes. When I get my hands on some perlite I may try one hempy with GH nutes. Seems that botanicare users are pretty rare here and I'd like to try something less obscure- easy to find feeding schedules and such
 
All the perlite and vermiculite separated when it was soaked in water, so learn from my mistake! I should also note that the layer of vermiculite smelled bad... Not quite rotten, but the best I can describe it is that it smelled like brussel sprouts. Odd, but true!

I had exactly the same thing happen in my hempy pots of verm/perl mix. Not fully rotted, but not good and slightly stinky. It coincided with our increase in temperature. I've since switched to just perl and the problem seems to have gone.
 
Yes - I am interested for sure. Because of light leak considerations in the flowering room, you will have to achieve a certain level of separation.
Are you going to have separate doors for the two rooms, or just one door and access veg only while flowering lights are on?


- I access my flowering room by going through the the veg room. Therefore I have to access flowering either when -both lights are on- or when both lights are off, using a green light. Sometimes I have to flip the veg room light off for a while, then go work in the flower room with a green light.
Understand my confusing explanation?
Easiest if you have two separate doors. But totally workable if you have only one- just more finicky.
EDIT- the more I think about my blathering the more I realize- making one door work would be sort of difficult - and probably it's two doors you will be going for....

What are you going to do for water drainage and safety issues with having one room above the other? Pretty easy to solve- just wondering....
Last question - I would have thought that with hempy you could leave it in one pot for the duration. Does it have to be transplanted?
Looking awesome JoJo.
I picked up some of the three part GH hydro nutes. When I get my hands on some perlite I may try one hempy with GH nutes. Seems that botanicare users are pretty rare here and I'd like to try something less obscure- easy to find feeding schedules and such

I'll get a better update and pictures of the grow room in the next day or two, as I just gathered all the supplies.

To answer your questions:

Yes, the veg and flower rooms will have separate doors, which will be more or less sealed when closed. The idea of this setup is to have airflow through both spaces with one fan/filter. The air will enter at the bottom of the flower space, then go through the ceiling (floor of the veg space) where the LEDs are located and cool them, then enter the bottom of the veg area and then exit the top through the filter. It will make for a cooler flower room and a warmer/more humid veg room. This is all inside of my larger room (previous grow room) in which I can control temperature/humidity. Or at least that's the plan...

I must make things confusing too, because I understood your confusing explanation! I'll probably add a green light in the big room so I can work in the flower room if needed. There haven't been many times I've needed to, but it's always helpful to be able to check on them during lights out sometimes.

Water drainage - I'm not sure yet. The SOG plants will sit in a tray that will be emptied, and the Hempys will still have spouts on them. I may eventually put a liner in the flower room and tilt it to one corner and pump out the water, but I don't think it'll be too bad as is. It definitely won't be as easy as my last grow, since the spouts are lower to the ground...

Yeah, don't transplant Hempys. It sucked, and I did it twice! I'm paying for it by her slow growth and recovery, but it was either transplant or wait 2 months until she finished, and then build the new grow room. So I figured I'd take a chance, and if it doesn't work out, I'll just use the clone instead!

Coming to the GH side, eh? You are one of the (very) few I've heard of using botanicare nutes. Is it a liquid multi-part line that is only popular with the cool kids!?
 
I had exactly the same thing happen in my hempy pots of verm/perl mix. Not fully rotted, but not good and slightly stinky. It coincided with our increase in temperature. I've since switched to just perl and the problem seems to have gone.

I'd like to blame it on trying to "float" the plant into the new container. When I recycled all the hempy mix from the last round, I put it in a bucket of water and held the roots while sloshing it around. Pulled out the roots, and the perlite all floated while the vermiculite sank. I really don't like re-using the vermiculite though. I don't know if it was from the broken down cotton rag, but there was a bunch of brown sludge that I drained off. It could have also been crushed up vermiculite, but I'm thinking of straight perlite next time. Do you notice much of a difference? Does it require any more frequent watering?
 
Update (62/13 days old):

Ok all, I got some solid work in on the room in the last few days, and got it all put together. I'm really happy with how it turned out (almost done) and think it will greatly help with:

1) Stealth - It is a much smaller space and very well sealed this time, so odor will have a tough time escaping.
2) Cooler - The smaller space is also easier to pull air though and cool. I noticed a dramatic difference in the temperature today. I'm also venting the lights into the veg cab, which is constantly vented.
3) Efficient Lighting - I should get more bang for my buck with these LEDs since I don't have glass between the LEDs and the plants (it can absorb like 8-12% of your light IIRC), and the plants are now surrounded by reflective material.

This update is mostly about my grow room, but I'll post some plant pics at the end. I guess I should mention that the goal of this downsize is pretty much summed up by: "Growing big in little spaces"

To start, this is how I designed the airflow for the grow room. The lights are attached to the ceiling of the flowering chamber, and there is a space between that and the floor of the veg chamber. This way the air flows completely across both chambers, and vents the lights at the same time. Sure, the veg chamber will be warmer and more humid, but that's a good thing!

design1.png


I got all my framing done last week, and I started building my panels and doors. I painted all the inside surfaces flat white and then assembled. Everything is screwed/stapled together so it can be taken down if needed.

I also got to take apart my 2x 300W MarsHydro LEDs. These are the 100x3W models which are no longer sold, but were only $100 USD each. They can always be put back together if needed. I was very surprised and impressed in the quality of these lights. Mars didn't take any shortcuts during the manufacturing of these things. All clip connections are zip-tied closed, the chassis is properly grounded, and the heatsink/vent design is very well done.

room_12_.jpg


room_1_.jpg


room_2_1.jpg


room_3_.jpg


room_9_.jpg


room_10_.jpg


room_4_.jpg


room_11_.jpg


That pretty much covers the room designs. I'm still finishing up a few things (hanging plastic, etc), but it's pretty much light-proof, or will be when I get through with it. I think it can last me a few years if needed, and was pretty cheap. It also seems bigger than I expected. The flowering chamber is about 24" deep by 50" wide by like 31" tall. My SOG 'n SCROG should work after all!

The plants are looking OK too. The seedlings have been stretching, but they're closer to the light now. I'll probably wait for them to grow a bit, then top at the 3rd or 4th node and turn the cutting into a clone. Flower the main plant and see which is my favorite! The big one is still recovering and dropping leaves, but there's a little bit of nute burn from the 1/3 dose nutes I was giving her. Hopefully she'll bounce back in the next week and I can start SCROGing.

room_6_.jpg


room_7_.jpg


room_5_.jpg


The clone isn't looking so good. I don't know what happened to one of those top leaves, but I expected her to root by now. I haven't been misting her every day though, and she's been a little tortured. Think she'll make it?

room_8_.jpg


That's all for now. Hope you're all doing well!
 
You have a sweet setup it looks as if you have put a good amount of thought into the design, kudos.
 
Yeah it's looking great JoJo.:thumb: really nice and contained. I did the door to my flowering room in a similar way- plywood door with weather stripping where it closes. I use three sliding latches to keep it snugly closed against light. I don't know if that room is meant to be hidden, maybe in a pinch? What do you have going on outside the room for your supplies? Some shelving, another room? Just curious because I use much less than half my space for growing and it's still pretty tight trying to contain it all.
 
Thanks guys! I'm an over-thinker, but I've had too many issues in the past, that I wanted to do it right this time!

@weasel - I may have to pick up some sliding latches... I'm using these clip/catch things that kinda suck. They aren't sealing completely too, and I can't have that in my flower cab! Yeah, the room is meant to be completely hidden/stealth. Since I transformed it, it is now a room-in-a-room, if that makes sense. All of my nutes and supplies are in the adjacent room, but it's a pain to mix everything up and take in into the grow room every time. Luckily I have water supply and drain pipes in the grow room, I just have to find the motivation to tap into them. Then I'll probably move all the supplies into the "grow room" and build some shelving, etc for it.

I agree though, I didn't realize all the supplies would take so much space! Not to mention storing the extra perlite, calibration solutions, etc. I don't know who said it, but someone mentioned that this hobby should be called "another 20 dollars". Somehow I keep finding all kinds of little things that I "need"!!! You guys know what I'm talking about...
 
Ha ha. I know it so well. There are so many essential things and so many nice luxuries. It seems to never end. Maybe you need to build another wall further back, if there is space, and have another stealth room with shelving to hold all your essential stuff -which you walk through to get to the grow...
 
Ditch the vermiculite. I holds old water with no oxygen in it and breeds bad bacteria. Hence the stink like broccoli. That's hydrogen sulphide or as known in the oil patch, sour gas. Toxic crap for your plants and yourself.

25% perlite, 25% peat/coco and the rest real dirt if that's what you're growing in. I just use peat based soilless mix like ProMix HP straight out of the bale that has all the perlite needed built in.

Your room setup is looking real good now and you're right about having the warm moist air going through the veg area but watch the RH doesn't get too high all the time or powdery mildew and other fungal problems may result.

L8r
 
@weasel - There I go again, not explaining myself very well... I'll call the grow areas "cabinets" which are in the back of my grow "room". So there actually is a stealth door which leads into my grow room. I'll put some shelving and supplies in there (you can see plastic hung around the room for air/odor penetration blocking), which will be right outside of my cabinets. I also might put the water supply and drain in the same grow room. Am I clear as mud again?

@OMU - Good advice on the vermiculite! You're so full of strange but useful info! I'm growing in Hempy (75% perlite, 25% vermiculite) and the first round went really well, even with the vermiculite. Healthy roots and no smell! I then "washed" the mix and attempted to re-use it. That's when it started getting stinky... I don't know if the left-over roots (there are only very small bits left) are affecting the smell too, or just the vermiculite, but I'm definitely not re-using that again! I washed my bin of extra Hempy mix free of the vermiculite and the perlite is drying now. I'll grow in 100% perlite from now on! I wish I would have known sooner!

My first few grows were in Promix with some added perlite, but I hated the stuff. I may have been waiting too long to water, but I had trouble getting it to absorb water at a decent rate, and it took lots of flushing to get the pH where I want it. I did like how it helped to buffer the pH though. I'll probably stick with Hempy for awhile.

Good point on the RH in the veg cab. That'll be something I'll have to watch, but I don't think it'll be an issue. Winter is coming (lower RH) and I have really good airflow through the cabinets. I'll be putting temperature and humidity sensors in each cab soon, too. I'll just have to remember to keep an eye on them!
 
I've been using ProMix for over 10 years and the latest one I got was the ProMix HP and use it right out of the bale. It has dolomitic and calcitic lime in it to keep the pH good along with a wetting agent and myco innoculant for healthy bacterial growth and more than enough coarse perlite. Soaks up water like a sponge too.

L8r
 
Back
Top Bottom