Utopian Submarine - 2000W, Indoor, Perpetual

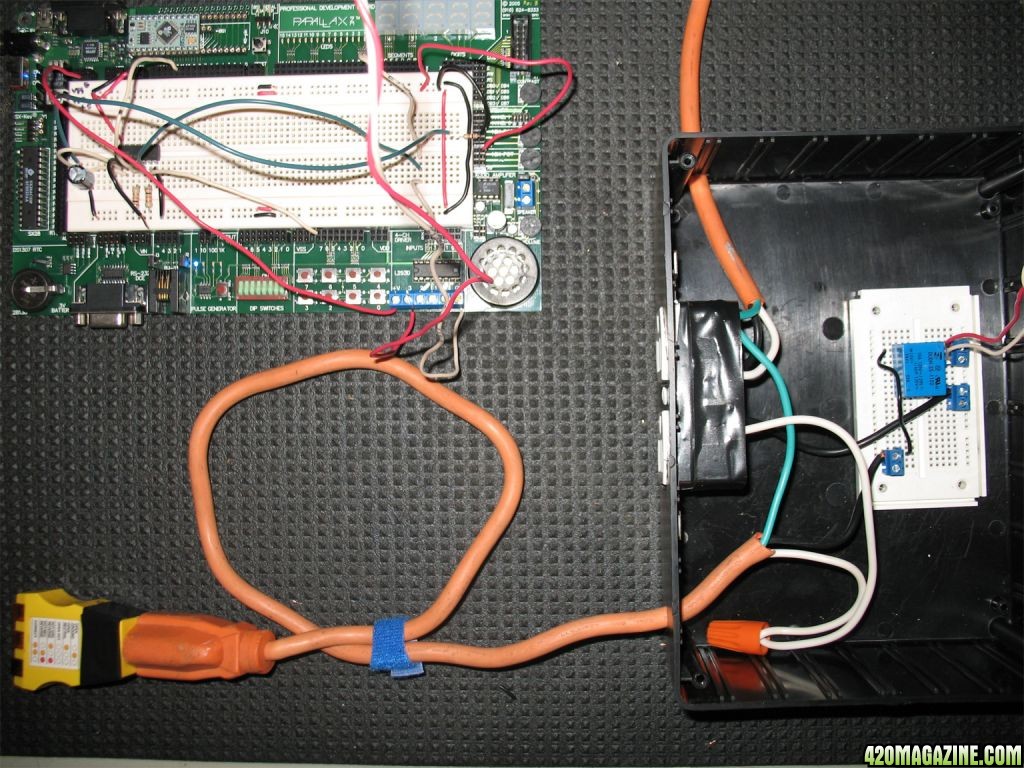
That controller of yours is starting to look kickass!
That code looks like it just migth work, atleast from what i can tell there are no blatant bugs in it. Just one question tho, what language your writing it in? I can't seem to put my finger on it.

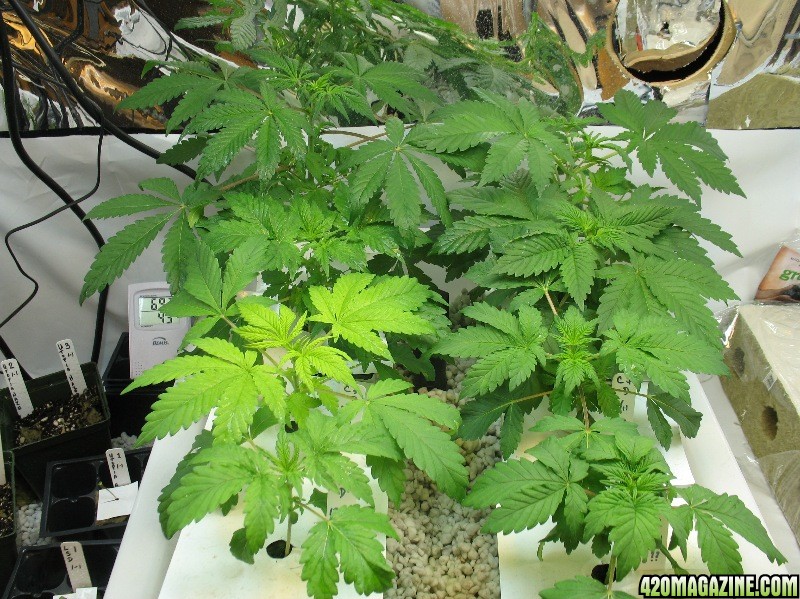
As for using FIM, it will lag their growth by 2-3 days so 8-10 will give them plenty of time to grow after that. I've seen pepole talk about giving them a week between toppings and a week before flower for topping.

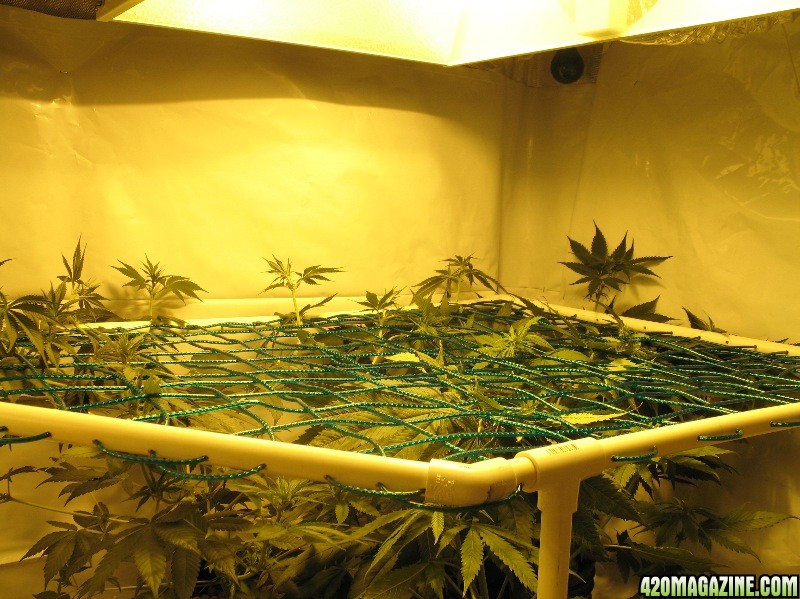
Your plants are looking well and best of luck:goodjob:
 
Thanks all for the fine words of encouragement.

Potpie - I totally appreciate the suggestion, but I have a feeling if I posted in that forum, they'd tell me to read the thread about FIM and other stuff in the Advanced Growers Forum. I've read them, and I'm just being a big baby about jumping in and getting my feet wet. I guess one of the nice things about this room is that I can experiment. So I FIMed (is that a word?) one of the plants in Veg. And I used good ol fashioned hemp twine to tie down one in flower. Pics tomorrow.

Stakkur - its pBASIC. BASIC language with a few extra commands for the stamp chip. You can get the entire program, user guide, demo projects and code, and lots more all FREE from Parallax.

Thanks both of you for the push off the pier to get started pruning.

Gonna take a little time now and try to do a schematic for the controller, so I know what I need to order from Parallax. I've never tried to do one this large so it will be slow and messy. I'm also gonna try to get at least a start on the flowchart for the program. I've got plenty of hand written notes for both, and now I've done enough testing to think my basic plan is valid - although its gonna be tight on pins on the Stamp.

Lets see what happens.
 
Overwatering the seedlings and clones

Well, I have been fucking up the water for the babies. Way too much. I discovered that my clones were really struggling. At least one or two will likely not survive the ordeal. Hopefully at least one of each of the 3 viable females will make it - but I'm not confident at this point.

Basically it was a combination of the rockwool not draining right when in those plastic disposable holders. And that BudBlanket thing sucks. Its just the stuff you see in some air-filters for your house. I won't go into it, it was a $6 experiment - don't bother. And I was giving them too much water, not realizing they weren't draining better from the plastic. The ppm and pH were fine.

I have put perlite across the bottom of both the seedling/clone tray and the veg tray. Added a hose to the intake on the pump for the veg, and added a circulation pump to the flowering res.

Now all the seedlings and veg sit on a nice bed of perlite that drains, and the rockwool is doing its thing.

I am feeling good about this setup for the first time in 4 grows since I switched from soil. Damn hydro is so damn sensitive when the plants are that small. Its the good news and bad news. When good, you can tweak it and get the plants going so much faster than soil, but screw it up and you can kill or stunt your plants in a day when they're small.

Anyways... glad to be getting all this worked out as much as possible now - the good seeds are in their 3rd day underground. I hope to see sprouts tomorrow or soon thereafter. Then the pressure's on cause those are the one's all the experimenting and dialing in levels leads up to - maximizing their potency and yield. I'm feeling pretty good that with these most recent adjustments they will do well. I will just make sure that I don't start the next batch too close behind them. I'm pretty ok so far on the timing of the plants and the room filling nicely with not too many plants in any given area.
hmmmmmm :smokin:

Yet another rambling post.
 
Wow. Very nice job with the plants. I'm also very impressed with the automation. You are moving quickly. My own automation is more high-level (USB and Java). You sure seem to have a handle on the hardware though.

:peace:

Thanks!

I have been thinking about the Javelin Stamp - stamp chip with Java for the language. I just haven't done a lot of Java, and BASIC is sooo, well - basic.

I have toyed with USB some, but the timing is so fast trying to grab those bits I had trouble getting the leading edge of the wave. I'm not that good yet. But, they do make some USB modules now that kinda take the work out of it - but they weren't in the budget for this one. Parallax also makes a USB board, but I got mine before that one existed, and I don't have the duckets for another dev board right now.

How are you with assembly language? I have two sx28 chips here, but I suck at assembly.

Minor update: am about 2/3 done with the first schematic, and I ordered another 175 bucks worth of stuff from parallax, including the CO2 sensor, 2 solder boards for the stamps, and another stamp to start the nutrient controller, so when that arrives - hopefully I can get the CO2 and fans online. Let that controller run for a while, and see how it does while I get a little start on nutes.

Question for those with controllers: If you have to calibrate the CO2 sensor, how often do you need to do it and what is the basic procedure? I'm thinking I will have to use outside as the calibration point and just use 380 as the default. Is there a better way?
 
I dont have a schematic but Are you using smaller gauge wire to make some ac connections here?
first_relay_on_controller.jpg


I recommend using the same 16ga or better that the extension cord runs. Just dont want your box to go up in flames. Looks good I just wanted to make sure I warned you

But the plants look good I dont know basic per say im more of a java guy myself although Im still learning. It will be fun to watch.
 
Hi Stealthy1 - thanks for coming by and thanks for all the input.

You are right - the one connection from the black incoming power to the relay is the smaller gauge wire. It is a very short run, and I'm only using it for testing. I was concerned about it as well, but even after leaving the controller running autonomously for hours, the wire doesn't get hot at all. In the final, that connection will be made directly with the higher gauge wire and solder.

Thanks! Its awesome the way you folks who know what you are doing can look at these pics and know whats going on. I'm not sure I could if I hadn't built it.
 
Nice controller your building there. I don't understand all the tech stuff, but I will be definately be keeping an eye on your show.
+rep for the controller.


Thanks! And welcome aboard!! Your setup is a clinic. Definitely a great source of knowledge.

Its really cool that you folks that are not necessarily going to build one of these are still checking this out. I was re-reading the thread, and I've already learned stuff. I also noticed that I gotta try to shorten my posts and make sure to get more growing in there and less computers.

Gonna do a little work on the girls and see if I can find 4 batteries for my camera.
 
You can put what you want into your journal I fill mine up with diy photos lol...

Yah the wire is enough to run basic things and I figured it was temp but I wouldn't plug a 1k light into it or anything like that.
 
I was wondering when someone would bring the parallax equipment to the cannabis control world. I have a friend who is developing a beer making controller. Pretty cool stuff. Hope this works out for you. I'd love to get something like this without paying thousands of dollars. +rep
 
I was wondering when someone would bring the parallax equipment to the cannabis control world. I have a friend who is developing a beer making controller. Pretty cool stuff. Hope this works out for you. I'd love to get something like this without paying thousands of dollars. +rep

Wow - beer maker - awesome! Hmm - I wonder if theres some way to combine systems and recycle cold water and hot air or whatever. And man - what a harvest party!

Saw your scrog. Its excellent. I did a scrog last time but it was not nearly as neat and well done as yours. I am thinking even of copying that in my room for just one end or something.

Question for you - is the PVC enough weight to keep the plants down when they're full size? I had 5 plants under the scrog last time and they were lifting it off the table.

The weight has been enough for the two plants so far. I can see how the frame can be lifted with more plants though. Various securing mechanisms could be employed like drilling a smaller hole on the side of the platform and through the pole sides and inserting long rods that could act as Cotter Pins.

I'll see what I can find out about his controller and what it did exactly. He is to the point that he ordered some custom etched boards and assembled a unit with the components. His design had a couple of mistakes that required the running of wire between points but should be corrected in the next revision. Do you participate in the Parallax forums as well? They may be able to help with some of the nitty gritty details in design.
 
I use small bungies to anchor the screen in my room. Bought them at Home Depot.

Very interesting stuff you are doing WP. Can't wait to see how it unfolds.
 
This place is awesome!. Just when I'm about to put glass in my eye (see next post about the plumbing) I get to come here and have cool convos with like-minded folks.

I think both ideas as for how to secure the scrog are excellent. Both demonstrate kiss and cheap. Both only involve 1 part. Both will last. Excellent.

Re the beer maker - that sounds friggin cool. I've never done a project that merited or required a printed board. In fact - this will be my first where I actually build the final completely soldered. I usually use a breadboard and just solder the odd resistor or cap inline with wires and cover them with heatshrink or tape. As far as the extra wires - I know how that goes for sure. Also, unless he's really good at putting caps and resistors everywhere needed, he will see likely see some voltage change on some pins - that was a gotcha for me one time when I built a 9 servo controller. Tested it with short 2 foot wires, then when I went to use 12 foot wires to the servos - they were confused - that was when I learned the value of capacitors.
 
I use small bungies to anchor the screen in my room. Bought them at Home Depot.

Very interesting stuff you are doing WP. Can't wait to see how it unfolds.

Welcome! That's a great idea for the bungees. I use them as safeties for my lights. They wouldn't do to hold them, but they will suffice to catch a disaster until I can get to the light.

Thanks very much for the words of encouragement and welcome aboard the sub!
 
How are you with assembly language? I have two sx28 chips here, but I suck at assembly.

It's been 15 years since I even looked at assembly. :crosseyed:

Minor update: am about 2/3 done with the first schematic, and I ordered another 175 bucks worth of stuff from parallax, including the CO2 sensor,

I'm looking for the CO2 sensor on their website, but I can't find it. Can you link me? PM if you like.

Question for those with controllers: If you have to calibrate the CO2 sensor, how often do you need to do it and what is the basic procedure? I'm thinking I will have to use outside as the calibration point and just use 380 as the default. Is there a better way?

My CAP controller expects to be calibrated using this basic procedure.

As for what you put in your journal, I would expect there's nothing wrong with the automation details - it is a properly related topic, and I'm sure lots of people would be interested. Go ahead IMO.

:peace:
 
It's been 15 years since I even looked at assembly. :crosseyed:

Amen, brother!

I'm looking for the CO2 sensor on their website, but I can't find it. Can you link me? PM if you like.

the Co2 sensor:
605-00010-M.jpg


My CAP controller expects to be calibrated using this basic procedure.

I stole the procedure from their manual. Seems straight forward, but a little bit of a pain in the ass to take the whole contraption outside. Hmmm - time to add wireless?

As for what you put in your journal, I would expect there's nothing wrong with the automation details - it is a properly related topic, and I'm sure lots of people would be interested. Go ahead IMO.

:peace:

Thanks. I tend to ramble when I get high, so I don't want to bore folks too much.
 
heheh - too funny. the problem is I can be that boring :).

Luckily the girls can not.

So we have a pretty good update today. First I gotta say fuck you plumbing and fuck you mylar. Another damn leak, and when I went to put up mylar it was oxydized. Neither wants to be a team player.

Now - on to the positive stuff.

IMG_0046_9_JPG_800.jpg


I was inspired by Munki. So I threw up a scrog. And, if I do say so, its one of my better pieces of work.

IMG_0047_9_JPG_8001.jpg


I also have good news on the clones I think. At least one of each female looks like its gonna make it - so each of those will become my mothers. That's 3 now - AK47, Kali-Mist, and my unknown seeds that shall from here on be known as Dog Hair.

IMG_0061_7_JPG_800.jpg


And yes - there in the background are the Barney's Farm sprouts. After some minor trauma, 5/6 have sprouted, and I'm hoping the 6th is just a late comer. The seeds are feminized so I will use 1 each as mothers. So that's two more strains that I have female babies ready to become moms. Not bad from a few bag seeds a few months ago.

And here's a quick pic of the ones in Veg:
IMG_0060_7_JPG_800.jpg
 
Back
Top Bottom