Date: Thursday, January 10th 2013
Time: 1:35 A.M.
Seeds: Lucy feminized (5)
Breeder: Barney’s Farm
Equipment/Supplies used:
Day 1:
A short time ago I had received my feminized Lucy seeds from Barney’s Farm. I stored them in the refrigerator for roughly a week until I got up and going with the equipment I needed for, (hopefully), a successful germination
Today, they were removed from their concealment within the manila envelopes they had been shipped in. I have to admit that the packaging by Barney’s Farm was somewhat impressive.
As for the seeds themselves, I guess I was expecting them to be somewhat larger, but am in no position to question their potency or potential. Since this is my first time grow my only hope is that they make it to harvest. If so, then I will consider my first grow a success.
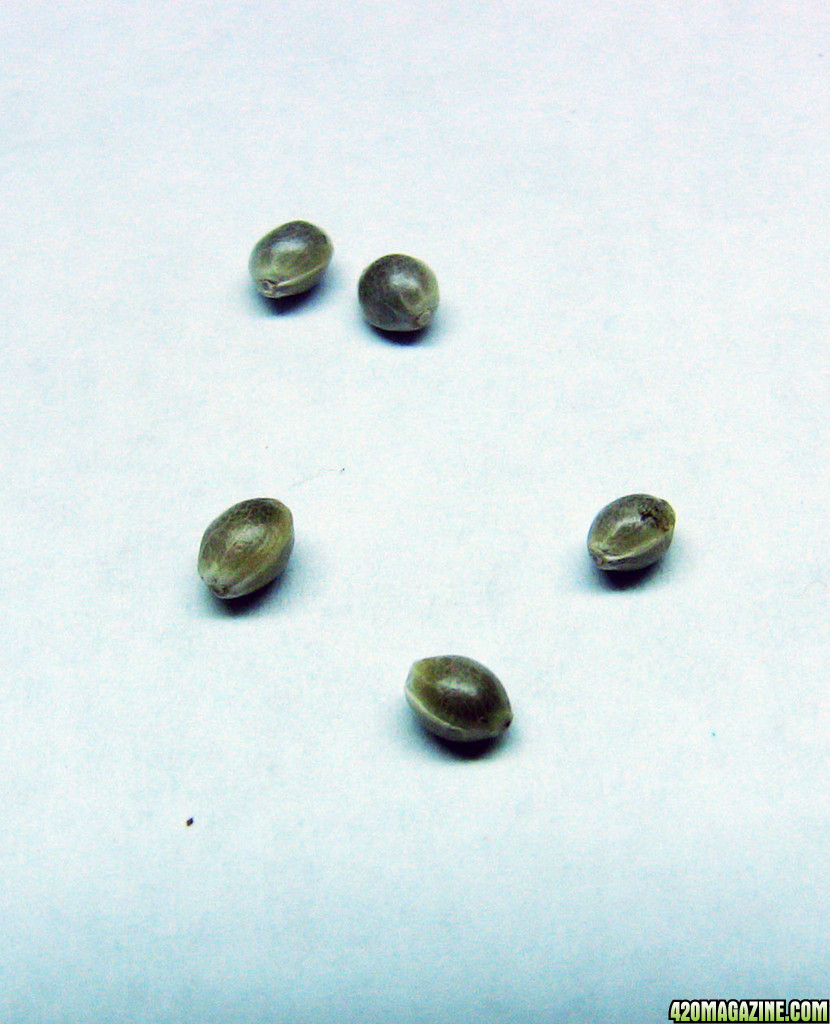
They have an attractive mottled pattern on their outer coatings. I wanted to get a picture of them before germination. They just look like they have attitude!
Originally I was going to simply plant them in soil, but had read so many rave reviews about rapid rooter plugs, that I decided to try a different method.
For years I had an old AeroGarden Deluxe model sitting on the shelf collecting dust. So I thought to myself, ‘What if I used the AeroGarden to germinate the seeds utilizing Rapid Rooter Plugs instead of the AeroGarden grow sponges that initially shipped with the unit’?
This sounded good in theory, but posed a small problem when put to the test. Unlike the grow sponges that initially came with the AeroGarden and fit so neatly inside the plastic basket inserts; I found the Rapid Rooter Plugs to be much wider and shorter in comparison.
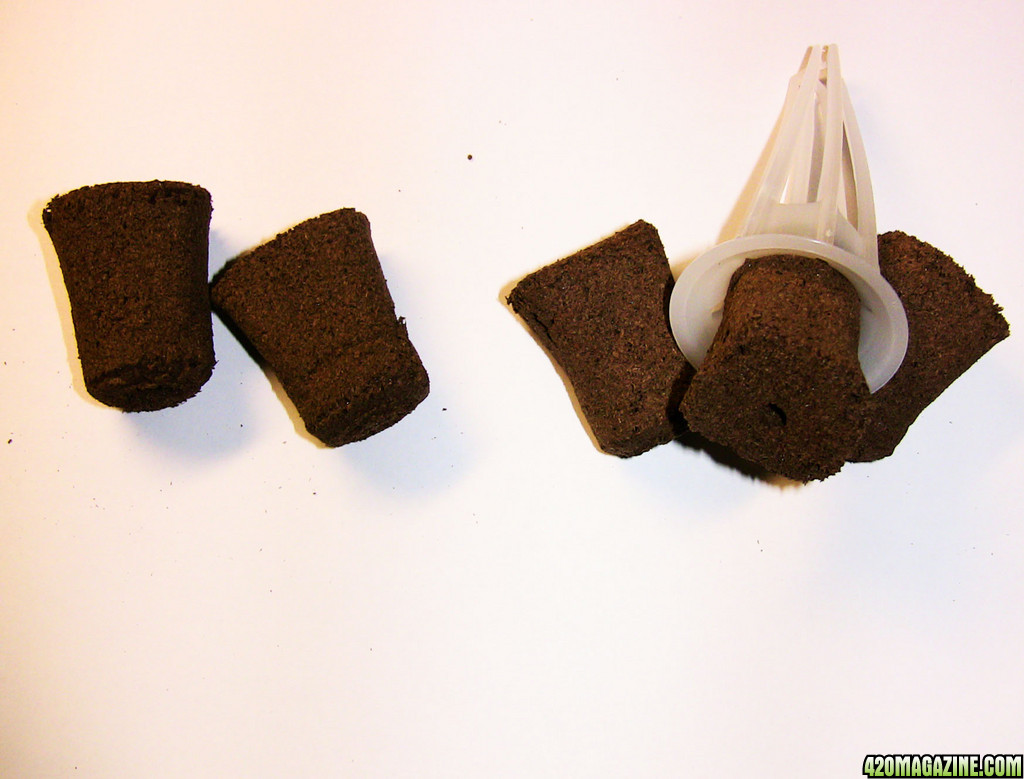
I had to cut the Rapid Rooters down to size in order to fit them into the system’s plastic basket inserts. This was not hard to do, but again posed another difficulty in regards to the AeroGarden unit itself.
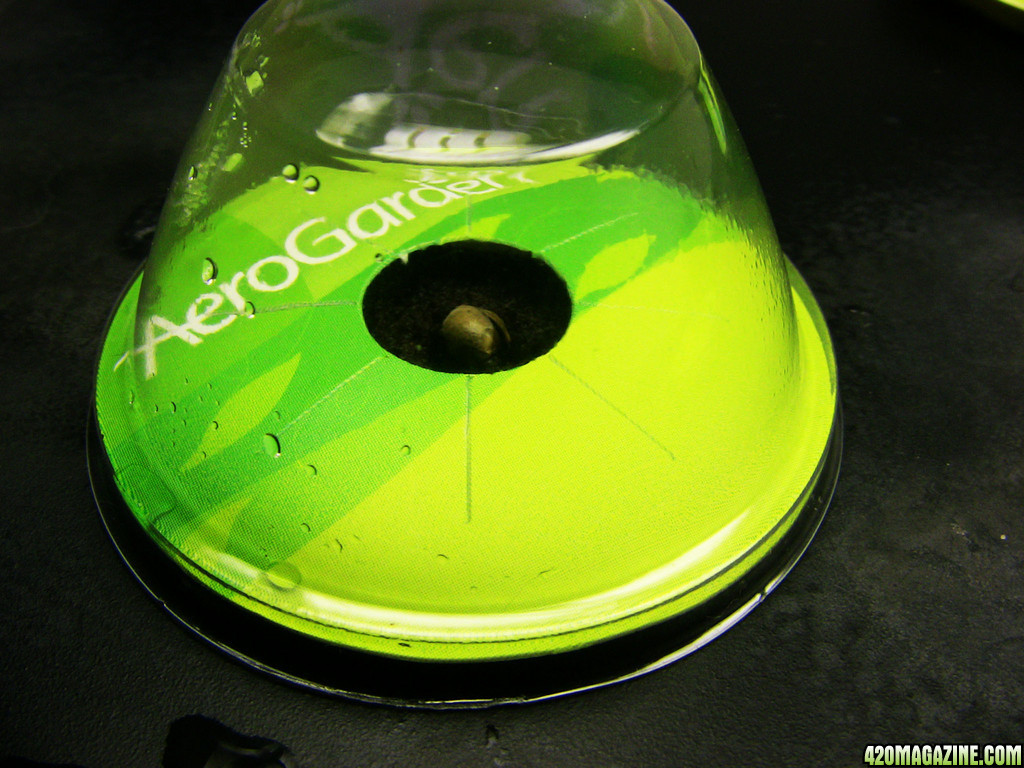
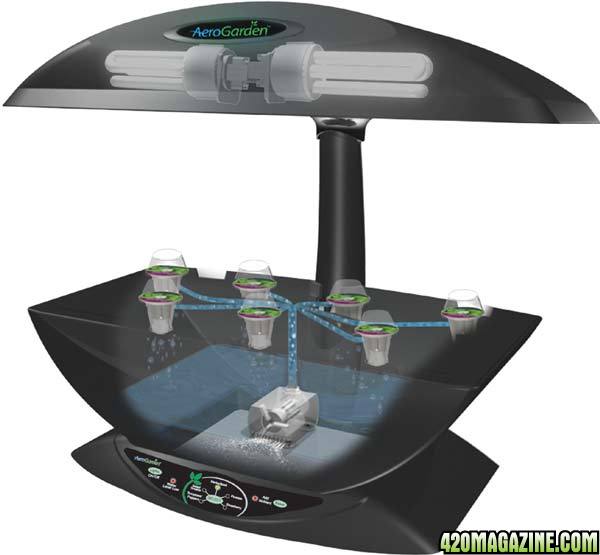
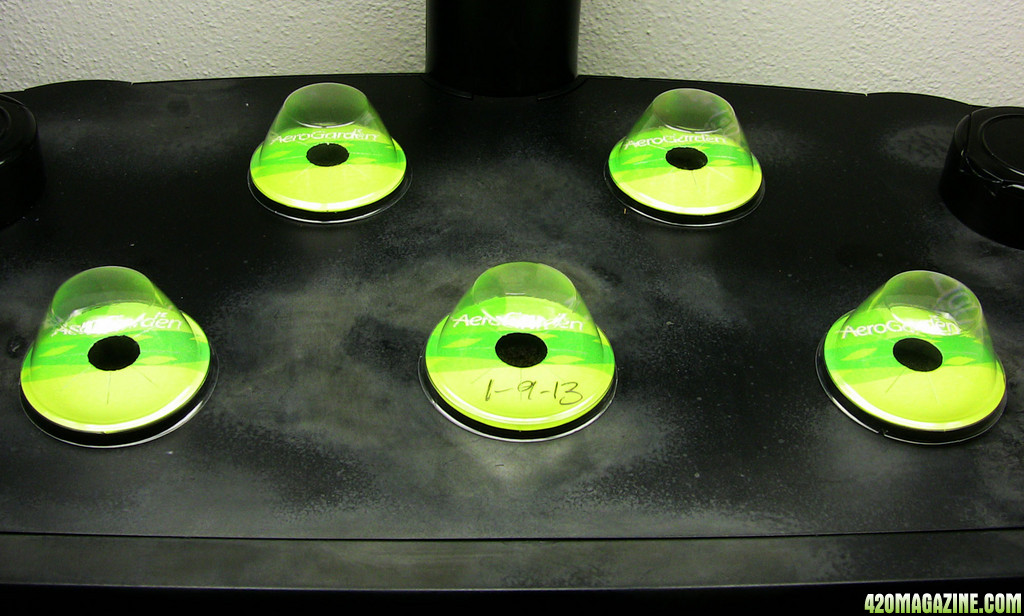
Although the name, “AeroGarden” would imply that the system was aeroponic by nature, this is not the truth. The system basically top irrigates by means of a directed drip down onto the plastic basket and growing sponge as you can see here:
My fear was that if the Rapid Rooters were trimmed too thin, the drip system would not be able to make a solid connection with the plug thereby rendering the irrigation process useless. Therefore, I had to be mindful of the fact that the Rapid Rooters had to be trimmed down to fit inside the baskets, but likewise needed to be somewhat firm against the sides of the plastic baskets as well.
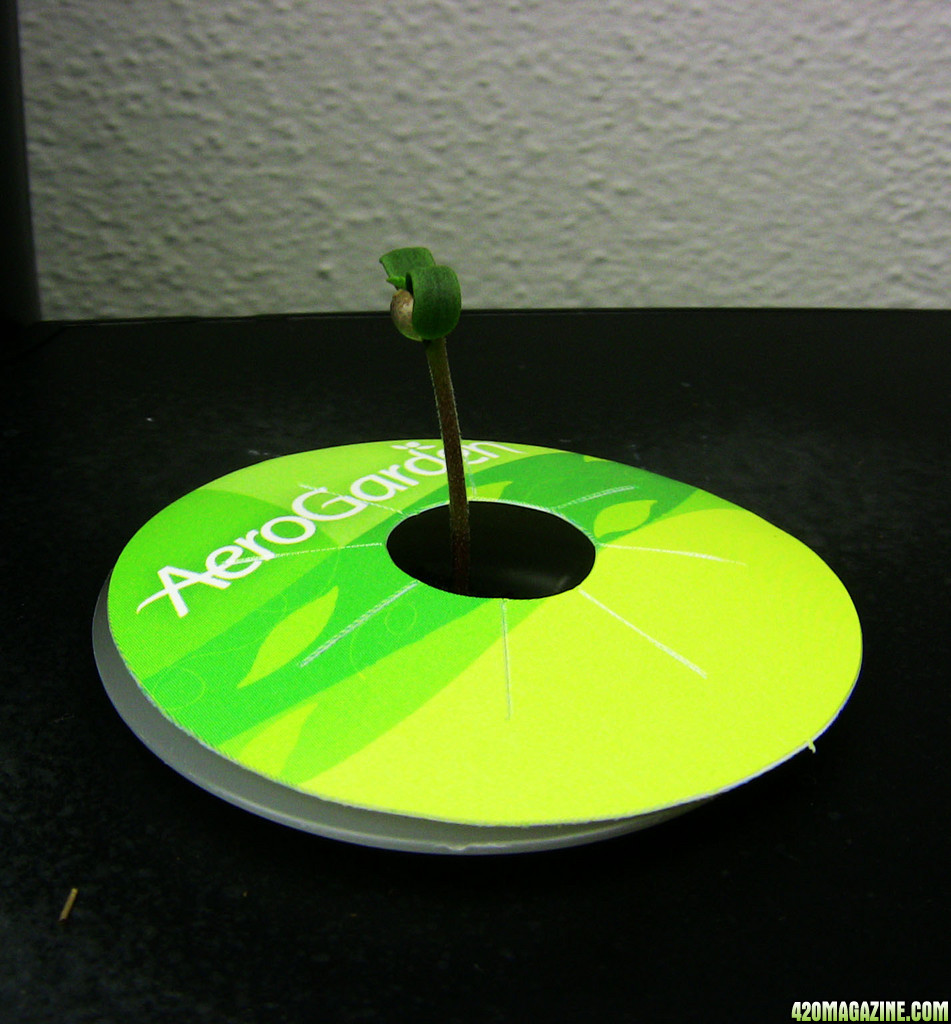
Another consideration was expanse of the Rapid Rooters once wet. If the Rooters were too snug against the plastic baskets they wouldn’t necessarily have an ample amount of room to expand. This would, in effect, leave the seeds in a very suffocative medium. With this in mind, I ended up with something that looked like this…
Once the Rapid Rooters had been trimmed to size it was time to start working on the AeroGarden.
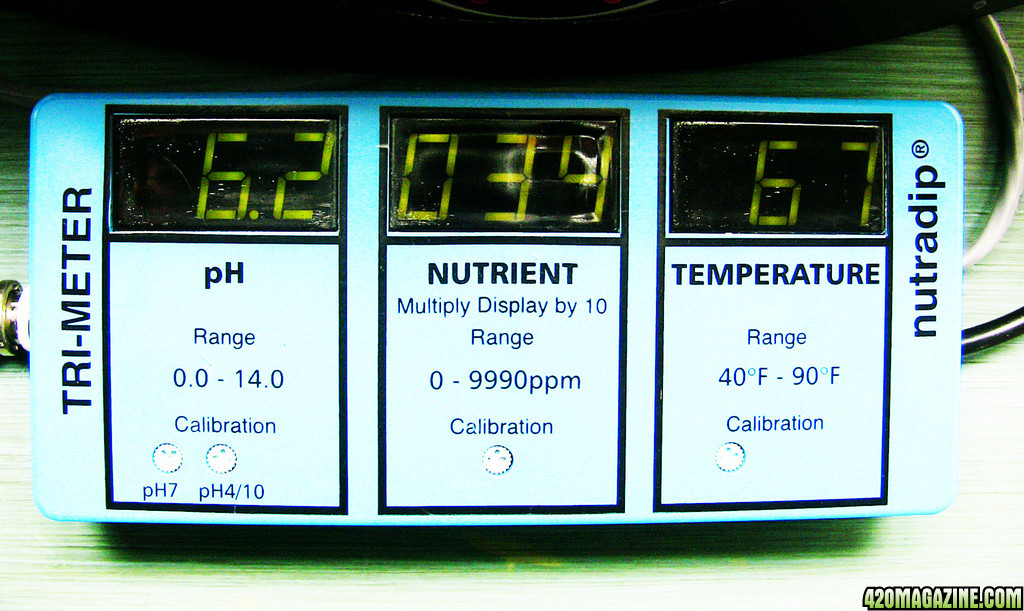
The unit was thoroughly cleaned. Once by hand scrubbing it with dish soap. A second time by running bleach through the system. A third time by running fresh water through the system. After I had felt the unit was sufficiently clean, I proceeded to add distilled water to the unit and balance the pH of the water. I realize that most growers use distilled water because of its near-neutral pH of 7.0, but again, this is as much of a misnomer as the AeroGarden being truly aeroponic. When I tested the pH of the distilled water, it was roughly at a pH of 4.0!
I have found a low pH in distilled water to hold true in the past as well, although I’m not quite sure why. I have a Nutri-Dip trimeter and had cleaned the probes properly as well as recalibrated the pH probe in both 7.0 and 4.0 solution.
I have read several times that the best pH to germinate cannabis seeds is between 5.8 - 6.2 and so set out accordingly. I had to up my pH by 2.0 and ended up with an acceptable reading of 6.2 once stabilized.
The ambient room temperature was also taken into consideration as it is staying at a consistent 75° and roughly 85° under the CFLs. Humidity is being maintained by the individual humidity domes that cover each Rapid Rooter.
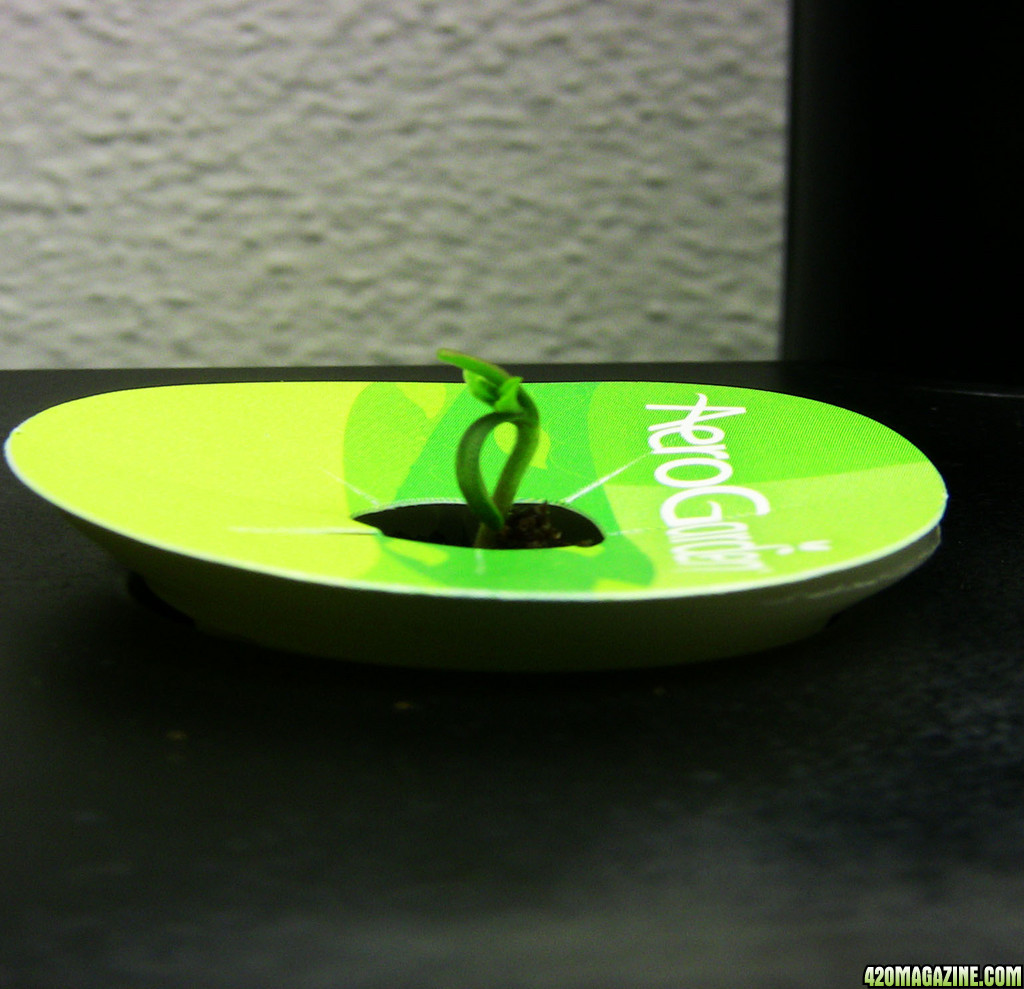
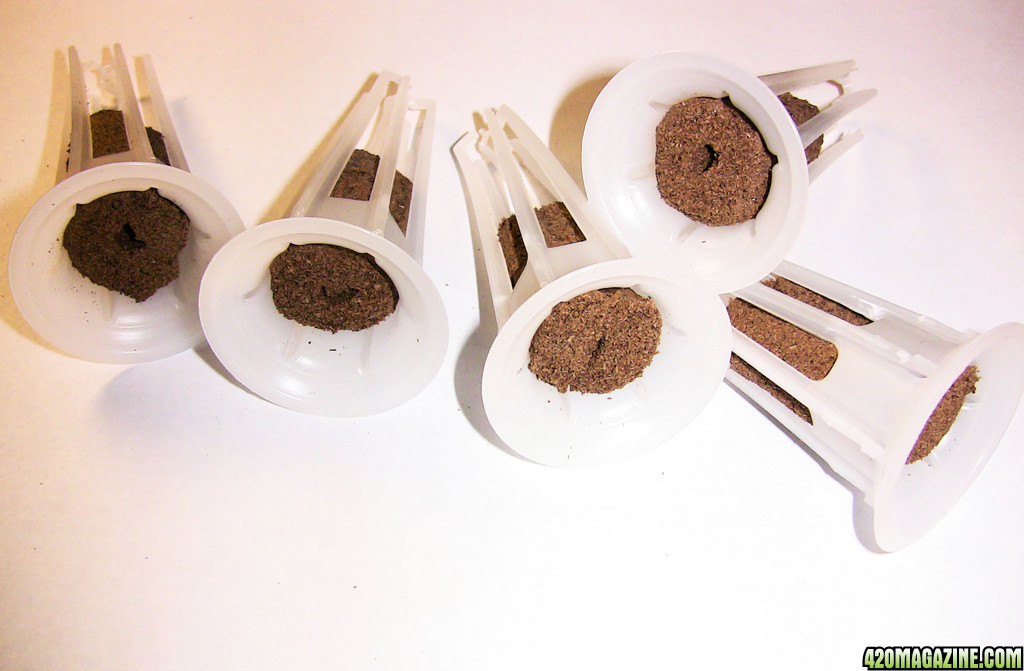
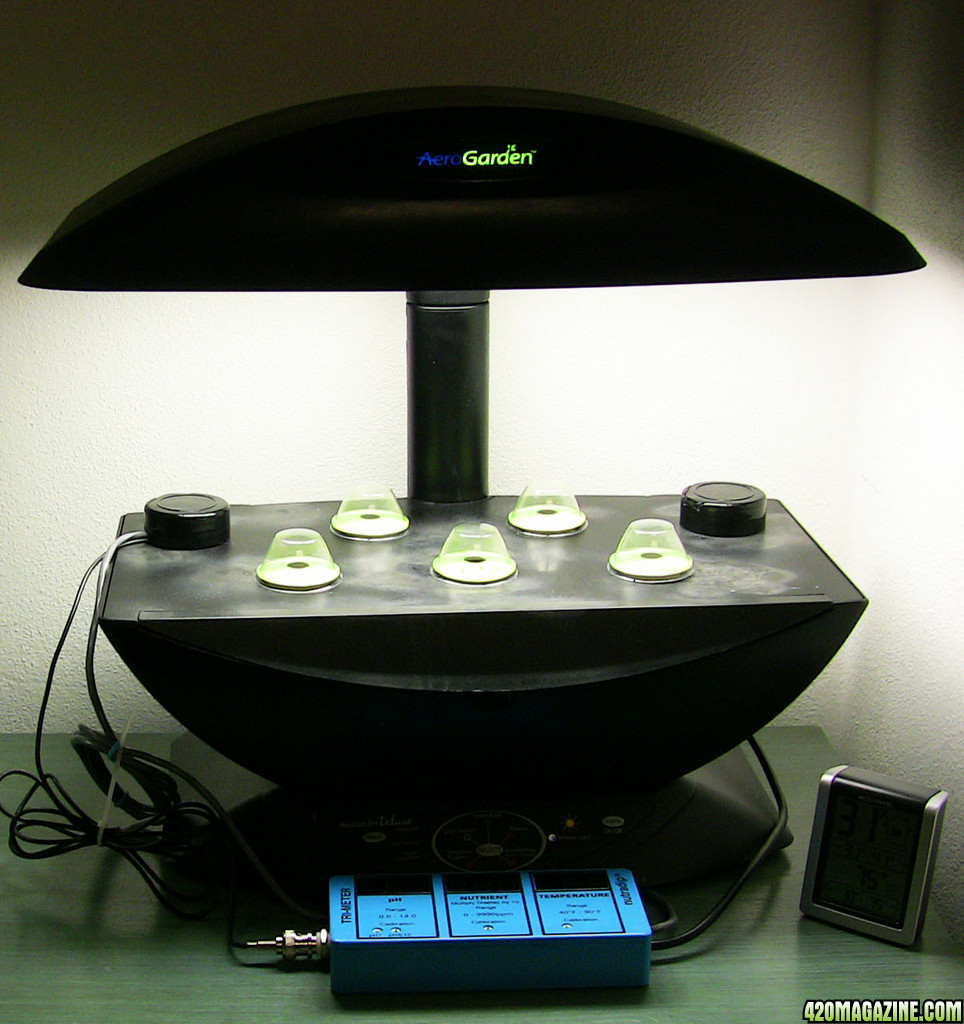
After all was said and done this was what the final setup looked like:
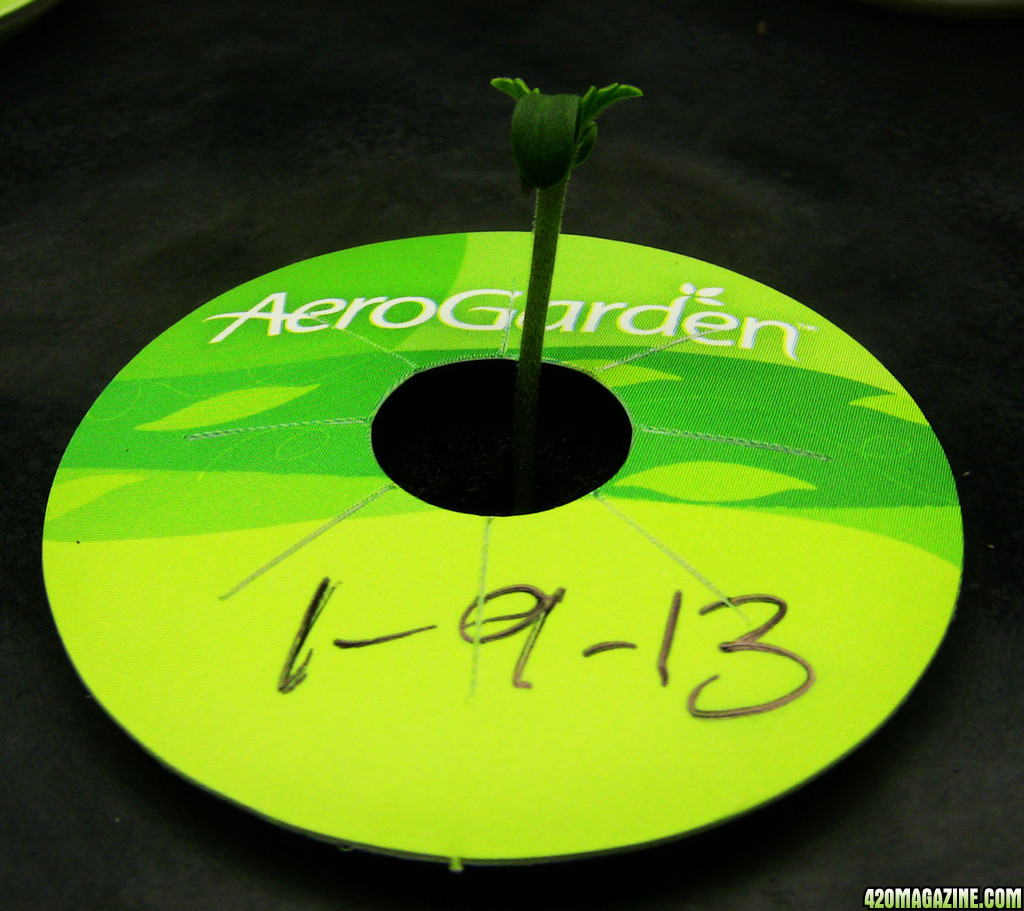
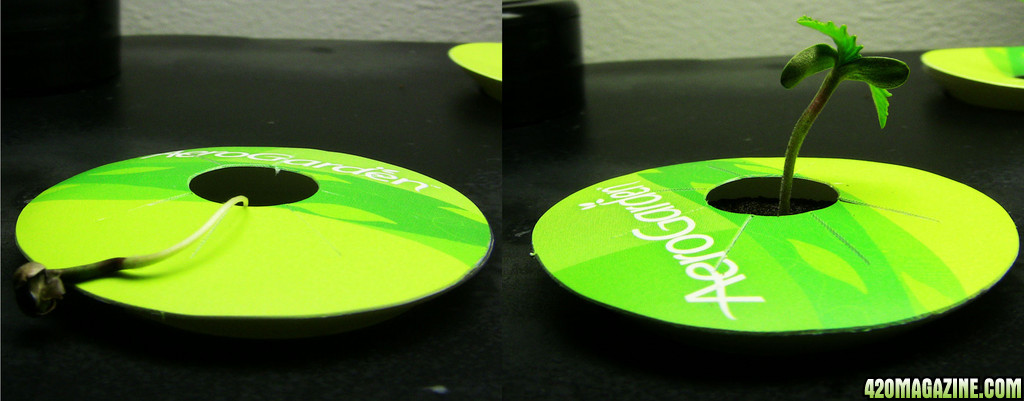
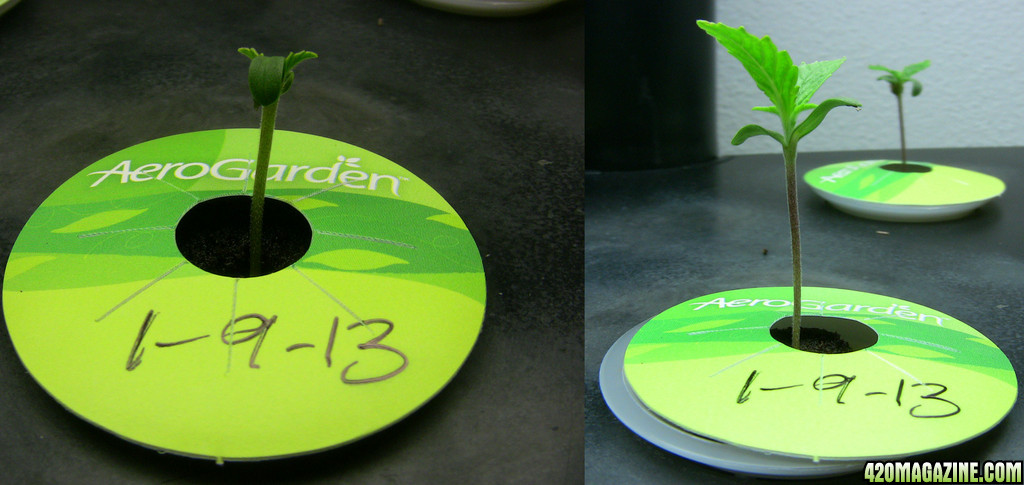
I did not label the seeds in as much as they are all the same but I did label one with the date as you can see here:
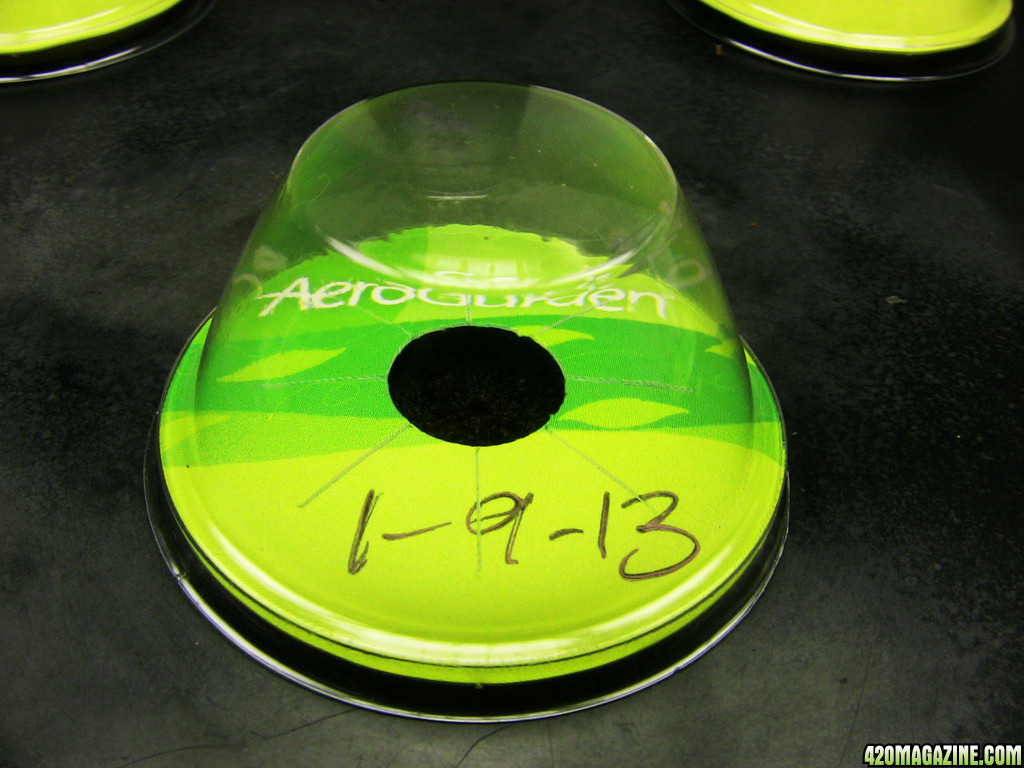
Also, the labels serve as algae prevention by helping to block out any light that may try to get to the water.
In summary, I tried to find an idiot-proof way to germinate my seeds. This may seem somewhat extreme, but then again, you have to be aware of the magnitude of idiocy you’re dealing with here. As stated before, this is my first-time grow and I am hoping to get it right the first time at bat.
Time will only tell I guess…
I want to personally thank all of you who took the time to read my journal.
Grüw
Time: 1:35 A.M.
Seeds: Lucy feminized (5)
Breeder: Barney’s Farm
Equipment/Supplies used:
- AeroGarden Deluxe
- Rapid Rooter Plugs
- Nutri-Dip Tri-meter
- Temp/Humidity Gauge
- 1 Gallon distilled water
- pH +
Day 1:
A short time ago I had received my feminized Lucy seeds from Barney’s Farm. I stored them in the refrigerator for roughly a week until I got up and going with the equipment I needed for, (hopefully), a successful germination
Today, they were removed from their concealment within the manila envelopes they had been shipped in. I have to admit that the packaging by Barney’s Farm was somewhat impressive.
As for the seeds themselves, I guess I was expecting them to be somewhat larger, but am in no position to question their potency or potential. Since this is my first time grow my only hope is that they make it to harvest. If so, then I will consider my first grow a success.
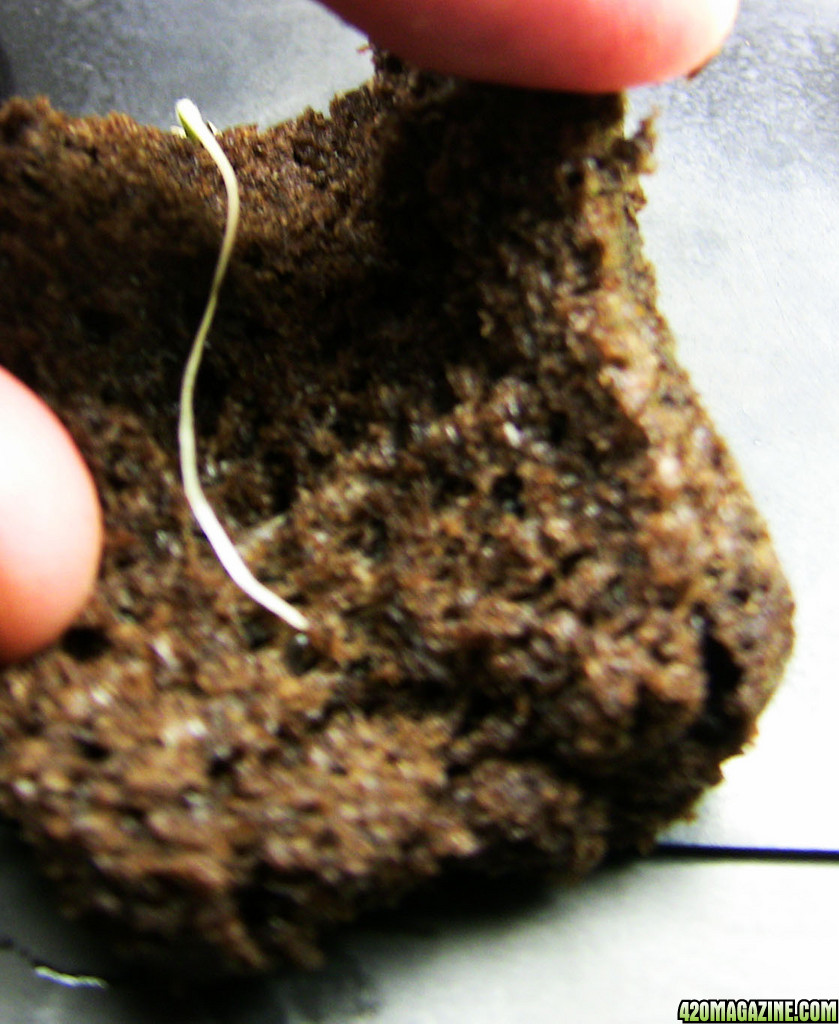
They have an attractive mottled pattern on their outer coatings. I wanted to get a picture of them before germination. They just look like they have attitude!
Originally I was going to simply plant them in soil, but had read so many rave reviews about rapid rooter plugs, that I decided to try a different method.
For years I had an old AeroGarden Deluxe model sitting on the shelf collecting dust. So I thought to myself, ‘What if I used the AeroGarden to germinate the seeds utilizing Rapid Rooter Plugs instead of the AeroGarden grow sponges that initially shipped with the unit’?
This sounded good in theory, but posed a small problem when put to the test. Unlike the grow sponges that initially came with the AeroGarden and fit so neatly inside the plastic basket inserts; I found the Rapid Rooter Plugs to be much wider and shorter in comparison.
I had to cut the Rapid Rooters down to size in order to fit them into the system’s plastic basket inserts. This was not hard to do, but again posed another difficulty in regards to the AeroGarden unit itself.
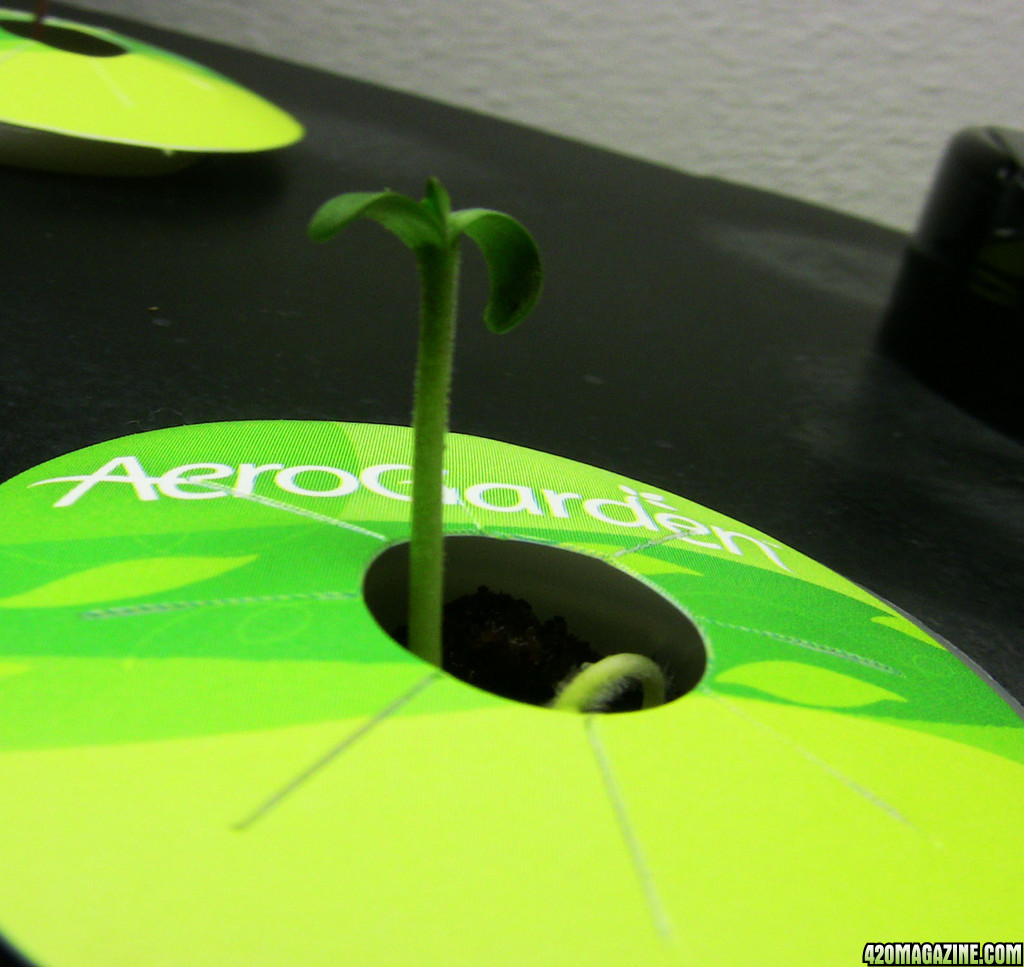
Although the name, “AeroGarden” would imply that the system was aeroponic by nature, this is not the truth. The system basically top irrigates by means of a directed drip down onto the plastic basket and growing sponge as you can see here:
My fear was that if the Rapid Rooters were trimmed too thin, the drip system would not be able to make a solid connection with the plug thereby rendering the irrigation process useless. Therefore, I had to be mindful of the fact that the Rapid Rooters had to be trimmed down to fit inside the baskets, but likewise needed to be somewhat firm against the sides of the plastic baskets as well.
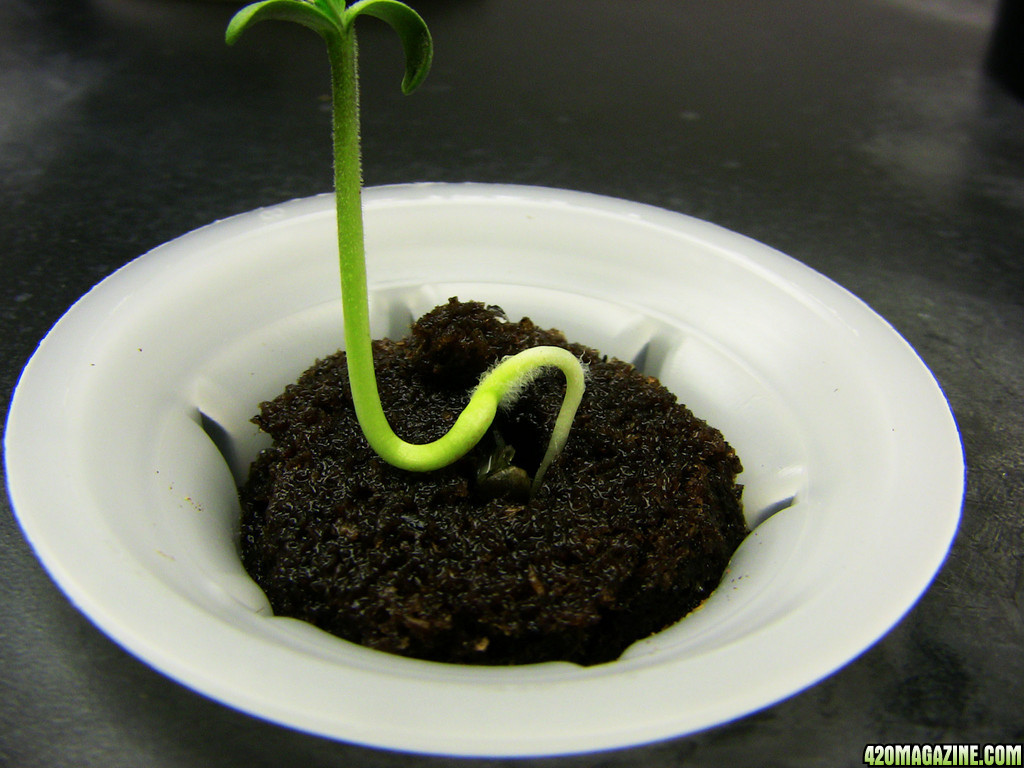
Another consideration was expanse of the Rapid Rooters once wet. If the Rooters were too snug against the plastic baskets they wouldn’t necessarily have an ample amount of room to expand. This would, in effect, leave the seeds in a very suffocative medium. With this in mind, I ended up with something that looked like this…
Once the Rapid Rooters had been trimmed to size it was time to start working on the AeroGarden.
The unit was thoroughly cleaned. Once by hand scrubbing it with dish soap. A second time by running bleach through the system. A third time by running fresh water through the system. After I had felt the unit was sufficiently clean, I proceeded to add distilled water to the unit and balance the pH of the water. I realize that most growers use distilled water because of its near-neutral pH of 7.0, but again, this is as much of a misnomer as the AeroGarden being truly aeroponic. When I tested the pH of the distilled water, it was roughly at a pH of 4.0!
I have found a low pH in distilled water to hold true in the past as well, although I’m not quite sure why. I have a Nutri-Dip trimeter and had cleaned the probes properly as well as recalibrated the pH probe in both 7.0 and 4.0 solution.
I have read several times that the best pH to germinate cannabis seeds is between 5.8 - 6.2 and so set out accordingly. I had to up my pH by 2.0 and ended up with an acceptable reading of 6.2 once stabilized.
The ambient room temperature was also taken into consideration as it is staying at a consistent 75° and roughly 85° under the CFLs. Humidity is being maintained by the individual humidity domes that cover each Rapid Rooter.
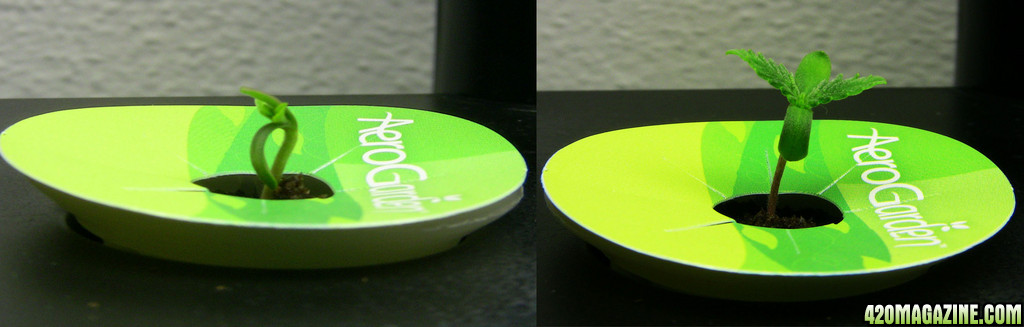
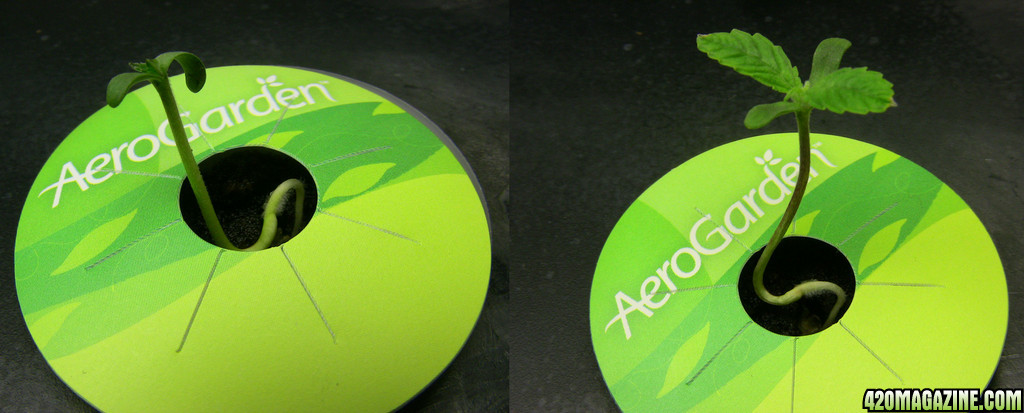
After all was said and done this was what the final setup looked like:
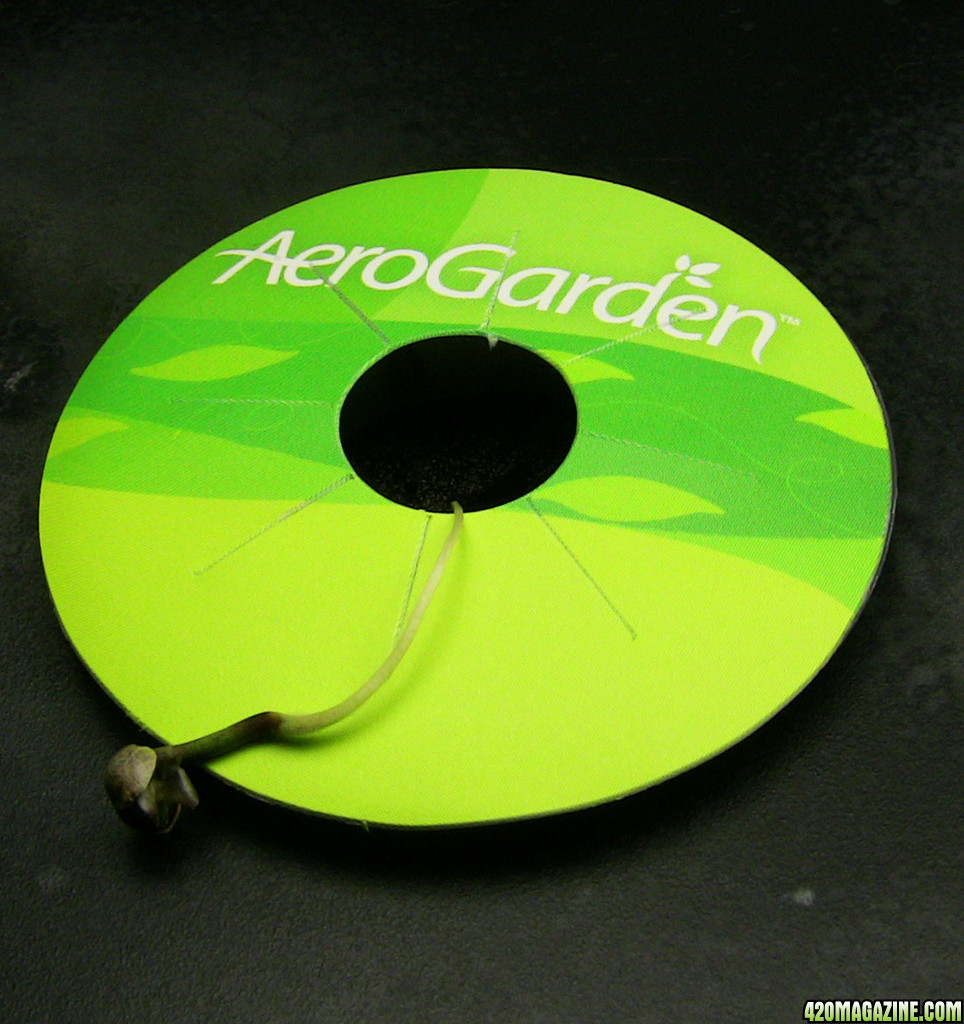
I did not label the seeds in as much as they are all the same but I did label one with the date as you can see here:
Also, the labels serve as algae prevention by helping to block out any light that may try to get to the water.
In summary, I tried to find an idiot-proof way to germinate my seeds. This may seem somewhat extreme, but then again, you have to be aware of the magnitude of idiocy you’re dealing with here. As stated before, this is my first-time grow and I am hoping to get it right the first time at bat.
Time will only tell I guess…
I want to personally thank all of you who took the time to read my journal.
Grüw