UG's Utopia

thanks x1000 Vick for the comply's :passitleft::Namaste::thanks:


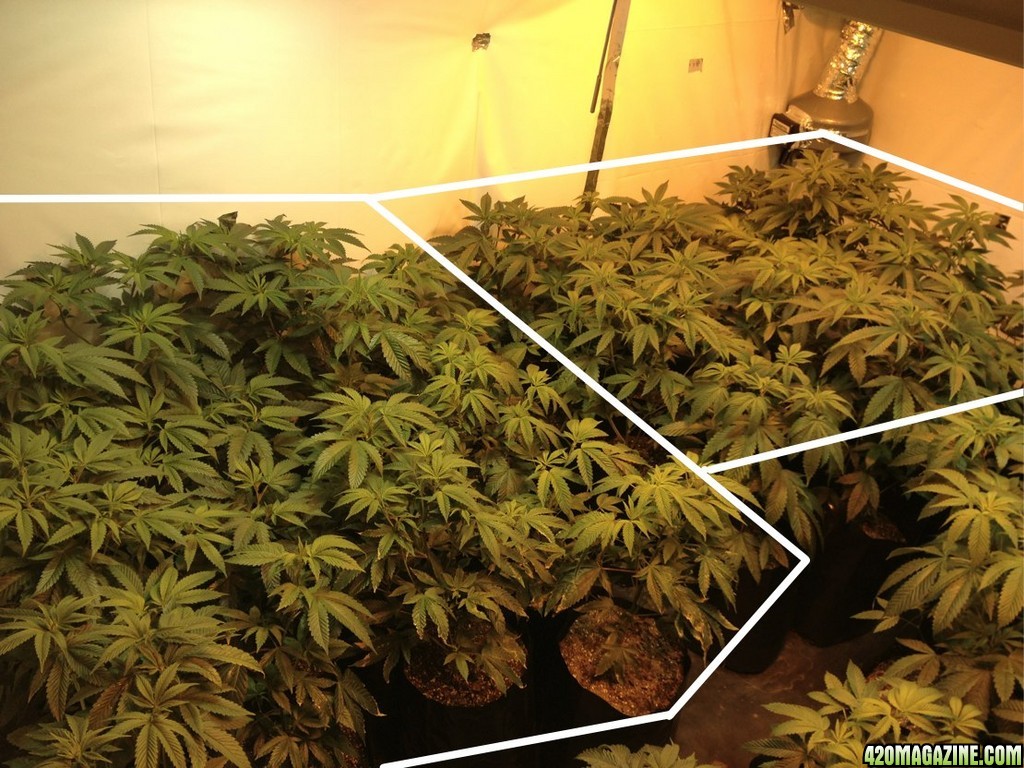
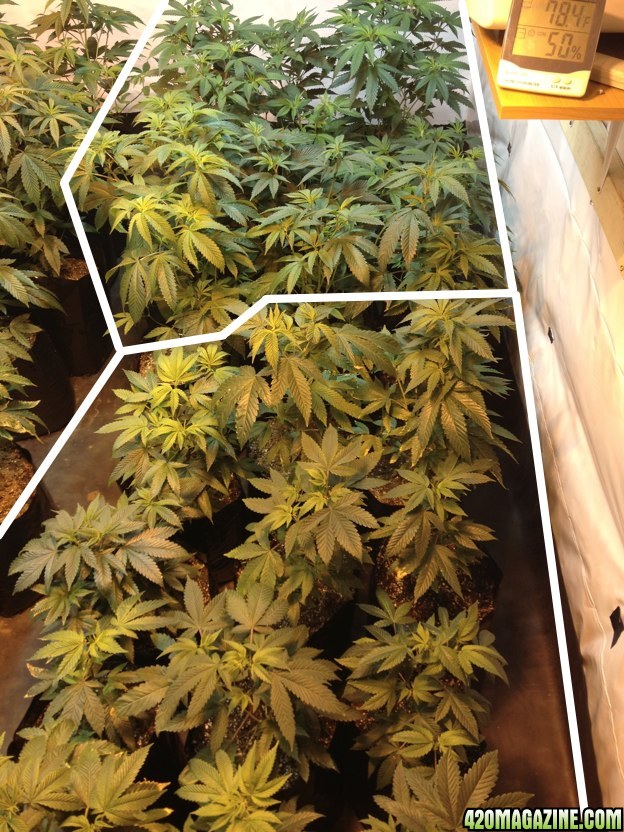
Yeah I honestly don't think giving them zero nutes helped, but it gave me a good idea to know how I should go about things next time. Flower room was drying buds so the slower growth has definitely helped in that aspect but it's getting effing way too crammed in there.

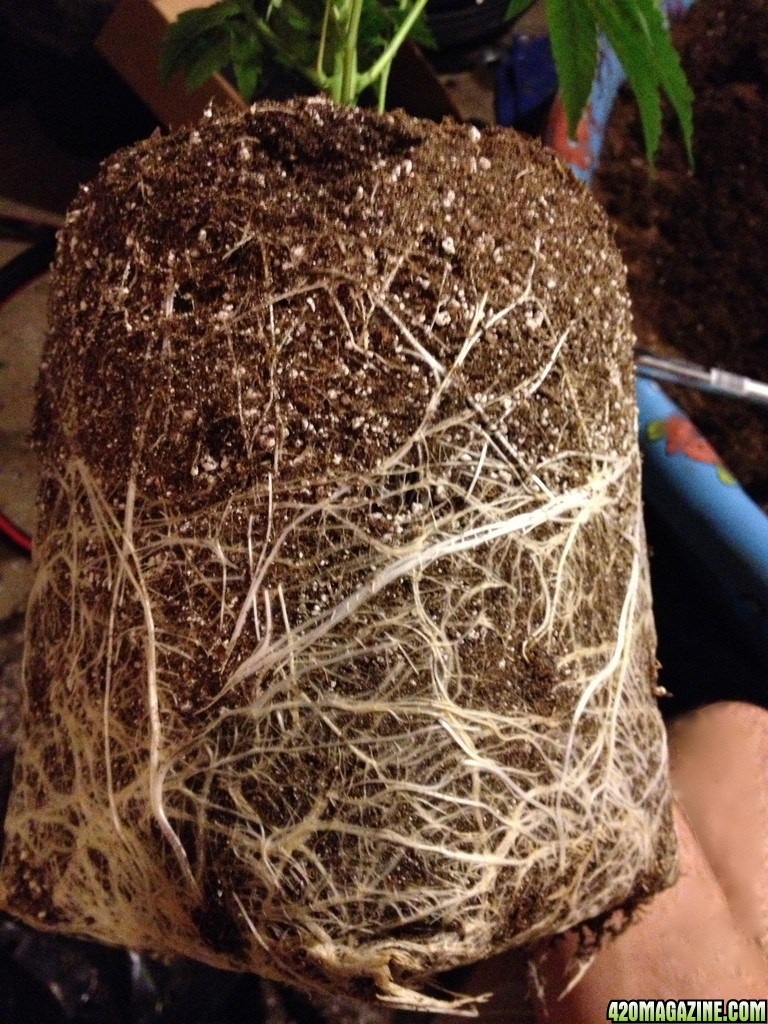
I haven't sprayed with anything yet cause I'm on 24/0, but I was thinking of spraying them right before moving them into the flower room/transplant. They are in 1/2 gal containers and average height is 20" so I should really transplant soon lol. Just been super busy and don't know what order I should do this in? The flower room is done drying but I am still tweaking some things but it will be ready tomorrow. Would you think it's okay to spray, transplant, then hit them with darkness for 1st time of their lives or is that too much stress at once?

I was actually using gyozym and silica for a while but when Corey asked what additives I used he said to ditch them. Didn't ask why but did it and problems slowly faded. I've seen people get crazy results with both products but I don't know if I'll use them till I can do a grow without nutrient problems lol.


Bro, I can more than see how busy you've been!! That is just nuts to hear that you got 2 jobs, and are pulling through with the "reno"!! Bravo man, seriously. I can only imagine what your plants are going to look like now :morenutes::morenutes:

Thanks bro!
It's been a tough few weeks I'll tell ya.
But I'm sure you exactly how it can be.

I'd spray them anytime now, then transplant. But give them a few days in that same room to recover from the re pot.
When they're showing you they're "over it" bring them down to the flower room and give them their 24 hour darkness there.
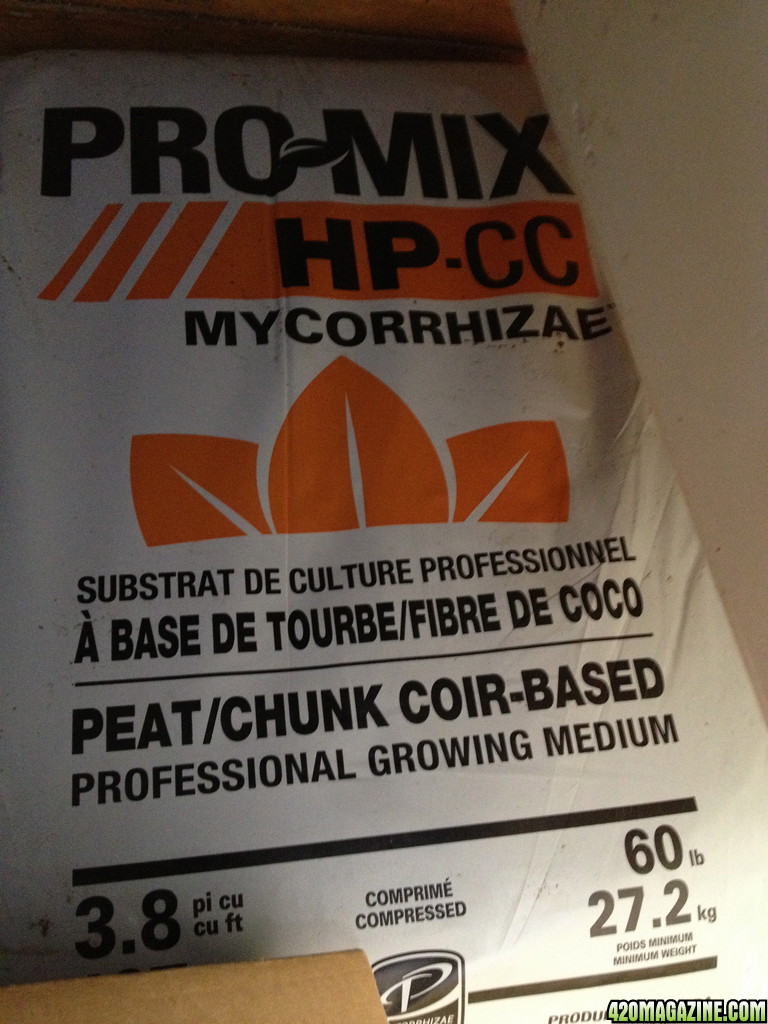
I would condition the new soil with either some a 1/4 strength nute, or diluted enzymes like grozyme and B vitamins (superthrive) with RO water.
This will really diminish the time it will take them to feel comfortable in their new pots.
I transplanted again this way the other night, and yeah they drooped a bit, but 2 hours later were right back up. And the next morning, they were way happier than they were before the transplant. :cheesygrinsmiley:
I know I've suggested this to you in the past, but I feel it's really important to give them some of exactly what they were getting pre transplant.. Then they won't be all, "what the hell!!?". It's like slipping them into their own favorite larger comfortable sweater that they know and love.
If you have given them their first BPN feed already, just dilute that same feed and use it as a soil conditioner to wet the new soil.
They'll love you for it.
:passitleft:
 
I have 15 minutes on the computer so I better be quick. Life is going faster than speed of light right now


Shotta...You were right buddy. I was very tired a couple weeks ago when I put up the ducting and did a shitty job at taping the reducer on real good. Put my hand on the other side and it was shooting out air. Thank you x10 for saving my ass bro.


Vick...You always give great advice man thank you so much. I soaked em with neem before bringing them into the room and had the soil pre-charged with 75% nute strength (they seem very hungry now but I did go over board. Next time is definitely 1/4-1/2 like you said). Thanks for everything bro. I think it really helps that were local so you know exactly what I'm going through lol
 
Need to flower these ASAP as I barely have any space. Turns out this is PK not BK...super sorry for the let down lol but I just found out. Still need a couple more days to adapt to 18/6, HPS light, neem spray, transplant and environment change (different rooms) but overall I'm a lot more pleased with this round.


P.S...Corey, love your nutes a lot man. Just that smell of the Seaweed is something else lol. Couldn't imagine your organics :laughtwo: But I do bet they are fantastic :roorrip:


New medium this time
IMG_084517.jpg


A little late but live and learn
IMG_084813.JPG


left box is under a light, as is the right box
IMG_085017.jpg


bottom under a light, top under a light. Bottom box was transplanted yesterday and all others a day and a half ago
IMG_085121.jpg
 
I also have 4 different thermometers reading different temperatures, all within arms width lol. Seems like every new/different one I buy reads a different temp!haha I have that one you see in the last pic saying 78.4f that just mind boggles me. I one behind it that reads 74.5f. I have 3 at canopy level, 76f, 74f, and 70f?? lol. Weird thing is that is actually feels pretty warm in there but all more ducting is working better? And I have more clean 65-68F temperature coming it at all times
 
Update...


I got a new job for Health Canada which I'm pretty excited about. However, it looks like I really won't be able to keep a journal active until the new MMPR takes place. If it doesn't get moved to abandoned journals, I will only be able to post updates every couple weeks with everything that's going on, in fact, it could go up to a month without an update so I might reconsider some things. It has always been a dream of mine to work for HC (r&d not pharma) but I never imagined it would happen this soon. If all goes south for the new Gazette, this could very well be my last journal. I hope you all understand but I really have to jump on this opportunity.
 
Great news for you my friend!!
That's awesome to hear that things are going your way.
all the best to you in your future journey's
totally understand the dedication that's going to be involved with the new gig.
Just make sure you stay in touch buddy.

and if you get a free sec to cruise around, I just started a new journal if you wanted to peep it.

:high-five:

Vick's - OG Kush & Ambrosia Grow - Coco-GH-HPS-Wiw!
 
Thank you very much Vick for everything you've done. I'd really like to smoke a bag with you in the summer when life slows down. Can't say I know anyone in person that has the modern knowledge that you do and I'd really love to learn from you (besides what I've already learned from ya!! lol)


Yeah man this new job has pro's and con's but I always pass down on good opportunities so it's time for me to change my ways. I won't be able to even vape until around 10pm every single night but I will keep busy so that helps. Will definitely keep in touch though buddy! 100%

I won't be online very much, but would be honoured to see your fantastic new journal!! You always strive higher and higher bro. :Namaste:
 
Just have a quick moment but have some news for you guys.

super busy as always but have decided to start planning the new rooms. I've decided that I'll journal every grow, but updates will be done about every 3-4 weeks. I am building 2 new rooms. Will be going with four 600's in each room. Will be doing some blueprints tonight and will post pics and see what you guys think? This will be a very large project compared to last but the construction is already done. I just need to figure out light layouts, air cooled or bare, ac size, dehu size, hydro or soil etc...
 
Would be superbly honoured if I could get your input on all this brother. I tried that google sketchup shit but I didn't have time to watch the vids and so yeah...couldn't figure it out too well lol.


I just use a mac app that was 99 cents lol but I can get the jist of things drawn.


Funds won't be anywhere near last time. I'm hoping to get all the equipment for about 6 grand (8 lights, ballasts, bulbs, fans, filters, co2, ac's, etc) but obviously it will be a little more.

Here's some quick sketches of what I'd like to do for both of the rooms (same size), so let me know what you guys think/would change? I also forgot to draw dehu's but they're will be a 50 pint in each room


Over head
skitched-20130328-215024.jpg

............................................................................................... .420mag logo is covering my door lol


Side
skitched-20130328-221231.jpg
 
Yeah that program google sketchup is pretty rad, but you have to have a few hours to screw with it..
I like your design. And don't see much wrong with it.
Maybe have the can filter mounted from ceiling or on a high shelf to get it up and out of the way.
I know you're planning on running an AC in each room. But having your scrubber up high will also help to extract the hot air that's rising from the room and not suck out the cold AC'ed air and CO2. But you'll probably be using timers to cycle with your fans.
From the first photo, I assume the bottom right closet is where you're intake will be coming in?

Have you seen Cola Monster's setup?
It's a kick ass flood and drain hydro system with two lights and one 4x8 table.
he's running AC, dehuey, CO2, full room controllers, res under the table.
It's a beautiful thing..1
You could do something similar, but have two tables side by side, with an aisle between them.
peep it!:

Cola Monster's Silver Haze and Super Grape Ape Hydro Grow

You would get some seriously fast growth no doubt!
I think you should ditch the soil for these next ones and get back to you're roots!
I know you've got some hydro experience brother, why not use it!
And with BPN in your res? you'd be pumping out some beautiful buds.
:thumb:
 
Yeah man I tried with the sketchup for a couple of mins but just thought fuck it lol. Just for future ref did you use the first template?

More I think about it, the more I don't want to exhaust/intake. I can maybe rig up some way to cool the lights with outside air so that a 15k btu ac should be able to keep the room cool.


I just checked out buddy's setup and damn man that looks awesome. It's a fantastic system, and he really started to get good results, but it still scares me to have nutrients sitting under light for that long (long for me lol). I really want to try something different but effective and cheap. I really, really like the Under Currents but 3g's is a lot for that lol. I found a good couple videos on a dude that makes his own for $600. The only thing I can't get here is the Uniseals...like buddy lol. I've called every hydro store in town and no one has em so it'll be about a month or two till I build 4 of these


This is not my original post. I am re-posting it for my own educational/building purposes.
- 2x 110 litre air pump - 260
- 2x 350gph inline pump - 240
- 36x 2'' uniseals & 2x 1'' Uniseals - 220
- 2x 2'' Bulkhead w/ hose attachment to drain res - 30
- 2x EZ Stor 8 gallon containers w/ lids for epicenter's - 55
- 16x 5 gallon painters buckets w/ Net pot lids - 160
- PVC elbows / connections - 45
- 2'' PVC / 1'' PVC - 30 ( always best to have extra )

Each system cost's just a bit over 500 bux for a 8 bucket system w/ res and everything. Putting them together with round buckets is a little trickier but can be done with patience.


All in all I built my 2 systems for about half the price of what Current Culture charges for a ridiculously over priced system Nothing against them, Just my opinion.

Here is a little do it yourself thread I started in another forum that is basically a ghost town, I will add it to here. If anybody else wants more Direct instructions for assembling this system I would be glad to help.

Things you will need :

* Uniseals 2'' ( How many will depend on how big your system is, 2 per bucket & 2 per reservoir )
* Uniseal 1'' ( only need 1 per reservoir )
* Bulkhead 2'' w/ attachment to thread into the bulkhead that will accept garden hose with on/off ctrl
* 2'' PVC ( again how much you need will depend on large your system is )
* 1'' PVC ( how much you need will depend on large your system is )
* 5 gallon black buckets (sidewall must be thick This is very important to get a good seal)
* DWC Net pot lids ( how many you need will depend on the size of your build )
* EZ Stor 8 gallon rectangular bin w/ lid ( acts as your epicenter AKA resivoir )
* 4x 2'' PVC Elbow joints
* 1x 2'' PVC T Joint
* 1x 2''- 1'' Converter for center hole of T-joint to run your 1'' return line
* 1x 1'' On/off valve
* 1x 1'' elbow
* 1x 1'' T-Joint

* 3'' Holesaw bit for your 2'' Uniseals
* 1 3/4 Holesaw bit for your 1'' Uniseal
* vaseline to lube your Uniseals for inserting the pipe

* Water pump * INLINE PUMPS ONLY * ( Dont use anything smaller than 350gph )
* Air pump ( Commercial grade works best if you can afford it )

This is all I will be posting for now, Along with a few tips because I simply cant think how to word the construction of this yet. I feel it will be easyer for you all who are interested to ask questions on how it is constructed then I will be able to explain those portions.

* Your holesaw holes you cut must be perfectly round take your time gently shave off the leftover burs with a razor blade make it clean ! this counts for a leakproof system.

* Your holes must be lined up perfectly with each other so the pipe that comes in the front is the same position as the pipe that comes out the back, Or else your system will be wonky looking & leaky We found with standard painters buckets 3'' from the bottom of the bucket & 3.5'' from either side into the center was a perfect distance to place your holes for your pipes.

* YOU MUST cut your pipe on an angle if you want any chance at getting it in. If it is cut on a sharp angle it is very easy to slide it in with somebody bracing the inside of the bucket around the uniseal.
This angle also allows for better water flow & less chance of the roots clogging your system.

* It is best to do a dry run & assemble your system without any plumbers glue at first make sure everything fits, Once you are sure of it plumbers glue all your joints. Dont skimp out ! make sure to do it fast & line everything up before it hardens. This stuff cures quick.

* You will likely need some 1'' pvc joint pieces for your water pump. I used danner magdrive pumps the front will require a double threaded piece that goes in & a screw on w/ 1'' socket on the other end then you can plumb your pipe right into it. The top of the pump only needs the screw on w/ 1'' socket on the opposite end. DON'T FORGET TO TEFLON TAPE all your threaded joints.


This hole system with top of the line pumps should run you around 500-700 dollars, Compared to double or triple that from current culture or another builder of these systems. If I can do it, So can you Just take your time & be rewarded with the most cutting edge hydro system to grow your medicine with.
 
Holy shit guys my brain is just fried lol. I am literally driving myself crazy trying to lay this all out.

I have 2-3 months to build everything. I'm either going to try and copy jon's top feed/ebb setup or make my own ebb n flow. Sucks that I was short for cash a while back and sold my flo n gro but it's in the past and I learned quite a bit from it. Cheap is my main goal, but quality is a necessity and a floods suck so I'm staying away from silicon as much as possible. Xlr8 has a very interesting dwc/flood and drain setup for his vegging plants and I might do something like that. He still has it on a timer, but have the Fill fitting on a couple risers to have it act as dwc when not flooding. I have two 10x10x8 rooms with 3x1.5x8 closets in each one. $500 max for each room is the goal.
 
I will also be helping a friend with his outdoor grow this year. I have six 4 foot plants vegging right now and they will be planted May 1st. He's really busy with his own stuff so I said I'd try to do as much as I could (basically just preparing). I will be using 20 gallon contractor bags as pots I think and just promix (dug into ground so roots stay cooler). I will either be doing OC+ or AN's future harvest outdoor blend. He won't have time to use liquid nutes so we're just going with time releasers. I'm probably just going to buy some huge contractor bags, pitch fork holes in the bottom and wrap the whole thing in like a potato sack (like Bdirtwarrior does, to keep roots warm on cold nights/mornings). I personally have never grown anything besides veggies outdoor so this will be very new to me. I'm just very lucky that another Medical Patient is taking these 8 plants under care for me or else they'd be in the garbage. I was very fortunate enough to see his medical garden last year and it was filled with 10 ft tall monsters so it'll be exciting to see what he can do with these! :high-five::Namaste: If any of you have experience with outdoor grows in Canada or anywhere else in the world, please if you have any special pointers I'd love to hear em
 
Bizzy bizzy!!
Awesome about the outdoor bro.
I'm planning to do a few this year too.
Been a few years since I've done any outdoor, but I'm just going to throw them in the biggest pots I can find and put them on my deck..
I'm going to build a little overhang to shelter from the rain.
Might re-use some of the Hercules air pots but they might expose the roots too much to the cold.
When I grew some outdoor monsters a few years back, I did just what you're talking about. Dug huge holes, line them with contractor bags with holes in the bottom and filled them up with Sunshine mix!
Just used tap water, and fed them nutes every few weeks or so.
They grew 8 feet tall, and gave me about a LB each. The main stems were as think as my arm. Because I didn't have them covered, I came home when it was raining one day, and the weight of the wet buds caused them to snap at the stem and fall over. Harvested them on the spot.

What kind of time releasers are you going to use?
 
I got the day off today, so I get to be on the computer for a full 45 minutes :cheesygrinsmiley:. I'll be getting up to par with yours and all other subbed journals today.

That's great to hear you have experience with outdoors bro. I can't imagine you growing anything less than perfect so I can't wait to see what you can do outside :high-five:

Yeah I was in a dilema about pots or in the ground but I'm just thinking screw it lol big pots are pretty expensive for me. Did you use time release or liquids? I was thinking about the Heavy Harvest from AN. I've seen some pretty good results with it even though it is pricey and nonorganic but seems very simple.

I am very worried about the rain though. The worst thing, is these 6 plants are all PK lol...So I might have to pull these inside every night and finish them off before fall to try and prevent the unavoidable pm.

That's great that you still saved the harvest though bro! I've heard so many bad stories lol...Damn though I didn't think of that..I'll have to cover them, which is another headache and expense lol
 
A full 45 minutes!
Damn!

Believe it or not I used Dr Shultze liquid ferts with my outdoor and it worked like crazy.
I did, add dolimite lime to the soil mix, along with extra perlite.
Haven't had any experience with time releasers yet.
But I was thinking I'm going to use BPN's 2 part for my outdoor.
Figured why not, I'm getting em for free anyway, and when I use BPN again for indoor, I'll be ordering the full high yield kit..
Yeah, rain is a big issue in B.C. for killing crops.
3 of my friends have had their shit wiped out due to 1 heavy rain.
When those colas get drenched in the fall, if they don't snap because of the weight? bud rot is close behind..
So make sure to jimmy up some kind of covering.
 
Back
Top Bottom