

First off before i get this thread started i want to thank Stratlogic's amazing setup and construction threads. They have been a great blueprint to start my own grow efficiently and effectivly. Also both my Propogator and DWC hydro bucket were created using his build pages.
Stratlogic's Hydro Closet ScrOG Grow
_______________________________________________________________
Alright so to get this journal started i should give a brief layout of what i have done so far. I should add that this whole build was built more or less as fast as i could with as low of a budget as i could. So im sorry in advance if it seems i was cutting corners. I was trying to make this happen as quick as i possibly could. So with that being said enjoy the journal.
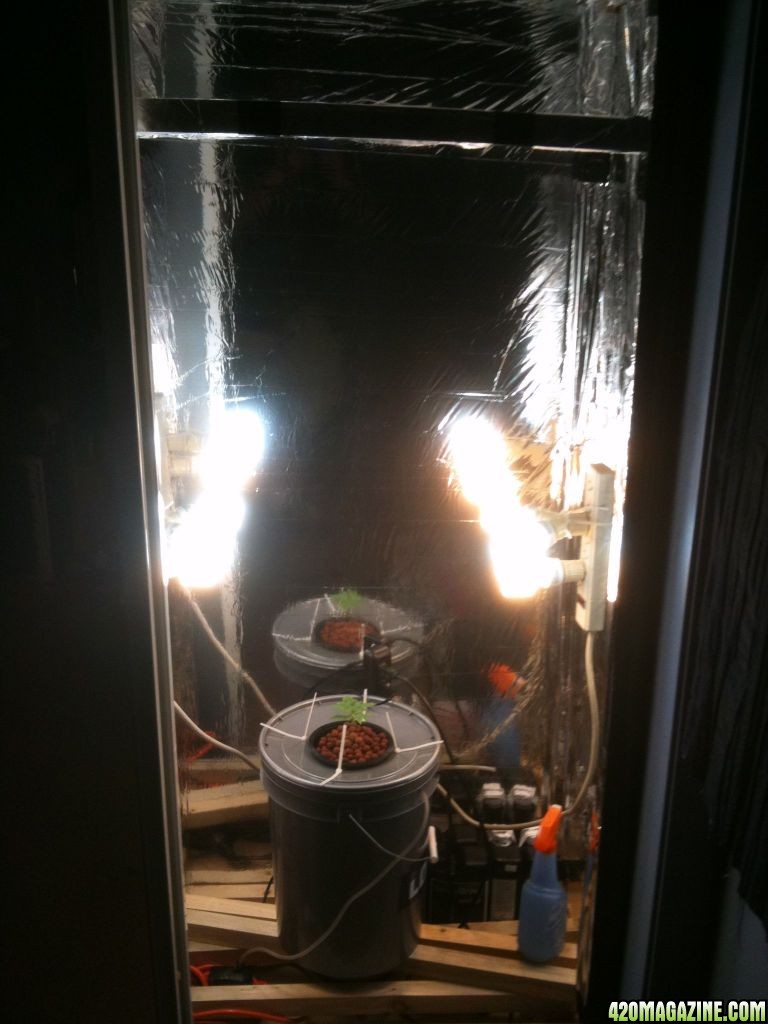
Due to odd depth and shape of my particular closet i have a slightly thinner grow box depth wise but close to double the length wise then Strat's. So im working with a slightly different area. The closet itself is made from MDF board and 2x2's. I used mainly home made brackets, liquid nails, and carpentry screws to assemble it. I also lined the inside of the box with mylar by using elmers spray adhesive. And for those of you who dont know space blankets are mylar. I bought 3 of them from the store for around 2 bucks a pop. Ide say they are around 6' to 6'4" long since height matters the most to a build. As my growbox is 5 1/2 feet tall i only used 2 1/4 blankets to line the entirety of the inside. This could easily be done with 2 since i had made a front board i had wanted to convert into a hinged door. This was cut out because of space issues.
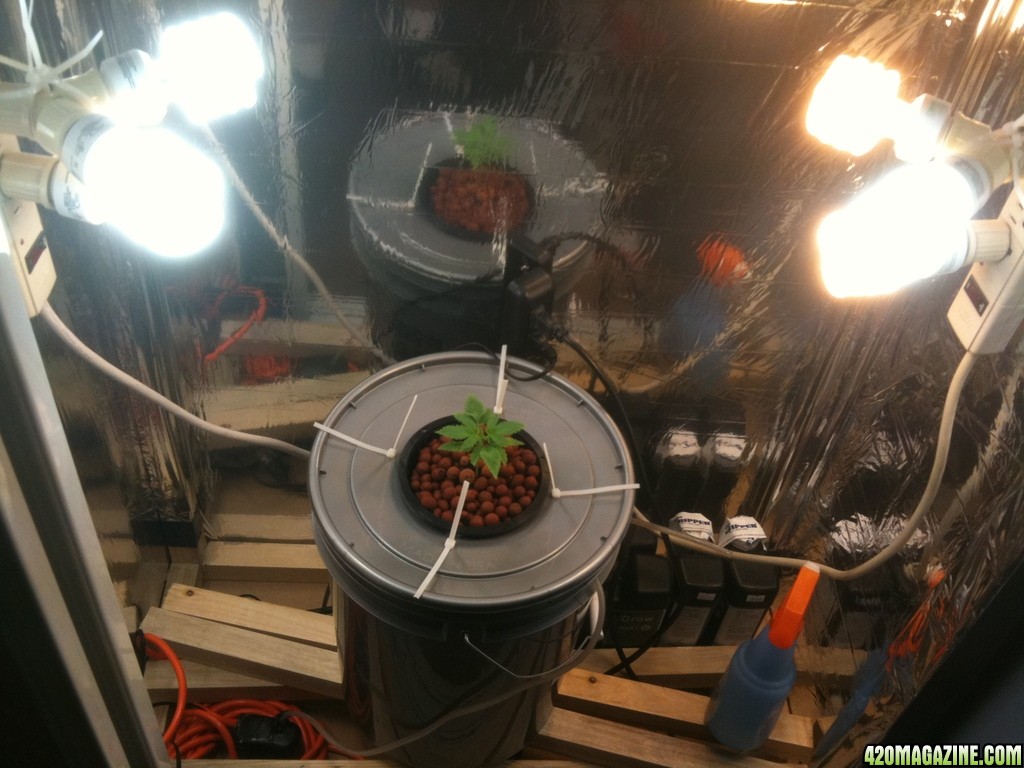
Im using the 6 CFL's of different spectrums with 3 on each powerstrip on each side of the box like Strat recommended in his build. I can vouch that they are indeed perfect for the Veg cycle from all ive seen with them. I plan on using the idea of putting both a 400 MH and 400 HPS lights in to further open up my flowering power. But for right now only CFL's are installed.
I made one of the propogators from the build thread to jump start 4 seeds at a time. I know this might seem like a waste but this way i can pick the healthiest of the group and if any others sprout sell them to any other local growers i know might be interested. Because who will turn down an already growing plant for 10-15. In any case i put mine on a 30min ebb and flow timer and vola all 4 sprouted wonderfully and after a week of sucking up water (And waiting for the rest of the supplies to arrive.) they just sat there chugging along. It was great to see the little guys do so much with a peat moss plug and plain water. In any case by the time transplant time came along the roots were nicely spread throughout the bottom of the propegator. Sadley i diddent get any pictures of them while they were together. But i plan on watching the one i chose closely.
_________________________________________________________________
Days: 1-7 Propogator
After using the Damp papertowel trick to get the taproots to show i then placed the little guys into their peat moss pellets. From there i placed them into my 2.5gal Ebb and Flow propegator which was on a 30min on off timer. This was with only water and under CFL light 16/8 to help induce females from what i have read. All 4 seeds took off and within 2 days all had sprouted to the surface. By day 4 all pellets had roots comming out the sides. By day 6 the roots had grown together at the edges of the lid where all the water would sit. By the end of day 7 they were prime for the final pick.
_________________________________________________________________
Day 8 Transplant
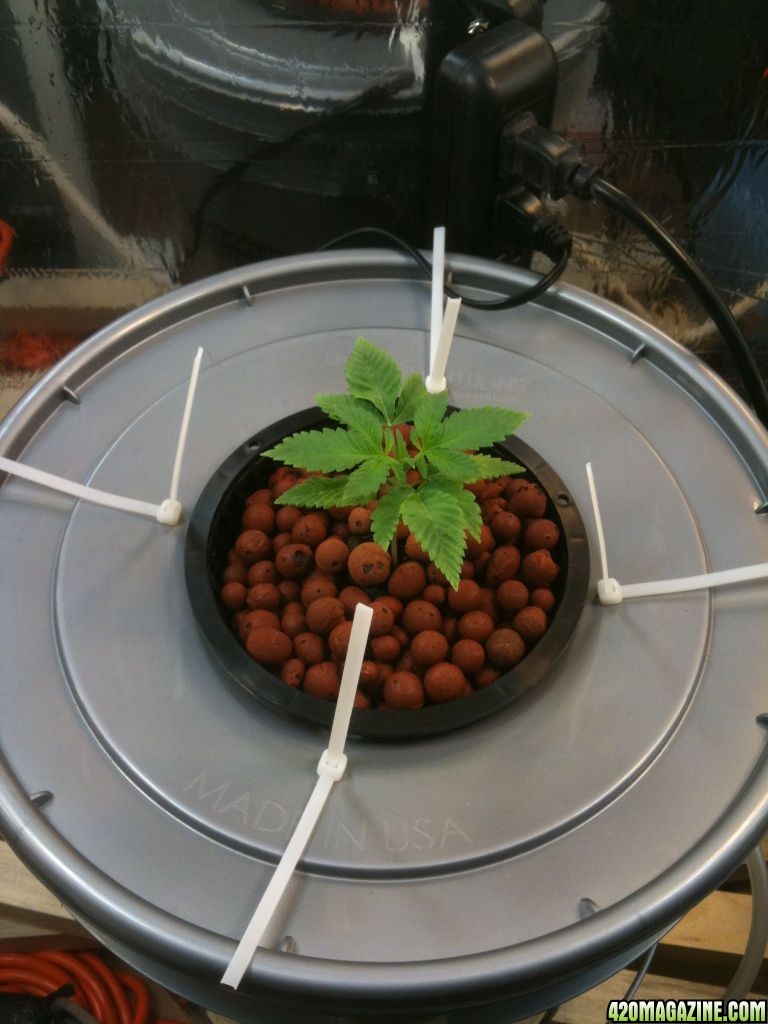
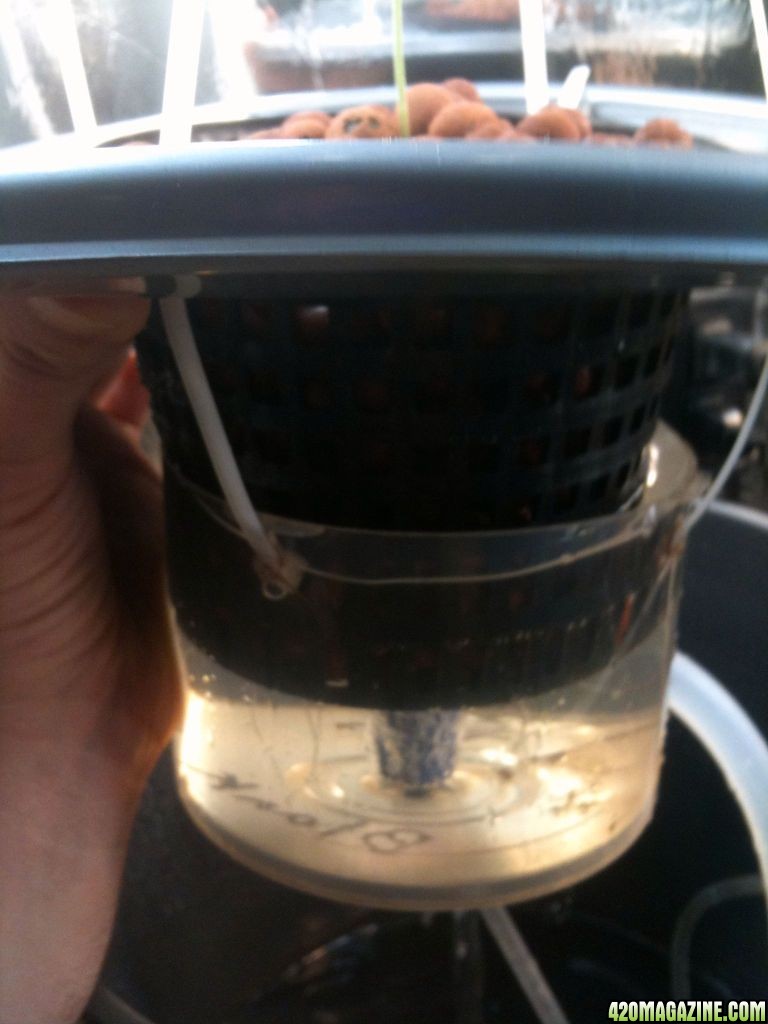
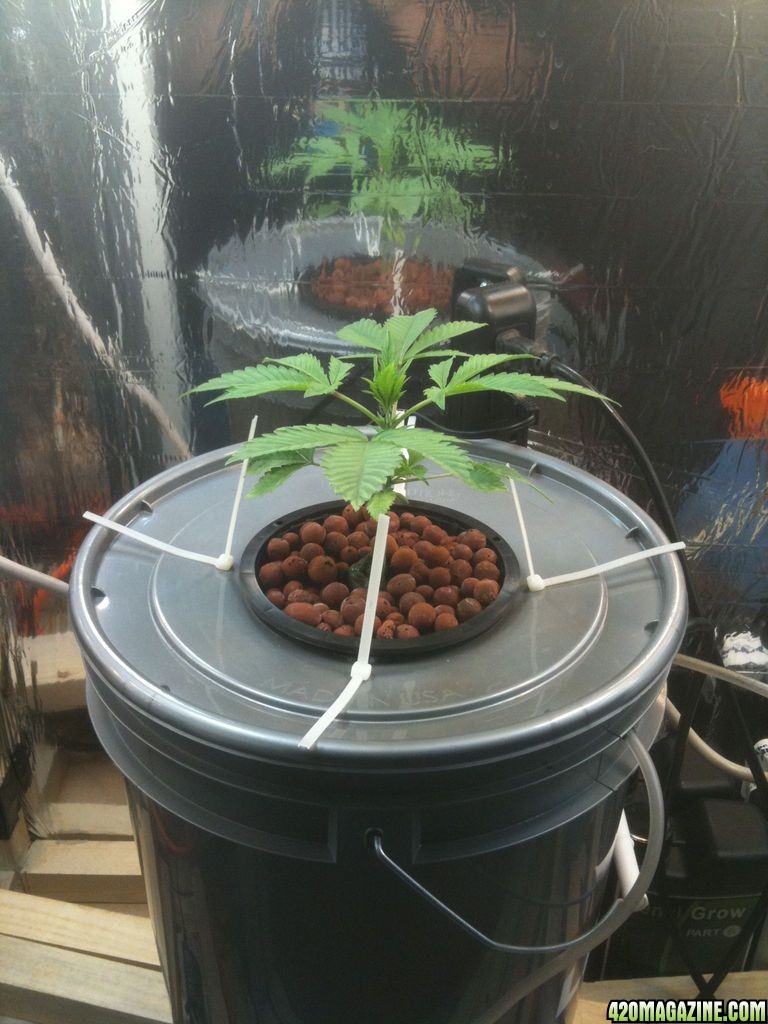
When i finally chose my cantidate her root was a good 6-8in starting from the underside of the pellet. This was an optimal length as it passed fully through the net bucket into the airated and nutrient filled solution. I used Hydroton pellets to fill my basket and around the plug. And am using advanced nutrients A&B grow for my veg cycle. I added 1 1/2 Tbsp of both A and B to 2gal of water. And i decided to use not only an airstone but a water pump that airates the water as well. I submerged the basket half way in for this starting phase so i could give the roots a chance to take off and grow through the growing medium and left it as that.
_________________________________________________________________
Day 9
The plant has taken to the pot like a fish to water. The overall width of the plant has already boosted by about 1/4 the size overnight. Its amazing to see it do so well.
_________________________________________________________________
Day 10
The little guy is deffintly rolling with the punches. I can see the bottom most leaves slightly yellowing around the edges while the top leaves are growing bigger and wider every time i see them. So it seems i might have shacked it slightly with the nute heavy water but I think its going to pull through like a champ.
_________________________________________________________________
Day 11
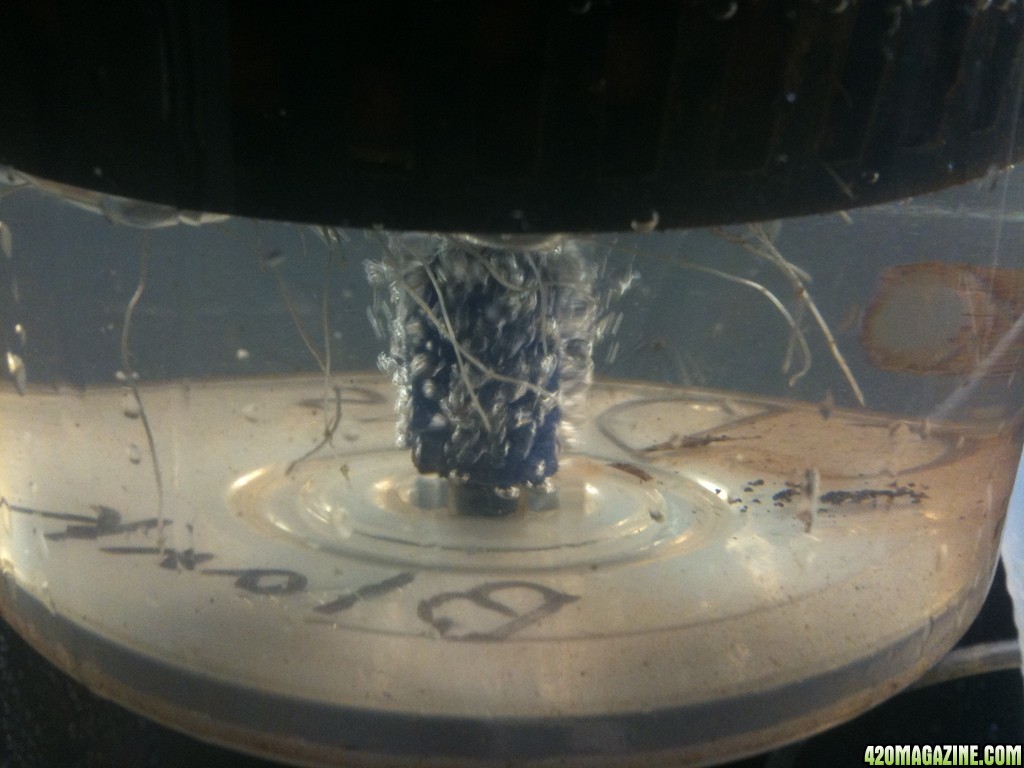
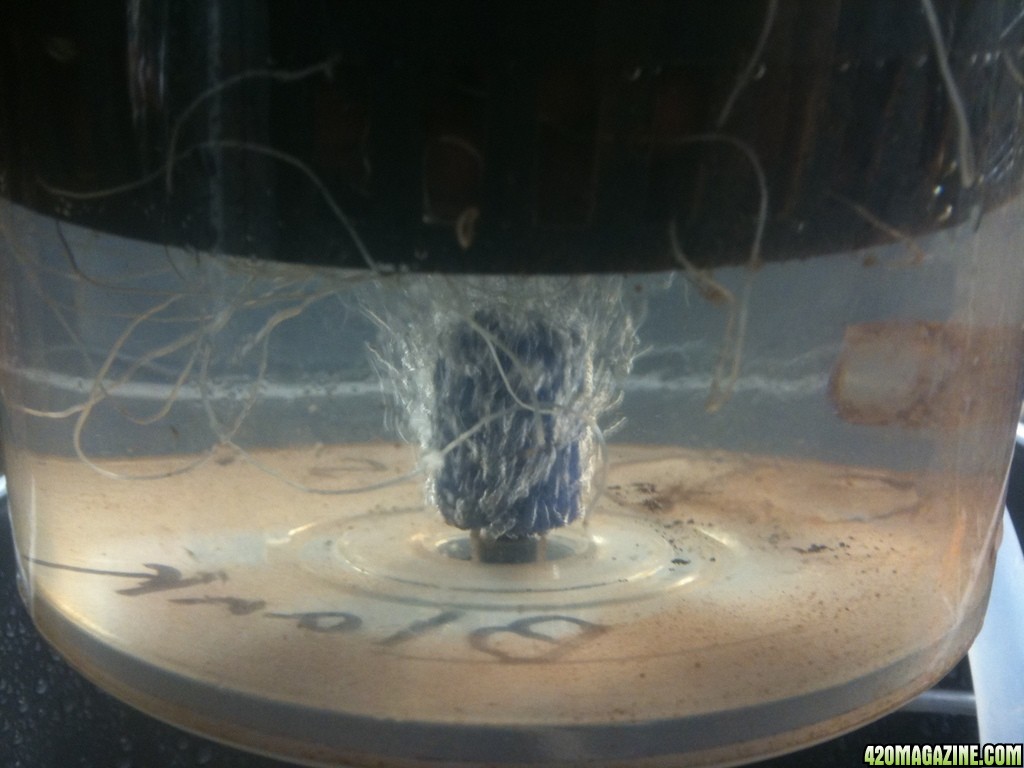
Wow, the little guy has made progress that i couldent even imagine. I looked underneath into the top resivoir where the inital taproot was submerged and there are now numerous healthy white roots comming through the medium all over. I see great things in this ones future.
_________________________________________________________________
Day 12
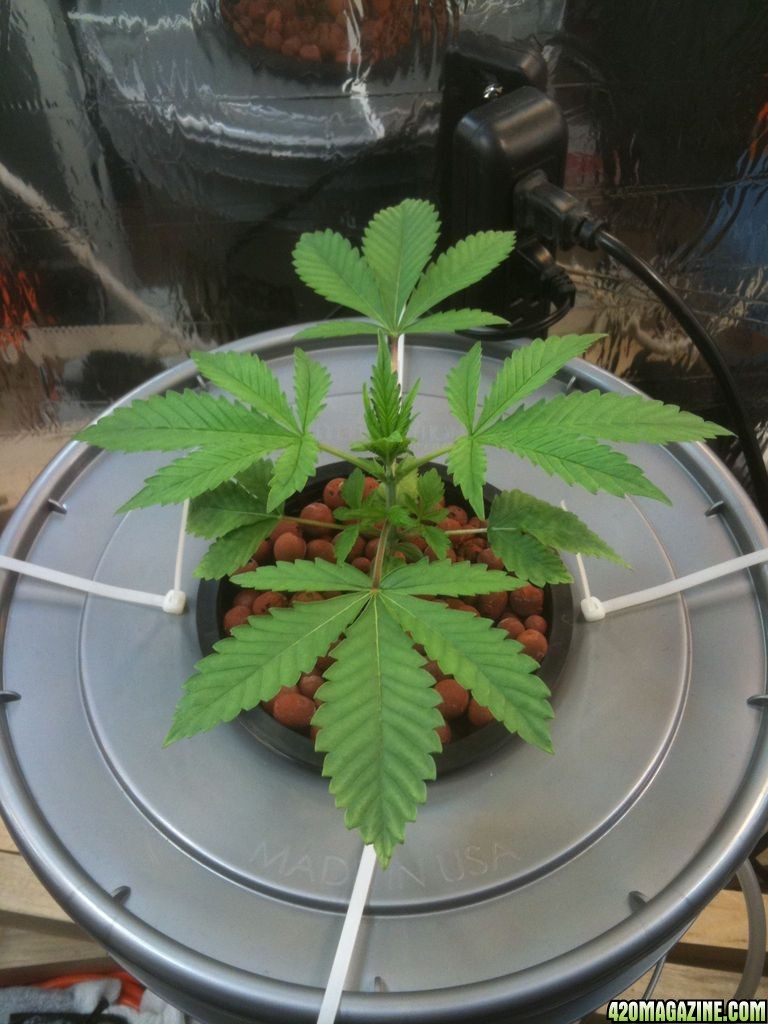
Bushy little one is definitly through the woods and on its way to the grandmas curing box. I can only hope that it will be female and not a hermie or male. But for right now im just happy its working so well.
I feel like an overprotective father always checking in on his daughter. But its so fun to be like "I swear its bigger then when i looked an hour ago." Im also trying a little hands on with the plant itself while not messing with the nutrients or anything of that type. I take time to fan the leaves and clean anything i see off them and to use my light meter for the best lighting location. I also have a constant shuffle of music on for it while i am out. Ill try it all for a higher yield and healthier girl.
_________________________________________________________________
Well guys im glad to finally get this Journal up and ready to go. Ill have pictures to upload later to add to the grow process. And im also going to try and take weekly pictures to watch her grow and to actually see it. So thanks for tuneing in. Much more to come.
Stratlogic's Hydro Closet ScrOG Grow
_______________________________________________________________
Alright so to get this journal started i should give a brief layout of what i have done so far. I should add that this whole build was built more or less as fast as i could with as low of a budget as i could. So im sorry in advance if it seems i was cutting corners. I was trying to make this happen as quick as i possibly could. So with that being said enjoy the journal.
Due to odd depth and shape of my particular closet i have a slightly thinner grow box depth wise but close to double the length wise then Strat's. So im working with a slightly different area. The closet itself is made from MDF board and 2x2's. I used mainly home made brackets, liquid nails, and carpentry screws to assemble it. I also lined the inside of the box with mylar by using elmers spray adhesive. And for those of you who dont know space blankets are mylar. I bought 3 of them from the store for around 2 bucks a pop. Ide say they are around 6' to 6'4" long since height matters the most to a build. As my growbox is 5 1/2 feet tall i only used 2 1/4 blankets to line the entirety of the inside. This could easily be done with 2 since i had made a front board i had wanted to convert into a hinged door. This was cut out because of space issues.
Im using the 6 CFL's of different spectrums with 3 on each powerstrip on each side of the box like Strat recommended in his build. I can vouch that they are indeed perfect for the Veg cycle from all ive seen with them. I plan on using the idea of putting both a 400 MH and 400 HPS lights in to further open up my flowering power. But for right now only CFL's are installed.
I made one of the propogators from the build thread to jump start 4 seeds at a time. I know this might seem like a waste but this way i can pick the healthiest of the group and if any others sprout sell them to any other local growers i know might be interested. Because who will turn down an already growing plant for 10-15. In any case i put mine on a 30min ebb and flow timer and vola all 4 sprouted wonderfully and after a week of sucking up water (And waiting for the rest of the supplies to arrive.) they just sat there chugging along. It was great to see the little guys do so much with a peat moss plug and plain water. In any case by the time transplant time came along the roots were nicely spread throughout the bottom of the propegator. Sadley i diddent get any pictures of them while they were together. But i plan on watching the one i chose closely.
_________________________________________________________________
Days: 1-7 Propogator
After using the Damp papertowel trick to get the taproots to show i then placed the little guys into their peat moss pellets. From there i placed them into my 2.5gal Ebb and Flow propegator which was on a 30min on off timer. This was with only water and under CFL light 16/8 to help induce females from what i have read. All 4 seeds took off and within 2 days all had sprouted to the surface. By day 4 all pellets had roots comming out the sides. By day 6 the roots had grown together at the edges of the lid where all the water would sit. By the end of day 7 they were prime for the final pick.
_________________________________________________________________
Day 8 Transplant
When i finally chose my cantidate her root was a good 6-8in starting from the underside of the pellet. This was an optimal length as it passed fully through the net bucket into the airated and nutrient filled solution. I used Hydroton pellets to fill my basket and around the plug. And am using advanced nutrients A&B grow for my veg cycle. I added 1 1/2 Tbsp of both A and B to 2gal of water. And i decided to use not only an airstone but a water pump that airates the water as well. I submerged the basket half way in for this starting phase so i could give the roots a chance to take off and grow through the growing medium and left it as that.
_________________________________________________________________
Day 9
The plant has taken to the pot like a fish to water. The overall width of the plant has already boosted by about 1/4 the size overnight. Its amazing to see it do so well.
_________________________________________________________________
Day 10
The little guy is deffintly rolling with the punches. I can see the bottom most leaves slightly yellowing around the edges while the top leaves are growing bigger and wider every time i see them. So it seems i might have shacked it slightly with the nute heavy water but I think its going to pull through like a champ.
_________________________________________________________________
Day 11
Wow, the little guy has made progress that i couldent even imagine. I looked underneath into the top resivoir where the inital taproot was submerged and there are now numerous healthy white roots comming through the medium all over. I see great things in this ones future.
_________________________________________________________________
Day 12
Bushy little one is definitly through the woods and on its way to the grandmas curing box. I can only hope that it will be female and not a hermie or male. But for right now im just happy its working so well.
I feel like an overprotective father always checking in on his daughter. But its so fun to be like "I swear its bigger then when i looked an hour ago." Im also trying a little hands on with the plant itself while not messing with the nutrients or anything of that type. I take time to fan the leaves and clean anything i see off them and to use my light meter for the best lighting location. I also have a constant shuffle of music on for it while i am out. Ill try it all for a higher yield and healthier girl.
_________________________________________________________________
Well guys im glad to finally get this Journal up and ready to go. Ill have pictures to upload later to add to the grow process. And im also going to try and take weekly pictures to watch her grow and to actually see it. So thanks for tuneing in. Much more to come.


")