Lemon Paradise's Little Garden - Perpetual

it's all good GD, I was just joking,, hehe,, glad to see you got everything in order...

It's the control freak/virgo in me. I have to have EVERYTHING I need before I need it before I start. Even stuff that I may need just in case I am getting before I start.

Did you see my new florescent ballast I appropriated from the garage??? Will that work for mamas and clones???
 
I saw your question on chrome's J..lol I think that would give you a good mixed spectrum using the 2 flouro's for the mom's/clones..

They are only 40 watt floros though. But cool white and soft white. So I figure I'll have to have them really close to the girls. Or I could use them for side lighting later on...
 
Man, your garden looks just delicious. Like Granddadie77 said in his J, MJ pics is the new porn hehehe.:yummy: Another question for you ... what's the significance of the molasses and what dosage do you use?
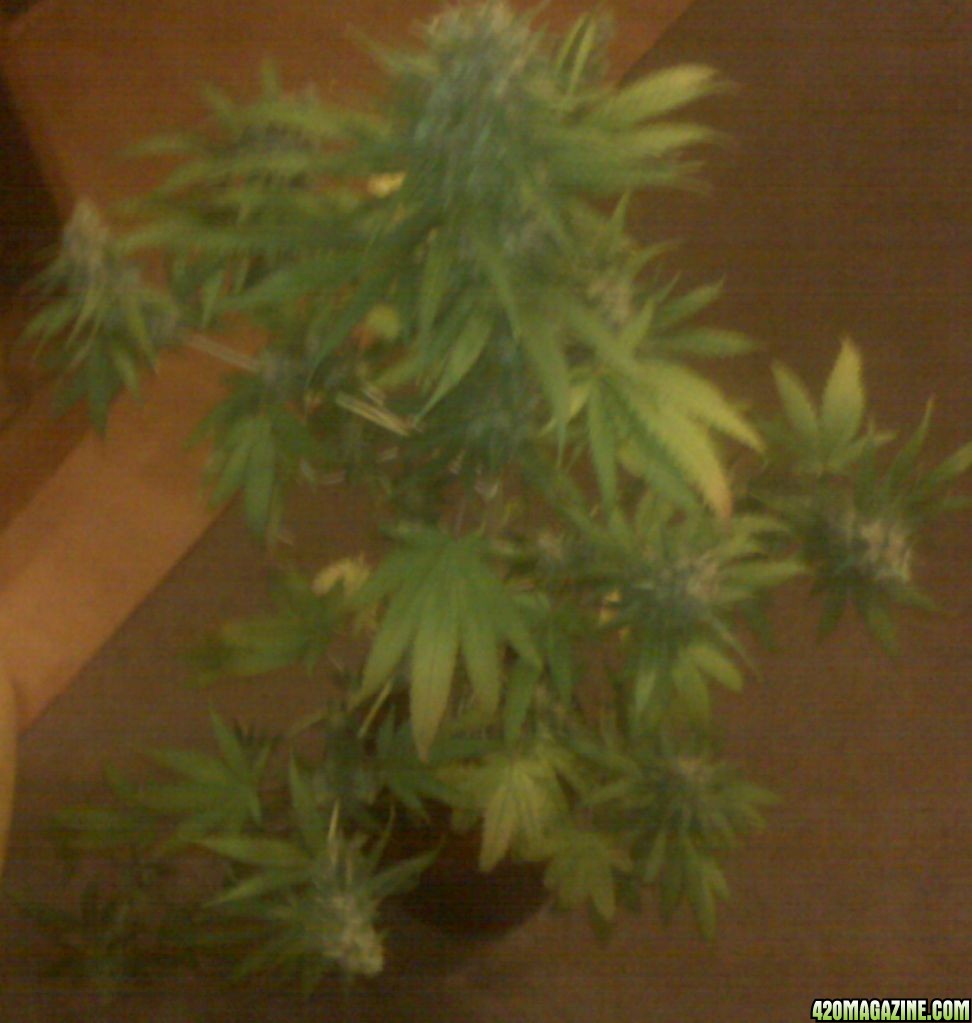
 
been reading a bit on it,,, in a nut shell.. it adds carbs, or sugars for the plant to utilize,, one of the biggest energy draws is fruit(bud) formation, so this gives them a boost to send to the buds,, and helps with the root zone, (I foget exactly what,, just that is helps... hehe) some use it later in flower, and some use it from the start of flower,, start low, like a tablespoon per gal, and work up,,, I think I saw Pit mention 1 or 2 oz per gal,, but I have not been steady with it,, so I only give a bit, like 1 to 2 tblspoon per gal.

It does have to be unsulphered,, I bought some black strap off the internet,, I have heard of people using regular old grandma's from the grocery store,, but I don't know the difference,,,,

Didn't know about using it for flowering girls but growing up on a rum producing island, I do know a thing or two about molasses. Forget Grandma's, it is watered down for the American palate and is crap. You can get some good organic unsulphured blackstrap (and molasses from real sugarcane should be organic) from Sunflower Market or other such wholesome store.

I'll start with your words here as a guide while I do additional research. Did I already say I really like it here ... friendly, real friendly folks.:yahoo:
 
We ended up cutting down the 2 g-13 yesterday. We were planning on this weekend, but noticed a small spot of rot on one bud,, so we took them both. I think we may even have been the culprits,, I think when we saw the first batch, that we looked the g13 over, since it was the next in line,, and we may have inadvertantly spread the mold spores.... once trimmed up, I jammed the ratshack microscope into a bus to take a look, and see all cloudy with some amber,, so I think it was ready anyways. The colas were way heavier than any bud harvested yet,, they were real heavy... WE just took the two out,, closed the room,, after harvest we changed, and did not go back into the room at all,, so we will do a complete look through today.

I saw a great post on another site about bud rot,, I will have to cut and paste it,, it had a lot of great info..
 
found it...
Bud Rot (aka: head rot, mold, or its evil name Botrytis Cinerea) is sinister…. insidious, after months of TLC and caring for your babies this invader stomps through your garden decimating one bud after another.

I have had the misfortune of fighting Botrytis twice, my first fight was a resounding loss with only a 1/4 of my crop salvaged and at that my babies had to be pulled way too early for anything to be construed as really potent.

At one point during my initial dealings with Botrytis I started pruning out one offending bud after another in succession, determined to save my girls. Some 10 quarter sized buds over 6 plants were cut out; pleased with my results I relaxed a little thinking that the worst was over. My pleasure was short lived as week later I was greeted with all the buds above and below the original 10 sites now infected PLUS another 12 new sites were found on surrounding branches. I freaked out!!!… Seeing another 30 more buds succumb to waste I panicked ran into the garden with my scissors….

After the carnage was over and a woeful, immature yield I was determined to be better prepared with Knowledge on the next grow. Little had I know at the time but the manner in which I handled the initial Botrytis infection had only compounded the infection exponentially!


Knowledge


botrytis%20cycle%20big.jpg


Fig 1: The life cycle of Botrytis


According to an article of the Ministry of Agriculture and Lands website:

- Botrytis can survive/over winter as mycelia and/or sclerotia in the soil, on plant debris, and on perennial plants and weeds for several months or years.
- Grey mould thrives under cool, wet condition and often establishes on dying tissues. It produces masses of dry spores called conidia that are air-borne. Spores are readily dispersed by wind (air currents), over-head irrigation or sprays, tools (particularly pruning shears & knives), machinery and workers. An epidemic situation can happen from air-borne spores that can infect soft tissues, cut-wounds and blossoms when moisture is present.
- Botrytis spores can remain dormant for 10 to 12 weeks within leaf scars made at pruning. Such spores can be triggered to germinate by low light, plant stress or shift in fruit load. Spores germinate and penetrate the plant surface within 5 to 8 hours on wet/moist plant surfaces at the optimum temperature of 15-20°C. A new infection can produce visible symptoms and masses of spores (conidia) within a few days, thus a multiple cycles of infection can be expected in a given growing season.

You will notice that one of the key “ingredient” to Botrytis germination and spread is always moisture.

After much investigation it became clear that a multipronged attack on a Botrytis outbreak was needed with the ideas of inspection, removal and prevention. Also as Botrytis predominately (read not 100% of the time) needs moisture to facilitate infections some form of moisture/humidity control was needed along with consideration of antifungal and nutritional support.

These are the tools that have really helped me stem (not totally eradicate) the bud rot tide:


1) Inspection

I cannot stress this basic routine type maintenance enough, right from your very, very first flower be vigilant inspecting your babies every day (if you can afford the time). The sooner you identify bud rot in your garden the better your chances of combating it. To inspect for bud rot I have adopted the following procedures:
a. When you are inspecting your girls for bud rot it is a good idea to gently pull on the large fan leaves to manoeuvre your viewing angle of the buds, don’t bring your fingers into the stem or to the bud as you may accidentally pick up spores on your fingertips and inadvertently spread the infections to otherwise healthy buds during your inspection.
b. While inspecting the buds carefully check the tiny pin leaves at the base of the buds, they should be green and healthy, any evidence of brown/grey/twisted/dying leaves (see Fig 2) at the base of the bud is a bad sign.
c. Test by gently pulling on one of these leaves, if the pin leaf is healthy it will resist and remain intact, if the leaf pulls off or merely “slides” out and the base of the leaf is brown/grey and squishy…it’s more than likely bud rot.


fig 2.jpg


Fig 2: Pin leaf and base of bud infected with Botrytis. This infection site is relatively new and just starting at the base of the bud adjacent to the plants main stem (crotch area). The pin leaf pulled away from the bud without any resistant during inspection. Left unchecked this entire bud would be mush in a matter of days and the infection would move on to both the stem and the adjacent buds


d. Gently pull the suspicious bud away from the main stem and look into the “crotch”; this is where bud rot starts between the warm protective flesh of the bud and the stem where airflow is minimum and moisture is more apt to be abundant.
e. I find it very handy to carry coloured yarn while I am inspecting buds for infection. Nothing is more frustrating than finding an infected bud, leave to collect your surgical tools (more on that later) and having to spend 5 minutes re-examining your canopy of buds looking for that one tiny infection, mark the culprit with a piece of coloured yarn.
f. Should you test and identify (see 1a) an infection immediately stop any further inspections, mark the spot with a piece of yarn and wash your hands before continuing. Touching the infected site could cover your fingers in millions of microscopic invaders. As part of my bud rot arsenal I bring both a bucket of hot soapy water for washing and a bottle of alcohol for further disinfection. Clean your hands than continue with inspection.
g. Once all the bud rot sites are identified it’s time to move on to surgery.


2) Surgery:

Ok so it’s not really surgery, but in some bizarre way it kinda feels like it…..

Equipment:
- Damp paper bag
- Damp paper towel
- Sharp Scissors / Exacto Knife (washed and sterilized)
- Q-Tips
- Latex Gloves
- Alcohol
- Copper Sulphate Solution
- Sodium Bicarbonate Spray Solution
- Bucket of Hot Soapy Water
- Dry Paper towels
- Popsicle sticks (good for gently prying a bud away from the stem for taking a peek.)

fig 3.jpg


Figure 3: Botrytis war kit (more on the ECO spray later in this article. The Copper Sulphate solution is in the purple coloured bottle.


Note on the Copper Sulphate Solution: A friend of mine is a Chemistry teacher at the local high school and I had him derive a Copper Sulphate solution @ 160 ppm (he knows the math and it’s been far too long since I was in Chem. 101! I am pretty sure he mixed at a ratio of 2ml of Copper Sulphate into 1 Liter of Distilled Water, however please see disclaimer. Copper is a common element in many antifungals. As a side note Botrytis is a very common threat to grapes I am sure anyone could enlist their local high school chemistry teacher to help derive a similar solution under the guise of “saving ones grapes”


When inspection reveals a botrytis/bud rot infection I immediately take the following steps;

a) Latex gloves, it just seems like a good precautionary measure to wear these while “operating” on a Botrytis site.
b) A dampened paper bag to contain the offending bud once it’s removed and it’s billions of spores. (Nothing like carrying an infected bud out of your garden in your bare hand while it showers your healthy babies with deadly spores.)
c) Dampened paper towel. I use these to cover over the healthy area immediate around the infection site to capture any dislodged spores while I am removing the infected bud.
d) Sharp Scissors washed in hot soapy water and dipped in alcohol. (I am not 100% sure if alcohol kills these spores but it seems a reasonable precautionary measure).
e) Once I have the above in place, I gently pull/bend the stem slightly so as minimize disturbing the offending bud, slide my scissors tight to the base of the stem and snip off the bad bud, it is gently put into the damp paper bag.
f) I than treat the “infection” site and associated stem area with a copper sulphate solution on a Q-TIP to help stop the Botrytis from literally crawling up or down the stem to the next buds.


fig 4.jpg


Fig 4: Q-tip dipped in Copper Sulphate Solution to be applied to the stem and surrounding area after removal of the infected bud.


g) The paper bag with the offending bud(s) and the deadly brood of spores is carried far away from the garden and if not burned placed in a trash bag.
h) After each infection removal WASH! Clean your tools and your hands.
i) It is imperative to monitor the cleansed site every day to monitor the overall health of the area and of course the surrounding buds for any contact infection. (The yarn trick works very well to keep track of these sites).


3 Preventions

Increase your airflow in and around your girls, this includes:
a. Some gentle LST (low stress training), by opening up your plant as it grows with ties and strings creating greater air gaps between adjacent plants, stems and branches. The more air flow the better, it helps to control bud rots friends (humidity & dampness). As a side benefit a stem trained even slightly horizontal, IMHO, produces a greater quantity of larger nugs than a vertical stem. Additionally the nugs grow upwards and away from the stem therefore eliminating the nasty “crotch” area where lack of airflow and moisture tends to live.


fig 5.jpg


Fig 5: An LST set up. A simple coat hanger bent into a horseshoe with garden ties makes a versatile set up to gently pull a branch away from the main stem and open up the plant to increase airflow.


b. Later on when the buds are larger I have actually gently inserted straws or large wooden tooth picks/straws between the stem and the bud creating a small air gap.


fig 6.jpg


Fig 6: To increase airflow around the entire bud and eliminate a “crotch” where airflow is minimal and moisture can be trapped a Popsicle stick works well.


c. Trim and clean the foliage under the plant specifically taking off non-productive stems and yellowing leaves. Open the airflow below your plant. Constantly clean out any weeds and dead debris under your girls where Botrytis can continue to live as a mycelium.

fig 7.jpg


Fig 7: Pretty basic maintenance, however cleaning up the undergrowth and keeping the ground clean helps to increase airflow. Note the fan blowing through the opened up “tunnel”.


d. Fans: This is somewhat a debatable issue as Botrytis spores can become airborne; however another reference article I had read indicated that the Botrytis spores are much more inclined to propagate via a moisture carrier (rain, irrigation, sprays). My thinking here is to remove morning dew as fast as possible in order to lower humidity and trapped moisture on the plants. As a side benefit my girls love the constant breeze and the stems have thickened nicely!
e. Shake your Plants: After a heavy rain has finished you will want to remove as much moisture as quickly as possible, shaking your babies (quite violently too) will help to do this. Make sure you don’t throttle the poor girls or snap a stem….
f. Watering: It goes without saying but water/feed first thing in the morning, this will allow the soil and your plants to absorb a fair bit of the moisture and help reduce evening dew. For example, Tomatoes are never watered in the evening for fear of promoting Mosaic Virus, your girls should be treated the same.
g. Don’t finger your buds unless you are inspecting It’s always nice to look over your yield, but don’t just play around with them, leave them alone you might inadvertently be spreading millions of Botrytis spores. Use the fan leaves to manoeuvre the stem/buds
h. I did not do this in this years grow, (although I really should have!). To help break/interrupt the Botrytis life cycle in next years grow I will not only thoroughly till over the garden bed but pre-treat the soil with an a garden antifungal well before the girls are planted. Hopefully this will help remove any over wintering mycelium.


4 Other Ideas on Combating Botrytis

a) Foliar Feeding with a Seaweed/Kelp Extract: I read an excellent article from another post. They illustrated that plant stresses, (including flowering) can cause the plant to consume all of its available K in mere hours and that a lack of K in a plant structure lowers its ability to combat disease. His recommendation was to foliar feed plants under a Botrytis attack with a seaweed/kelp extract containing K. The stuff really stinks however my girls really seemed to enjoy the applications of seaweed extract and it’s relatively cheap (ECO SPRAY @ $8.00)

fig 8.jpg

Figure 8:Seaweed Extract Spray


b) Sodium Bicarbonate solution: Many reference articles point to a sodium bicarbonate solution made from Baking Soda (make sure the baking soda does not contain other elements, just Sodium Bicarbonate), 1tsp Baking Soda, ¼ tsp Neem oil and 1 qt warm water, shake well to mix in the Neem Oil while applying with a mister. I use this method and it seems quite successful.
c) Potassium Bicarbonate Solution: Additional articles make very positive reference to a solution of 15 –30 ml of Potassium Bicarbonate mixed into water and applied with a mister. As common and relatively safe as Potassium Bicarbonate is, I have yet to locate a local source for trials
d) Citrus Spray: Another article made reference to a citric based spray; I have yet to locate a “garden” citrus spray other than a floor cleaner for trials.


5 Some Reference Photos & Discussion

This year I encountered 5 initial (primary) Botrytis infections some 2-3 weeks into flowering; the buds were about the size of quarters. These 5 sites were removed in the method outlined earlier. Some 3 days later I discovered another 2 separate primary infections (in all likelihood I missed these in the previous inspection or they weren’t as developed as the others). Another 3 days later I had to remove the upper and lower buds from 2 of the primary infection sites and remove the top of one cola. To date the count is 12 young buds as compared to the previous year of some 40-bud infections before I panic harvested! The point to make here is that after removing the initial infections you are not out of the woods as guaranteed there will be additional primary and secondary infections that will undoubtedly develop. Be dedicated to your inspections and persistent with infection removal and treatment. (Since writing this article I have had no new outbreaks in over 9 days now).

To further demonstrate and reinforce the point of catching infections as early as possible please see both Fig 9 and Fig 10.

Fig 9 is from a primary infection site and is one of the locations that I had to also remove the upper and lower bud, note the nasty brown scarring on the stem. This (IMHO) primary site had time to penetrate into the stem and start “crawling” both upwards and downwards, hence the loss of the upper and lower bud as the infection had reached them before I treated the area.

Whereas Fig 10 shows a secondary infection site that was discovered in the very early stages of the infection (to see the actual bud taken from this area please see Fig 2.) Because this infection was caught very early the stem is still vibrant, unscarred and other wise healthy, no further bud loss has occurred at this site

fig 9.jpg


Fig 9: Shows a previously removed primary infected bud and the remaining stem scar from the infection. The infection had time to penetrate into the stem, which allowed it to infect both the upper and lower buds, which ultimately had to be also removed. The stem was dabbed repeatedly with a solution of Copper Sulphate; notice that the remaining buds around the site are still healthy and intact.


fig 10.jpg


Fig 10: The infection here was found in its very early stages and removed. As compared to Figure 9, the stem was not yet penetrated (the stem was still treated with the Copper Sulphate solution after the bud was removed).


fig 11.jpg


Figure 11: Unfortunately the very top bud had to be removed on one plant due to an infection , however doing this has salvaged the rest of the associated buds.


fig 12.jpg


Figure 12: Just plain Nasty!!!!!…. A secondary infection caught in the very early development; note that infections always start down in the “crotch” of the stem and the bud.


Closing

Too often I have read postings of bud rot advice that simply state to cut the bud or the stem right out, this is very poor advise as merely hacking out bad buds without some infection control measures will create additional infections and minimize your final yield, that is if additional secondary and even tertiary infections don’t make you hurriedly harvest off you crop in a panic as I had.

It is a tedious and time consuming procedure to manage a Botrytis outbreak in your garden, treat it like a deadly virus (deadly mould) that is highly contagious, because it is! Fighting Botrytis requires patience and perseverance to not only salvage your crop but to see it thorough the remaining weeks to it’s maximum potential without prematurely having to harvest, approach the problem with patience, perseverance and caution. Don’t be discouraged by the onset of new additional infections and keep in mind that the loss of a few buds will save the whole garden and see it though to its full maturity is the goal.

(hopefully not breaking any rules for plagerism,,,)
 
Ah man, it got ya again? Hopefully that's the last of it with the better flow.

The garden look's great and it's gonna be a whole new journal when there in there full 12 megapixel glory. :)

Hopefully it will be just in time for some G13 pics.

Edit: Wow, I'm gonna have to come back and read that one in segments. :cheesygrinsmiley:
 
so, the two girls

IMG541.jpg

IMG534.jpg


cola's
IMG542.jpg

IMG535.jpg


various buds
IMG538.jpg

IMG537.jpg

IMG5361.jpg


shot after trimming one of the girls
IMG539.jpg

IMG540.jpg


all I had on me at the time was the blackberry,, so pics are kinda bad,,, but the buds looked great :)

The room is really getting on a roll now.. we probably do not have anything more to come out of the room for a couple of weeks now,, but the beg of september,, we have 4 girls slated to come out,, one a day for the first few days of the month,, should be great. Then we got the new girls,,,, coming up mid september,,, :yahoo:

Hopefully, the budrot spores did not spread to bad in the room,, and I will have to start looking for some solution... that copper solutions sure does sound like the stuff I got to combat tomato blight last year...
 
yeah pres,, it is a long read..lol but had a ton of info in it..

we got lucky on the g13,, literally only one spot, about the size of a dime,,, we got it early..
 
Good to hear. My room got a complete cleaning after I found it. Not quite as hard with four plants in there though.

Those buds are looking mighty tasty. They look pretty solid as well.
 
thanks pres,, if we find anymore spots ,, then we may need to do a room cleaning,, we will see,,

those buds were very solid,, I cannot believe how heavy they were..

oh,, and man, after the harvest,, left for a few minutes and came back,, the smell was outrageous,, I can't believe how bad it stunk,, the hallway, from about a 5 second exposure,, to his apartment,, where we cut her down, both reeked for hours,, had to febreeze the hell out of it...lol

walk into our grow room though,, and you cannot smell anything,, just a little ona,,, so, I would say that stuff works real good,,,,
 
zepplin,, I sent you a PM.. it won't let me post the name of the site,, it stars ti out,, and I would not want to post a link to another MJ site directly..

it is from roll it up (put it all together,,, no spaces) .org if you google bud rot, it will be like the 5th one down,, "bud rot wars"
 
Back
Top Bottom