Complete budjet grow under $50!

ganja guru

New Member
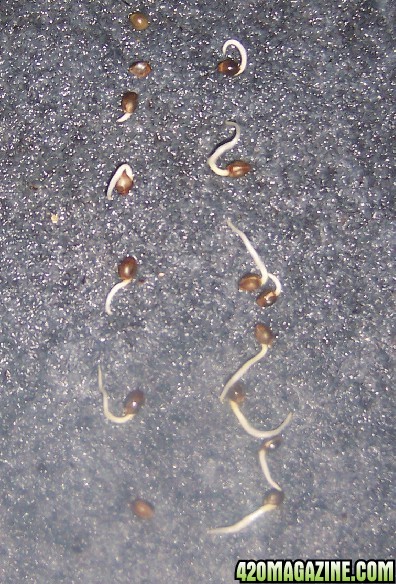
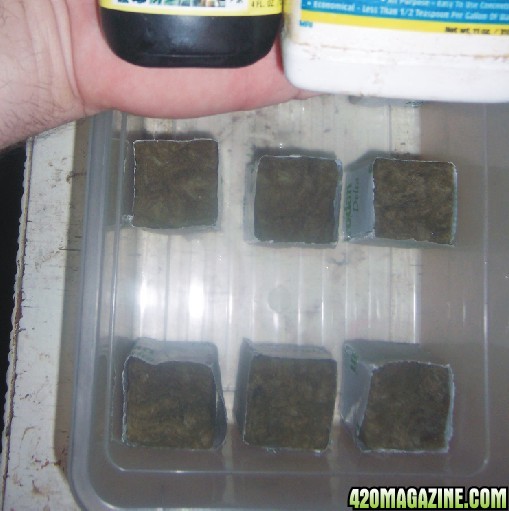
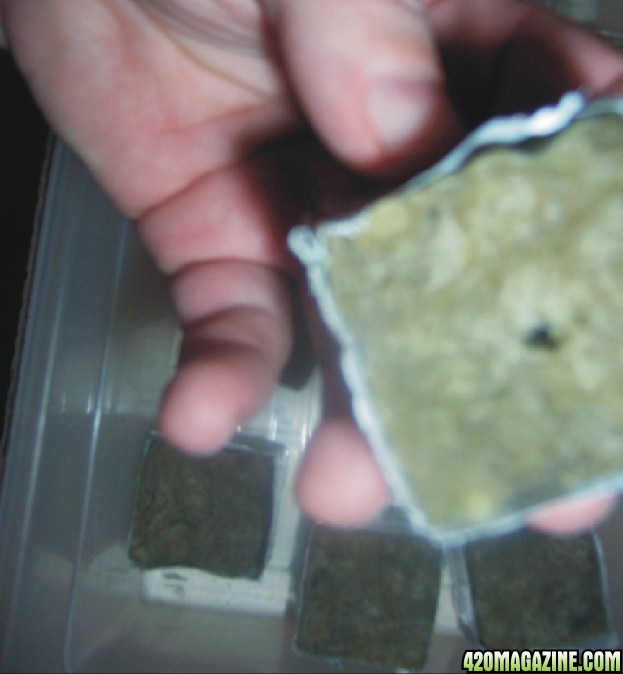
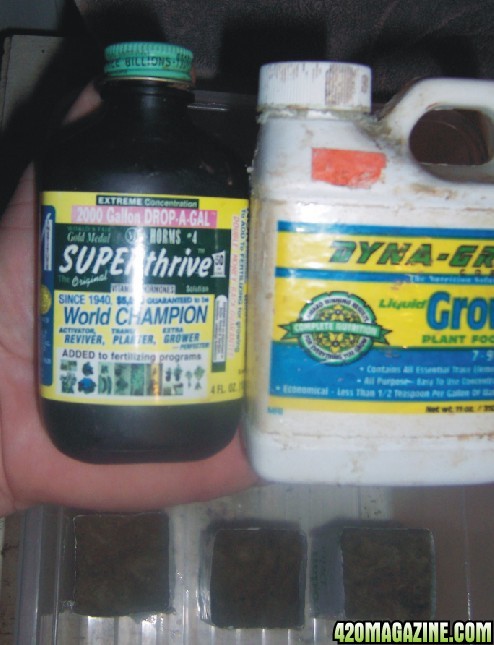
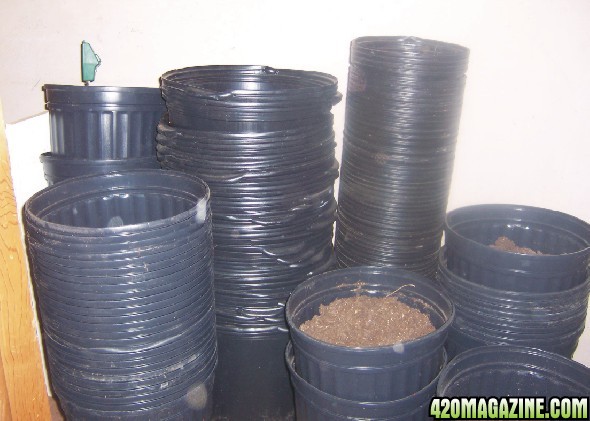
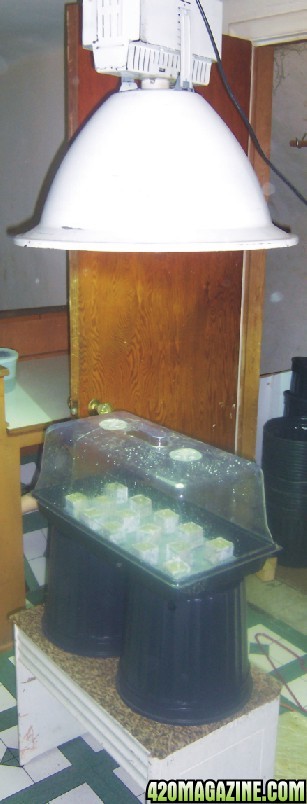
So on this journal were going to do a complete grow utilizing all of the cheapest methods we ever used that had good end results, not all methods we tried worked out good, while others did very well. My husband gave me fity bones ($50.00) to start a new grow and start converting our grow room. I know lights are going to be costly so that's a separate budget the 50 is for just the grow. We need to shop and see what's going on with cost these days but we wont be buying new lights as we really like the metal halide for veg and hps lights for flower we may get something like cfls for part of it we will see. as I said we already have great stuff to grow in and a grow room already set up but we are going to start fresh using this budget so were actually starting in our bedroom tonight until we can make room in our grow room tomorrow.

A bit about us and why change our stuff over:
My husband and I have been growing since March of 92, we don't know it all and there is always room for improvement and new things to learn all the time. We helped a friend in the area last year with his first grow I believe he posted a journal. We are asked by our friends all the time for help and again we don't know it all but with our experience and as often as we moved we have had experience with several different typed of growing from dirt in nursery pots to several types of custom made hydro grows. Were going to take this knowledge and start a new more efficient grow room.

Well with every thing going on and with this economy we are going to do a new grow using budget methods we had over the years that got good results. So we told the people we know to tune in and we will post all the info here for every one to read and enjoy and in some areas we may even need your help. With the new laws in Michigan were going to do a 12 plant grow from scratch using a budget to show how easy and inexpensive this really can be, you don't need $400 set ups and 2k in lighting u can do it yourself and have a great final product. we are also are going to try to utilize several passive types of watering to keep electric bills down to about only $50 a month and yes we have done this before. We need to save as much $$$ as we can these days so we are going to be changing all our stuff over as well on this grow and get back to basics.
 
This journal should help encourage peeps who are hesitating to grow because they think it requires a lot of money.


:nicethread:

Thanks that's what we want, and yea I know peeps who u say hydro and they assume 1000's of dollars and tons of time. That's simply not true any more and with cost of some of this new lighting we don't need 200 a month eclectic bills either
 
this post is actualy 24 hours old and the start of this was last night but i didnt get to post last night but after 24 hours we have 11 of the 14 seeds breaking open!!! they will need to be transferred tomorrow for sure but dont expect your seeds to open this fast we just get very good results or were lucky i guess.

First step cost about $8 so 42 left and this step is to germinate and sprout seeds, of course clones are better and we all know that out of 12 seeds that 6 will probably (hopefully) will be female so I will need to steal a few of my clones to complete the dozen but that will give u some of our cloning tricks as well in this thread.

We want to show how most get started and most people will start with seeds since not every one has friends with clones. So again with my budget I can't order any awesome feminized seeds. So what's the best deal? Bag seed of course, if u have some good bag seed from some good stock u can start with that. We have a few "northern lights" seeds from a friend and yes we have smoked it so we know it was good and we can confirm what it was we don't want to waste our time on just garbage and we wanted to change up from the strain we been growing for years and may order a new strain later who knows

To sum up what your about to read, we simply use a germination tray with large propagation dome sitting on a household heating pad. This is nothing fancy but has worked for us countless times and we get better results than other things we tried. It's very inexpensive and has great results not to mention a must for cloning; this set up even makes it husband proof lol and takes all guess work out. Read on for details.

Ok as I said we have good equipment and I do have small table top green houses for my seeds and clones but on a budget I wouldn't have those so were going tried and true old school for germination but I did get the green houses from wall greens for 10.00 on sale about 5 years ago. Those work great and u will get to see them when I clone but this set up I think works second best compared to the greenhouses we have but the green house is not much better this set up really works good

dome2.jpg


We had this dome and tray, but we went to the local green house today to price this stuff out and the tray was 1.95 and the dome was 5.99 for a total of 8.00 10 if u got the 2.00 mat for the tray. You don't have to get the mat but I had it u can substitute it with felt or a wash cloth or something else u may have. Some peeps use paper towel to do this but were using this we will lay out 18 seeds and try to get 12 to sprout. All I do it lay the seeds down on the mat and cover with a soft child's wash cloth or you can fold the mat over or do what ever works for you. We like this mat with this particular tray as the edges fall into the built in reservoir in the tray. That's why this tray cost $2 the regular tray without the res was like .95 cents but we like this and it comes in handy for clones and such it pays off believe me other wise u will need to build something for cloning and I will get into that later as I will be cloning my other plants in a week or 2

tray12.jpg


Also we use just a simple heat pad underneath it from around the house and never set above low. Its cold here in mich at this time so we need it some places wont need it or if your in a warm room you don't really need it so were not going to budget it in since it's a common house hold item especially if u ever had back pain! If u did buy one im sure there cheap, I know the seedling mats for this are $25 and I think this was only $10 at wall greens or we got ours for $2.00 at the church garage sale 5 years ago. We usually get germination to occur within 1-3 days set up like this and have good results using the heat pad but usually were using clones and have not done seeds in a long time.

heatpad.jpg
 
Ahhhhh...*contented sigh*...I remember the days of endless sunshine and horse-poop tea. Grew some of the best Skunk in the world with those two ingredients, both of 'em free.... ;) :rollit:

:peace:
 
Ahhhhh...*contented sigh*...I remember the days of endless sunshine and horse-poop tea. Grew some of the best Skunk in the world with those two ingredients, both of 'em free.... ;) :rollit:

:peace:

As they say the best things in life come free! but absolutely we tried stuff like that as well we too the "poo" put it in burlap and soaked or diped it in and out of a 5 gal bucket to get the goodie out and use that water, very good stuff and maybe i should use that instead of what i just preped the cubes in hell free beats 4 bucks. some peeps just dont like to spend any money some will spend a ton to not have to get hands dirty.

i tell you guys, iv seen alot of stuff made but nothing is like this plant were not going to go out and shoot every one up or overdose and die. watching a plant from seed to weed is awsome they become your babies not ony is the medical parts great to help you so is the actual grow i could be having a hell of a day but come home and turn on some match box 20 as my ladies seem to like them do a bit of foliair feeding and chatting and hmm relaxed then back to see the wife. haha you will start realizing if its me or her soon.
 
WOW! after 36 hours (a day and half) my seeds sprouted I got 12 out of like 15 so 3 didn't sprout but that's still good and very fast! So I have to get my rock wool cubes ready I always use this to start. We tried jiffy pots, strait to soil, and other methods including the newer sure to grow stuff. And nothing gives us the results rock wool gives us and it's cheap locally for .29 cents each times 12 cubes for $3.50 grow nutes for 3.99 and super thrive for $2.00 off our budget so now were down to $32.50. but we will have nutes for vegetation growth. I am using dya gro for this since it's a very inexpensive alternative to the good stuff, it doesn't have all the goodies some of the others do but if u can afford it I really like fox farm stuff but that rings in at 15 a quart but there are several others with great micros and do a very good job.

seedsoflove.jpg


OK here is a sum up of what u are about to read so for those who just want the quick version here it is followed by the step by step and detailed version. We pre soak our rock wool for about a day 15-24 hours In a solution with hormones and vegetation grow nutes in the propagation dome so its self watering great humidity and keeps the cubes perfect and all we do is drop in a ¼ cup of solution every few days.

rwcubestreated.jpg


I try to do a summery first for those who understand and know what up then I go into a lot of detail and taking one step at a time but each step while important its not carved in stone you can put your own creative spin on it if u have a idea speak up too some just need more information than others. we don't know it all and if we tried it before we can tell u how it worked or if it didn't work some times we forget too but we my try it and let u know the outcome save u some headache time and money too or you may have a awesome idea that cuts time and make it better so where all ears!. We had one system in Texas when we lived there for a few that was passive and had very good quality with great yield taste and potency just from Texas bag weed from Mexico


I like to prep my rock wool cubes I don't worry about ph at this time and well I know what it's going to be since I worked it like this for several years. I do have a ph pen and a ppm pen the ppm pen was a gift and the ph was a test kit from a supply store for $8.00. but I noticed that the same 140 ph pens and ppm pens are 20 with shipping on ebay now and well worth it but I know a few ways of growing that will have nutual ph and will balance by using it by the directions so im going to try not to use mine since u would not have one with this budget how ever we wont need one we get about 5.8 ph with this set up.


I also do not like to squeeze my cubes out and want to hit my husband when he does. If u squeeze your cube u will notice they feel week and smaller after. Feel a cube when u get one there hard and in good shape get them wet and squeeze them out they loose there density this may be crazy and just imo but I feel I get roots faster without squeezing the "Charmin". But I like to prep it so it takes 24 hours and since I need them tomorrow I need to prep my cubes tonight again u don't have to do this but we do and have good results.

cube.jpg


We take our 1 gallon mixing bucket add just 2 drops of super thrive hormones and im not sure of the price I got it at home depot years ago for about 2.00 they have small bottles and it only takes drops and u only use it a few times and not the full gro so it last a long time this bottle has lasted us 7-8 years now. I also add our grow nutes. I use fox farm but with budget of what we have I pulled out some old dyna gro its very good and does a good job I got a quart for 3.99 so its cheap and I've tried a lot of different nutes these are the best bang for the buck I believe others may disagree they also have a dyno gro and a dyno bloom that makes it easy and just follow the directions but for seeds u go 1/8th strength so u don't burn the out. you will read that a lot on this forum that people cut the nutes at first to ¼ and such. As for treating the cubed I mix 1/8th of a teaspoon to a gallon ¼ teaspoon is half dose plus the super thrive

starternutes.jpg


I soak my cubes in this solution in a small Tupperware container or plastic shoe box I fill the box until it comes half way up the cubes I will flip the cubes as well some times. Then after 24 hours of soaking I pinch the cubed very softly to get some of the treatment out not a lot and not to squeeze it as I feel its ruined if u do that. Then I put it back in the container and put a dry towel in bottom to soak out the solution then a few hours before I transplant I clean out the plain water I had in the seedlings tray and use this solution on the seedlings. Which I did just now because I have roots so once I get the root I change to this solution as well. Then once I change out the dome and tray station I place the cubes in there as well since there is tons of room this will help to get them to the perfect.


NEVER USE THIS OR ANY CRAZY MIXTURE OR SOLUTION FOR CLONES OTHER THAN CLONE SPECIFIC SOLUTION YOU WILL BURN THEM RIGHT OUT!!! We will do clones soon don't worry and we will pick a mother as well and teach you how to take care of a mother very efficiently with a video of how to actulay top and prune and take the guess work out of that for you. Every one reads it and sees crude drawing I will do a vid so peeps don't use the term fim for what it actually means they use it with pride lol
 
i can definitely appreciate the motivation to save money, if soil was the medium i would say use miracle grow, its terrible if used wrong but used correctly... you dont need to add nutes through veg and only bloom and micro nutes through 12/12. roots dont look beautiful by the end but they make it most of the way and the yield is nothing to laugh at.
 
As I said, yea we want to make it easy and pics say a thousand words so I will be going step by step with pics of every part to make this as easy as possible.

As for soil we have done several soil grows, and your correct the yield is still very good. But I don't want to get into the hydro/soil debate that's the last thing we want. Here is a pic we have over 100 of each size nursery pots that should tell u how much soil grows we have done. I do believe we may use these to do a passive grow not a soil to show how easy this can be, imo even easier than soil.

nurserypots.jpg
 
Woke up this morning to open up my germination to find 14 germinated seeds, hmm to keep or not to keep. We decided to keep them all its just a few extra cubed of rock wool, so we dipped a coupled extra cubed and transferred them.

When u transfer try to push the whole root into the hole in the rock wool if there is no hole use a pair of tweezers to push in and then open the hole. Then take the same tweezers if your careful to put the roots into the hole but with tweezers you can break the roots up so be gentle. If the roots are really squiggly open up the hole in the cubes and then just form the rock wool around it. You only really want the 2 small leaves showing and you want the whole root into the cubes.
I usually prefer the round slotted rock wool that actually fits into the round slots of the larger cubed then u simply open the slot and lay down the spout lings nice and gently but they didn't have any of those so I had to compromise when they do though the are about 6.99 for 45 of them.

sprouts6.jpg


transplantsprouts.jpg


Ok I then took the same set up I been using that I said you will get your moneys worth from. And placed it on top of a stool and raised it up with 2 nursery pots to get it close to the light along with the heat pad under it still set at low as well.

sproutsnrw.jpg

finaldome.jpg
 
Yes please follow along I would appreciate it, I would also like some input as well all input will be greatly appreciated I want my friends and others reading to get some good tools from this journal. As I said we have tried several ways of growing in all types of systems we want to make this easy as hell for any person to see how easy growing can be. I want to do this journal right and show people how to really get a good tasting dirt yield with the speed of hydro using little or no effort at all like a passive hydro set up. To achieve this I will be mixing all types of our old grow methods we used in the past.

This is intended so any one can grow on a small budget and were still clocked in at $32.50 left from our 50.00 budget and our separate light budget is up to $22.50 I think I said the total would be under $100 with lighting I’ll have to go back and look if not I did mean to say that. As for light I got up this morning and went to home depot lowes and wally world, a 300w cfl was $15 and don’t get me started on floros. If u go to the hydro shop or order on line you’re looking at 65-400 bux for a new 175-400w metal halide. I will be posting my results here in a few minutes!

Give a man a fish he eats for a week teach him to fish he eats for ever or something like that lol. But seriously there is a lot of joy in growing your own baby girls from seeds to smoke not to mention access to your own medicine withougt the streets invoved and much less in cost we can get a month supply of zanax for 7.00 but we cant go to wall greens and get a month supply of thc for 7.00!
 
Now let there be light!!!
Lighting is a big subject I could go on for ever about this but I figure I will shed some light on this situation lol but not a lot of light as there is tons of great information about light on this site. Remember nothing beats free natural light of the sun but not all of us have green houses or sun panels in our roof so here is my light outcome.

But first to recap we have spent $17.50 on the grow so far. 6.00 for hood, 2.00 for tray with reservoir, 2.00 capillary mat, 4.00 nutes, 3.5 for rock wool cubes and optional heat pad some of you won't be able to use one or use a house hold one. I also now have $22.50 in lighting as I bought 2 400w mh lights for $45 he wanted 25 each but I got 5 off for buying 2 I got these like 6 years ago but I found the same deals today on line so it can still be done. But I decided to start with a shop style 400w metal halide light for 22.50 it also had to be wired to 110 so I took a old computer cord fed that in and wired it up not bad for chick huh! But if u want full detail and what I found on my shopping spree today and what I compared to cost I posted it all in depth for you to read so u can see why I came to this decision.


Ok when it comes to lighting it's all up to your budget and space u must make sure u have enough lighting for the plants your trying to grow. Be prepared to spend from 25-1000 bucks on lighting depending on if your growing 2 plants under cfl or trying for 12 under a 400w metal halide (probably not enough). You need to figure out what's good for you and your space while in a closet one of those cfl grow lights with hood for $40 may work but u don't need to cram in 1000w hps in a closet.

There is several types of good lighting systems out there, I have a friend who tried a led and well in his words where "f@%k that piece of s#!t" & said he "will never spend that much money on a gimmick like that again". I have not used them but ill take his word. I'm sure others used em with great effect but ill leave em alone! Here is my choice for lighting in order of plant priority if funds are available.

1) Metal halide (great for vegetation and in a pinch you can flower with it)
2) High pressure sodium (makes nice dense sticky buds in flowering not the best for veg)
3) Fluorescent (do they still make twist bulbs? if not I know they make grow bulbs)
4) cfl's they would beat #3 but the final cost of making rigs with all those lights don't appeal to me remember I'm a female but I did convert the light I have to 110 with the multi tap using a old computer cord so I'm not a dumb blond and keep that in mind lol!
If you only have the funds and are veging and growing in one area I feel a metal halide will take you from start to finish, then a nice cfl for you mother and clones may be a great set up as well.


I told you and most will agree I like the metal halide for vegetation and the hps for flowering so what to do? You shop around, I got 2 metal halide for $45for both from a shop that transferred to t5 floro because of there ac and I got 2 hps for $80 for both on craigslist you can find the same deals on ebay too. I have heard of people using mercury vapor I have added it in the past for side light but its not a good light I would tell u to use floros or something else before using that but they are cheap and get halogens, black lights, flood lights and other goofy lights right out of your mind!


Im not saying there is any thing wrong with fluorescent or cfl lights, I have seen very good grows with them in fact my first few grows were with 4ft floros and bulbs called twist bulbs I had to keep the light right on top of the plants. I got great results but not the best I found I get dense sticky good buds using high pressure sodium. And as for growth I just like metal halide, but it is the same as cfl for the spectrum also nothing beats free natural lighting but with indoor were gona need some light!

the lights i have are for factories with high ceilings and most are changing over or going out of business around here so for what I would pay for a cfl and a shop clamp light I got a good grow light and wont have to let my plants suffer for the same money. I did find another electrician with 35 lights for $25 each. Watch out for these deals guys there way better than rigging up 20 cfl lights and I feel way more efficient just be careful some are 220 only you need to make sure the lights are multi tap meaning you can wire them for 110

setup32.jpg


With this type of light u can be a few feet away from your plants unlike floro's or cfl's they require you to be as close as possible even torching the plant tops. So as u see I placed my rig on the nursery pots to get them closer I may not need to be this close but I can always back them down. They also sell a retractable cord for your lights as well so u can raise and lower your light instead of your plants. When I make room in my grow room I will be setting up the light to something like that and there is a shelf in there that I can raise and lower so the plants can be adjust to the light as needed but u will see that later.
 
Umm cheap simple now your talking I always wanted to see a cheap hydro grow im in grow well
 
Cool, and yea we been going over some old hydro methods the past 2 days and medium. We want it to be simple and for any size garden from 1 plant to several. And as for medium we would like something reusable and since dirt has to be replaced each grow we need a good medium that can be totally reused so we don't have soil costs each grow. So we been crunching and have a few ideas, and I think what we come up with will be a good easy system for every one to use.

Right now about 3-4 ideas are on the table if we cant decide we may even have a vote but I think we should have something in the next few days besides these babies are going to be ready fast.
 
Were tossed! We were thinking either a hempy bucket with a spin using nursery pots. Or a soil grow for ease and cost and I do like soil. With hempys u get to reuse the medium over and over with same start up but with soil you need new soil each time.

Himmm what would u like to see it seems every one is doing a soil grow no one seems to be doing a grow like what we are thinking. Right now they are planted in cups for support ill give u some pics tonight hopefully.
 
Back
Top Bottom