How to get started growing indoors organically - No bottles

Good start! I would advise you not to leave your worm bin out in the elements. Rain can flood it, bad. Sun can overheat it, bad. Cold weather can freeze it, bad. Anywhere indoors or a garage you can put it is much better. I keep mine inside and it stays around 65 degrees which is ideal.

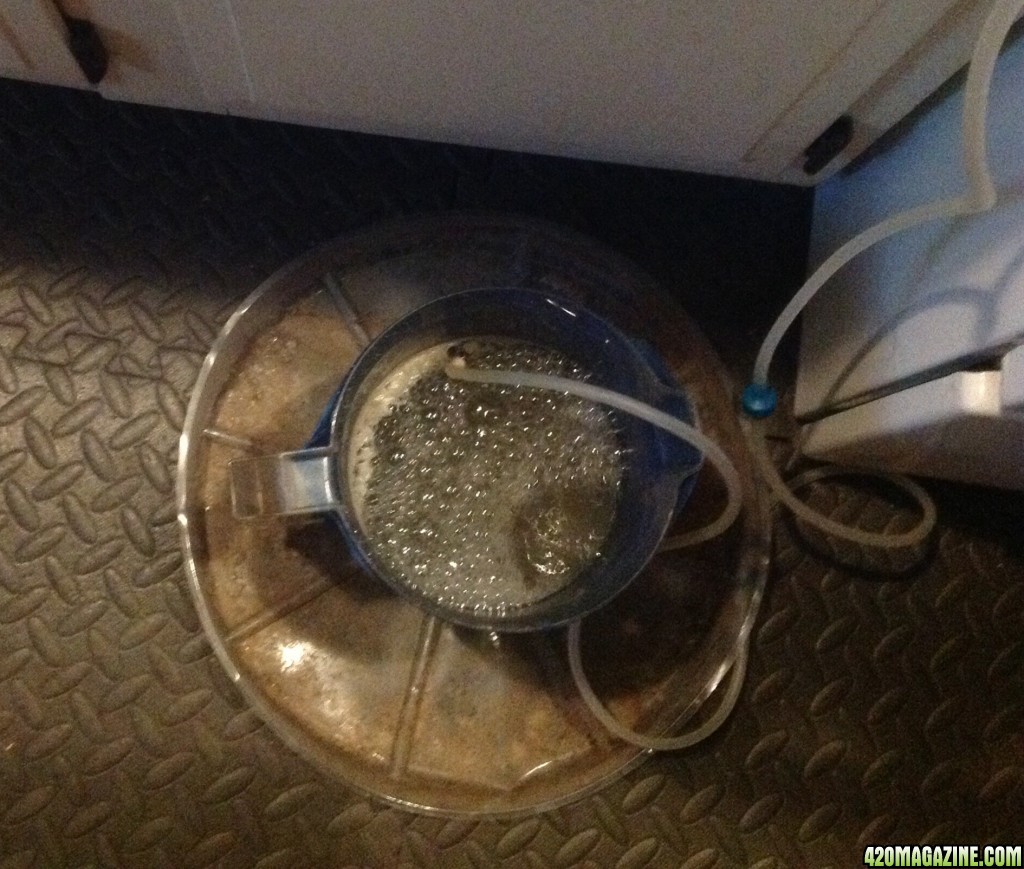
I rarely water mine, too much water is not great for the worm bin. I have been keeping moisture up in there simply by adding raw veggie scraps occasionally (I REALLY like carrot peels for this purpose). Also I add the sludgy end stuff from teas. I haven't actually watered my worm bin in well over 6 months.

Thanks CO!
I should have clarified. The worm bin definitely stays in the garage.

I was thinking of putting my temporary soil bins out in the rain to get some water.
Then I realized they already weigh 40+ lbs. and have no drainage. Adding an unknown and substantial amount of rain water this weekend would make them too heavy to move for a long time :)

The tubs that have my soil will later become the secondary and tertiary levels of my worm farm when I move my soil to their grow pots in a few weeks.

I'm looking for parts to make my own ACT's too. Looked easy enough to make fairly cheaply. I think between my aquarium and beer making that I gave up, I probably have enough parts already, lol! Giving the worms the ACT sludge sounds great. I don't generate a lot of vegetative food waste here at my house.
 
RE: Fungus Gnats

GD turned me on to this technique to deal with Fungus Gnats. What I do is put about a cup of RO water in a spray bottle and a full shot glass of Hydrogen Peroxide and spray the crap out of the top layer of soil in the pot and spray all the adult fliers. This kills the adults flying and also kills any larvae that are close to the surface in the soil. It works for a few weeks until I brew some more ACT with my compost from outside where the gnats come from. Then the cycle starts all over again. If I wait a few days after watering with the new ACT (with my outdoor compost) and spray it keeps the gnat population to a barely noticeable population. I just did this yesterday and today no more adults flying around at all totally gone (for now). The hydrogen Peroxide/water mixture does not hurt any green plants so you can spray right on the plants to no ill effect, it will oxiginate the soil too. The mixture doesn't seem to hurt mycelium, I've sprayed an active colony living on the surface of one of my plants that had some dead leaves laying on the soil with mycelium under the leaves that was consuming the leaves and after spraying the mycelium is still there and thriving.
 
I have a question regarding worm bins .. google will give a ton of different interior makeups .. some have bedding on top, others at the bottom, some in between a layer of moisture absorbing material and the food layer, topped off with more paper ...

I'm a bit at a loss what to do .. I shredded a couple of egg cartons in fairly big chunks, on top of that went some last autumns leaves, on top of that some compost and sand, topped off with more leaves and wood chips, lid placed loosely on top, to make ventilation possible. No drainage holes in the bottom yet ..

Any topic here people can point me to to fix my bin ?

You're already on the right track. There are many different and varied approaches to a good worm bin. The basics are adequate aeration, some sort of bedding (which the worms will eventually eat) and food.

You need to think of the bedding as a cool zone for the worms. When they need a break from all the heat put off by all the decomposing going on they can slip into those cool zones. In the beginning my bedding was in the bottom. As time went on and they needed new bedding I simply added it to the top. In the end most of it was processed by those busy worms. Whether you layer it or not, you really only need to be sure to include it.

Moisture is kept to a minimum. Too much moisture kills worm, but too little will do the same. You need to find that balance for yourself. I also, haven't watered my kitchen bin in months. Occasionally I dampen the bedding on the surface, but the moisture is derived from food scraps. Finely chopped gets eaten faster than chunks, but resist the urge to purée. Worms need little bits of food. Be sure to sprinkle in sand and minerals and all the wonderful stuff you want your soil to have access to. Never lose sight of the fact that you are custom-making food for your soil community.

Bins smaller than 12" deep do best.

Other than that, hide them out of the way and try to leave them alone.

I have at least two pictorials in my first journal that shows how I set it up and how I feed it. I could track them down if you wanted, but I think you're already there, or will be after you drill those holes for drainage. Have fun with it. Keep it simple and enjoy the process.
 
Hey guys. I am super interested in starting my own LOS. From what I've been gathering from this thread and others it seems to be relatively simple. My only problem is I do not have access to RO water. Anyways, I've been looking at soil recipes and mixes also. Can maybe a few of you post your mixes for me? I'd love to compare different ones. I'm completely new to this, I thought my GO nutrients were truly organic a few days prior to this post :D

Thanks!
 
Hey there BM - google "RO Buddie" - for an in-expensive RO water filter. They work REALLY well are not expensive $60-$75 for 100 gal per day filter which will be good enough for your family (I HIGHLY recommend you drink RO water for health if you have municipal water and even well water), We collect the RO water in a Carboy (what home brewers use for beer/wine) - 3 gal jar is easier to carry/pour than the 5-6gal carboy is. I'm getting 5-8 ppm/6.5ph out of it with my city water reading well over 400 ppm which would probably kill my ladies!

I haven't tested the PH for a while but I do test the PPM every so often to be sure the filter is doing it's job and not clogging up. This last filter I've been using for 6 months and its still going good - filters are replaceable too for short money.

The only aside to the RO Buddie is you have to figure out a place to install it and hook it up to your existing plumbing. I have this to say - My wife hooked ours up and we are on our 4th one in say 12 years. She's got a special tool box with just plumbing bits and tools to make short order of replacement. My opinion is RO water is a must - it will change everything in your grow room and your soil. No more problems that are hard to identify/fix with the ladies.

RO water takes one of the challenges with growing out of the picture. I think water is THE main problem with folks growing at home, besides all the chems in fancy labeled bottles of course. <--The purpose of going LOS; that and tastier nugz.

Keep it clean and green!
BB
 
Good tip, bobrown -- thank you for that. Been thinking about an inexpensive RO system.. I googled the product and it appears there is a quick connect/disconnect feature to use it on a garden hose. Sounds like your is, plumbed in. Do you know anything about the garden hose method?
 
Good tip, bobrown -- thank you for that. Been thinking about an inexpensive RO system.. I googled the product and it appears there is a quick connect/disconnect feature to use it on a garden hose. Sounds like your is, plumbed in. Do you know anything about the garden hose method?

Yes you bet - we used to use it outside for our outdoor garden which is how we started then started drinking it and had to haul bottles inside/outside and where we live had to move it indoors for the winter months, where we have it today. I have ours connected to a "Y" connector added to our washing machine cold outlet with toggle on/off lever and put a jug/carboy container on top of our washing machine with towel under the container and run the waste water down the drain for the washing machine.

Spring/summer/fall we collect the grey waste water in a 80gal trash can (just throw the waste tube out the window drains into trash can), we don't like wasting resources specially water. You get 1 gal of RO water for every 5gal filtered so 4 gallons go down the drain. I can water veggies after that waste water sits a bit and sometimes I throw a bubble stone in there for a few days. I can even brew a huge ACT with that waste water and water my raised beds with it.

Overall pretty easy too hook up.
 
Hey guys. I am super interested in starting my own LOS. From what I've been gathering from this thread and others it seems to be relatively simple. My only problem is I do not have access to RO water. Anyways, I've been looking at soil recipes and mixes also. Can maybe a few of you post your mixes for me? I'd love to compare different ones. I'm completely new to this, I thought my GO nutrients were truly organic a few days prior to this post :D

Thanks!

The RO water isn't a requirement to successfully grow in LOS. It is, however, necessary to remove chlorine or neutralize the chloramines that our tap water gets treated with. Removing chlorine is easy - just let it sit out for at least 24 hours. A larger surface area speeds the process up.

Neutralizing chloramines requires that you introduce a small amount of organic matter to the tap water and let it sit for at least 10 minutes. Two tiny drops of molasses, something many of us have laying around, will do the trick. I started my initial grow with stored rainwater and then shifted to chloramine-neutralized water when I ran out of rainwater. My plants didn't skip a beat.

Unless your water is criminally polluted or deficient, or you really want the benefits for your family's drinking health, save yourself the money on an RO system. It can be better used somewhere else.
 
Having read bobrown's last post I may someday plumb in my own system for our family health and then share it with my plants. My point was that it's not absolutely necessary for a successful grow. Now, for a spectacular grow? Maybe. Mine turned out pretty spectacular.
 
I live in an area where everyone knows "Don't drink the water" so I have to go buy RO water for some pesos and have discovered from using it that yes it is ph'd at 7.

The problem I found is the Calcium and Magnesium is really low after the filtration and the plants suffer from it. I now have Lime in my soil to cover the Cal. and I water with diluted Coconut Milk for the Mag.
 
Thanks so much for the help and info everyone. So I can leave water out uncovered and the chlorine will evaporate? Also, I want to start a vermicompost and was wondering what everyone's opinions are on using non-organic food scraps? For example, some GMO cucumbers would not be as good as non-GMO cucumbers?
 
I live in an area where everyone knows "Don't drink the water" so I have to go buy RO water for some pesos and have discovered from using it that yes it is ph'd at 7.

The problem I found is the Calcium and Magnesium is really low after the filtration and the plants suffer from it. I now have Lime in my soil to cover the Cal. and I water with diluted Coconut Milk for the Mag.

We use RO water for health concerns - where we live the public water utility adds in chemicals supposedly to benefit our health. One is fluoride.

When running an LOS soil you will not need to worry about Cal Mag deficiency, your EWC has all that you need and then some. We run a fair amount of ACT and SST teas - these need clean water IMHO, definitely no chlorine as it kills all the beneficial bacteria we want to grow and add in to the soil. As SS mentioned you can neutralize chlorine, even letting it sit or bubble the tap water over night works, but there's a lot more in the water that we don't know about or don't need in our soil to feed our ladies. You can use tap water no problem and get good results. I recommend RO water, my wife talked me into it a few years ago, I thought she was full of huey but I reluctantly went along.
 
I live in an area where everyone knows "Don't drink the water" so I have to go buy RO water for some pesos and have discovered from using it that yes it is ph'd at 7.

The problem I found is the Calcium and Magnesium is really low after the filtration and the plants suffer from it. I now have Lime in my soil to cover the Cal. and I water with diluted Coconut Milk for the Mag.

This was good to read. I'm doing my first grow under LED and you hear of Cal/Mag concerns, so I'm alert for ways to counter those concerns. I already have a highly mineralized soil mix and I water at least once a week with diluted coconut water and aloe vera juice. I suspected I already had it covered. Your post reassured me. Thanks Cruizer.
 
This is a good place to drop this post.

SOIL BUILDING:Living Organic Soil (LOS)

I don't think there are many things more pleasurable than building a strong Living Organic Soil. I got so carried away yesterday with the HB mix that I forgot to get my enzyme tea done, so I made sure to get it going before I started into the LOS mix.

image23015.jpg


Tomorrow morning this will be configured into a nutrient-rich tea for the micro herd. I've been a bit remiss about this lately, but the soil can handle a bit of inconsistency.

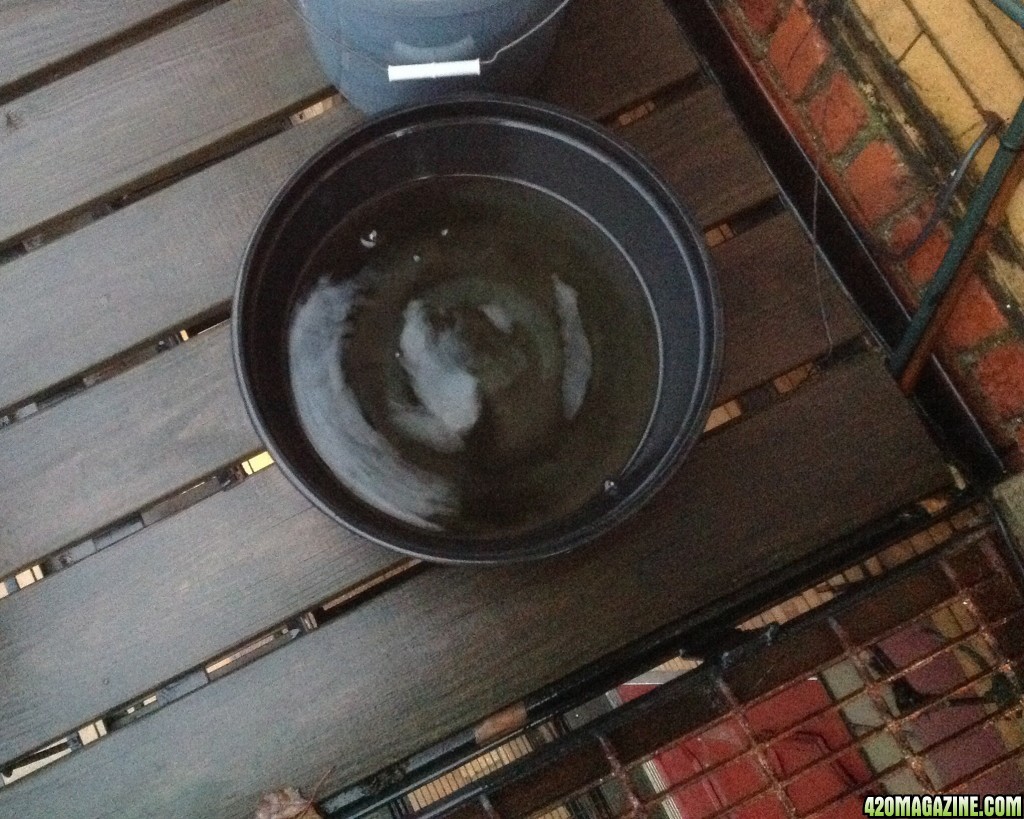
Once again we begin by collecting rainwater. I'll need about a gallon and a half for this batch. I'm only mixing up a cubic foot of the LOS. I already have two pots. I just need some on hand for germinating and seedling stage.

image23016.jpg


I thought of the HB as mixing the soil. Living Organic Soil is a building project to me. It's formulating a fine recipe to feed the herd. There's much more diversity in the mix.

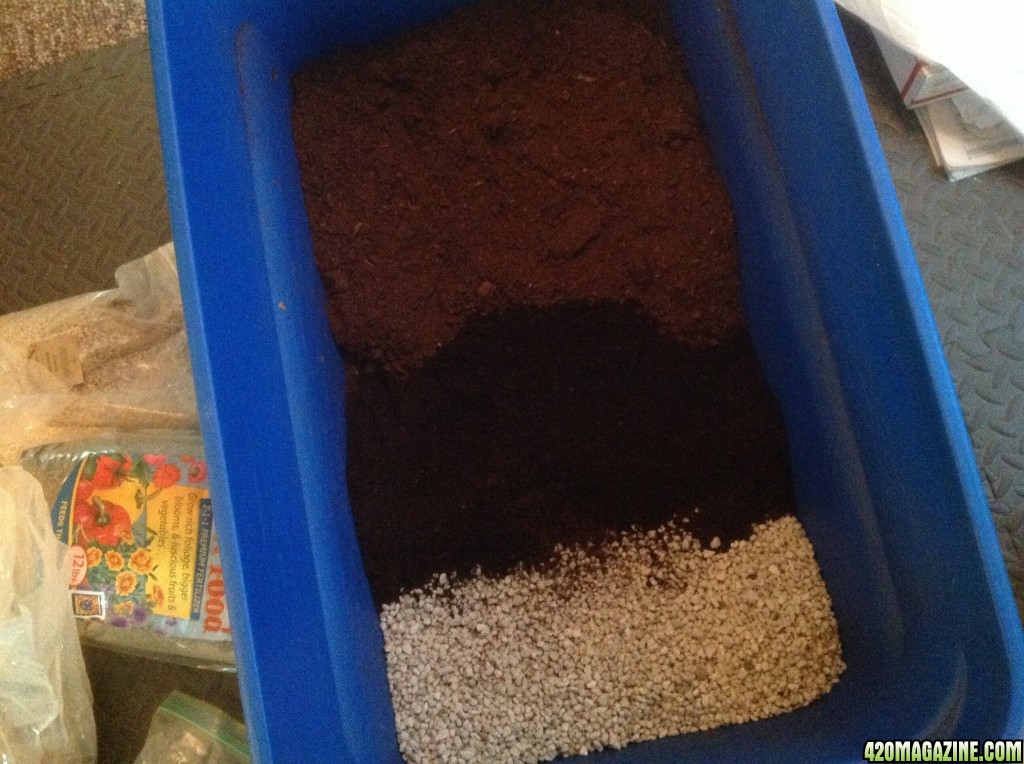
My base mix is equal parts by volume of sphagnum peat moss, Worm Power vermicompost and pumice.

image23017.jpg


I was fascinated by the difference between Worm Power vermicompost and the Wiggle Worm EWC. Worlds apart in quality. I reminded myself that the HB mix uses this substandard EWC because you're controlling the phosphorous content. Sorry, it looks deficient to me. I love digging into the Worm Power. You can feel the energy ready to burst out. Look at me - excited about high quality worm pop! :laughtwo:

image23018.jpg


To the base we add 4 cups of the Clackamas Coots-style minerals mix and 1.5 cups of the accompanying. CC-style nutrient mix.

image23019.jpg


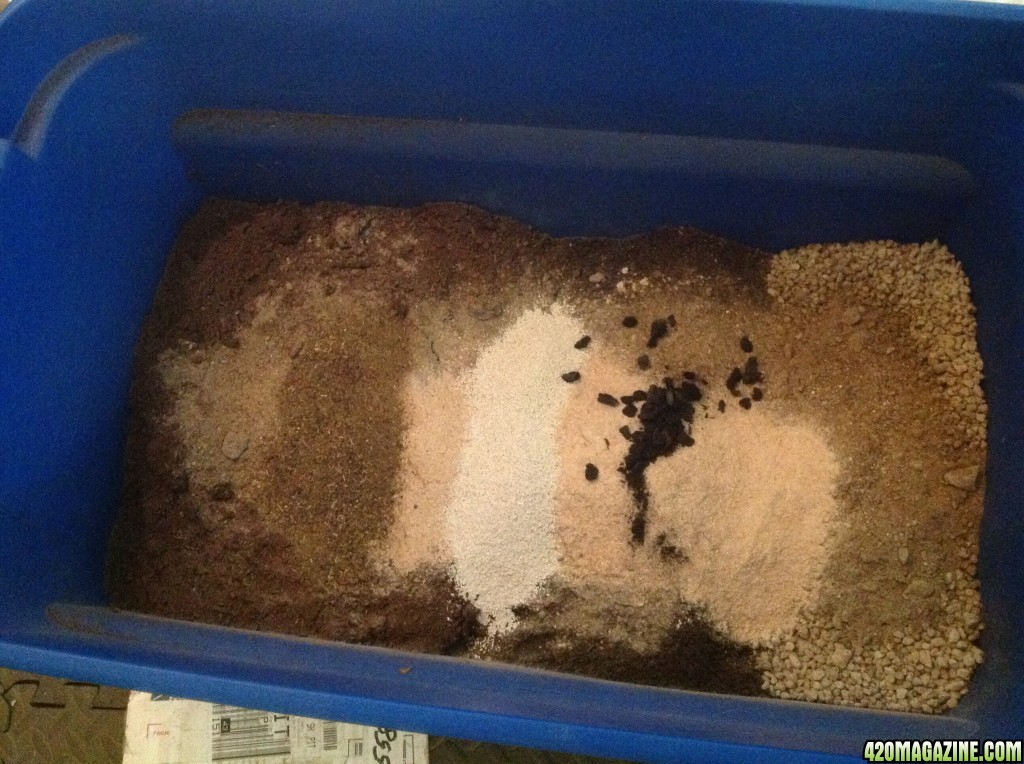
Coots has recommended adding the malted barley grain directly to the soil mix for the added enzyme boost. His success inspired me to do the same with this mix. It's something I will do from now on with each new batch. Using the coffee grinder purchased just for grinding malted barley I powdered up 2 cups of the grain.

image23020.jpg


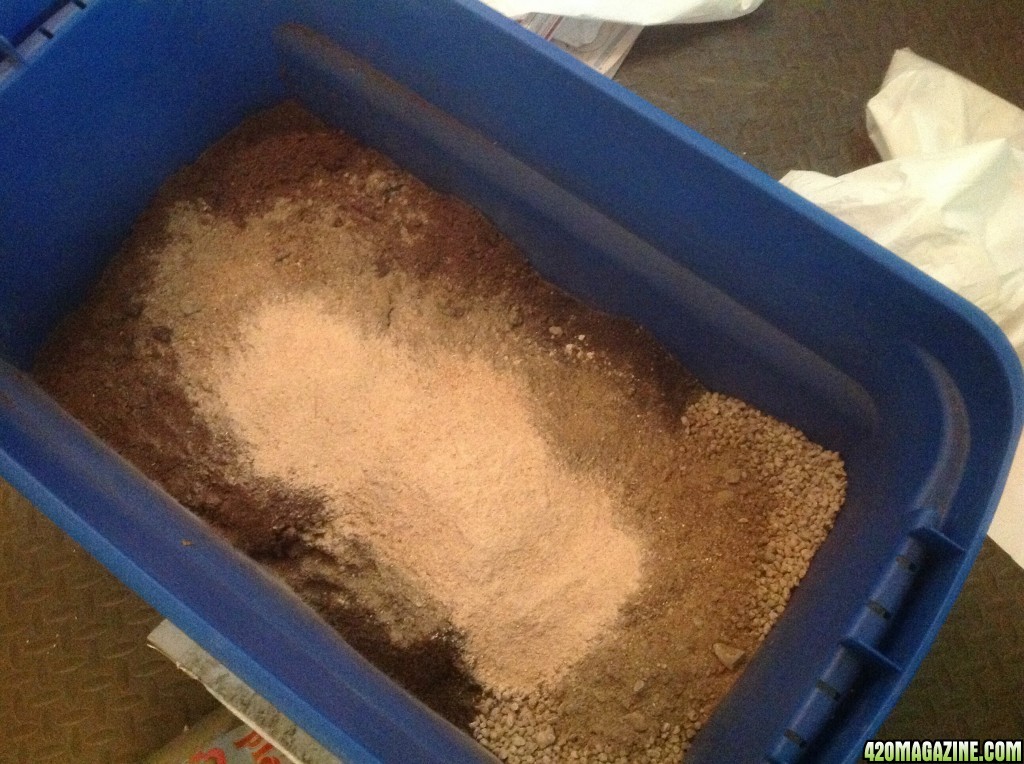
I have Yum Yum Mix, so 3/4 cup of that, along with 3/4 cup of zeolite (helps with water retention) and some biochar I had on hand, so why not? Only good can come of it. Oh, and about a half cup of some exotic Japanese river sands, just because they're interesting shapes and surfaces.

image23021.jpg


I use a SWICK watering system, which means I want extra aeration in the mix to help with all that wicking that will keep my soil matrix evenly hydrated. An evenly hydrated matrix means the micro herd and fungi can more efficiently shuttle nutrients around when called upon.

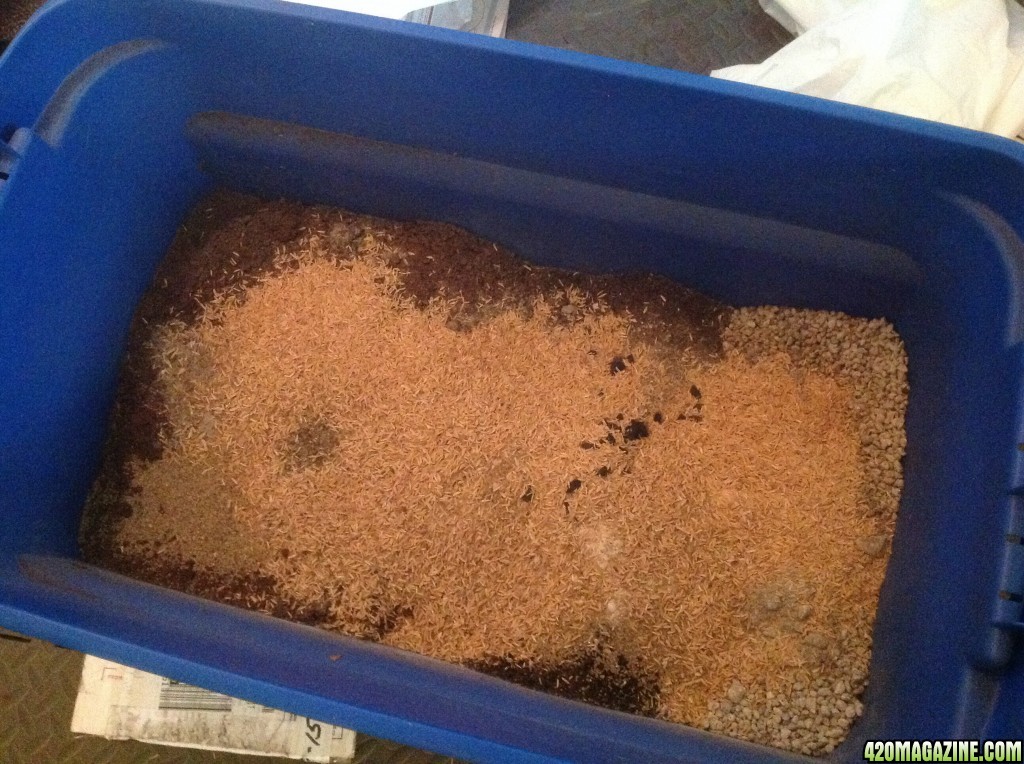
My choice for extra aeration is rice hulls. They're beautiful, fragrant, add silica to the food cart and some interesting surface areas for the micro herd. One of the things I'm always trying to accomplish with my soil mix is a wide diversity of surface areas. I like to imagine the biota making use of all this diversity, places to hide and hunt, living out their destiny with an abundance of available options. It's that Mother Earth thing run amok again. :love:

image23022.jpg


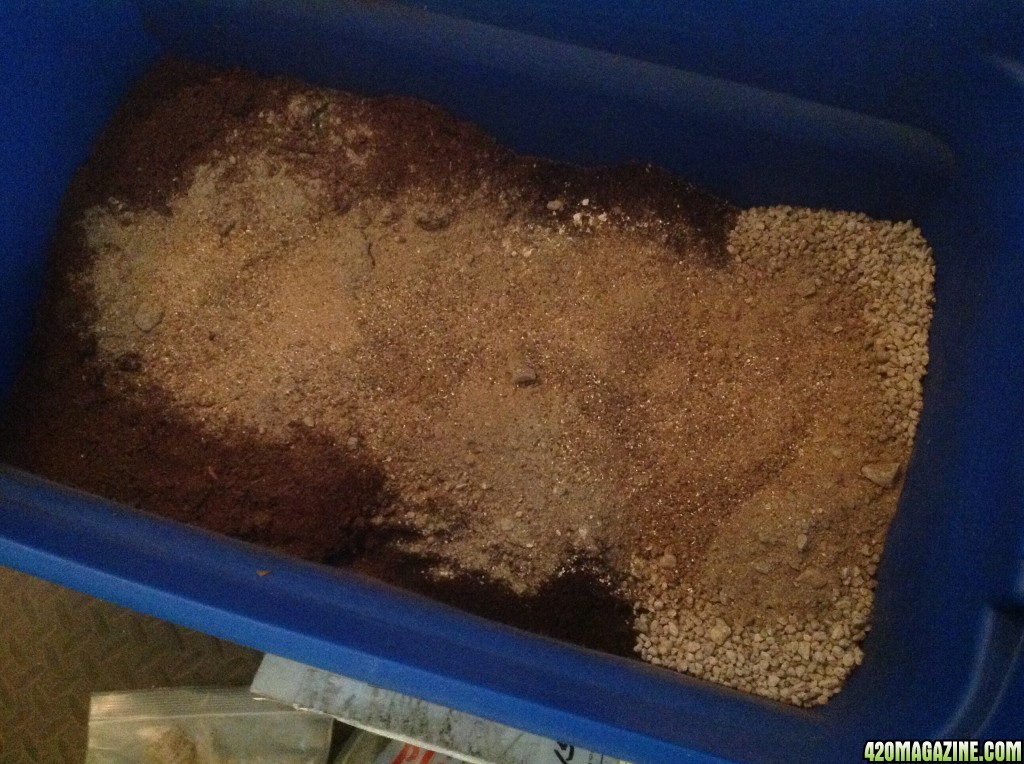
Now for my second favorite part - the initial mixing.

image23023.jpg


At this stage I'm working for a homogenous blend. There should be no big chunks of peat moss, so I break them up as I go. Then it's just dredge and lift, toss and tumble, mix and churn until everything looks completely dispersed throughout.

Using the Chapin, spray with 1 1/2 gallons of rainwater.

image23024.jpg


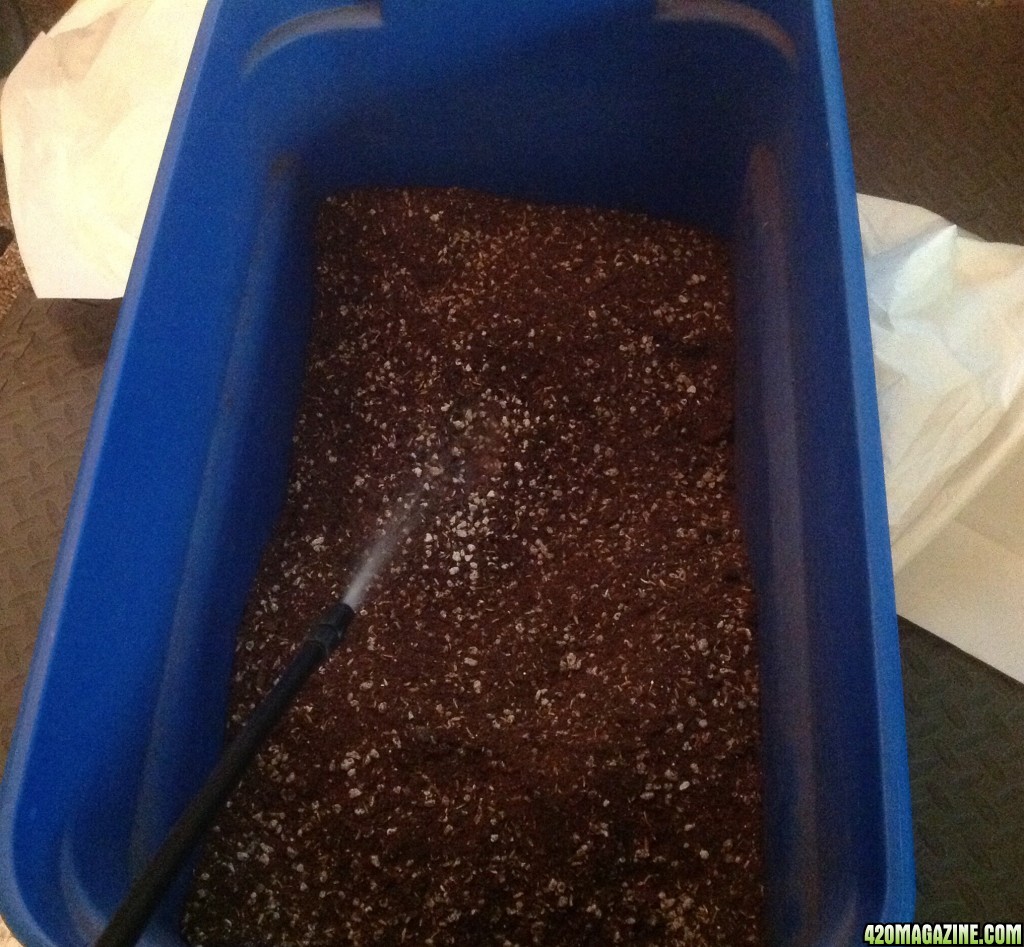
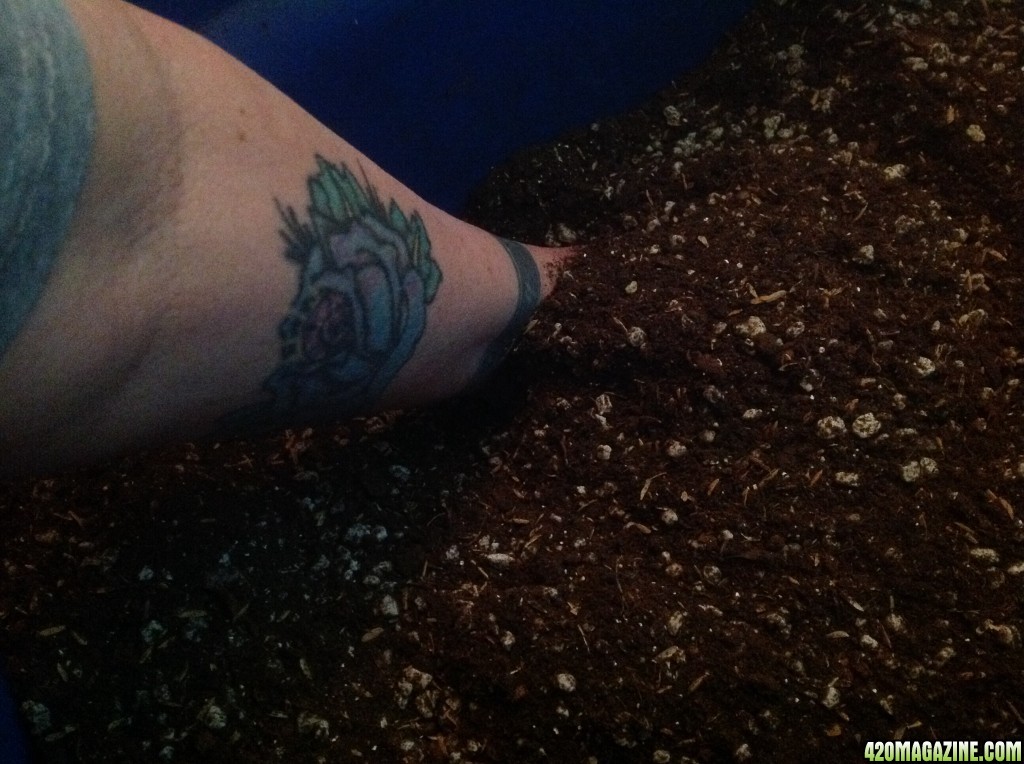
My favorite part - the final mixing.

image23025.jpg


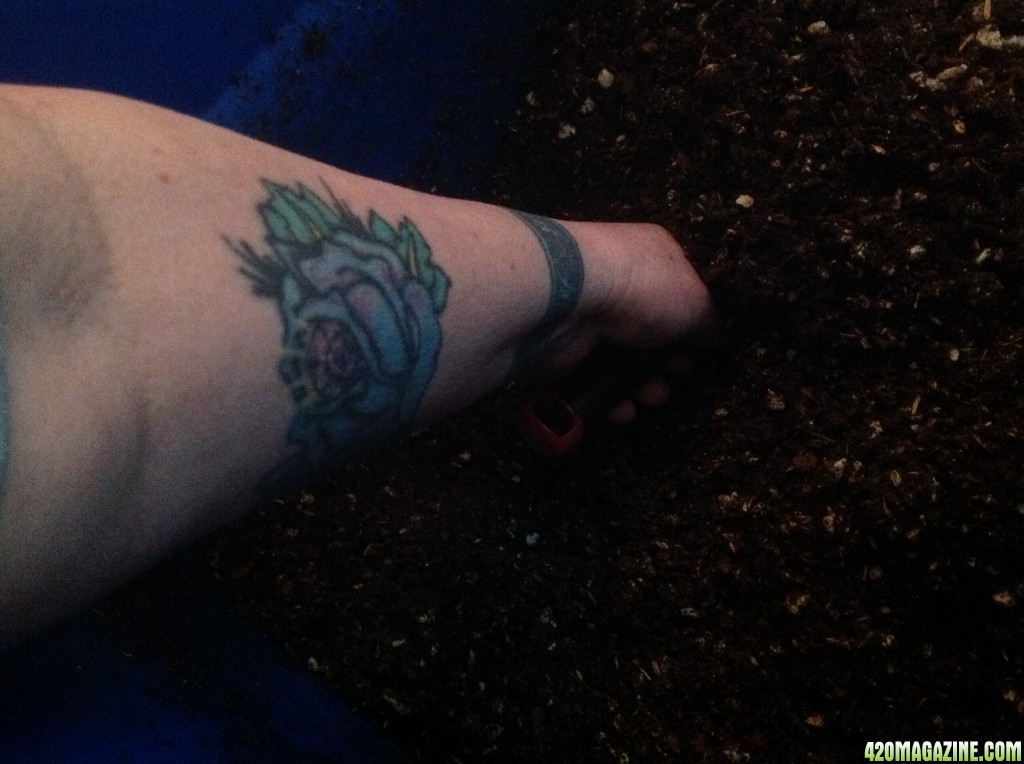
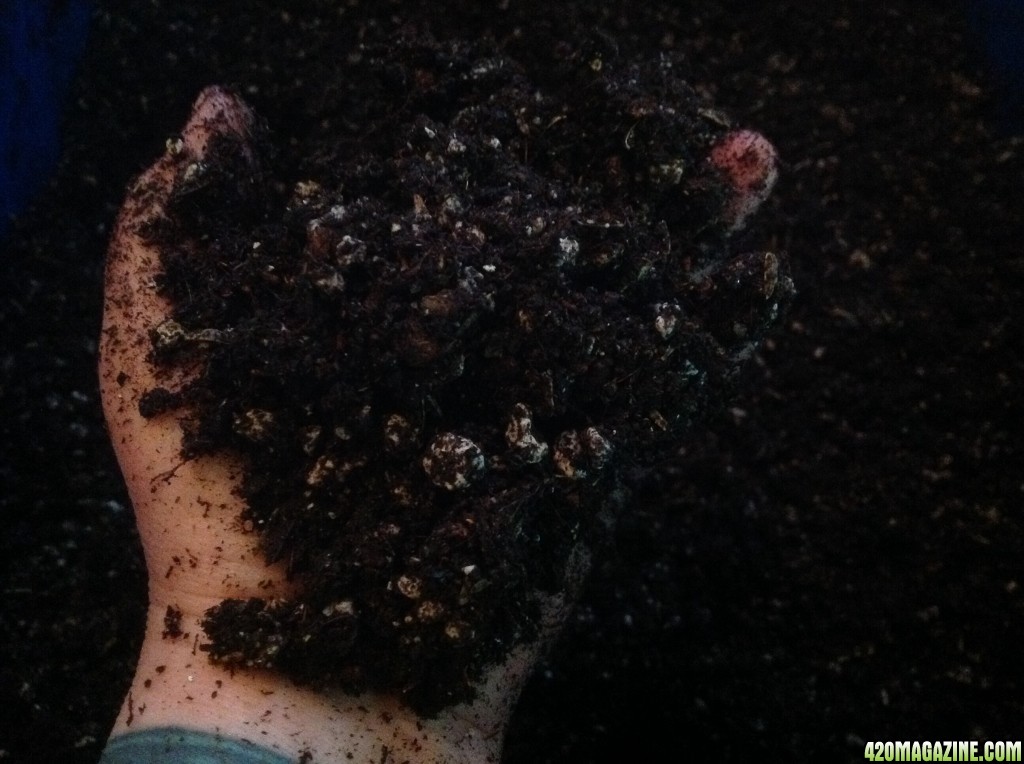
I love the feel of the soil components, the smells of the mingling. Using my bare hands allows for a finer mix IMHO. Any larger pieces of peat are easier to feel than see at this stage and, darn it, I just LOVE getting my arms up to the elbow in fabulous soil. This soil fills ME with energy. You can imagine the happy plants that will benefit from my efforts today.

I mean really, isn't this just the most beautiful stuff? You should smell it. Dank and sweet at the same time. It smells like life to me.

image23026.jpg


Water and mix, water and mix - the time is lost in the joy of playing in the dirt. I could never do this with gloves.

It's hard not to linger a moment and just appreciate all this loveliness. Life will spring from this soil that will help my family be healthier. What a blessed thing, eh?

image23027.jpg


The soil building is complete. It will be covered and stored, being turned once a week for the next month.

image23028.jpg


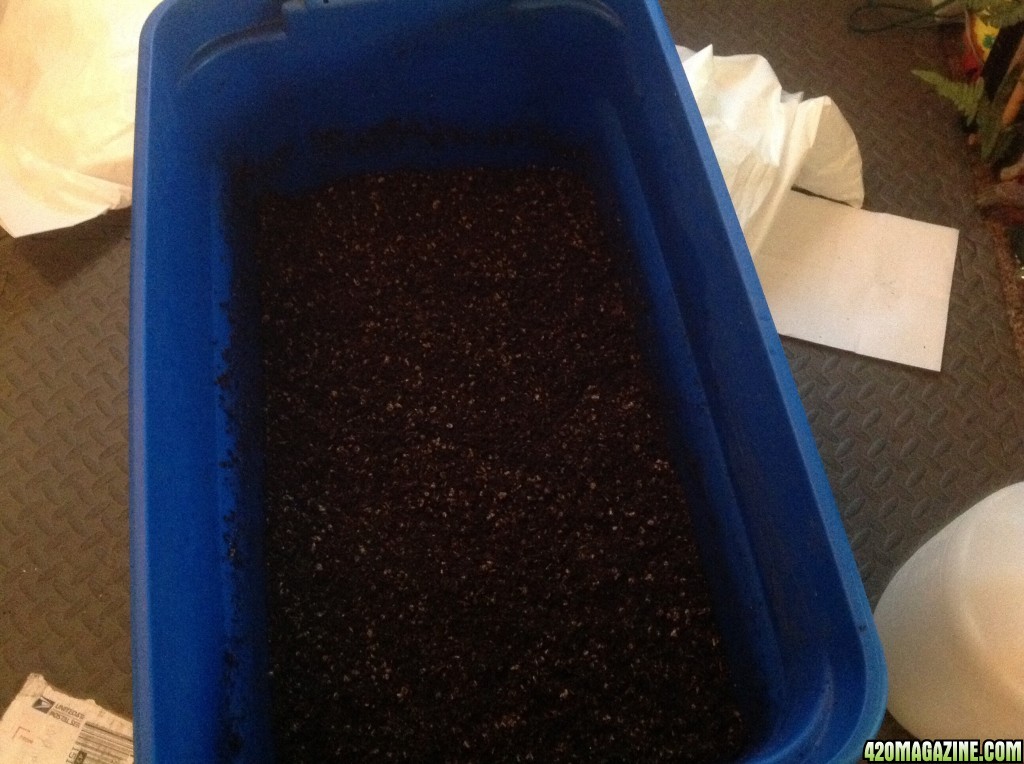
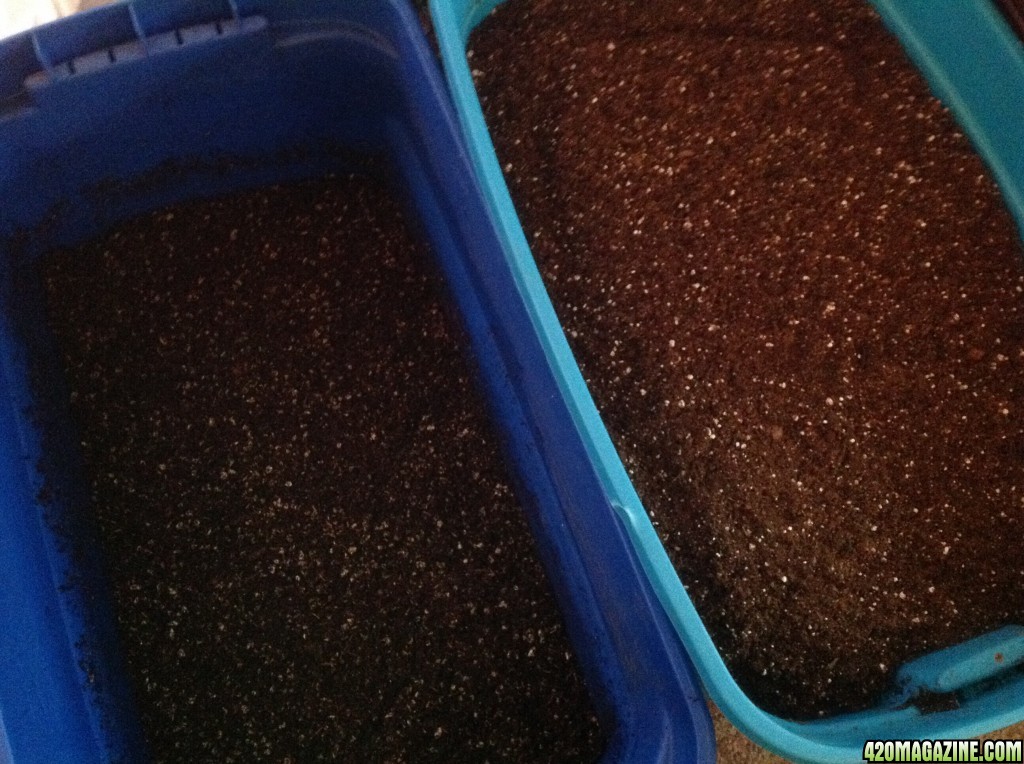
Both soils cooking. The countdown begins.

Notice the HB soil is in the electric blue tote. I thought that appropriate.

image23029.jpg


Thank you for sharing in my joy through the soil building process. Now begins the hardest part - the waiting. I have much to do though, between now and May 7, when these soils will be ready for planting.

:Namaste:

DrZiggy, are you as excited as I am?????:slide:
 
Back
Top Bottom