

At 7 weeks into flowering I decided to outline my first grow in a grow journal to record what I did correctly and incorrectly. Would love to hear feedback to improve my next grow. All references to “days” of growth were recorded from the day the seeds popped.
Basic Equipment:
1. Dimmable 1000W Cool Sun XL Reflector integral cooling duct
2. 1000 W HM Bulb for Seedling and Veg stages (bulb good for 2 or 3 grows)
3. 1000 W HPS Bulb for Flower stages (bulb good for 2 or 3 grows)
4. Timer That Can Handle 1000W Light: Purple Reign 115V 15A Digital 7 Day Dual Outlet Grow Light Timer
5. RO Water Filter System like the Hydro Logic Stealth RO150 Reverse Osmosis Filter - 150GPD with premium carbon filter (filters about 3.25 gallons per hour with 10-20 ppm of total dissolved solids)
6. Exhaust Fan & Flexible Ducting
7. Humidifier
8. Dehumidifier
9. Panda Film Black & White Poly Film 5.5 Mil 10' x 25' to build enclosure if needed
10. pH Meter & calibration fluid Oakton EcoTestr pH 2 Waterproof pH Tester, 0.0 to 14.0 pH Range
11. Total Dissolved Solids Meter HM DIGITAL TDS-4TM Handheld TDS Meter Tester With Large LCD Screen Includes ATC Temperature Reading Testing For Hydroponics Gardening Aquariums Reefs Pools Spas Drinking Pure Filter system
12. Light Meter Dr.Meter LX1010B 100,000 Light Meter with LCD Display
13. 420 Microscope for Trichome and Spider Mites Identification on Cannabis Plants 60X-200X Mag.
14. Measure Temperature & Humidity
15. Dedicate hand trimmer
16. ½ GAL. GROW BAGS for seedlings
17. 5 Gallon Smart Pots
18. Two 6” fans
19. Bamboo stakes and tie wraps to support what is hoped to be many massive Cola’s
20. Scale
Growing Materials
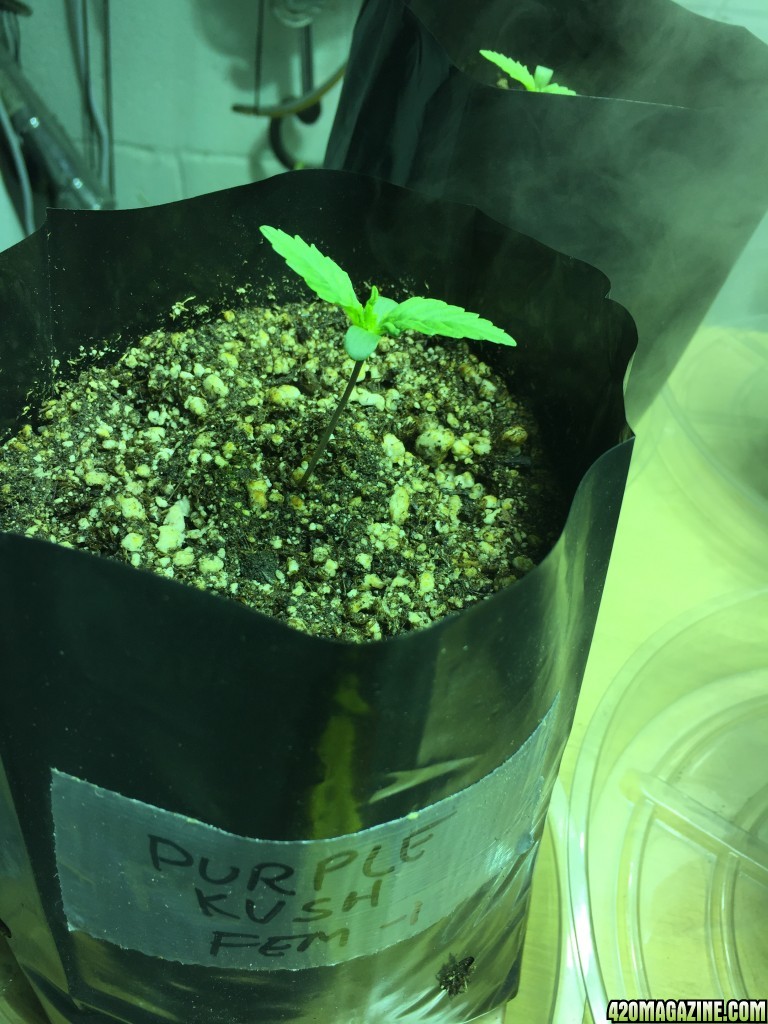
1. Seeds (Purple Kush Auto, Northern Lights Photoperiod, Chocolate Cream Photoperiod, Mazer Photoperiod)
2. Light Warrior Seed Starter Medium
3. Perlite
4. Fox Farm Ocean Forest Potting Soil
5. Azos Extreme N2 supplement for transplant
6. General Hyponics Organic Coco Tec Grow Medium
7. Emerald Harvest Pro 2 Part Nutrient Package
8. pH Up and pH Down solutions
9. Perlite Growstone Gnat Nix! Fungus Gnat Control, 9-Liter (needed 20-Liter)
10. Sticky Stakes: 4 of Safer Brand 5025 Houseplant Sticky Stakes Insect Trap, 7 Traps per pkg
Grow Media
After much research I based my first grow on the Dutchman's Hydrosoil Method since it provides the benefits of hydroponics (fast growth, large yields, large healthy plants) with the taste and quality that soil growing offers. To create Hydrosoil, mix 1/3 Ocean Farm potting soil, 1/3 Perlite and 1/3 Coco.
The coco helps drainage, swells to 10x in size when it absorbs water, promotes fine root growth (tips of roots is where the absorption occurs), makes watering more forgiving, is a natural sweetener that helps taste but also provides the plants with needed carbohydrates.
Perlite is like puffed recycled glass about the size of a small marble that lightens the soil and helps the roots breath better. If you have never picked it up, it feels like a hand full of white Cheetos.
I am trying to keep everything organic as possible without having to make my own nutrients and compost. I understand that Ocean Farms used to be organic but lost the designation for some reason in the past year so they are probably not far off the mark. Emerald Harvest is working on obtaining an organic certification.
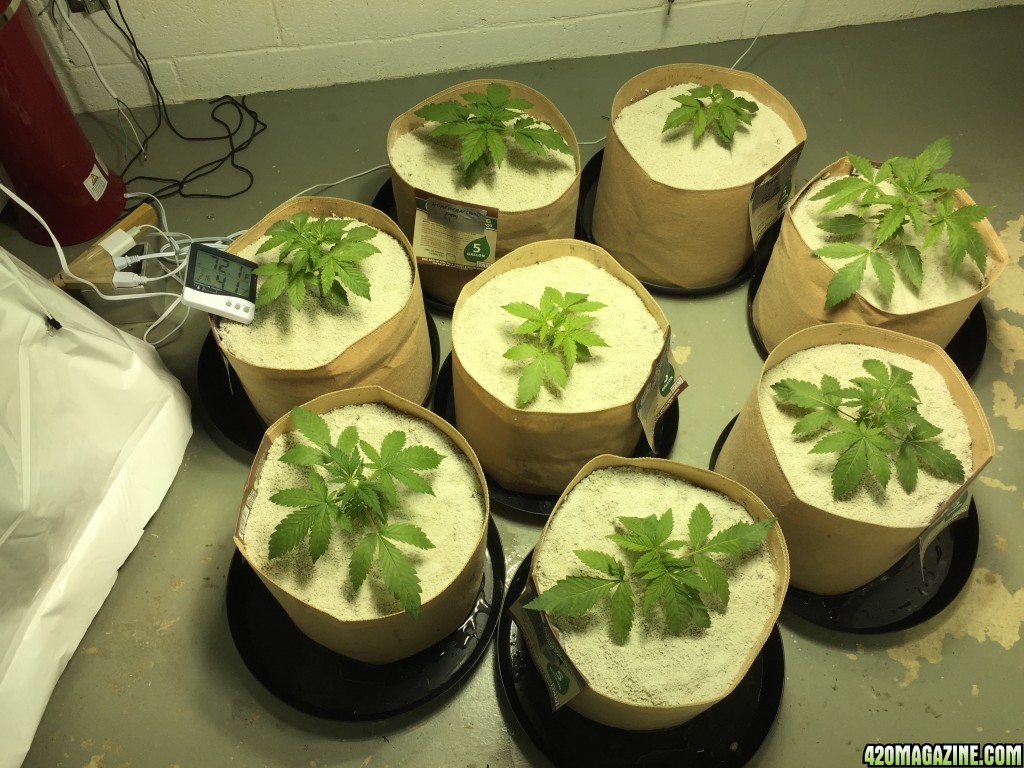
Smart Pots
The grow uses fabric smart pots; for the seedlings, I used plastic ½ gallon grow bags with many 3/8” diameter (approximate) holes are in the bags so the roots can more oxygen. The reasoning for using the smart pot idea is that they are made of cloth fabric so the roots can breathe better. The roots are “air-pruned”; roots grow to the edge of the pot but don’t go outside of the fabric.
I raised the pots over the top of their saucers to add about 25% more breathing surface for the roots and allow the bottom of the pot to dry out better. To raise the pots, I made simple PVC stands that can be height adjusted so the plant canopy’s can all be the same distance under the grow light.
Feeding/Water
Our tap water is very hard; it has a Total Dissolved Solids (TDS) content of about 330 ppm. Our tap water also contains chlorine and chloramine along with other undesirable elements that cause root and growth problems by blocking nutrients from going into the plant. Furthermore, the tap water also has a high pH which will also prevent nutrients from being absorbed by the roots. After the water runs through the reverse osmosis (RO) system, the TDS drops to about 5 to 20 ppm and the chlorine and chloramine has been removed through an additional filter. Since I am using RO water, it was recommended that I use full strength Emerald Harvest Cal-Mag (5ml/gal) at the start of watering and feeding except don’t use it for the initial seed sprouting and the final flushing before harvest time. All other Emerald Harvest nutrients are mixed at 50% of the recommended amount and adjust up only if needed. Emerald Harvest provides a very helpful feeding schedule for each phase and week of growth. We are using Emerald Harvest’s 2-Part Nutrient system and read that they have applied for a “organic” certification for their nutrients.
All of my watering and feeding is with the “drain to waste” method meaning 10% to 20% just drains through the bottom of the smart pot as waste. Drain-to-waste may also keep salt build ups from forming on the roots. If the grow medium is too wet, you get fungus gnats plus algae growth on the surface of your dirt. Too much water is not good for the plants; you will see that in their droopy leaves and other problems it causes.
When using reverse osmosis water, I first add Cal-Mag (full 100% strength at 5ml/gal), then add the other micro nutrients like Emerald Goddess, then finally either Grow or Bloom A&B depending if I am in veg or flower, and mix them in that order for mineral compatibility reasons. Then finally pH balance the solution since nutrients change pH levels. I used 5ml/gal Cal-Mag on every watering & feeding cycle. Adding Cal-Mag as the first micro nutrient helps keep the other nutrients go into solution. I have the aerator running while mixing the solutions after adding each nutrient. The roots will love you for the extra oxygen if you also use an aquarium or bait tank aerator when you are mixing your feed and watering solutions.
Keep pH to 5.8 to 6.5, best if pH is 6.0 to 6.2 and many target a pH of 6.0 for Hydrosoil. Using the “pH Down” product: 1 mL/gallon of water will generally reduce your pH about 1 point. Using PH Up, depending on how hard your water is you need to add 2-4mL/gallon of water to raise the pH 1 point. That's just a very rough estimate, but gives you a starting point. In imperial measurements that's 0.4-0.8tsp/gallon. Don’t use both pH Up and pH Down in the same bucket. If you over shoot your mark, add more RO water to move it in the other direction. I’m told the pH Up and pH Down solutions don’t work well when combined.
It is helpful to weigh your plants before their first watering, weigh the plants after they get watered or fed; all drain-to-waste. It is okay to do a medium watering using less water if you are having a drying out problem and your next feeding cycle is quickly approaching. Remember that water weighs 8 pounds per gallon so based on the weight, you will always know how much moisture is left in the soil. Measuring the pH and the ppm of the TDS in the drain to waste water gives me an idea of what is going on in the soil and lets you know if it needs to be amended. If the drain to waste product is within 0.5 pH of your input water the you are fine. However, during some stages of flowering it is normal for drain to waste products to go up to 7.0 pH if you water going in has a 6.0 pH - the plants will be fine.
Some say stick your finger in the soil a couple of inches to see if it is dry but I always ended up over-watering with that method.
Note: If you have to go out of town for a week and you are lucky enough to have a babysitter for your queens, you can pre-mix solutions a week in advance, it is likely the solutions will need to be pH adjusted (even after you already did it). Remember to stir well to get the minerals off the bottom, and aerate and pH balance before feeding or watering.
[Lesson 1] Make a checklist. I have been distracted more than once while mixing my nutrients for weekly feedings; once so bad I dumped 8 gallons of feed water out and started over. I was lucky on that one because I caught the error before it was too late. The missed pH balance I was not so lucky and ended up yellowing some leaves as a result (realized the mistake at the end of the feeding and saw the damage the next day and was bummed). Now I calculate the number of teaspoons of each nutrient, write it down next to the name of the nutrient, and create a checklist that I check off after adding each mineral. I even have a check mark for pH balancing at the end. I then check my pH and TDS ppms against previous feedings as a cross check.
Lighting
For veg growth I try to maintain 15,000 - 50,000 lux with a target of 40,000 Lux using a MH bulb. Under 15,000 plants get too stretchy (long skinny distances between nodes). For flowering I change to a HPS bulb with 45,000 - 70,000 lux - optimal amount of light for cannabis plants in the flowering (budding) stage. 65,000 Lux is good. I built stands out of PVC to help maintain an level canopy distance to the light. To maintain these light levels, the light is about 24” from the canopy.
Temperature, Humidity & Air
Good room ventilation aids in creating a desired high transpiration rate for the plants which translates into a greater rate of nutrient uptake; more water leaving the plant through the leaves means more nutrients need to come up through the roots. Remember that ventilation means changing the air, not just blowing it around the room (that is circulation). This is where a good exhaust fan is needed to pull in fresh air into the room, pass it through your plants, then through the grow light to keep it cooled down, and then outside the building.
For the seedling and veg stages, I tried to keep humidity levels within 40%rh to 70%rh and temperatures between 70F and 80F. Bud mold starts at 65F and thrives at 60F. This is where a humidifier and/or dehumidifier comes in handy. But even with a humidifier you will have a hard time keeping levels up because of the exhaust just fan doing its job. I have learned that just by just hanging a wet beach towel in the room, the humidity can raise it 5% or 10% in no time; when it dries put a new clean wet towel in its place (towels used over and over might create mold and mildew). During flowering I try to keep the room 40% to 50% with the last 2-3 weeks below 25% if able. Then for drying the bud I try to maintain 65F to 75F and 45% to 55% rh. Holding these goals has been difficult with my budget humidifiers and dehumidifiers but I try my best.
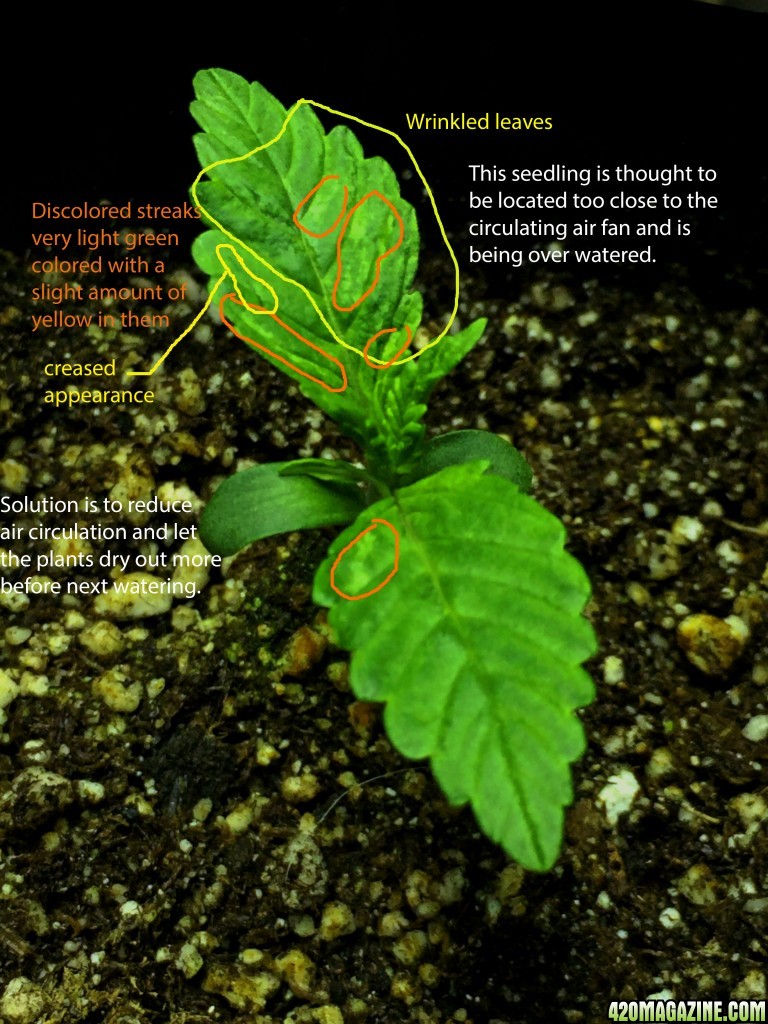
Circulation of the air is also important. You can use one or two little 6” fans to provide needed air circulation to 6 or 8 plants. This provides enough force air so that all of the leaves wiggle slightly (they are not supposed to be blow around hard). This light breeze and movement of leaves helps prevent stagnate areas that might be ideal for mold and mildew growth. [Lesson 2] Too much wind across the plants can actually get wind burn to the leaves. Too much wind can pull too much moisture out of the leaves thus requiring the plan to pull up too many nutrients into the plant to replace what has left which causes obvious problems for the plant.
Cleanliness
You will want to keep the grow room as clean as practical to prevent pests, mold and mildew which are all bad for your queens. Keeping pets and people with muddy feet out of the room can go a long way to keeping the room clean.
Sprouting Seeds
[Lesson 3] Seeds can be a long-led item if you must order them from half way around the world and will want to take that into your planning - they can take over a month to arrive.
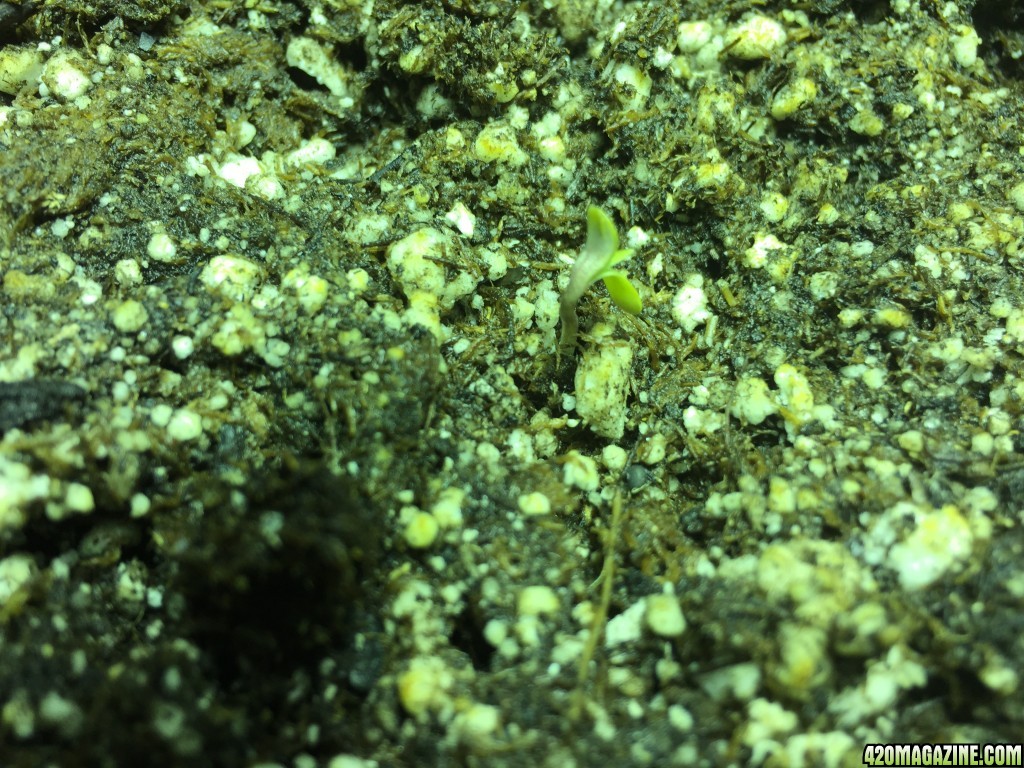
I have been told that seeds should not be handled with your bare fingers since oils and other contamination can damage them so they don’t pop open and it is not that hard to do. I soaked my seeds in 1 tsp Europonic Nitrozime per quart of RO water then pH adjusted the solution before adding seeds. The soaking was done in a shot glass that was either clear or had contrasting color inside so I could see what is going on with the seed. The seeds were soaked for 24 to 48 hours at room temperature and ambient light. They were ready when the seed opened like a clam shell and a small white tap root began to emerge. 100% of the seeds popped after about 29 hours using this method. If it takes longer than 48 hours, then the seeds probably won’t pop.
[Lesson 4] In my first grow, unknowingly mixed my Purple Kush Auto Flower seeds with my photoperiod seeds (didn't know the difference at the time of ordering). The autos go into the flower growth stage based on their own schedule that is determined by their genetics which is not controllable. My other photoperiod seeds go into flower when I change the lighting schedule from veg 18/6 (18 light, 6 hours dark) to flower 12/12. Mixing the two types in the same grow made things a little more complex when the lighting and feeding schedules got mixed together in the same room. It ended up working fine for me this time, but don’t want to repeat it. I just ran the Autos at the same light schedule as the photoperiods and will see how the yields were affected shortly – they look good so far.
Seedling Grow Medium
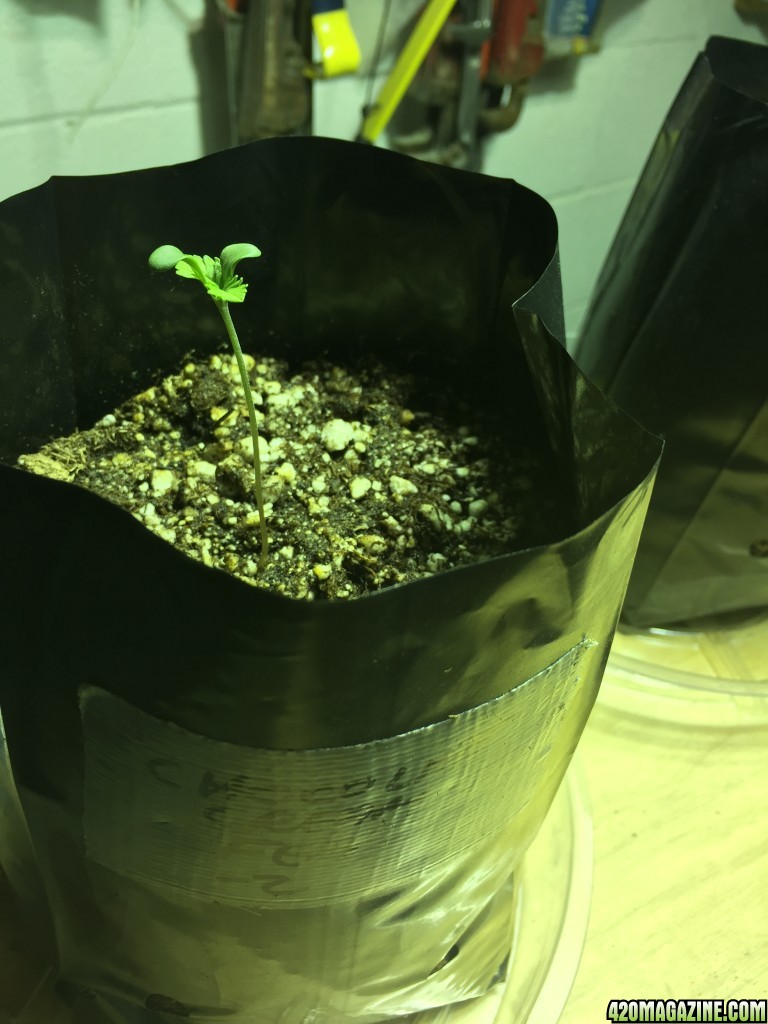
For the seedling stage, I used 100% Light Warrior Seed Starter on this first grow. [Lesson 5] My next grow will be 1/3 Light Warrior Seed Starter, 1/3 Perlite and 1/3 coco with about a 2” diameter ball of Light Warrior Seed Starter in the top center of the pot to place the popped seed. Using 100% Light Warrior held too much moisture and did not dry out as fast as I would like; I like to feed with nutrients on Sunday and then water with pH adjusted RO water & Cal-Mag at least once mid-week when the pots have dried out.
To reduce the likelihood of fungus gnats I add about 2 inches of perlite gnatnix on the top of the soil. I only added about 1” on this grow since I didn’t order enough; will use 2” for the next grow with the yellow sticky stakes.
I weight my pots when dry and then after completing the drain-to-waste feeding. I know water weights 8 pounds per gallon so I know exactly how much water is left. After awhile I could just pick them up and pretty much know if they are ready for water. By measuring the pH and TDS of the waste product, you get a good idea of what is going on in the grow media and if you need to amend it.
Light
The 1000 W Metal Halide (MH) light bulb was used during the Seedling stage. It was dimmed to 750 W; 18 hours with light on and 6 hours with light off. I’m told 15,000 - 50,000 lux with the light meter is a good amount of light for healthy vegetative growth. 40,000 Lux is my target. This is accomplished with the light around 24” above the top of the plant leaves. I recorded my new bulb readings at different positions at beginning of the grow to determine a baseline to judge how the bulb ages.
Feeding & Watering
[Lesson 6] Always let the pots dry out before the next watering or feeding to prevent fungus gnats and algae issues. I had a little algae form during my seedling stage and caught a couple dozen fungus gnats after transplanting due to over watering in the seedling stage.
Temperature, Humidity & Air
For seedlings and veg stages, I try to keep humidity levels within 40%rh to 70%rh and temperatures between 70F and 80F. Bud mold starts at 65F and thrives at 60F. This is where a humidifier and/or dehumidifier comes in handy. But even with a humidifier you will have a hard time keeping levels up because of the exhaust fan is doing its job. I have learned that just by just hanging a wet beach towel in the room, the humidity can raise it 5% or 10% in no time; when it dries put a new clean wet towel in its place (towels used over and over may create mold and mildew).

 https://www.420magazine.com/gallery/data/511
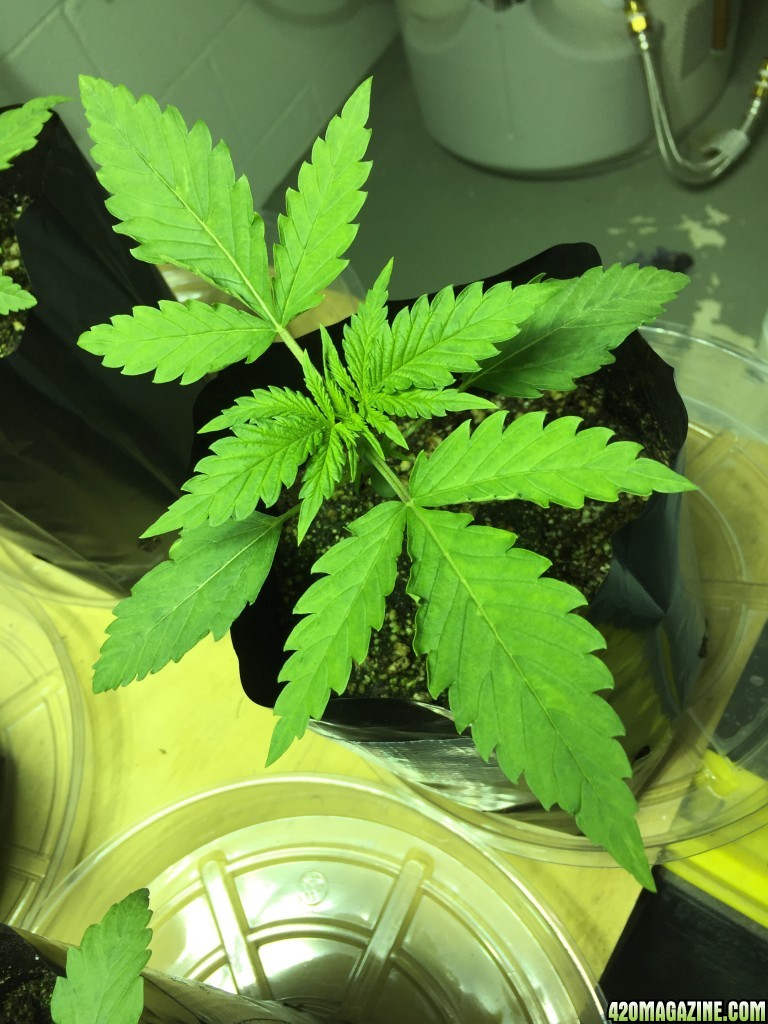
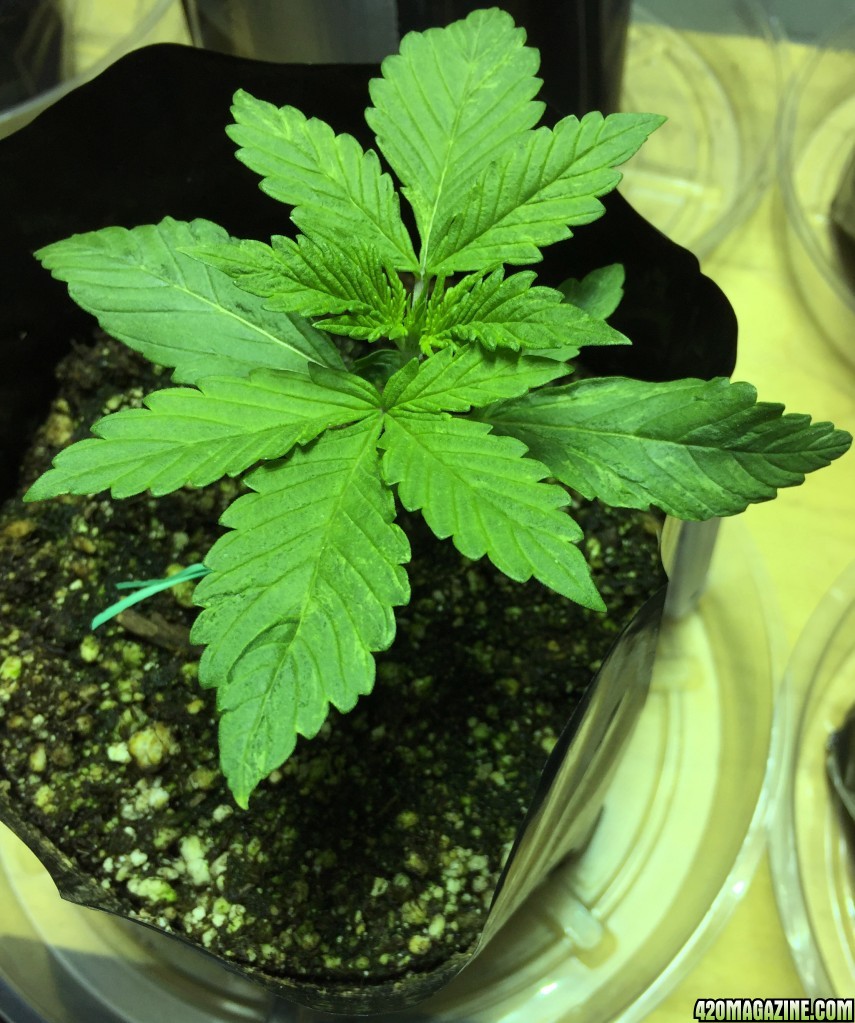
[B][CENTER][U]Early Veg Stage[/U][/CENTER][/B]
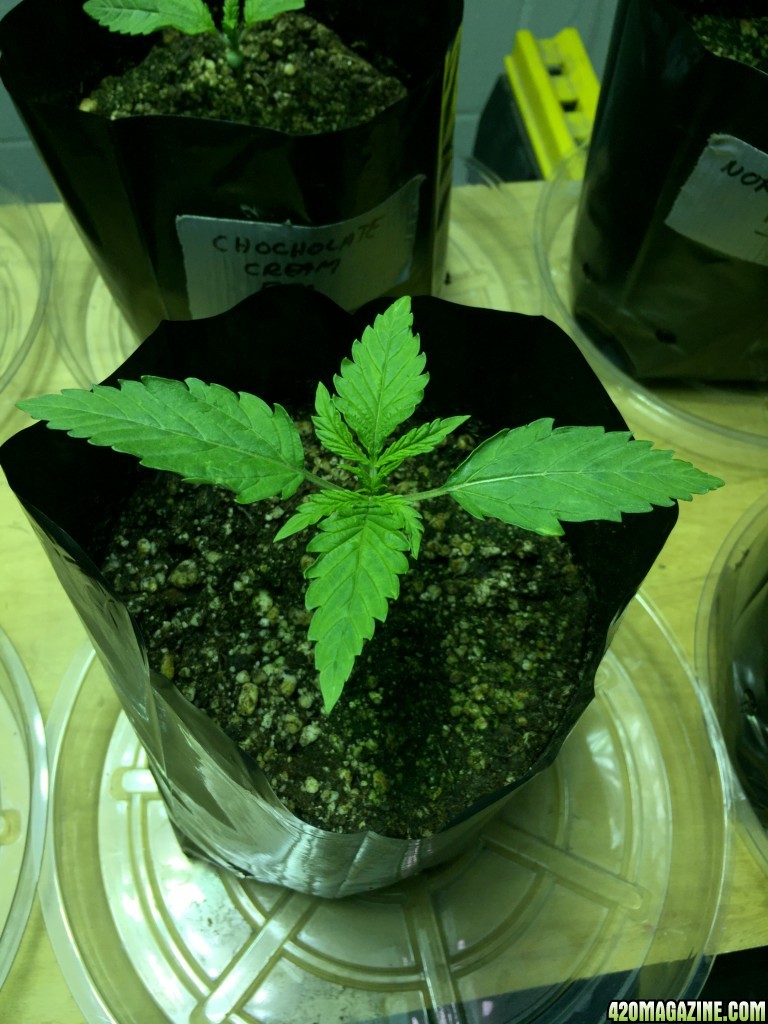
Seedlings are considered go into the Early Veg stage about 10 to 14 days from seeds show first signs of life through the grow medium. The growth stage helps determine the nutrient feeding schedule. My plants started Early Veg on [B]day 14[/B]. At day 14, my plants were 2” to 4.5” tall with leaf spans measured tip-to-tip between 2.25” and 5.75” and now growing about0 .25 to 0.50 inches per day. Some say early veg begins when the plants get their first set of normal leaves with 5 or 7 fingers depending on type of plant; the ‘normal leaf’ is the leaf you normally think of when you talk about marijuana.
[B]Topping, Fimming and LST[/B]
These are 3 methods I tried during my first grow that seemed to make sense and are expected to increase my yield of massive buds.
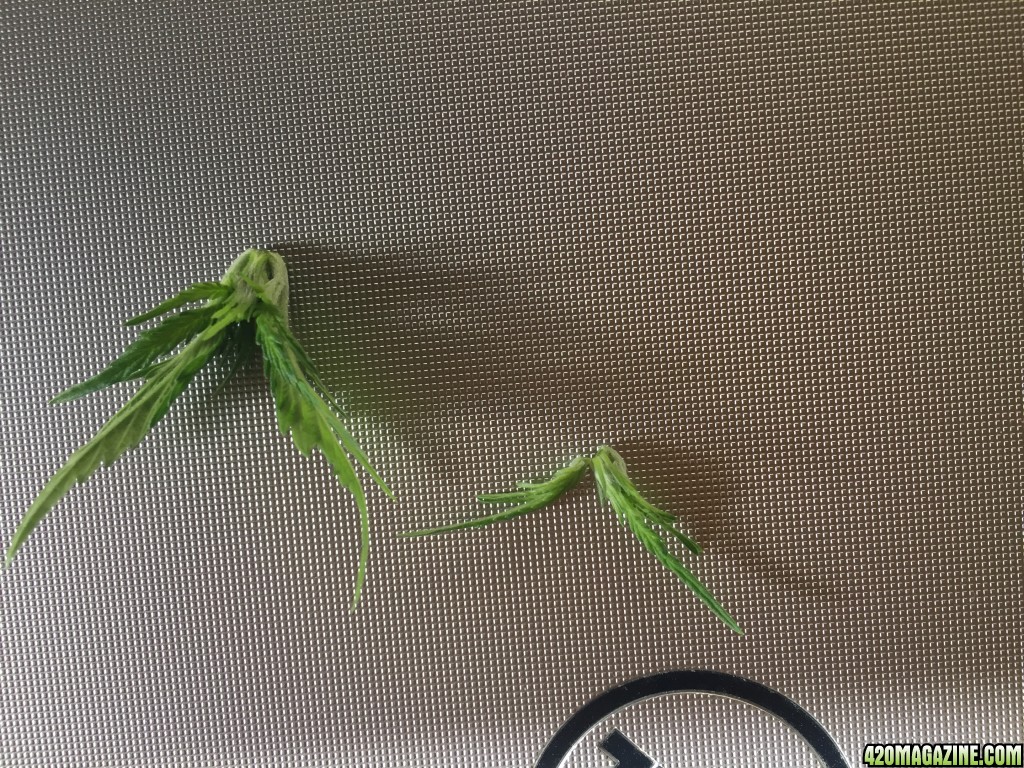
Topping is the cutting off of the very top main stem of your plant by cutting through the main stem just below the new growth with clean scissors (clean scissors with alcohol before cutting the next plant to avoid transferring diseases). This should be done after the 3rd or 4th leaf set (nodes) and can be done as late as the 1 week into flowering or more. Topping plants allows you to get TWO big fat main colas instead of just one. Topping will also stunt the growth of the plant for a few days and up to as much as a week. It is best to do topping at night when the hormones are working in the roots. Topping is good to slow down growth of plants that are stretching too much and leaving you with too much distance between leaf nodes. Though topping will produce a shorter plant, the yield will likely be much larger. The topping will produce a “Y” in the main stem. I had three photoperiod plants that were taller than the rest so I topped them on [B]day 20[/B] when they ranged between 2.75” to 5.875” in height with tip-to-tip leaf spans ranging 7.5” to 14.5”. The plants are growing at about 0.5 to 1.0 inches per day now.
I also “FIM’ed” the top of the three other photoperiod plants on [B]day 28[/B] after seeds popped. It is the same as topping except you leave a small portion of growth of the main shoot intact. The plant will then create 4 shoots that grow evenly in height instead of 2 shoots from topping. Sometimes FIM topping works and sometimes it doesn’t. The worst that will happen though is that you will have a few funny looking leaves.
Low Stress Training (LST) is another method of getting more big fat bud tops without stunting the growth. I am told that you are not supposed to top or FIM auto flower plants, like my two Purple Kush plants, because the growth cycle is so fast that any stunting of growth is harmful to the yield. I LST’ed one Purple Kush to compare the yield to a non-LST Purple Kush. LST is basically bending the plant over to the side so the tip of the top is lower than the rest of the trunk, and securing it all in place with tie wraps or paperclips. The main cola will eventually grow straight upward toward the light. The side shoots will also grow vertical toward the light creating the extra colas. This can greatly increase the overall yield. I don’t have my yield numbers yet.
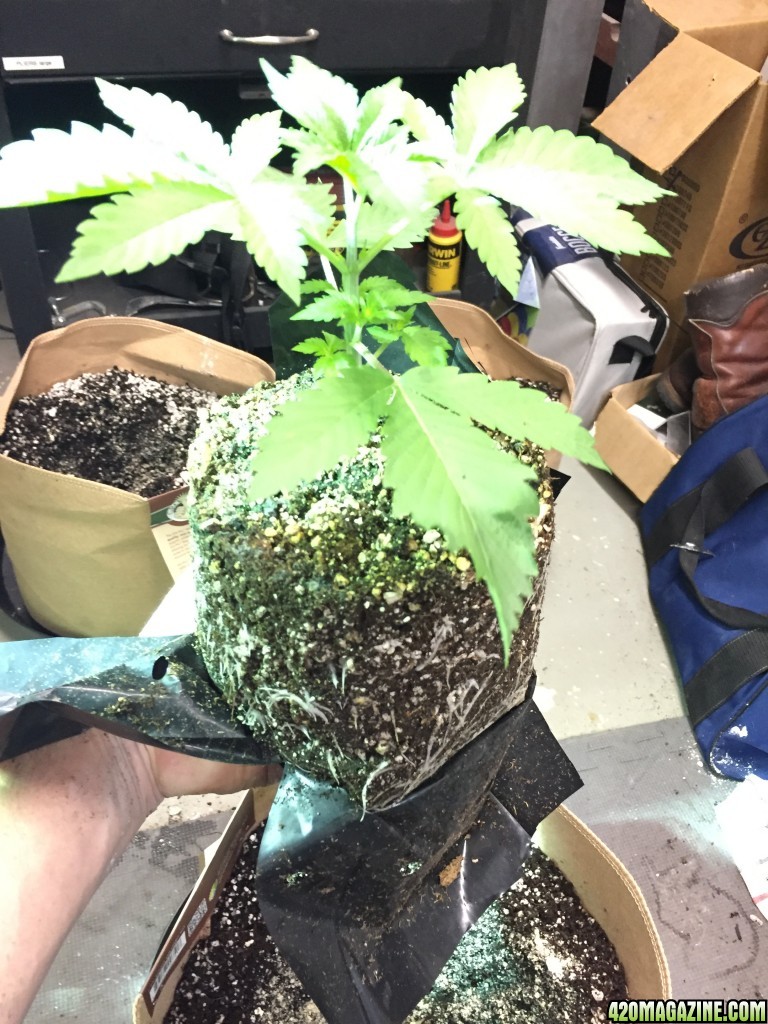
[B]Transplant from ½ Gallon Grow Bags to 5 Gallon Smart Pots[/B]
The plants were removed from their ½ gallon grow bags to the 5 gallon smart pots on [B]day 21[/B]. The 5 gallon smart pots contained 1/3 Ocean Forest Potting Soil, 1/3 coco, and 1/3 perlite. I made a hole large enough in the grow medium to accept the entire root ball from the grow bags. The hole was dusted with 2 teaspoons of Azos Extreme. After carefully removing the root ball for transplanting, the surface was covered with ¾” Grow Stone GnatNix to avoid problems with fungus gnats (I would have put on 2” but ran out of material). I ended up with 24 gnats total on the yellow sticky stakes during the grow.
I lollipopped and defoliated all of the plants except the Purple Kush Auto Flowers. This remove leaves and branches that don’t add any value to the plant. Excess foliage just take energy from the plant and blocks the air flow which needed to prevent mold and mildew. The plants are much easier to inspect and maintain without the extra leaves in the way.
[img]https://www.420magazine.com/gallery/data/511/12-19-2016_Day_15_Early_Veg.JPG
If I found I needed to extend the veg stage, I would repeat one of the late veg feeding week(s).
During the last week of veg I left the light on 24 hours per day and put the plants in complete darkness for the last 36 hours of the week. This is thought to super juice the plants for more massive buds. Emerald Harvest has a transition feeding stage from veg to flower.
Interestingly, the plants stopped growing vertically when they went into mid-flower (about day 62); the plant is now putting energy into growing buds. When they went into the late flowering feeding schedule, the plants did not dry out or use up the moisture in the grow media as fast as in the earlier flower stages.
I still have a couple of weeks left of flowering for the photoperiod plants. I just harvested the auto flowers yesterday after day 84. Before harvest I waited until most of the white pistils were brown and curled in, and looked at the trichomes under the 420 microscope for 70% cloudy trichomes and 10% amber which means it is good to harvest. I was told 25% of the bud weight will occur in last 2 weeks so be careful not to harvest too soon. When flushing, I fed the plants with the Emerald Harvest flush feeding schedule and then watered them over the following week twice with 100% pH balanced RO water and flushed until the Total Dissolved Solids were under 400 ppm. I flushed them (drain to waste of course) with 1.5 gallons instead of my usual 0.75 gallons. I was told to harvest when the plants have completely stopped growing and the white pistils are at least 50% to 70% brown and the trichomes are right. However, on this one I waited until 90% of the pistils were brown since that is what people told me to do for my Kush plants (since that is what provides the more relaxed effect for people who want Kush buds).
I washed the harvested buds in 5 gallons RO water with 1 cup lemon juice and 1 cup baking soda, then rinsed in 5 gallons RO water. I agitated the buds for about 20 seconds in each bucket before hanging to dry for about 7 to 10 days in a dark, 50% rh room with good fan circulation and ventilation. I found many people are doing this now, the reasoning makes sense and I figure, what can it hurt?
Wow, it took me about 4 hours per plant to trim each Purple Kush plant. Right after trim and while on the stems (before wash), they weighed about 8 ounces but realize I will end up with 20% to 25% of that after they are removed from the stems, dried and cured (if I am lucky). The Purple Kush Auto is not a high yield plant.
Problem: My Purple Kush buds looked very nice on the plant but after trim they came out light and airy on one Kush, the other plant was had denser buds. Both were quite light and airy compared to what I am used to seeing. Not sure what causes that but I think it is all appearance and wont affect the end result. I think the buds may become denser and compacted during the dry and cure cycle. I hope so but time will tell. The other buds in the grow look and feel dense like I am used to seeing. Which I knew what made them different than the others.
After drying, I plan to cure for 4 to 6 weeks in Ball Wide Mouth Quart jars, opening them once a day to air out for the first two weeks, then twice per week for two weeks and finally once per week thereafter. I will put in desiccant packs used for cigars to hold the buds at 62% rh in the jars during cure.
Basic Equipment:
1. Dimmable 1000W Cool Sun XL Reflector integral cooling duct
2. 1000 W HM Bulb for Seedling and Veg stages (bulb good for 2 or 3 grows)
3. 1000 W HPS Bulb for Flower stages (bulb good for 2 or 3 grows)
4. Timer That Can Handle 1000W Light: Purple Reign 115V 15A Digital 7 Day Dual Outlet Grow Light Timer
5. RO Water Filter System like the Hydro Logic Stealth RO150 Reverse Osmosis Filter - 150GPD with premium carbon filter (filters about 3.25 gallons per hour with 10-20 ppm of total dissolved solids)
6. Exhaust Fan & Flexible Ducting
7. Humidifier
8. Dehumidifier
9. Panda Film Black & White Poly Film 5.5 Mil 10' x 25' to build enclosure if needed
10. pH Meter & calibration fluid Oakton EcoTestr pH 2 Waterproof pH Tester, 0.0 to 14.0 pH Range
11. Total Dissolved Solids Meter HM DIGITAL TDS-4TM Handheld TDS Meter Tester With Large LCD Screen Includes ATC Temperature Reading Testing For Hydroponics Gardening Aquariums Reefs Pools Spas Drinking Pure Filter system
12. Light Meter Dr.Meter LX1010B 100,000 Light Meter with LCD Display
13. 420 Microscope for Trichome and Spider Mites Identification on Cannabis Plants 60X-200X Mag.
14. Measure Temperature & Humidity
15. Dedicate hand trimmer
16. ½ GAL. GROW BAGS for seedlings
17. 5 Gallon Smart Pots
18. Two 6” fans
19. Bamboo stakes and tie wraps to support what is hoped to be many massive Cola’s
20. Scale
Growing Materials
1. Seeds (Purple Kush Auto, Northern Lights Photoperiod, Chocolate Cream Photoperiod, Mazer Photoperiod)
2. Light Warrior Seed Starter Medium
3. Perlite
4. Fox Farm Ocean Forest Potting Soil
5. Azos Extreme N2 supplement for transplant
6. General Hyponics Organic Coco Tec Grow Medium
7. Emerald Harvest Pro 2 Part Nutrient Package
8. pH Up and pH Down solutions
9. Perlite Growstone Gnat Nix! Fungus Gnat Control, 9-Liter (needed 20-Liter)
10. Sticky Stakes: 4 of Safer Brand 5025 Houseplant Sticky Stakes Insect Trap, 7 Traps per pkg
Background
Grow Media
After much research I based my first grow on the Dutchman's Hydrosoil Method since it provides the benefits of hydroponics (fast growth, large yields, large healthy plants) with the taste and quality that soil growing offers. To create Hydrosoil, mix 1/3 Ocean Farm potting soil, 1/3 Perlite and 1/3 Coco.
The coco helps drainage, swells to 10x in size when it absorbs water, promotes fine root growth (tips of roots is where the absorption occurs), makes watering more forgiving, is a natural sweetener that helps taste but also provides the plants with needed carbohydrates.
Perlite is like puffed recycled glass about the size of a small marble that lightens the soil and helps the roots breath better. If you have never picked it up, it feels like a hand full of white Cheetos.
I am trying to keep everything organic as possible without having to make my own nutrients and compost. I understand that Ocean Farms used to be organic but lost the designation for some reason in the past year so they are probably not far off the mark. Emerald Harvest is working on obtaining an organic certification.
Smart Pots
The grow uses fabric smart pots; for the seedlings, I used plastic ½ gallon grow bags with many 3/8” diameter (approximate) holes are in the bags so the roots can more oxygen. The reasoning for using the smart pot idea is that they are made of cloth fabric so the roots can breathe better. The roots are “air-pruned”; roots grow to the edge of the pot but don’t go outside of the fabric.
I raised the pots over the top of their saucers to add about 25% more breathing surface for the roots and allow the bottom of the pot to dry out better. To raise the pots, I made simple PVC stands that can be height adjusted so the plant canopy’s can all be the same distance under the grow light.
Feeding/Water
Our tap water is very hard; it has a Total Dissolved Solids (TDS) content of about 330 ppm. Our tap water also contains chlorine and chloramine along with other undesirable elements that cause root and growth problems by blocking nutrients from going into the plant. Furthermore, the tap water also has a high pH which will also prevent nutrients from being absorbed by the roots. After the water runs through the reverse osmosis (RO) system, the TDS drops to about 5 to 20 ppm and the chlorine and chloramine has been removed through an additional filter. Since I am using RO water, it was recommended that I use full strength Emerald Harvest Cal-Mag (5ml/gal) at the start of watering and feeding except don’t use it for the initial seed sprouting and the final flushing before harvest time. All other Emerald Harvest nutrients are mixed at 50% of the recommended amount and adjust up only if needed. Emerald Harvest provides a very helpful feeding schedule for each phase and week of growth. We are using Emerald Harvest’s 2-Part Nutrient system and read that they have applied for a “organic” certification for their nutrients.
All of my watering and feeding is with the “drain to waste” method meaning 10% to 20% just drains through the bottom of the smart pot as waste. Drain-to-waste may also keep salt build ups from forming on the roots. If the grow medium is too wet, you get fungus gnats plus algae growth on the surface of your dirt. Too much water is not good for the plants; you will see that in their droopy leaves and other problems it causes.
When using reverse osmosis water, I first add Cal-Mag (full 100% strength at 5ml/gal), then add the other micro nutrients like Emerald Goddess, then finally either Grow or Bloom A&B depending if I am in veg or flower, and mix them in that order for mineral compatibility reasons. Then finally pH balance the solution since nutrients change pH levels. I used 5ml/gal Cal-Mag on every watering & feeding cycle. Adding Cal-Mag as the first micro nutrient helps keep the other nutrients go into solution. I have the aerator running while mixing the solutions after adding each nutrient. The roots will love you for the extra oxygen if you also use an aquarium or bait tank aerator when you are mixing your feed and watering solutions.
Keep pH to 5.8 to 6.5, best if pH is 6.0 to 6.2 and many target a pH of 6.0 for Hydrosoil. Using the “pH Down” product: 1 mL/gallon of water will generally reduce your pH about 1 point. Using PH Up, depending on how hard your water is you need to add 2-4mL/gallon of water to raise the pH 1 point. That's just a very rough estimate, but gives you a starting point. In imperial measurements that's 0.4-0.8tsp/gallon. Don’t use both pH Up and pH Down in the same bucket. If you over shoot your mark, add more RO water to move it in the other direction. I’m told the pH Up and pH Down solutions don’t work well when combined.
It is helpful to weigh your plants before their first watering, weigh the plants after they get watered or fed; all drain-to-waste. It is okay to do a medium watering using less water if you are having a drying out problem and your next feeding cycle is quickly approaching. Remember that water weighs 8 pounds per gallon so based on the weight, you will always know how much moisture is left in the soil. Measuring the pH and the ppm of the TDS in the drain to waste water gives me an idea of what is going on in the soil and lets you know if it needs to be amended. If the drain to waste product is within 0.5 pH of your input water the you are fine. However, during some stages of flowering it is normal for drain to waste products to go up to 7.0 pH if you water going in has a 6.0 pH - the plants will be fine.
Some say stick your finger in the soil a couple of inches to see if it is dry but I always ended up over-watering with that method.
Note: If you have to go out of town for a week and you are lucky enough to have a babysitter for your queens, you can pre-mix solutions a week in advance, it is likely the solutions will need to be pH adjusted (even after you already did it). Remember to stir well to get the minerals off the bottom, and aerate and pH balance before feeding or watering.
[Lesson 1] Make a checklist. I have been distracted more than once while mixing my nutrients for weekly feedings; once so bad I dumped 8 gallons of feed water out and started over. I was lucky on that one because I caught the error before it was too late. The missed pH balance I was not so lucky and ended up yellowing some leaves as a result (realized the mistake at the end of the feeding and saw the damage the next day and was bummed). Now I calculate the number of teaspoons of each nutrient, write it down next to the name of the nutrient, and create a checklist that I check off after adding each mineral. I even have a check mark for pH balancing at the end. I then check my pH and TDS ppms against previous feedings as a cross check.
Lighting
For veg growth I try to maintain 15,000 - 50,000 lux with a target of 40,000 Lux using a MH bulb. Under 15,000 plants get too stretchy (long skinny distances between nodes). For flowering I change to a HPS bulb with 45,000 - 70,000 lux - optimal amount of light for cannabis plants in the flowering (budding) stage. 65,000 Lux is good. I built stands out of PVC to help maintain an level canopy distance to the light. To maintain these light levels, the light is about 24” from the canopy.
Temperature, Humidity & Air
Good room ventilation aids in creating a desired high transpiration rate for the plants which translates into a greater rate of nutrient uptake; more water leaving the plant through the leaves means more nutrients need to come up through the roots. Remember that ventilation means changing the air, not just blowing it around the room (that is circulation). This is where a good exhaust fan is needed to pull in fresh air into the room, pass it through your plants, then through the grow light to keep it cooled down, and then outside the building.
For the seedling and veg stages, I tried to keep humidity levels within 40%rh to 70%rh and temperatures between 70F and 80F. Bud mold starts at 65F and thrives at 60F. This is where a humidifier and/or dehumidifier comes in handy. But even with a humidifier you will have a hard time keeping levels up because of the exhaust just fan doing its job. I have learned that just by just hanging a wet beach towel in the room, the humidity can raise it 5% or 10% in no time; when it dries put a new clean wet towel in its place (towels used over and over might create mold and mildew). During flowering I try to keep the room 40% to 50% with the last 2-3 weeks below 25% if able. Then for drying the bud I try to maintain 65F to 75F and 45% to 55% rh. Holding these goals has been difficult with my budget humidifiers and dehumidifiers but I try my best.
Circulation of the air is also important. You can use one or two little 6” fans to provide needed air circulation to 6 or 8 plants. This provides enough force air so that all of the leaves wiggle slightly (they are not supposed to be blow around hard). This light breeze and movement of leaves helps prevent stagnate areas that might be ideal for mold and mildew growth. [Lesson 2] Too much wind across the plants can actually get wind burn to the leaves. Too much wind can pull too much moisture out of the leaves thus requiring the plan to pull up too many nutrients into the plant to replace what has left which causes obvious problems for the plant.
Cleanliness
You will want to keep the grow room as clean as practical to prevent pests, mold and mildew which are all bad for your queens. Keeping pets and people with muddy feet out of the room can go a long way to keeping the room clean.
Seedling Stage
Sprouting Seeds
[Lesson 3] Seeds can be a long-led item if you must order them from half way around the world and will want to take that into your planning - they can take over a month to arrive.
I have been told that seeds should not be handled with your bare fingers since oils and other contamination can damage them so they don’t pop open and it is not that hard to do. I soaked my seeds in 1 tsp Europonic Nitrozime per quart of RO water then pH adjusted the solution before adding seeds. The soaking was done in a shot glass that was either clear or had contrasting color inside so I could see what is going on with the seed. The seeds were soaked for 24 to 48 hours at room temperature and ambient light. They were ready when the seed opened like a clam shell and a small white tap root began to emerge. 100% of the seeds popped after about 29 hours using this method. If it takes longer than 48 hours, then the seeds probably won’t pop.
[Lesson 4] In my first grow, unknowingly mixed my Purple Kush Auto Flower seeds with my photoperiod seeds (didn't know the difference at the time of ordering). The autos go into the flower growth stage based on their own schedule that is determined by their genetics which is not controllable. My other photoperiod seeds go into flower when I change the lighting schedule from veg 18/6 (18 light, 6 hours dark) to flower 12/12. Mixing the two types in the same grow made things a little more complex when the lighting and feeding schedules got mixed together in the same room. It ended up working fine for me this time, but don’t want to repeat it. I just ran the Autos at the same light schedule as the photoperiods and will see how the yields were affected shortly – they look good so far.
Seedling Grow Medium
For the seedling stage, I used 100% Light Warrior Seed Starter on this first grow. [Lesson 5] My next grow will be 1/3 Light Warrior Seed Starter, 1/3 Perlite and 1/3 coco with about a 2” diameter ball of Light Warrior Seed Starter in the top center of the pot to place the popped seed. Using 100% Light Warrior held too much moisture and did not dry out as fast as I would like; I like to feed with nutrients on Sunday and then water with pH adjusted RO water & Cal-Mag at least once mid-week when the pots have dried out.
To reduce the likelihood of fungus gnats I add about 2 inches of perlite gnatnix on the top of the soil. I only added about 1” on this grow since I didn’t order enough; will use 2” for the next grow with the yellow sticky stakes.
I weight my pots when dry and then after completing the drain-to-waste feeding. I know water weights 8 pounds per gallon so I know exactly how much water is left. After awhile I could just pick them up and pretty much know if they are ready for water. By measuring the pH and TDS of the waste product, you get a good idea of what is going on in the grow media and if you need to amend it.
Light
The 1000 W Metal Halide (MH) light bulb was used during the Seedling stage. It was dimmed to 750 W; 18 hours with light on and 6 hours with light off. I’m told 15,000 - 50,000 lux with the light meter is a good amount of light for healthy vegetative growth. 40,000 Lux is my target. This is accomplished with the light around 24” above the top of the plant leaves. I recorded my new bulb readings at different positions at beginning of the grow to determine a baseline to judge how the bulb ages.
Feeding & Watering
[Lesson 6] Always let the pots dry out before the next watering or feeding to prevent fungus gnats and algae issues. I had a little algae form during my seedling stage and caught a couple dozen fungus gnats after transplanting due to over watering in the seedling stage.
Temperature, Humidity & Air
For seedlings and veg stages, I try to keep humidity levels within 40%rh to 70%rh and temperatures between 70F and 80F. Bud mold starts at 65F and thrives at 60F. This is where a humidifier and/or dehumidifier comes in handy. But even with a humidifier you will have a hard time keeping levels up because of the exhaust fan is doing its job. I have learned that just by just hanging a wet beach towel in the room, the humidity can raise it 5% or 10% in no time; when it dries put a new clean wet towel in its place (towels used over and over may create mold and mildew).
[B][CENTER][U]Early Veg Stage[/U][/CENTER][/B]
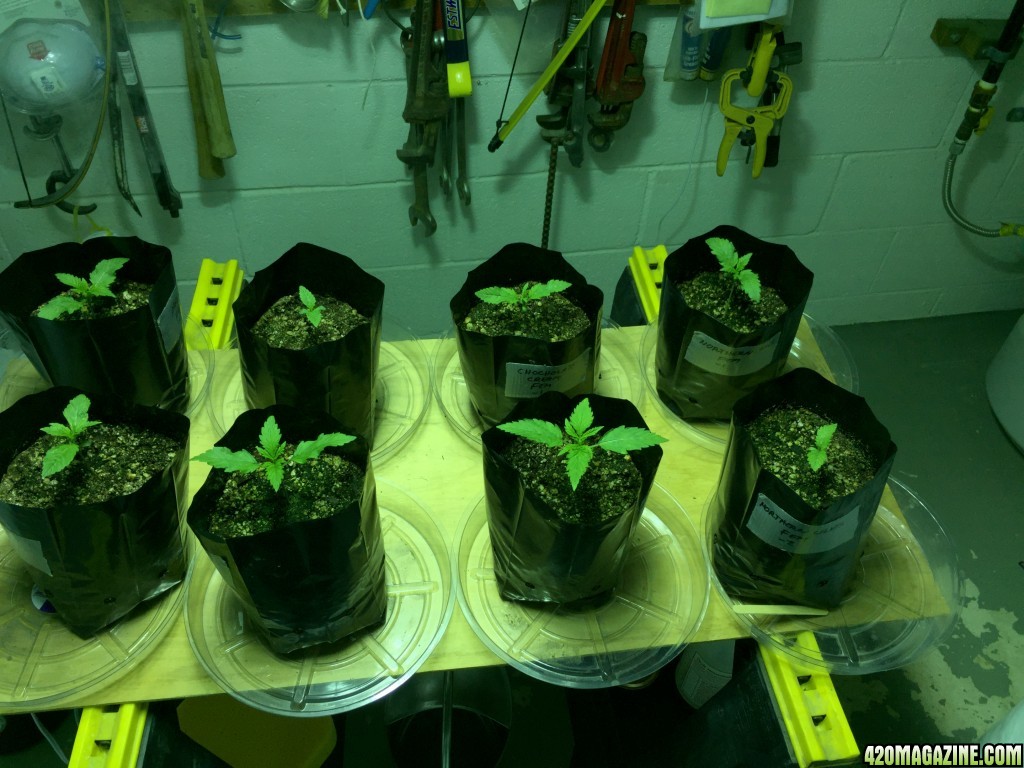
Seedlings are considered go into the Early Veg stage about 10 to 14 days from seeds show first signs of life through the grow medium. The growth stage helps determine the nutrient feeding schedule. My plants started Early Veg on [B]day 14[/B]. At day 14, my plants were 2” to 4.5” tall with leaf spans measured tip-to-tip between 2.25” and 5.75” and now growing about0 .25 to 0.50 inches per day. Some say early veg begins when the plants get their first set of normal leaves with 5 or 7 fingers depending on type of plant; the ‘normal leaf’ is the leaf you normally think of when you talk about marijuana.
[B]Topping, Fimming and LST[/B]
These are 3 methods I tried during my first grow that seemed to make sense and are expected to increase my yield of massive buds.
Topping is the cutting off of the very top main stem of your plant by cutting through the main stem just below the new growth with clean scissors (clean scissors with alcohol before cutting the next plant to avoid transferring diseases). This should be done after the 3rd or 4th leaf set (nodes) and can be done as late as the 1 week into flowering or more. Topping plants allows you to get TWO big fat main colas instead of just one. Topping will also stunt the growth of the plant for a few days and up to as much as a week. It is best to do topping at night when the hormones are working in the roots. Topping is good to slow down growth of plants that are stretching too much and leaving you with too much distance between leaf nodes. Though topping will produce a shorter plant, the yield will likely be much larger. The topping will produce a “Y” in the main stem. I had three photoperiod plants that were taller than the rest so I topped them on [B]day 20[/B] when they ranged between 2.75” to 5.875” in height with tip-to-tip leaf spans ranging 7.5” to 14.5”. The plants are growing at about 0.5 to 1.0 inches per day now.
I also “FIM’ed” the top of the three other photoperiod plants on [B]day 28[/B] after seeds popped. It is the same as topping except you leave a small portion of growth of the main shoot intact. The plant will then create 4 shoots that grow evenly in height instead of 2 shoots from topping. Sometimes FIM topping works and sometimes it doesn’t. The worst that will happen though is that you will have a few funny looking leaves.
Low Stress Training (LST) is another method of getting more big fat bud tops without stunting the growth. I am told that you are not supposed to top or FIM auto flower plants, like my two Purple Kush plants, because the growth cycle is so fast that any stunting of growth is harmful to the yield. I LST’ed one Purple Kush to compare the yield to a non-LST Purple Kush. LST is basically bending the plant over to the side so the tip of the top is lower than the rest of the trunk, and securing it all in place with tie wraps or paperclips. The main cola will eventually grow straight upward toward the light. The side shoots will also grow vertical toward the light creating the extra colas. This can greatly increase the overall yield. I don’t have my yield numbers yet.
[B]Transplant from ½ Gallon Grow Bags to 5 Gallon Smart Pots[/B]
The plants were removed from their ½ gallon grow bags to the 5 gallon smart pots on [B]day 21[/B]. The 5 gallon smart pots contained 1/3 Ocean Forest Potting Soil, 1/3 coco, and 1/3 perlite. I made a hole large enough in the grow medium to accept the entire root ball from the grow bags. The hole was dusted with 2 teaspoons of Azos Extreme. After carefully removing the root ball for transplanting, the surface was covered with ¾” Grow Stone GnatNix to avoid problems with fungus gnats (I would have put on 2” but ran out of material). I ended up with 24 gnats total on the yellow sticky stakes during the grow.
I lollipopped and defoliated all of the plants except the Purple Kush Auto Flowers. This remove leaves and branches that don’t add any value to the plant. Excess foliage just take energy from the plant and blocks the air flow which needed to prevent mold and mildew. The plants are much easier to inspect and maintain without the extra leaves in the way.
[img]https://www.420magazine.com/gallery/data/511/12-19-2016_Day_15_Early_Veg.JPG
Late Veg Stage
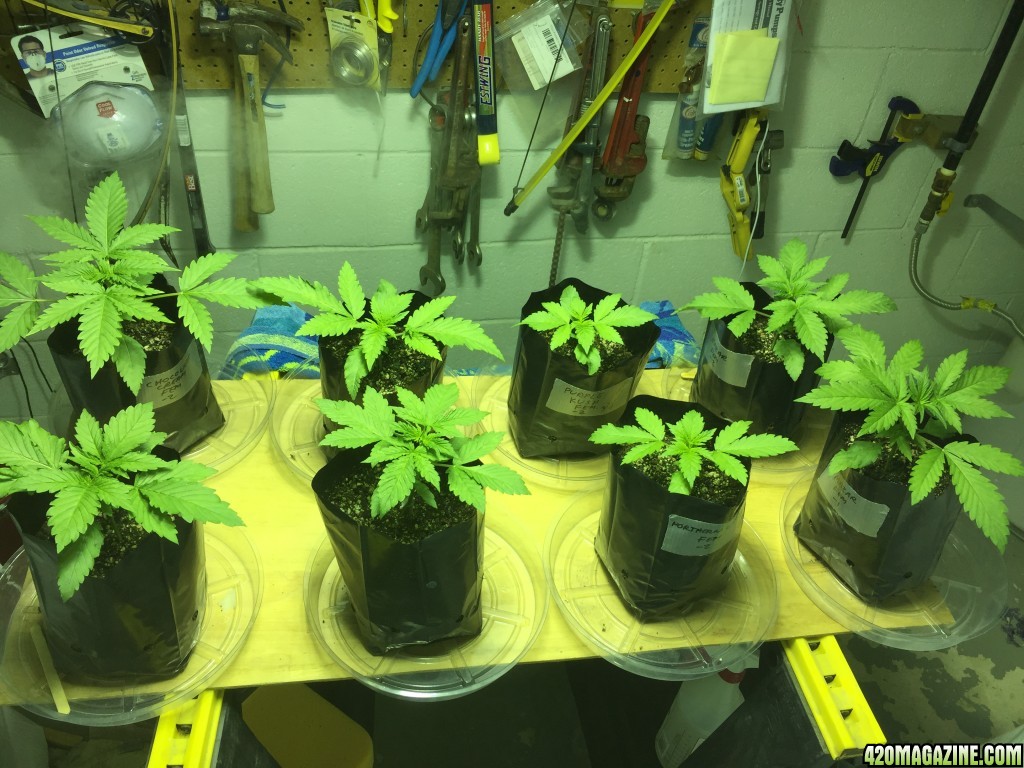
The plants went from the early veg to the late veg feeding schedule on day 35. The plants were between 9 and 14 inches tall with a tip-to-tip leaf span between 17 and 23 inches. The plants are growing at 1.0 to 1.5 inches per day now. Based on the early bud formation on the auto flower Purple Kush plants already, I put them into early flowering feeding schedule on the same day; not a real clean transition, but I had to do something for the autos. If I found I needed to extend the veg stage, I would repeat one of the late veg feeding week(s).
Flowering Stage
After 6 to 8 weeks in veg, go right into the Flower stage. My plants went into the flower stage after 7 weeks from seed but should have waited another week perhaps. The flowering stage usually takes about 8 to 10 weeks.During the last week of veg I left the light on 24 hours per day and put the plants in complete darkness for the last 36 hours of the week. This is thought to super juice the plants for more massive buds. Emerald Harvest has a transition feeding stage from veg to flower.
Interestingly, the plants stopped growing vertically when they went into mid-flower (about day 62); the plant is now putting energy into growing buds. When they went into the late flowering feeding schedule, the plants did not dry out or use up the moisture in the grow media as fast as in the earlier flower stages.
I still have a couple of weeks left of flowering for the photoperiod plants. I just harvested the auto flowers yesterday after day 84. Before harvest I waited until most of the white pistils were brown and curled in, and looked at the trichomes under the 420 microscope for 70% cloudy trichomes and 10% amber which means it is good to harvest. I was told 25% of the bud weight will occur in last 2 weeks so be careful not to harvest too soon. When flushing, I fed the plants with the Emerald Harvest flush feeding schedule and then watered them over the following week twice with 100% pH balanced RO water and flushed until the Total Dissolved Solids were under 400 ppm. I flushed them (drain to waste of course) with 1.5 gallons instead of my usual 0.75 gallons. I was told to harvest when the plants have completely stopped growing and the white pistils are at least 50% to 70% brown and the trichomes are right. However, on this one I waited until 90% of the pistils were brown since that is what people told me to do for my Kush plants (since that is what provides the more relaxed effect for people who want Kush buds).
I washed the harvested buds in 5 gallons RO water with 1 cup lemon juice and 1 cup baking soda, then rinsed in 5 gallons RO water. I agitated the buds for about 20 seconds in each bucket before hanging to dry for about 7 to 10 days in a dark, 50% rh room with good fan circulation and ventilation. I found many people are doing this now, the reasoning makes sense and I figure, what can it hurt?
Wow, it took me about 4 hours per plant to trim each Purple Kush plant. Right after trim and while on the stems (before wash), they weighed about 8 ounces but realize I will end up with 20% to 25% of that after they are removed from the stems, dried and cured (if I am lucky). The Purple Kush Auto is not a high yield plant.
Problem: My Purple Kush buds looked very nice on the plant but after trim they came out light and airy on one Kush, the other plant was had denser buds. Both were quite light and airy compared to what I am used to seeing. Not sure what causes that but I think it is all appearance and wont affect the end result. I think the buds may become denser and compacted during the dry and cure cycle. I hope so but time will tell. The other buds in the grow look and feel dense like I am used to seeing. Which I knew what made them different than the others.
After drying, I plan to cure for 4 to 6 weeks in Ball Wide Mouth Quart jars, opening them once a day to air out for the first two weeks, then twice per week for two weeks and finally once per week thereafter. I will put in desiccant packs used for cigars to hold the buds at 62% rh in the jars during cure.
