Greenislands 5 Gallon Upgrade Ebb & Gro TEK

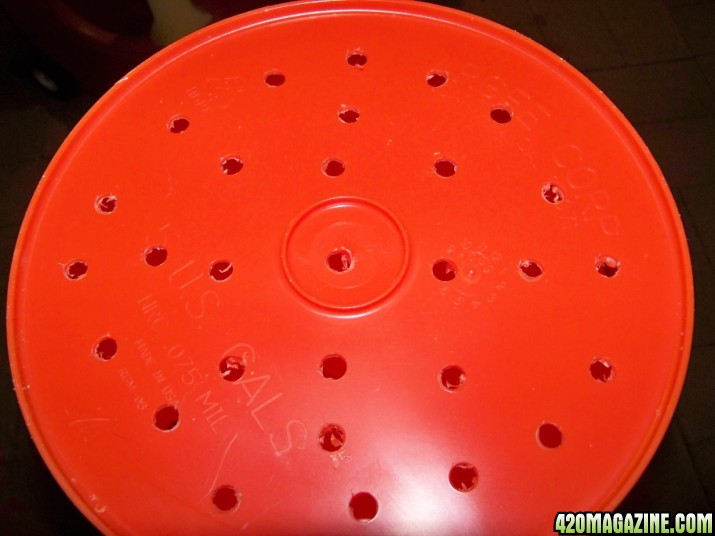
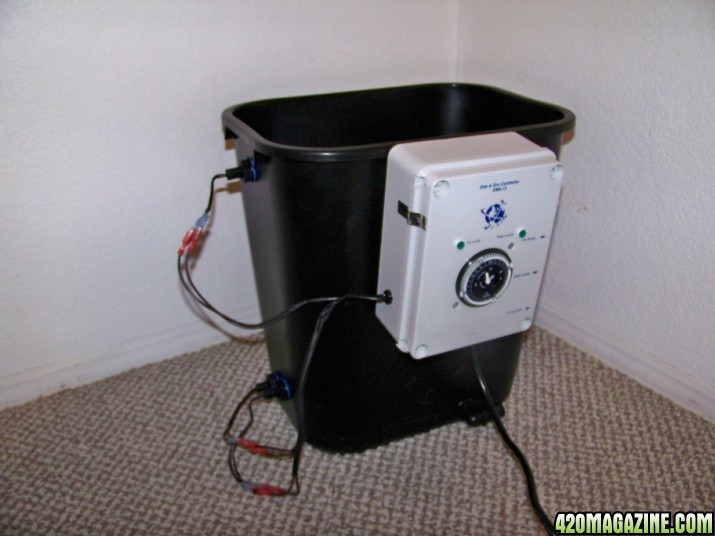
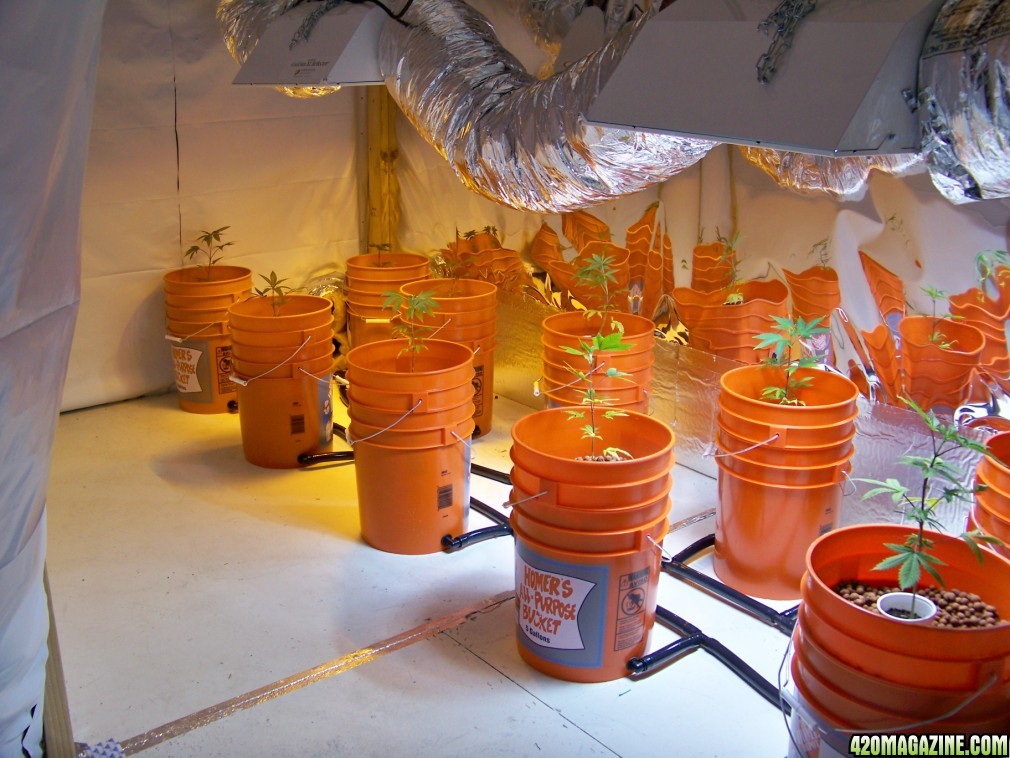
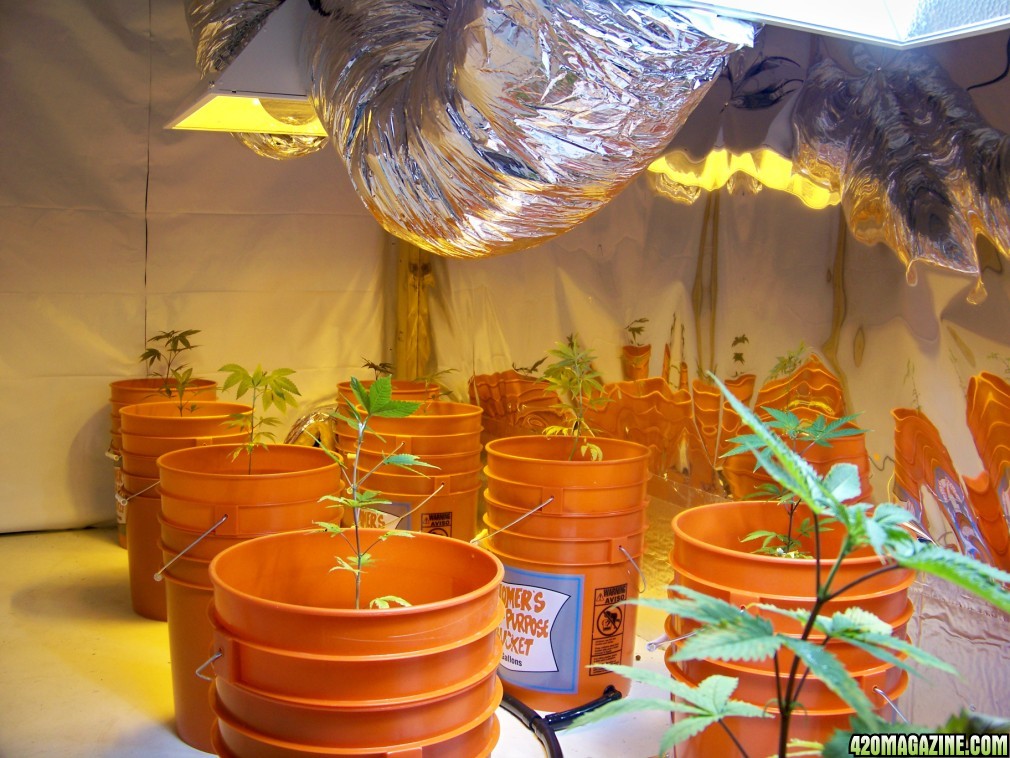
Hasn't happened to me but I also grow many smaller plants (30-36 inches tall). Roots do grow down into the bottom. I run an air stone in my res's to ensure as much oxygen as possible is in the water.

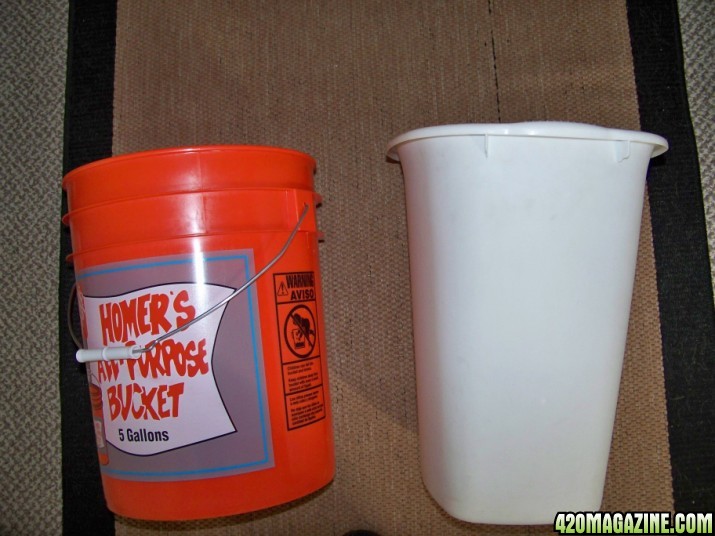
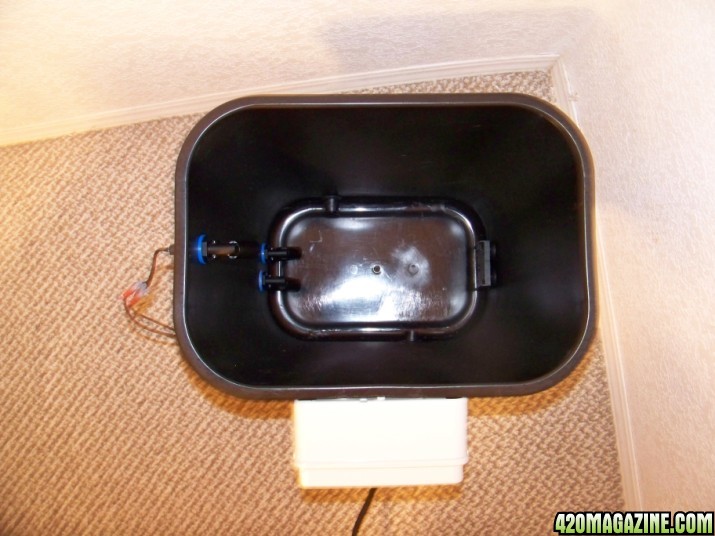
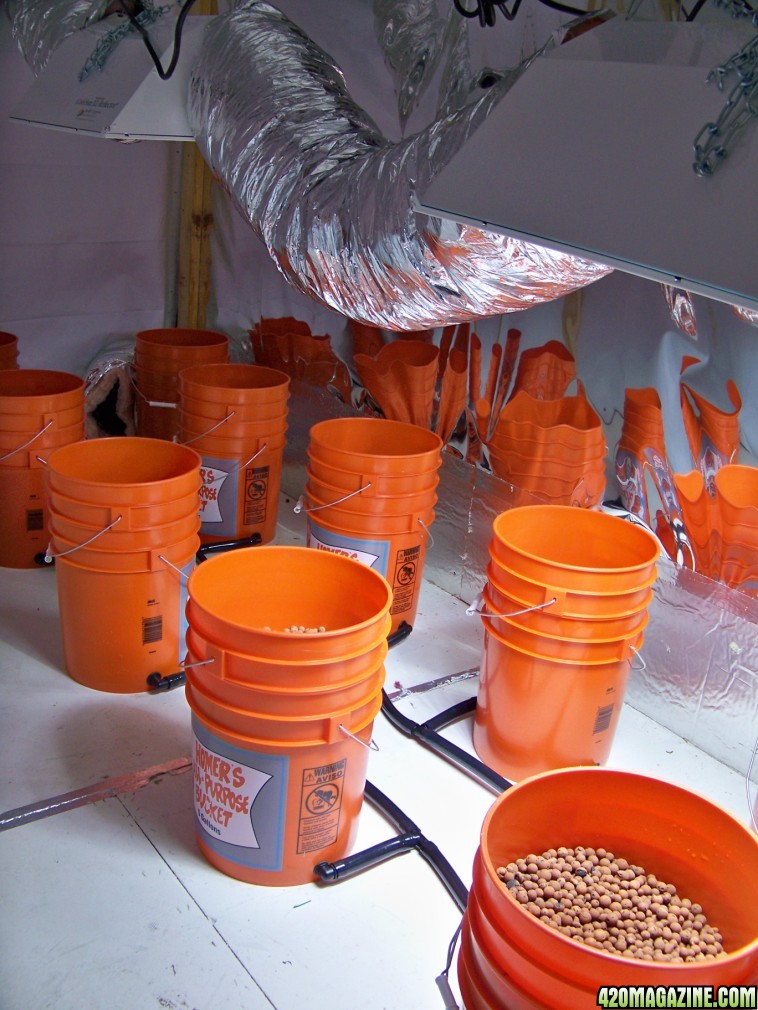
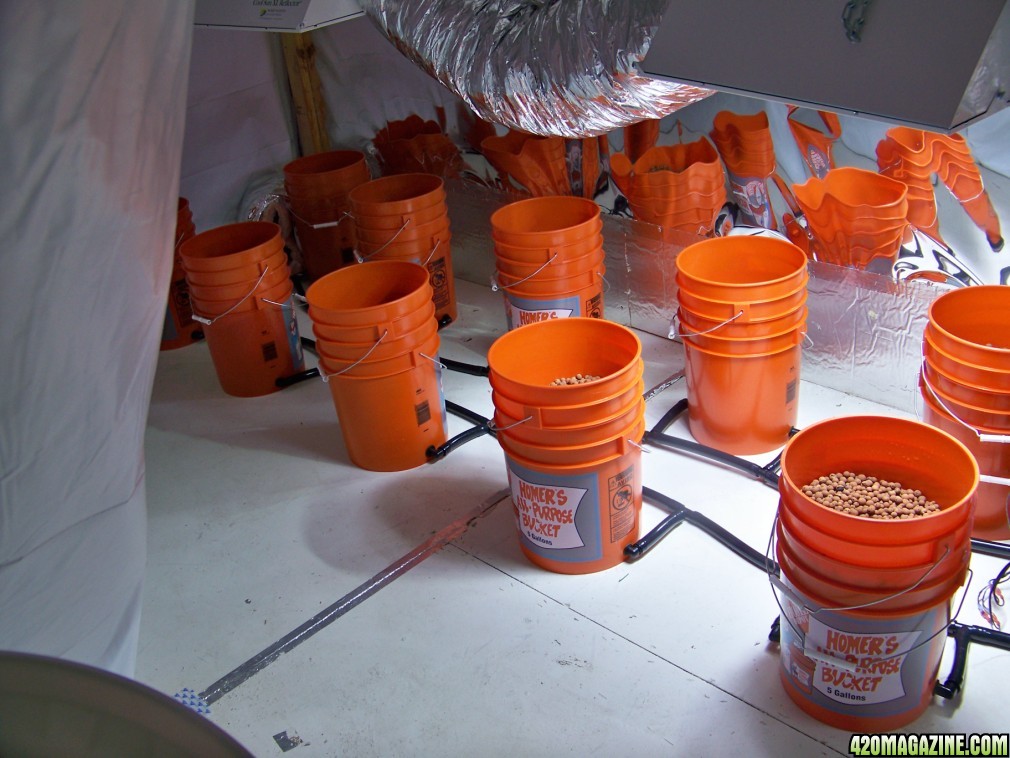
Some have gone as far as running a air stone down in the bottom of the outer bucket. thats a lot of airstones, lines and pumps if I were to do that. I think it would be easier to find a way from letting the roots into the bottom pot. perhaps capillary mats or something in the bottom of the inner pots would help.

I have had minimal root intrustion on the buckets....its never a problem. Even when I had that freak plant that was rootbound, I didnt have many toots coming out at all
 
I do believe they are 2 gallon buckets and not 2.5. Which explains the 2.5 buckets to fill 1 5 gallon. I calculate 1 50L bag will fill 2 and 3/5 5 gallon buckets


I filled the buckets up with hydroton already and it took 3 bags to fill 10 buckets, however it will probably take a liitle bit more because the plants arent in yet so I filled them a little low. And remember that the buckets wont be all the way full because they sit about 3-4 inches apart so you can only have the water go so high without flowing over the sides of the first bucket. I think in the end we will be looking at something like 3.5 bags to fill all the buckets but thats just fine with me because that will leave several bags for backups. If I get off work early enough the girls will be moved tamale. Thanks for stopping by everyone!
 
Alright!!! I am finally on the way to having this system work for me instead of me working for it! I just ran it for over 24 gours with no glitches no leaks no nothing. So now the plants are in and starting to grow! hooray!! So I want to add that I had THOUGHT that I had White Widow clones in the mix but apparently I forgot to take those clones or that strains only female wasnt ready for cloning yet, Im not sure which...dont remember, but its just Super lemon haze, GDP Sweet Tooth Tangerine and Big Bang...lol.."only". On another note its coming to the end of the alloted time to vote for member of the month, and for those of you who dont already know this I was nominated this month and am in the running, its a close one! If you feel like this one or either of my two other journals have helped you in any way than maybe you would like to throw a vote my way, and even if I havent helped you and you dont want to vote for me there are still many MANY other great members in the contest to vote for as well. You can link to the contest here 420 Member Contest of the Month.

Just getting started here, just got done straightening out the pots.

100_1470_-_Copy.jpg


100_1471_-_Copy.jpg


Finally the little girls are in, the 1000 watt on the left has a hps where as the one on the right has a MH, but the ones on the left are shorter and need to stretch to catch up so hopefully tgis lighting setup will help that...even though realistically with this many NEW strains it will be damn near impossible for me to know how each strain will stretch in relation to one another, and Im sure come harvest time there will be all different sizes and shapes of phenotypes in here, even some of the same strains are differnt phenos of the same strain. Of course both lights are on the rail so they move back and forth in a way that allows all the plants to get a little of each spectrum although the ones on right do get more blue light and the plants on left will get more red as expected.

100_1472_-_Copy.jpg


100_1474_-_Copy.jpg


100_1473_-_Copy.jpg


And heres another pic of my wild ductwork that has just taken over the room, I already posted a picture of this but I wanted everyone to see that its much cleaner and finished now than it was when those last pictures were taken, lol

100_1476_-_Copy.jpg


I really like building this system but right now Im really happy that this whole thing is finally put together and done. Seriously it was a lot more work than I expected it was gonna be, but of corse at first I wasnt planning on building a new room for it will all new top of the line goodies either, but here we are, done at last. I will be adding a compilation post that will cover everything from start to finish with instructions for how to build , where to acquire the parts, estimated total cost, estimated total time and all that stuff tomarrow or as soon as I get the time, definetally tommarrow or the next day.(time which should be a lot less time than it took me because there was a lot of "learning things the hard way" for this build) Also there will be a lot more previously unposted pictures of the kit coming together and my tips and tricks for getting this thing built quick and cheap, which really it is neither but I will do my best to help with keeping both decent. Hope everyone has enjoyed this DIY TEK thus far, its been great to have all of you around. And thank you everyone for your help. Greenisland,
 
Congrats on finishing the room and setup. It look awesome. Love to see those plants ready to get going. Great job and I would rep you a ton they just won't let me. Great job again.
 
Alright!!! I am finally on the way to having this system work for me instead of me working for it! I just ran it for over 24 gours with no glitches no leaks no nothing. So now the plants are in and starting to grow! hooray!! So I want to add that I had THOUGHT that I had White Widow clones in the mix but apparently I forgot to take those clones or that strains only female wasnt ready for cloning yet, Im not sure which...dont remember, but its just Super lemon haze, GDP Sweet Tooth Tangerine and Big Bang...lol.."only". On another note its coming to the end of the alloted time to vote for member of the month, and for those of you who dont already know this I was nominated this month and am in the running, its a close one! If you feel like this one or either of my two other journals have helped you in any way than maybe you would like to throw a vote my way, and even if I havent helped you and you dont want to vote for me there are still many MANY other great members in the contest to vote for as well. You can link to the contest here 420 Member Contest of the Month.

Job to be commended...question...how much cieling space do you have bro?

Just getting started here, just got done straightening out the pots.

100_1470_-_Copy.jpg


100_1471_-_Copy.jpg


Finally the little girls are in, the 1000 watt on the left has a hps where as the one on the right has a MH, but the ones on the left are shorter and need to stretch to catch up so hopefully tgis lighting setup will help that...even though realistically with this many NEW strains it will be damn near impossible for me to know how each strain will stretch in relation to one another, and Im sure come harvest time there will be all different sizes and shapes of phenotypes in here, even some of the same strains are differnt phenos of the same strain. Of course both lights are on the rail so they move back and forth in a way that allows all the plants to get a little of each spectrum although the ones on right do get more blue light and the plants on left will get more red as expected.

100_1472_-_Copy.jpg


100_1474_-_Copy.jpg


100_1473_-_Copy.jpg


And heres another pic of my wild ductwork that has just taken over the room, I already posted a picture of this but I wanted everyone to see that its much cleaner and finished now than it was when those last pictures were taken, lol

100_1476_-_Copy.jpg


I really like building this system but right now Im really happy that this whole thing is finally put together and done. Seriously it was a lot more work than I expected it was gonna be, but of corse at first I wasnt planning on building a new room for it will all new top of the line goodies either, but here we are, done at last. I will be adding a compilation post that will cover everything from start to finish with instructions for how to build , where to acquire the parts, estimated total cost, estimated total time and all that stuff tomarrow or as soon as I get the time, definetally tommarrow or the next day.(time which should be a lot less time than it took me because there was a lot of "learning things the hard way" for this build) Also there will be a lot more previously unposted pictures of the kit coming together and my tips and tricks for getting this thing built quick and cheap, which really it is neither but I will do my best to help with keeping both decent. Hope everyone has enjoyed this DIY TEK thus far, its been great to have all of you around. And thank you everyone for your help. Greenisland,

Job to be commended...question...how much cieling space do you have bro?
 
By any chance are using Drip Clean? Highly recomend...very concentracted.. .5ML per gallon...guarentees no salt buildup...we both use Hydroton..just a suggestion.
 
Yeah where do you get that Pit? Ive never seen it in the local hydro store. Sounds like a good idea though. And yeah I have tried to + rep just about everyone on this page yesterday and the day before including you Sonzor, Butcher, and Pitviper, but it wont let me yet. Do any of you guys know how many rep points you have to give out before you can rep again? And to answer your question Pit the ceiling is about 10ft to 8ft, the area with the plants is almost 9ft everywhere though, the 8ft high part is is the veg room. Because of the uneven (vaulted) ceiling I had to adjust each side idividually to level off the 2-2x4's. The ceiling where the rail needed to be was way slanted, and of course there werent any studs where I needed them to be, plus the 1" thick Tuff R RF sheild and insulation made it a little tougher. Needless to say it was interesting trying to mount the rail properly but in the end it looked clean and worked well and thats what matters right?I can get the plants to atleast 5 ft tall, propably almost 6 though if need be, which it shouldnt be needed, lol. Thanks for stopping by again guys, hope this journal has inspired someone to build a 5 gallon ebb and gro. Like I said yesterday though, I plan on putting up a whole continuous DIY TEK post here later today. Nice to see everyone! Stay high!
 
I never learned the point system...I rep everyone daily when it allows me.
Drip Clean is a H&G product. I would rank this up with the Rootxcellerator..In fact Im extremely happy with the whole product line. except for the 3rd eye...
 
Ok so here is the final DIY post for all of you out there who might want to duplicate this sysytem. Lets start out witha picture of what were building here. Its a 5 gallon ebb and grow DIY kit utilizing a CAP controller unit and a 100 gallon reservoir. It only holds about 4 gallons of substrate in this configuration, if I put the buckets with smaller lips on top I would have almost the whole 5 gallons to fill with hydroton or whatever. Heres a finished picture.

100_1472_-_Copy.jpg


Ok, so you want to built it? Heres how!

Materials list first!:

23-3/4" inside diameter rubber grommets (1 included for extra) COST:abt 20cents each FIND:eek:nline is your best bet, you can get them here https://www.stunair.com/grommets.htm
20-5 gallon buckets with 1 3/4" to 3" "lip" the bigger it is the less substrate it will hold. COST: $2.50 to $4.50 FIND:home depot is the cheapest but walmart has the best size and holds the most substrate out of any bucket I found.
1-Trashcan (as tall as ONE 5 gallon bucket) COST:$5-$10 FIND:got mine at Wal-Mart but they have them just about anywhere in the correct size.
100 Gallon reservoir (make sure it can fit thru your doorway!) COST:100-150 FIND:try to find someplace local to stay away from shipping cost, feed stores are a great place to look for these.
25' of 1/2" dia. poly tubing (black) COST:$10-$20 FIND: Support you local hydro store they should have this
30' of 3/4" dia. poly tubing (black) COST:$15-$25 FIND: Also at your local hydro store
23-3/4" barbed "L" fittings COST:$25-30 FIND: hydro store or home depot
21-3/4" barbed "T" fittings COST:$25-30 FIND: hydro store or home depot
2' of 16 or 18 gauge wire (for lamps or whatever, small gauge wire) COST: under $10 FIND: hardware store
3 sets of enclosed wire connectors (so they cant touch each other and short) COST:$5-$10 FIND: hardware store
1- CAP ebb and gro controller unit (comes with bucket pumps and a few barbed fittings) COST:$282 +S&H FIND: online at www.northwesthydroponics.com or at you local hydro store

Tools Needed(everything can be found at home depot or lowes)

sandpaper
(1 pack will be fine, medium grit.)
utility knife (to cut tubing)
drill (cordless is nice)
conical drill bit (this is an expensive tool usually around 30-50, but its GREAT and a must for this build! get the biggest one and it will serve you well in any of your future hydro builds including this one! these bits are the ones that can cut many sized holes and are shaped like a V on the tip)

Ok so lets get started! make sure you purchase all the parts so once you get started you can just keep on going until its done, thats one reason why it took me so long, it took forever to acquire everything. REMEMBER if you decide to try and find grommets at home depot they only carry 6 at each store so it will be a very long drive to find 20+ of them, also the hydro store might have these but usually they are the wrong kind of grommets for the job. We need grommets with a front and back so the ecoplus ones wont work nearly as good.

100_1075_-_Copy1.jpg


Step one: Drill small 1/4" holes about an inch apart on the bottom of 10 of the 5 gallon buckets, there doesnt need to be any special pattern or anything. If you plan on using hygromite you might want slightly smaller holes because recently they started making the rocks much smaller. Heres a picture to help you with this step.

100_1082_-_Copy1.jpg


Step 2: drill holes in the rest of the buckets left. This is where the conical drill bit will come in handy (make sure it cuts 1/2" holes up past 1 1/4", its usually the larger more expensive one unfortenatelly). DO NOT try and use a "spade" or "paddlebit" to cut these holes! Usually It wont work and you will end up destroying the bucket. You can use a hole saw but they cost almost 2/3 as much for a decent one as the conical drill bits do and olny cut one size. the conical makes much cleaner cute with no burs which is a definete bonus! We want to make 2 holes in the SIDE of the bucket down towards the base. What I did was line the holes up with where the handles attatched that way I knwe they were exactly on oposite sides of one another and makes all the buckets face the same way once assembled for a neater overall look. . Make the hole just big enough for the grommet to fit on and for the 3/4" barbed fitting fits in. This hole may be 1" for some grommets and 1 1/4" for others so make sure you staert out small and work your way up, cause once you cut it theres no going back. Also make sure you dont start to low on the bucket otherwise the grommets sides will not fit. You want to try and aim towards to make the hole 3/8" to 1/2" from the bottom of the bucket. the closer the better because it will drain better but you nedd to also leave room for the lip. Heres a picture to aid you in the alighnment of the hole and this step.

100_1079_-_Copy1.jpg


STEP 3: Now were going to take apart the control bucket that came with the CAP ebb and gro controller. Set aside the buckets for now and get comfortable, this step is the longest and toughest of all the steps but when broken down to the basics it pretty easy. For this step you will need the wire, the wire cutters and the enclosed wire terminals. First cut back the outer covering of the bottom float wires, this is necessary to determine where everything goes and which wire goes to which float. Its pretty obvious which wire goes to the top float but not so much the bottom two floats thats why this is necessary. Next label all the wires with tape or whatever so you can tell which wires go with each other after you cut them. Next cut the wires in the middle as much as possible leaving as much room as possible left for you to work with. Take out the floats by uncrewing the nut on the outside of the bucket, (without the wires cut you will not be able to remove these floats) pull the floats through the whole from the inside of the bucket and set aside. You are going to want and generally copy the layout of the floats on the trashcan, however the space between the bottom and top floats will be greater. Make sure that the top hole in the trashcan is the same distance as the top of the hole in the old control bucket, and make sure the bottom two holes are the same distance from the bottom of the bucket as they are in the original bucket. This will insure the floats work properly. The holes should be cut with the conical drill bit for a smooth accurate finish.

STEP 4: Were going to need to take the control module off the old control bucket. Were going to do this by opening the unit up (keep in mind this VOIDS YOUR WARRANTY), once the unit is open there are two screws that need to be removed before the module will come freely. There are two metal clips that you will want to make sure you keep because you will need them to remount the module on the new control trashcan. Once the holes are cut and the floats have been put in the new "trashcan" control bucket you need to mount the control unit to the side of the trashcan. I mounted mine on the broadside but I would suggest people put it on the thinner side so the weight of the module doesnt tip over the trashcan when its empty. When you mount the module you might need to do some work with the trashcan and making sure the clips work with your trashcan. The clips are necessary for the trashcan because without them the plastic will not be able to hold the weight of the module.

100_1193_-_Copy1.jpg


100_1286_-_Copy1.jpg


100_1283_-_Copy1.jpg


STEP 4: Now we need to reconnect everything! The floats and module should be connected and setup by now so the next step is lengthening the wires so that we can add connectors to them and wire it all together. The old wires that were there will be too short to use again so you need to lengthen all the wires by about a foot. At the end of each wire you can either just wire the wires together with the new longer wires or you can add terminals so that you can take them apart and reconnect them again with ease (its really unnecessary though unless you think you will screw up the control bucket somewhere down the line and you will need to cut the wires again).

STEP 5:All the places where wire is showing you need to make sure you wrap with electrical tape or they wont work properly. You need to make sure that no wires have exposed metal at ALL. Shring tubing works great too but is more difficult that electrical tape and you need a heatgun or be good with lighters

STEP 6:Cut holes in the bottom of the control bucket. These holes will be the same size as the holes on the sides of the bottom buckets, abt an inch or so and will also have 3/4" grommets in them. I would not put the holes exactly oppossite of eachother because this creates a low spot in the bucket and may keep the floats from reading correctly.

STEP 7: Putting the buckets and control module together. Now that most of the system is built we just need to assemble it. Soapy water will assist greatly with putting all the barbed fittings into the grommets. REMEMBER it SHOULD be a tight fit! I would put all the "L" peices into the grommets on the sides of the buckets. Attatched to those "L's" attatch a 5-7 inch peice of 3/4" poly tubing, and then on the end of that put a 3/4" barbed "T" fitting.

100_1189_-_Copy.jpg


STEP 8:The next thing is put the 2 "L" fittings into the bottom of the control bucket just like the bottom of the 5 gallon buckets. Next I would lay out all your buckets including the control bucket exactly how you want them in the grow room, this way you know exactly how long the peices will need to be that join all the buckets. Obviously you now need to cut all these peices with the utility knife and fill them in where needed. Make a big loop from the control bucket through all the 5 gallon buckets and into the other hole in the control bucket.

100_1389_-_Copy.jpg


STEP 9: Get your control bucket and mount the lid from the old control bucket onto you trashcan. It probably wont fit exactly just like mine didnt. You will have to drill a few tiny holes for screws that go through the lid and into the trashcan. After the holes are drilled use some course thread drywall scews to anchor it to the top of the trashcan. Make sure you DONT put any holes in the actual trashcan you want to just drill into just the lip of the trashcan. If your trashcan had a lid that came with it even better. Just mimmick the holes that were in the original lid and were all set, two are for 1/2" hoses and the larger hole is for the chord for the pump that goes in the reservoir.

110609_1920_00_.jpg


STEP 10:Put your 100 gallon reservoir wherever it is that you want it. Put to holes in the top that are the same size as the holes in the side of the ORIGINAL control bucket. The holes should fit the same 1/2" grommet thats used in the control bucket as well. Take one of your pumps that came from the control bucket kit and put it in the reservoir (you may want to put the 1/2" poly hose on it first if you cant reach into reservoir like mine).
This pump connects to a barbed fitting which is then pushed through one of the grommets in the lid of the reservoir. If you dont have a lid for your reservoir than just run a straight poly hose over to the lid on the control bucket and put the barbed fitting the hose is attatched to and shove it into one of the holes in the lid with a grommet of course. The next pump goes into the control bucket and has a very short hose (about 12-18")with 1/2" barbed fitting on the end. Put the barbed fitting up through the other hole in the lid (make sure you have the grommet in once again, otherwise it wont stay in place). The top of the barbed fitting should stick out the top of the lid about 3/4". Take that 3/4" tip and connect a 1/2" hose to it that runs over to your reservoir. If at all possible make it so that it runs just to the top of the reservoir than falls into the it so that it aerates the reservoir as it falls into it. With 100 gallon reservoir I would suggest you put an airstone in the bottom just to keep the oxygen content high. Also you will probably notice right away that the 1/2" poly hose will kink just after the barbed fittings either on the reservoir or the control bucket, to fix this just take about 6-8" of 3/4" black poly and slit it down the side. Then take this peice nod poly and wrap it around the outside of the 1/2" poly where it is kinked, this will keep it straight and should keep the kinking to a minimum.

110609_1918_00_.jpg


STEP 11: At this point you should be able to fill up your reservoir with nutrients. You will also want to set the control module to be "active" or "on" for 30 minutes every 4 hours. Next put im whatever substrate you prefer and viola! Your done! put in your plants and enjoy the grow! PS: before you leave it running with your baby plants in it I would suggest running it for a day to get rid of any kinks the system might have and also to saturate the substrate. Make sure you check for leaks after a few hours also, check the buckets the reservoir and the control bucket.

This kit has been running for about 3 days now flawlessly, the plants seem to like it and they have about 2.5 times as much substrate to grow into as they had with the original 2 gallon buckets used by CAP.

100_1431_-_Copy1.jpg


I hope you all like the DIY TEK! If you have any questions which Im sure you will! feel free to ask, thats why Im here!

FINAL STEP!: SMOKE A BOWL AND WATCH THE KIT RUN!!!!

WHEW what a long post!!:ganjamon::thanks:
 
Wow, thanks for taking the time to post that DIY, easy to understand, great job and when I have some time I am going to try that for sure, On a much smaller scale but same idea. Thanks again..
 
So I forgot to mention that the total time it should take a person to do this is one FULL day. The total cost was almost about $700, which is quite a bit but really I feel it will be well worth it. The entire garden built around the set cost about $2200 so the total cost for this room was somewhere around 3K. I forfot to put that in the TEK so there ya go guys! and gals!
 
Alright guys and girls today is the last day to get your votes in for the 420 contests, including the 420 member of the month which Im in, the polls are very very close at this point. Get your vote in here 420 Magazine's 420 Member of the Month - October 2009 And thanks a million to everyone that has already voted for me and everyone else!
 
Back
Top Bottom