TheRoach's First - Soil - Aurora Indica - Organic Grow - 600W

Excerpts from Lazy Gardener

Soil Amendments - Rice Hulls


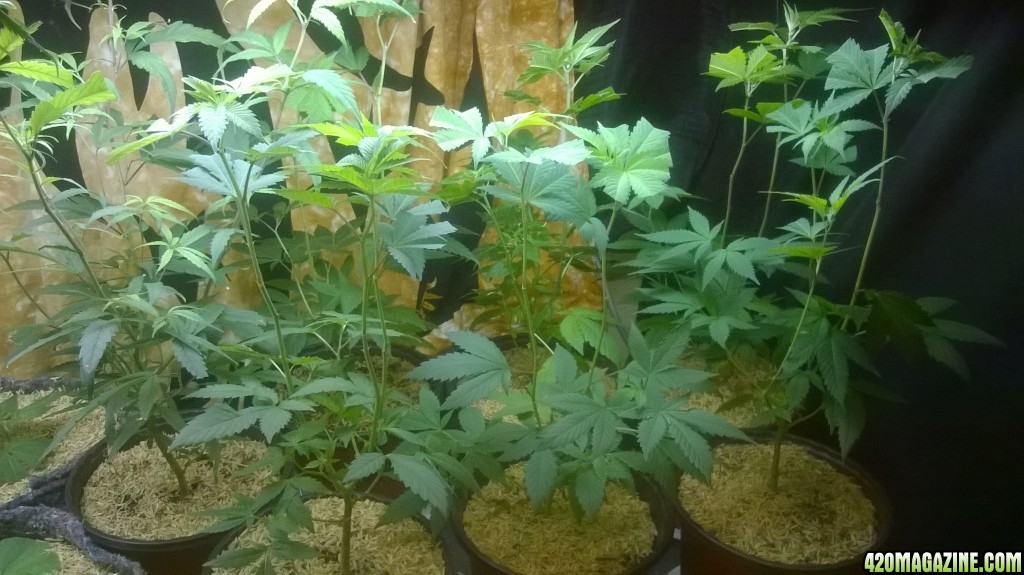
Rice hulls have been used for thousands of years as a soil amendment in farming and gardening. Rice hulls (rice husks) are the hard protective covering of the grains of rice and are composed of lignin with a very high (45%) silicon (Si) content. Rice hulls are the left over product from the milling of rice to obtain the grain we eat. Worldwide there are millions of tons of rice hulls produced every year that have to be disposed of.


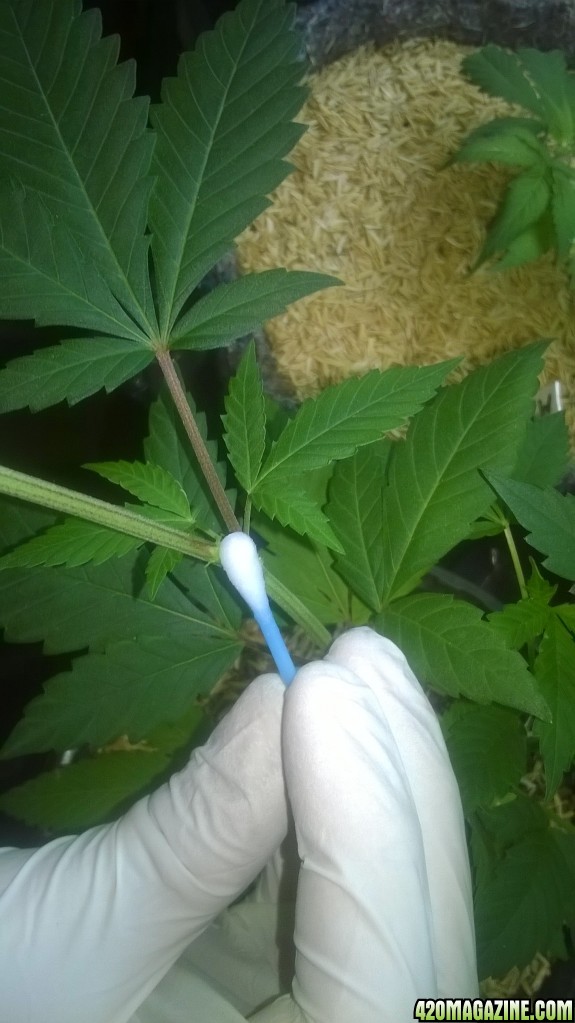
Rice hulls are available in several forms: fresh rice hulls, par boiled rice hulls, aged rice hulls, composted rice hulls, ground rice hulls, and rice hull ash.


Fresh rice hulls - these are straight from the milling process, they are very light weight and porous and often contain viable seeds. They tend to increase the pH when used as soil amendments and in general they perform poorly until they break down. They also often attract rodents.


Ground rice hulls - these are fresh rice hulls that have been ground into a powder to reduce the volume of material that must be transported and disposed of. This form is often used as a fiber source (low quality) for both human and animal food products. In this form it burns easily and is often used as a fuel, producing rice hull ash as the left over product. They tend to increase the pH when used as soil amendment.


Par-boiled rice hulls - these are fresh hulls that have been sterilized by using steam and are free of seeds and pathogens that are killed by the heat. These may be combined with other amendments such as pine bark, vermiculite, etc. up to 40% by volume, and they have positive effects with respect to plant growth when used in containers. This amendment is often used in mixes for containers as it is very slow to decompose, hence there is less shrinkage of the potting media. At a soil proportion level above 40% it tends to have negative effects for most species.


Aged rice hulls - this is the most common form of rice hulls one finds. The mills just pile up the hulls into very large piles and let them sit for months before disposal. This aging turns the hulls brownish. They tend to increase the pH when used as soil amendment. Above 40%, it tends to have negative effects for most species.


Composted rice hulls - these are rice hulls that have been composted by either aerobic or anaerobic methods. Due to the high silicon content, they are very slow to break down. If aerobic methods are used, the rice hulls are mixed with other feedstocks to compost properly. They turn a dark brown color, have a lower carbon to nitrogen ratio, and the pH becomes increased slightly. Anaerobic composting is usually done by burying the rice hulls in a pit for months to years where they slowly decompose. Under the these conditions they darken (sometimes become black) and become slightly acidic. In both methods if done correctly, the seeds are killed. Composted rice hulls work better in most applications.


Rice hulls have many other uses that include: rice hull ash, biochar, building material. animal bedding, silicon source for industry, fertilizer component, insulation material, fuel, making beer, filler in cheap pet foods, pillows, biodegradable nursery pots, absorbents, body powders, etc.


Conclusion: Rice hulls can be a useful soil amendment for many gardeners when used properly. The most common usage is to till them into heavy clays to physically change the soil properties before planting a new garden. This was a common practice before we had good compost available and rice hulls were more easily available.


PROS:


- comparable to perlite in water holding capacity per weight but higher air-porosity and no dust as with perlite

- improves soil physical properties

- improves a soils aggregation, porosity, tilth

- easy to spread

- renewable resource

- feedstock for making compost

- some types can be certified "organic"

- relatively inexpensive


CONS:

- quality, type, and value varies greatly

- low cation exchange capacity (CEC)

- work poorly by themselves

- nutrient content is insignificant

- blows in wind if used as a mulch

- availability limited to rice growing areas

- slow to breakdown

- does not stimulate beneficial microbial activity as compared to other organic amendments
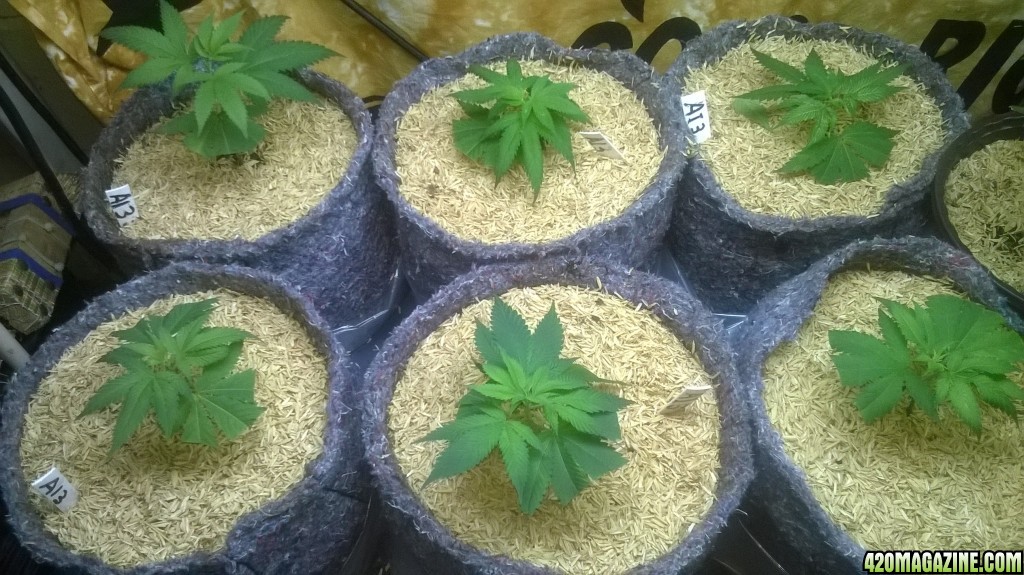
 
You can check this thread here

Original thread by JohnyBtreed

Well for starters, I've cloned many ways over the years. I've used cutting to sand, cutting to soil, cutting to rockwool, and cloning aeroponically. And I have to say making an aeroponic cloner is certainly the easiest if your planning on a DWC system. Cloning into rockwool and putting that in the Deep Water Culture system is also one of my favorites and I will be doing a tutorial on that later in the month. But for now, I'll show you the basics on making an aeroponic/fogging cloner for under 50$

Here is a Parts List/ Order List for everything you need aside from a 2 inch hole cutter attachment on a drill, which you can pick up at any hardware store. You can't use a spade bit because it will just tear up the plastic to bad and you'll be going through the neoprene like crazy.


Stealth Hydro Mistic Cloner Exact Replica - 45$ shipping included


The Fogger unit - 25$

Rubbermaid Tub - 5$ + 2.28 shipping

18 Neoprene Inserts - 9$


Cloning_001.jpg


008196.jpg


11009_001.jpg


002277.jpg


The great thing about cloning aeroponically is the versatility. You can put it in soil, or just surround it with hydroton and do DWC. Pretty much anything you wanna do But if you want a Perpetual Grow a cloner should def be on your to-do list


btw the clone in the picture is 10 days old.

Happy Cloning!!!!


:roorrip:
 

I made a propagator using the instructions above, I only use cheap rooting powder; it is washed away after a few minutes. I´m sure they can root without the powder.
I am really grateful to all people at :420: for sharing what they know, as it really empowers others in their quest for more bud.
 
Thanks Ghetto.
I have two different AI phenos, one (#5) that is Indica dominant and reminds me of Northern Lights because of the fruity smell and another one (#3) that has a bit more of sativa on it and has a kerosene like smell.
I saved the donor plants to flower them so I could get a feel of how the flowering room behaves. #5 seems to be ready to harvest sooner than #3, but #3 has more trichomes on it. Neither of these mother plants will give much of a harvest, as I didn't take good care of them during the early transition to flowering, plus they underwent a lot of abuse (my wife breaking a branch of #5, underwatered, heat etc)
Back during the last couple months of last year and the first two or so of this year, I had a lot of things going on... Plus my wife gave me a PS4 for Christmas and it was very hard for me to resist to the temptation of some COD after so long without a videogame console (Im a big fan of videogames)
Hopefully everything will be back in track soon.
I have to buy white cordura fabric to line the inner walls of the grow closet as to increase light reflection, also my PH meter is acting weird so I will have to get a replacement probe, calibration and storage solutions.
I also need a stronger fan in the flowering room, as the oscillating one I had broke and no longer oscillates.
Growing cannabis is a very fun hobby, but it does require dedication!
 
was making some calculations based on my grow closet size: 1.20 m long by 1 m wide and 1.90 m, that is 2.28 cubic meters (80.5 Cubic feet) My exhaust fan is rated at 87 cfm. That should be replacing the grow room air every minute or so, right? Is this ventilation good enough? I read two versions of the same numbers; some people say air should be replaced 3-5 times every minute, others have the opinion that replacing air every 3-5 minutes is ok? Can somebody with more experience shed some light on this please?
Also, I switched the HPS ballast to 100% output and temps were between 74 (off) and 88.6 (on) Fahrenheit (23.3 to 31.4 Celsius).
I read that temps shouldn't go over 30 Celsius (86 F) so I went back to 75% output and temps dropped to 84.4 during lights on.
Are this temperatures acceptable? Should I take any action regarding this matter?
The RH is 48%-76%, and I live in a very humid area, so the intake air is always relatively humid. I´ve thought of a dehumidifier, but will it be enough given the fact air is replaced every minute? Will it draw humidity from the air fast enough as to make it drier in a minute? will it make a difference?
I would really appreciate some help with this!
Thank your for stopping by.
 
was making some calculations based on my grow closet size: 1.20 m long by 1 m wide and 1.90 m, that is 2.28 cubic meters (80.5 Cubic feet) My exhaust fan is rated at 87 cfm. That should be replacing the grow room air every minute or so, right? Is this ventilation good enough? I read two version of the same numbers; some people say air should be replaced 3-5 times every minute, others have the opinion that replacing air every 3-5 minutes is ok? Can somebody with more experience shed some light on this please?

I don't think it quite necessary to replace the air 3-5time per minute. In fact, that really only became possible when people started using grow tents and adapting closets for growing. I am in a 3000 cubic foot space and use a 660cfm fan so I'm only replacing the air completely every five minutes or so. Seems to work just fine. I don't see anything wrong will recycling your air that often, but it is probably a little over kill. (Just better supplies to have for the next time you decide to upgrade to a bigger space)

Also, I switched the HPS ballast to 100% output and temps were between 74 (off) and 88.6 (on) Fahrenheit (23.3 to 31.4 Celsius).
I read that temps shouldn't go over 30 Celsius (86 F) so I went back to 75% output and temps dropped to 84.4 during lights on.
Are this temperatures acceptable? Should I take any action regarding this matter?

I think with co2 you can have your temps that high, but I would try to have it below 80 during the day (if you aren't running co2) and above 63 at night


The RH is 48%-76%, and I live in a very humid area, so the intake air is always relatively humid. I´ve thought of a dehumidifier, but will it be enough given the fact air is replaced every minute? Will it draw humidity from the air fast enough as to make it drier in a minute? will it make a difference?
I would really appreciate some help with this!
Thank your for stopping by.

conundrum... I THINK your only option would be to run the dehumidi and cross your fingers. Other than setting up a whole new sealed system, the humidity of your input air (esp if you are recycling the air that quickly) will inevitably be the humidity of the room.
 
I don't think it quite necessary to replace the air 3-5time per minute. In fact, that really only became possible when people started using grow tents and adapting closets for growing. I am in a 3000 cubic foot space and use a 660cfm fan so I'm only replacing the air completely every five minutes or so. Seems to work just fine. I don't see anything wrong will recycling your air that often, but it is probably a little over kill. (Just better supplies to have for the next time you decide to upgrade to a bigger space)


I think with co2 you can have your temps that high, but I would try to have it below 80 during the day (if you aren't running co2) and above 63 at night


conundrum... I THINK your only option would be to run the dehumidi and cross your fingers. Other than setting up a whole new sealed system, the humidity of your input air (esp if you are recycling the air that quickly) will inevitably be the humidity of the room.

Thank you iwltfum, I may be able to get a dehumidifier for cheap; I´m thinking making a small box with the humidifier inside, a hole for intake and another hole for exhaust connected to the intake of the flowering room. Does that make sense?
my logic is that the dehumidifier will keep dry air in a smaller area from where the passive intake will be fed, so when air is pulled in it only feed on dry air. Do you think that will work? Or are my plans just the product of the last two joints?
Sorry my linguistic skills decrease proportionally to how stoned I am.

You are fine replacing the air every minute or so. Just watch the humidity. Maybe running a bigger fan (more cfm) or adding another (heat concerns)and a dehumidifier would be better. I replace my air every 5-7 minutes and haven't ran into any problems.

Thanks Guambomb, did you mean adding another light? Im really looking for an excuse to buy a small LED panel, they only deterrent being I am on a budget right now because of other projects I have. looks like a dehumidifier might be my only option.

Thank you both for the quick replies Reps+
 
Hi TR, Nice propagator, never seen one using ultrasonic before. Yes, with just bubbles water and very low light on the plants, they will root without fancy creams pastes or powders. your journal is full of interesting stuff!! subbed.
 
Just make your owm dehumidifier & led panel like you did the fabric pots! :grinjoint:
I hadn't think of building it myself. The dehumidifier is a rather simple device.
It consists of a fan that forces air over a refrigerated copper pipe radiator (sorry I that's not the word for that part), as to bring the water in the air to dew point, condensate and drip into a catcher pan. I was watching a video about how they operate. I think one can be made by salvaging parts from an old fridge and getting a thermostat to dial it to whatever RH one wants.
I know making a LED panel is no good; the amount of LEDs required makes it too costly. Would rather buy an used LED panel, some spares and service it myself.
It remains an interesting suggestion, though. It would be fun to try just to see if it can be made.
It is my opinion that there are some things that one should do just because they can be done, growing one owns cannabis fall in that category as well IMHO.

Later on tonight I will take 15 clones from my mother plants just to keep things short and uniform (the mother plants are getting tall, and I have to keep the shop light too high for the clones in the fabric pots to receive enough light.
 
Hi TR, Nice propagator, never seen one using ultrasonic before. Yes, with just bubbles water and very low light on the plants, they will root without fancy creams pastes or powders. your journal is full of interesting stuff!! subbed.

Hi thank you for tagging along Vlad!
Yes the propagation unit is one of my favorite toys; it makes cloning so much easier for me.
I still think rooting powder and gels do make a difference. In the pictures of the original Poster of the thread (JohnyBtreed) the early roots can be seen over all of the exposed area. While my results are good, I believe they could be improved by using a good cloning gel.
I hope the show is worth watching!
 
Last time I took clones I prepared them in the same fashion you will see below, but as I didn't take any pictures of the process I waited to mention it on my journal. My reasoning is that waiting a few hours after preparation of the clone will allow all the small wounds and cuts to heal and be ¨sealed¨ by the time I cut the clones from the plant; I think that by doing this the clone will draw the energy to heal from the mother plant while still attached to it and not from its own resources after being cut. I also wonder if by doing this the cutting gets a little extra reserves, as the water and nutrients that were normally fed to the leaves are flowing directly to the upper corona of leaves and also stored in the stem.
The first time I took clones with this propagator I didn't do this ¨preparation¨ for cloning, and in all the clones the lower leaf yellowed and died as the plant drew its reserves from it.
Then this last time I took the batch of 6 clones (the ones in the fabric pots) I did cut the leaves in advance, and applied rubbing alcohol to all wounds, then gave the branches a few hours to recover (8-9 hrs). When I went later to make the cuttings I took my jeweler loupe and inspected the cuts I made earlier. All of them looked healed and dry. The edge of the leaves were I made the cut to decrease surface area also had a very thin scar.
So I assume they healed in the meantime, and that was my intention in the first place; but after checking the clones and watching the pictures of the propagator, I noticed how none of the lower leaves died in this batch of clones.
What do you guys think about this?
Sound proof of benefits?
Hippie new age-pseudo science?
I will let you guys be the judges.


Here is where I will make the cut, right above the grow tip and making sure the grow tip is not damaged. It is my experience that if you leave a stump without a small grow tip to draw sap, it will die back and possibly infect, spreading in the form of a dry, dark spot over the stem. I use gloves to keep things clean and nice.

WP_20150615_029.jpg


These are the tools I will use; a sharp, clean blade and some cotton tipped sticks (is there a name for them?), not pictured is the bottle of alcohol I use to clean the blade after each cut (or to drink a sip to steady my pulse, if the need arises...Just kidding).

WP_20150615_026.jpg


I cut the fan leaves preserving only the upper third of them, then I clean the areas where I made the cuts and the stems 2 centimeters above and below the cut areas. I would rather use another 5 minutes cleaning while taking clones than risk pathogens killing the clones.

WP_20150615_033.jpg


Then I remove these leaves too, and do more cleaning.

WP_20150615_034.jpg


Finally I cut the upper corona of leaves with clean scissors

WP_20150615_037.jpg


This is how they look after being under the blade

WP_20150615_040.jpg
WP_20150615_041.jpg


This is how a clone looks after preparations, it is just one more cut away before moving into the propagator.

WP_20150615_045.jpg


I save all the leaves that I cut to feed the compost worms; nothing green goes to waste in my house!

WP_20150615_043.jpg


If you find you need help, you can always call a trusted friend!

wp_ss_20150610_0048.jpg


So tomorrow when I take the clones I will just make the final cut, scrape lightly, add rooting powder and put them into the propagator.

Thank you for watching.

:420:
 
Also here is a picture of the clones in the fabric pots. There is a slight yellowing, but I will wait before taking any action, as the soil mix has nutrients for a few weeks.

WP_20150615_047.jpg


Thank you for watching!!!

You liked the cat picture right?
Here it is again for you cat lovers!

wp_ss_20150610_0048.jpg
 
Back
Top Bottom