Northern Lights Auto - Budget T5 & T8 Grow Box

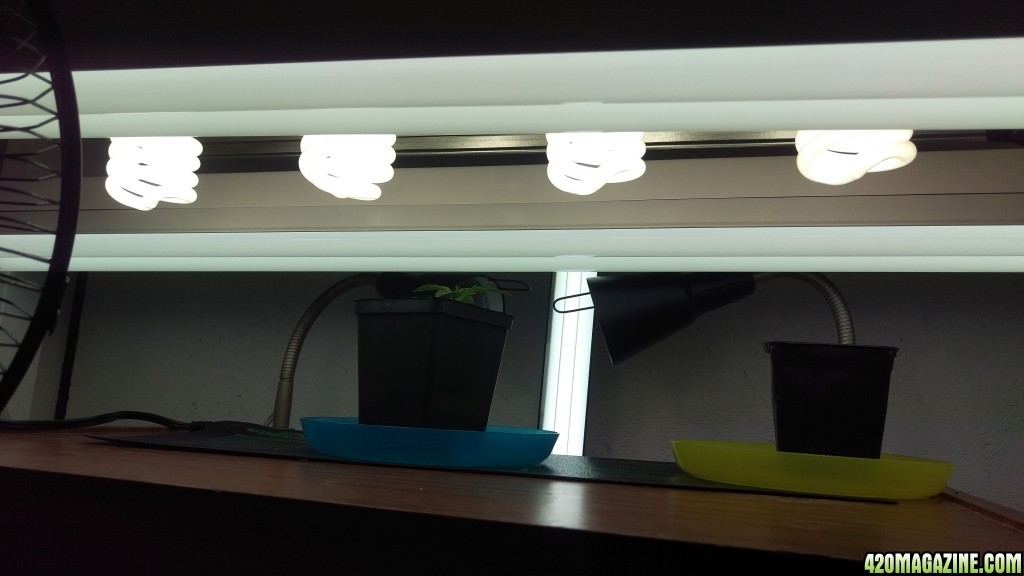
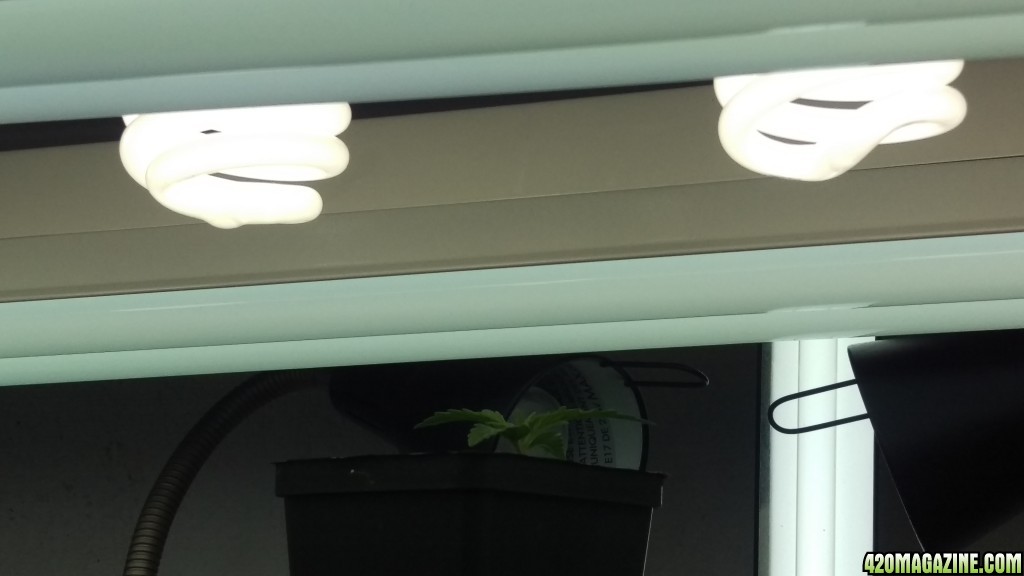
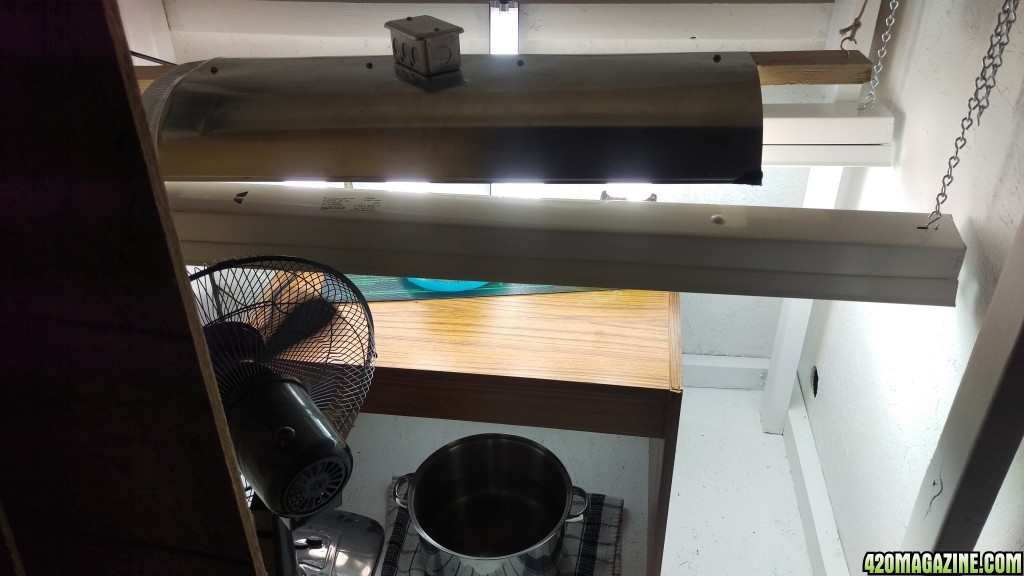
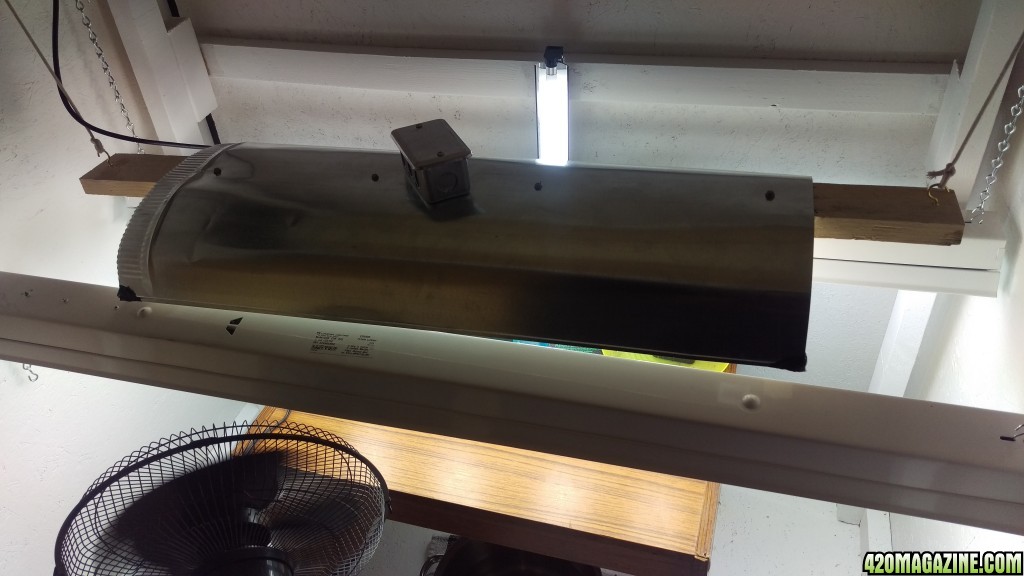
and, your grow space is doing just fine for growing.
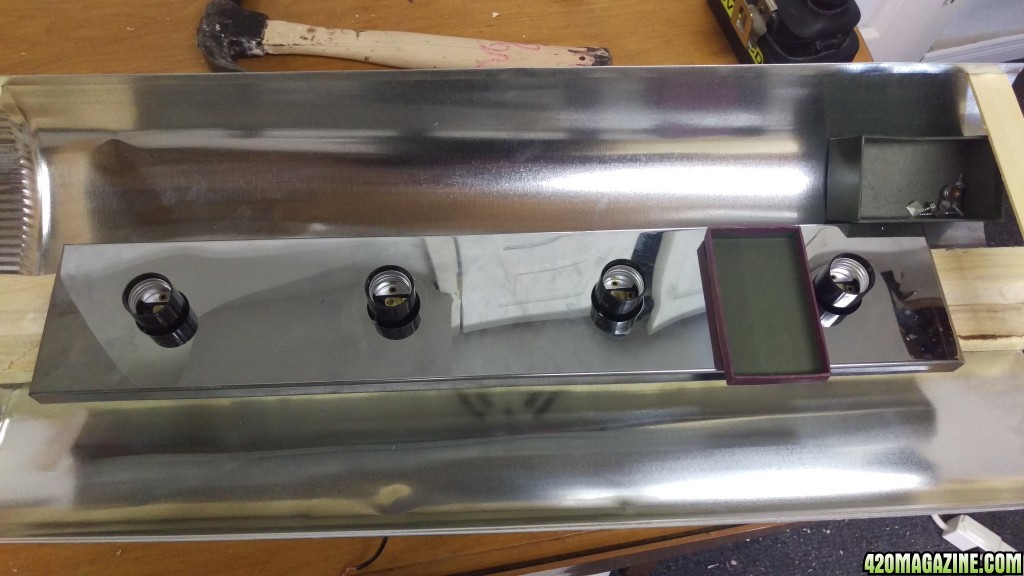
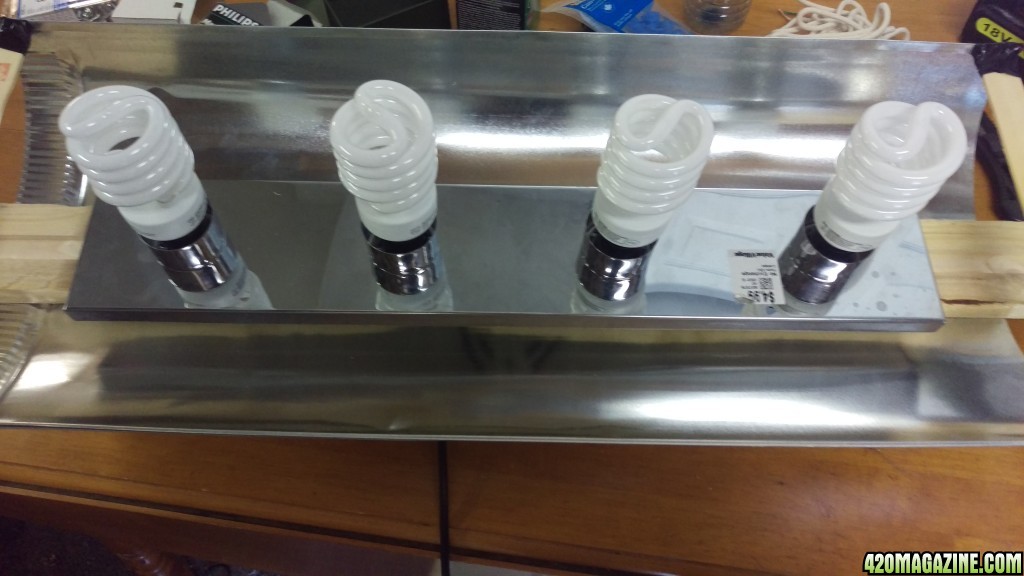
"we take what we have, and make what we need and what we don't have, we improvise to make what we need "
 
#2 is dead, leaves fell off, stem withered and brown. #sad.
#1 is still doing gorgeously.
germinating a replacement.
 
#1 looking beautiful, 2nd set of leaves is 3 fingered, and close examination shows VERY tiny but present 3rd set has started, so looks like my soil and light combo are a happy home for my girls. the leaves are all right on top of each other, no stem growth to speak of since first set came out, as I understand this is a good thing, means I have my light dialed in and plant doesn't need to expend energy growing vertically. confirmation of this from someone more experienced would be appreciated, will post a pic later when i get home.
 
IMAG070817.jpg
IMAG070916.jpg
IMAG071012.jpg
IMAG071115.jpg


As promised, some pics of progress so far. As can be seen on the closeups, 2nd set of leaves are throwing out 3 fingers, and 3rd set are peeking out to say hello, hoping for 5 fingers on those.

Debating if I want to top this girl before I start LST or just go straight to LST. Thinking the final pot will be a 5 gal bucket, will be about 16 inches or so of space for taproot to go down but only a bit over 12 inches diameter. If I do top it will be on day 14, no later. Today is very early on day 8 since she broke surface.
 
It is damned cold in the house, and it is damned cold in my cabinet. I think I may have to pull one of my cfl's and put in an old standard incandescent 100w for extra heat for the next few days during this cold snap. Damned high efficiency T8's and cfl's, Y U NO MAKE MORE HEATS.

Glad I planned ahead and went with a strain that does reasonably well in colder environments, but I gotta up the temperature in there somehow, it can't be more than 23C in there, and during the 6 hours lights are off it's probably closer to 19 or 20. Curse my wife and her draconian control of the thermostat, my girl needs heat.

Have the seedling pot on a standard germination/seedling mat as well, but I don't think it's quite enough to deal with my winter.

Other than that, I'm happy to say she seems to be doing well, the first leaf set doubled in size since my last pics, the 2nd set continues to slowly squeeze out the extra leaves, not much action from the 3rd set, some growth but minimal.

Pot was nice and light, mix was bone dry for at least 1.5 inches so gave #1 her first good drink, local source, beautiful trace salts and minerals, including HCO3 which naturally adjusts PH to around 6.0 to 6.2 and gets metabolized into CO2 as well as providing a biological buffer against sudden PH changes in either direction, Calcium which I hear most green things like, Magnesium which again I heard somewhere is a good thing to feed to pretty much anything green, NO3 , and K or potassium if you prefer.

Only thing missing from this water is phosphorous, which I am having trouble sourcing organically and locally atm, at least in a form that is easily converted to spray bottle friendly form, but am not overly worried about as my original compost sources for my mix contained several composted manures, all of which contained at least some.

After more reading and research into what and when to feed my girls with the mix I'm using, the answers I've come up with is not much at all and not until flowering time unless the girls tell me otherwise. My mix and method appears to most closely resemble a so called "super-soil" grow, which by all reports are given nothing but water from seed to harvest unless needed, which is only if you start with used or improperly refreshed mix. I will monitor closely and post pictures for advice if anything odd begins to happen.

Replacement seed sprouted while I wasn't paying attention, checked this morning nothing, check an hour ago, taproot 1.25 cm long, so into the #2 pot it went, have it on the mat under mild light. Better luck this time little thing, your predecessor died an ugly death, try to avoid that if you can.

Im folowing every step of you and your doing great.You can try with egg shell,banana,bone/fish bone,crab shell.All easy and 100% organic just for you ....


GOTTA TRY THEM ALL!!!
 
I'm a wee bit concerned #1 may be struggling, leaves seem to be curling down a bit and 2nd set of leaves seems alot more yellowish green than I think it should, will post pics shortly, happy to hear everyone's thoughts when i do.

Edit : after a bit more searching and reading I'm hopeful I just overwatered.
 
IMAG072312.jpg
IMAG072218.jpg
IMAG072111.jpg
IMAG07169.jpg
IMAG071512.jpg
IMAG071413.jpg
IMAG072014.jpg
IMAG071913.jpg
IMAG071815.jpg
IMAG071713.jpg


Several angles, zooms, and light conditions to show shape and color. She looks better now than when i got home, less lime/yellow than 4 hrs ago and less droopy, but still not the vibrant deep green I have been seeing before.

I'm fairly certain it's not nutrient related, as I understand it, if the medium grows tomatoes well it should grow cannabis well too, and this same medium (I am using fresh unused remnants of the garden batch) with drought, then flood level rains, then drought again, and poor attention all season, gave me 20-40 pounds of tomatoes per plant in my garden with nothing but chlorinated fluoridated tap water straight from the hose from seed to harvest.

I should also point out that my first observation where I noticed yellowing and drooping coincided with end of 6hr night.

My 2 guesses at this point based on small but visible improvement over 4 hours are :
-if improvement continues, assume mild over-watering that is already self correcting, if so then continue as planned, IE: no more water for a few days until pot is light again, give less at next watering, see if symptoms re-occur, if so is plant less impacted with less watering? I need to bear in mind that both the vermiculite and the peat moss in my mix retain more water than standard soils, and not allow so much runoff.
-my low temps may be adversely affecting plant's metabolism, thus slowing down chlorophyll production during growth. It may be coincidental but lights on appears to have led to improvement, and this leads me to suspect temperature as a contributing factor if not an outright cause. Must urgently find way too raise temps a couple more degrees in box, and get around to making the trip to town for a thermometer and humidity gauge, really shouldn't have put it off this long. I would kill the oscillating fan for a while to stop that source of cooling, but I don't want to lose the circulation in the box and further reduce evaporation from soil, and I intend to train the naughty girl, so I want that wind shaking her good and giving her a strong stem.

edit : I think for now as a stopgap to help with heat and humidity in box, I shall boil a large pot of water and place it under the table
 
Yes it can do the trick but just look up for the temp risin and humidity too so I suggest first you take that thermometer and humidity before you go for that( if you dont have one)


GOTTA TRY THEM ALL!!!
 
Yeah, it's been on my to-do list for a while but i try to only make the trip into the city once a month, and next planned trip is still a week away. Also on list is swing by the thrift stores and look for cheap lamps to convert into cfl arrays, why pay $30+ for sockets splitters and wiring only to have to build and wire a fixture, when i can buy a 5-10 dollar 2 socket lamp, smash off what i dont need, and have a nice safely wired fixture, pre-wired to wall, just add splitters. I still plan to add more T8's when i can, but I'm moving from seedling to veg and I'm still way underwatted for my square footage, need to add some cheap lumens fast and have ALOT of unused 27w 5000k cfl's laying around. By my math i'm only at about 15w / square foot atm, although that's not factoring that my seedlings are VERY close to the lights and they're currently packed in and focused. In current configuration I make a rough guess that there's roughly 60-70 watts/square foot hitting the seedlings, but once they start spreading out and growing and I have to move the lights further away that will drop off FAST. Total out of wall watts in the box atm is 193w, mixture of T5, T8, and cfl bulb types and spectrums, total of 12 square feet. I aim to bring total out of wall watts in box to around 400 via the cfl's by next week, with a final maximum capacity goal of 600 out of wall watts for flowering phase. Side note, I'm glad I have access to 2 different circuits with minimal extension cord in my box location, cause the closer one I'm using right now is fused for 15 amps and I'm sitting near 10 amps draw on that line already, If I were to add that many more bulbs and the extra fans I plan to add, as well as the exhaust and filtration system all on that same circuit I think I might end up with a problem, and while I may be crazy, I'm not an idiot, I'm not about to up the fuse and burn the house down with overheated wiring.
 
color on #1 looks a bit better, continuing to monitor.

replacement seed popped above surface, shell still on but it's barely above surface, hope i don't get another stuck shell, if I do I believe I shall cry. will give it a day or 2 before i worry much.
 
Today`s photo update focuses on the cabinet.


******DISCLAIMER******

I know what I am doing when it comes to electricity and wiring, with that said this in no way serves as a how-to, instructional, or other similar advice on how to build your own grow light. I do not advise anyone to do as I have done, and accept no responsibility if you do it wrong and cause fire, injury, or death. Seriously people, doing this wrong is at best painful and at worst lethal, don't mess with things you don't understand.


IMAG072412.jpg


Found this 4 socket (only the middle bar) fixture @ local thrift store for $5. It's a damp area friendly bathroom vanity fixture, so bonus points. :cheer:
Added a piece of 5" ducting I had left over from another project, a few pieces of scrap wood, and an extra electrical box I had in the workshop, recycled an old PC power cord I wasn't using (nice heavy gauge wire and already has a ground, which for this wiring was an absolute must) and a 5 amp fuse in the box just for extra safety, although even when I get the splitters and throw in 4 more bulbs I should only be a hair over 4 amps draw.
IMAG072513.jpg

Finished and with bulbs in. Looks like 1 a grow light doesn't it?
IMAG072616.jpg
IMAG072712.jpg
IMAG072812.jpg
IMAG072910.jpg

Installed after testing, not final hanging method, need to get more chain when I get the splitters, but good enough for now. Notice the box and complete lack of exposed wiring. Once again I must insist, if you're going to do something silly like build one of these, do it right, spend the extra few dollars for the boxes and connection covers, and don't play the human bug-zapper game. I know from direct experience, it isn't fun.

Total out of wall wattage is now precisely 274, and with splitters I can boost that to 382 with the bulbs I have on hand. Also have a few unused random 1 socket fixtures I could easily drop in to push me over 400watts out of wall.

Bulb mix currently stands 4 x 32w 6500k 4' tubes, 1 x vertical mounted 24w 6500k 2' tube, 4 x 27w (100w equivalent) 5000k cfl, and 2 x 7w 3000k mini cfl lamps to give the girls a taste of that end of the spectrum, and since it's so cold and they all make so little heat, I got em all REAL close to the girls. I learned the Lux meter on my phone maxes out at 10000 apparently. Based on the angle of the curve before going off scale I'm ballparking it at around 15000 to 18000 lux on #1, have a total of 21030 lumens in the box on paper, 12 square feet, online calculators agree with my math. Adding in the splitters bring that up to just a bit shy of 24000 lux on-paper......And a wattage equivalent in the 900w to 1000w range.......I think I'll be good with this as a final light setup. I have enough intensity, and a good mix of light wavelengths. Think only thing left to do is change the 6500k's to 3000k's come flowering and I should be set for lights, which is good cause the wife is getting grumpy with my budget over-runs.

#1 seems to be stabilizing, color is still a bit more lime/yellow than I would like but still improving and there's definitely growth happening, extra fingers on 2nd set are really taking off, 3rd set looks about ready to throw out fingers as well, and it appears to my (shameless bragging) amazingly good and sharp 20/10 eyes that there's a teeny tiny microscopic 4th set formed deep inside the 3rd, I'm quite sure thes are fingers of 3rd, the alignment is wrong. Hope I get a bit of a growth spurt out of her, if I'm to top her at 14 days she's got some growth to do, hope the cold isn't stunting her. A bit over 96 hrs to go and she will be 14 full days above surface and I wouldn't be comfortable topping her at her size if she maintains same growth rate she's shown so far. Not that I intend to cut there, just stating for info, I currently only have a hair over 2mm between 1st and 2nd nodes, and less than 1mm between 2nd and 3rd.

#2 replacement seed shed its shell and seems to be doing its thing, coty's hadn't unfolded last I checked but not gonna worry about that until tomorrow, she knows what she's doing. Have her on the warming mat at the end of the tubes off to one side so she isn't getting the full focused light bath #1 is.
 
#2 opened, I'm a bit concerned, there appears to be a white spot, perhaps also damage, to one of the coty's again, right where a piece of the membrane was stuck (again). It looks to be in far better shape than the one I lost though, can see 1st leaves already developped inside the closed coty's so I'm relatively confident it will be ok, but either I got some bad seeds or am doing something wrong between germination and opening. Wondering if perhaps I'm not planting germed seeds deep enough, or perhaps not packing the soil in enough and making it too easy for the sprouts to pop up.

My wife will be severely displeased if I lose a 2nd seedling, and honestly so will I. Here are some pics. Not very clear but I think you can see what I am describing.

IMAG073315.jpg
IMAG073211.jpg
IMAG07349.jpg

IMAG073514.jpg
 
As a follow up, since I know most growers seem to prefer to discuss light in PAR rather than lumens or lux, after a rough calculation (and I'm no expert with PAR/PPF math...yet....) I make a rough guess of roughly 317 umol m2 s1, or about 20.5 moles m2 d1 with the as yet not included extra cfl's and the 6500k tubes. Without the extras, I make it closer to 250 umol m2 s1 or s hsir over 16 moles m2 d1

Once I switch to 3000k tubes, as I understand the math, I'll be more around 32.5 moles m2 d1.

If I have any light experts checking in, I'd like to hear your thoughts on if this will be sufficient for good yields. I'd also like to hear what people generally aim for with PAR in different phases.
 
yup, definitely another seedling with a damaged cotyledon, in exactly the same place, after another fussy shell......either I messed up in exactly the same way twice, or there's something flawed in this particular strain's genetics.....and since I produce few hundred pounds of food in my garden every year and don't lose more than 1 out of 50 things I plant there, I'm leaning towards flawed genetics. Think I will send CKS customer support an email, likely won't get anything out of it since they only guarantee %80 germination and nothing at all about successful plants, but who knows, they might throw me a couple mystery seeds or a small partial credit if I ask nice.
 
That CFL hood is awesome build...I used that light fixture before....But that hood is a brilliant hack.. I will deff. Be adding the hood

Sent from my QTAQZ3 using 420 Magazine Mobile App
 
#1 doing nicely, starting to have a very faint pleasant odor, leaves expanding, 4th set is growing well and 3 fingered, 5th set is starting to form but still tiny. Not a whole lot of vertical growth, not sure I'll be able to top between 3rd and 4th nodes, may have to skip topping and just LST, I will not top her after day 16 above surface, all my research says that would be a bad thing with autos. have to decide by suppertime on the 9th. Pot is starting to get light, think 2nd watering tomorrow, reminder to self, water alot more lightly this time and check for re-occurence of drooping and yellowing.

#2 appears to be ok, the damaged coty is still attached and still green, 1st set grew a bit more and decent color, a hair yellow and droopy but stem looks straight and strong, a bit strecthy but not horribly I think, much less concerned now that I was at last post, looks like she'll recover with help. pretty much no water since planting, just a few drops a day on soil at base and a few more inside humidome.
 
so I don't think I'll be topping #1, not enough space between nodes 3 and 4 and don't want to shock it that much with the needed transplant coming soon. moved the lights a bit further away, if i can get a couple mm of growth out of it to add space before supper tomorrow I may reconsider. is it normal to have 5 nodes on 1 cm of main stem? anyhow, color seems good, growth seems steady, pot is getting light again, time for second watering tomorrow before lights out, then I think I'll transplant to final pot Friday evening while the soil in still moist and clumpy. mixing up growth medium tonight in preparation, will post pics of the process and plant progress later when I'm done.

#2 stretching is under control, 1st true leaves growing well, 2nd set is formed and expanding, shape is a bit off but it seems to be recovering well considering. the damaged coty is still attached by about 1/3 of its width and green so all seems as well as can be expected.
 
Back
Top Bottom