Mr.Sniffle's Hydro JillyBean Grow Journal

MisterSniffle

New Member
Hello everyone! I'm a brand new medical cannabis patient is this is my very first cannabis grow. I'm also brand new to 420 Magazine, so hello again! I have many years' experience with hydroponic growing. Mostly growing/breeding and eating delicious peppers, so I'm hopeful that my first medicinal grow goes well!

Wish me luck, please!

The essentials:

Four Plants (started from seed- Fingers crossed for maximum females!)
Genetics: JillyBean seeds from TGA Subcool Seeds
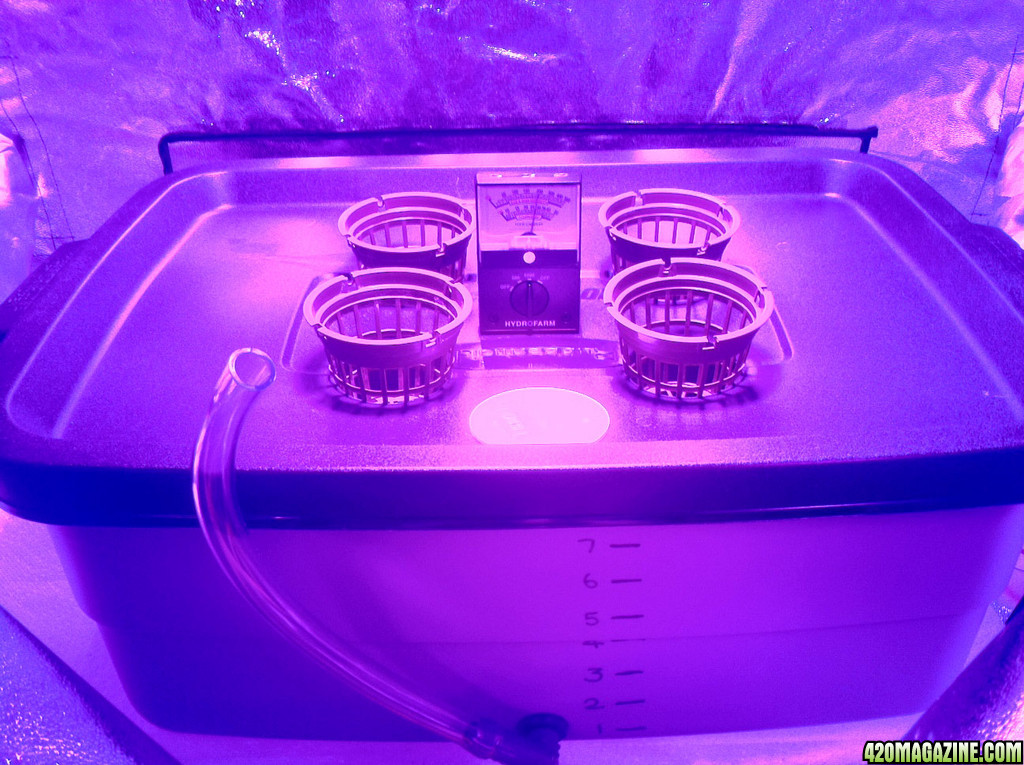
Method: Hydroponics - Deep Water Culture
Container: DIY - Rubbermaid 10 gallon Roughneck
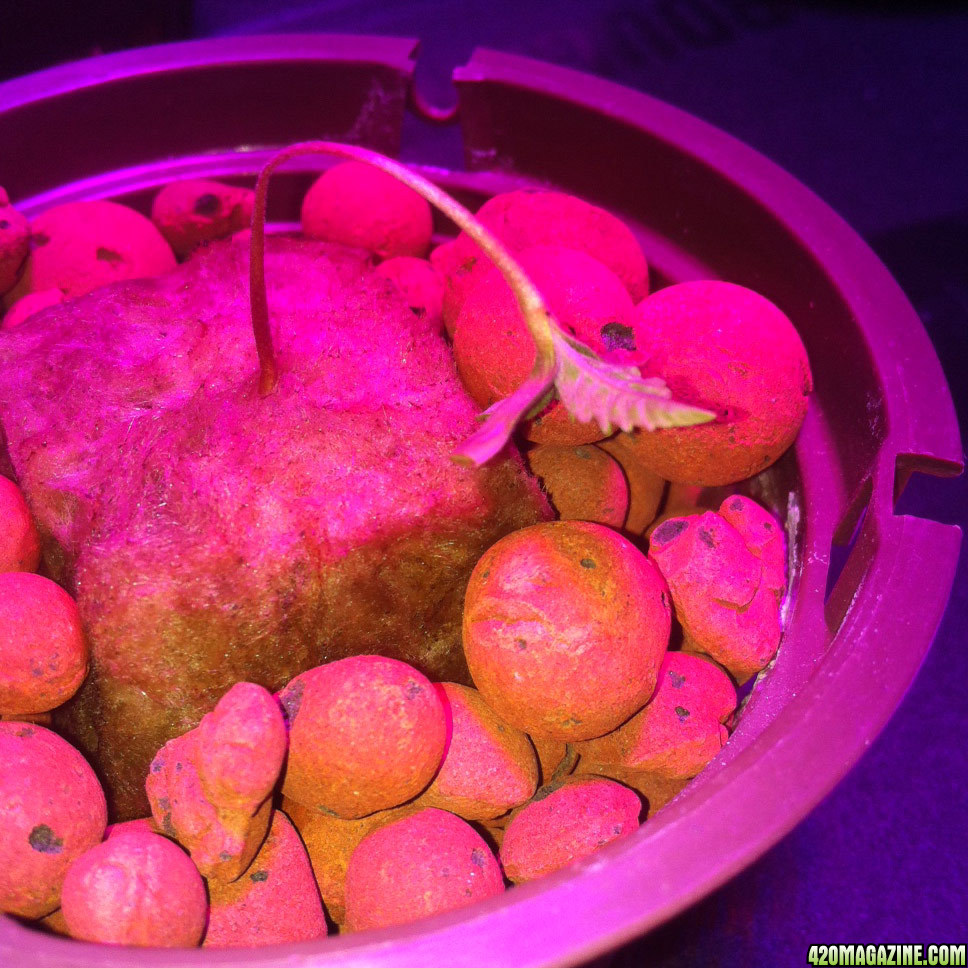
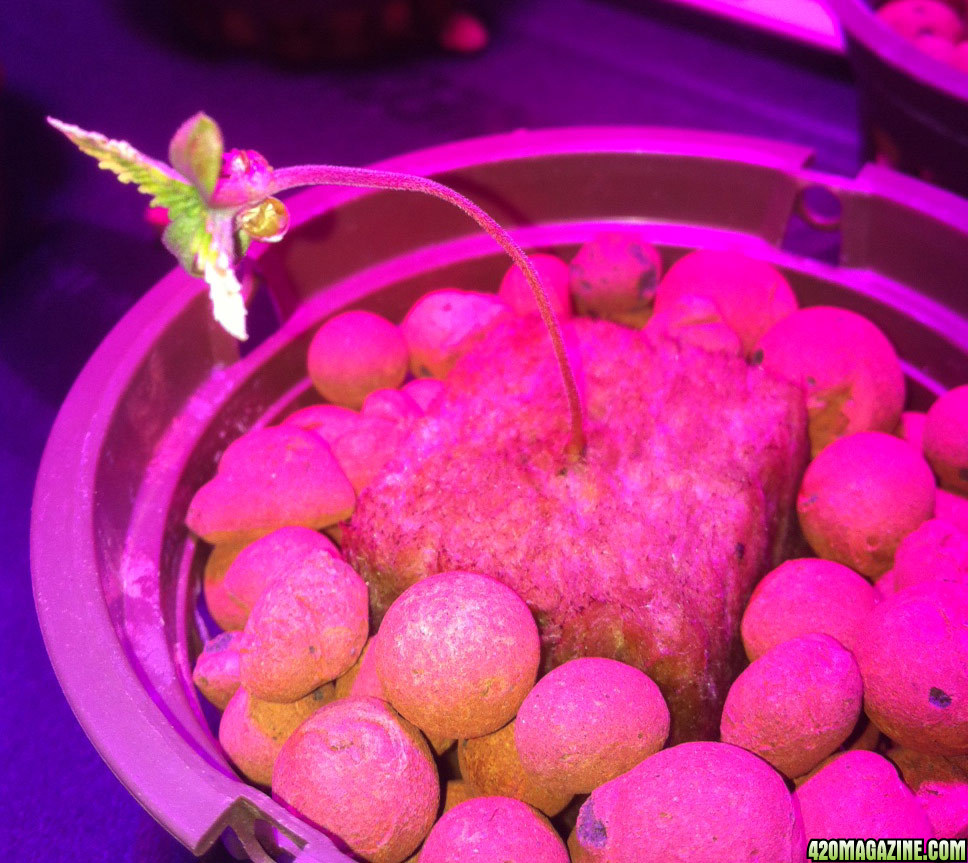
Medium: Rockwool/Hydroton
Nutrients: TechnaFlora BC Grow/Bloom (And the rest of Recipe For Success)
Supplements: Hygrozyme, Superthrive, Liquid Karma, Silica Blast
Lighting: NEXTGEN 400/600 watt switchable digital ballast (Configured for 400 watt MH then HPS)


First things first, let's have a look at these here seeds:


JillyBean seeds in their breeder pack - from TGA Subcool Seeds


With the cardboard flap removed, I found the seeds in a little glass vial inside of a plastic bag. Nice crush protection!

Time to germinate! I'm germinating the seeds in rockwool cubes (1x1x1.5 inches) so the first job is to soak the rockwool cubes in my rockwool soaking solution:

16 ounces distilled water
1 DROP superthrive
1 mL Technaflora Root 66
1 mL Technaflora Thrive Alive B-1 Red

I mixed up the solution and pH adjusted it to 5.7. The cubes go in. In this case, I soaked them for 24 hours.


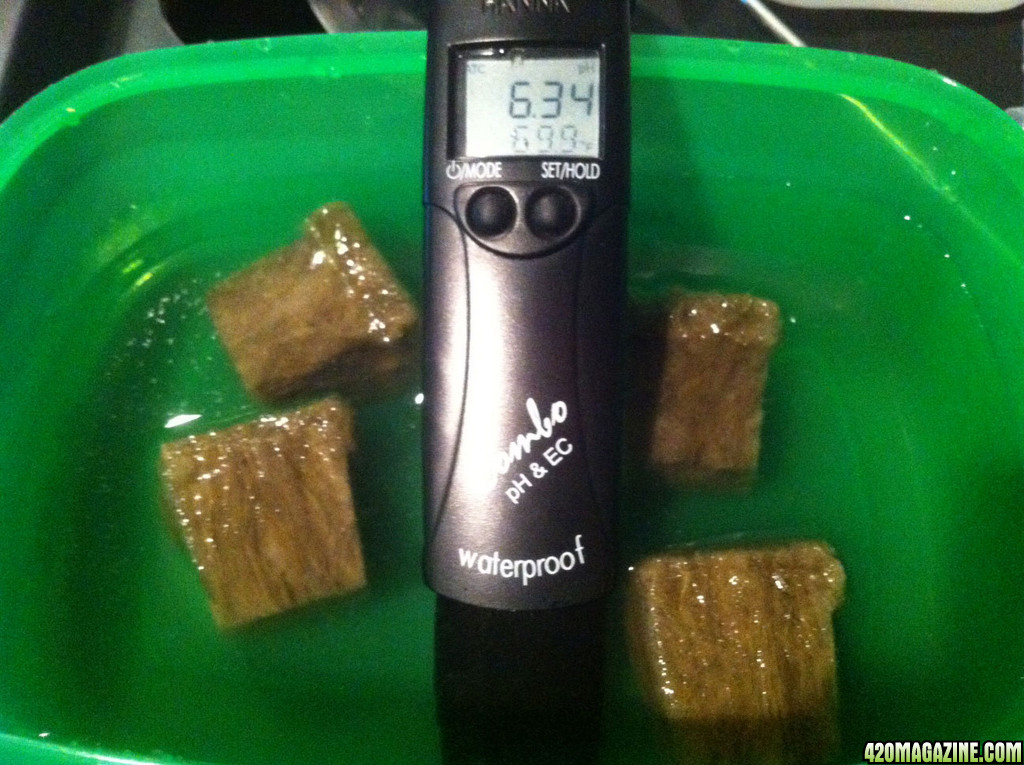
After 24 hours of soaking, pH drifted to about ~6.3, still in a good range.

I also soak my seeds prior to germinating. I soak them for 12 hours in my germination solution:

8 ounces distilled water
1 DROP superthrive
2 DROPS Technaflora Thrive Alive B-1 Red

The glass containing the seeds and soaking solution lives on a heat mat set to keep the temperature around 76 degrees F.


Seeds soak in germination solution for 12 hours

Every couple of hours I use a little syringe to squirt water over the soaking seeds. Eventually they will all sink and can remain at the bottom of the glass for the rest of the soaking period.

When the rockwool cubes have soaked for 24 hours I lift them out of the solution and shake the excess water out. I want them damp but not soaking wet.

I prep the cubes by boring a hole for the seeds. I like to flip the cubes upside down and make my own hole. (I find the factory-made hole to be a bit too deep). I shoot for a hole that is about 1/4 inch wide and a 1/4 inch deep. The idea here is to make a cavity in the cube that gives the seed room to flip and roll as the sprouting plant tries to push it up and out of the rockwool:


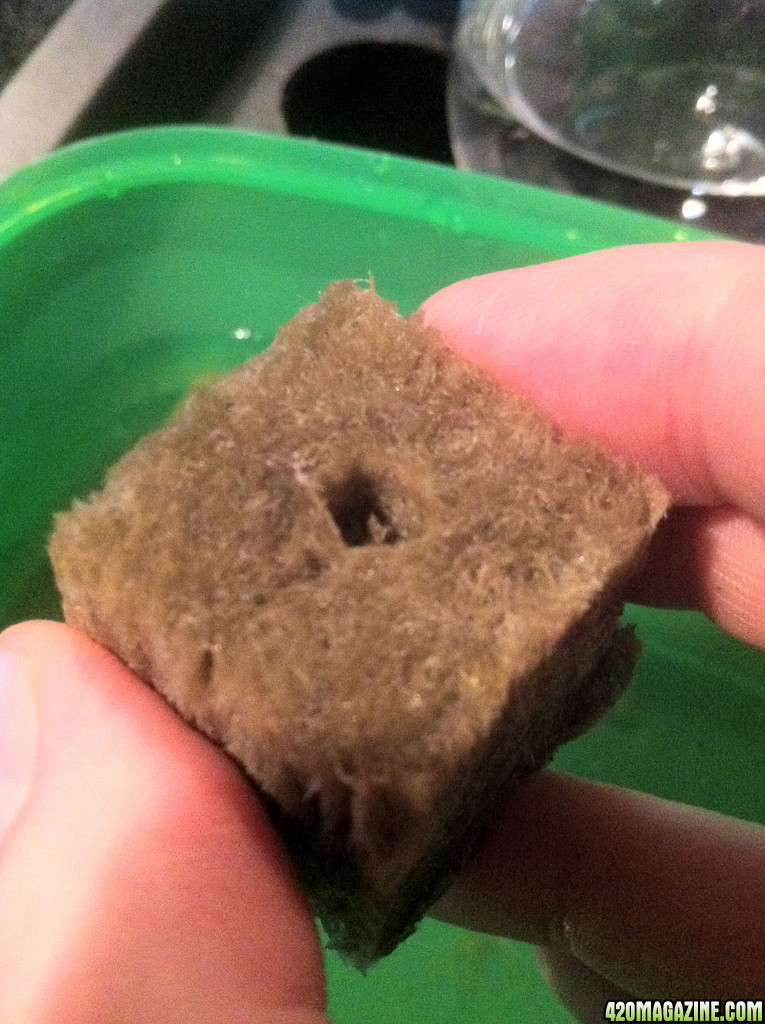
A hole is made in the rock wool cube, about 1/4 inch wide and 1/4 inch deep.

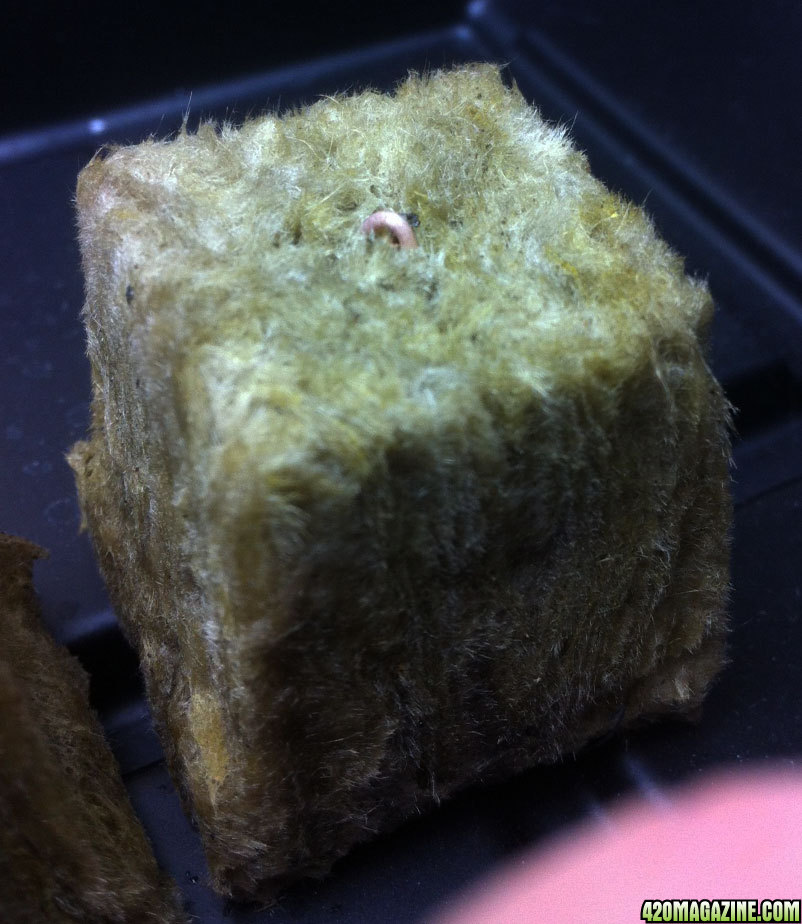
I place one seed in each rockwool cube and very gently brush the rockwool together to close/cover the top of the hole. I don't squeeze the hole closed, I try to leave the seed some room to move in the hole and simply close the top of the cube to block out light and keep the little 'chamber' sealed.


With one seed placed in the hole, the hole is then gently brushed closed.

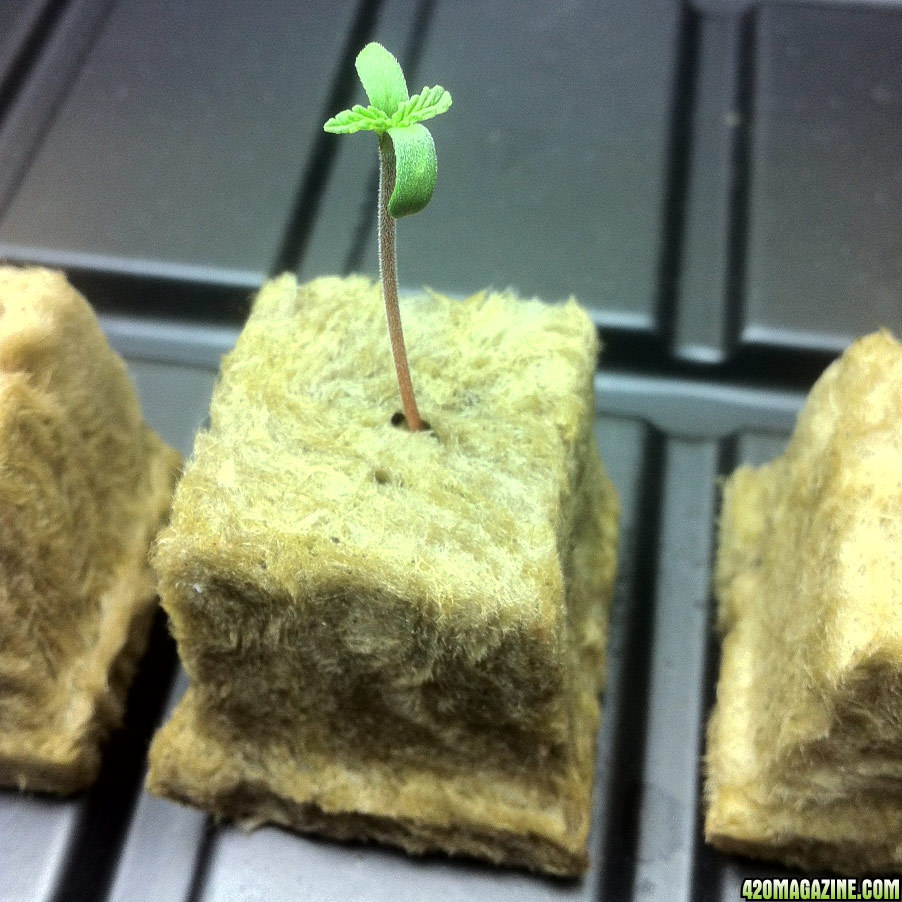
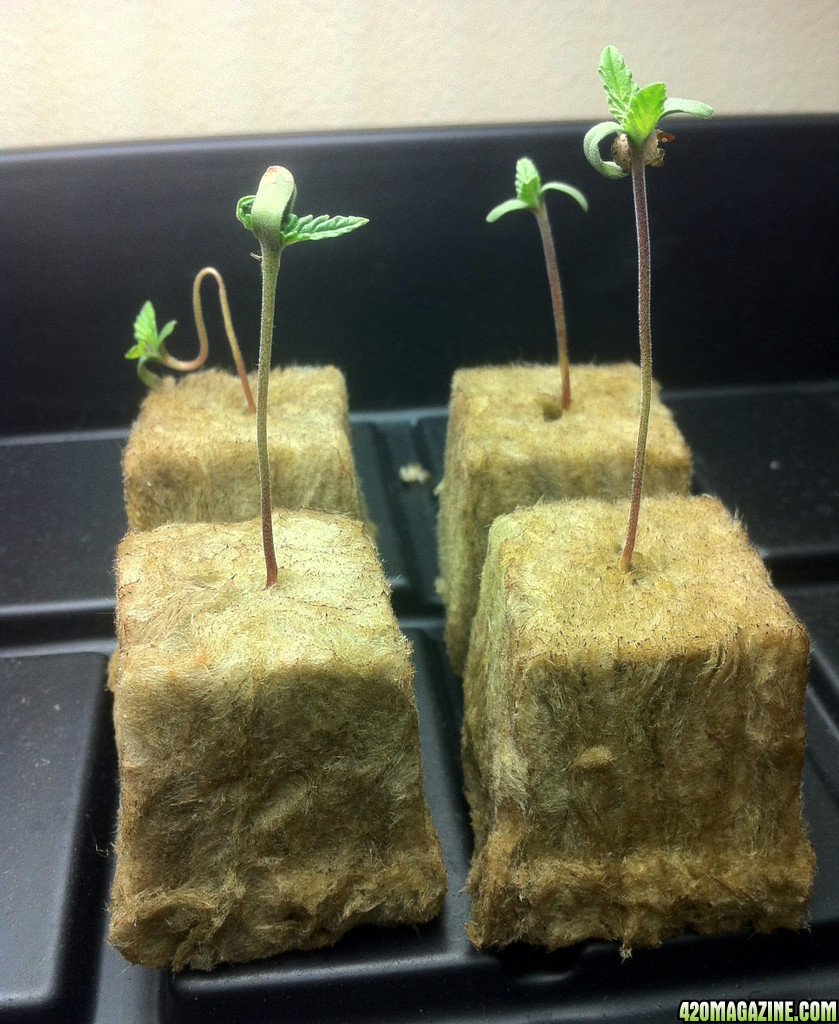
Alright! With all seeds sealed in their own rockwool cubes, these guys go onto a heat mat (set for 77 degrees F) in total darkness until they germinate and sprout.

Next Update: They'll sprout or they won't!

-Sniff
 
Hi Sniffles, welcome to the :420: grow forums. This is a great place to document your grow, and provide/receive help.

I'm looking forward to your grow, you have a lot of experience with hydro, so I'm curious to see what kind of spin your going to put on your MJ garden. ;)

Good luck with your grow and welcome.
 
Hi PeeJay -

Jilly Bean wasn't my first choice. I was really looking for a high-CBD strain to grow so that I'd have something to try for tremors, since high THC strains can actually make some of my symptoms worse and are useless to me at night.

I wasn't very lucky locating seeds for Pennywise- a roughly 50/50 split of THC/CBD (by percentage). Since I couldn't find my first-choice strain I looked at my wish-list and decided instead for JillyBean, since it has a good reputation for treating anxiety and depression, and no local dispensaries had any JillyBean flowers. A lot of other strains on my wish-list are available as flowers right now at local dispensaries so I pushed those down the list for growing.

I have a pair of grow setups so I hope to start a batch of Pennywise once I can find beans.

-Sniff
 
Day Two: Hurry up and Wait

Exactly 24 hours after sowing the seeds in their rockwool cubes. No big surprise- nothing has appeared yet.

The rockwool cubes feel a little light (meaning they have gotten too dry) so I gently misted each one with distilled water until they returned to a decent weight, holding a bit of water. I keep the cubes under a dome for protection and cleanliness, but I have all dome vents wide open to prevent too much humidity build-up, as this would promote the development of mold/fungus.

-LIGHT: Total darkness
-HUMIDITY: 55% RH
-TEMP: Holding around 76/77 F

(I flipped a light on to take this photo but otherwise the germinating blocks stay in total darkness)


24 hours after sowing- still no action. Which is normal.


-Sniff
 
Day Two: They're Hatching!

Just a quick update- I had a peek at the kids and I can see that two of the rockwool cubes have a seed pressed up against the top (where I closed the seed-sowing hole), so two of the little ones have germinated so I expect they'll push through the rockwool overnight.

(BTW: It's currently 36 hours into the grow)

Here's hoping for a good photo update in the morning! :bitingnails:
 
Day Three: Popping up!

I just checked on the kids and all four seedlings are in various stages of pushing themselves out of the rockwool. Two of them are doubled over (see photo below) and the other two are still little bulges just about ready to push themselves up and out.

I was a little surprised, as the seedlings look much like they did early this morning. I figured they'd be up out of the 'ground' by the time I got home from work tonight. Maybe tomorrow.

I took tonight's photo then gave everyone a light mist of distilled water to get the cubes nicely dampened to get 'em through the night.

jilly_d03_sprout_cropped.jpg

On day three, a seedling has almost pushed itself up from the rockwool.

Oooh I'm so excited! Next update should have some visible leaves for us! Cotyledons at least.

:rollit:

-Sniff
 
Day Four - Changing the light plan

I am changing the lighting plan for this grow. The original plan was to use a 400 watt HID lamp, but I have heat problems.

I have a 2x4x4 foot grow tent prepared to house the Jillies once they're all sprouted, have true leaves and are ready to go. I've been running some temperature tests in the empty tent and I'm having a hell of a time keeping the temperature under 90 degrees F with the 400 watt metal halide lamp running. Since this is a DWC grow, the reservoir is in the tent and I definitely do not want reservoir temps running that high.

I installed a CoolTube inline air-cooled reflector and with my duct fan running full blast (180CFM) I can only manage to keep the temperature around 88F. Still seems a little too hot, don't you think? I can't stop worrying what could happen if the inline fan were to crap out at some point.

I decided to invest in another LED grow light (I already have a Kessil H350- it's being used on a different grow), so I picked up a new SolarFlare 200 watt full-cycle LED. I've seen some nice grow journals utilizing this particular lamp and folks that own one seem to like it. It also comes with a three-year warrantee which is a nice bonus for a contraption that runs up to 20 hours per day, every single day.

At $400USD each, I can't afford to own a dedicated LED lamp for Veg and a second for Flowering, so I opted for the 'full-cycle' Solar Flare, which should support plants from seed to harvest. Like most full-cycle grow lamps this one leans red, placing more emphasis on the flowering phase. I suppose I'll toss in a couple 6500K T5's or CFLs for a bit of a boost when vegging.

I'll save my HID gear for my larger 5x5x7 tent where heat accumulation is much less of a problem. I'm not growing on that scale yet, though.

Oh right, it's not an update without some photos of plants:


Four day old Jillybean sprouts. The taller one is one inch.

This photo shows the highest and lowest performing seedlings from the four that I planted. The one on the left is a full inch tall and will probably open its leaves by morning. The second is still working its merry way up.

Now that all of the seeds have germinated, they don't need to be in the dark anymore. I placed the seedlings under a Hydrofarm 125 watt 6500k CFL set on 18 hours a day. I gave everyone the usual light spritz with distilled water to keep their cubes damp and put them to bed for the night.

-Sniff
 
Day 5 - Everyone's Up!

This morning makes five days since the seeds were placed in rockwool. All of the Jillybeans are up now:


Five days in, all seeds have sprouted. One even has tiny true leaves.

Here's a closeup of our best student:


This seedling has a tiny set of true leaves


The Rockwool cubes were really dry, so I gave them the usual misting with distilled water after taking the photo. I think it's time to mix up a very weak nutrient solution so that I can start feeding the seedlings. I'll do that as part of the next update.

Thanks for looking!

-Sniff
 
Thanks, PeeJay- I have high hopes! Things seem to be going OK so far :thumb:

Feeding the Seedlings
Based on a discussion in another thread (my AutoBomb grow journal) I have decided to change my plan on controlling moisture in the rockwool cubes. I've been running to the garden several times a day to give the cubes a little spritz of water to keep them damp.

From now on I'll give the cubes a lot of water (get them soaked) when they look pretty dry, but leave them alone until they get pretty dry. Maybe they'll need water once per day, maybe once every two days.

I mixed up a little batch of light nutrients to feed the seedlings:


A fresh batch of delicious Seedling Feedling

Mister Sniffle's Seedling Feedling:
-16oz Distilled Water
-1 mL Thrive Alive B-1 Red
-1 mL Root66
-1 mL Sugar Daddy

Nothing much to it. Just a very dilute solution with a tiny amount of NPK and some micronutrients.

I'm a little worried- my pepper seedlings really loved this solution but I worry that it's still a bit strong for these guys. I guess we'll see. I might have to refine it a bit. I reckon I can flush the rockwool if the plants look unhappy.

-Sniff
 
Day 7

Ho-hum, just another day with very young seedlings. :;):


Jillybean seedlings, 7 days from seed

So, the stretching is evident in three of the four seedlings. This is most certainly due in some part to the lighting. I moved the plants up four inches yesterday, much closer to the CFL to get them enough light without stretching.

The seedling in the back-right of the photo is shorter than the others. This one sprouted a day behind the others and spent one day less with the light too far away. So this one is of a more normal height.

The seedling in the front left is oddly-shaped. This is because the cotyledons never opened. The seed hull left being a little 'band' of material which served to 'glue' them shut. The true leaves emerged anyway. Eventually growth will pull (or rip) the cotyledons open.

Tomorrow is going to be an exciting day. Gotta fire up the DWC and get the tent running!


-Sniff
 
Here's some fun! My LED grow lamp showed up! I need to do some temperature testing so that I can work out my plan for ventilation in the grow tent that the JillyBeans will inhabit.

I won't do a full review of the light right now, we can consider the rest of this journal a 'living review'. But I'm happy to say that it looks and feels very solid, very well-made. Attractive, too.


200W Solar Flare Full-Cycle LED Grow Light

I removed my HID reflector from the tent and packed the ballast away. Then I hung the SolarFlare:


WOW! That's bright. B)

This is a bright damn light. I didn't write the results down and I may recall these numbers wrongly but I think was getting 2,500 foot-candles at like 18 inches from the light. I hit 5,000 at a little over six inches, and the light meter is pegged (5000+) the rest of the way to the lamp. I'll measure again tomorrow and if these are wrong I'll edit them.

OK, on to temperature testing. I flipped on the SolarFlare and sealed up the tent. No fans or vents at this point. Ambient temperature was 72F.

After 60 minutes the temperature was 85.5F. Not bad.

The SolarFlare has a pretty quiet cooling fan, and it doesn't run at a very high speed (maybe it would if the tent were hotter). My point is, I'm not getting a lot of air circulation for 'free' from my light's cooling fan. So I added a small oscillating fan to circulate air within the tent but not necessarily vent it. After 60 minutes the temperature was 88.9F- Too warm!

I have a Ventech 4 inch duct fan for primary ventilation, and a Ventech fan speed controller. I flipped on the fan and set the speed for around 2/3 (66%). After an hour of this, temperatures were down to 82.0 and held right around there for another hour. This is a happy place for me, so I just need to set up the DWC system tomorrow morning then the Jillys can go to their new home!

-Sniff
 
Day 9 - They're still seedlings!

A couple of things are going oddly for me on this grow. Have a look at the kids:

jb_d09.jpg

JillyBean seedlings on day 9

So, starting in the front row:

-The seedling in the front left is the one which had a thin band of material left over from the seed which prevented the cotyledons from opening. The true leaves are struggling to get out, so I carefully snipped the bonded tips of the cotyledon after taking this picture so that the could separate and relieve the pressure on the true leaves.

-The seedling in the front right is one of the early-sprouters, from when the light was too far away and and seedling stretched. So it's abnormally tall, but doing well since I lowered the light.

Back row:

-The back left seedling was the first to sprout, and thus spent the most time stretching before I fixed the lighting. This one got so tall and weak that it fell over on itself. It's trying to recover, but I imagine this was a significant stressor for the plant so we'll have to see how it does.

-The back right seedling is the healthiest of the bunch. It's a good height with a nice sturdy stem and fine little true leaves.

So, a few problems, but none that are unfamiliar to me. Just things I'll have to do better next time. I have a tent prepared for these little ones. I'm just waiting to see some roots protruding from the rockwool and then they can go into their new home!


-Sniff
 
I got bored so I finished up the deep water culture container for these plants. :cheesygrinsmiley:


An eight gallon DIY Deep Water Culture container

This is a DIY type of deal. It's made from an 8 gallon Rubbermaid Roughneck container. I used a hole saw to make four holes for three-inch net pots. I actually made the holes 2 1/4 inches. This way the net pots don't sit as low in the reservoir, allowing me to have a bit more water in the reservoir without the net pots sitting in water all the time.

I may have put the net pots too close together... I suppose it's a risk. This is going to be a SCROG grow if I end up with three or more females, so I'll have an opportunity to train them apart a bit. Anyway, here's hoping it's not too crowded.

I need to get a CFL or something else set up in the tent for when I want to take photos. The blinding purple light from the LED doesn't make for great pictures.

Anyway, I filled the container with water and started the air pump. I adjusted the light so that there are 2,000 footcandles falling on the net pots according to my little Hydrofarm light meter. That should be the right amount of light for the young plants.

The white circle below the light meter in the center of the container is a two-inch PVC plug. I cut a two-inch hole in that spot with a hole saw and placed the plug in there. This is my observation and fill port. Very convenient for getting a peek inside the reservoir or taking water samples or adding nutrients.

The loose floppy piece of tubing is a water level indicator. I secured it with a plastic ziptie after taking this photo. I made this extra long because I also use it to drain the reservoir. I just slip it inside of a larger hose and bend it downward to get the water to flow. This tube is installed through the wall of the reservoir using a 1/2 inch Hydrofarm rubber tank grommet and a 1/2 inch 90 degree PVC barb from a hardware store.

ARGH, come on plants, let's get going!

-Sniff
 
Seedling mass death strikes! Grower seeks help

All four Jillybean seedlings have died! I'd really appreciate it if some other growers could have a look at my photos here and perhaps help me diagnose.

My diagnosis is Root Rot. I have always used Rapid Rooter plugs for my hydroponics projects over the years and this was my first attempt to use Rockwool. I'm pretty sure I buggered the moisture control and kept the rockwool cubes too wet. I think I was re-watering them when they LOOKED dry but still had plenty of water in their center, up against the roots.

It could also be Damping Off, but I'm not so sure. I used new rockwool and distilled water, and I always clean my tools and trays between uses, so it seems rather unlikely that the seeds or seedlings were exposed to that particular pathogen. Unless it was on the seeds.

In any event, I moved the Jillys to their hydroponics unit a couple of afternoons ago. They were not receiving any water or nutes from the system. They were just resting in their net pots while I waited for roots to reach down into the solution. I hand-watered the cubes for those two days. With fresh, pH adjusted water - no nutes.

The seedlings were already started to look a little janky when I moved them to the hydro unit- the stems were curved (starting to collapse, I believe) and they did not recover, they only got worse. I was hoping they'd pep up and point at the lights but they continued to decline.

It's also possible that I started feeding them too early, although this seems a strange way for them to die if that were indeed the problem. There's a little leaf-tip discoloration that might be interesting, please see the photos below.


jilly_dead02.jpg

Seedling #1, dying. Note the constricted midpoint of the stem. Damping Off killed this one?


jilly_dead01.jpg

Seedling #2, dying under similar circumstances.

So, let's get a better idea of what's going on here. Let's tear into the rockwool and have a look at the roots:

jilly_autopsy01.jpg

An autopsy of seedling #1's rockwool cube. Taproot has no root hairs or lateral roots. Also, slightly slimy-looking.

In the above photo some discoloration of the leaf tips is evident. Perhaps this is a handy clue to what went wrong?


jilly_autopsy02.jpg

Seedling #2's cube shows lateral roots but no root hairs. The constricted stem is obvious here, as well.​

:rip: little ones. Ye shall be avenged!

I have a 10-pack of less-expensive seeds which I will use until I figure this out. I have five germinating as we speak. I'll start a journal for those a little later if I get them to actually survive to veg.

:straightface:

-Sniff
 
Back
Top Bottom