1000W Purple Grow

Was wanting to get me some OG Kush but they were sold out when I was ready to order. So instead I got Blackberry, Querkle, and more PKush. Can't really get clones around my area so Im kind of limited to whatevers available online. Good to hear about Bubba Kush, I got some of that curing also it smells so good!

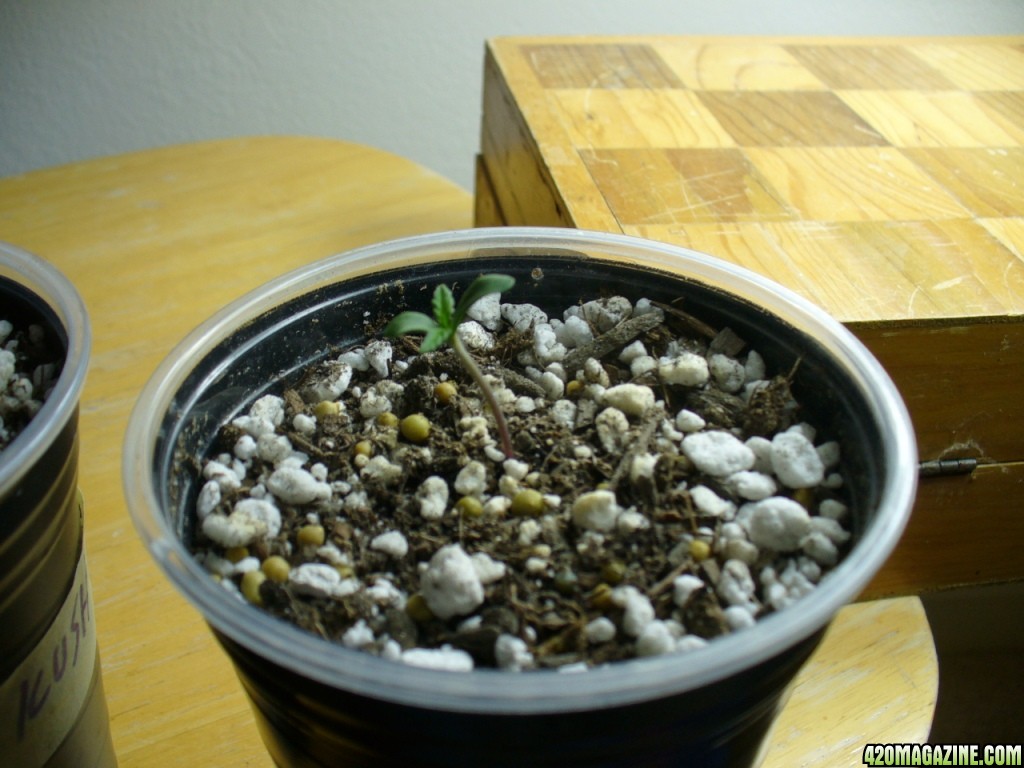
I'll probably transplant them in a week or so, trying to get them back into Veg mode before I stress em out anymore.

If I lived in an area where I couldn't get clones I would make a small mother room and make my own clones. I have kind of a love hate relationship with ordering seeds off the net. On the one hand you get access to strains you normally would not be able to get locally. On the other hand, it really pisses me off to buy a 10 or 15 dollar seed and have it not even sprout. IMHO seeds are WAY overpriced. I feel seed companies would sell more seeds if they lowered the price of their seeds. Who wants to shell out 100 bucks for 10 seeds?! No other plant can get away with seeds that expensive. I have had mostly poor luck with seeds. Whether its the fact I am doing something wrong I do not know but I put the seeds in seed starter, put them in a clone dome with a heating blanket underneath on the lowest setting and still maybe 25-50% of the seeds actually germinate. It is even lower when I start seeds in Dixie Cups with Light Warrior or Happy Frog. Still, the plants that do hatch seem to be very strong and I;m happy to get a Chem #4 X OG and Chem Valley Kush plant which I would have never been able to buy as a clone around here. So, I don;t know, the seed business is what it is. Just wish they would give you 50 seeds for 100 bucks instead of this 10 pack nonsense.
 
I agree paying 10bucks a seed is tough especially when its a dud. Its hit or miss with the seed banks, I have had good luck with some strains like querkle, SLH, and Blue Cheese which are around $10 a seed. The seeds that are cheaper like PKush which is around $4 have not been a stable. The seed banks should just throw in a couple of extra seeds of the same strain you ordered instead of whatever promo they got going. I have probably 20 random seeds from Attitude, maybe Ill use them up on a summer grow.

Blue cheese just popped, still waiting on the BKush hermie seeds hopefully I get at least 1 out of the 4.
 
I agree, and I wish they would tell me what strain the free seeds are, most of the time they don't. I hate growing things that I dont know all the detailes about, I have no idea if it's an indica or sativa, how long to flower or anything. I mean I can telkl when its growing and tell when its done, but it's difficult to plan for when you have no clue what it is.
 
On the subject of seeds...I just ordered seeds from Nirvana. They had a weekend deal of 10 seeds of Papaya and 10 seeds of NYPD, with shipping cost me $50. So, it cost me about $2.50 per seed(including shipping). It just goes to show that you don't have to spend $10 per seed. You just have to shop around and wait for a deal to come around. Also if you go to Seedsman, they have some very very cheap seeds as well. Maybe not the strains that have won awards but I'm sure you can grow some decent meds from them.

There is also this seed bank in BC, Canada called BC bud king. They sell 15 seeds for $60. It's a pretty decent price for quality seeds.
 
Oh and I always hear people talking about seeds not sprouting. I think sometimes people try to do too much with seeds and end up killing them with love (if you know what I mean). All you really need is some distilled water and a paper towel. The seed starters and additives that the seed companies are trying to sell are so useless. Just drop a paper towel on a plate, pour some distilled water on it and cover with another paper towel. So far, 100% germination rate for me with different strains from different seed banks. :morenutes:
 
I don't know Hemp Rocket, I grew some Papaya in October and I was not very impressed. The genetics seemed unstable and there was a lot of mutations going on. Irregular leaf growth, bizarre looking buds. I went online and learned I was not the only one having this problem. From what I understand, Papaya is a rip off of Soma Seeds Somango. I wish you the best of luck with your Papaya grow. It is a very interesting plant. The pheno I had had these really dark greasy leaves sort of like Sensi Star if you've ever grown that and I thought it would be a good strain but I just got crap for yields off the plant. I mean, I vegged it for over a month and got less than an ounce off the plant. It was pathetic. On the other hand, I haven't given up on Nirvana totally. I did purchase 2 BLACKBERRY seeds. 1 seed popped almost instantly, it was amazing how viable it was. The other seed never germinated?!?! So, I have no idea what is going on. I just have terrible luck. I think the mistake I made was not presoaking the seeds in a paper towel or a shot glass full of water. I just stuck them in rooter plugs and put them in the clone dome. The weird part is quite a few seeds sprouted while half just sat there, grew a small rootlet, but never got any bigger???
 
I'm sorry to hear about your bad luck with seeds. I would totally suggest doing what I do with my seeds. Paper towel, distilled water, another paper towel and then I cover them to make sure they are in the dark and place them on my fridge. All seeds have always cracked withing 48 hours for me.

I've never ordered from Nirvana before so I want to try them out. I will start another journal when I get the seeds so you can follow my grow if you like.
:peacetwo:
 
Heard good and bad things about Nirvana, I just stick with Attitude cause I'm already paranoid about the whole process and I've had pretty good luck so far with them. There are a couple of strains that I wish I could get my hands on but I think they are clone only Blue Dream and GDP.

I used to get this unbelievably good purple stuff a long time ago and thats why I'm growing purple, I think it might be GDP or blackberry but I really have no clue, gonna have to wait till fall for a blackberry grow, GDP probably never gonna happen.

Whats everyones favorite strain?:blunt:

Just checked the babies, the blue cheese is up and 1 Bkush is just about to break the soil, dug out the other 3 Bkush and none of them had cracked there shell so I put them in a wet paper towel, :thumb: 
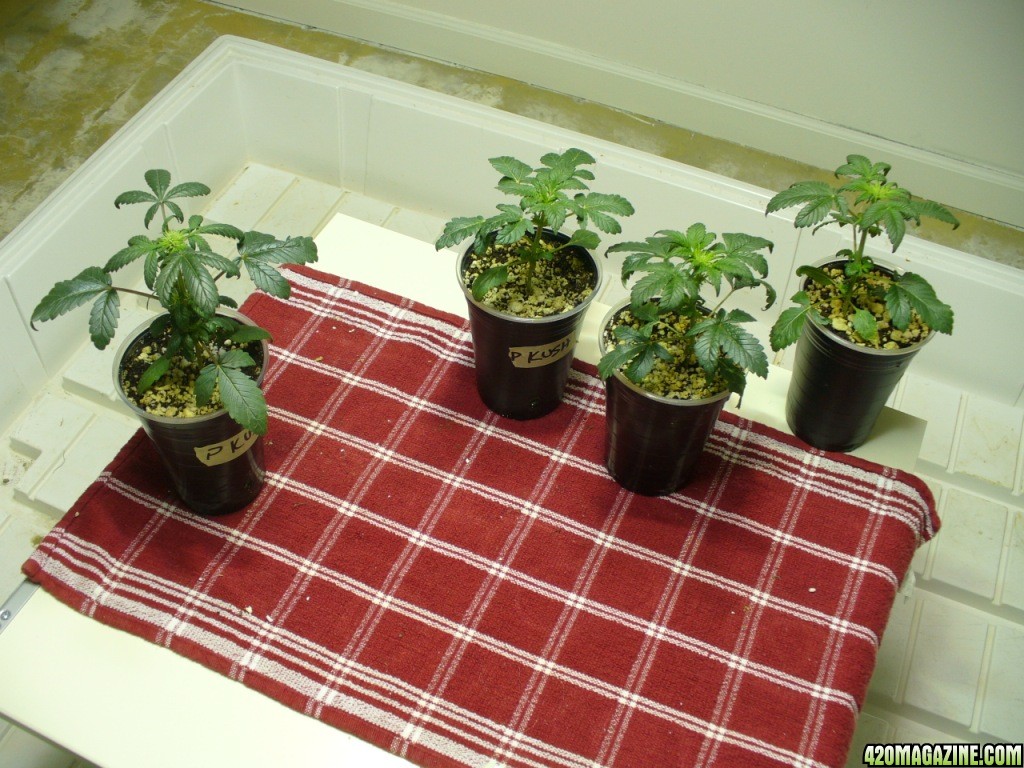
I was hoping for 2 Bkush to get a better idea of how these hermie seeds will grow up.
 
I agree with just putting seeds in a wet paper towel, Ive allways used this method, except i put them on a plate and on the cable box. Its just very important to make sure they dont dry up. Once the tap root pops out, plant it going down, and thats it, pretty simple and effective. I've only had trouble with a 10pack of free seeds i got with an order, none of them germinated, but I had 100% of the ones I paid for so thats fine with me.
 
Ok so I'm gonna be transplanting in the next few days and I'm trying to come up with a good soil mix. Last grow I used FFOF and 20% perlite mixed with OC+. This time I think I'm gonna feed the soil a little more with organics. So I have 2 bags of FFOF and 1 3.8cuft bag of Promix #4 hopefully thats enough for 9 or 10 pots.

Per 5 gallons
FFOF + 10% perlite
1 cup worm castings
3/4 cup greensand
1 cup of espoma plant-tone (couldn't find tomato tone)
1.5 tbls humic acid
1.5 tbls mittleiders micro feed
Top dress OC+ as needed

I was thinking of doing the same recipe with the Promix#4 soil

I will also be feeding weekly with seaweed in veg, and Sucanat in bloom, and calmag as necessary.

Let me know what you think, this is only my second soil grow. :smokin:
 
New Pics:popcorn: 
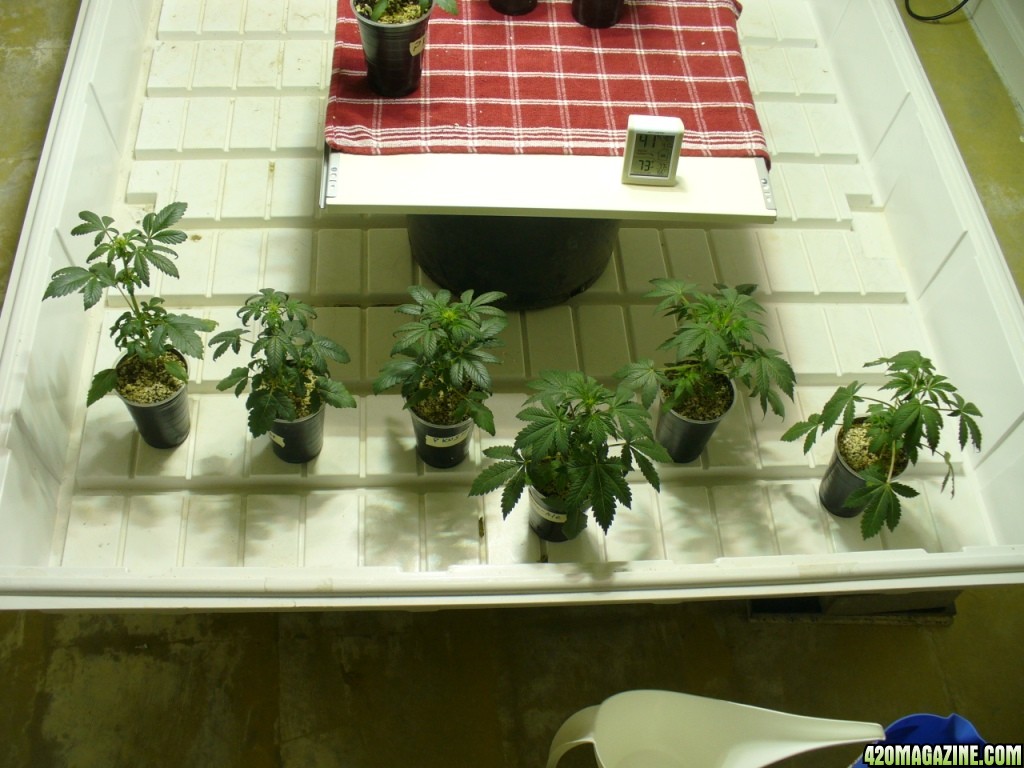
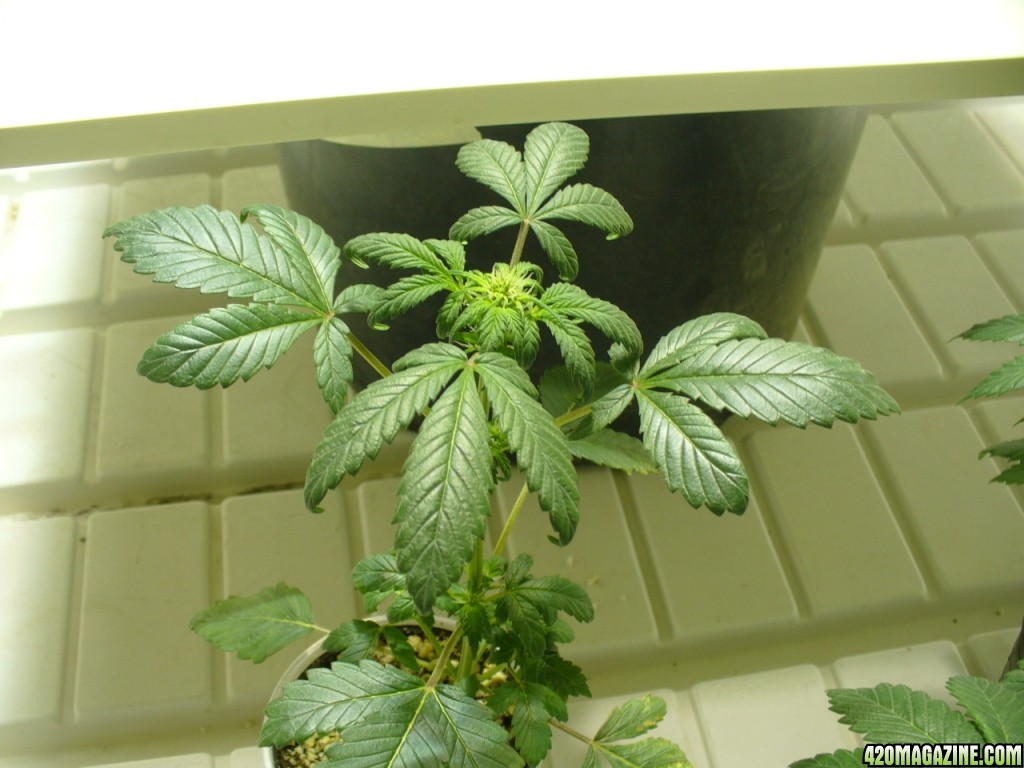
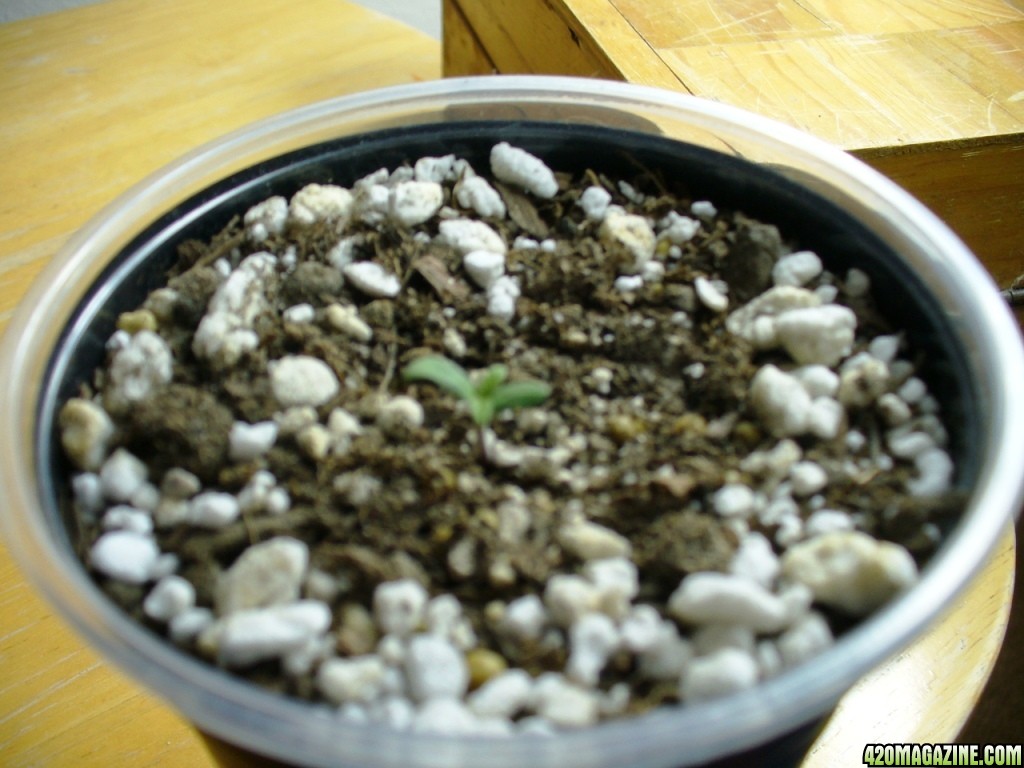
Exactly one month old!

003538.JPG

Bigger ones gettin fed


002572.JPG


001525.JPG

Little guys


006423.JPG

Most developed Bud, hope it goes away soon


007423.JPG

Hermie Bkush seed


008398.JPG

Fem Blue cheese

Well switching them from 12/12 to 18/6 has not slowed the growth so I may have to transplant in the next couple days, I was hoping to wait till the weekend, this is the largest plants I've had in mini hempys.:party::wood:
 
The sooner you can transplant the better. I bet those babies are root bound. I transplanted a few plants that were in small Dixie Cups and a few in those small square pots into 3 gallon Smart Pots. After I transplanted the plants and they came out of shock from transplant they grew quite a bit up and out and really filled in. After transplanting I watered with a light dose of Fox Farm Grow Big liquid fertilizer, Hygrozyme (I was out of Sensizym) and also a good dose of Bushdoktor Kangaroots root inoculant. The Bushdoktor stuff has all kinds of beneficial microorganisms in it and is a great root drench. This little cocktail is my secret to making sure the transplant shock is not such a terrible ordeal for the plant. To minimize shock, instead of using ice cold tap water I let the water warm up to luke warm before filling up my gallon jug I use to water my plants with.
 
This is Subcools soil mix, I try to do something along these lines, hope it helps

The Base


Start with at least six to eight large bags of high-quality organic soil. This is your base soil—i.e., your regular potting soil without the additives. The selection of your base soil is very important, so don’t cut corners here. I can’t begin to discuss all the different products out there, but I will mention a few in this article. A good organic soil should cost you from $8 to $10 per 30-pound bag. Since I want to give you a very specific idea of what I consider to be a balanced soil, take a look at the ingredients in a product called Roots Organic:

Lignite, coco fiber, perlite, pumice, compost, peat moss, bone meal, bat guano, kelp meal, greensand, soybean meal, leonardite, k-mag, glacial rock dust, alfalfa meal, oyster shell flour, earthworm castings and mycorrhizae.


Another local product we’re trying out now, Harvest Moon, has the following ingredients:

Washed coco fibers, Alaskan peat moss, perlite, yucca, pumice, diatoms, worm castings, feather meal, fishmeal, kelp meal, limestone, gypsum, soybean meal, alfalfa meal, rock dust, yucca meal and mycorrhizae fungi.


So far we’ve found that Roots Organic produces a more floral smell in the finished buds, while Harvest Moon generates larger yields.


If you have access to a good local mix like these, then I highly recommend starting with a product of this type. We’ve also had decent results using commercial brands, but never “as is.” The best results we’ve had to date using a well-known commercial soil has been with Fox Farms’ Ocean Forest soil combined in a 2-to-1 ratio with Light Warrior. Used on its own, Ocean Forest is known for burning plants and having the wrong ratio of nutrients, but when cut with Light Warrior, it makes a pretty good base-soil mix.


You can also just use two bales of Sunshine Mix #4, but this would be my last choice, since plants grown in this mix may not respond well to my “just add water” method of growing.


After choosing your base soil, the Super Soil concentrate is placed in the bottom one-third to one-half of the container and blended with the base soil. (With strains that require high levels of nutrients, we’ll go so far as to fill ¾ of the container with Super Soil, but this is necessary only with a small percentage of strains.) This allows the plants to grow into the concentrated Super Soil layer, which means that in the right size container, they’ll need nothing but water throughout their full cycle. One of the things I like best about this soil mix is that I can drop off plants with patients, and all they have to do is water them when the soil dries out.


Stir It Up


There are several ways to mix these ingredients well. You can sweep up a patio or garage and work there on a tarp, or you can use a plastic wading pool for kids. (These cost about 10 bucks apiece and work really well for a few seasons.) Some growers have been known to rent a cement mixer to cut down on the physical labor. Whatever method you use, all that matters in the end is that you get the ingredients mixed properly.


This can be a lot of work, so be careful not to pull a muscle if you’re not used to strenuous activity. On the other hand, the physical effort involved is good for mind and body, and working with soil has kept me in pretty good shape. But if you have physical limitations, you can simply have someone mix it up for you while you supervise. As far as the proper steps go: Pour a few bags of base soil into your mixing container first, making a mound. Then pour the powdered nutrients in a circle around the mound and cover everything with another bag of base soil. In goes the bat poop and then more base soil. I continue this process of layering soil and additives until everything has been added to the pile.


Now I put on my muck boots, which help me kick the soil around and get it mixed up well using my larger and stronger leg muscles instead of my arms. The rest is simple; as my skipper used to say, “Put your back into it.” This is hard work that I obsess over, even breaking up all the soil clods by hand. I work on the pile for at least 15 minutes, turning the soil over and over until it’s thoroughly mixed.


Then I store my Super Soil in large garbage cans. (And before using any of it, I pour the entire load out and mix it well once more.) Once it’s placed in the cans, I water it slightly—adding three gallons of water to each large garbage can’s worth. Though it makes stirring the soil harder, adding water will activate the mycorrhizae and help all the powders dissolve.


Before Planting


So we’ve added the water, and now we let it cook in the sunshine—30 days is best for this concentrate. Do not put seeds or clones directly into this Super Soil mix or they will burn. This is an advanced recipe to be used in conjunction with base soil. First you place a layer of Super Soil at the bottom of each finishing container; then you layer a bed of base soil on top of the Super Soil concentrate; and then you transplant your fully rooted, established clones into the bed of base soil. As the plants grow, they’ll slowly push their roots through the base soil and into the Super Soil, drawing up all the nutrients they need for a full life cycle. The Super Soil can be also be used to top-dress plants that take longer to mature. I’ll use this mix for a full year.


Buds grown with this method finish with a fade and a smoother, fruitier flavor. The plants aren’t green at harvest time, but rather purple, red, orange, even black—plus the resin content is heavier, and the terpenes always seem more pungent. This method is now being used by medical growers all over the world, and with amazing results. The feedback I’ve received is really positive, including reports of hydro-like growth and novice growers producing buds of the same high quality as lifelong cultivators. So give it a try! You won’t be disappointed.


The Mix


Here are the amounts we’ve found will produce the best-tasting buds and strongest medicines:


8 large bags of a high-quality organic potting soil with coco fiber and mycorrhizae (i.e., your base soil)

25 to 50 lbs of organic worm castings
5 lbs steamed bone meal
5 lbs Bloom bat guano
5 lbs blood meal
3 lbs rock phosphate
¾ cup Epson salts
½ cup sweet lime (dolomite)
½ cup azomite (trace elements)
2 tbsp powdered humic acid

This is the same basic recipe I’ve been using for the past 15 years. The hardest ingredient to acquire are the worm castings (especially since many people don’t even know what they are. FYI: worm poop). But don’t decide to just skip them: Be resourceful. After all, worms comprise up to ¾ of the living organisms found underground, and they’re crucial to holding our planet together. Also, don’t waste money on a “soil conditioner” with worm castings; source out some local pure worm poop with no added mulch.


Subcool is the author of Dank: The Quest for the Very Best Marijuana, available at dankgearonline.com.


THIS ARTICLE WAS FEATURED IN THE MARCH 2009 ISSUE OF HIGH TIMES
 
The sooner you can transplant the better. I bet those babies are root bound. I transplanted a few plants that were in small Dixie Cups and a few in those small square pots into 3 gallon Smart Pots. After I transplanted the plants and they came out of shock from transplant they grew quite a bit up and out and really filled in. After transplanting I watered with a light dose of Fox Farm Grow Big liquid fertilizer, Hygrozyme (I was out of Sensizym) and also a good dose of Bushdoktor Kangaroots root inoculant. The Bushdoktor stuff has all kinds of beneficial microorganisms in it and is a great root drench. This little cocktail is my secret to making sure the transplant shock is not such a terrible ordeal for the plant. To minimize shock, instead of using ice cold tap water I let the water warm up to luke warm before filling up my gallon jug I use to water my plants with.

Just checked on them this morning, no droopy leaves and they are still filling out, they can get pretty big in these mini hempy cups. They do look pretty funny, all the larger plants are taller and wider than the cups. Hope they make it to Saturday:wood:

Sounds like a great mixture you've come up with do you use the Fox farms line throughout the grow?:tokin:
 
Would love to do Subcools mix thanks for posting this article. I just don't have 30 days to wait for the soil to cook, I think the plants would have deficiencies until the microorganisms started kickin butt. Hoping to slowly work my way towards Subcools mix, the OC+ is kind of like training wheels. I did like the bit on mixing FFOF and Light warrior. That is what I initially wanted to do but nobody carrys light warrior in my neck of the woods but I may call around today and see what I can come up with after reading this article. :high-five:
 
Im glad it helped, it's got some great info in it. Maybe you can shoot for it next round. He has great results, and so far, my plants are looking really good in my first organic run.
 
Would love to do Subcools mix thanks for posting this article. I just don't have 30 days to wait for the soil to cook, I think the plants would have deficiencies until the microorganisms started kickin butt. Hoping to slowly work my way towards Subcools mix, the OC+ is kind of like training wheels. I did like the bit on mixing FFOF and Light warrior. That is what I initially wanted to do but nobody carrys light warrior in my neck of the woods but I may call around today and see what I can come up with after reading this article. :high-five:

There is a good way to increase the numbers of good microorganisms in your soil without waiting the 30 days. Compost teas. What you do is put a couple cups of compost into a 5 Gal bucket and fill with water. Make sure you have an air stone in there to aerate the tea. Add a couple tbsp of molasses (to feed them) and brew for 2-3 days. When you water with this stuff, you will not only give your girls some good nutrients but you will also add literally millions of beneficial microorganism to your medium. :cheer:
 
There is a good way to increase the numbers of good microorganisms in your soil without waiting the 30 days. Compost teas. What you do is put a couple cups of compost into a 5 Gal bucket and fill with water. Make sure you have an air stone in there to aerate the tea. Add a couple tbsp of molasses (to feed them) and brew for 2-3 days. When you water with this stuff, you will not only give your girls some good nutrients but you will also add literally millions of beneficial microorganism to your medium. :cheer:

I like the tea idea:grinjoint:
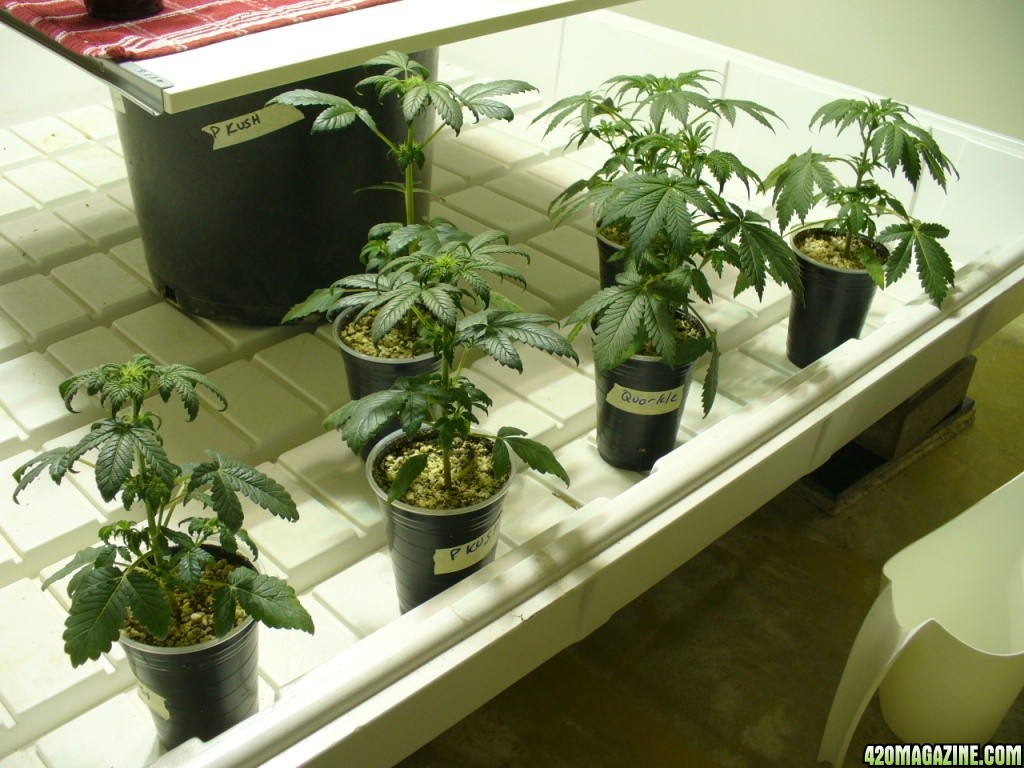
, should I do that once a week or just a couple times throughout the entire grow? It looks like I won't be getting any light warrior. Do you think between the tea, seaweed, sucanat that I will still have to transplant with OC+ mixed in. I would rather just top dress OC+ as needed rather than mix it in with the soil.
 
Back
Top Bottom