HD's Soil 1200w Sour Diesel CloneFest - 2nd indoor

HawaiianDuck

New Member
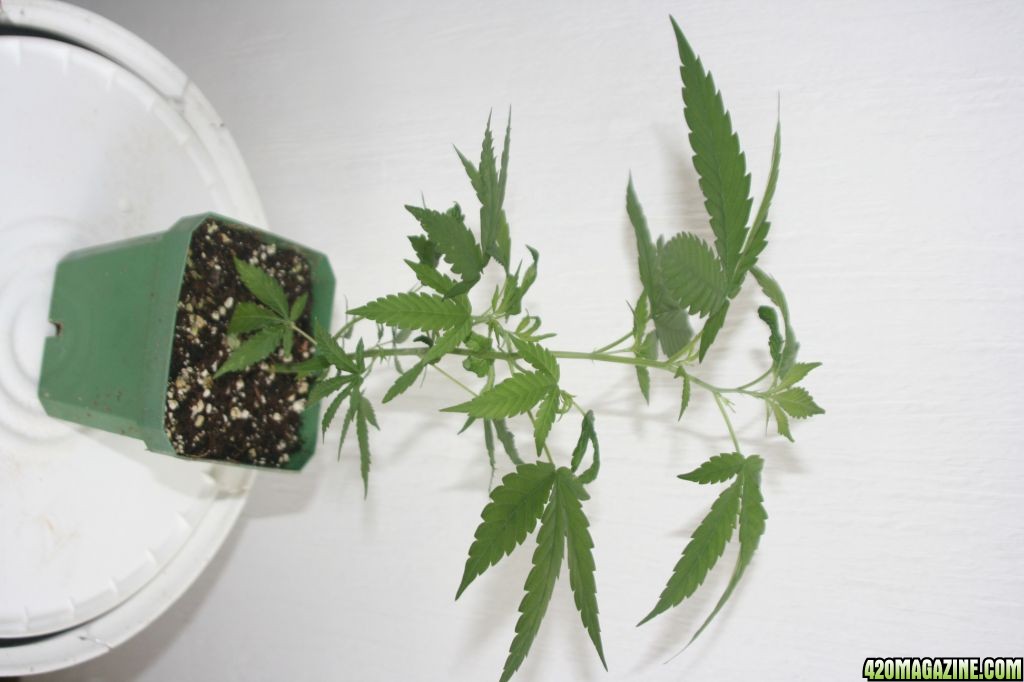
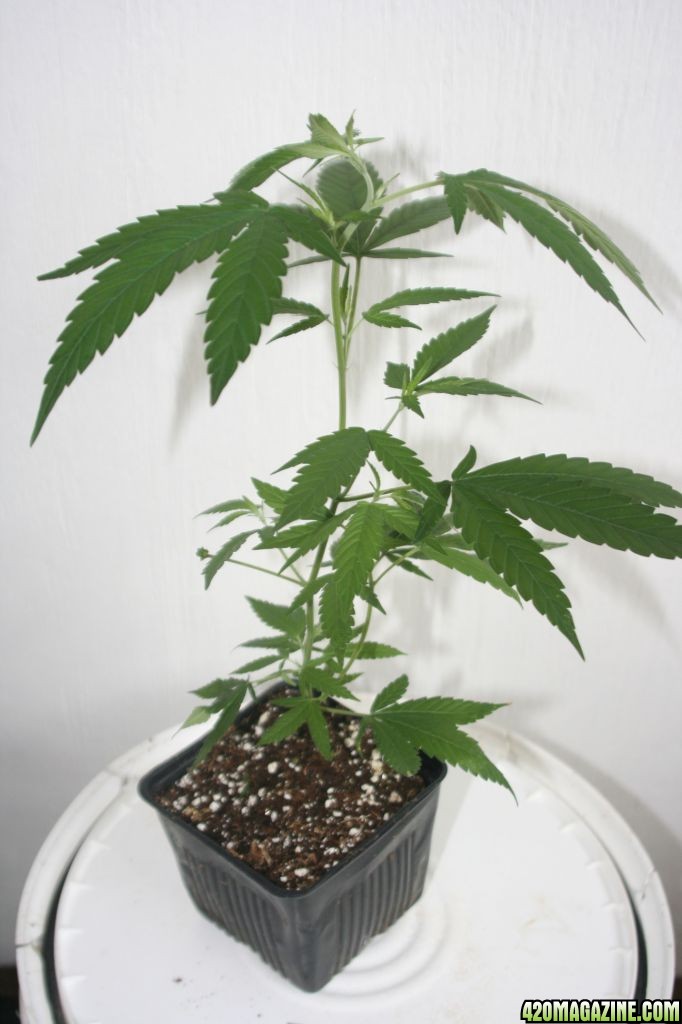
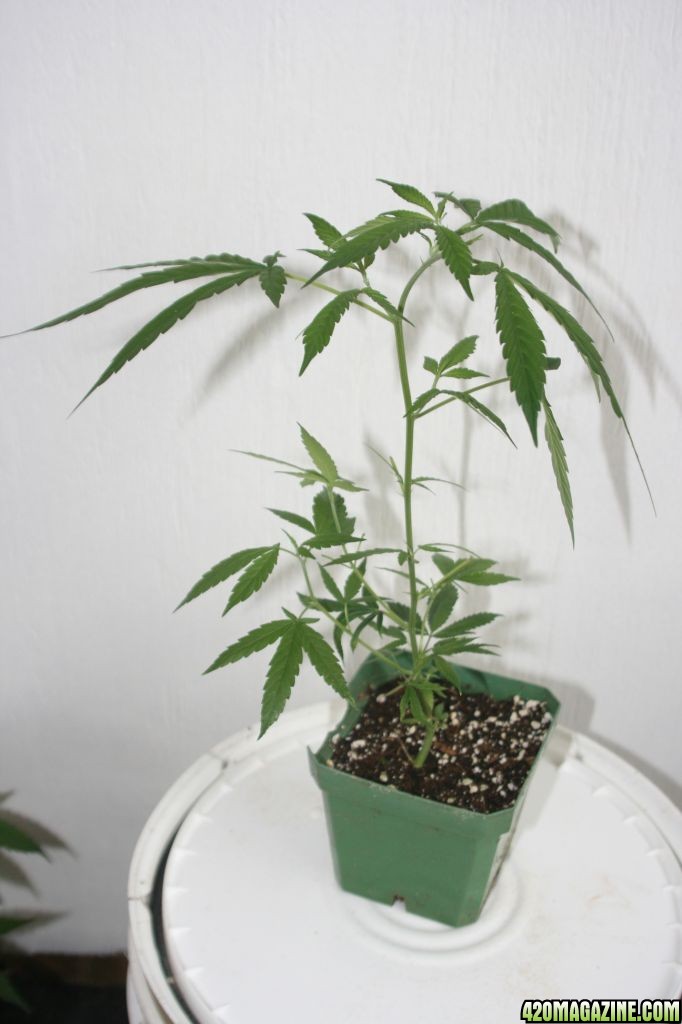
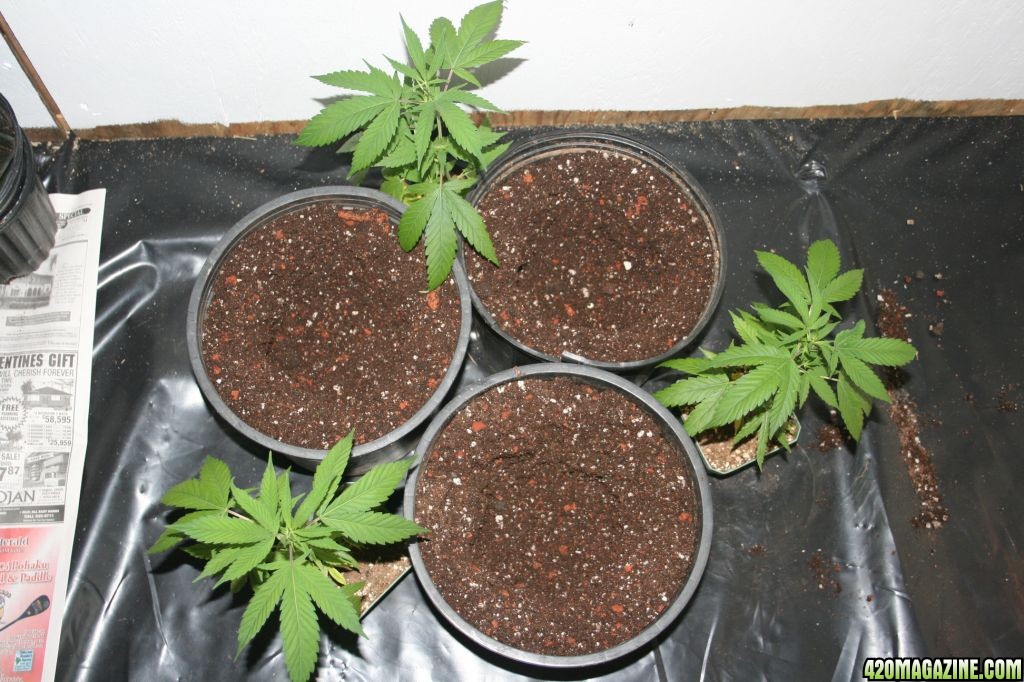
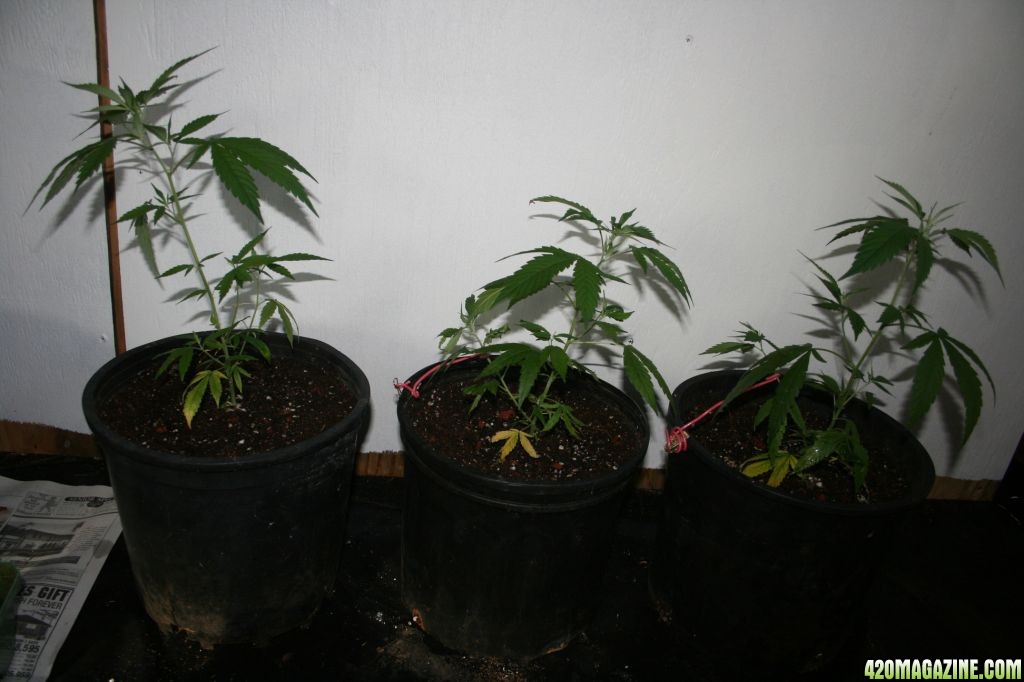
Alright, I am only about 2/3 of the way thru my first journal, but I just got 3 Sour Diesel clones yesterday and from now on I want to start my journal as the grow starts (last on-not so much), so I am gonna get this going now. So the plan is get those branched out and ready to pull a room full of clones (hopefully 18 total under two 600w hps). So I am going to chronical pretty much from the day I got the clones, getting them to throw enough branches so I can pull a couple dozen clones at one time, vegging them thru till 12/12, and then on to glory.....lmao. This is my next great indoor adventure! I will be back in just a bit to give more particulars and pics.
Pakaloha,
HD
 
OK, here's what I got going on-
Strain: Sour Diesel
Medium: 80% pro-mix and 20% hawaiian volcanic cinder
Lighting: I am using T-5's for veg (I have one 4' four bulb fixture, and one 2' w/two double bulbs); two 600w hps (not cooled) will be running the flower room
Ventilation: closed environment with intake - 420 cfm 6" can fan/filter and exhaust 420 cfm 6" can fan/filter providing complete air exchange every 5 min; oscillating tower fan for flower area, one vornado knockoff small fan per each veg chamber
Temp.: about 80-83 in the day/light cycle, mid to low 70's at night
RH: probably around 40-50 right now, but if this drought ends it could shoot up to 60-70
Nutes: FF Grow Big, FF Big Bloom and Tiger Bloom for the whole flower
Soil Treatment Pre-Potting: about 2 tbs per pot of lime, and same of crushed green sand (local)

And here are the 3 clones I got on Friday- (forgot to rotate first pic, sry)
rsz_girls2_003.jpg


rsz_girls2_005.jpg


rsz_girls2_004.jpg


I think they look pretty good, and have some decent low branches already. They will likely all 3 become mother plants to clone from. I'll be transplanting them into 3 gal pots either today or tomorrow

So, I was lucky enough to have read more than one journal here that really emphasized doing a thurough exam of any new plants/clones that you are going to put into your indoor environment, and this is what I found when I did so-

girls2_002bug.jpg


Whitefly
ALWAYS CHECK YOUR CLONES FIRST THING!!!

I got it and one more off of the plants outside then brought them into their new home-

rsz_girls2_006.jpg


all settled in under the 4' T5. There's a fan that you can't see giving them a nice breeze.

So yeah, thats that I guess. Next, I'll show my room setup (its all in my other journal too, using the same space, so this will be redundant to anyone who is following that one too).
Back in a few....
 
OK, my DIY grow room. The room I built inside a much larger space, it is 8'x7'x7.5h, and it's completely sealed top to bottom (at least theoretically) except for the active ventilation. Inside there is 4'x7'x7' dedicated to flowering under the two 600's. On the other half of the room there is a 4'x2.5'x3'h enclosed veg chamber, and a 2'x2'x3'h built on top of that. There are gaps that allow for semi-passive airflow from the bottom veg to the top veg and out (any heat should be allowed out passively, and when the air intake for the room is going it pushes more air through to the top and out with the exaust), with light traps to keep the flowering room aphotic. Further there are two hanging dividers/reflectors I use to keep the light tight and bouncing inside the flower area, then I can just take em down when I need to work on the girls.

I started with making 3' and 4' 2x4 frames and sheeting them with 3/8" ply, then bolted them together to form the walls and ceiling:
Here is the first corner in (I didn't take any more pics of that part cause I was trying to jam and get it done that day)-
rsz_aarons_0061.jpg


and here it is mostly done-
rsz_aarons_035.jpg


other side-
rsz_aarons_036.jpg


inside, the stacked 4' and 2' veg chambers (with previous batch of plants in them, not the sour d)
rsz_aarons_029.jpg


veg chambers closed, also here you can see the air intake for the room, pulls very cool air from outside and shoots it downward in the corner opposite the exhaust-
rsz_aarons_045.jpg


flowering space (pic is a few weeks old, from my current mix strain grow)-
rsz_aarons_032.jpg


with one hanging reflector up-
rsz_aarons_046.jpg


and both up-
rsz_aarons_047.jpg


So the idea was to have something I could unbolt and unscrew everything and move it in a single day, and building this was actually less expensive (~$300) than most tents that are half the size.

OK, next up - I get more into the ideas I started with on designing my grow room. This is actually just gonna be copy/paste from my other journal, but it may be helpful stuff to anyone looking to get their own thing going. OK, it'll be up in a few...
 
OK, so a little more detail of the how and why of my grow room design. First, I want to acknowledge most every bit of design consideration came from reading a shitload of info on this site, so a big mahalos to 420!

So I guess I'll start with the plan as it started almost a year ago. I was planning on renting a house back then, and specifically a house with an extra bedroom to set up in. I wanted a fairly large space (minimum 10'x10) with full stealth capabilities. My idea was to build a completely contained and sealed room within that room. The inner room would then be divided by another full wall seperating the veg area and the flower area. I was looking for a house/bedroom with open beam or vaulted ceiling so I would have a good amount of space above the room to give the warm/hot exhaust air to re-mix with cooler fresh air as somewhat of a thermal imaging shield just in case any of that was to happen. Also the room inside the room would provide me with two locked doors between any visitors and the plants, any noise should be totally un-noticable thru two sets of walls, and carbon filters would keep the smell contained as well. That way I could let anyone I wanted come into the house and visit, and if it ever came up I could just say the landlord keeps that room for storage and I don't have the key. If anything really got screwy and I needed to close up "shop" quickly, the whole room/walls are panelized and bolted so I could pull everything down and out in a short day. Anyway, that was kind of the theories and starting point for building what I did. I did look at some tents and other pre-fabbed boxes and such, but after looking at the prices went down to home depot and priced out the lumber and figured out I could build a big room for about $300 (shell/walls only, no vent/electric equip). Thats way cheaper than any tents I found, plus having plywood walls rather than fabric meant way better thermal and noise insulation. It also gives me the freedom to put holes, screws, eye-screws, hook screws, duck tape, etc. etc., anywhere I want without worry, and since this was my first indoor set up, I liked the idea of that freedom to adjust things however I wanted.
So, anyways, that was the starting point in my head. Then money got a little too tight and I had to revize the plan, and I wound up in a fairly large studio w/loft instead of a 2(+) bedroom house. The bad about it: its a studio so there is no room to hide the room, so, no visitors. Also, the room had to be smaller in order to fit between the windows on the two walls my room would share (it woulda looked weird from the outside if the windows were blocked half way by walls on the inside). So my 10'x10' (or bigger) plan got scaled down to 8'x7'. The good about the space: the studio is amazingly cool for being in Hawaii, due to a combination of being up about 10' from the ground with windows on all four side giving great thru house breeze, the loft giving any warm air a place to go up and out, and best of all thermal insulation in the roofs to keep the hot tin roofs heat out of the house (I am figuring any overhead thermal imaging really shouldn't see anything). So the air I pull from the studio into the grow room is pretty cool without any need for airconditioning, and I can vent right out of the top for exhaust and that warm air moves/gets pulled up and out without warming the studio at all. I can hear the grow room can fans thru the wall while I am in the studio, but outside it really isn't noticable. I do plan on building some sound proof boxes to contain the can fans in (basically a box just a little bigger than the fan with 6" holes on either side for ducting and the inside lined with probably egg cartons to kill the sound), but not right away. I have a few more improvements I want to try out, but probably not until the next grow. I am hoping that I can do one more grow after this one where I am at (thats this sour d grow), then I will hopefully be back on track to get a bigger (real) house, at which point I break this room down, build more panels to add to the space, and put it back together bigger and better.

Im sure this is WAY more than 99% of you ever wanted to know, but even if it helps just one person with getting started I'd be happy.

Alright, thats all the intro and info I can think of. I'll try to get pics of transplanting when I do.
:peace: and Aloha,
HD
 
Have faith brother. :peace:

Thanks dude. Once I finish my other grow (my 1st indoor ever) I'll be able to have a bit more faith, but right know I have just a lot of hope, some knowledge, and almost no experience (with indoor). But mahalos for the encouragement!
 
Thanks dude. Once I finish my other grow (my 1st indoor ever) I'll be able to have a bit more faith, but right know I have just a lot of hope, some knowledge, and almost no experience (with indoor). But mahalos for the encouragement!

This is good vibes coming from OMM for your clones.:hippy::ganjamon::hippy:
Well done, again on the explanation of what your trying to do. Just like the pro you are.:cheer:
Will be looking at this for sho:peace:
Lates.
 
This is good vibes coming from OMM for your clones.:hippy::ganjamon::hippy:
Well done, again on the explanation of what your trying to do. Just like the pro you are.:cheer:
Will be looking at this for sho:peace:
Lates.

Mahalos OMM, and I'm stoked to have you in on this journey as well.
 
HD Congratulations on your second grow. This should be an epic grow with a long road ahead. Clones, mothers, more clones flowering, more, more more! :goodluck:

I'll be checking both of your grows! :bravo:

Yep, long road indeed, but should be fun. Yesssss, more, more, more, more!!
:peace: and Aloha Brother,
HD
 
looking awesome man, cant wait to see more posts.:goodluck:

Mahalos DG! This one is going to be a little slow at first with building up the 3 as mothers for a big clone run (well, big to me). But it will get more exciting as time goes on. Glad you are here and I hope to not disappoint. Check out my other grow if you get a chance, its just starting to get exciting.
Much Aloha,
HD
 
OK, transplanting day was today for my little girls. I am kinda out of fresh soil (promix) so I am just recycling several pots of soil from my first batch (outher journal) that had just males in them, the males all got cut a few weeks ago or more. I'll go thru the process I have learned just in case anyone hasn't done this before (or if someone has a better way to share), but it I let the pots dry out really well for a couple weeks b4 running them thru with water really well about a week ago. For the last week they have been in my grow room drying back out (and adding a little humidity to the room). Today they were 85-90% dry which is about perfect.
I got my tub for mixing, a soil scooper (large yogurt container) lime, crushed/fine green sand (Used as a soil amendment and fertilizer, Greensand (0-0-3) is mined from deposits of minerals that were originally part of the ocean floor. Contains about 3% total potash, along with iron, magnesium, silica and as many as 30 other trace minerals.), a gallon of plain water (mine is rainwater catchment > two 10 micron filters > UV filter), and one gallon of 2/3 strength fox farm grow big.
rsz_girls3_048.jpg


dump all the old soil in the tub and break it all apart, pull out the old root balls and get most of the dirt off, and break it up some more till its all small and fluffy. then I add in the lime and green sand at about 2 tbs each per pot that I am planting (3-4 gal pots), so three clones/pots = 6 tbs each of lime and sand. This is where I really like to have my soil back to fairly dry, it seems much easier to mix completely with dry amendments.
rsz_girls3_049.jpg


here it is mixed dry-
rsz_girls3_050.jpg


Once its totally mixed I add some plain water, but just enough that the soil mix is lightly damp and can kind of clump/hold its shape if you press it. For this, about 10 gal dry soil I gave about a half gallon. Maybe hard to tell in the pic, but its kinda clumpy here, but far from soggy.
rsz_girls3_051.jpg


I really like to use a scooper and drop the soil into the pot fairly lightly to keep the soil as fluffy down low as possible for the best possible root developement. Here the pots look fairly full now, but it is so loose/fluffy that I can easily pack the soil to form a cup for the new transplant to drop.
rsz_girls3_052.jpg


and here are the formed cups ready for the clones, I do press the soil fairly firmly to the sides to prepare for the next step-
rsz_girls3_053.jpg


the next step being the nutes, which are lightly sprinkled along the pressed walls and fluffy bottom of the formed cup to show the roots where to start spreading. When I was doing this for outdoor grows I used dry fertilizer, but basically same thing, pack a little into the walls and floor and sprinkle with water.
rsz_girls3_054.jpg


The soil on the clone is fairly dry, but not enough to stress it out, and the roots are well spread but not bound, a bit of circling at the bottom, so this is pretty much exactly how I wanted them.
rsz_girls3_056.jpg


now I gently break open the roots a bit by pulling out slightly each of the bottom four corners of the soil/roots.
rsz_girls3_057.jpg


and into the pots they go, with some more light packing around and over the orginal clone soil/roots.
rsz_girls3_058.jpg


Then I poor a ring of the 2/3 nute/water around the seam of the transplanted soil to the fresh (reconditioned) soil. The stratagy is tobreak open the roots from dryish soil to dampened fertlized soil to encourage root speading quickly, so when I water the ring around, I really want it just on the outer edge of the roots. After this I can do any last adjustments on how the plant is sitting, then its dont. With these I put them in at a slight angle to expose a couple good branches that were coming up from below, and had to pull a couple out with clips/wire.
rsz_girls3_059.jpg


And here they are in their new home, super happy!!
rsz_girls3_060.jpg


I was there for a couple hours after checking them out every once in a while, and never saw any kind of drooping. Using this method I think at worst Ive seen a plant loose a days growth (stall for a day), but then usually the kick into overdrive by the next day. I wont water for a good while now, letting them run through the damp soil and nutes for as long as possible before giving them a full watering. So, thats my fairly simple but always successfull soil recycling and transplanting techniques, hope this can help someone just starting out at some point.
OK, now its way past my bed time and I got to work early tomorrow.
Aloha,
HD
 
That's great news for me HD You can recondition soil? Great!:grinjoint:
I replanted a couple of girls today and did it like you said. Used fresh FFOF soil and broke it up and made it fluffy. Made the place for the plant to fit in.
My plants were dried for a couple of day, Shook as much soil off them as I could, gently as I could, added water to the seam of ring and done. They have just been moved to their new home outside. Guess OMM has learned something in the last 8 months. HeHe.

Let me say this bro, once again your explanation of reconditioning the soil was top rate. +reps.

Only two questions. What kind of Lime and where do you get the green sand?


First, I have to say I have read a lot of your journal and you have learned a TON in the last 8 months!! But glad I could maybe add to that.
Thanks for the +reps, alwys appreciated!
Not a big deal, but I maybe didn't explain the breaking up of the roots and soil of the transplantee well enough (it was hella late and I was hella stoned :smokin: 
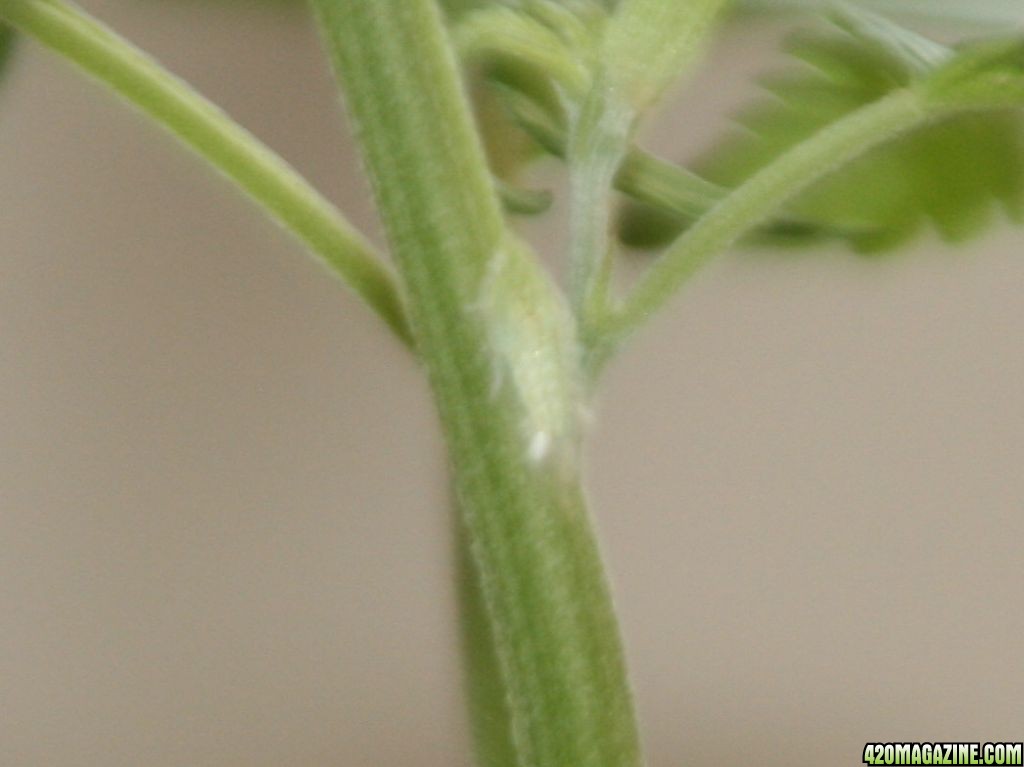
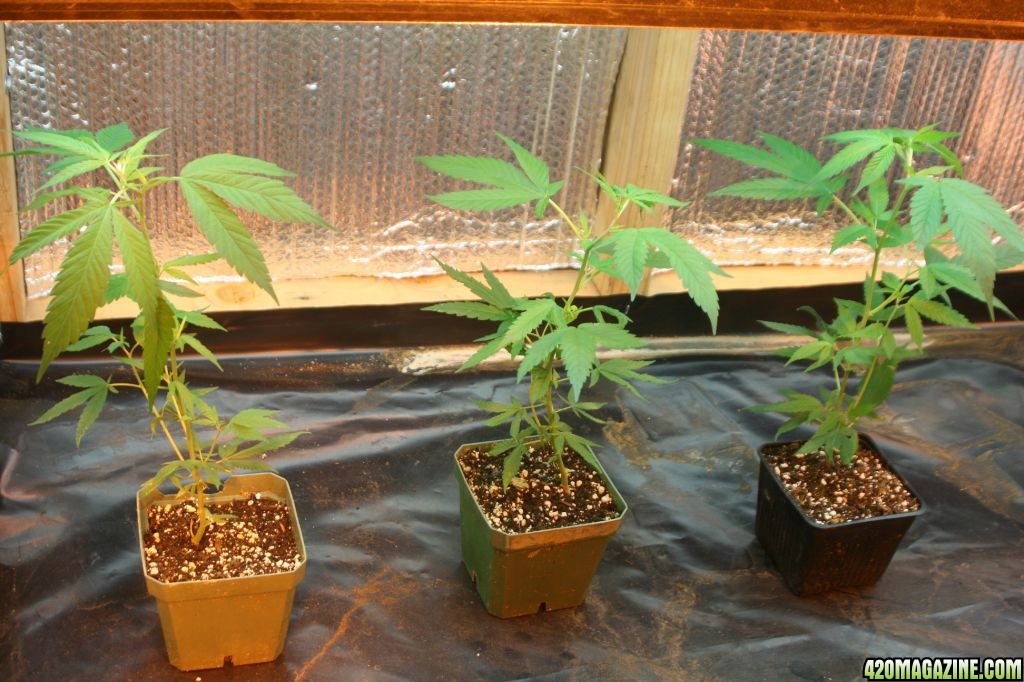
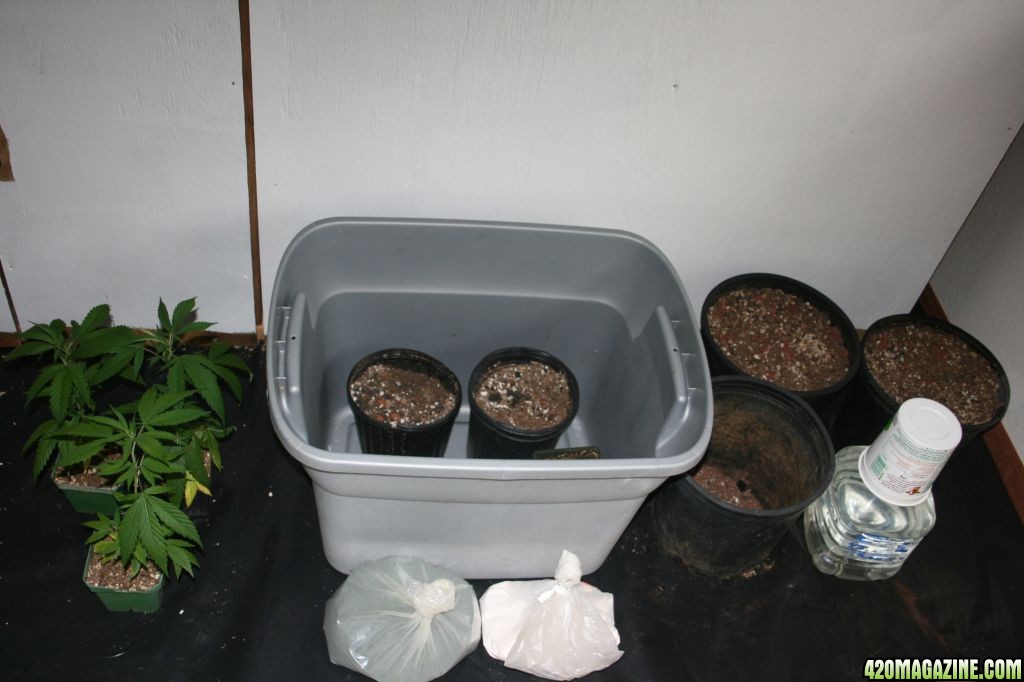
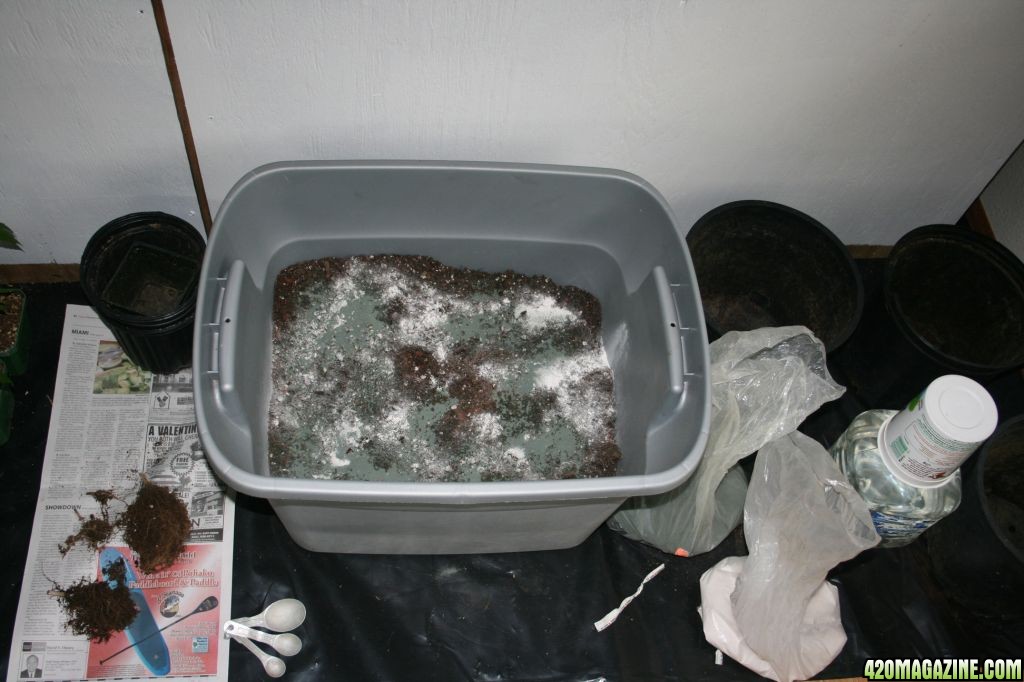
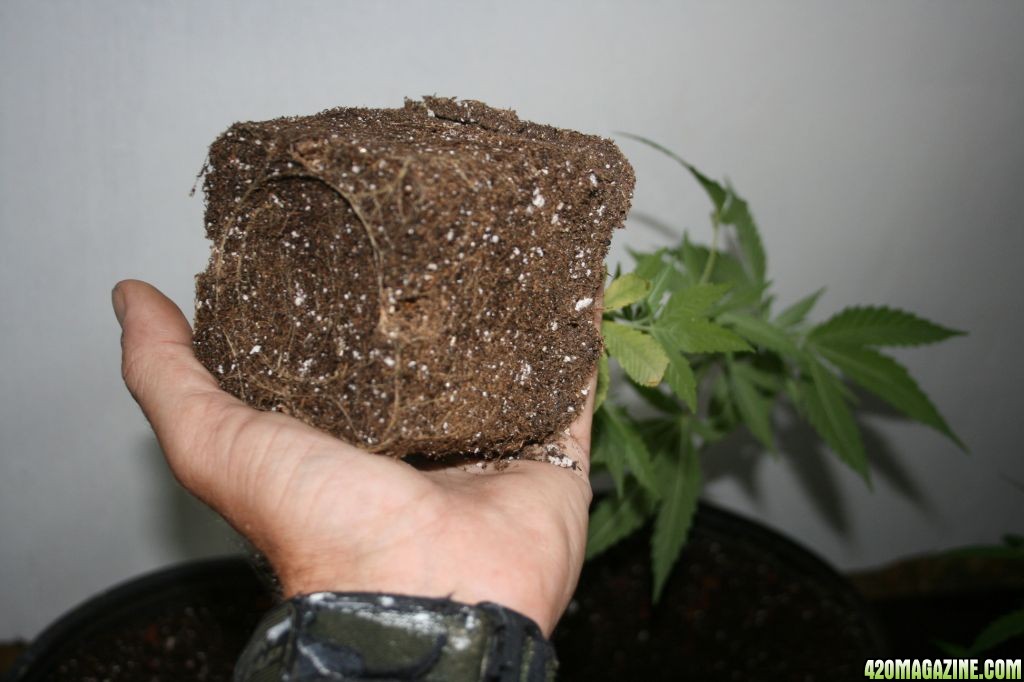
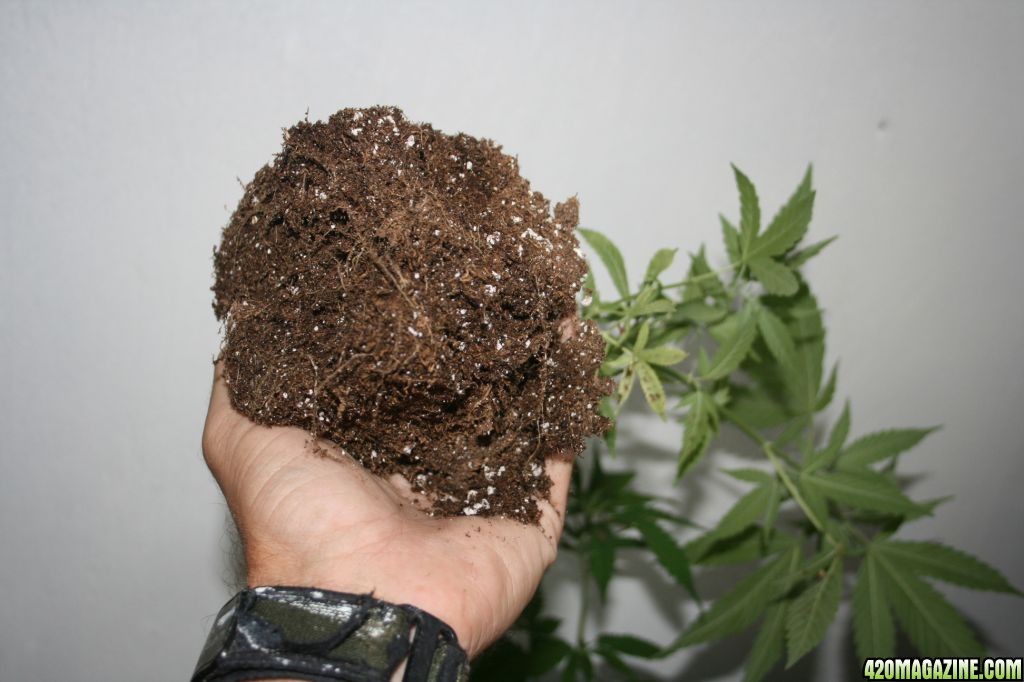
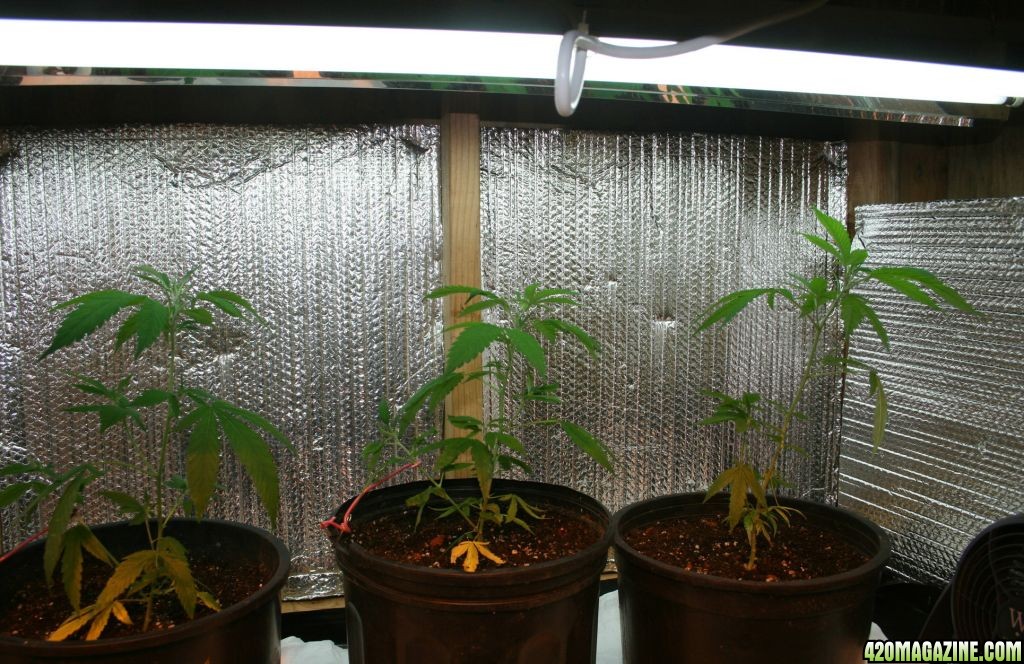
). The goal there was NOT to remove the soil from the roots but to just lightly break it open from the bottom, pulling each of the 4 corners away from the center. Some soil will fall off, but that isn't the primary intent, and no shaking is neccessary. But as long as you were gentle, it should be great. Let me know if you saw any wilting or other "slow downs" post transplant. I am guessing it should be fine, the main thing really was to keep the water/moisture to a minimum except for in the ring just around and under the root edges that are now exposed, and the slightly less moist soil around that. The only times I have seen wilting post transplant is when there was either too wet of soil around the roots, or too heavy a watering after the plant is repotted.
For the lime and green sand I have a good local Fert and Feed shop that carries some cool stuff at a good price (they even have FF nutes for cheeper than anywhere I can find on the web, love those guys). I suggest going to a non-MMJ oriented garden supply store (even Ace Hardware) since the prices are always lower, look for a nice local supply store that sells a lot of orchids and other tropicals, and ask what they have as far as lime soil ammendments. Most common is Dolemitic Lime (Dolemite), it can be pelletized for a little slower release or powderized. I go for the powderized so it processes quicker, then if that pot of soil doesn't go through a whole to-harvest run I feel better about there not still being a ton left in the soil and retreat (after having flushed to soil well) with a normal dose. And just ask around for the green sand, like I said, the shops that more specialize in orchids and other nice tropicals should have it. Or just try a web search, you can order online. Gypsum is another good soil ammendment/conditioner, but the pro mix has that in it, so at least for the first few uses of the soil I never add that.
Anyways, hope that helps buddy. Have a great day!
HD
 
Howzit! This looks like the beginning of a great grow!

I learned something with your soil recycling lesson. Good to know I can do that in a pinch.

Can't wait to see your next updates. Hopefully I can learn some more.

ALOHAZ
 
Back
Top Bottom