Sweetsue's First Grow - Stealthy Trio of Autos Under CFLs

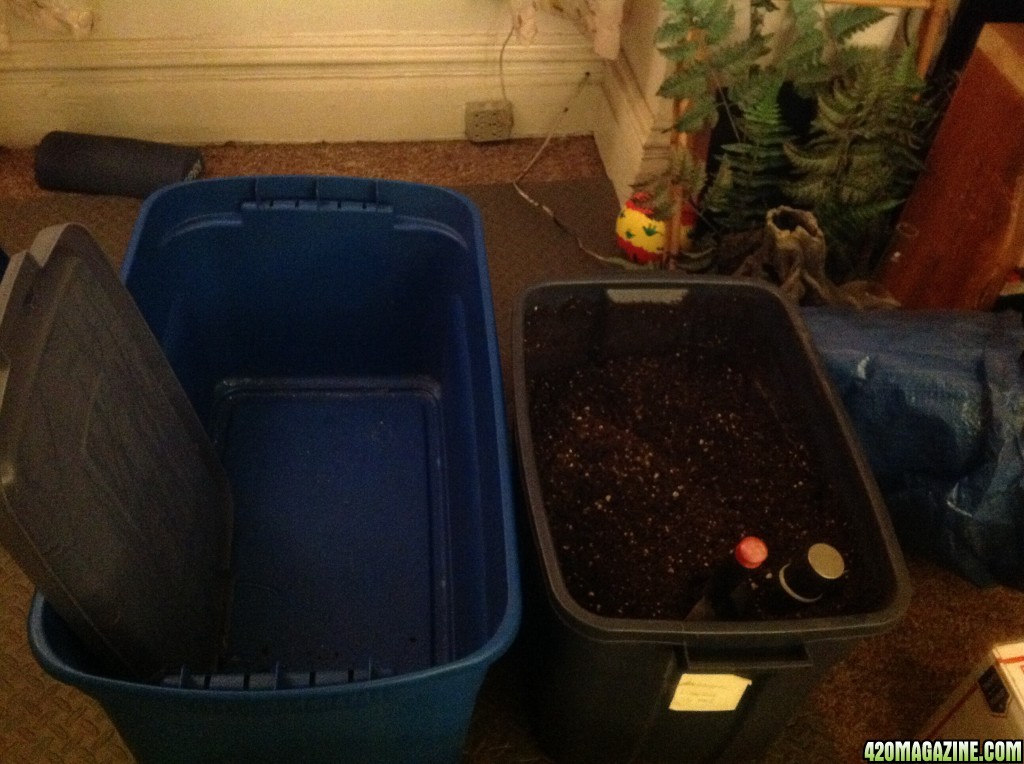
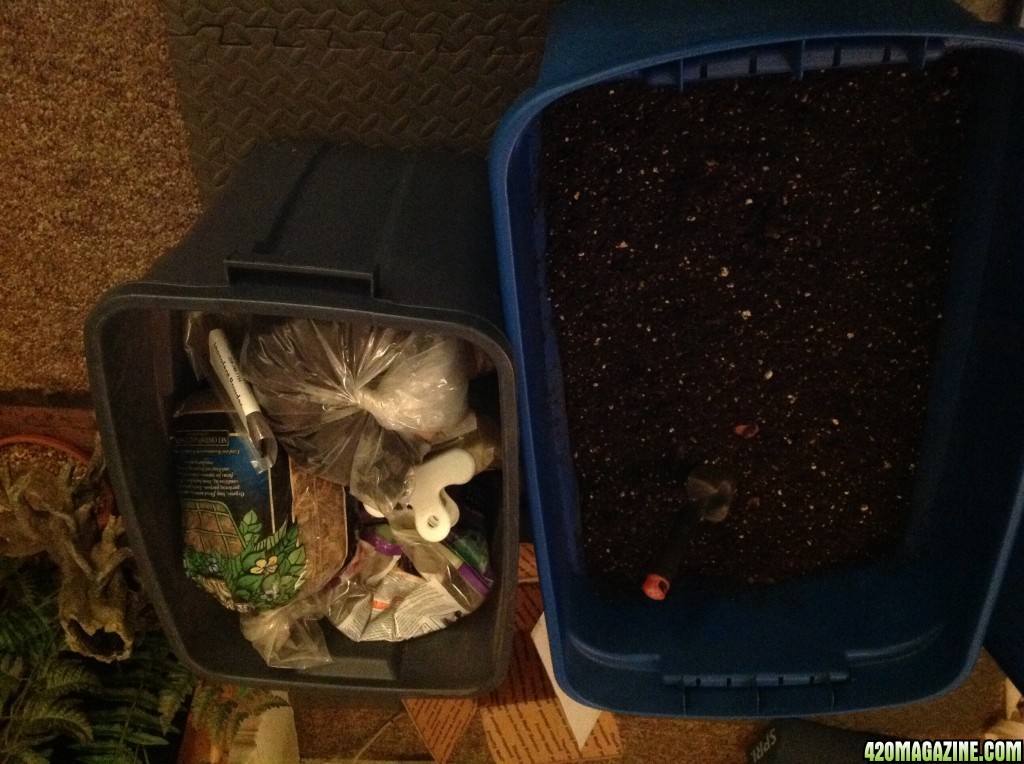
So I'm having a senior moment. I came home tonight, went for that large container and could not find it anywhere. Our place is only 750 sq. ft. It's hard to lose something here, but I did just that. I can't remember for the life of me giving it away. Both of us have brothers who live in the same building, so that's a distinct possibility, but it's too late tonight to ask. I still need to wait for the rice hulls anyway, so I'll go out tomorrow and buy another container to suit my needs. It's either that or I'll have to dump it all onto a tarp to stir it up and then shovel it back into the 14 gal. tote. Not an optimal choice. I did, however, dig out the tarp, just in case.

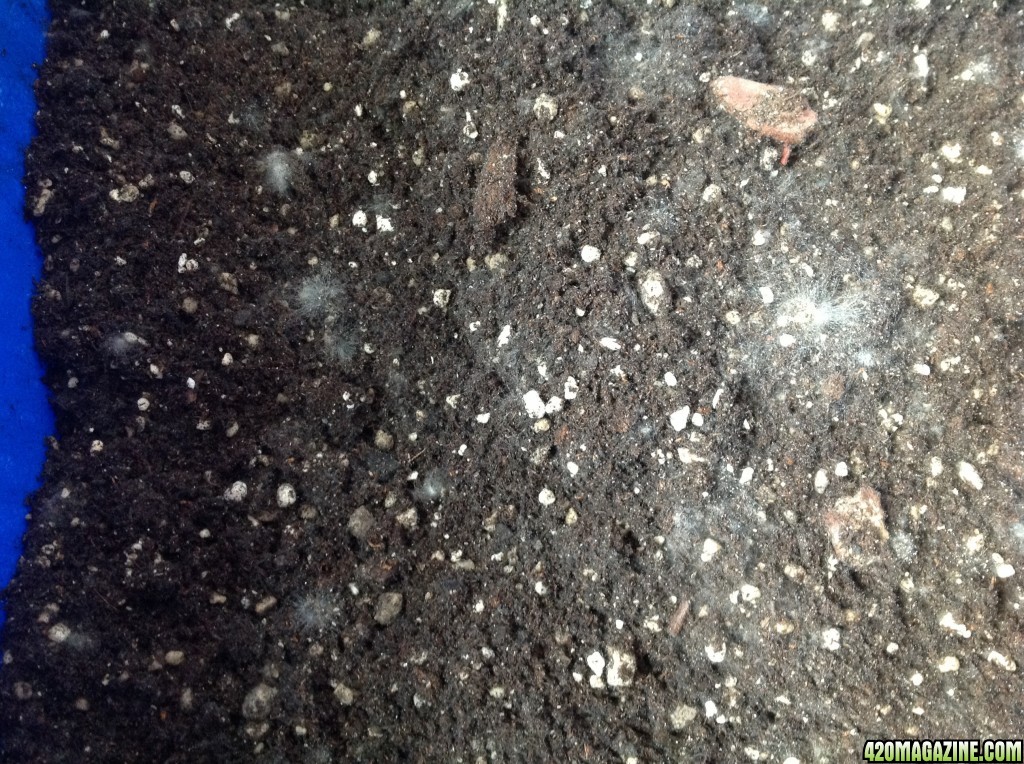
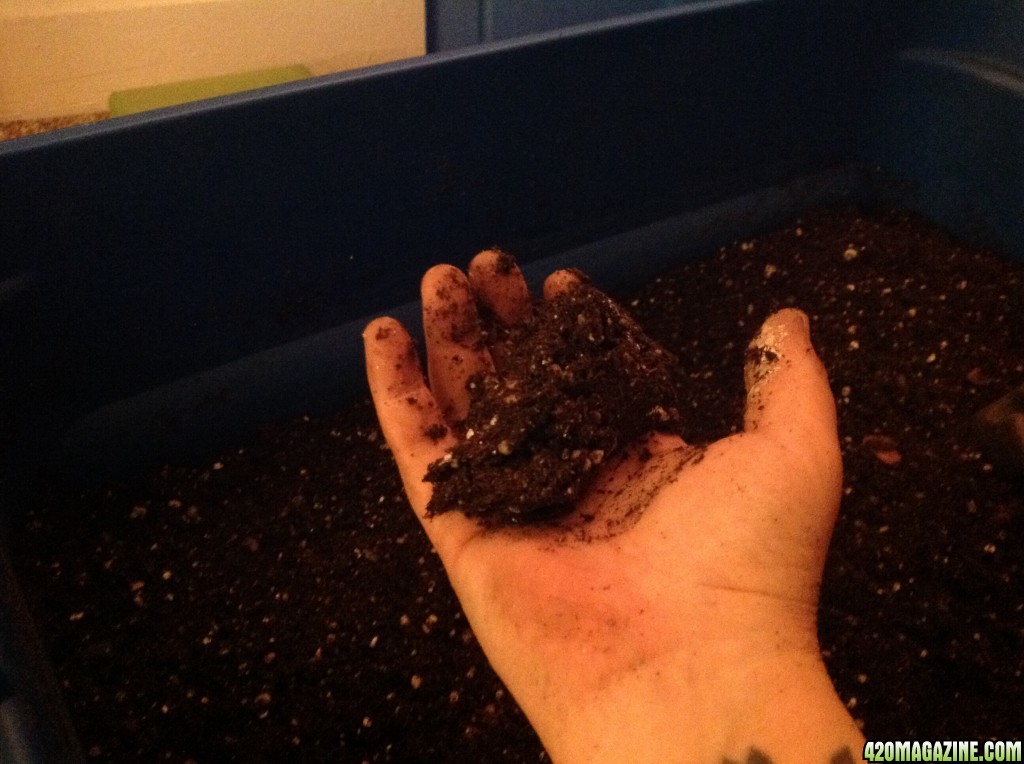
Tonight I gave it all a good stir (I've been stirring every 4 days) and decided to hold off on adding more vermicompost and additional amendments until I had that larger container available. It's beautiful soil at this point. I got the moisture content perfect. It's good to know my instincts are true. I'm excited about how it will look with rice hulls added. I think I'm addicted to the process. It's part art project and part science experiment - kind of like life. :blushsmile:

I'm beat. It's tiring sometimes being all things for so many people. Time for bed. Back to the hospital again tomorrow morning, hopefully for the last full day. He's been laughing all day. A good sign of healing.
 
image15384.jpg
Found it!! It was standing on end, crammed into the side of a tiny closet in the bedroom. This is going to be perfect for cooking soil. Woo Hoo!
 
Added about 2 gallons more vermicompost (that stuff is like black gold) and another quart of water, then mixed thoroughly. I remember from gardening with my mother that this is how you know your moisture levels are correct; you should be able to squeeze a handful and have it clump together but crumble easily. Knowing you have the soil ingredients in balance is an instinctive thing. This mix only needs the rice hulls and time to cook completely. This container turned out to be exactly what I needed. Just the right depth for this quantity of soil. Easy to mix and move around. It feels good to get the hands into decent soil.
image15385.jpg


The now empty tote turned out to be just the right size for extra amendments. Sweet.

image15386.jpg


If you had told me I would be mixing up soil in my living room in my robe at 11:45 PM I would have thought you daft! :laugh:

I'm happy now. Good night all.
 
CO, I was reading through SoilGirl's journal and came across your post about Sustainable Landscape Mgt. Rich with info. My favorite line was "Mulch is a verb: Do it on the surrounding soil area to improve SFW habitat."

I like that. :)
 
CO, I was reading through SoilGirl's journal and came across your post about Sustainable Landscape Mgt. Rich with info. My favorite line was "Mulch is a verb: Do it on the surrounding soil area to improve SFW habitat."

I like that. :)

oh yeah. I got a kick out of that as well.
 
Hopefully I'll be bringing Dale home tomorrow and I can begin to catch up here. I still need to paint and hang shelves and lights while the soil cooks and I want to do a cost accounting of start-up. I'm interested myself in how it all breaks down.

The really interesting thing will be how little it costs after it's up and running.
 
He's finally home!!! The soil is cooking (still waiting on rice hulls - maybe today?) and now I can begin to get the grow space put together.

Life is sweet indeed.

While I was waiting for them to release him (almost a two day process fraught with numerous pitfalls and missteps) I ran a cost evaluation of my investment in soil building to this point.

Soil Building
$ 10.20 Mycorrhizae and Innoculants
45.61 Yum Yum mix (shipping included)
40.00 Clackamas Coot Style Nutrient Mix (for 7.5 cu. ft of fluid)
20.00 Pumice (3 gal bag)
56.00 Worm Power Vermicompost (2 bags, 3 gal. each)
10.67 Sphagnum Peat Moss (3 cu. ft.)
21.00 Rice Hulls (4 gal)

$ 202.48 Total investment so far. I'm thinking of replacing the inoculant mix with a more appropriate one that is only Glomus intaradicea, G. mosseae, G. aggregatum and G. etynicatum. Still looking into this. Even with pitching the original purchase it's reasonable expense to my thinking. I was lucky to have some interesting organic elements to add, but they were just a bonus. The Geo Pots ran me $14.05 for two 7 gal. size and $10.51 shipping. Worth every penny, according to everything I could find on them.

It's worth noting that much of what I purchased going in left me with excess supplies that can be used for other soil building projects in the future. I'm planning to start some container plantings of fruits and veggies on the balcony come spring. This initial soil will serve me for many consecutive grows and only get stronger and healthier with thoughtful amendments of SSTs, AACTs and top dressing with foraged elements and good vermicompost. I honestly haven't had the time to do a comparison pricing with chemical nutes. I never considered them as an option for my gardening so I've never priced them. Now that Dale's home I can spend more time researching.
 
:goodluck: & I can see everything coming along nicely already. what breeder girls white widow? as I have one for next grow by dinafem would be nice to see another grow before hand. wish your husband the best too & hope he's feeling brighter & ready to get involved soon :)
 
:goodluck: & I can see everything coming along nicely already. what breeder girls white widow? as I have one for next grow by dinafem would be nice to see another grow before hand. wish your husband the best too & hope he's feeling brighter & ready to get involved soon :)

Little miss, this seed was a gift from my brother-in-law and I am almost certain it is also dinafem. Hopefully I can give you a good look at a nice grow. He really enjoyed the one he grew, although it did nothing for me, but his lighting wasn't nearly as effective as my CFL array.
 
that's a very reasonable start up cost I think. The price of a premium ounce of weed (in CO on the blackmarket). Great job getting started right!

Thanks CO. You've been a great influence in my choices. In our neck of the woods that wouldn't buy an ounce, and definitely wouldn't match the quality of the orphaned Medical No Name I rescued and finished on my very first partial grow. I consider the soil cost a bargain. I'm expecting to get more than that in value from the first grow.
 
It's been four days, I believe, since I added the Worm Power, so it was time for a stir. My biggest concern was that I had over-watered or that I had left dry spots. One of the key elements to a solid no-till is to become instinctively associated to the soil. Primary to that, IMO, would be to learn the water requirements of your soil mix. You want moist, not dry. You want that moistness to be evenly distributed. Dry pockets are to be avoided. It was with curiosity that I popped the lid open
And found this:

image15537.jpg


Why be so thrilled about white mold? This is living proof that I have succeeded in creating Living Organic Soil. Woo Hoo!!! This white webby material is a saprophyte, the ultimate proof of life. Finding this beautiful web means that my potting soil is spot on and will create a bio-active root environment. To actually see one of the normally invisible organisms that will assist so mightily in the growth of healthy, organic plants is one of those things I find exciting. Just a little garden nerd here guys. I have fertile soil in the works. The rice hulls still need to be added.

My ultimate goal is to maintain soil that will easily sprout seeds and feed the plant through harvest. Simplicity itself.

CO, what have you started? :laugh:

Mixing the soil like this is quite enjoyable for me. Since I will be doing no-till, this is my only opportunity to become intimately familiar with this healthy soil blend. I'm studying the particle variety and sizes. Learning the "feel" of the soil mix. Watching for the ways the different elements hold moisture and how that becomes distributed through the community. Taking the time to break up clumps of peat moss (balls really, since it was already broken up when I mixed it in). I've noticed that as the nutrients cook they lose their defining scents and the whole batch is beginning to take on a lovely loamy smell.

One of my goals is to create the kind of soil that completely resists compaction. I remember my grandparents' carrot bed. You could harvest by simply grabbing the tops, giving it the smallest of shakes side-to-side and lifting right out. The biggest, sweetest, cleanest carrots you have ever seen or tasted. That's the soil I want - structured for stability without compaction. I believe I have made significant headway in that pursuit.

Some worms may be a nice addition. Worms for the top (composters) and worms that dive deep and move things vertically. I don't know much about the deep divers, but my instincts tell me this would be an optimal approach. Worms and ants are the true farmers of the soil. We humans only imagine that it's us.
 
honestly, I hope you crush it, im getting close to taking a hiatus from interneting, and I just opened a huge worm can. maybe you can carry the torch so to speak, on 420mag, in my absence.

nothing crazy by any means, I just have to focus on real life hard for a while as a new and first time home buyer and a GM hatin', weed growing, hydro scoffin', dude in the mountains. I have already layed down the start for any inquiring mind who wants to find the organic truth.

I was anticipating that at some point CO. Purchasing a new home and getting your new permanent grow space ready (doesn't that have a nice ring to it?) will be an all-consuming job. I couldn't be happier for you. You'll be sorely missed though and we'll be watching for your return. You've opened my eyes to a whole new world. There are a couple excellent threads on other sites I've been scouring for info on organic no-tills as well, so my research work has a solid foundation. My grandparents were lifelong subscribers to Organic Gardening magazine, as was my mother. I've got quite a solid pedigree to prepare me for organic gardening.

Every time I open that bin of cooking soil my heart sings. I'm pretty hooked already.

I'll do my best to help carry that torch when you take your break CO. At the very least the journal should be a sweet ride to some excellent harvest. Step by step.
 
The soil got stirred again last night. Added another quart of water and mixed well. It's a nice, moist consistency. I'm still waiting for the rice hulls and pots to be delivered.

In the meantime, I've been researching mulch and watering techniques and schedules. It will be to my benefit to have some type of raised surface to set the pots on for drainage purposes. I'm considering constructing some out of bamboo. My standard method of watering was developed from our foray into bonsai years ago. Water slowly until it begins to run through. Let it sit for a while and repeat, continuing to water slowly. I'm not certain that will work with these no-tills. This soil holds moisture beautifully. When it's planted and worms are established I'm hoping to be able to learn to read the soil well enough to be able to maintain a consistent moisture level.

Mulch will be instrumental in keeping the soil consistently moist. Given the multitude of active com posters that establish communities in the top layer it is imperative to keep it from drying out. I've been collecting bits and pieces of things I believe will create a beneficial mulch layer. I've got an assortment of leaves from local trees, dried leaves of yarrow, dandelion, burdock, some old wood mulch that's been weathering and decomposing for about a year now and some rice hulls (when they come in). I'm going to throw it all together, add a sprinkling of CC style mineral mix and some diluted comfrey juice, and cook it until I plant, stirring regularly. It should make an interesting mix.

The worm population is expanding. It's hard to stay away from them. No bad smells from the container. It smells nice and healthy in there. I've been feeding them fresh veggie scraps, coffee grounds and filters, small bits of fruit, a sprinkling of corn meal every now and then and a wee bit of sand. They appear to be happy in their dark, moist den. Such an unexpected hobby. Sooner or later I will need to either move them to a larger container or add another one. Maybe invest in a regular worm farm setup. I have months to work that out.

Hopefully tomorrow I can finish painting the closet. Fingers crossed.
 
Rice bulls are being shipped. Finally. The soil has been cooking now for about two weeks. After I add the rice hulls the plan is to let it all continue to cook for another two weeks and then plant and get this baby going!

Nursing someone back from open heart surgery would be easier with better pain meds than the narcotics the doctors prescribe. Time to begin making positive steps in that direction.
 
I have worms in my pots and would suggest you use coco coir as your mulch because this then doubles up as worm bedding and aids the environment for them, I'm not sure I'd recommend deliberately adding worms because you then need to keep them fed and happy as well as your plants but when using castings sometimes they slip in there! I think it's far easier to care for worms properly if they have there own home, unfortunately mine don't.......hence the knowledge!
 
I have worms in my pots and would suggest you use coco coir as your mulch because this then doubles up as worm bedding and aids the environment for them, I'm not sure I'd recommend deliberately adding worms because you then need to keep them fed and happy as well as your plants but when using castings sometimes they slip in there! I think it's far easier to care for worms properly if they have there own home, unfortunately mine don't.......hence the knowledge!

Pearl, I've been following an extensive no-till journal on another site that has great success with worms in the pots. His are all 20 gallon ones, but I've seen the same in the tiny pots the Rev illustrates in his TOS book. There's more than enough food in the soil mix for them, which will be supplemented with hearty mulch materials. The value of the worms is the way they till the soil for us. I'm actually thinking of grabbing some European ones as well as red wrigglers since they are deeper divers and will move things vertically more than the top-dwelling red composters will.

The beauty of a no-till is how you maintain it, assuring a continual replenishment of the soil components. The more I study the art of no-tills, the more excited I get about future prospects.

Tomorrow I will be picking up those elusive rice hulls from the local post office and adding them into the soil as an additional aeration element. I like the variety of this soil mix. I'll take the time to pull together a mulch mix as well. Two weeks from tomorrow I plant. Time to get the rest of the grow space in line. A little cleaning, a bit of paint and hang the lights. All I need now are the pots. I'm still waiting on a shipping date for them. Maybe they're in with those hulls. One can only hope.

Dale still has three weeks of unbelievable pain to get through, and we're tapped out financially, so no more underground meds to help him deal with it. So sad. By this time next year that won't be a concern any more. There's the goal: to make my man's life easier to deal with. One step at a time.
 
Back
Top Bottom