RVgrowers 1st Stealth Grow of Afghan Kush Ryder and Kannabia Special

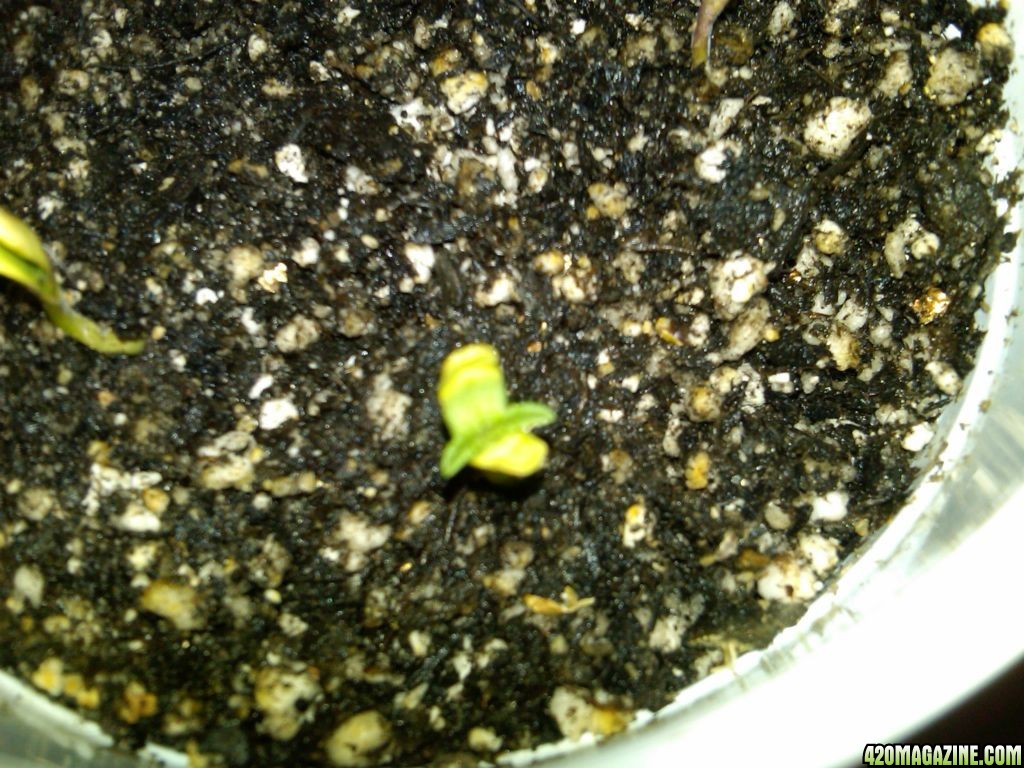
Wow! Cool pix and a very nice looking AKR you've got going there! Yeah, I am so thankful for the pix! At what day of growing are you at at this point? And also, you say yours sprouted so quick and easy, PLEASE! I beg of you to tell me, what technique are you using to germinate your seeds? I can get them to crack, & even had tap roots a 1/4th an inch long or so on the AKR I had and the Kannabia Special that I got as a freebie when I got my seeds thru WOS myself...After 15 days I just saw the seeds rotting it seemed, and I checked & they had rotted sprout "embryos" or whatever it's called when it's still in the partially opened husk...I guess I kept the soil too wet, I never "watered" tho, just misted the soil when it got dry everyday...but that was "seedling" soil mix, 50/50 spaghnum peat moss & vermiculite, ( with a dash of lime as a "wetting agent" the package said....) at first & I didn't get them transplanted into my "Hempy soil cups" that I learned about from BlueDog...they work fantastic for him! He had cups packed FULL of thick, healthy, white roots after just one week in those cups!!!! That's what I am trying so hard to do! I just don't know what piece of the puzzle I am missing, since this is my 1st serious try at a real grow indoors in 25 plus years....I can throw the one's I think are crap out the door & into the driveway gravel, or stick some down into the Pothos houseplant's pot and it doesn't even get watered a lot, & the dang things end up sprouting all the TIME when I don't want them to!!! I appreciate any ideas and info, and thanks for stopping by to check out my grow...yeah, I NEED this AKR for the medicinal values, I am coming off narcotic pills after 5 years and 6 surgeries...I HAVE to have this medicine, and I'm tired of taking my chances with people and products I have no idea about! I WANT to be the one to raise it, love it, take care of it, and then harvest it and let it nourish me and heal me and come full circle.... WE already gro our other veggies and herbs as much as we can, so I especially want to grow THIS! Besides, I don't drive so I can't always go to the dispensary, if they even had one around here, to get what I need for the whole month, and then, I can't afford their prices! I am on a small monthly income, and don't even make my share of the bills and food as it is because of the herbal medicine costs....I need to and have the right to, grow my own and I am going to get this right some how, some way.......thanks so much, and "Nice to meet you, Growing247"!

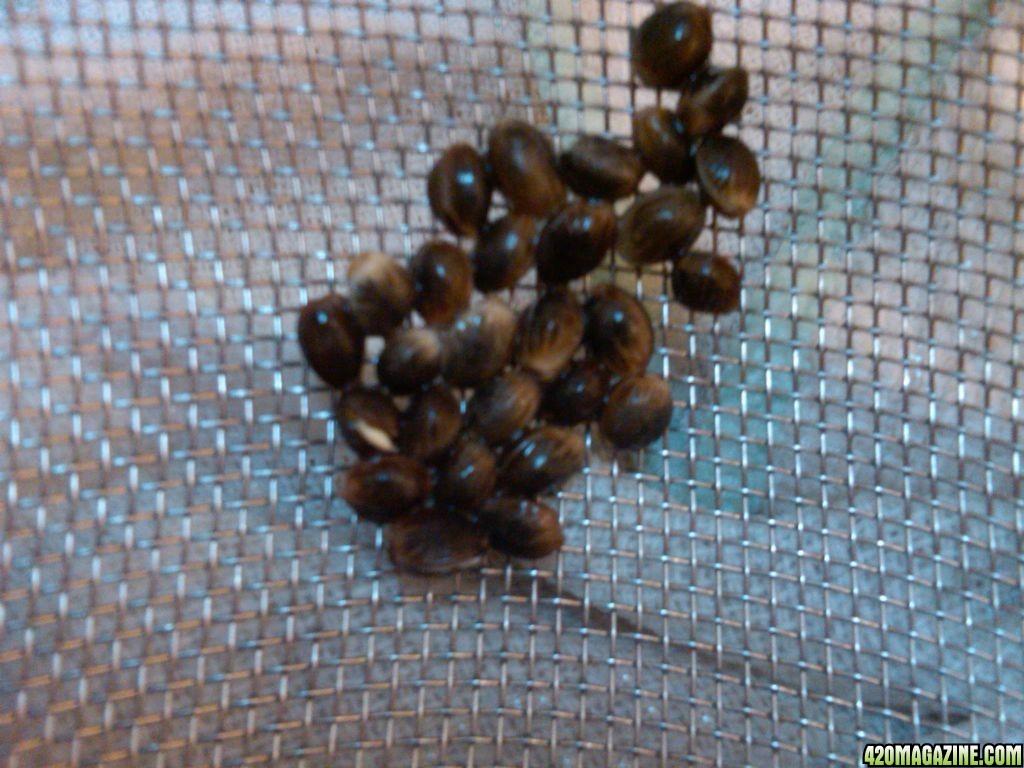
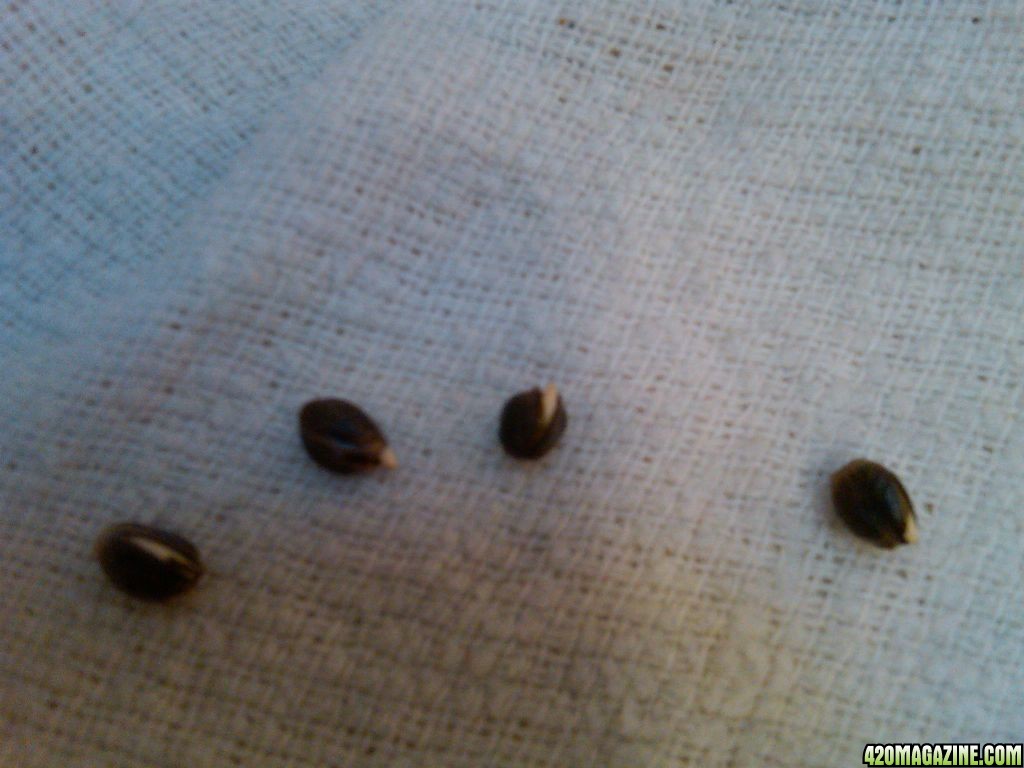
I just checked the tag on my AKR (always label your plants with strain info and date) and it sprouted and was planted on January 22nd. That would make this plant 40 days old I believe. The hairs are starting to turn orange. I grow mostly from clone but recently have been growing from seeds a LOT and I can tell you how to increase your germination rate. I had almost the same problem where the seeds would sit there and drown. Recently I purchased 6 RESERVA PRIVADA Cataract Kush (OG Kush x LA Confidential) and since it was as promo I got a free lighter and also 6 LA CHEESE seeds (EXODUS Cheese X LA Confidential) and a couple other freebies. One was called Blue Hash and it is a Blueberry X California Hash Plant and a Powerkush seed that had a birth defect shell and never hatched.

I got 100% seed germination and I can tell you how to do it yourself. All the information I used I got from a book written by Jorge Cervantes (a weed guru) that takes you thru every step of growing weed. First I take my seeds and put them in brand new DIXIE cups that I have labeled with a marker. I write the seeds strain name and the date and time. I put the seeds in the cup and fill it halfway with distilled water that is luke warm either store bought or from my dehumidifier. I leave the seeds in the cup for 24 hours and check on them. By now some will have cracked. Some will have cracked and produced a small rootlet. Others will still not have cracked at all. The more seeds you can germ at once the better because you can see that not all seeds follow the same schedule. Some seeds will literally jump out of their shell in 24 hours of soaking while others will barely crack open and produce a small rootlet. After 24-48 hours or whenever they have produced a small rootlet i take the seeds out and transplant them to a Dixie Cup with holes cut in the bottom and the cup filled with a product called LIGHT WARRIOR. It is made by Fox Farm and is peat based seed starting soil. The soil you use to start your seeds is very important because if you use regular potting soil a lot of times the soil will be too high in minerals and nitrogen and kill the seed. LIGHT WARRIOR has never let me down. It holds an incredible amount of water but also holds a lot of oxygen which is important because you don't want your seedling to die. It has things in it like Humic acid which help seeds starting out as well. So now you have a seedling with a small rootlet. What I do now is water the soil with distilled water until the medium is completely soaked. Then I use a pen to poke a tiny 2mm size hole and plant the seed rootlet down but leave the top of the seed barely exposed to the light. Next I use a zip tie as a marker and plant it into the soil next to the seed so I know exactly where the seed is and I don't lose track of it while watering. Now I take all my seeds and repeat the process until all my seeds with tiny rootlets are planted. Then, I plug in a heating blanket, and put a towel over it and put a cloner/propagator on top of the heating blanket. Next I put the Dixie Cups in the cloner and put the lid on top. I put a high/low thermometer inside the cloner as well. I want to keep the humidity high and the temperature @ a constant 75 degrees. Too hot, seeds will cook, too cold seeds will freeze. This state is really crucial. Give the seeds a small bit of water every day and keep track of their process. Watering with an oral thermometer is a good way of watering your seedlings without stressing them out or knocking them over. Be careful not to drown your seeds. I had some seeds germ and grow its 1st set of leaves while still in the cup. I've had seeds that have taken over two weeks to shed their shell and begin growing leaves. It really all depends on a lot of things. I believe the fact that each seed germinates at all different times has to do with preservation of the species. If all the seeds germinated at once and there was bad weather the species would all die out. So it seems like a protective measure to me, like a survival mechanism. One thing you should never do though is try to take the seed shell off yourself unless you are being EXTREMELY careful and the seed shell is coming off on its own anyway. I have killed a seedling on accident trying to help take the shell off. It will come off when it is ready so don't rush it. Once the plant sprouts leaves I remove the Dixie cup from the clone dome and put it under a T5 with my other clones and seedlings. I wish you luck on germinating your seeds. Germinating seeds is the toughest part of growing weed for me. If you are a new grower or someone who just wants to grow a small crop for personal use I would recommend growing from clones because seeds can be a bit tricky. Clones are nice because you know what you are getting more or less. Also, you can get a couple clones. Keep one as a mother and keep making clones off her and have an endless supply of clones and plants. That is pretty much what I am doing. I only buy new clones to make new mothers or to try something new. Wish you best wishes on your grow. Hope your seeds germinate. Every grower has had problems germinating seeds. If they say they have not they haven't been growing long enough LOL. I am just really surprised because my AK and AKR germinated really fast in a "Root Riot" cube and were like the 1st plants with leaves. Maybe you got a hold of a bad supply? Anyway, best of luck on the AKR. I just bought a "BC GOD BUD" clone and I am stoked. :yahoo:
 
Thanks for the info, and I really appreciate all the time you took to give me that info, thanks so much!
And on a good note, I DID get 4 seedlings going in the last 36 to 48 hours or so, maybe more. Anyhow, they are an inch or so tall already, haven't opened their cotyledons yet, got a bit of light brown papery-looking stuff on the tips of the cotyledons that looks like it's keeping them from opening, on every damn one of 'em!! I SO want to get an exacto blade or something and slice thru that and let it open, but I KNOW I have to let mother nature take its course, this brown crap holding it together will, hopefully, fall off when it's supposed to!
I will post pics soon, thanks, and any info or ideas is always appreciated.
Thanks!

If they haven't shed the seed husk in 24-48 hours after sprouting, I would use a toothpick (exacto knife is fine, just don't cut anything!) and see if you can slide the husk away from the plant. This will help prevent the cotyledons from rotting.
 
Yeah Mr. Krip, I thought so too, so I remembered YOU did that, so I followed your example and did that myself, boy were my hands shaking at first! But I pushed up a little soil around the base of each stem, and used that to stabilize it, then all I had to do was kind of hold the stem between 2 fingers ever so gently, then used the other hand to pull the sheaths off with the tweezers...my wife was good enough to hold the cup with one hand of hers and the flashlight with her other hand! Whew! It was like surgery or something it felt like! But as SOON as we pulled those sheaths off, they literally SPRANG open! they should be fully stretched open and exposing those first true leaves, so I should be in veg with in a week or so, don't you think? I mean, doesn't it only take a day or 2 to grow each node, especially in medium such as FFOF? What do you think Mr. Krip?

Here's some pics of the going's on of the last week, well, really since I started my "second grow" with the bag seeds...

Here's my first 2 bag seeds to pop up, above soil and with it's husk falling off, about 3 days ago....
3_bagseeds_on_4_3_11.jpg


Here is seed # 4 who is in a cup by herself, there was another in here, originally had germinated 6 successfully, but then it got moved too much when it was falling sideways & I tried to gently stand it up, it stopped crowing at that point....shows you howdelicate these guys are at this stage!
bag_seed_4.jpg


A view of all three standing up today, before I pulled off the sheath from the cotyledons...
3_seedlings_.jpg


A side view of the # 4 seedling, before removal of the sheath on the cotyledon...you can almost see the dark green first leaves inside!
bag_seed_4_from_side_view.jpg


Another view of the first 3...
the_1st_3_girls_I_HOPE_.jpg
This is what my grow loos like now...the lights were exactly 6" above the plants, while in germination they were a little closer and I got temps into the 90's so i backed them up and the temps came down to the 80's, still on the high side, but my humidity rocks at between 15-20% up to 35% usually, and after we shower, and hang our damp towels on the wall on the other side of the room, it's just enough to bring the RH up to the 40's and 50's...and that's great! I think having to ADD moisture is always going to be easier than having to REMOVE moisture, don't you guys agree? AN when they flower, it will be really good so I don't get bud rot and such, as you all pointed out to me a long time ago...

Okay, one more shot of the second try seedlings...
new_grow_w_bag_seeds_finishing_gernination_in_cups.jpg


This is how we fixed the issue of the lights at night being visible by passing Shuttles! A simple piece of scrap card board, cut to size, covered in foil, shiny side out on both sides, taped up good at all the seams, and then using the "Command" brand removable "Poster Stick ups"...they are put in each corner, and when I need to remove the "light barrier", I simply pull the tabs that stick out the edge and the sticky stuff pulls right off, and it doesn't even tear the aluminum foil!!! Great stuff for this application!


skylight_cover.jpg


:slide: 
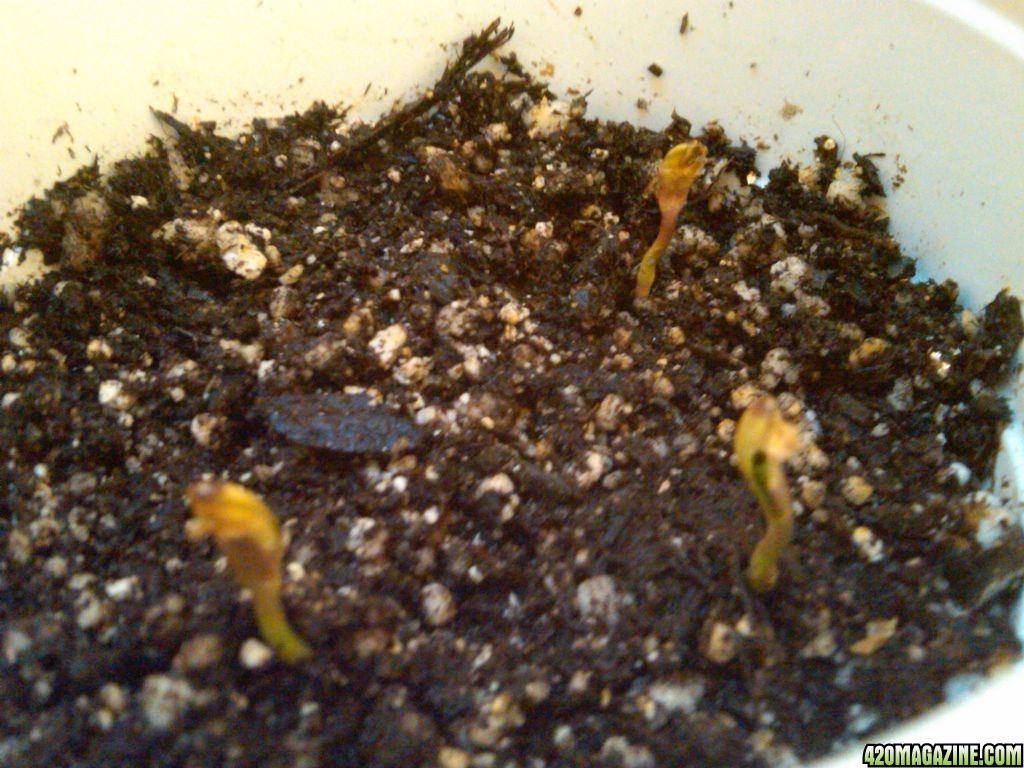
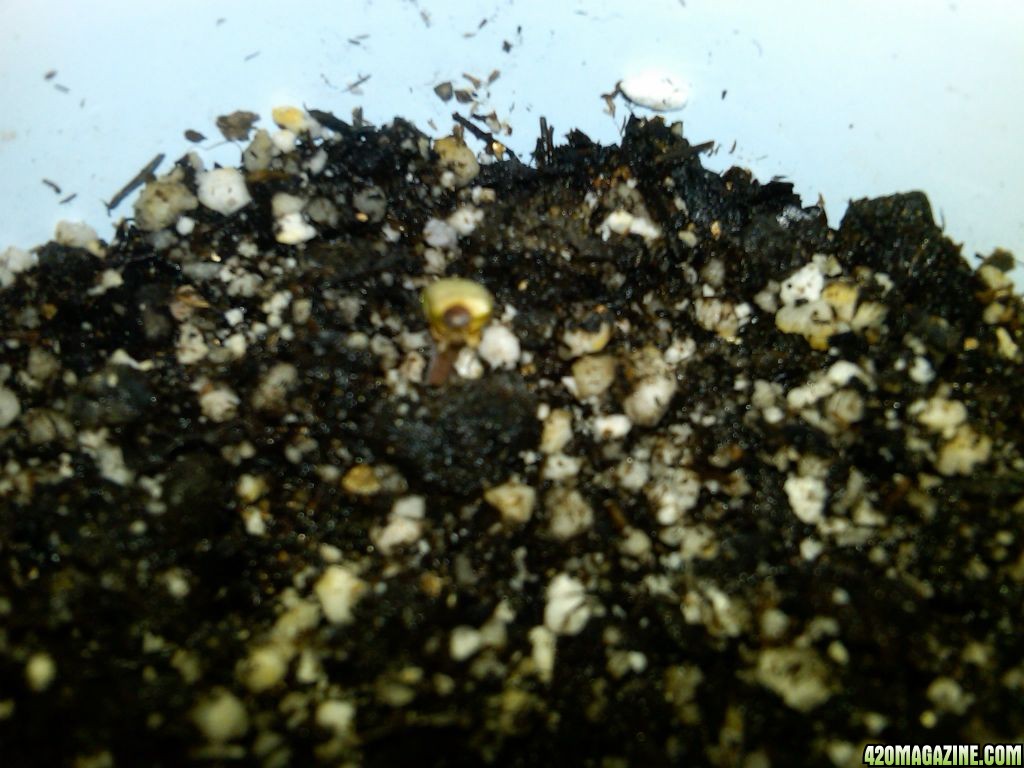
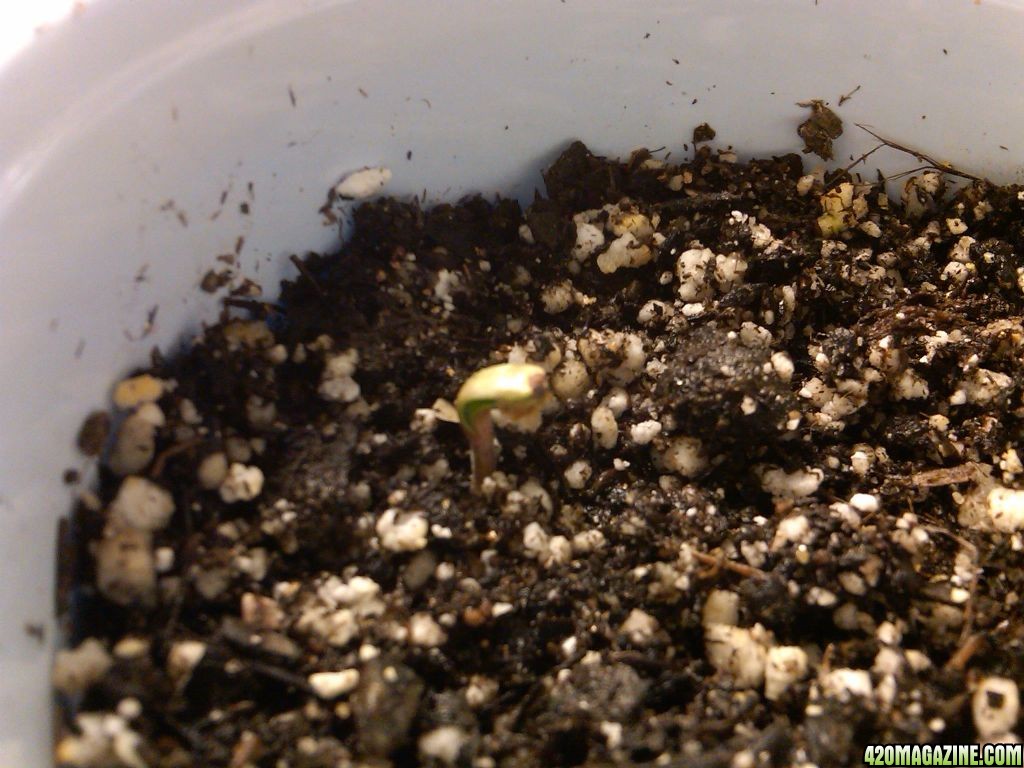
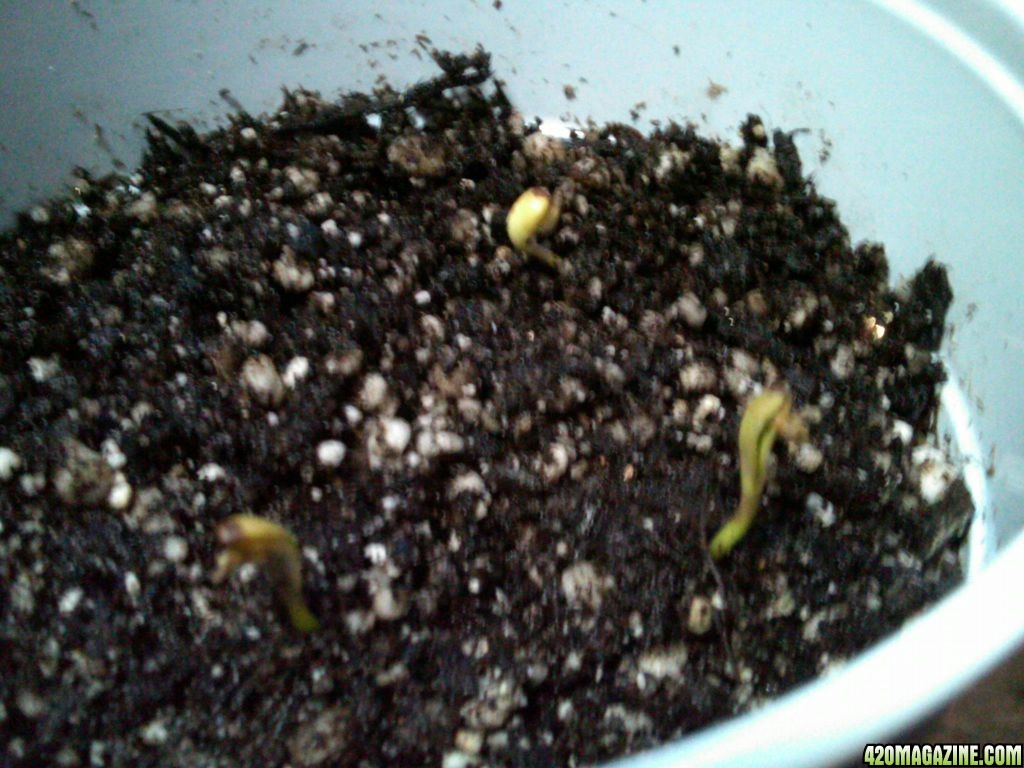
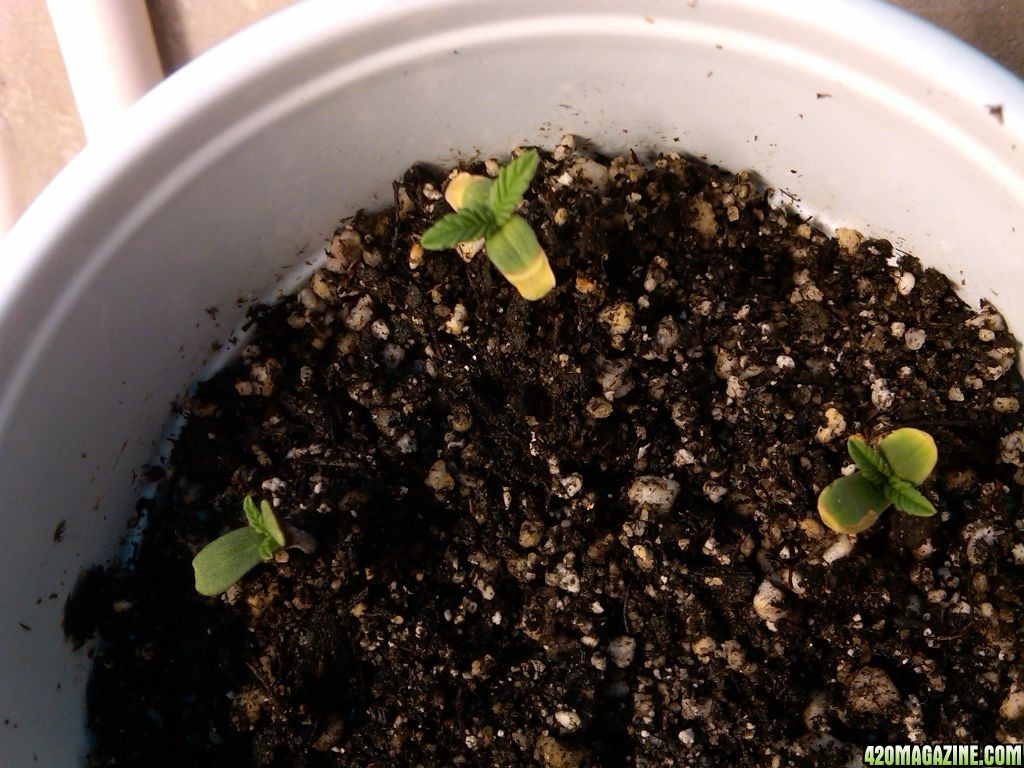
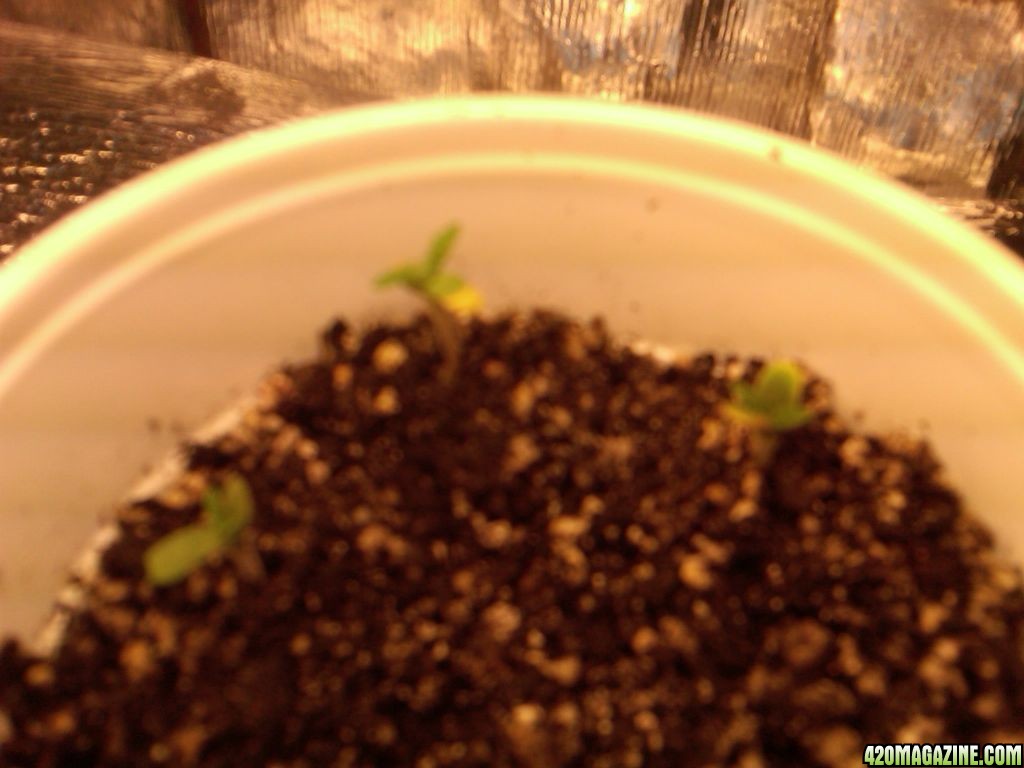
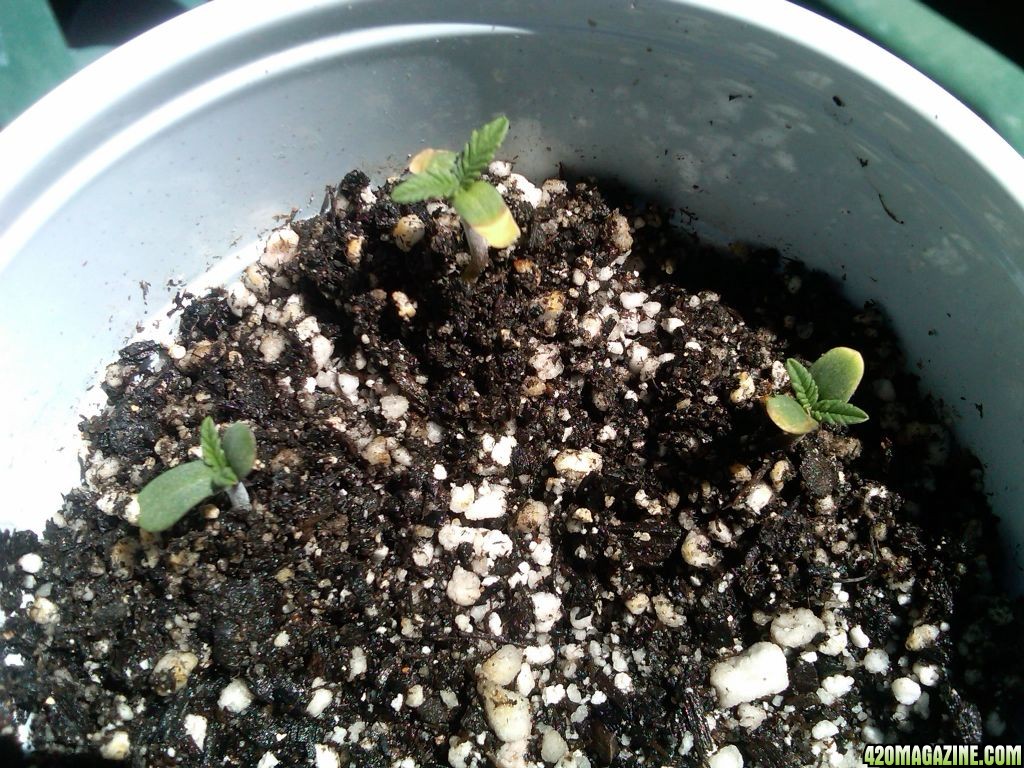
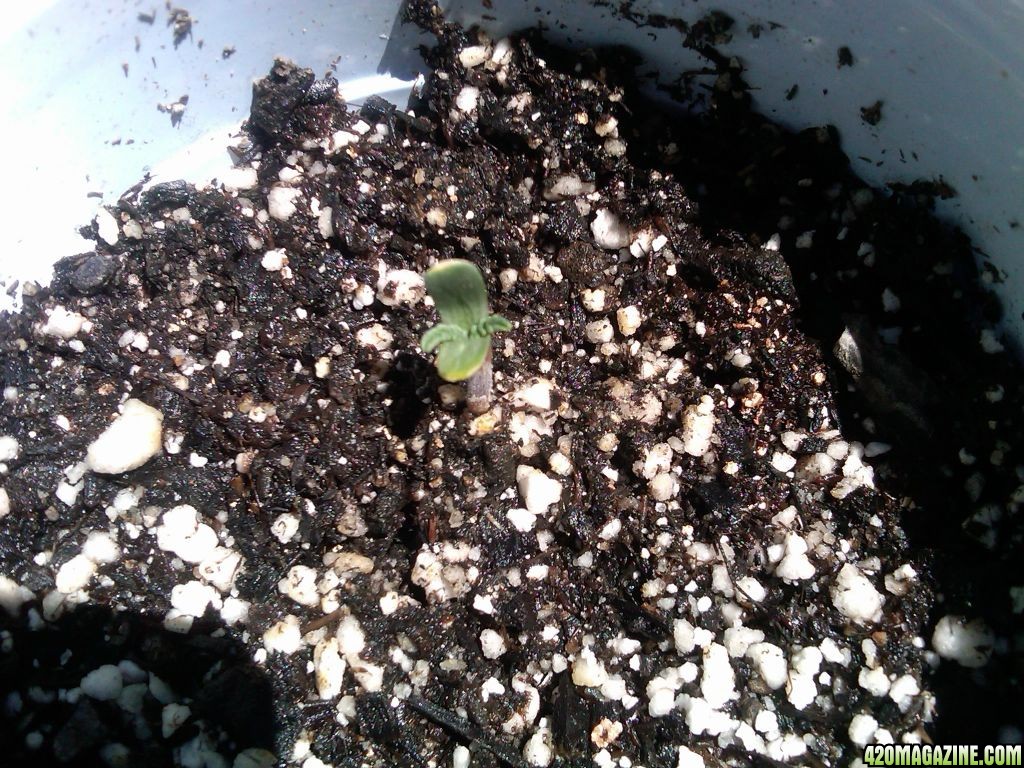
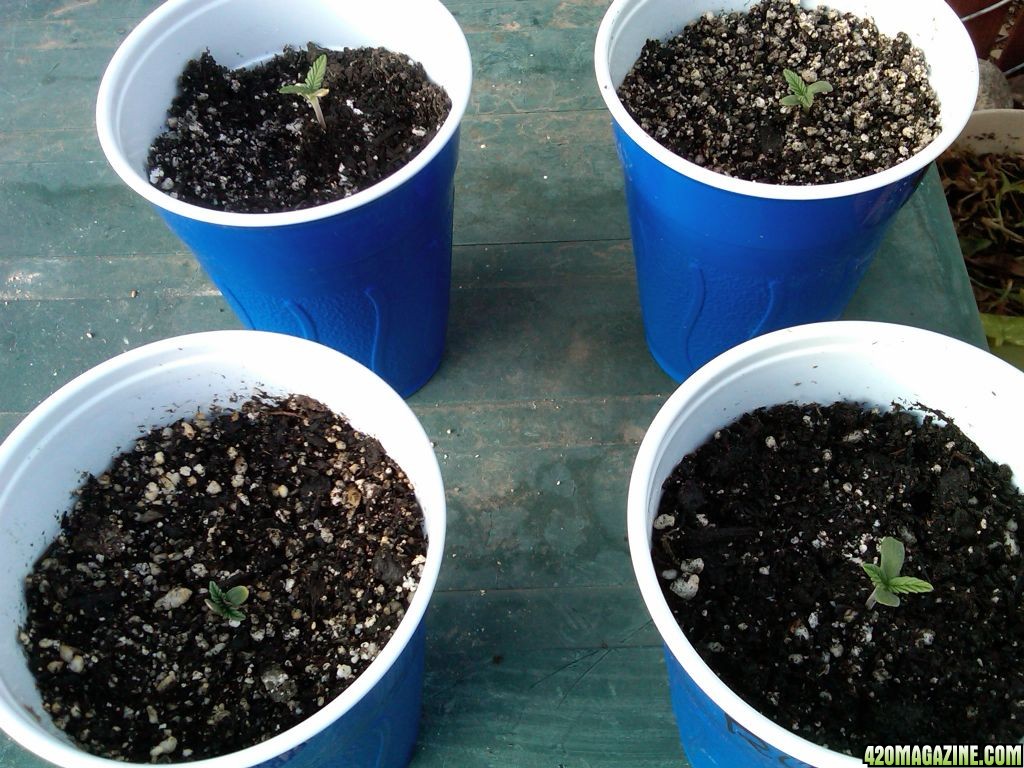
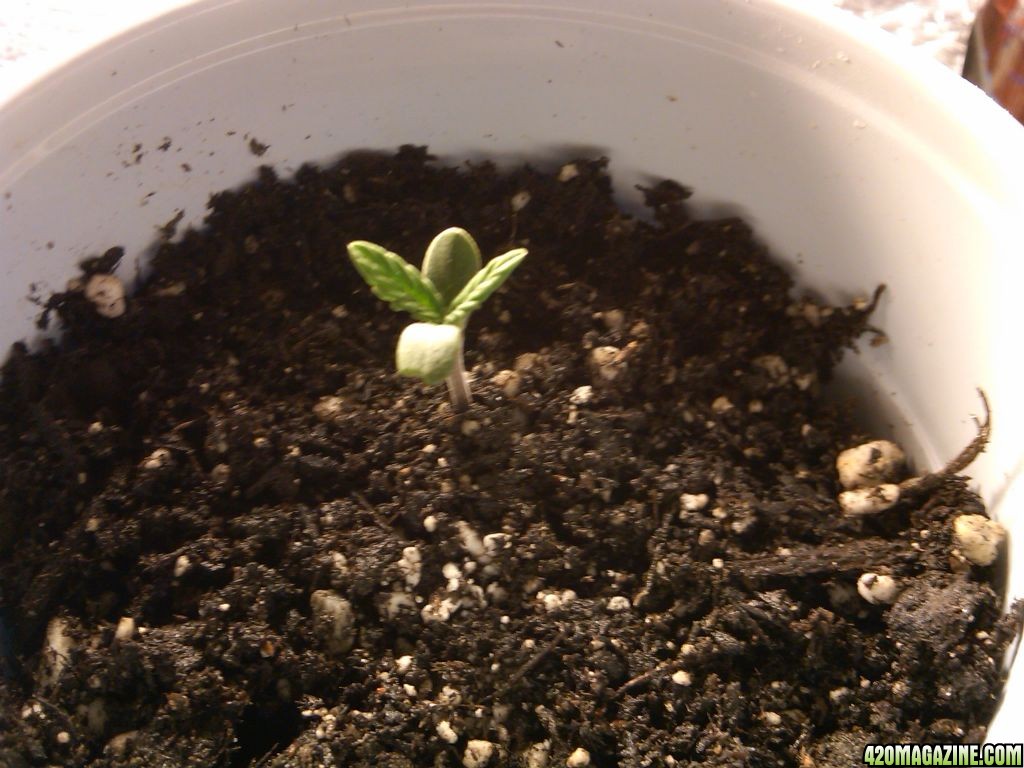
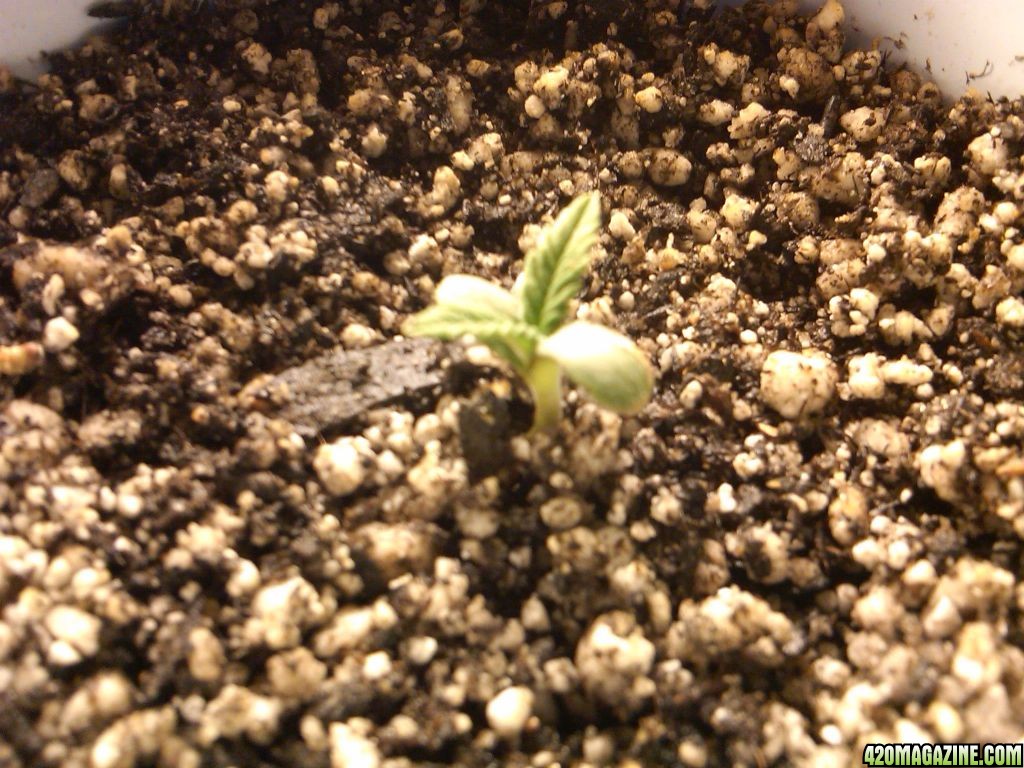
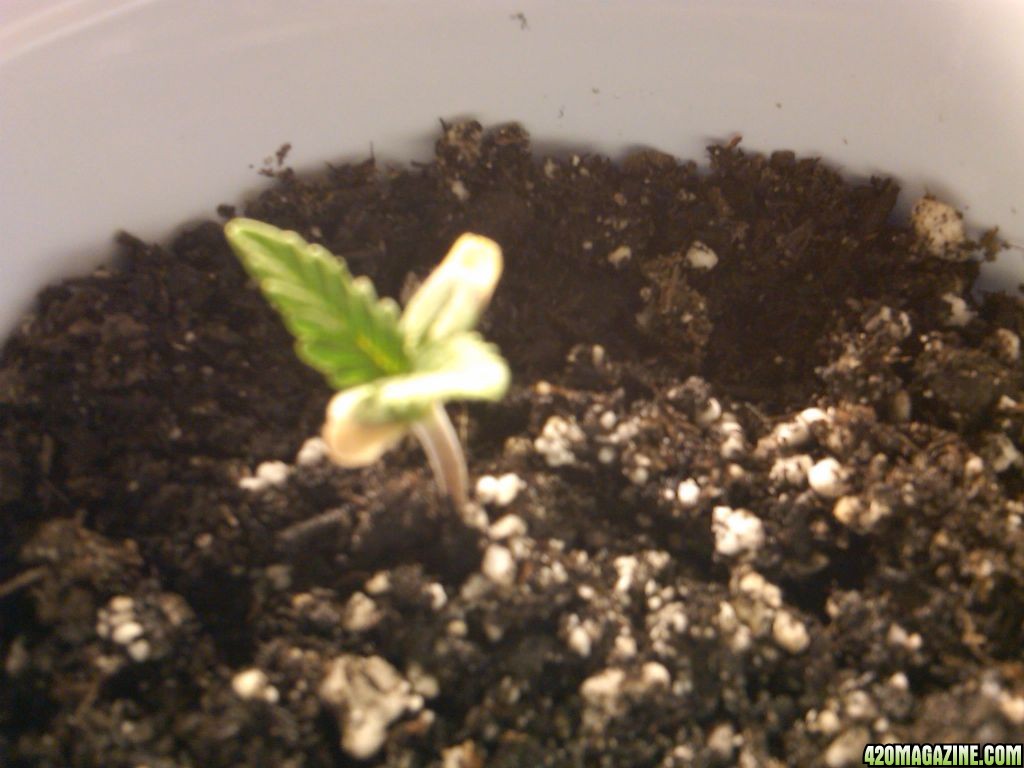
I'm so freaking happy! I know I'm not there yet, not by far, but I made mistakes, tried to learn from it all to make it a lesson, not a mistake, and then tried again immediately to make those slight adjustments, which I did, so that I could actually sprout some seeds and get some real seedlings going, which I have now finally done, thanks to the support of all you guys that stopped by everyday or so and helped me out, shared your failures and really were trying to help me with mine...

I will be back on tomorrow am with pics of these girls with their first leaves! I am SO STOKED!
SEE YA ALL TOMORROW! HOPE YOUR GROWS ARE ALL GREEN AND HEALTHY MY FRIENDS!
 
Great work, RVG! Congrat's on your new babies! :goodjob:

I've found each phase of the grow brings on new challenges, and it's experience in overcoming these challenges that makes someone a good grower.

The only think I would recommend at this point is that you move the three sprouts to their own solo cups soon. Right now, the plants will be focusing on developing roots, and it won't be long before the roots are all inter-twined and impossible to seperate without damaging them and stressing the plants.

Keep up the good work! :thumb:

Mr. K is right. I was just going to say the same thing to move them to their own containers. :Namaste:
 
Thanks Mr. Krip and HempRocket...yeah I was going to ask you about that, and I have another question I either forgot this or never did read it anywhere yet, but WHEN exactly, do I start regular watering? Their cups are almost like 75% full of perlite because of the set up with the bottom 1/2 or 1/3rd is pure perlite to just above the hole we made, about 1/8th of an inch in diameter, and it works well it seems to me, the excess water drained when I watered it last week when I set them up, and the heat isn't so HOT as it is just DRYING, so it dried up all the water in the cup and the soil is barely even damp at this point. I stuck my finger down in the cups and they came up almost dry, so I think I better know when and how to water them properly. I have been using water from the tap that had sat out about 24-36 hours, and has about 5 drops of Superthrive per quart of this water. It's in a spray bottle that I bought new just for this, and I have been misting the soil of other plants with it, and honestly, I misted the SOIL ONLY of the "Hempy soil" cups today because it was a beautiful sunny day with nothing but blue sky so I took all our seedlings outside and sat them in the sun under a tree and they got natural sunlight for about 6 hours or so, and I got to save on the electric for that long as well! LOL! Anyways, they loved it, they were already stretching outwards and upwards with their tiny first leaves! They are SO CUTE! I wish we hadn't had the computer issue we had today or you'd be looking at their beautiful pictures, but they accidentally got wiped from the album on my computer desktop that I was pulling them from, so we have to re-upload all the images I had in MY grow album on my computer, including the new ones from today showing the seedlings outside soaking up some pure sunlight while they are still small enough to do so! The are so healthy looking, that's why I am so terrified on when and how and how much to water them. I believe that BlueDog said he would water his "as needed", but don't quote me on that, I'm really not exactly sure, so I am going to go re-rea that one again, since that's the model I'm working off of. On another note, in my "seed germination skills practice", I have started a 3rd batch of seeds into germination, using the method that Mr. Krip, no wait....was it HempRocket?....hmmmmm....or was it Growing247? Dang it guys, I'm sorry I can't remember right now, I'm so fried right now, but was determined to get this update out tonight and thank you guys for your continuing support and help and tell you at least what was going on and why I had no pics as I had promised to have by now...
Anyways, tomorrow morning I am going to split up the 3, andI hope to find the Y connectors I've been looking for as well, then hit Walmart for 2 more 55Watt CFL's and the timer(s) I need...I've been having to manually turn on & off the lights for the last month or so, every day, every night. Oh, and I was going to stop at the nursery and get some Fox Farms Grow Big Liquid, for their feed right now, right? And they have Tiger Bloom and I think one called, maybe..."Big Bloom"...does that sound right? I don't need any blooming stuff obviously, not for a month or 2, but I DO need some basic food for them, and I remember everyone saying , "ALWAYS USE NUTES/FERTS @ HALF STRENGTH, AT LEAST TO START, SO YOU DON'T BURN THE PLANT"...and I HAVE to find a Ph meter too, I think I need the digital kind...I'm not f*cking with test tubes and little strip things...my arthritis in my hands is too bad for me to mess with that crap. I think I will look online...I really don't know WHAT I need as far as THAT goes...there are so many, and even if I read all kinds of journals, other people are talking about their grows, not doing comparisons on Ph meters.
Anyhow, they are beautiful babies, and I want to keep them for now, see if they are girls or boys, and in the mean time, like I mentioned at the beginning, I have that 3rd set of seeds germinating with the sandpaper tube & then the seeds go in a screen-style strainer that gets wrapped in wet towel(s), with a steady drip of water falling onto the top of the cloth...one of you guys,( so sorry I can't remember now!) had a video link attached in your message to me last week about seed germination that uses this method, after only 8 hrs, I had my first seed crack, it takes about 24-36 hrs I believe to get about a 100% germination rate, "even with frozen or old seeds..."

Okay, so I gotta go crash, I really promise I will have those pics of the babies as they are NOW, and they are so perfect looking! So I hope to find the answers about:
#1= watering, when , how, how much, application method, etc...
Second- food! When do I start feeding. I'm using FFOF with a 60/40 split of FFOF & perlite, but the FFOF I thought would offer them SOMETHING, about 3 weeks is what I have been told, read.
Okay, have a great Tuesday morning everyone!
Be back tomorrow as soon as I can!,well, later this morning!
 
Good work, RVG! Glad to hear the video helped!

One of the most common mistakes for beginners is the tendency to overwater the plants. It's OK to let the top layer of soil dry out a little. Remember, you want those roots to seek out the water.

With hempy's, the distance from the bottom of the container up to the hole you put in the side, forms a reservoir of nutes. You want the roots to work their way down to the res, and once they hit the res, they really start taking off.

It's a good idea to get an idea of how heavy the hempy is before watering, and then after watering. You'll notice a significant difference, even in a small hempy.

So, for the first week or so, just make sure you keep the roots moist, but not soaked, so they can work their way down to the res. Then, every couple/few days, when the hempy feels light, water until you get a steady stream of run-off from the drain hole.

I use straight perlite in my hempys, so mine probably dry out quicker than yours will with the soil mix.
 
You started your seed out in a good mix, so you should have enough food to last a couple of weeks. Once you start getting some more growth on the top Hempy can be kinda sketchy till the roots get to the res. with my clones I would water twice a day till the roots got to the res. As far as nutes go I'm using Osmocote+, it has been simple very simple. No needs to mix nutes.

Congrats on the seedlings.
 
HOT DOG!!! it's gettin' excitin' now! pbrmj's right about the oc+, especially if u can keep the temps down although u MAY have add a little cal-mag as it has no cal. if u're temps run high u might prefer dymamite. it doesn't release as much nit. as fast. nice grow so far. hang in there, u're gettin' through the worst of it.
 
SO!!! Here they are! Got some new pics from yesterday and the day before, and I think a few from this am...

So, here was what the seedlings looked like on the 2nd day after I helped pull the papery stuff stuck on the front tip of the cotyledons!!
my_1st_bag_seedling_to_show_true_leaves_4_3_11.jpg


And here's the 1st 3 to sprout, yesterday am, looking better everyday!
top_shot_4_4_11.jpg


Here's a side shot of the 1st 3...it is slightly blurry, but it shows good color I thought...
blurry_new_bag_babes_4_4_11.jpg


Here's the 1st 3 yesterday afternoon in the sun, I'm giving them sunlight everyday, all day, right now while they can have it, I think it's okay, don't you all? What's better than pure sunlight?
3_bag_babies_in_the_sun.jpg


Here's the 4th bag seed baby to sprout, enjoying her day in the sun yesterday too.
4th_bag_baby_n_the_sun.jpg


This is a pic from this am, the 3rd germination set, at 24 hrs in, at 1030 this am...
3rd_germ_seeds_24hrs_in.jpg


And here is the 1st 4 I saw that had cracked open...2 in the side, 2 in the tip, which is basically, their tap roots starting I think.....
3rd_germ_the_1st_4_to_crack.jpg


And what do you all think? is the theory true that if the seed cracks on the tip it's a girl, and if it cracks on the side, it's a boy or vice versa? I read that somewhere in someone's journal a while back....

Anyhow, that's not really too important to me right now, I got to also tell you that today, I got the babies all into their separate cups, and when I did, this one plant, I named Rudy ( as in "root-y"), because it had already a 3&1/2" root, and it had a big cluster of tiny "micro-roots" all together in a ball halfway up, I took a pic of it while I was doing all this, this am, just wont have pics up till later or tonight. But yeah, they are all looking healthy, just got 1 that is really small, has a small, L-shaped root, but even that one has some tiny "micro-roots" on the end...I have another 1 that was in the "1st 3" group, that was also on the small side, and it's root was small, but still has tiny "micro-roots"...the 2nd largest had a root length of about 2 or so inches long, and has those pert little fuzzy looking "micro-roots" as well. I'm so glad I got the Fox Farms Ocean Forest, with that Michorrizahl or whatever the heck that stuff is called in the soil that stimulates the roots to burst into a huge bunch of thick fat white roots, and I have NEVER, EVER SEEN ROOTS GET SO BIG ON SUCH A TINY SEEDLING BEFORE! IF THEY'RE THIS BIG NOW, THEN THEY SHOULD BE MASSIVE IN A MONTH!!! THIS BAG SEED TRIAL IS TURNING OUT TO BE A LOT OF FUN! WOO! HOO!:headbanger:
I wll have todays pictures up later or tomorrow...PEACE my brothers and sisters of the green .....
 
NICeeeeee good thing im in early for this grow cant wait to see how it turns out

Well nice to meet you, Avalon! Yeah, I'm sorry if the name on my journal is misleading since you are just now joining this affair...I started out with some AKR and Kannabia Special seeds, and a few bag seeds, and started out trying to grow those, but they were over-handled and over-watered by me it turned out, so I started my second grow, 6 bag seeds that germed and 4 that turned into seedlings just as the other AKR & Kannabia died...I asked the other guys following me at that point if I should start a new journal, and they suggested not to, because I have all my background in here, it's got all the info from the beginning of tis grow till now...and I DO still intend to be successful with an AKR grow here really soon, along with some other medical grade seeds I have and have coming...

So these bag seeds I'm playin with are really for my own experience and to get comfortable with these skills, so I don't go and kill off any more expensive & precious seeds ever again....I hadn't grown inside in over 25 years, so I am re-learning these things and learning all the new info that just wasn't out there 25 years ago...

So here are the 4 bag seed babies in their own cups today!
the_4_bag_babies_in_their_own_cups_now_.jpg


ANd I gave them names today too, here is Rudy (as in Root-y, cuz it was the one with the roots 5 times as big as it!)
this_is_Rudy_.jpg


And this one is Shorty cuz it's just a short guy, same size leaves and all, just shorter...
this_is_Shorty.jpg


This is Stumpy because it is small and has the shortest roots, well, ROOT, cuz it's just a short L shaped root that has a ball of tiny rootlets or whatever at the tip of the root...
this_is_Stumpy.jpg


And lastly we have Waldo! My wife gave it that name (after her dad, RIP dad..) because it is tall and stretching towards the sky....
this_is_waldo.jpg


So, I have the 3rd set of seeds germinating still, as I showed also earlier today...I checked tonight, which is at 36 hours, and I have for sure, 5 maybe even a 6th seed cracked, out of 29 tried... I don't know how that guy in the video got such results...he said they were OLD seeds, and I did use kind of fine sand paper, it was all I had available! So I shook them for a LONG time...then I soaked them for 28 hrs, then started the drip....
But this is all in preparation for when I start my mmj grow here real soon....I can't afford to kill any more valuable seeds! But I am doing okay so far with these bag seeds for practice, and am just letting these guys grow as I learn, re-learn and learn some more about how to grow my medicine next. That will be the BEST part of this ALL! I have 2 AKR seeds left still, and 7 more MMJ seeds coming any day now...so I will hopefully be starting a great mmj grow, the whole idea here anyways!, in the next week or so, I CAN'T WAIT!!!!!:wood:
I hope you all enjoyed my pix tonight....
Also, I am looking for other germination techniques, and more importantly, I need to figure out how to do a Hempy "bucket" for each of my future mmj plants, as I believe that will be the easiest way for me to deal with them in the situation I live in here, and needing to move them around a bit every few days...If anyone remembers who did a good "Hempy" style bucket grow journal that was good, I mean they had great results, etc...please let me know, as I am looking for that now.

Okay girls and boys, have a green evening.....:tokin:
 
RV, u went from a seed drowner to a rootin' son of a gun in just a few days. CONGRATS! this is about to get interesting. good luck.
 
Thanks paw-paw! you are a nice guy...well, I guess I'm being presumptuous there...but then, okay...you're a nice person! lol! .
So anyways, I am more confident now that I have these guys this far in a little over a week, and I hope to start a PROPER mmj grow with in the next week or so...I am glad these lil' seedlings look so great and all, but I promise you they are mis-leading....All these seeds come from the only "medicine" I am able to find around here, and I just hesitate to call it that tho, because it is SO AWFUL! I mean, it's little more than smoking some sweeter tasting hemp, really, but when you're sick, and this is still the ONLY medicine that won't kill me or tear up my stomach, even tho it barely works, it does still offer some aid to me, so you have to take what people give you when you're as sick as me and HAVE to have this medicine...That's why I am now waiting to start my REAL grow, like I tried to in the beginning, but that was a whole new lesson in rookie mistakes for me, embarrassing as that is for a lady of my age, who was smoking' ganja in 1980...

I've got 2 more Afghan Kush Ryders left to use, they are a medicinal strain, THC of 22%, don't remember the CBD levels...but I also have 7 more true medical seeds on their way, could be here today, I HOPE!!! I have 3 Fem Northern Lights X Skunk coming, ( a mmj strain) and got 4 freebies with those, also all mmj strains! What an AWESOME seed supplier I have!!! So I'm ALSO getting- 1 UFO#1 Buddha Seeds Syrup Auto Fem, 1- Emerald Triangle Emerald Jack Fem, 1-Emerald Triangle Grapefruit Kush Fem, and 1-Emerald Triangle Super Sour OG Fem....I can HADLY WAIT to get some of these girls going!!! I hope to find a good one to try to take some clones from, if Fems and Auto fems can make good mothers, so there's some MORE homework to do, lol! I have never done that before either, but I am damn well going to try! Because I have a tote I'm already using for my seeds/ seedlings to sit up on in the grow area/ my tub/shower unit, so I have realized that if I can rig up one on my own, then I can have a clone "rooter" or what ever you call it going underneath INSIDE the tote, right? while I have the smaller plants growing up above??? But then when the plants get bigger, and are too big to be up on the tote in the tub anymore, I will just remove the tote, and bring it out into the kitchen/ living room area, underneath the table maybe, and keep putting out clones as needed I guess....oh well, that's so way far down the road, so I will stop there about that....

So I will check in later, we are overcast here and cooler today, so the babies are staying in the nursery today...

OH! By the way, I have been running them on a 20/4 cycle, cuz I don't know what strain of hemp-crap shit seeds I got anyways, but I have these 6 or so seeds that I just germed over the last 48 hours, and I have to plant them in a few Hempy-soil cups today, just to make sure these techniques I just used on these last seedlings are a dependable way to germinate and start my costly and very valuable mmj seeds! So after these next set of seeds turn into seedlings, I AM starting my next try at a REAL mmj set, so I can have some decent meeds in the next 3-4 months! Then I will be growing another set right thru the winter....a few plants aren't much to some, but to ME, they are all I need, I am only 1 person, lucky me! ( I mean as far as using the cannabis therapy!)

Okay, I look forward to hearing from you guys later then, I think I will wait to get the ferts and nutes because if I am not planning on using these "test" plants there is no point in feeding them and wasting all that money on stuff I'm throwing away! That's why I got to get my mmj going....

I will be back later today or tonight all, have a beautiful day all my green gobblin' friends! lol!
 
If anyone remembers who did a good "Hempy" style bucket grow journal that was good, I mean they had great results, etc...please let me know, as I am looking for that now.

DocBud, BlueDog to name a couple. I have had no problems so far.
Heres a link to Hempy


https://www.420magazine.com/community/threads/guide-hempy-just-put-hole-bucket.121141/

Thanks PBRMJ! I sure appreciate you doing that for me, and yeah, it hit me last night after I posted this, that all I had to do was just scan the journals MYSELF, DUH!, and look for these on my own. I guess I was just thinking , at the time I posted that, that maybe someone just KNEW, maybe off the top of their heads, which journals I was thinking of....but then I went back to BlueDog, where I learned my "mini- Hempy soil cups" technique from, and THAT led me to Doc Buds, and I fell asleep reading Doc Bud's journals last night...

So THANK YOU SO MUCH for being such an awesome person and posting that for me, even tho it was kinda dumb on my part....

You rock, my friend! :thanks:
 
Hey friends! I got a quick question for you all out there that can respond kinda quick: I got my bulbs, the 55watt CFL's 2700K, equiv. to 200 watts each, when I started my grow a few weeks ago, and just the 2 of them have got my seedlings started, but I want efficiency, and the best i can get or do if I can do it, so I ask you, what would you do in this dilemma? I went back to get some more bulbs, and they DID have 2 more of the same bulbs, so I got them, at $12.44 a piece...then I went to a hardware store here in town to get the Y bulb connectors, and I found some GE "Clear Spectrum" bulbs, that had the 6500K I could really use right now for my vegetation phase, but they might have been some incandescent style, and I THINK I saw some CFL style too, but they for sure had the designations of either "Soft white", "Cool white", or "Daytime"...And now I am messed up over what to do with my lighting situation! I REALLY REALLY want to get the right "blue" spectrum, for the veg stage of my mmj grow I'm about to start, and I know that the that the bulbs I already have are "Soft White", and 2700K each, NOT the 6500K I want/ need....but some of you say none of this really matters that much, so what do you all vote I should do??? I REALLY REALLY WANT SOME IDEAS HERE GUYS! PLEASE! I am hearing a lot of pluses and more minuses than I thought I would, on L.E.D. systems, but I also had this thought as well...what if I stick with these 2700 K bulbs ( which are 55watt CFL's , 200Watt equiv. EACH!), all 4 of them, and just add a Blue spectrum only L.E.D.? I saw some on Ebay for like 30-40 bucks I think....that way, I can keep running the one's I got, and just ADD in the blue spectrum with the blue L.E.D. panel now, while they are in veg, then remove the panel for the bloom phase? ( OR just stick with 2 of the 2700K bulbs and add the blue L.E.D. panel, then stop the blue when I got into bloom?) I just plugged in the extra 2 55 Watt CFL's, now I got the equiv. of 800 watts of light in my tub/shower, and I had to remove the 8" reflector dishes I got because they won't fit these huge CFL's on a double Y connector under 1 8" dish, so NOW, if I DO keep these extra CFL's I just got, and you all suggest that running these is fine all at once, then I have to go and find 2 bigger reflector dishes now, or like my wife just suggested, build myself a reflector.....

AARRRGGGHHHH!!!!!!!! too many choices and I am already ADD!!! THIS right here is why I desperately NEED your help everyone! Please send in your idea, vote, help, info, whatever, tonight if possible, so I can take these back if necessary, and/ or get those new reflector dishes or start on building one for myself....

THANKS EVERYONE!!!!!!!!!:cheer:
 
High RVG. Firstly, "daytime" is 6500K. Don't buy cheap LED lights. they suck. You have to spend a good buck on LED's if you want any sort of benefit from them. Just use the 2700K bulbs and add a couple 6500K bulbs and use that for your entire grow. Oh and when we talk about watts, we only talk about real watts, not equivalent. The equivalent number means nothing.
 
High RVG. Firstly, "daytime" is 6500K. Don't buy cheap LED lights. they suck. You have to spend a good buck on LED's if you want any sort of benefit from them. Just use the 2700K bulbs and add a couple 6500K bulbs and use that for your entire grow. Oh and when we talk about watts, we only talk about real watts, not equivalent. The equivalent number means nothing.

Okay, thanks so much for that input HR, I really appreciate that! Also, when you say REAL watts, on a CFL, you mean like the 55 watts I have in each of my bulbs, meaning I have a total of 220 watts, not " the equivalent of 800 watts", correct?

Cool, that only leaves the problem of getting more bulbs in there now! lol! Any ideas on how to do that? lol, oh well, this is what I love about growing, it's a beautiful day everyday you wake up to them, they teach you something new everyday, and the whole affair makes you smarter and more creative, having to figure these things out, but it's SO cool to have the help I get here! I would have to go out and GUESS which book to buy, or make the mistake of talking to the wrong person, or getting really BAD advice from a tool who don't know crap... No, that would suck.....

Thanks again for everything, HR, and all the rest of you guys who are stopping' by to drop a line....

One thing on that subject! Why is it that I only see some responses only in an email reply to me, but not up here in the thread? I have missed so many responses because I don't go into my email that often, only once a week or so, but I get on here multiple times daily looking for responses and reading journals, etc...but I don't ever see those responses here. Does anyone know why that is happening to me? I feel bad, because I like to respond with at least a "thanks!" to those who take the time to stop by to offer their advice and help, that's really important to me! Do I have some setting off that I don't know about? I just don't get that one...

Anyhow, thanks! to all who stopped by to give some advice, I really DO appreciate it! And I am so sorry I never before realized I was missing some responses that way!
Much love and green happiness to all!
 
Back
Top Bottom