

Every time i tell someone to flush there plant someone gets in the conversation and says the science says flushing will not remove nutrients or salts.I agree with you .When i flush even if my plant is healthy the leaves give a nice cup to the light after telling me boy good flush i feel great fresh nutrients no salt build up good ph now thanks for the flush.
Navigation
Install the app
How to install the app on iOS
How To Use Progressive Web App aka PWA On 420 Magazine Forum
Note: This feature may not be available in some browsers.
More options
You are using an out of date browser. It may not display this or other websites correctly.
You should upgrade or use an alternative browser.
You should upgrade or use an alternative browser.
DrCannaCanadian: MarsHydro & Seedsman, Soil & Coco, 2020
- Thread starter DrCannaCanadian
- Start date
- Thread starter
- #142
DrCannaCanadian
Well-Known Member
Daily Tips & Tricks

By Royal Queen Seeds
Indoor Cannabis Growing: Relative Humidity and Temperatures
The most refined techniques to grow cannabis become irrelevant when relative humidity and temperatures are not being controlled – learn more about these two major factors.By Royal Queen Seeds
Indoor Cannabis Growing: Relative Humidity and Temperatures

Final results of an indoor grow are greatly influenced by the way growers keep in control of parameters that influence their plants growth. There are two basic factors that can easily be forgotten when we’re busy thinking of other ways to increase yields, size, and overall health of our plants – temperature & relative humidity. This blog summarizes ways to keep both of these factors within an optimum range, and provides specific information what conditions should be maintained to achieve best results.
HOW TEMPERATURES AND HUMIDITY LEVELS INTERACT
It’s important to know that humidity levels and temperatures are closely related to one another. When we talk about humidity, we usually mean relative humidity (RH), which is the ratio of partial pressure of water vapor to the maximum vapor pressure of water at the same temperature. You get the whole idea when knowing the basic principle that warm air holds more water vapor than cold air. This is one of the reasons why it’s necessary to extract a lot of warm air from our grow room, and ideally allow cool air to enter – warm air simply holds too much water vapor in it.
We need to define what humidity and temperature control actually means when growing cannabis. It makes sense to divide the life of cannabis plants into 4 different stages in which humidity levels, and temperatures, should be adjusted to ensure healthy growth. Don’t think that humidity and temperature control is complicated and not worth it! It’s generally very easy, and more about keeping parameters within a certain range, and as constant as possible.
The first thing you need to do is to buy a hygrometer and thermometer, preferably a digital one with memory function, also showing maximum and minimum values of the past. Some hygrometers aren't the most accurate, so don’t bother having several devices in your grow room to compare values. Now that we’re able to closely monitor our conditions, we can get to the essence of humidity and temperature control – the actual humidity levels and temperatures we aim for.
1. Seedling Stage
- Seedlings and clones like high humidity levels of 65-70%
- Reason: The root system is not established
- High humidity levels allow water intake through leaves
- Temperatures with lights on: 20-25 C° (lights off: 4-5 C° lower)
2. Vegetation Period
- Humidity levels can be lowered by 5% each week (acceptable range: 40-70%)
- Temperatures can be increased a little bit (no obligation)
- Reason: Roots absorb more water; evaporation through leaves cools plant(s)
- Temperatures with lights on: 22-28 C° (lights off: 4-5 C° lower)
3. Flowering Period
- Humidity levels need to be lowered to 40-50% (extremely important)
- You can get away with 55% (anything over 60% is real bad)
- It’s best to slightly lower temperatures in flowering
- Temperatures with lights on: 20-26 C° (avoid high temperatures)
4. Late flowering (1-2 weeks before harvest)
- The following steps are no necessity, but can improve yield, flavour and appearance
- Bring down humidity levels as much as you can: 30-40%
- Lower daytime temperatures, and also increase the temperature difference (day/night)
- Temperatures with lights on: 18-24 °C (lights off: minus 5-10 C°)
ADJUSTING HUMIDTY LEVELS AND TEMPERATURES
We’ve got a pretty good idea on humidity levels and temperatures we aim for. Now it’s time to get to the practical part, and to find ways to bring things back in balance when they’re not. Most growers will struggle to keep both relative humidity and temperatures down, which is of primary importance in the flowering period – we got that. In some colder regions, and depending on the lighting solution, the opposite scenario might be the case, and temperatures or humidity levels must be raised.
Remember the basic principle that warm air holds more water than cold air? Keep this in mind, and be aware of the fact that relative humidity and temperatures interact with one another.
A. WAYS TO LOWER HUMIDITY
- Run you existing tube vent on higher velocities or upgrade (air exits tent AND the room it is placed in!)
- Increase fresh/cool air supply (e.g. active air intake by 140mm case fans for PC’s)
- Try to water your plants right after lights are switched on
- Spend money on a decent sized dehumidifier (the small ones can’t hold enough water)
B. WAYS TO LOWER TEMPERATURES
- Just like lowering humidity: Increase the total airflow in your room by allowing more warm air to be extracted, and more cool air to enter (higher velocities or bigger tube vent)
- Always have “lights off” during the day, and “lights on” at night
- When you grow with HPS lights, consider using a cooltube
- Install an air conditioning unit (AC’s will also lower humidity levels)
- Manually increase humidity levels with a spray bottle (It won’t last long)
- Keep the surface of the soil moist, but not wet
- Hang wet towels/cloths in your grow room or put open water containers in it
- Invest money in a humidifier with a large water tank (small ones demand constant refills)
D. RAISING TEMPERATURES
- You can always upgrade to a bigger grow light (more watts = more heat)
- Place a heating mat at the bottom of your tent or grow room
- Isolate your grow room with materials from the hardware store
- Use a simple space heater with a thermostat
- Thread starter
- #143
DrCannaCanadian
Well-Known Member
I can't remember laughing this hard in weeks!
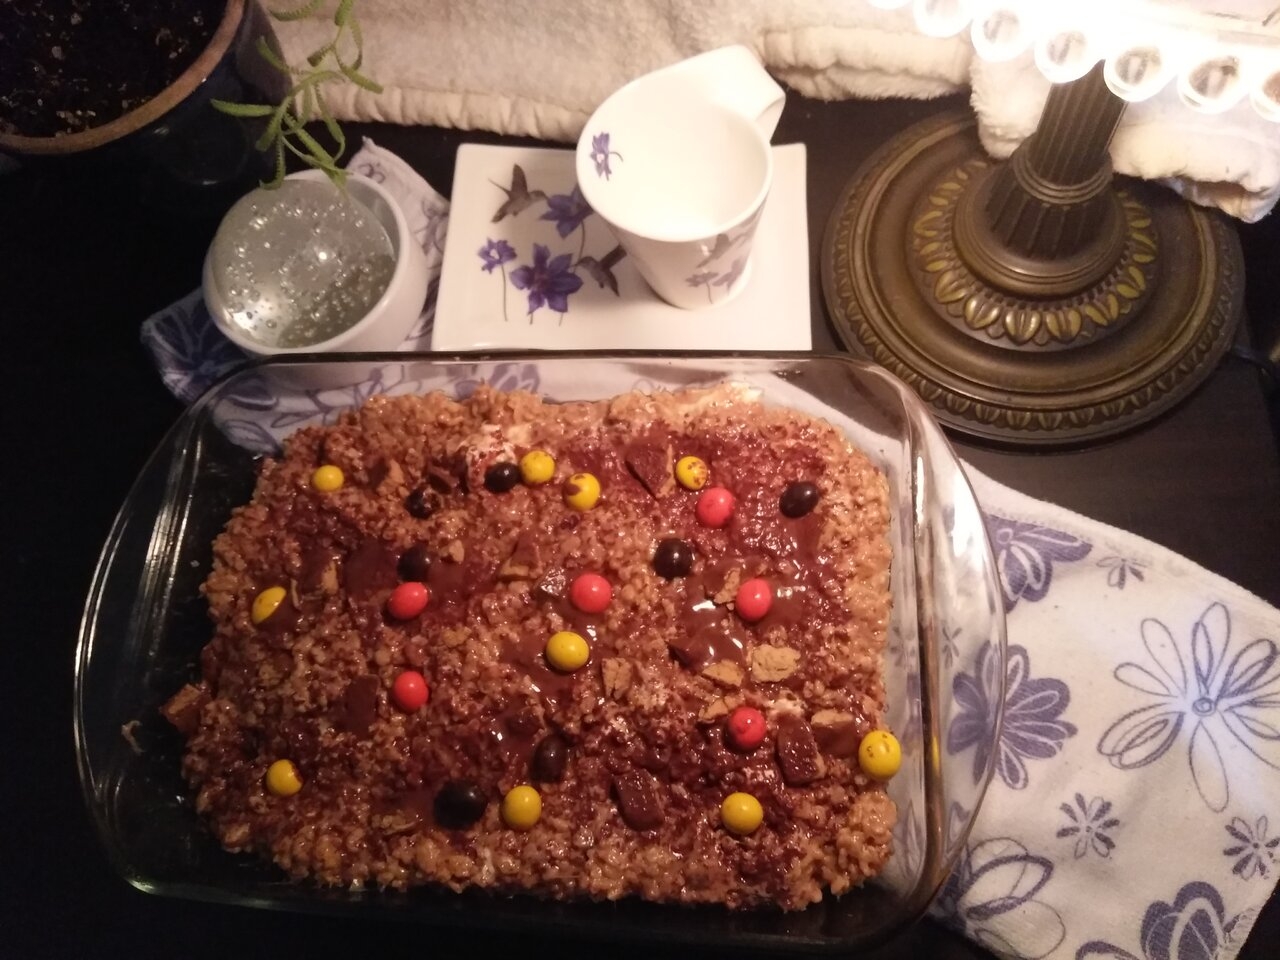
The Mrs made "Nuclear Armageddon - Reeses Pieces - Reeses Peanut Butter Cup - Canna Rice Crispy Squares - Medicinal Edition" tonight.
She literally went to war on the giant marshmallows that would not melt!
This is gonna be so good!!!
The Mrs made "Nuclear Armageddon - Reeses Pieces - Reeses Peanut Butter Cup - Canna Rice Crispy Squares - Medicinal Edition" tonight.
She literally went to war on the giant marshmallows that would not melt!
This is gonna be so good!!!
Nuclear Armageddon - Reeses Pieces - Reeses Peanut Butter Cup - Canna Rice Crispy Squares - Medicinal Edition
The Mrs made these tonight after getting THC Chocolate "Tokyo Smoke" from the grocery store.
- Thread starter
- #144
DrCannaCanadian
Well-Known Member
Barrie's Hello Winter 2020

We went out again for our walk today, and we got to chatting about starting an album that highlights the true beauty of our city.
Today, we were at Johnson's Beach and the path that goes all the way around Kempenfelt Bay - it's a beautiful walk!
Barrie's Hello Winter 2020
Looking West along the trail near Johnson's Beach.
Barrie's Hello Winter 2020
Looking South over Kempenfelt Bay - on the trail near Johnson's Beach.
Welcoming back Yoda!
- Thread starter
- #146
DrCannaCanadian
Well-Known Member
Dagobah Frost Forest
Update

Vegetation - Day 08
Update
Vegetation - Day 08
Hey 420!
On Tuesday January 14, 2020 (Veg - Day 03), we up-potted a few of the plants from the red solo cups to the black 1.5 litre (1.5 quart) pots.
Dagobah Frost Forest - Obi-Wan Kenobi
Peyote WiFi - Coco/Perlite - Veg Day 03
Dagobah Frost Forest - Obi-Wan Kenobi
Peyote WiFi - Coco/Perlite - Veg Day 03
Today all five of the plants got a full watering. The plants in coco are getting a full feeding every two days and a very light feeding, around the edges, in between.
The seedling in the soil gets a very light feeding, around the edges, everyday; and a full feeding every five days - when the solo cup feels empty.
It is very important to go by weight when you are watering in soil - let the soil nearly dry out - and let those roots search out their water and their nutrients.
The more roots we grow in veg - the better off the plant will be to grow larger buds when we get to the flowering stage.
I did a photo shoot, but the composition is way too busy. No big deal, I'll do better next time! I just have to keep looking at other photos people have here so I can improve!
Here are the plants I have decided to keep this round - basking, as always, under the warmth of a Mars Hydro light:
Dagobah Frost Forest - Rey
Peyote WiFi - Fox Farm Ocean Forest Soil - Veg Day 08
Dagobah Frost Forest - Darth Maul
Peyote WiFi - Coco/Perlite - Veg Day 08
Dagobah Frost Forest - Emperor Sidius
Peyote WiFi - Coco/Perlite - Veg Day 08
Dagobah Frost Forest - Obi-Wan Kenobi
Peyote WiFi - Coco/Perlite - Veg Day 08
Dagobah Frost Forest - Princess Leia
Peyote WiFi - Coco/Perlite - Veg Day 08
- Thread starter
- #147
DrCannaCanadian
Well-Known Member
")
- Thread starter
- #148
DrCannaCanadian
Well-Known Member
Daily Tips & Tricks
By Royal Queen Seeds
Marijuana Pruning: Topping Vs Fimming
By Royal Queen Seeds
Marijuana Pruning: Topping Vs Fimming
Do you dream of long-running, resinous, chunky cannabis colas? Make it a reality in your marijuana garden with high-yield cultivation methods. Topping and Fimming are two proven techniques. Keep reading to find out which one is the best method for you.

WHAT IS TOPPING CANNABIS?
Topping is the process of pruning the growing tip of the main stem of a cannabis plant. This is perhaps the most common HST or high stress training technique applied by both indoor and outdoor growers. Marijuana growing naturally will typically take on a Christmas tree structure; One dominant, main central cola and multiple sets of side branches. All plant parts receiving a share of sunlight at some stage during the day as the sun traverses the sky.
In contrast, indoor cannabis plants receive illumination from a stationary grow lamp positioned above. This makes naturally-shaped cannabis plants inefficient to crop indoors, unless you cultivate in large numbers using the SOG or Sea of Green method. Topping is the method of choice for pro growers to increase yields. It is also favoured by home growers that want to fill out their grow space with a handful of plants, rather than pack in as many as possible.
Removing the terminal bud will encourage the development of two new main colas and promote growth of the lower, secondary branches. The aim is to invert the Christmas tree shape to allow more light penetration. Growth hormone is diffused to all of the shoots once the apical bud’s dominance is removed. Branchy, low-profile plants are more desirable to every grower. Indoors, vertical space is often at a premium and outdoors, bushes are stealthier than tall trees. Topping is a great technique to take control of the cannabis canopy.
Topping is best applied with a single, clean cut to the tip of the main stem with sterile scissors. Remove 100% of the tip from the main stem and one cola will become two. Best of all, the process can be repeated again and again to double-down on the number of top colas.
All seasoned cannabis growers will agree that topping is a technique for the vegetative growth phase. Exactly the right moment is a matter of debate. Most growers these days will top early, typically when the plant has just 3-5 nodes. On the other hand, old-school growers are usually a little more patient, waiting about 30 days or until plants are at least 30cm (12") in height before topping.
As topping is a HST method, plants will need some time to recover. Allow 1-2 weeks before applying further pruning and training techniques.
Fimming is another HST technique used to increase yield that is similar to topping, but not quite the same. The objective is still to increase the number of main colas. But instead of doubling down, fimming can give rise to 4+ new top colas. This technique is highly recommended for micro-growers with perhaps just 1-2 plants.
Secondary shoots are juiced with the growth hormone that previously would have been used to develop the main stem. However, most growers report that fimming is slightly less effective at reducing stretching than topping. A fimmed cannabis plant can still grow rather tall, albeit with far more top colas.
HOW TO FIM MARIJUANA
Just like with topping, the FIM technique is best applied during the vegetative growth stage. But unlike topping, this method favours a less precise approach. FIM does stand for “Fuck I Missed” after all. Pinching off 75% of the tip from the main stem between fingers is preferred to a neat scissor-cut to the whole tip.
It ain’t pretty, but it works. At least 4 new shoots will emerge in a week or two. Sometimes as many as 8. Moreover, secondary shoots will catch up growing in the meantime. Apart from a few disfigured fan leaves, the FIM method is not all that different from topping. 1-2 weeks recovery time post-FIM is standard.
Do you want the heaviest harvest possible? If you do, then you must be prepared to blend a few techniques. Topping or fimming cannabis plants alone is not really going far enough. Go the extra mile for those extra grams. By adding the following two methods to the mix, you might hit upon the recipe for a scale-tipping harvest.
LOLLIPOPPING
In brief, lollipopping is the removal of fluffy, lower bud sites from cannabis plants. The idea is to focus plant energy on developing big, fat nugs, rather than popcorn buds. Most growers like to strip away lower growth during week 3 of flowering. Pinching off is generally preferred to clipping away with a scissors. ScrOG growers will usually remove all of the lower growth beneath the screen to improve airflow and drive all plant energy to the tops.
SCROGGING
All of the above high-yield cannabis cultivation techniques can be further enhanced with a ScrOG or Screen of Green. A ScrOG is the pinnacle of high-performance marijuana growing. By deploying a mesh screen across the grow space, the whole grow-op is tuned for maximum production. Essentially, the grower must bend and fold shoots to fill out as many of the grid squares as possible. This begins in the vegetative stage and continues on until early bloom.
Topping and fimming will prolong the amount of time cannabis plants will need to spend in the 18/6 vegetative growth stage. Expect a 4-6 week vegetative growth phase if you plan on applying these techniques.
Another oft-overlooked and obvious problem with encouraging the formation of multiple fat colas is that marijuana plants tend to become really top heavy. In the absence of a ScrOG, plants may require staking with bamboo for support.
- Thread starter
- #149
DrCannaCanadian
Well-Known Member
Daily Tips & Tricks
By Royal Queen Seeds
How To Perform Low Stress Training On Cannabis For Better Yields
By Royal Queen Seeds
How To Perform Low Stress Training On Cannabis For Better Yields
Low stress training (LST) is a growing technique that involves manipulating the shape of cannabis plants to produce better yields. It's easy, and can actually be a lot of fun to do! Read on to learn how to LST like a pro!

WHAT IS LOW STRESS TRAINING AND WHY DO WE DO IT?
As a yield-boosting training method, LST allows growers to make the most of their available space and light. At its simplest, this training technique involves gently bending and tying down cannabis plant branches and stems. We do this for two reasons: First, cannabis normally grows one large main stem that develops one large, elongated cola. This exists alongside other, smaller side-branches with smaller buds to suit. The natural tendency for cannabis to grow into this “Christmas tree” shape is known as apical dominance. With LST, the goal is to break this apical dominance, instead flattening out the canopy to grow at the same height.
This brings us to the second reason behind LST: better light distribution. By bending and securing plants in a way that breaks apical dominance and evens the height of the canopy, all areas of the plant will be exposed to greater light distribution, thus creating more viable buds sites and larger yields at the end! Not only that, but LST doesn’t even require you to alter your growing setup to achieve great results. All you need is some know-how and a few essential tools.
THE HISTORY OF LOW STRESS TRAINING
Over centuries, horticulturists have devised ways to get more out of their plants using simple training techniques. These techniques can involve topping and pruning plants, as well as bending, ScrOG, and all manner of other methods. Although they all differ slightly, each one ensures optimal use of light, space, and resources.
Low stress training is a modern variant of an old technique used to force fruiting trees to grow in a flat structure. The ancient Egyptians are thought to have used similar methods to grow fig trees horizontally more than 3,000 years ago. A method known as espalier then became very popular in 17th century Europe, and made espaliered (ie. carefully trimmed and shaped) hedgerows of fruit trees a common sight. The practice was also widely used in apple and pear orchards—not just for better harvests, but more so as a way to beautify the landscape.
LST: A TRAINING TECHNIQUE THAT YOUR CANNABIS PLANTS WON’T MIND
A key element of this training technique lies plainly in its name; “low stress” is what separates this method from “high stress” techniques like topping. Whereas the latter technique involves cutting off the plant’s main growing tip in an effort to redistribute growth hormone, LST is much gentler. Not only does this decrease the risk of over-stressing your plant, but it means less time spent waiting for your plant to recover and adapt to high stress changes. With LST, there’s no inherent pruning or trimming, although this method is often used alongside other, more severe tek. All in all, plants that undergo LST respond very favourably, and will reward you for your efforts and finesse with healthy, hefty yields of huge buds.
To properly perform LST on your plants, you need the following equipment:
- Rubber-coated plant wire/soft plant ties
- Thin wooden/bamboo stakes
- Small hand drill
- Duct tape
PREPARE YOUR CONTAINER FOR LST
We keep referring to tying down stems and branches, but to where?! All you need to do is drill several holes around the rim of your growing container. Now you can loop the ties through the holes and around the branches to hold the shoots securely in place.
For even more support options, some thin wooden or bamboo stakes with a length of about 30 cm 12"() work great to hold everything in place. And lastly, because accidents can happen when we’re bending branches, get some duct tape so you can patch up any snaps or breaks.
Let’s get to the interesting bits: how to LST your cannabis plants!
BREAK APICAL DOMINANCE
To start, it’s all about breaking that apical dominance. Begin by bending your main stem gently down toward the rim of the container. Using the soft plant wire and the pre-drilled holes, securely tie the stem in place. Ta da! You’ve just flattened the canopy and made way for future, horizontal growth. This way, light will reach many more buds sites, which in turn will result in a greater yield.
Tips: Some growers choose to first top the main stem, then bend the secondary shoots out to the side. This way, the plant will take on more of a “spider” shape. But even if you’re performing standard LST—without topping—you may want to consider some light defoliation to increase light penetration.
SHAPE AND MAINTAIN YOUR PLANTS
One thing to keep in mind with LST is that you always want to maintain a flat canopy, so no one branch is taller than the other. When it comes to shaping, it’s important to bend shoots outward and away from the main stem. This isn’t rocket science per se, but it is helpful to have a desired shape in mind rather than just winging it. Even this can work, but beginners are better off doing some basic planning to avoid any pitfalls.
Moreover, sometimes accidents can happen, say if you accidentally snap a branch as you’re bending it. No reason to freak out! Plants are actually more robust than one may think. As long as a branch hasn’t entirely come off, you can always fix such mishaps with some duct tape. It will take a week or so to heal, but it won’t be the end of the world.
Likewise, know that LST isn’t something you do once and then you’re done. This technique requires consistent upkeep. The reason for this is that your plant will keep growing regardless of what shape you’ve moulded it into. In time, shoots will grow and leaves will get larger. For this reason, you’ll want to re-adjust your bends once in a while to make sure the canopy stays nicely even.
WHERE AND WHEN TO LST
Some people think LST is for indoor growers only—but this is far from true! Don’t forget, plant training isn’t exactly new, and it began as an outdoor method to boot. If you live in a colder climate such as the UK and other parts of Northern Europe, outdoor LST can be a good way to increase yield during the summer season, even if you’re not blessed with much sunshine. Likewise, LST can also be a helpful tool to keep your outdoor cannabis plants low-profile. A plant that you tied down for a flatter canopy won’t just give you better yields, but will also draw less attention compared to a towering weed plant somewhere out in the wild, just waiting to be discovered!
As for when you should start with LST, the answer here is: as soon as possible. Once your plant is comfortably in its vegetative stage, it will be primed and ready for manipulation. You don’t want to go too early before the plant has established a few good nodes, but you also don’t want to wait around. There is only one time where LST can be genuinely problematic, and this is when your plant is already into full flowering. At this stage, the plant’s stems may be too rigid to bend, and you risk potentially snapping a branch holding your precious buds. This aside, however, you can start LST at pretty much any time during the vegetative phase. The earlier the better.
Can you LST autoflowers? Absolutely!
Autoflowers grow quickly and don’t require a change in light cycle to initiate flowering, meaning they don’t have much time to recover from high stress training methods like topping and defoliation. With LST, however, plants can still benefit from the optimal light exposure, and they won’t need time to recover since it doesn’t cause any real damage. Although the autos of old likely would not hold up well to LST, the new generation is more than capable of handling it.
In fact, LST can be a great way to boost the yield of your autoflowering ladies! Just know that autos will go into flowering after about 4 weeks, so you should have already made up your mind whether you want to LST them or not! Get started as early as possible for best results.
Here are the top 5 strains to utilise the LST method with:
CHOCOLATE HAZE
Chocolate Haze is an absolute treat for the taste buds, with hints of chocolate, sweetness, and earthiness lighting up the tongue when smoked or vaped. The unique terpene profile within the flowers was gifted to this strain via the breeding of parent strains OG Chocolate Thai and Cannalope Haze. Chocolate Haze is a sativa-dominant lady that features 95% sativa genetics and just 5% indica genetics. This results in a potent high that is cerebral, motivating, and very energising. Fuelled by a THC content of 20%, this high takes hold fast, and is often the source of some very interesting and deep conversations.
Chocolate Haze can be grown successfully both indoors and outdoors, and is a strong contender for the LST method. Indoor plants cultivated within grow rooms or tents are capable of rewarding growers with yields of between 475–525g/m². Outdoor plants grown within garden beds or pots are able to produce harvests of up to 500g/plant, and are ready for harvest during late October. Chocolate Haze favours a mild climate and features a flowering time of 9–10 weeks.
Shining Silver Haze is a superb option when it comes to selecting a strain for LST. She is fast to flower and offers powerful highs and fantastic yields to boot. Shining Silver Haze features genetics partially passed down from the world-renowned and legendary Haze, bred with an equally legendary cross of Skunk and Northern Light. This powerful mix of genetics produced a sativa-dominant lady featuring 75% sativa genetics and 25% indica. The flowers of this strain produce a large coat of resin that contains THC levels of around 21%. Smoking a bong bowl or joint loaded with Shining Silver Haze results in a instant and potent high that targets the mind almost entirely, inducing a motivated and creative state. This satisfying effect is coupled with pleasant scents and tastes of sweetness, earthiness, and citrus.
Shining Silver Haze is capable of churning out 600–650g/m² when grown indoors. Her medium height makes her an easy strain to tame using LST. Plants grown outdoors are able to produce harvests of up to 650g/plant, making them an ideal option for getting the most amount of bud out of the available space. Shining Silver Haze has a flowering time of 9–11 weeks, with outdoor plants ready for harvest during late October.
Amnesia Haze was created after Haze genetics arrived within the borders of Holland. Breeders created numerous hybrids, one of which was bred with an old-school Haze, giving rise to Amnesia Haze. This well-known variety is famed for her potency and impressive yields, two factors that make her attractive for LST. She features 70% sativa genetics and 30% indica, a balance that ensures a high that targets both body and mind. Each hit can be felt almost immediately, sending the mind into a creative frenzy whilst relaxing the body and melting the muscles. The flowers of this strain are loaded with terpenes that provide earthy and citrus scents.
Amnesia Haze produces good yields both indoors and outdoors. She is known to grow tall, but LST makes taming her that much easier, promoting more lateral and bushy growth. Plants cultivated indoors produce yields of between 600–650g/m², whereas outdoor plants can pump out massive yields of up to 700g/plant. Amnesia Haze has a flowering time of 10–11 weeks, with outdoor plants ready to harvest during late October.
Royal Haze Automatic is another great candidate for LST, especially for those who want to harvest buds as soon as possible. She is the result of potent parent strains Amnesia Haze, Skunk, and a ruderalis variety, a mix that has created a genetic makeup consisting of 50% sativa genetics, 20% indica, and 30% ruderalis. The strain offers moderate highs that are satisfying but not overwhelming, with THC clocking in at around 15%. The high itself is more mind-oriented, offering cerebral, uplifting, and motivating sensations. She’s a great strain to fire up just before engaging in creative work such as writing or making music. Each hit from a joint or vape is accompanied by aromas and flavours of citrus and herbs.
Royal Haze Automatic explodes from seed to harvest in as little as 10 weeks, making her ideal for growers in search of a fast turnaround. Plants grown indoors yield between 300–350g/m² and grow to small heights, making them even easier to manage using LST. Outdoor plants offer yields of up to 180g/plant, figures which may be exceeded using LST.
Royal Dwarf is an ideal strain for growers dealing with limited space, or those wanting to keep their growing operations as discreet as possible. This tiny variety was created via a breeding project featuring parent strains Skunk and ruderalis. She is an excellent beginner strain in numerous ways. For one, she is very easy to grow and offers beautiful buds within a rapid timeframe. Secondly, her flowers contain a THC content of 13%, ideal for novice smokers who want to start things off gently. Royal Dwarf is slightly sativa-dominant, resulting in highs that are motivating and inspiring.
Royal Dwarf usually reaches heights of between 40–70cm indoors and 50–90cm outdoors. She can be kept even closer to the ground using LST, with a potential increase in yields. Indoor plants usually pump out 150–200g/m², whereas outdoors plants provide 80g/plant. Royal Dwarf is a hardy strain that can comfortably tolerate cold climates.
- Thread starter
- #150
DrCannaCanadian
Well-Known Member
Barrie's Hello Winter 2020
I went down to Johnson's Beach again today to watch the sunset. Unfortunately I had to go alone, because the Mrs has a tiny shard of glasss stuck in her heel - ouch!
It was a bit overcast today, but I still got to see the orange and yellow sunlight against the dark gray clouds - the contrast can really make the colours pop sometimes!
Just before I left, an ice fisherman came strolling out from the bay saying he had a few hits on his line, but nothing took. At only 15 cm (6") thick, I'll let the ice freeze up a bit more before we wander out onto it to do our fishing this year!
Barrie's Hello Winter 2020
Johnson's Beach looking South West across Kempenfelt Bay near dusk.
- Thread starter
- #151
DrCannaCanadian
Well-Known Member
Dagobah Frost Forest
Update
Vegetation - Day 09
Update
Vegetation - Day 09
Hey 420!
I managed to get my hands on two feminized HSO Chemdawg seeds a few days ago.
First, I soaked them for 12 hours in a Star Wars glass, so they would crack open and sink to the bottom.
Dagobah Frost Forest - HSO Chemdawg
Let the seeds soak in water for 12 hours until they crack open and sink to the bottom.
I then put the two seeds into a well rinsed paper towel for 24 hours - at which point they both had small tap roots. The two seeds were then planted, pointy side up, into solo cups of soil.
The first seedling to pop its head up will be called - Chewbacca!
Dagobah Frost Forest - Chewbacca
Chemdawg - Fox Farm Ocean Forest Soil - Veg Day 09
So, at this point, we have:
2 FEM Peyote WiFi - Mostly Indica
3 REG Tangie Cookies - Mostly Sativa
2 FEM Chemdawg - Mostly Sativa
We will need to wait a few more weeks before we can tell if any of our Tangie Cookies are male, so we can collect some pollen!
- Thread starter
- #152
DrCannaCanadian
Well-Known Member
Daily Tips & Tricks
By Royal Queen Seeds
7 Cannabis Training Mistakes To Avoid
By Royal Queen Seeds
7 Cannabis Training Mistakes To Avoid
Being aware of these 7 cannabis training mistakes will ensure you have a trouble-free grow and get the best from your genetics. Cannabis loves to be trained, but only by those with the care and finesse to do it right.

Training cannabis plants is a great way to encourage more bud sites and bigger yields. Cannabis responds well, in fact vibrantly, to being trained. Indoors and outdoors, a number of training methods are proven to improve the overall performance of cannabis.
There is no doubt that cannabis is a hardy plant. However, it is not so hardy as to instantly recover from misplaced over-enthusiasm. Plants will eventually recover under most circumstances, but can end up stunted or extending vegetation time significantly. Without a specific time frame, cannabis will recover from the cruellest of attention. But who wants to wait weeks more for lower-quality buds?
Avoiding these training mistakes will ensure you get the quality you are after, in the time frame you want.
1. NOT TRAINING
Not training plants at all is the first mistake most inexperienced growers make. Indoor grow spaces are most often limited, and not training means not optimising the production capabilities of any space. Even smaller autoflowering varieties respond well to even light distribution over a tied-down canopy.
The screen of green training technique places a metal or plastic screen over the plant canopy. New growth is tucked under the screen to form an even sheet of weed that receives equally intense light exposure. During the flowering phase, emerging colas are arranged evenly for maximum light and air circulation. Only choose this technique if you have the time to spend with your plants, as it can be labour-intensive.
Topping too early and placing the screen too close to the growing medium are an invitation to diseases. Plants need to have good air circulation below the canopy and at the surface of the growing medium.
Not using the screen enough defeats the purpose of this technique. All growth needs to be kept at screen level until at least the second week of flowering. A good knowledge of how plants respond to being topped is essential. If plants simply have a screen placed over them, but aren’t manipulated to suit, then there is simply a grow space with a screen getting in the way.
3. WHOOPS! SNAPPED BRANCHES
Snapped branches and training too early (before plants are strong enough) are the most common mistakes made by growers. Snapped branches can be splinted and taped back together, but the recovery time is extensive, while plants that are still too young for training can become stunted as they are not yet strong enough to respond with vigour. Let plants grow to the sixth node before attempting training methods. Take it gently yet firmly, and get the timing right.
Mainlining involves topping a plant a number of times, then undershucking the branches so only main colas are grown. Branches are tied into positions to maximise light and air distribution.
Topping too early, then too often, is a common mistake when mainlining. Too early, and plants take longer to recover, then new growth is too close to the grow medium, preventing air circulation and risking disease. Then, when aiming for 16 or more colas, branches need to grow enough before being topped again so the plant volume doesn’t become overcrowded. Topping all new growth successively will create a slow-growing, poorly structured plant.
A good rule of thumb for a well-distributed plant is to wait to top again until you have the same number of nodes as what number topping it is. After the first top, let two nodes grow before the second top, then let three nodes grow before the third top, then let four nodes grow before the fourth top. This way, plants won’t fight for space and will remain vigorous at each topping.
5. FORGETTING THE “LOW” IN LST
Low-stress training techniques expose as much leaf surface area to light, then as much bud surface area to light as practical in any grow space. Branches are bent and tied into position to optimise light penetration. At its simplest, it can involve bending a young plant over; at its most complex, it can be a large ScrOG.
Low-stress training techniques require plants to be handled often. Disrespect the natural tolerance of cannabis and it will break for sure. Every grower at some point has cringed to the telltale crunch of a branch snapping through, then painstakingly repaired the injury while trying not to break any more branches. Be confident but gentle—the difference between bent and broken is tiny, especially with strains that have a crispier and stiffer texture.
Defoliation is the select removal of leaves at specific stages of growth in order to enhance plant performance. During vegetation, the increased light penetration into the understory of the plant increases overall growth. Then, in the early budding phase, removal of leaves stimulates growth in the flowering part of the plant.
Be sure to remove the right type of leaves when defoliating. Only remove fan leaves—not sugar leaves. Fan leaves are the large ones that form at a branch; sugar leaves, on the other hand, are part of the bud structure. Removing the wrong leaves is one step forward and two steps back.
Taking off too many leaves makes for a long recovery time. Beginners should start off gently, and then let experience make them more cavalier. If time was no problem, cannabis could recuperate from an utter stripping, and will even force new growth through bare trunks and branches. But it takes a long time, so don’t despair when things are overdone, just a bit of patience is required.
Make sure plants are full-on vegetating before removing leaves. If plants are too young, they will simply be damaged. As a very general rule, if the new growth does not look robust enough to support itself without the sustenance from the adjacent fan leaf, leave the leaf on. When fan leaves are taken off too early, the plant will consider the emerging branch a dud, and it will end up stunted as the plant concentrates energy somewhere closer to the light. As a result, a potential flower site is lost.
The medium in which plants are grown can affect response rates in trained plants. Things are pretty much equal with LST techniques, but plants in DWC or hydro respond quicker to harsher treatment than organic soil grows. Soil still benefits from the extra growth, only over a slightly longer time—but a bit of patience never hurt anyone. Depending on the variables of your grow, training techniques will ultimately result in a spectrum of different recovery periods. It all comes down to watching and “listening” to your plants, giving them the time and space they need to recover after being bent, bruised, and manhandled.
Fruity pebbles will do fine.Hand waves across screen emitting Jedi mind tricks.
- Thread starter
- #154
DrCannaCanadian
Well-Known Member
Daily Tips & Tricks
By Royal Queen Seeds
Top 10 biggest mistakes made by cannabis growers
There is an art to the science of growing cannabis herb. Cannabis is a hearty plant, hence the nickname "weed."By Royal Queen Seeds
Top 10 biggest mistakes made by cannabis growers

KEEP IT PRIVATE
Growing herb is a private endeavor that should be conducted in a "need to know basis." Once the grower shares their secret, it can open a Pandora's Box of unnecessary drama.
Remember, growing herb is a two to three month endeavor, and a commitment to finish the project that begins with the sowing of that seed. The best way to protect the crop and oneself is to just keep it private.
Planting unknown seeds will bring unknown results. While it may be a fun experiment to grow a few seeds from a particularly tasty bud, it's best to know exactly what one is investing their time, energy, and resources into.
Royal Queen seeds are meticulously prepared to produce a dependable crop of the highest quality herb. Royal Queen seeds are feminized and 99.9% guaranteed to produce female plants with hearty buds. They come with detailed instructions for growing each particular seed strain according to the requirements of its genetic heritage.
Growers who work with Royal Queen seeds know exactly what to expect in terms of THC and CBD contents and can plan their crop to prepare for the height and aromas of their chosen varieties. They know the length of time that it will take for their crop to sprout, flower, and when to harvest.
This knowledge is essential for the grower, who can plan their crop with confidence, knowing where to plant taller and longer growing strains as well as shorter and quicker crops. If the plants will produce a "skunky" aroma in the garden, they will require more protection, with filtering systems for indoor settings and thoughtful placement in an outdoor setting.
TOUCH/KILL DANGER
It's best to start the seeds in their growing medium as opposed to sprouting them with paper towels that will require moving the tender seedlings into their medium.
Propagated plants put the grower at risk of introducing pests and diseases into their crop, and should be used with caution.
TIMING THE GROWTH CYCLE
Sowing the seeds in the first week of June provides the plants the perfect amount of time to complete their growing cycle in the least amount of time while producing the maximum harvest. After the summer solstice, the days start becoming shorter. This induces the plants to move into their flowering and budding stages without unnecessary excessive height growth. Indoor growing environments should mimic this example.
GROWING CULTURE
Cannabis plants are arid drought-resistant plants that require good air circulation, good drainage and suffer from too much water and food. In outdoor situations, sandy loam soil is optimal. They should be watered when the top two to three inches of soil are dry. A well-constructed hydroponic system will be less inclined to over-watering, as they are designed to provide good drainage. These plants grow best in full sun with temperatures between 24-27 degrees, and humidity of 30-70%.
FEEDING THE PLANTS
Organically grown cannabis plants taste and burn better, but time-released fertilizer is acceptable. Start with a 25% dilution and gradually increase the potency of the food. If the leaves curl or show other signs of malformation, flood the plants and spray the leaves with water.
Once the pistils start turning from white to brown, the grower can start picking them. Resist the temptation to harvest the plant until the pistils are mostly brown. Hang the plants upside down in a dark room with good air circulation until the stems are completely dry, then pick the buds, and begin the curing process.
- Thread starter
- #155
DrCannaCanadian
Well-Known Member
Fruity pebbles will do fine.Hand waves across screen emitting Jedi mind tricks.
I'm going to go get my canna brownie, then head over to the FAQ section again.
What are you up to tonight @BeanTownFan420 ?
- Thread starter
- #156
DrCannaCanadian
Well-Known Member
Strain Information

Humboldt Seed Organization - Chemdawg

Gotta Love the Primary cola!
DescriptionHumboldt Seed Organization - Chemdawg
Gotta Love the Primary cola!
Chemdawg has developed an incredible reputation in the US where it is said to be the male parent line of OG Kush, Sour Diesel and Headband. It is a sativa-dominant strain that exudes a powerful perfume which combines the aromas of pineapple with diesel/petrol.
Chemdawg boasts a particularly powerful effect, which is not recommended for novices, with THC levels that consistently achieve the figure of 20%. Indoors it will be ready to crop in just 9 weeks of flowering whereas outdoors harvest time will be the beginning of October.
- Thread starter
- #157
DrCannaCanadian
Well-Known Member
Daily Tips & Tricks
By Royal Queen Seeds
SOG & ScrOG - Cannabis Training Techniques For Heavier Yields
By Royal Queen Seeds
SOG & ScrOG - Cannabis Training Techniques For Heavier Yields
PLANT HEALTH COMES FIRST
Any training technique combined with any growing method or substrate in the first place requires happy and thriving plants. Incorporating best practice plant care means vigorous and healthy plants at each stage of growth. There are a number of growing techniques that can be used to maximise space efficiency during growth and to increase harvests. However, no technique will help if plants aren’t vibrantly full of life to begin with.
Maintaining healthy plants means the grow environment must be ideal for cannabis growth. This includes grow medium and pot size, light type and strength, water pH, nutrients and feeding schedules, temperature and humidity. Once each of these factors is dialled in, healthy plants are yours to do with as you please. And then there are a number of low-stress training (LST) techniques used to increase yields.
Two popular methods of low-stress training that increase yield are sea of green (SOG) and screen of green (ScrOG). Each technique is used very successfully to maximise yield per square metre. Autocorrect might hate them, but cannabis plants love SOG and ScrOG.
SOG
Sea of green is a cannabis manipulation technique that utilises many small plants in small pots for every square metre of space. The advantage of growing with this method is plants spend less time in vegetation, while still producing as many bud sites per volume of space. With SOG grows, buds are ready sooner, which can result in an extra crop per year.
SCROG
Screen of green is a plant training method with the same goals as SOG—to increase the yield per square metre at harvest time as much as possible. Larger pots are used to accommodate larger root zones for larger plants. Many flower sights are encouraged by bending and holding new growth horizontally. Even light distribution over a literal screen of green fills an entire grow room with fewer plants that have an abundance of homogeneously sized flowers.
SOG: Plants with few lateral branches are encouraged to grow a single predominant cola. Plants don’t require training and require little attention besides regular plant upkeep. Less time is spent per week training—as you would with larger plants—for similar end results.
ScrOG: This entails a mesh screen with large enough apertures through which to feed cannabis leaves and branches. This can be made from commercial fencing wire or a plastic trellis, or made from wire or string and fixed to a frame. The purpose of the screen is to continually tuck under new growth into a flat sheet. What would have been undeveloped lateral branches with barely developed buds become healthy, stout branches with plenty of light exposure and their own dense flowers.
EFFICIENT USE OF SPACE
SOG and ScrOG are ideal for growers with space restrictions, as minimal height is required and every square centimetre of floor area gets used efficiently. There is no need for as much grow space volume as there would be for an untrained plant to get just as heavy a yield. SOG produces large individual buds with no popcorn or poorly formed flowers due to lack of light.
Typically, the SOG technique encourages apical dominance to strengthen and enlarge the main flower cluster. The ScrOG method, however, discourages apical dominance to promote many similarly sized flower clusters.
Strain selection plays its part for efficient use of space.
SOG: Cultivars that tend to naturally produce a dominant central cola with minimal lateral branching are often used. Indicas and indica-dominant hybrids have this feature as part of their morphology. Once plants are of a certain height, usually 20–30cm tall, the 12-12 flip to the bloom cycle is made. Plants develop almost entirely as a single cola with lateral branches being reduced to single buds. Some individuals will initiate the entire grow starting from 12-12 so that only small plants develop.
ScrOG: Cultivars that naturally produce lots of bud sites take well to this technique. Sativas or sativa-dominant strains that have a lot of nodes have this feature as part of their morphology. These normally tall and branchy strains, whose lower buds may not develop fully if left to grow untrained, get light exposure to all the bud sites, which encourages larger bud growth. It isn’t absolutely necessary to grow sativas this way, as indicas respond just as well.
CONSIDER THE POT
Using the right pots for your SOG or ScrOG garden is super important to ensure the health of your plants and the best possible yields. As a general rule of thumb, you’ll never want to grow using pots of less than 3–4 litres, but keep reading for a more detailed look at what pots to use for SOG and SCROG.
SOG: Remember, when using SOG, you’ll be growing between 9–12 plants per m². For best results, you’ll need to make sure each one of these plants has enough soil to develop a healthy root system, and keep the plant from toppling over once it grows.
When growing 9–12 plants per m², you’ll be restricted to using pots with a diameter of between 20–30cm, which typically have a capacity of 7–11 litres. Using pots of this size is fine, but keep in mind that you’ll only be able to veg your clones for about 8 weeks without them becoming rootbound and stressed from the lack of space. If you want to keep your plants vegging for longer, you’ll need to invest in larger pots.
Some growers raise up to 25 plants per m² using SOG. When doing so, they cut down the time their plants veg, meaning they’ll harvest quicker. For such a high plant density, however, you’ll have to use smaller pots of about 5 litres.
SCROG: When growing with the ScrOG method, you have a bit more flexibility regarding the number of plants you choose to grow. If you plan to grow a single plant per m², you’ll need to use a pot of at least 20l. If you want to cut down the time it takes for you to harvest, you could grow 4 plants per m², with each plant growing in a 10l pot.
With ScrOG, there is really no firm rule on how many plants you can grow per m². It really depends on your goals, budget, and the amount of time you’re willing to dedicate to each harvest. Remember, no matter what grow technique you use, you’ll always want to give your plants as much room to grow as possible.
SOG: More vigorous varieties or branchy cultivars like sativas and sativa-dominant hybrids, whose lateral branching may crowd the space too much, have their lower branches removed to encourage a thicker, more developed main bud and to increase light penetration into the whole grow. This also promotes healthy air circulation around the complete plant and the top of the growing medium.
ScrOG: Plants are topped early to promote branch growth, ready for training in several directions to fill the whole screen. Growth is encouraged above the screen only, and any vegetation below the screen is trimmed away as it will receive minimal light. This way, a plenum is developed below the screen to ensure air circulation encompasses the whole plant and the grow medium surface.
In both instances, transpiration from leaf surfaces and evaporation from the medium will always play their important roles in plant health.
IN THE END, IT'S ALL GOOD
Both of these low-stress training techniques have proven to be very successful for the domestic and commercial cannabis grower. They each have their advantages and make the most of the grow space on offer. Experimenting with both of these techniques will let you decide which one best suits your style.
- Thread starter
- #158
DrCannaCanadian
Well-Known Member
Daily Tips & Tricks
By Royal Queen Seeds
Growing Cannabis Indoors
If you’re interested in growing cannabis, but don’t have experience with it, you may think that it would be rather difficult. Don’t despair! Even though growing cannabis may present some challenges, if you know about some growing basics and how to avoid common mistakes, it can be much easier than you thought!By Royal Queen Seeds
Growing Cannabis Indoors

Our guide for indoor growing will help you get started on your cultivation journey. Once you learn the basics of growing successfully, a bountiful harvest will be just around the corner!
There are nine main elements to growing your plants. These elements are your grow room, your grow lights, the growing medium you use, the plant containers, nutrients, watering, the correct pH levels, air, and controlling/monitoring your grow. We will look at each of these in a bit. Before we do, let’s talk about another essential aspect of growing cannabis, how to successfully germinate your seeds.
Every grow starts out with germinating seeds. You can find plenty of information on the “best ways” to germinate, but let’s keep it simple! The least risky, easiest way is to germinate your sensitive seedlings right in soil.
To germinate your seeds, plant them about one centimetre (0.5") deep into firmly packed and moist soil. A moderate temperature of 20-25°C is optimal. (Other germination methods like the “paper towel method” or germinating seeds in a glass of water all carry certain risks for your seedlings, so we won’t recommend these here in this guide).
Once you have planted your seeds, keep the soil moist and don’t allow it to dry out. However, also make sure not to overwater.
The quality of your seeds can also play a role in optimal germination rates. Quality cannabis seeds like those from Royal Queen Seeds have the best germination rates and they usually sprout within two days from planting.
Some recommended strains if you're just starting out with indoor growing:
Royal Creamatic is an indica-dominant hybrid (60% indica) with a sweet maple-like scent and a great candy flavour.
Royal Dwarf is a compact and quick growing sativa-dominant hybrid (60% sativa) that delivers a potent, Skunky high.
Both strains are autoflowering and well-suited to beginners!
THE MAIN ELEMENTS FOR GROWING CANNABIS INDOORS
GROW ROOM
Your “Grow Room” could be a dedicated room in your home, but it can also be any suitable space. This includes a closet or a corner in your basement, or a grow tent. Growers have a lot of choices today with grow stores offering tents in all sizes. Before you plan on buying a grow space or tent however, consider how many plants you want to grow. Fewer plants are easier to handle. Should you ever run into a problem from pests or something else, any loss will be lighter on your wallet than if you were to lose an entire large crop.
A smaller grow space will also have lighter (and cheaper!) requirements for your grow lights, fans and other equipment. Just take into account that the space should provide your desired number of plants with plenty of space so they can grow.
GROW LIGHTS
The type and quality of your lights are perhaps the most important considerations for successful growing. Your lights are not an area where you want to pinch pennies or cut corners. Growers have an overwhelming variety of light options to choose from today, which doesn’t exactly help with finding the right one. Here are some of the most common grow lights.
HID Grow Lights
HID (high intensity discharge) grow lights are still widely used because they are very efficient and provide a good value. The most common HID grow lights are MH (metal halide) lights, which are used for the vegetative growing phase. HPS (high pressure sodium) lights give off a more reddish light, which is optimal for flowering.
LED Grow Lights
Among the other types of grow lights that are becoming increasingly popular are LED grow lights. LEDs have several advantages over other types of lights. They are now very efficient and use far less electricity as compared to HID lights. Their disadvantage is that they can cost a lot more. Know that the market is currently flooded with low-quality LEDs, so getting a good one will require some research or the advice of experienced growers.
There are several unique cultivation methods that use different types of growing mediums, such as hydroponics, aeroponics, or growing in coco. In this guide, however, we will stick with the traditional and easy way of growing weed in soil. Growing in soil has advantages for less experienced growers since it can be more forgiving with common mistakes.
On the other hand, there are vast differences in the quality and makeup of potting mixes (soil) that you should know about. Most good-quality potting mixes are essentially suitable for cannabis, but you should avoid those which contain so called “extended release fertilisers” like Miracle Grow.
Almost all widely available potting mixes come pre-fertilised, but these nutrients won’t usually last for the entire duration of a grow. As a rule of thumb, you can expect the nutrients in a commercial potting mix to last about 3-4 weeks (usually covering the vegetative phase of your plants), which means that you should start giving additional nutrients as soon as flowering starts.
Some more experienced cultivars like to make their own organic potting mixes, so called “super-soils,” where they add all types of beneficial ingredients like worm castings, bat guano and other things for optimal growth.
WHAT CONTAINERS TO USE
You can find all types of containers for growing, from the most simple plastic containers and fabric “grow bags” and “smart pots,” to fancy self-watering pots. But when it comes to choosing standard pots, there is really not much to it, except that you want the right size for your plants. It can be a good idea if you start out with 20L pots. What’s important is that the pots provide adequate drainage. This is why pots will normally have holes at the bottom. Some pots may require you to break out these holes first before you use them. Tip: Rectangular flower pots are particularly well-suited for indoor growing in tight spaces!
Unless you are using a pre-fertilised, organic potting mix that covers the entire duration of a grow, you will at some point have to feed your plants with nutrients. Cannabis nutrients are available as liquids or in powder form. You add these nutrients according to specific instructions when you water your plants.
What’s important to know is that cannabis nutrients are normally available separately for the vegetative grow phase and then for the bloom/flowering phase. This is because cannabis has different nutrient requirements depending on the stage of growth. Most of the time for your grow, you will have at least two bottles and possibly more depending on the micronutrient regimen of your crop.
Nutrient burn and other growing troubles from too many nutrients are very typical among less experienced growers. To avoid overfeeding, you should start with half the recommended dosage. Otherwise, stick to the instructions for your brand of nutrients while understanding that the makers of these products normally tend to recommend too much - after all, they make money from selling you their stuff!
For seedlings, you should not feed at all for 2-3 weeks and only start giving light doses of nutrients once they have their 3rd set of real leaves. Overfeeding seedlings is a very common first time grower mistake!
WATERING
Watering your cannabis plants right may sound like the easiest thing, but many new cultivars do this improperly!
Rather than watering your plants lightly but frequently, it is better to water them less often, but well. When you water, water them thoroughly so that the entire soil is saturated, until water drains out from the bottom of the container. Wait between watering and allow the soil to dry out again. (A good way to check this is by weight if you lift your pots up). It is much better for your plants to be slightly wilting than to overwater them! Overwatering is one of the most common reasons for all sorts of growing troubles!
THE CORRECT pH LEVEL
Watering your plants (and feeding them) is not everything. Almost equally important is maintaining the right pH level of your water or nutrient solution. This is because cannabis can only take in nutrients when the pH level is right. For growing in soil, the pH for your water should be between 6.0 to 7.0. Use pH measuring drops or a pH meter to check the levels of your water. Increase or decrease the pH level accordingly with “pH down” or “pH up” products. You can also use lemon juice.
AIR
Cannabis needs air for optimal growth. Some experienced growers may have elaborate systems in place to provide their plants with CO₂ and to get rid of odours. But we don’t need to go there yet. A simple fan can be all that you need to start. A gentle breeze of air can help to keep temperatures in check, prevent mould and keep insects at bay. Furthermore, a constant but slight breeze over your plants can make them grow stronger stems and branches.
CONTROLLING AND MONITORING YOUR GROW
We’re almost there, having set up an optimal environment for our cannabis plants! We have a nice grow room or tent, we hooked up a light and a fan. We got all the nutrients and then of course, some quality seeds that are just waiting to grow!
What’s left to do is to control and monitor our grow for best results.
The one thing that you definitely want to control is the ratio of light exposure your plants receive. This involves manually regulating the light/dark cycles of your grow lights. As a new grower, you will likely choose autoflowering cannabis strains where the light cycles are not important yet. So set your grow lights on a timer to provide your autoflowering plants 18 hours of light per each 24-hour period.
For advanced growing, such as when you grow non-autoflowering strains that rely on the light cycles for their vegetative and flowering period, you would also control these using your timer. In this case, you would initiate flowering once you switch your lights to a 12-hour darkness cycle per each 24-hour period.
Once you understand these fundamental elements of indoor growing, you can look forward to a bountiful harvest in no time. As a final tip, don’t let some growing setbacks ever discourage you from trying again. After all, this is the way you learn to become a master cannabis grower! Know that no one is born a pro and that all of us were new to growing at some point. Good luck and happy indoor growing!
Once you get your feet wet and are eager to learn more, visit our blog for other helpful articles on cannabis growing techniques.
- Thread starter
- #159
DrCannaCanadian
Well-Known Member
DrCC's How To Ask For Grow Support

Version 02
Version 02
Pictures
Pictures should be taken under white light - Blurple is too difficult to diagnose.
Pictures should be clear and not blurred.
Please provide a group pic of your plants.
Please provide a top to bottom pic of your plant.
Please provide a close up of fan leaves with issues.
Plants
What Strain is it?
Is it Indica, Sativa or Hybrid? What percentages?
How Many Plants?
Is it in Vegetative or Flowering Stage?
If in Vegetative Stage... How Long?
If in Flowering Stage... How Long?
Location
Indoor?Outdoor?Green house?
Grow Room
Room? Closet? Tent
Dimensions - Length x Width x Height?
Is is light proof? Pitch black?
Grow Environment
Is it Air Conditioned?
Temperature of Room/Cabinet?
Is there a humidifier/dehumidifier?
RH of Room/Cabinet?
Air
Fans for exhaust?
Fans for air circulation?
Are you adding CO2?
Grow Lights
HID or LED?
Size (Wattage) of Light? How Many?
How far above the canopy are the lights?
What is your schedule? 20-4? 18-6?
Sunlight
How many daylight hours currently?
Grow Medium
Soil/Coco/Peat or Hydro?
If Hydro, Reservoir size?
If Hydro, Reservoir Temperature?
If Hydro, what type of Medium?
If Hydro, what type of Setup?
If Soil/Coco/Peat... What is in your Mix?
Containers
If Soil/Coco/Peat... What Size Pot?
If Soil/Coco/Peat... Fabric or plastic?
If Soil/Coco/Peat... When was the last time you up-potted your plants?
Water
pH of Medium or Reservoir?
TDS of Medium or Reservoir?
How Often are you Watering? Feeding?
Do you flush your plants regularly to remove salts and debris?
Nutrients
Type and Strength of Fertilizers used?
Are you following the nutrient line's feeding schedule?
Pests
Any Pests?
Have you used a jewelers loupe to check for bugs and bug larvae?
Controlling And Monitoring Your Grow
Temperature controllers?
Humidity controllers?
CO2 controllers?
Temperature/Humidity sensors?
Jewelers loupe /microscope for checking trichomes?
This information is necessary for accurate support to be given.
- Thread starter
- #160
DrCannaCanadian
Well-Known Member
Daily Tips & Tricks
By Royal Queen Seeds
Growing Cannabis With The ScrOG (Screen Of Green) Method
By Royal Queen Seeds
Growing Cannabis With The ScrOG (Screen Of Green) Method
Getting optimal yields from your indoor marijuana garden requires a different approach than what is commonly used outdoors, and the Screen Of Green (SCROG) method is an ideal way to maximize the amount of canopy that receives light from your high-intensity discharge lamps.

The Sea of Green (SOG) has been popular for years, and the SCROG method relies on the same features, but growers add a screen that can maximize light exposure. Screens can be as simple as chicken wire or nylon netting that allows you to hold back the tops of the growing canopy. Ideally, the screen should have holes with a 5-cm diameter.
Screens should be kept as close to your lights as possible, and you can train your plants' tops to increase the number of marijuana buds that have access to light. Screens are kept between the growing medium and your favorite Cannabis plants. Generally, marijuana gardeners put one plant for every 30 square centimeters of screen. If you're not sure, it's better to use less plants rather than more. You can grow all of our marijuana strains with the SCROG method, and it works just as good with Indicas as it does with Sativas. Because Cannabis Sativa has a tendency to stretch during the first few weeks of flowering, the plants are an ideal option, and you can use the screen to keep the total height of your indoor marijuana garden down, making sure that your buds do not burn under intense indoor lights.
VEGETATIVE MARIJUANA GROWTH WITH SCROG
Knowing the way that your marijuana plants will grow is crucial to getting optimal yields with the SCROG method. If you're growing one of our outstanding Cannabis Sativa strains, like our Sour Diesel, you may want to keep your plants in the vegetative stage for a few weeks. Because Cannabis Indica varieties, like our Special Kush, will not stretch much during flowering, you can keep them in the vegetative stage for a longer period of time.
The main concept behind the SCROG method is that instead of growing a single top bud, you can grow multiple colas under your light. As your plants grow through the screen, you simply pull them back down and tie the branches to the screen. This creates more budding sites and allows you to maximize your indoor marijuana harvest. Plants can easily be tied down with plastic ties, and you can guide the branches to the empty sections of your screen. As the plants grow, they will branch out, and you'll get a crop of massive buds that have access to the light on which they thrive. Keep in mind that you'll probably see more branches when you turn your lights back to 12 hours of darkness and start the flowering period.
TRIMMING LEAVES
Because the SCROG method attempts to create more budding sites, removing the larger fan leaves allows your buds to get more energy, so you can harvest dense buds that are coated with trichomes. It's essential to keep in mind that the plants depend on sun leaves for energy, and you may want to be sure that you don't remove too many of the larger leaves.
PROPER AIR CIRCULATION
While growing Cannabis with the SCROG method, you'll have a thicker canopy, so optimal air circulation is crucial. You can also find some of our Cannabis strains that are mold resistant, so you don't need to be concerned about the increased humidity. If you're growing your indoor marijuana garden in a tent, having an air-cooled lamp is the best way to keep temperatures and humidity in the proper ranges.
STRAINS SUITED TO SCROG
GREEN GELATO
Green Gelato is one of those strains that is spoken about with longing amongst cannabis growers and connoisseurs. Growers enjoy the ease of maintenance and the thrill of watching dense nuggets form as the 12-12 progresses. Striking purples and mauves develop as the fragrances reach their tell-tale Kush, mint biscuit, and fruity dessert crescendo. Green Gelato is certainly the most flavoursome way to introduce a far-out 25%+ THC into your system. In combination with a unique terpene profile, this strain will whisk your brain away and give your muscles a case of the jellies.
A slight indica dominance gives Green Gelato a number of characteristics that take well to the ScrOG. A high flower-to-leaf ratio means more light exposure to nuggets as there is minimal shading by excessive leaf production. Minimal leaf production also means less need for time-consuming under-shucking. Tight flower clusters form at each node, rather than forming long colas, which creates an evenly exposed canopy of homogeneous buds. Lower flowers that might otherwise be small on an untrained plant are given the opportunity for maximum growth.
OG Kush quickly became a much sought-after strain the moment it was introduced in the US. Then, it wasn’t long until it found equal appreciation in the global cannabis scene. The fragrance, look, potency, and palate of this plant continues to thrill cannabis fans on every continent. Striking citrus top notes predominate over gentler sweets and sours, and an enjoyable aftertaste lingers long after spliffs are finished—extracts are a pure flavour sensation. Euphoria and
mental clarity with a bone-deep physical effect make it a favourite for recreational and therapeutic use.
The healthy stretch between nodes of OG Kush makes it an apt selection for the ScrOG. Topping a number of times and exchanging apical dominance for area allows buds at each site to reach their full potential, creating a carpet of Kush with enough distance between nuggets to prevent shading and allow airflow. Cannabis in general responds with vigour to training, and OG Kush is no exception, producing evenly-sized and equally dense flowers across the whole light footprint. OG Kush delivers great yields for a plant that is so undemanding to grow.
Similar threads
- Replies
- 9K
- Views
- 314K
- Replies
- 1K
- Views
- 37K
- Replies
- 165
- Views
- 11K
- Replies
- 9
- Views
- 850
- Replies
- 153
- Views
- 4K