StonedGypsy's First Farming Foray!

Just a quicky update for some 3D printed garden parts.

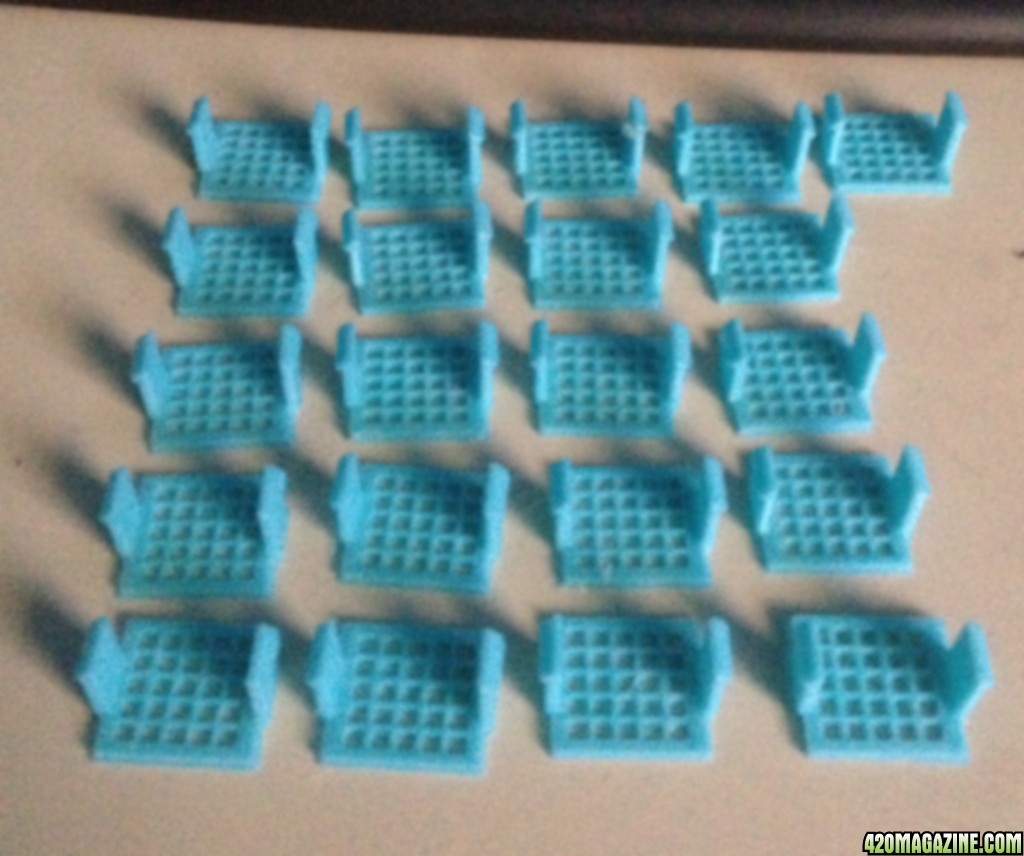
I had some 10" pots with 4 giant holes in each, so I wanted to use them but not lose my soil with the RO, so I designed drain screens ;)

Cheers and thanx for checking out my journal!

drain_screens.jpg


Here they are in place

IMG_0396_1_2.JPG
 
An update finally! Day 36 OTF:

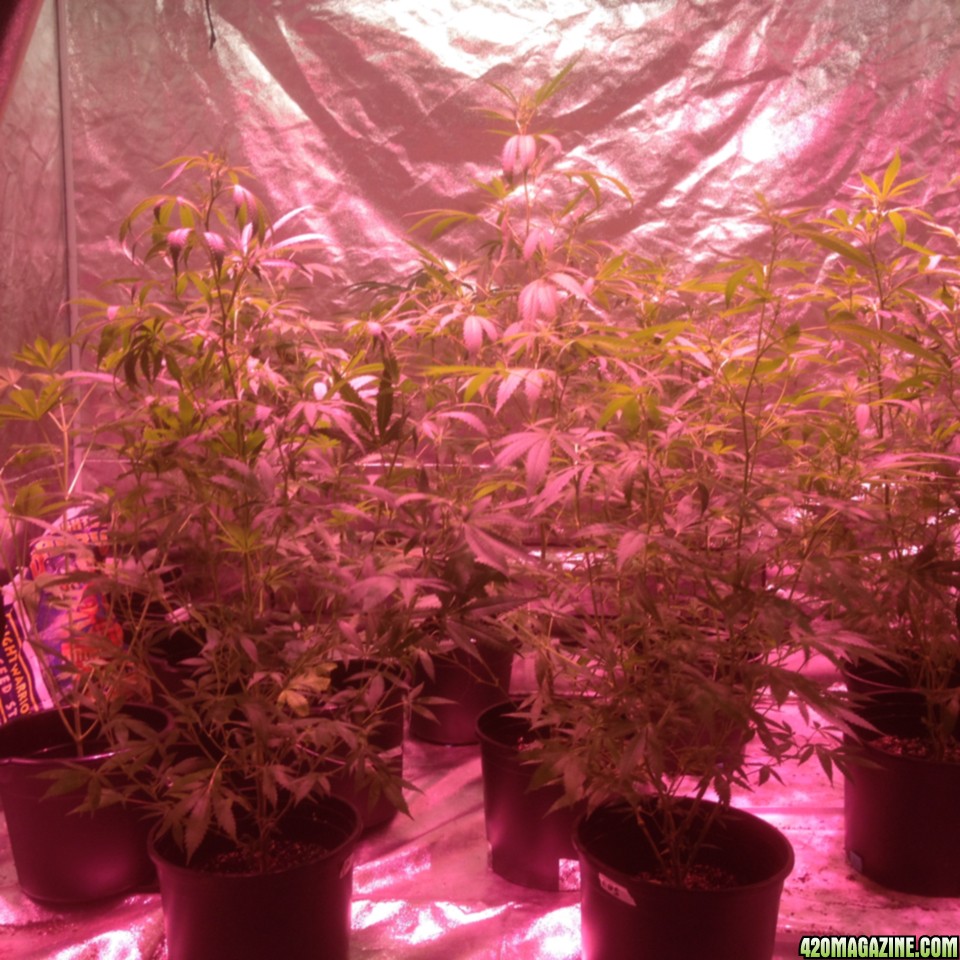
I transplanted all the babies to some buckets I got from Dollar Tree, same size as other HD pots I used but I drilled 4 much smaller holes in the bottom so no need for screen plugs. I wish I would have went there first before wasting the funds on HD Doh! Lately I am tempted to LST but I like the way they look and they seem to be spreading out slightly on their own so it will wait. They are all about 2 1/2 ft tall now except the GreenCrack is about 6" shorter but bushier. I may have 1 or 2 male babies, watching the situation daily as to be absolutely sure before I make any decisions, should be more definite signs by next week. I have increased the nutes to 3 tsp ea. Micro, Grow, Bloom for a balanced aggressive growth mix to use every other feed.
TEMP- 74~80 RH- 55~68 pH- 6.6~7.0 18/6 daily rainwater mist

Thats all folks! TC and Peace!

IMG_039941.JPG


IMG_039746.JPG
 
Hi all,

Update time.... Day 48 OTF

All growing good no health issues, some faster than others. I tried moving them around in the lights but hardly any difference. The suspect male turned out not to be so theres that and I think Day 60 will be flip day for all no matter what the size or condition. A wizard friend has told me I will need to tie them up down the road. i plan on spreading them out and getting rid of the cloning table and chair, then spreading the lights a bit and adding the 6500K CFLs. I also tested the solar/battery powered 2000w inverter to power the whole tent....I managed to run for 2 hours on 2 smaller 12v 150a Tractor batteries in parallel. I will add 2 larger Deep Cycle to the bank and 3 more 15w panels on the roof and then we may have a total solar power indoor grow, so then more of the automation fun can continue!. Here are some pics of the teens & welcome to my jungle!

Peace, Cheers and much respect!

IMG_042041.JPG


Here is the trim mulch mash for the Cannabsynth distillation, More on natural fermenting/CO2 generator soon!

IMG_041939.JPG

IMG_041843.JPG

IMG_041747.JPG


Lollipop Thai Plant in corner, 1 big cola and 4 little fluxxers around the base...Dr. Moreau would be proud

IMG_041542.JPG
 
OOO Yeh another update! Thats 2 inna row now, dang!

Update: Cannabsynth production started! I'm stoked....

I decided to get out my distillation rig and start up some sweet mash using the overveg from 10 plants...Heres how I did it!

I dried out all the veg material thoroughly and crumbled it some to put in a gallon milk bottle. I covered the material up with spring water and capped it air tight, then agitate for a minute or so. Open cap to let any pressure out! Then I let the water come to the 80F temp in the tent before adding 3/4lb. Domino Cane Sugar, agitate again to mix good. I added the fermenting supplements/tools listed in the pics. YMMV at getting them locally (Hint try a home brewing store). Then I added the beast yeast Turbo 24 hour 14%FPV, so at this lower temp it will take maybe 3-4 days not 1, and capped it with bubbler. The mash will give off copius amounts of CO2 for those days, which I think the girls will love! So win win I must say!

Now the pics of it, TC and Peace!

IMG_042241.JPG

IMG_042631.JPG

IMG_042443.JPG


You can see pics of my still in earlier post here or in my personal photo gallery! Cost is very cheap < $50 and not dangerous at all! (Hint: Uses electric hot plate) if instructions are followed correctly. I aim to make some real nice oil without any harmful solvents, and if it tastes good you can dilute it some and have a shot of "Tonic" as Granny Smith would call it! I plan on doing just that myself!
 
Wow! That's awesome! Sure did fill that space up nicely. Can't wait to go indoors. My lil ones are suffering from lack of light and Rain, rain, rain.... Lol. Looks like us newbies might get a decent harvest!

Peaceful blazing... ��

Thanks for the reply, I'm so trying to do it all correctly so I can get that big harvest of multi-colors we all want so bad. We'll see how I do.
 
Update: Cannabsynth finished!!

Well I did it...It turned out to be 60 proof and smells like sweet tea, even tastes somewhat like it too. It is sweet and mellow with a tiny light green hue that hits your throat after you have swallowed. Right decent liquor that will get better after it rests for a bit in the cool fruit cellar. I only got 1 pint from a gallon of mash so thats about right for any run I have done, but I usually get 100 proof from corn (more plant sugar to start with) I can't wait to try a shot this weekend!
Cheers with Tonic even!

IMG_0429_1_1.JPG

IMG_0428_1_1.JPG
 
Update for light flipping: Day 56 OTF

OK so I think I should flip them now, thats what the little voices in my head are telling me anyways. So BAM its a done deal! I started them off yesterday with an added 2 tbsp dose of Flora Nova Bloom along with the usual food! I need to go get those warm white CFL tubes tomorrow but other than that, good to go and ready to pop some bud to go with my Tonic!

Peace & Cheers!

IMG_0430_1_3.JPG

IMG_0431_1_1.JPG
 
Update Day 62 OTF:

OK so I slacked for a few days and went on vacation, but I have to say the Cannabsynth was amazing!! I was shocked when folks came up and asked for some to try out of curiosity and said it was good even. I cant wait to make some from bud.

I'm about 5 days into flowering now and I'm glad I flipped when I did as the girls are mostly all at the half tent level. I fed them all some plain water before I left and they were almost dry when I returned. I fed them all GH Flora Nova Bloom 3 tbsp/gallon only this time as they looked a wee stressed.

The stats were Temp 74~80F RH 55~65 PH 6.6~7.0.

I'm getting nice buds forming on all but 1 of the bag seed babies which was about 2 weeks behind the rest. Not going to worry about it ATM as I will have my hands full shortly with all these others!. I replaced my 2 2700k tubes with 4750k warm whites today and re-arranged the plant layout and light fixture locations to spread things out a bit. I also got rid of the cloning table, chair and all the equipment that was hanging around taking up space. The light spread is decent but I will make some custom hangers on my 3D printer to allow me to move the LED's even higher up, we'll see how they come out. I may even need to do a net of some type to help hold them up. TTYS, Have a safe holiday and Cheers!

IMG_043744.jpg
 
Update: Day 65 OTF Flower Power Edition!

Some future bud porn is all this really is...

IMG_045538.JPG

IMG_045243.JPG

IMG_045137.JPG

IMG_045038.JPG


Bagseed Babies in bloom!

IMG_045440.JPG

IMG_045336.JPG


The whole family!

IMG_045637.JPG


I ended up using the same wire hangers for the LED's, but folded them in half to get the lights higher up. The spread is much better and a lot more even throughout the tent. All in all I would say coming along decently, but hey...what do I know. I think I have more sativa dominants and a few indicas, but again (see previous sentence). Already thinking about winter crops and upgrades to the system, but I will stay indoors with soil thank you.

Take care, Peace & Cheers!
 
Hey man, been a while since I've been around to see what's going on, was away on vacation. Things have really changed around here and the ladies are growing away like they should! Keep up the good work over here and I will be back more often to check in :)
 
Hey man, been a while since I've been around to see what's going on, was away on vacation. Things have really changed around here and the ladies are growing away like they should! Keep up the good work over here and I will be back more often to check in :)

Thanks for checking in!...I'm doing everything the way the little voices in my head tell me to at this point. Any suggestions would be welcome. Today I will attempt to design & 3D print some tent post connectors to make a small seedling/clone tent from a tarp to save funds for other supplies. Many pics to come once they are finished.

Cheers, Peace & much respect!
 
Perfect, good to hear you are still making progress and getting into some new things. I enjoy watching what you've made with the 3d printer, will be cool to see the new clone tent in action! Keep up the good work.
 
Perfect, good to hear you are still making progress and getting into some new things. I enjoy watching what you've made with the 3d printer, will be cool to see the new clone tent in action! Keep up the good work.

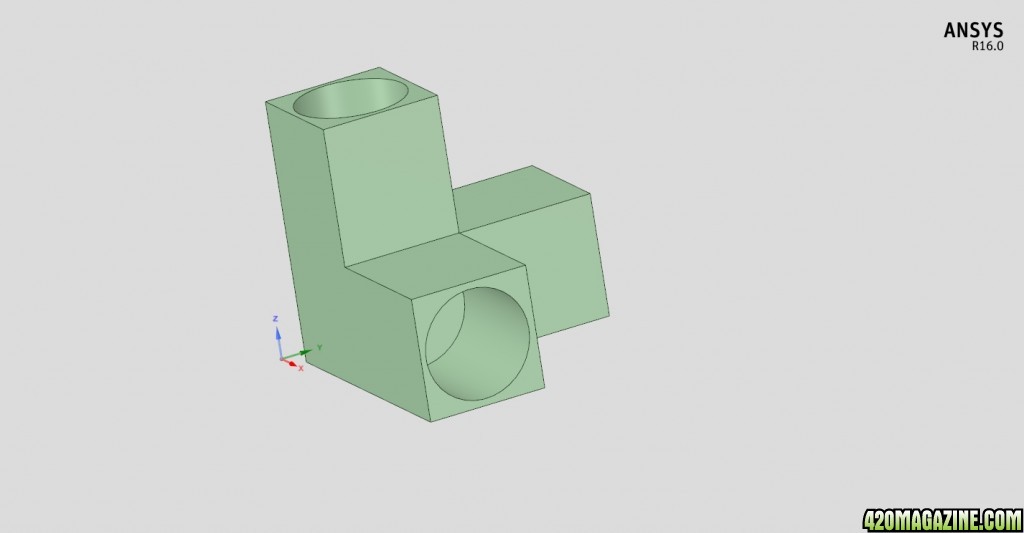
Here's what the final part will be like, nothing fancy just easy to print & design lol.

TentConnector2.jpg


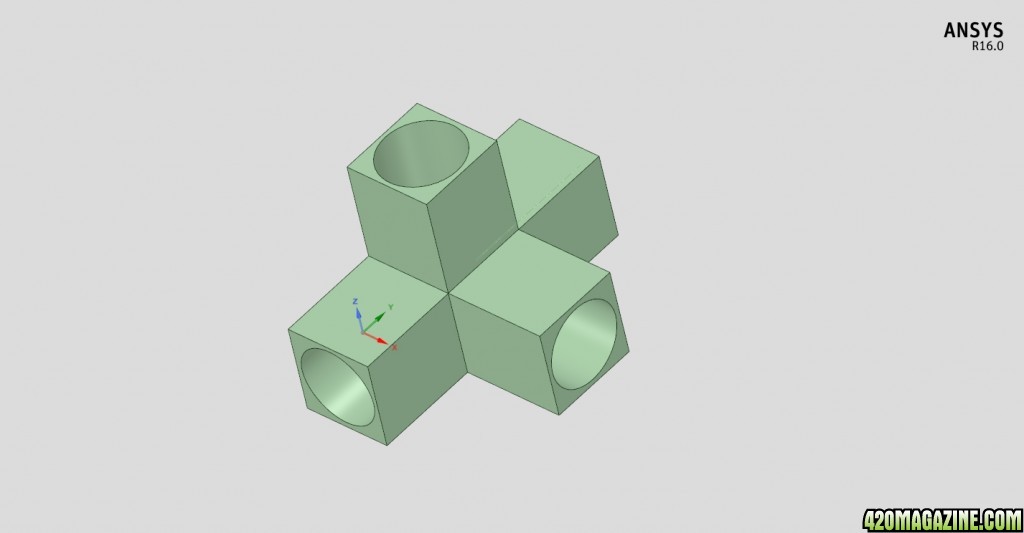
Here's the mid-span I just added too

TentConnector23.jpg


PS Its made for 19mm tent poles, if anyone wants to make one I have the .stl used to print it just ask.
 
Update for 3D printed DIY clone/seedling tent parts:

Well I went and did it...spent the last 6 hours printing parts. I guess patience is a virtue, specially when 3D printing! I made some square bumpers for the mid span support, as I'm only using one pole section per side on this test rig. I will cover with white poly film from HD using double sided carpet tape for now. I will try a 4-way light fixture w/13w 4750K to start, maybe add another if needed. More pics as I complete each step. Cheers, Peace & much respect!

IMG_045744.JPG

IMG_045845.JPG
 
Update: DIY 3D printed Clone/Seedling Tent v1.0

OK so what i'm thinking is to wrap it twice, once around the 3 sides and once around from front all the way around leaving a flap for the door. I will use some Duct tape to seal up the edges. The tent is 30" x 30" X 30" and I'll be using a white 2mil poly wrap this time.
Another update once I get the wrap cut and attached. Cheers, Peace & much respect!

IMG_045949.JPG


IMG_0460_1_2.JPG
 
Back
Top Bottom