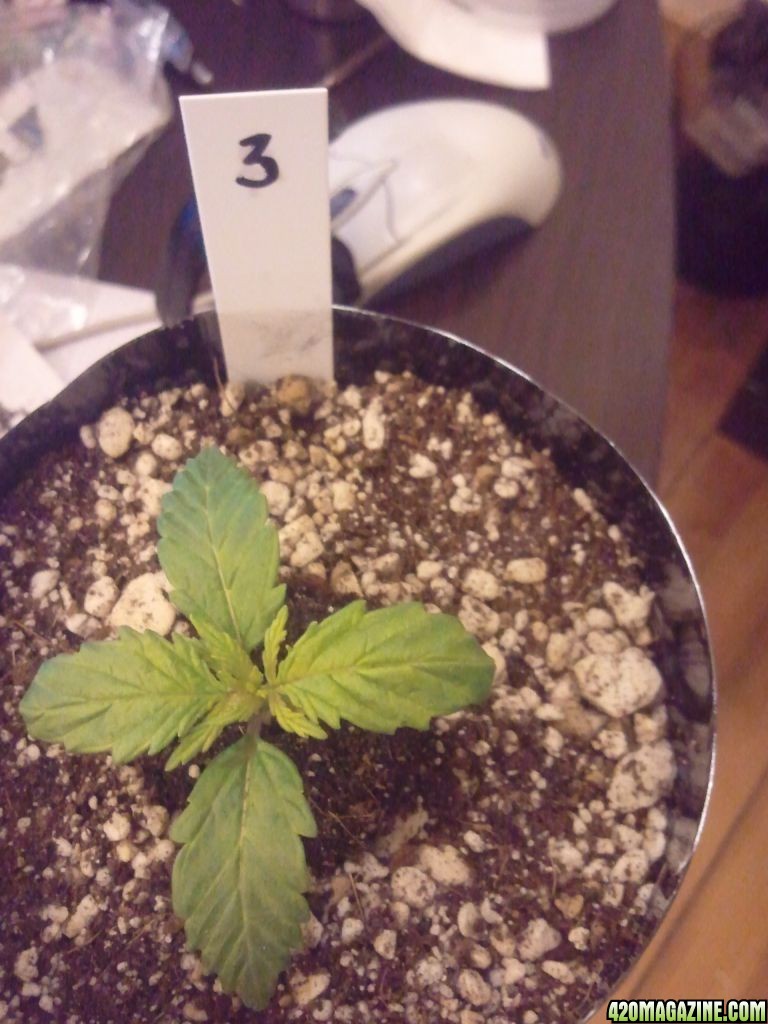
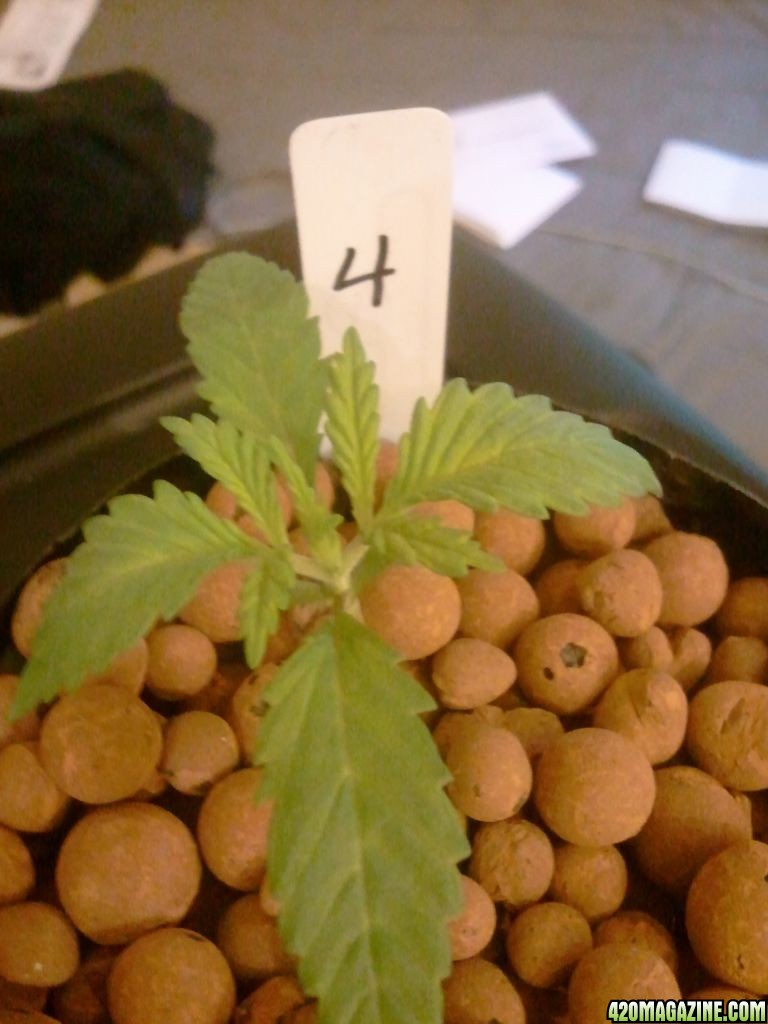
Nice come back on #4

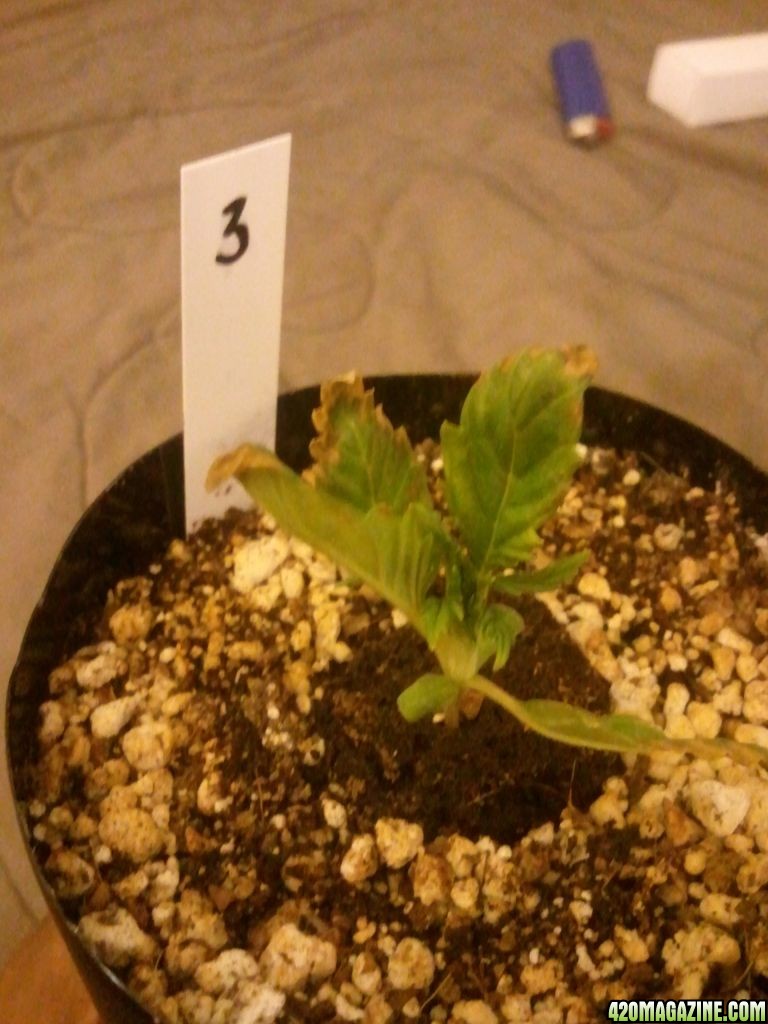
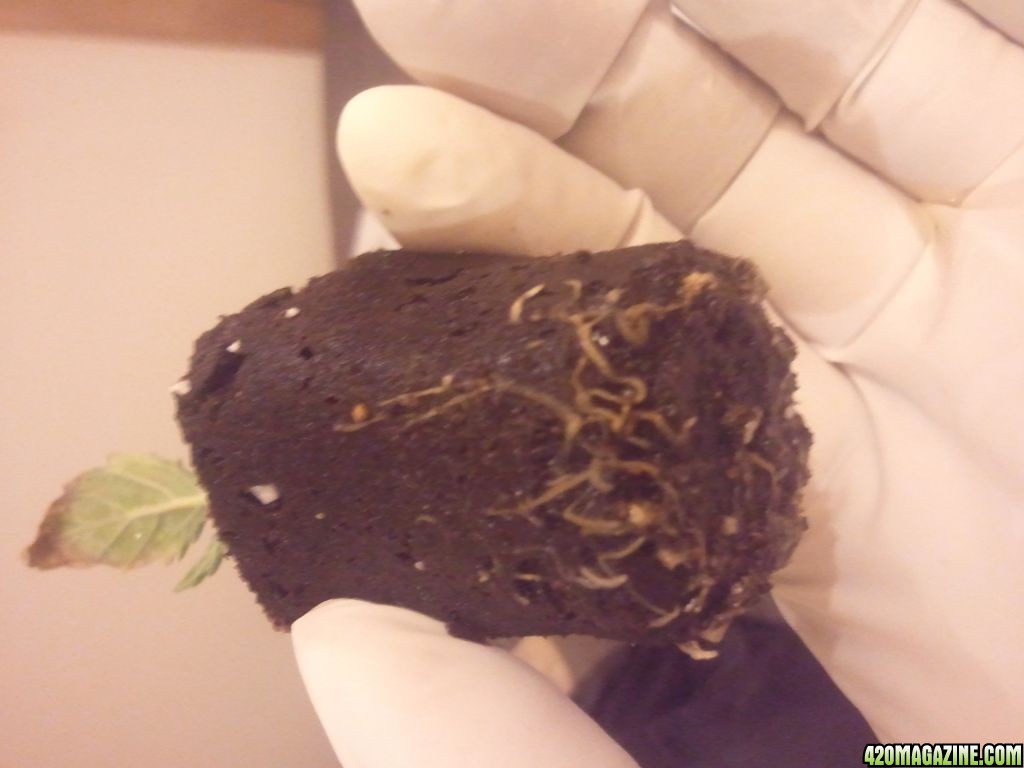
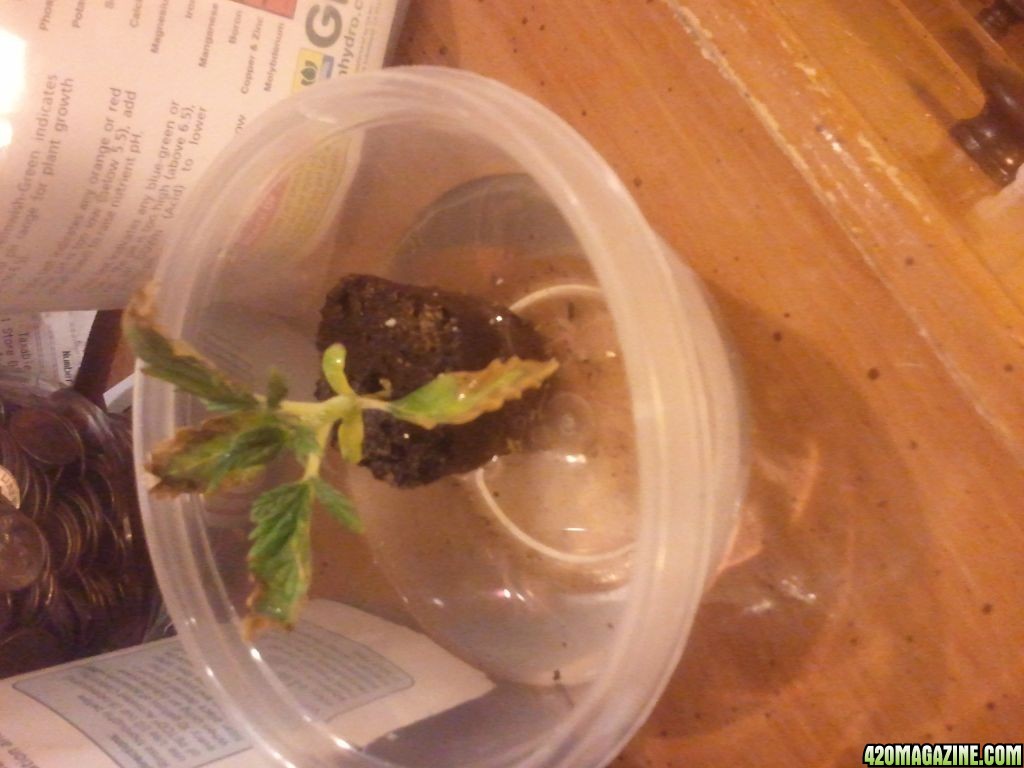
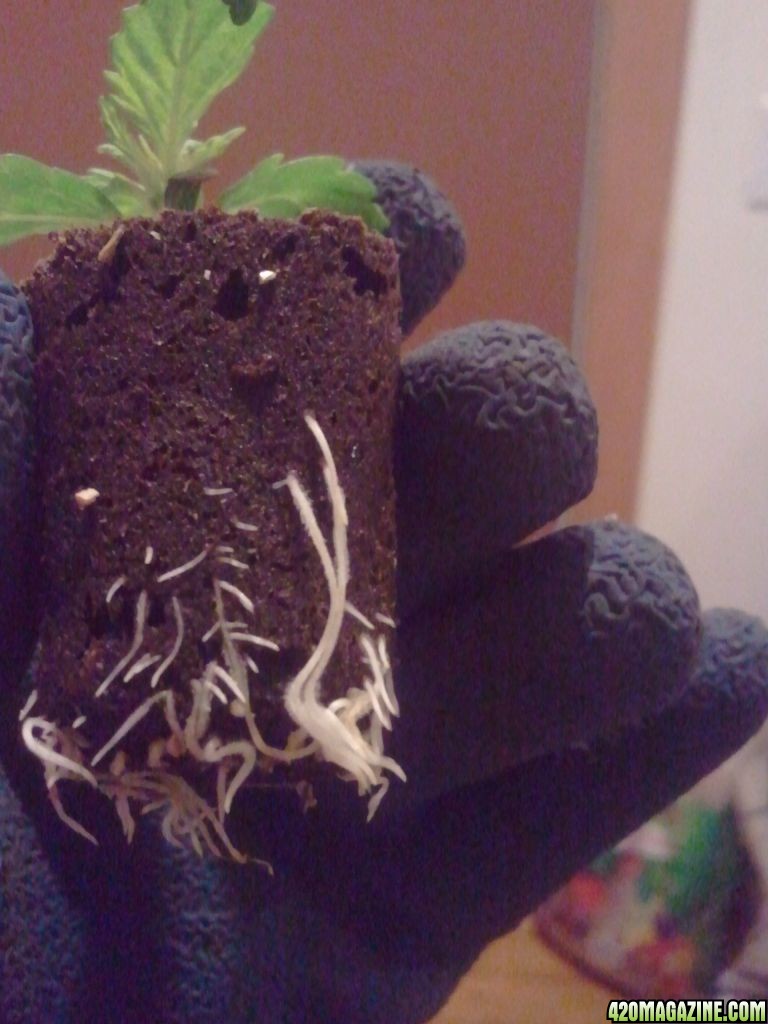
Those cubes look like rapid rooters (ground up and pressed tree bark)
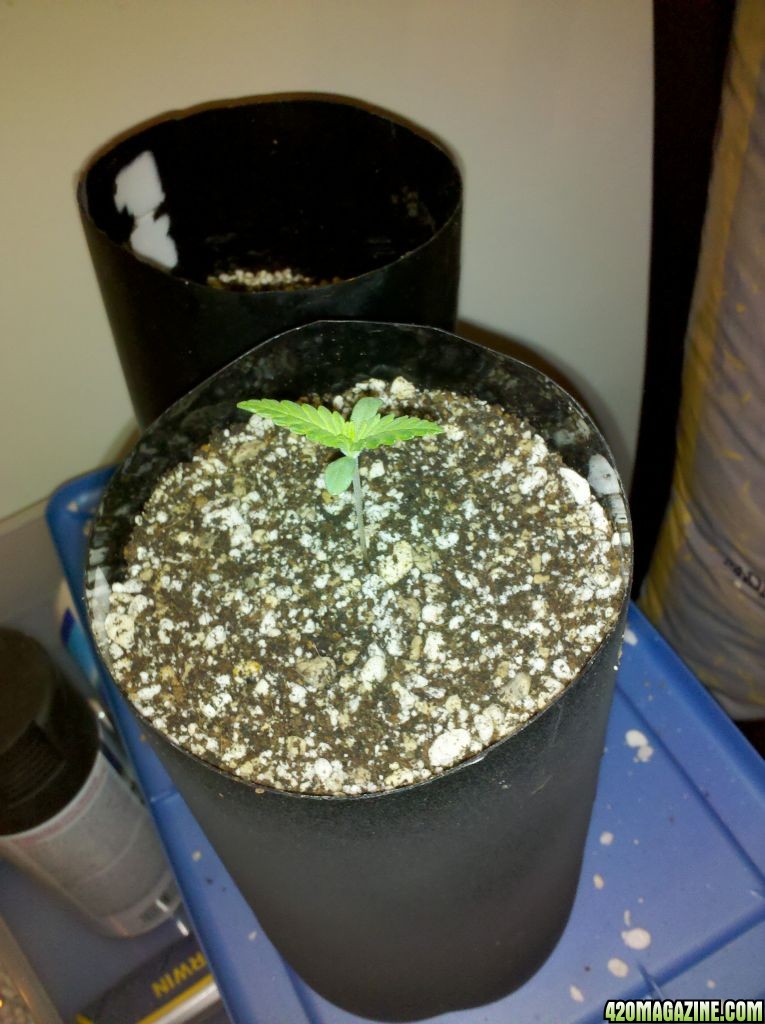
I still say you are over watering. When I use those to root clones I add water once over a 2 week period.

If you touch the cube with your dry finger and it feels cool and moist...no water needed....but if you must water them let them drain DO NOT let them sit in a puddle of water. If you are worried about the roots that are poking out of the bottom drying up...plant them in something bigger.

Light on during the night in veg will not hurt them... But neither will 72f.

Time to start inching that light down if you have not started already.

:welldone:
 
Ok, a lot has happened since I was last on with you guys. I'll just jump right into it;
So, I really liked how T12's veg room looked in his perp grow, so I copied his color scheme with the black pots(his were airpots), so I'm using all black 2L's, and the half with coco will use hydroton.With my hempy's ready to go, I mixed up a batch of perlite and vermiculite for one half of my babies. First I put a bunch in a small tupperware container about the size of a shoe-box, filled that with water, put the lid on, then tipped it on edge with the lid still on, to let the water drain out. I did this about 6 times before I felt the bulk of the dust was washed away. At the same time I put my hydroton balls in to soak. I drilled a small hole about 1/8" just above the arches at the bottom of the bottle. I put it there based on other journals, but with the hydroton it feels a bit too high. I can understand having that much res in the p/v pots, but in order to keep the coco from leaking out, I filled with hydroton to just above that mark, but It seemed like not much room for the actual media(coco mix) at that point, and since the coco is more absorbent than the p/v, I don't think I need as much res. I may lower the on the next batch. Anyways, I then filled the hempy's with coco to a point that would leave me enough room to put in the plug and still be just under the top level of the pot. Filling he p/v pots was the same process as with the coco, just no clay:
IMG_20111030_222231.jpg

IMG_20111030_222134.jpg

IMG_20111030_233207.jpg

IMG_20111030_234015.jpg

IMG_20111030_234802.jpg

IMG_20111030_235457.jpg

IMG_20111031_000109.jpg

IMG_20111030_222206.jpg

IMG_20111030_234342.jpg


Back with more in an hour or so...
 
I also made a custom exhaust setup for my a/c, so that I can pump cool air directly into the tent. I've been running things with the door open, but now that I have the air going, I'm temp testing with the door closed.All I need now is a timer for the a/c outlet, and I can synchronize the on/off times with my light. I spray painted the normal metal ducting black after stretching it out into exactly the shape I needed. I also sprayed the inside of the ducting as much as I could from both ends to keep the light from bouncing around and shining outside.
I got some scrap pieces of cool looking wood from home depot. If you go to the section where they cut the wood, they always have scrap bins, and you can buy leftover pieces of wood for like $.5, and they'll still cut it for free. I got some pieces of this cut to fit the blowing area of my a/c, as well as the space left in the window to the side of the a/c. I put a 4" hole in each of these boards and attached flanges to them and trimmed down any over-hang to make it fit the space. I made my holes by drawing a circle, then using a drill bit I made holes going all around that just barely touched to line from the inside, Then used my dremmel to connect the holes, and then to trim it down flush with the line. I could've just bought a 4" hole saw bit for $15, but I had the stuff I found a more complicated way to do it with what I had, in true DIY fashion! I painted all this flat black, and once dry, I held it in place over the a/c and drilled 1/8" holes thru the wood straight into the metal of the a/c. I then used #6 screws to mount the new grille. The duct fits right into the room, and I have a diffuser to keep the cold air from hitting the plants directly. The last pic shows the second piece filling the window space, which is not being used right now, and will be taped over unless I choose to switch the duct over. This setup is important to me, because I have plans to test the way cold affects bud color. I know lots of people out there scream bloody mary over potentially loosing yield/potency in a moronic pursuit of color that means nothing. The way I see it, if I can pull out a nug of purple kush that's really purple, I would be the f---in MAN to my friends! The whole point of this is to learn anyways, right? So, here's the pix:
2011-11-01_18_12_53.jpg

2011-11-01_18_41_41.jpg

2011-10-31_16_33_35.jpg

2011-10-31_16_38_03.jpg

2011-10-31_16_40_01.jpg

2011-10-31_16_46_16.jpg

IMG_20111102_180529.jpg

IMG_20111102_180552.jpg
IMG_20111102_180559.jpg
 
Ok, so I went to the home store and got a grounded extension and a digital timer. It can store 20 different on/off cycles, with any combination of days of the week for each cycle, and is programmable to the minute. I now have the a/c connected to that for my active air intake. I'll be posting yesterdays pics right now, but I didn't want to go any more time without a visual. #2 is still leading the pack, with 1 and 5 jockeying for position. #4 is bringing up the rear for the 4 that are now in hempy's, and 3 is still in the starter pack, but looking good. The only touch of anything other than green on any of the girls is one spot on #4 that was laying on the media when her leaves first flopped open. I've doubled the nute dosage, and tonight will be my first flush watering. I tested the runoff yesterday, and it was about 6.5-7, so I'm not worried about that at all.
2011-11-03_19_04_33.jpg

2011-11-03_07_12_34.jpg

2011-11-03_07_13_05.jpg

2011-11-03_07_11_42.jpg

2011-11-03_07_10_46.jpg

2011-11-03_07_15_28.jpg

2011-11-03_07_16_58.jpg

2011-11-03_07_17_21.jpg
 
hello sauron blue i just read your whole journal and thought i would share a few thoughts, i have a few grows under my belt i think im on my 6th indoor, i have made many mistakes and had some good results also, for me my best success has come from taking a deep breath stepping back from all the info, and reflecting on a couple basic things
1. this is a very resilient plant that can grow almost anywhere in a very wide range of circumstances on its own without any help from man,
2 . less is more ! it really is important that we dont try to fix problems by adding more and more stuff, i know i almost killed a few plants by over thinking and trying to "fix" things by adding (light,nutes,h202,h20, etc. etc. its better to back off and let these beauty's do what they do best "be a plant"
3. everything in moderation. always go slow when adding anything give them time to react on their time and adjust to "our" intervention that way if they dont like it the damage is minimal and correctable,
4. dont get to caught up in numbers, although there are "ideal" parameters for growing,dont forget that plants cant read or do math, the human numbers can be perfect and the plants unhappy, different strains and even individual plants may be happier with numbers that dont match the "specs" set forth by man, so in this area im very lenient i look at the plants ,,do they look happy? healthy?
5. have fun!! growing should be relaxing,fun and satisfying , not stressing over whether or not your doing it right, we only have so much actual control over these very wild natural things, i say have fun first and foremost , and let these lil' darlings share time and space with you and they will bring you peace,joy,satisfaction, and good natural medication! :ganjamon:
i think you are on your way to being an excellent grower, my only real advice right now for you is take it slow ,and dont get to caught up over thinking the nuts 'n' bolts of it,
and again have fun with it!
and the girls look good, i do think imho the moisture was way to much in the beginning, but it looks like they are happy now!
enjoy your grow and good luck to you, heres wishing you big sticky dank buds!!:thumb:
 
Thanks for coming along for the ride, dood. I appreciate the advice, and the praise. I am on the point of relaxing a bit, unfortunately. With all of your years of growing, you may have forgotten the anticipation of seeing things happen for the first time, but I am enjoying and embracing it. It's like young love or first kids. When we are new to something we are always hyper-sensitive in dealing with it, but isn't that the fun part? Once you get to the point of flipping a switch and knowing they'll be fine for 7 days,you lose the hippy-ness of it all, then it becomes just another appliance we run, like a crock-pot. I am loving doing all this. I am a pair of pantyhose and 2 hose clamps away from finishing a carbon filter that looks like anything you'd buy in a grow shop, and I am psyched! I'm about a middle-schooler at his right now, maybe less, and like all youngsters, I just wanna be a grown-up - but I'm trying to remember to enjoy this , too. Obsessing about every detail is the only way to get it right, for me, and getting it right is how I have fun. How much fun will I have when I have a high-quality product at the end of this? How much would it suck if after all this work and investment, a stupid mistake that I let go untreated for a couple days (like the cooked seeds) cost me my whole grow? If I wanted to go simple, I could put some bagseed on the porch in a pot with yard soil. Who's to say where the line of moderation and ideals becomes too much? I'm got sum big pistils, and I'm gonna let 'em hang, baby! lol
Don't get me wrong, I'm not trying to be mean, or rude, or whatever - I am VERY glad you decided to read my thread and post, and I am sure that I will feel the same as you when I have as much experience, just wanted to give a noob's perspective. I always hear seasoned growers telling people to relax and let the plants grow, cuz they are resilient, then you check out their journals, and they have DWC systems with ppm meters, top-of-the-line chemical nutrients and 1000W HID lights. Anyways, much respect to you and ALL of my peers here on 420Mag, and I hope you stay tuned. Hopefully I can grow a talent to match my arrogance, and impress you with my tinkering:):):)
:hookah::passitleft::hookah:
 
lol im not at all saying dont do what your doing, if it makes you happy by all means do it, im no pro here just a doode doing my thing also, wanna see ghetto, go look at my grow, spent prolly 100 bucks total lol, i dont have years and years exp just a couple, i still consider myself a noob and get plenty excited for every seed or clone i raise, i just noticed you seemed like you were stressing over losing babies and how much they cost you, and the way i see it i thought i let you know you can breathe easier knowing that as long as you dont over do it they wont die,, you should listen to those pros that say to go easy and have 5000$ setups they know their stuff, i know i did and still do!, those guys were where we are not to long ago, and have the knowledge to help us not make every mistake they did, we inherit their wisdom and save the headache and heart break they did to further the art!! anyway, i just figured id throw in my 2 cents, take it or leave it, but the important thing is you enjoy your grow, and learn as much as you can, only way to go is fwd!!
peace man
 
Thanks for vibin' wit me, Doode. I haven't had time to read ur journal yet(though I am interested), but I scanned it, and had a couple Q's- It looks like ur using perlite to clone, then transferring to another media? How do you deal with the roots grabbing onto the perlite? Do you clean it off, or leave it it intact? Are roots meant to come out of those home-made net pots, or will you transfer the plant before it gets that big? Poking bigger holes would make it look more like the ones I see sold, but maybe there's something you've learned that calls for this design? It looks like you're pretty dialed in there, that mommy looks nice and GREEEEN! I'm looking into DWC, but at the same time love the hempy, all-cola idea, so I would want to mimic that even if I went aero or hydro. One thing that I've been wondering is: In the hempy's, the roots can curl around and not be bound, but I've seen proof that roots grow much faster in hydro setups, so how do you control root growth in a container as small as a hempy? would they get to the point that they might block water flow? Is covering the in/out tubes with mesh a good idea? Thanks and keep checking in!
 
Ok, so this is gonna be an exciting update! I have moved #3 into her own hempy, as she was looking really flush, and she was teeming with roots! I didn't put any hydroton down yet, as she is still really short, and I don't want her leaves to be resting on anything, so I'll add the clay after some stretch. I'd like to see if there is an advantage in moving them at first sign of tap root, as in case of #4 and #6, or waiting longer as in 1, 2, and 3. Some are still thin and stretchy, and I'm thinking those are the ones that have not hit the res yet, while the bushier plants are showing the signs of deeper drinking. Thickening stems seems to be an indicator of this, as they would need more room to carry all that water. #'s 2, then 6 are leading the pack in stem thickness, followed by 4, 3, then #1. #1 is really thin and tall, and I hope she hits the res soon. Since #2 was on her 3rd set of spiky leaves, I decided to FIM her. She could make an awesome bonsai mom, and I'm even considering finding a way to fit a veg tent in here to keep her going, cranking out mini's! I'd like to have plants to just play with, try to tranny some out with coll. silver, or practicing LSTing, whatever. The two in perlite mix are showing very small signs of browning on the tips of biggest leaves, I think due to them getting plain water the day before, and having less food stored in the surrounding media than the coco did. I am taking a liking to the coco mix at this point, due to an innate feel that it is more all-around complete nutrition for the plant, and a feel that they want to be wetter than the perlite is keeping them. I reserve the right to stick my foot in my mouth at a later date, as with just about anything I say:)
On a final note, there is what looks like white fur/hair on #2, which you can barely make out in the post-FIM pic. I don't think this is an issue, but wanted it noted for the record.
2011-11-06_09_05_071.jpg

2011-11-06_09_19_46.jpg

2011-11-06_09_16_25.jpg

2011-11-06_09_16_56.jpg

2011-11-06_08_03_42.jpg

2011-11-06_09_20_19.jpg

2011-11-06_09_20_59.jpg
 
In the words of Rocky and Bullwinkle:"Now for something you'll really enjoy!"
So, I spent countless hours searching for answers to all kinds of questions in my head, and eventually I came across a very promising carbon scrubber guide on another site. I've modified it using what supplies I could find/thought were best, and tried it out. Now you guys can all try it out, cuz it kicks a$$!
First all the supplies:
2'x5' hardware cloth or chicken wire with 1/4" square holes $10
6" duct connector $4
8" to 6" duct reducer $4
(2) 6 1/2" hose clamps $3
(4) 4 1/4" hose clamps $5
4" end cap $3
6" end cap $3
XXL opaque black pantyhose $2
a very strong epoxy or sealant glue $5
about 7 pounds of activated carbon pellets $35

Tools needed:
wire snips
a good marker
something to rinse the carbon in
vice grips or pliers are helpful, but not necessary


So I rang in at $75 for the whole setup, which is at a bit cheaper than a comparable store-bought filter, and I can always empty this one and refill it, so cost on the next filter will be only $35. Also, I have a full 2 inches of carbon that the air must pass through, quite sure that this is more than what most retail offerings provide, and the more carbon touches the air, the more odor will be reduced. Also, I have greater airflow with chickenwire than any mesh on a retail filter, so my fan will pull more air over this, therefore I can use a slower, cheaper fan. Mainly, it was just more fun for me to do it myself, and gain some knowledge. The one drawback mine has as compared to the top-of -the-line models is the conical base, which I am still searching for, and can add at any time. A pre-filter can be put on here, but I see no point, as it will decrease airflow, and I'm growing plants, not cutting wood - I don't have large particles floating around the air in my room, just odor molecules.


The chickenwire comes with a thin wire of the same material wrapped around it to keep it in a roll. You have to remove this before you do anything, but don't throw it out, it will come in handy very shortly. The first thing to do, is cut your chicken wire so that you have 12" of solid squares going all the way across, not counting any that have 1 or more wall cut off, If you can buy 12" chicken wire, then skip this step. Now that you have a roll of 12"x5' chickenwire, clean the edges by cutting all the little spikes that are no longer cubes. It makes it much easier to work with this stuff if you don't have it snagging on everything it touches, including your skin, so try to trim it as smooth as you can without skipping over into the next square. Now start off with the 6' duct connector, and use it as a core to roll the chickenwire around. While carefully holding the wire in place, and after making sure it is straight all the way across - not crooked or wrinkled - I used a marker to make a line where it overlaps about 1". I measured mine at 20" long. You don't want to connect it end to end, it will be flimsy, you want that overlap. Use that wire from the beginning (cut into pieces an inch or 2 long, then bent at the bottom, like a fish hook) to thread between the overlapping sheet o mesh, then use your plies to pinch it closed. grab it a mm or so up, and twist it to lock it in place, then snip it off, leaving enough that it will stay twisted and attached. To further reduce snag risks, try to turn these so that they stick out towards the inside of the tube.
2011-11-04_19_49_34.jpg

2011-11-06_09_57_07.jpg

2011-11-04_19_56_40.jpg

2011-11-04_20_15_17.jpg

2011-11-04_20_16_56.jpg

2011-11-04_20_16_25.jpg

2011-11-04_20_20_50.jpg

2011-11-04_20_19_51.jpg


Repeat this process 4-5 times, securing the span of the connection we just made. You should now have a tube of wire that stands on it's own, and is exactly the size to receive a 6" duct. fit the 6" base into one end and you can start rolling the pantyhose carefully onto the tub, end cap first. Avoid snagging the pantyhose, as this is the only thing keeping your carbon in place, we don't want holes or weak spots - this is where cleaning up those snagging ends really pays off! It makes it easier if you roll it up like you would a pair of socks, then stretch it a bit, so that It's not so tight, and slips on without causing you to squeeze the tube so much. Now you can fasten one of the hose clamps over that end of the tube, ensuring that the pantyhose is nice and snugly on, there is no mesh sicking out farther than the end cap, and that the hose clamp will be pinching the mesh and the end cap together. Now we can put the duct connector into the other end, but sticking out enough to have a good connection to the reducing section. I chose to cut off about 1/3 of my duct connector with the wire snips, so that it didn't take up so much room, while still making good contact with everything. I forgot to photo this step, so I threw in a pic of the whole skeleton how it will fit together without the pantyhose, carbon, and clamps. Pull the remaining length of pantyhose the rest of the way off of the tube, and clamp it down using the same precautions as the last step. now you can make sure everything looks good, and fits into the reducer the way you want. You can still loosen the clamps and make any adjustments you want, then cut off the leftover pantyhose dangling off when you're ready.
2011-11-05_18_19_54.jpg

2011-11-05_18_09_48.jpg

2011-11-04_22_34_15new.jpg


At this stage, I used the epoxy to seal the connection between the duct connector/inner tube to the duct reducer. This ensures that there is an airtight seal in there, but either way, it's gonna be sucking through the carbon, so I guess you can skip this step and save $5. When your glue is dry(if you use any) you can begin making an outer tube the same way we made the inner one, using the 8" end cap, or the reducer for sizing. I didn't remember to measure the sheet for reference on this one. This time, you want to connect the top end first, So after struggling to get your pantyhose over the top of the reducer, pull them down over the wire tube, and hose-clamp in place. I couldn't find 8 1/4" hose clamps locally, so I got (2) 4 1/4" clamps and opened them all the way until the ends came apart, then threaded on onto the other to make one double clamp of 8 1/2". Roll the stockings all the way down, and we're done with the bulk of the mechanical stuff. With the filter sitting on it's head, fill it with rinsed and somewhat dried activated carbon pellets. I rinsed mine just like I do the perlite, put it in a small Tupperware container, fill with water, cover, tilt to one side to allow water to leak out, while carbon stays inside, repeat till water comes out clear. Since I had spare bottles to cut up, I used the top of one as a funnel to make getting the pellets between the two walls less of a chore. Once you get it almost filled with carbon, smack the filter all around it(like how you would slap a dog on it's hind leg when patting him enthusiastically or when clapping comfortably - you want a bit of force to create movement, but you don't want do pulverize the carbon or dent the filter.) to settle the pellets and make them compact against each other. Fill it back up to the very top(or bottom) with pellets. Then you can fit the end cap(make sure to get it on there really well. Tamp it down, shake the filter around to move the pellets and make room, just get that end cap good and snug on there, so there's not too much shifting of the carbon. See how close the bottom of my end cap is to the bottom of the mesh tube?) on and secure with a double hose clamp, flip over, trim the pantyhose from the top end with a razor or some scissors, and you're done!
The last 3 pics are before cutting stockings, view from where fan/ducting will connect(red lines showing where I trimmed and glued the duct connector to the reducer), finished product with bill for scale.
2011-11-06_09_53_27.jpg

2011-11-06_11_20_09.jpg

2011-11-06_11_25_32.jpg

2011-11-06_11_29_41.jpg

2011-11-06_11_34_18new.jpg

2011-11-06_11_34_51.jpg


This can be modified to fit many different sizes easily. any size ducting that you can find a reducer for can potentially become the top angled part, and the length can be any length chickenwire comes in, or potentially longer, as you could connect multiple pieces in the same way we made ours loop over. Theoretically, you could have a 12" hi-v fan running a 5 foot long filter that would freshen up the dankiest grows for a year or two
 
Thanks for vibin' wit me, Doode. I haven't had time to read ur journal yet(though I am interested), but I scanned it, and had a couple Q's- It looks like ur using perlite to clone, then transferring to another media? How do you deal with the roots grabbing onto the perlite? Do you clean it off, or leave it it intact? Are roots meant to come out of those home-made net pots, or will you transfer the plant before it gets that big? Poking bigger holes would make it look more like the ones I see sold, but maybe there's something you've learned that calls for this design? It looks like you're pretty dialed in there, that mommy looks nice and GREEEEN! I'm looking into DWC, but at the same time love the hempy, all-cola idea, so I would want to mimic that even if I went aero or hydro. One thing that I've been wondering is: In the hempy's, the roots can curl around and not be bound, but I've seen proof that roots grow much faster in hydro setups, so how do you control root growth in a container as small as a hempy? would they get to the point that they might block water flow? Is covering the in/out tubes with mesh a good idea? Thanks and keep checking in!

hey there its all good in the loc'd out hood!! lol, to answer your q's when i transplant i just gently shake off the loose pearlite there's actually not too much left and it assures me they will have some nice air pockets to utilize, it has been working good thus far, and have not had a plant wilt from drowning yet! :cheesygrinsmiley: 
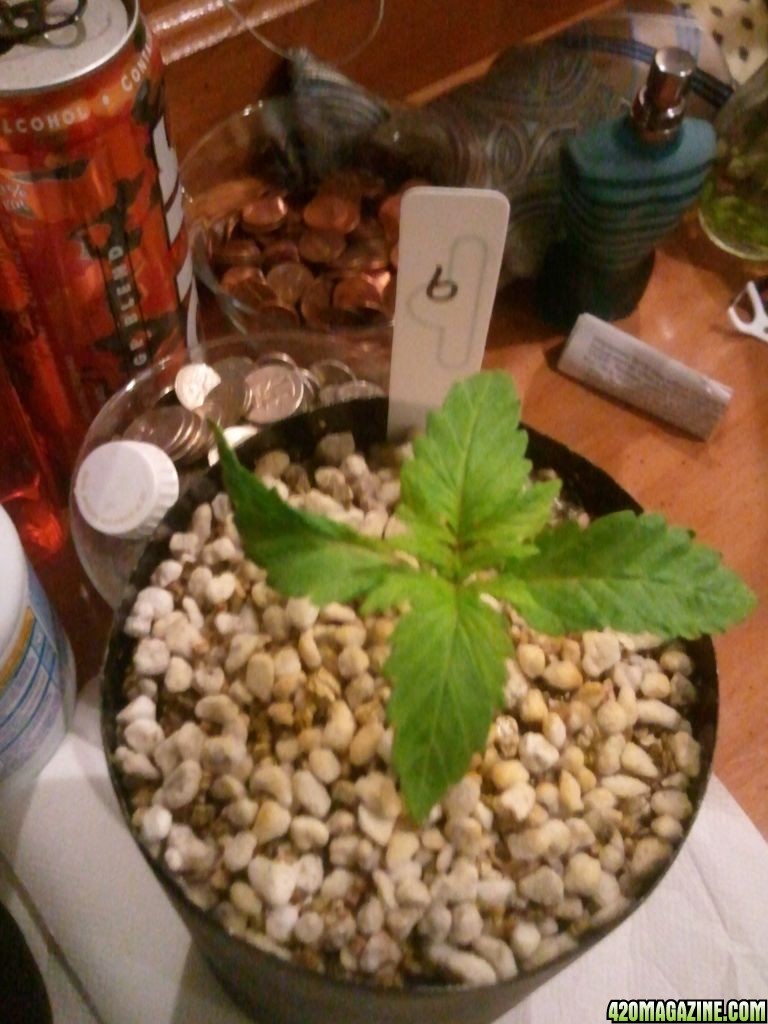
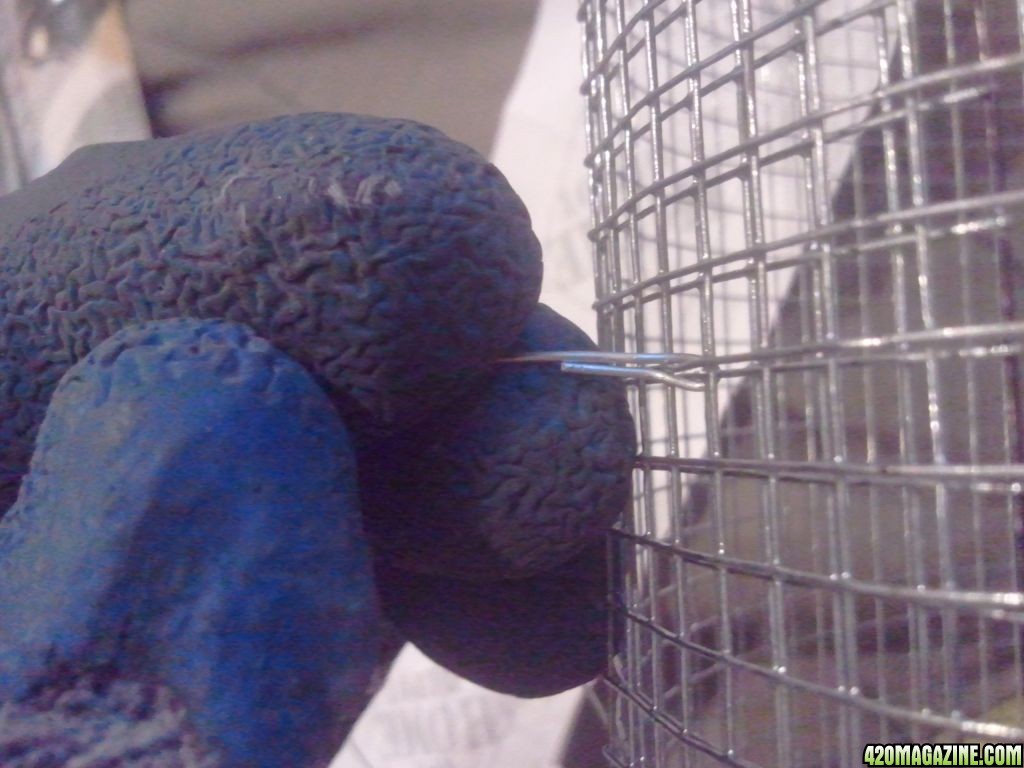
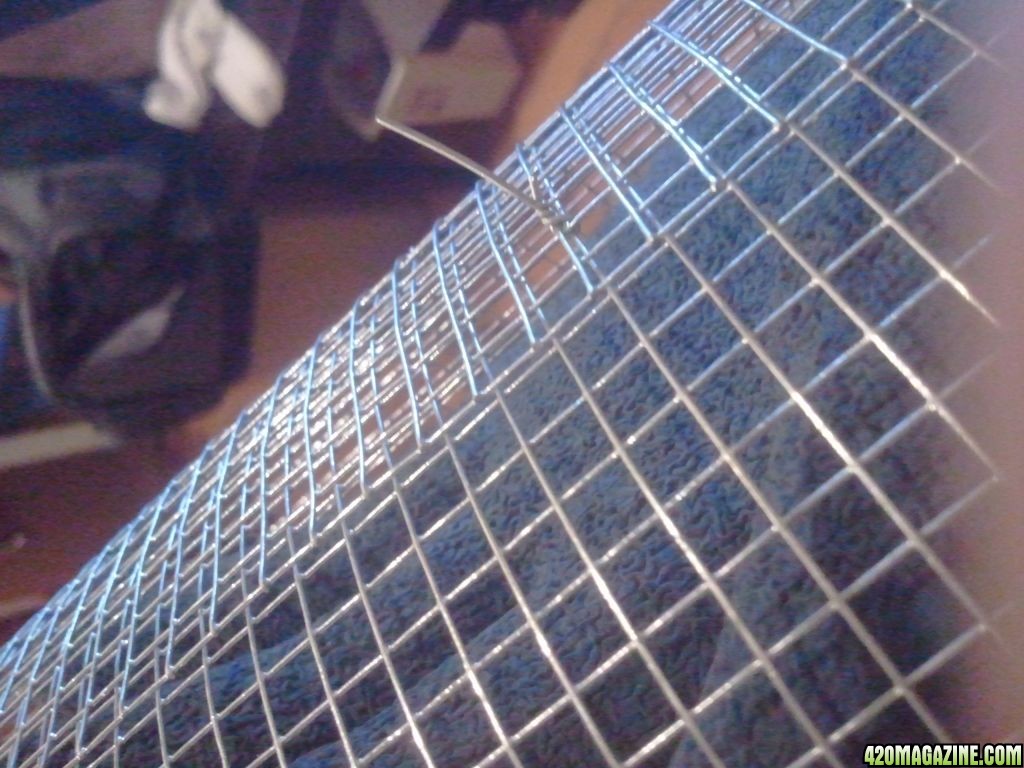
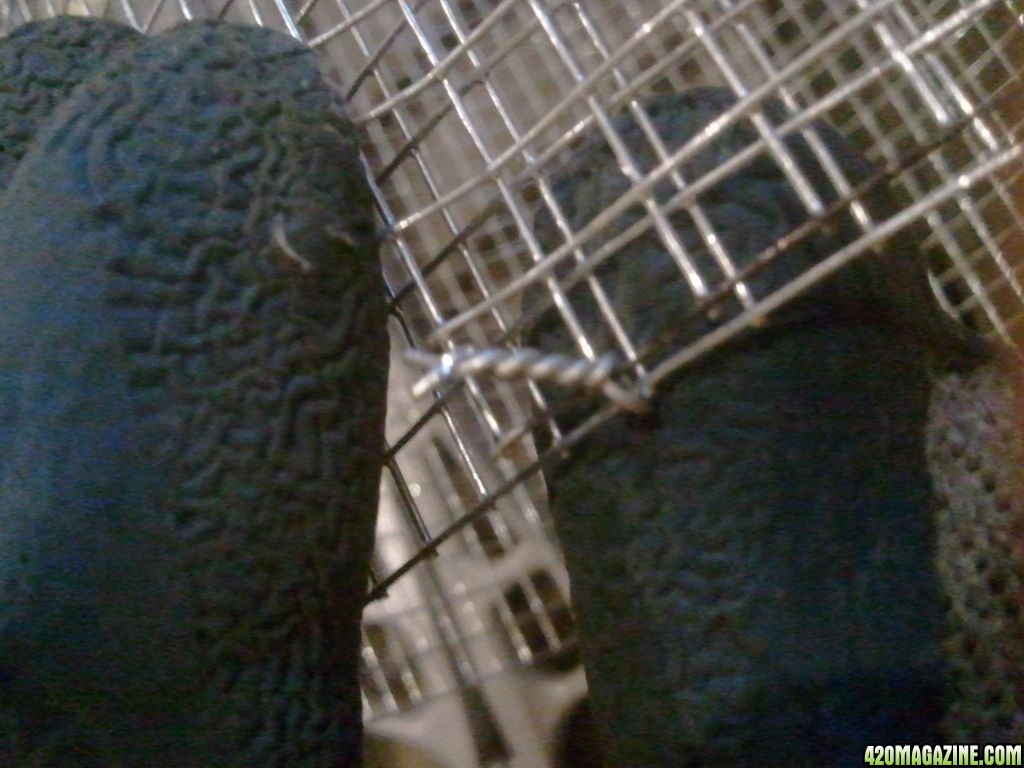
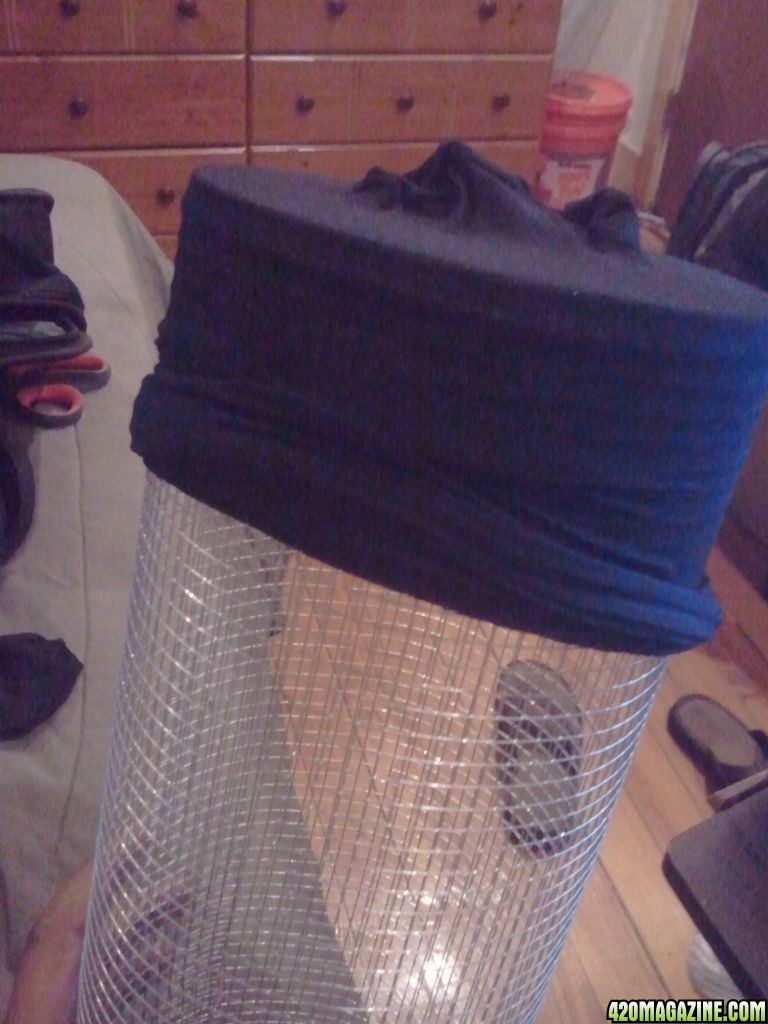
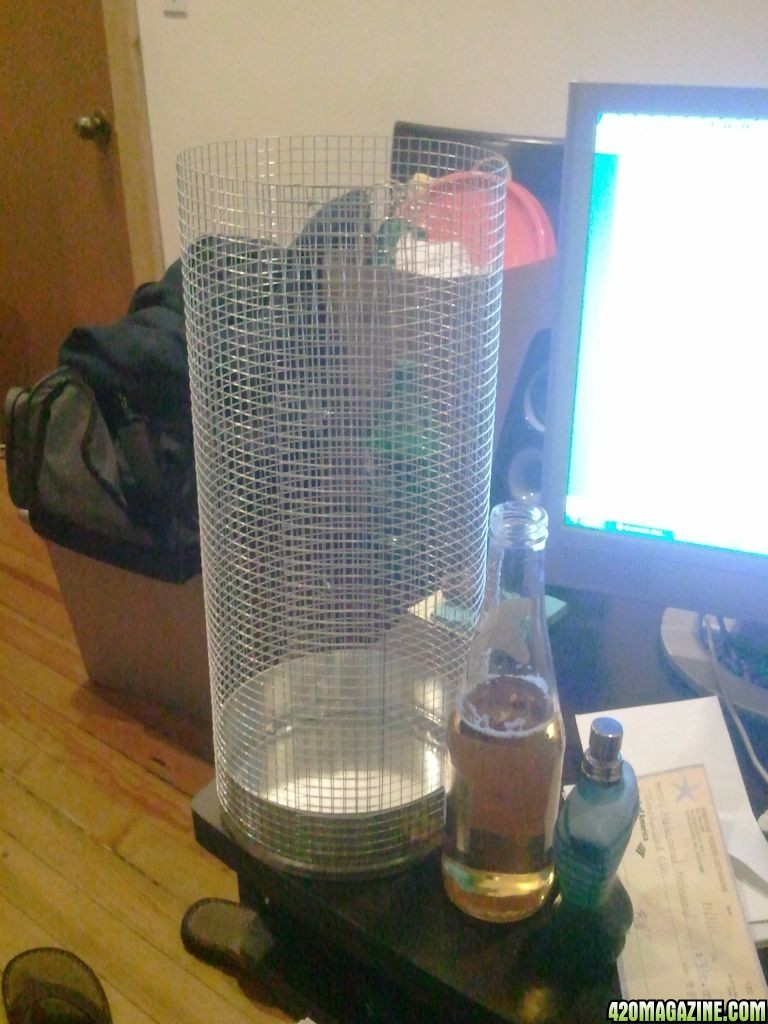
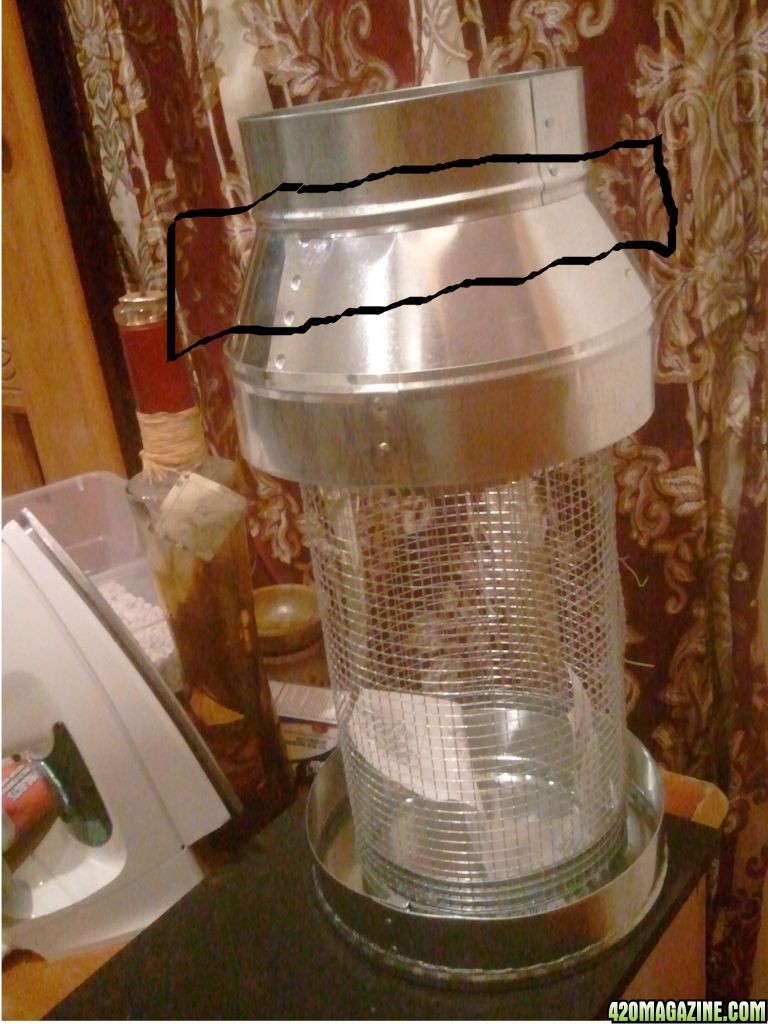
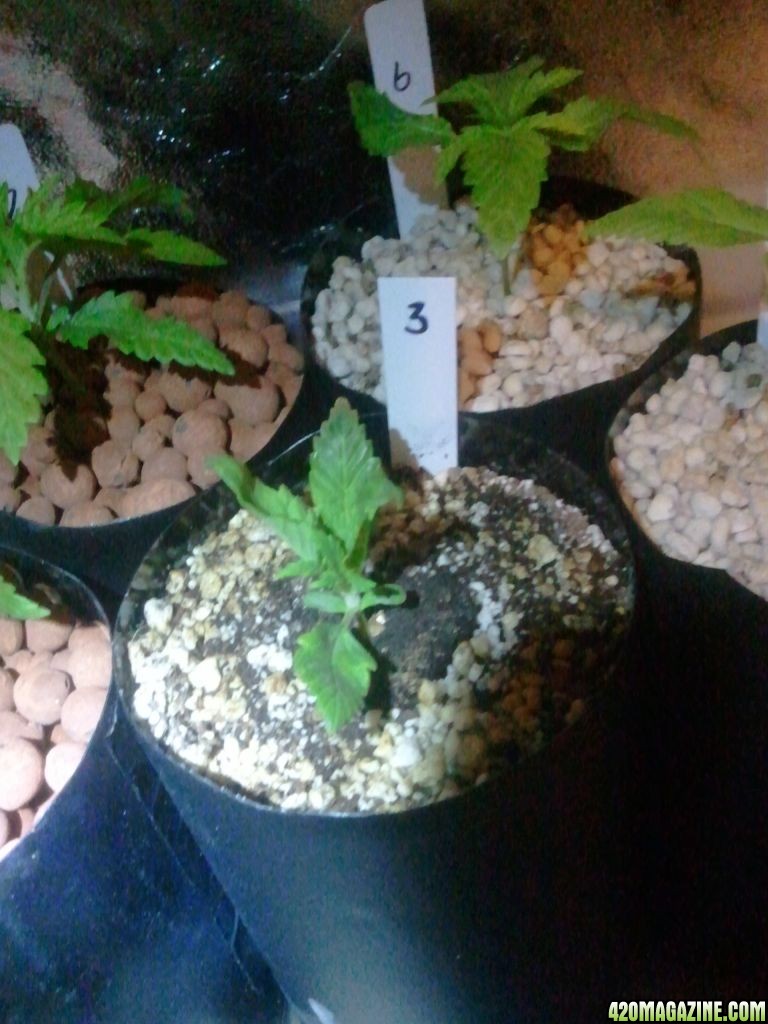
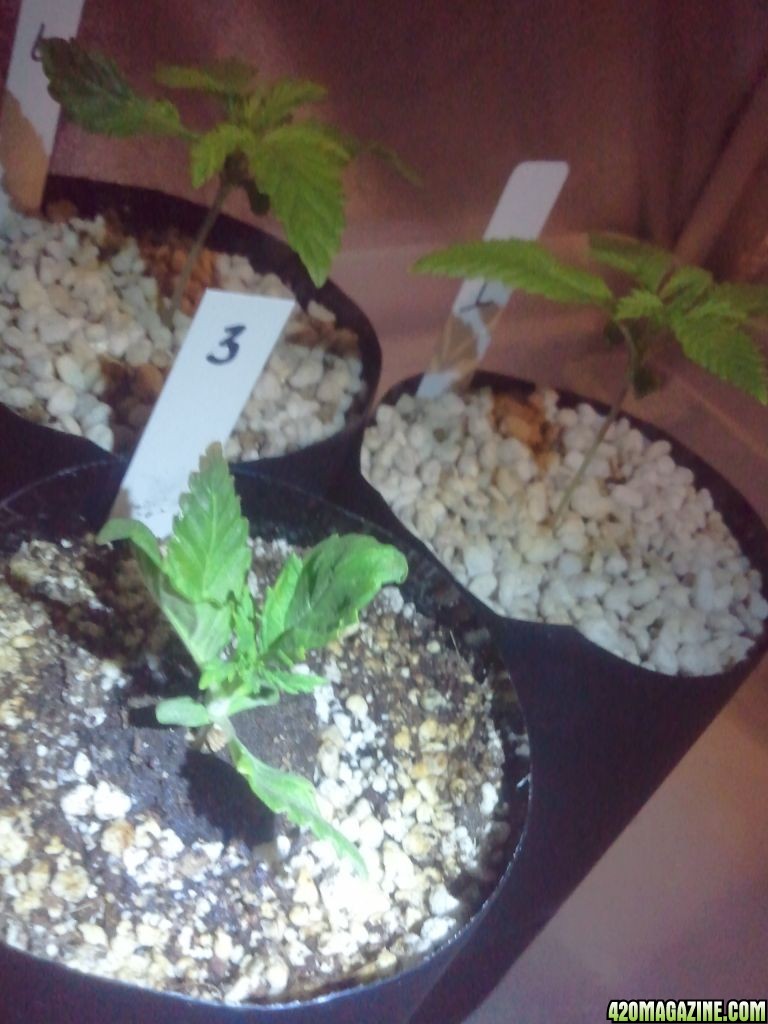
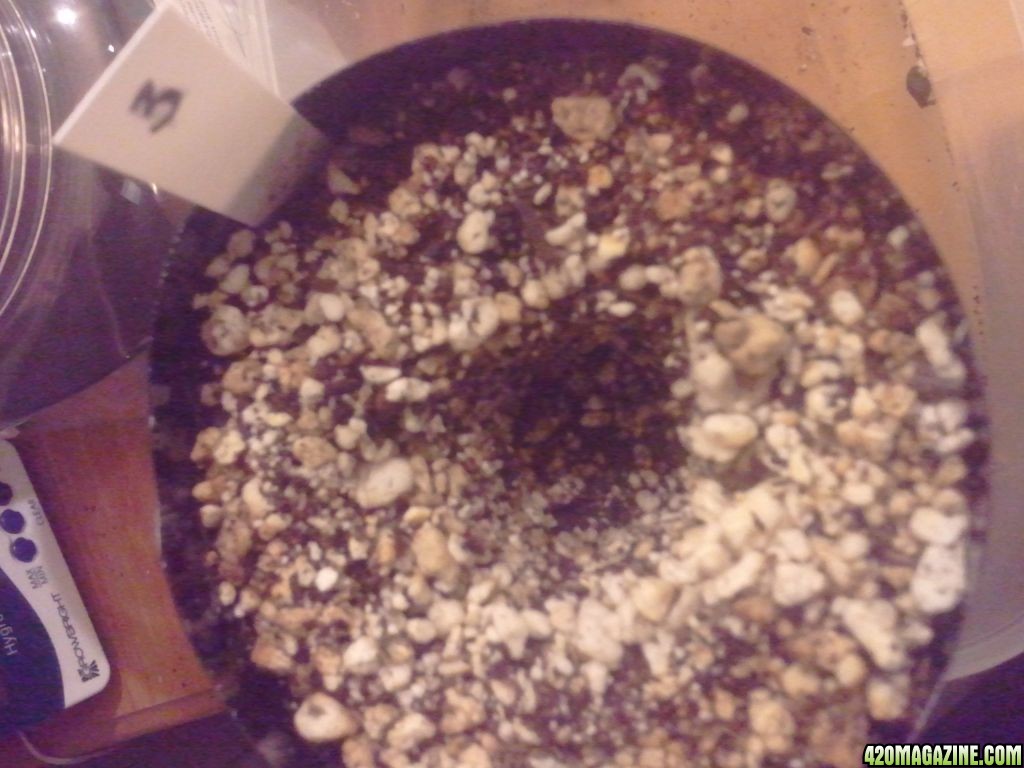
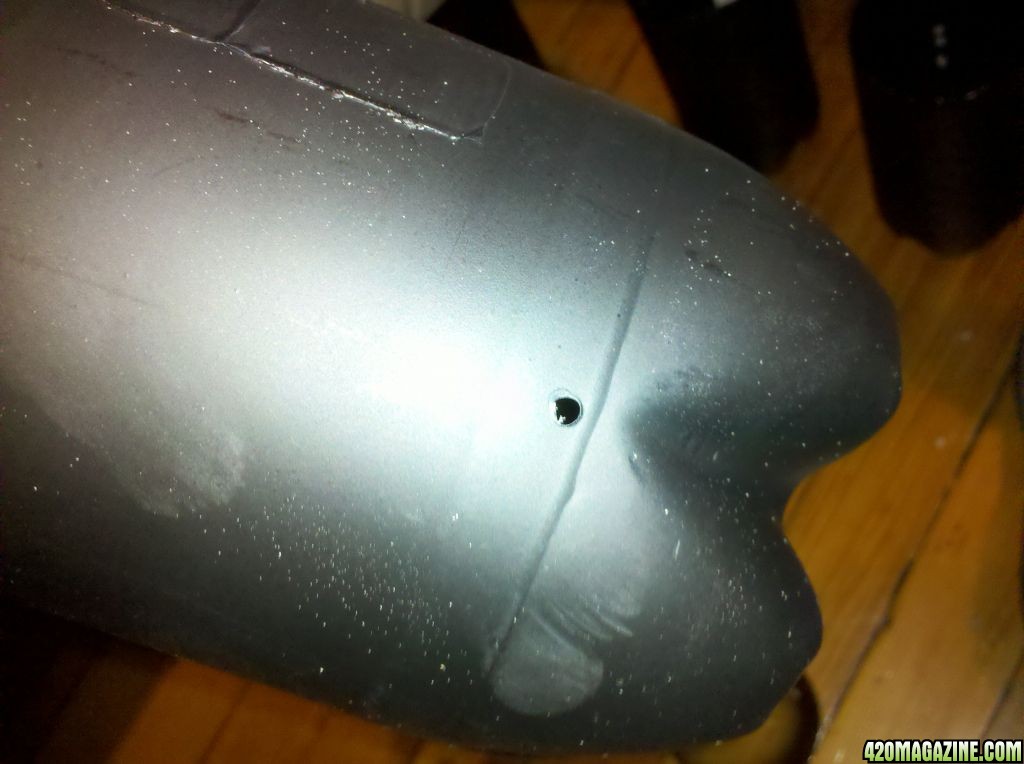
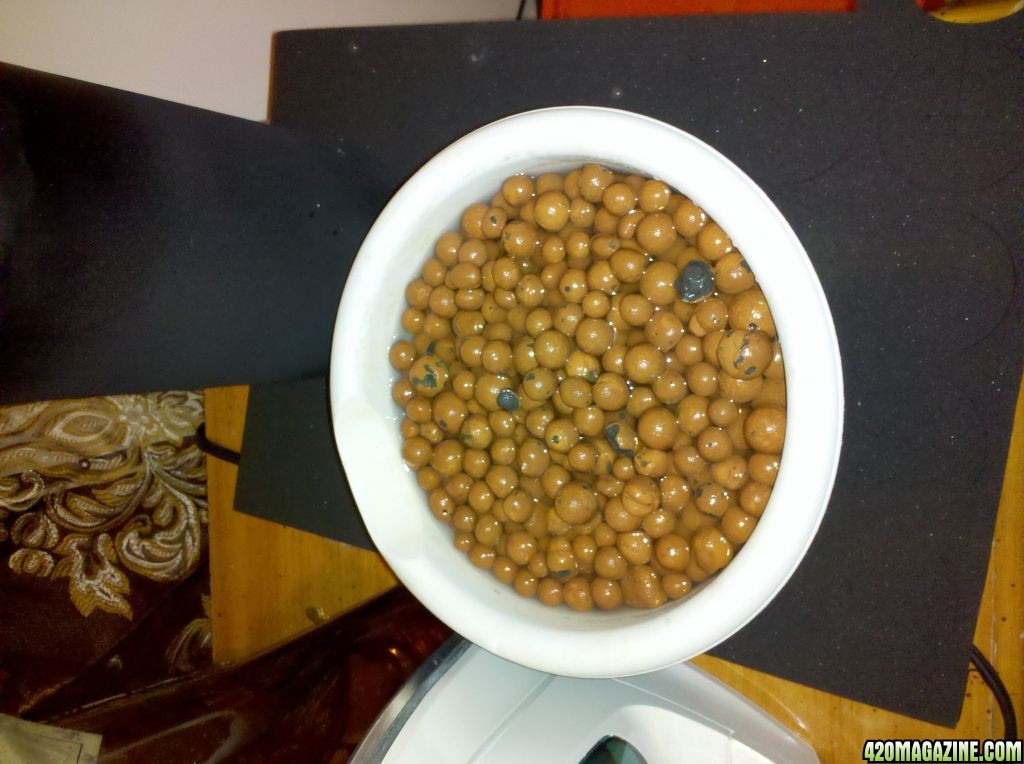
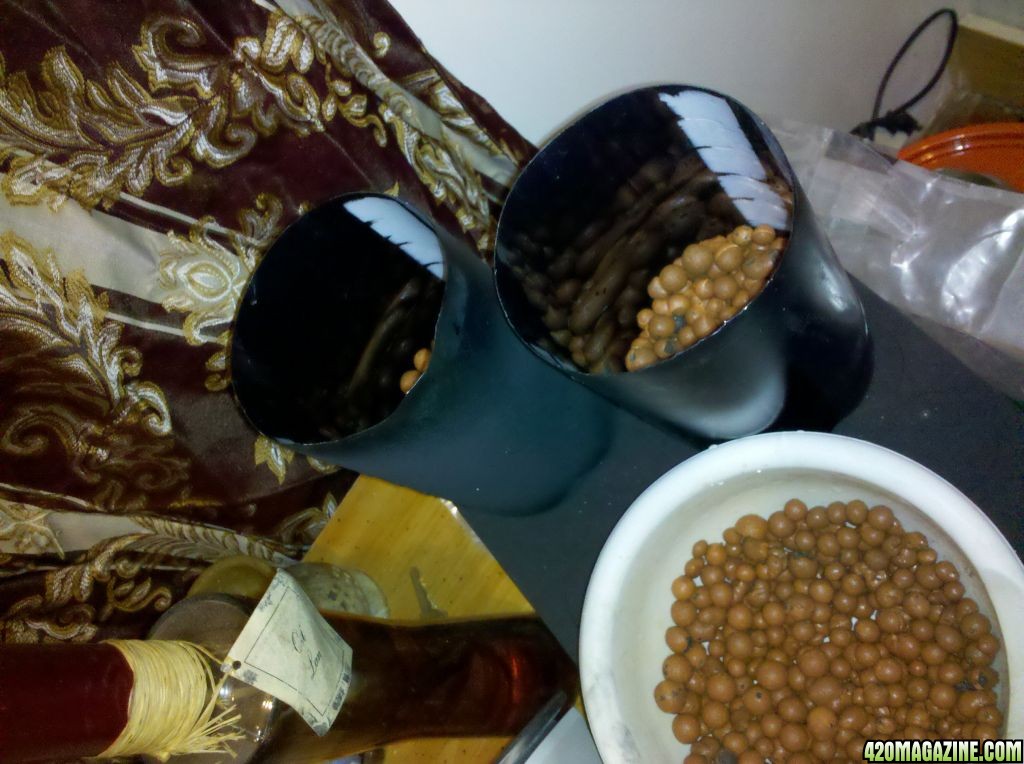
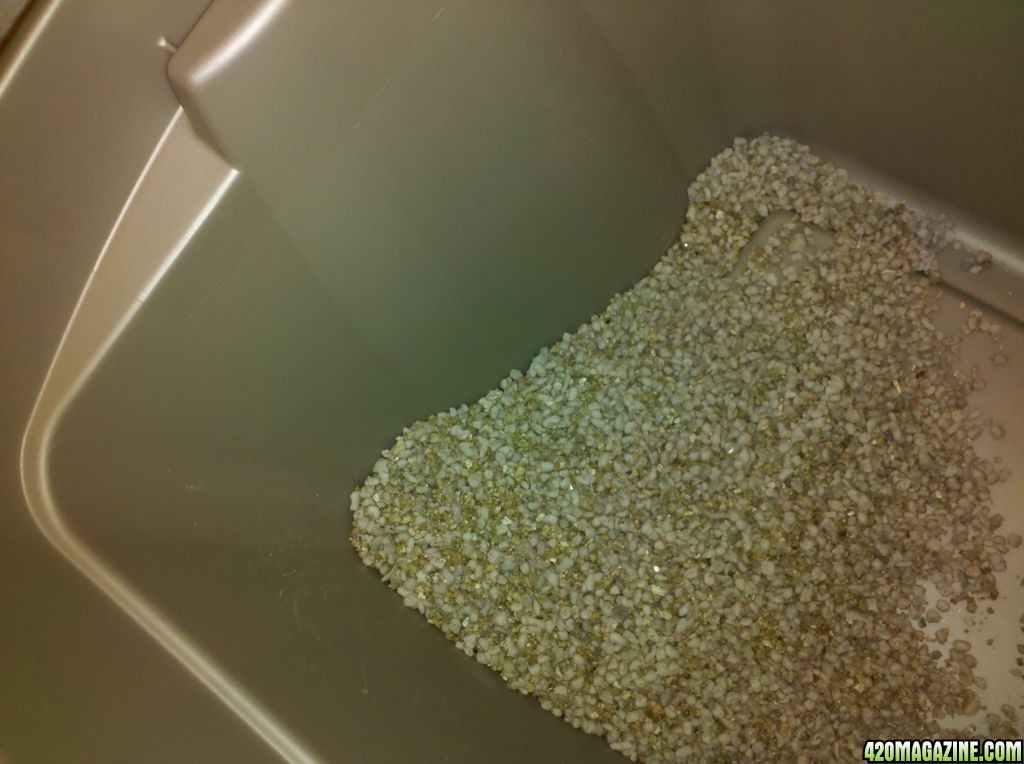
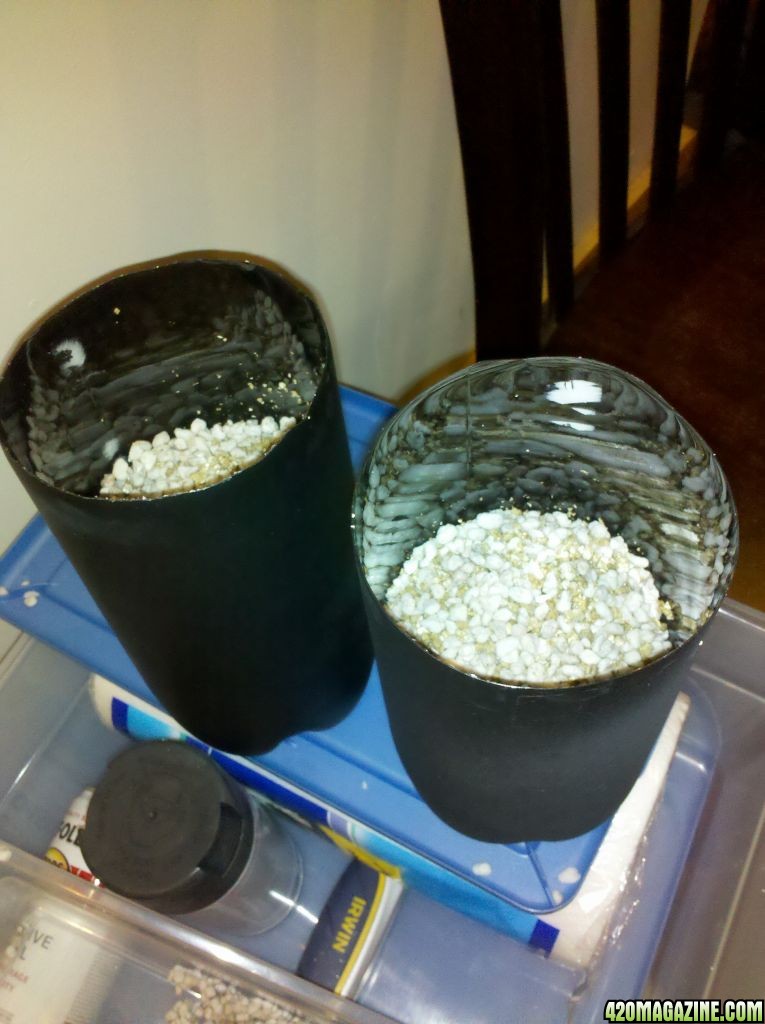
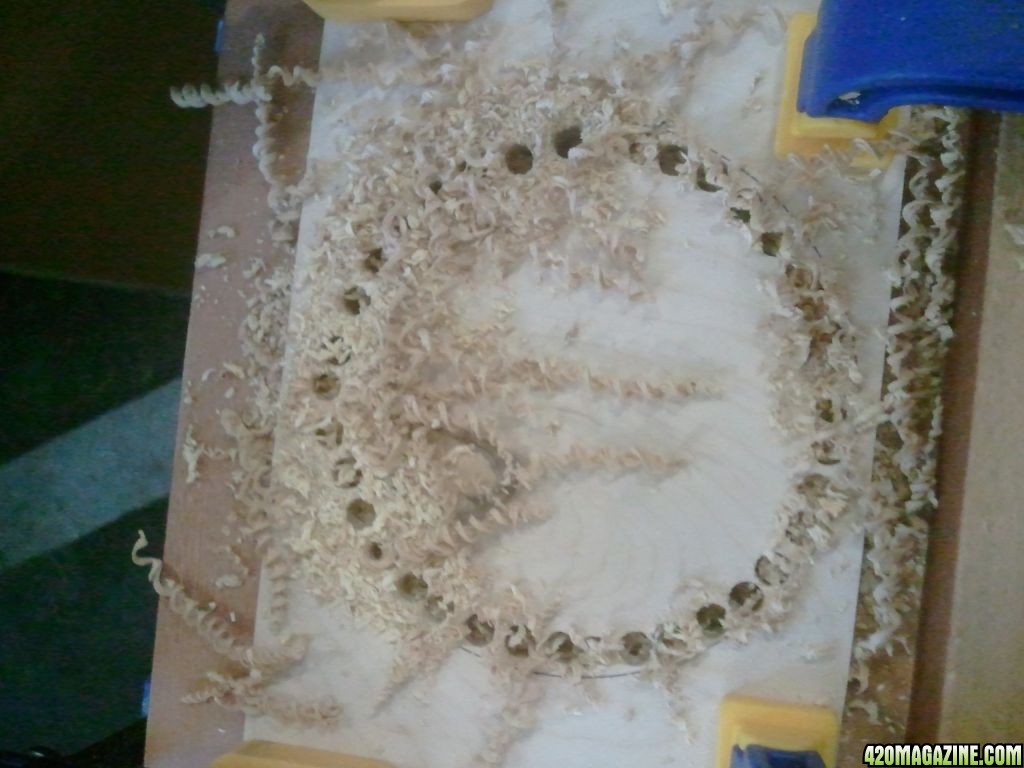
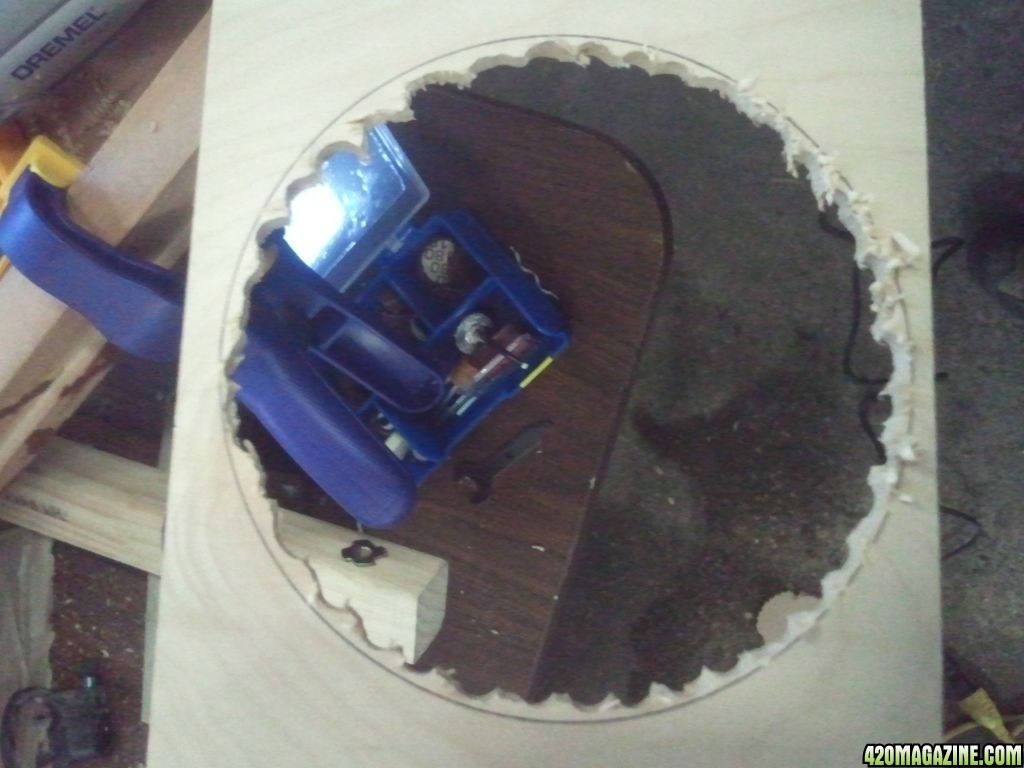
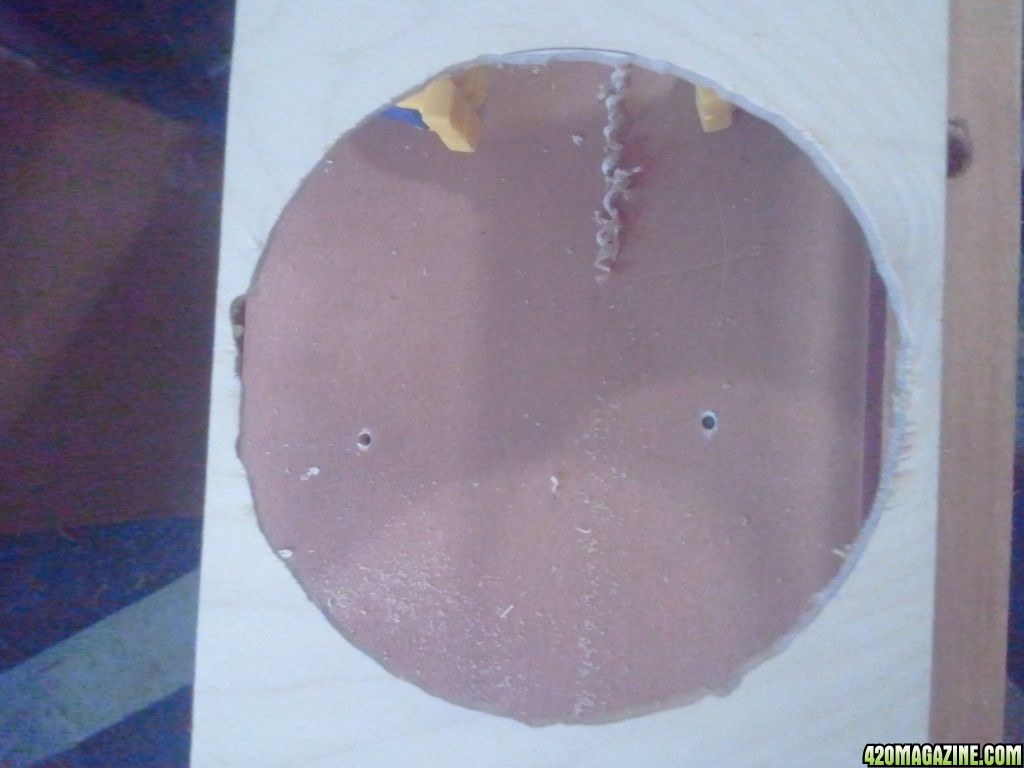
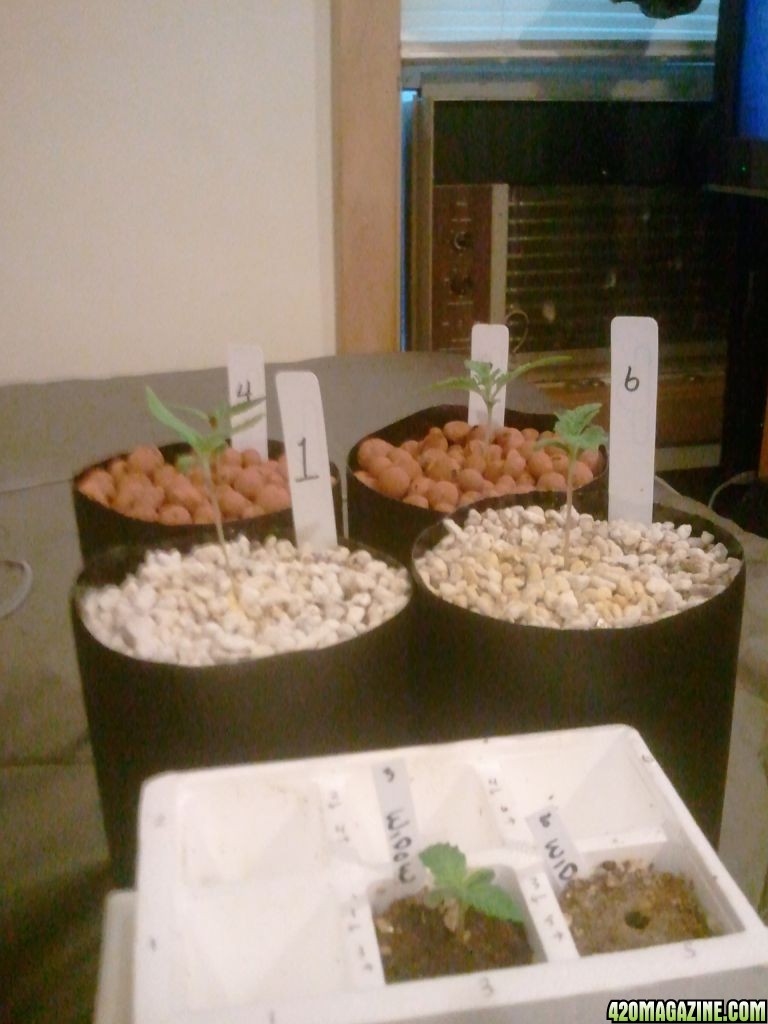
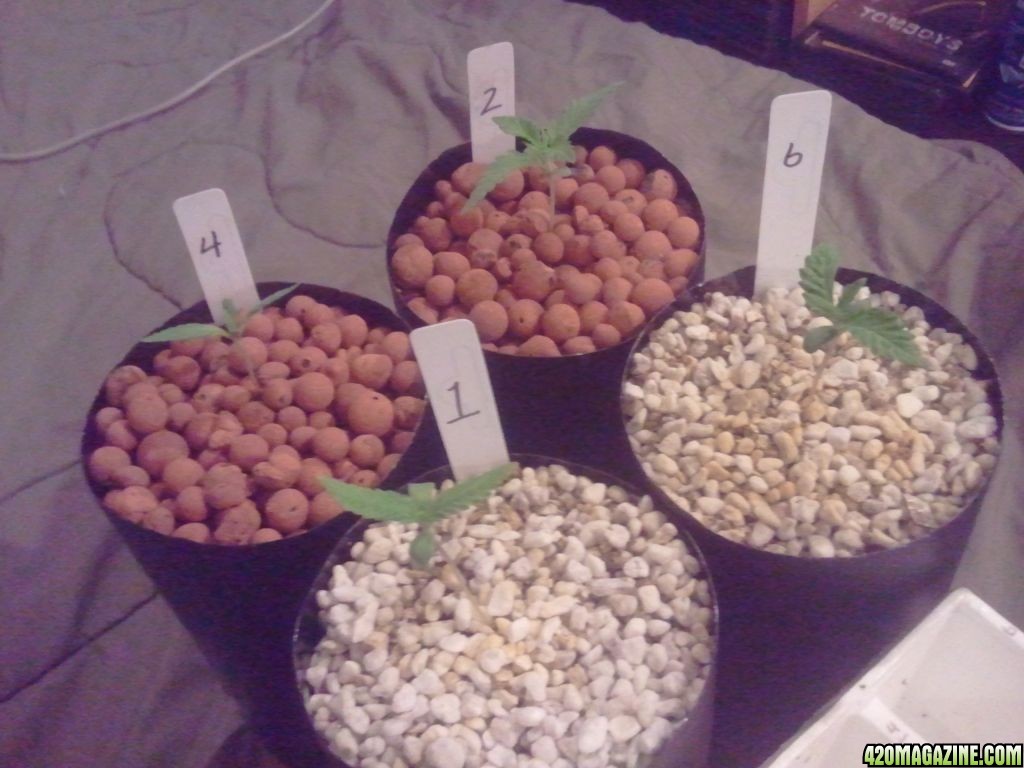
the "net pot" is a first attempt/experiment, the hole size was determined by the biggest dremel bit i had available at the time,
the very first run i did with it was a tomato plant, and it did well from seed to harvest in that "netpot" buy the end there were massive amounts of roots hanging down into the res, so im expecting similar results with cannabis, they have alot in common with tomatoes , since its a first attempt i cant say what will happen,its a learning attempt/experiment for using recycled garbage, at present my "mini dwc hydro" has cost me 0 bucks! if i end up needing bigger holes its any easy mod. but last update i noticed quite a few roots are already coming out of the holes,oh and the holes on the bottom side are alot bigger, i made them with a red hot soldering iron and the plastic melted so fast the whole iron went thru !! oops, also my coco/Pearlite mix is finer than i'd prefer so yeah i kinda did keep em smaller than if i had my "drouthers"

my hempys i designed to follow along with other 2L bottle hempy projects i have seen and studied, the concept is to fill the hempys with roots fast and go into flower fast, root bound plants will use alot of water,(daily watering) but due to the small res at the bottom tend to have plenty of water,,hempy by design is very easy to work with,and very forgiving when combined with coco, i have seen plants 2 1/2 feet tall with dense "hot house" cucumber sized colas 12- 18 inches long that grew in 2Liter hempys from seed/clone to harvest with no issues, i think the nature of hydro "hempy" style growing, kinda throws out the book on container size requirements with its ability to support so much root mass you can grow much larger plants than if it were in something else like soil for example.
also you can make a hempy as big as you like, theres a very large commercial type called "airbeds" or something im not sure of the name
i doubt that the roots would interfere with water flow unless you let them veg way to long, this is also my first official hempy/coco grow of cannabis, so results may vary
my "hoses in and out" are hand watering every day, and pouring the run off into the garden or where ever i need some fert water around the house or land, i grow 50% of my own food, and am very into the "green" thing, i recycle everything, have several compost bins,piles etc. im even feeding kitchen scrap to a box full of red wiggler composting worms,(worm castings) in prep for a 100% organic canna grow after the new year!, i have no plans to cover the drains with mesh i dont lose any medium to speak of,
I know some ppl have set up a drip,ebb&flo,mist,and so forth type system with their hempy's and coco too, i never noticed them using mesh, but for me now i prefer the low tech approach, it saves $ on equipment and electricity,and i like seeing and checking them daily, yes i even talk to my plants!! lol they like the co2 i exhale too!!
well i hope that answers your questions, feel free to ask more if your so inclined:thanks::theband: 
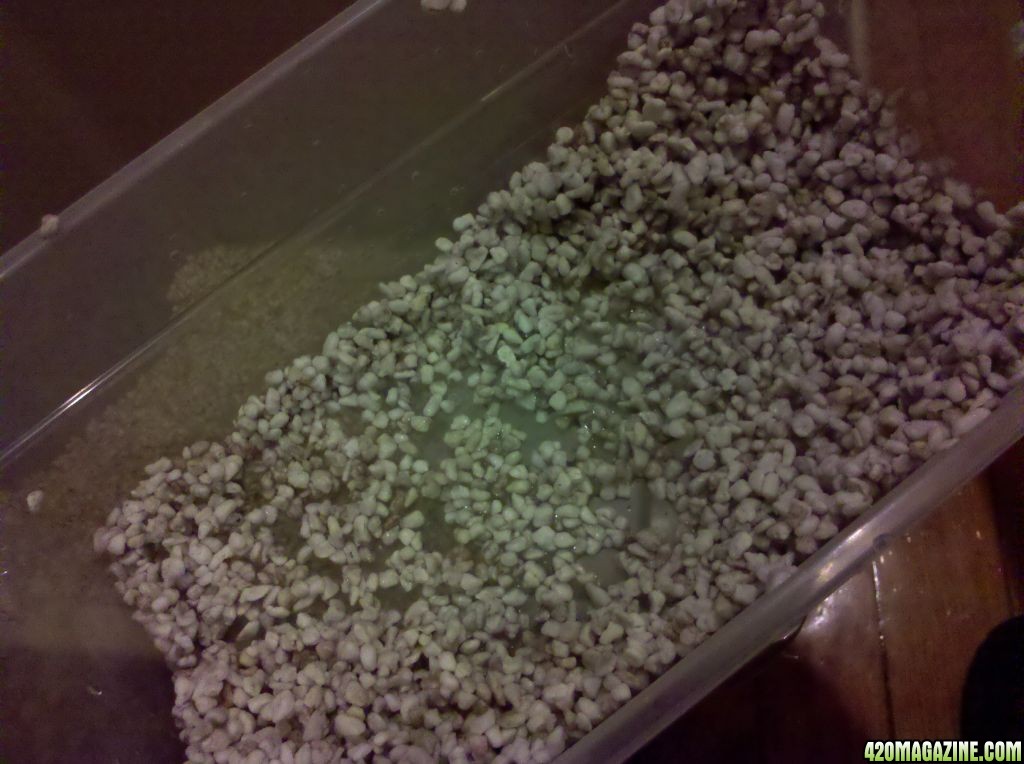
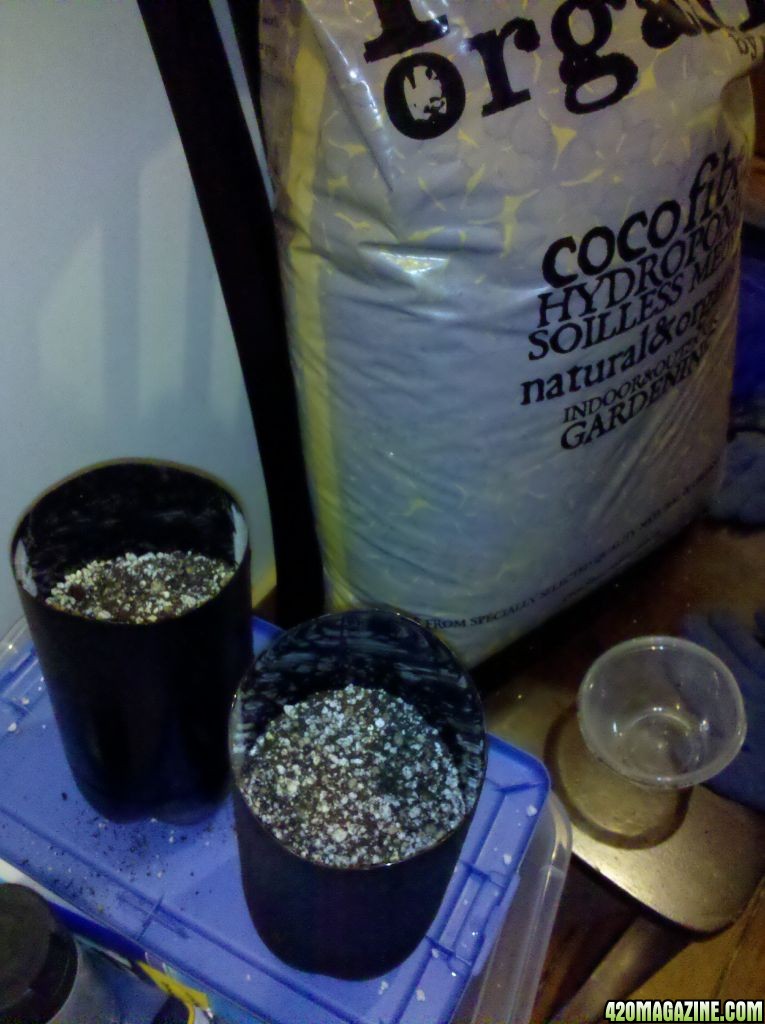
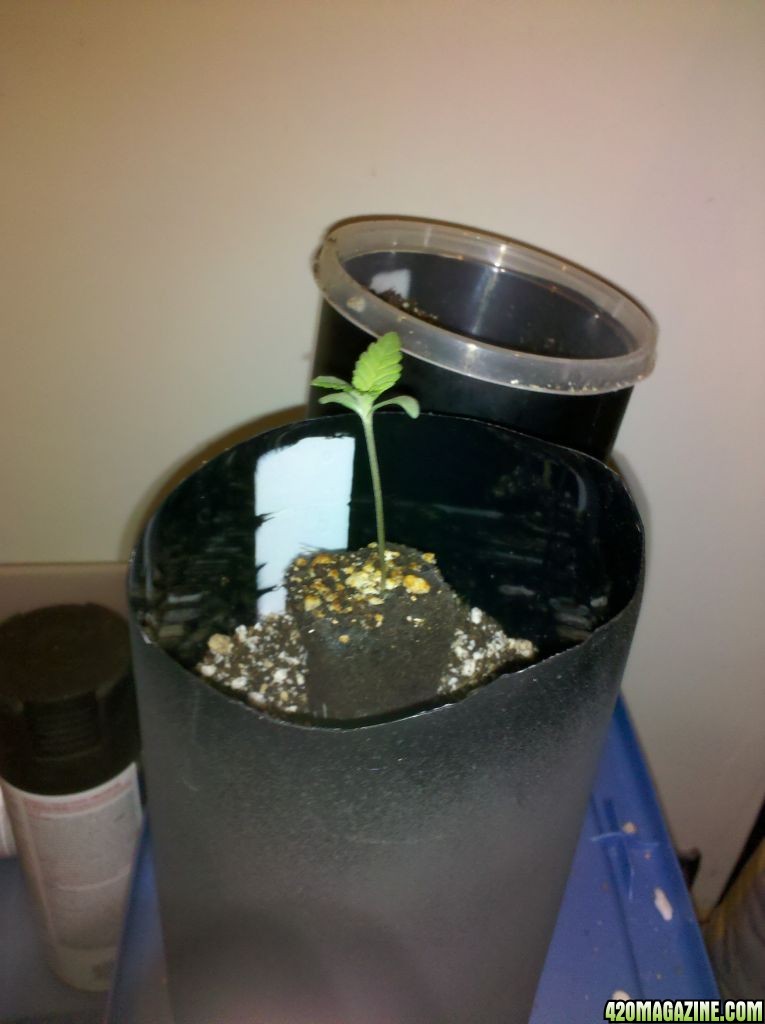
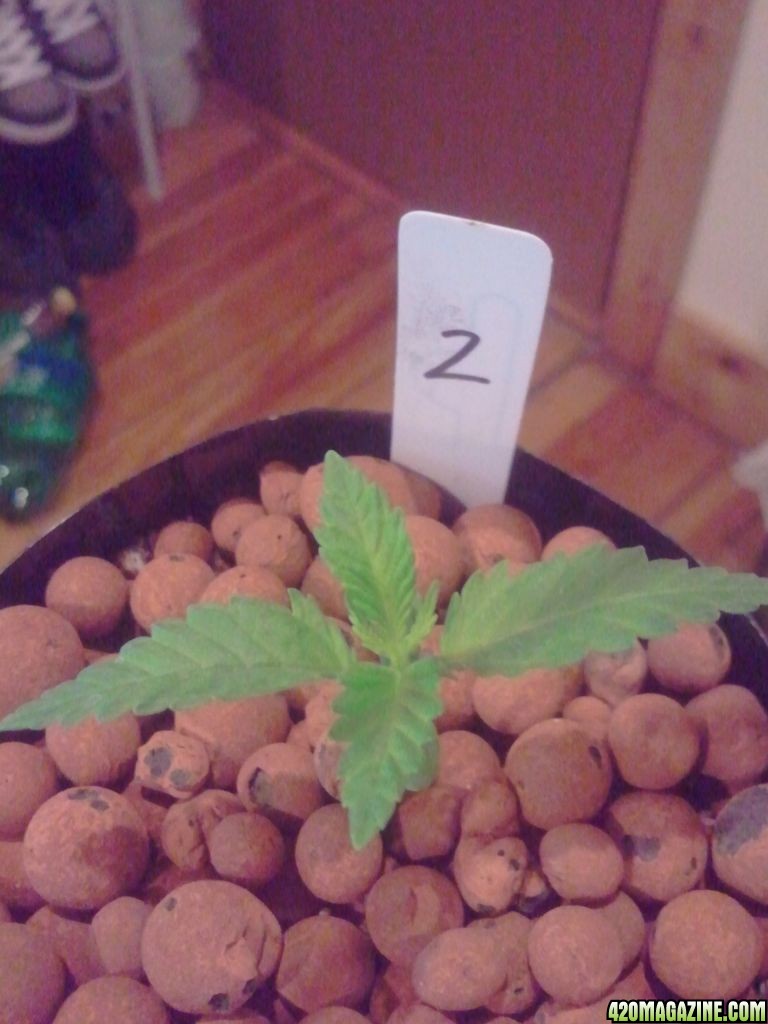
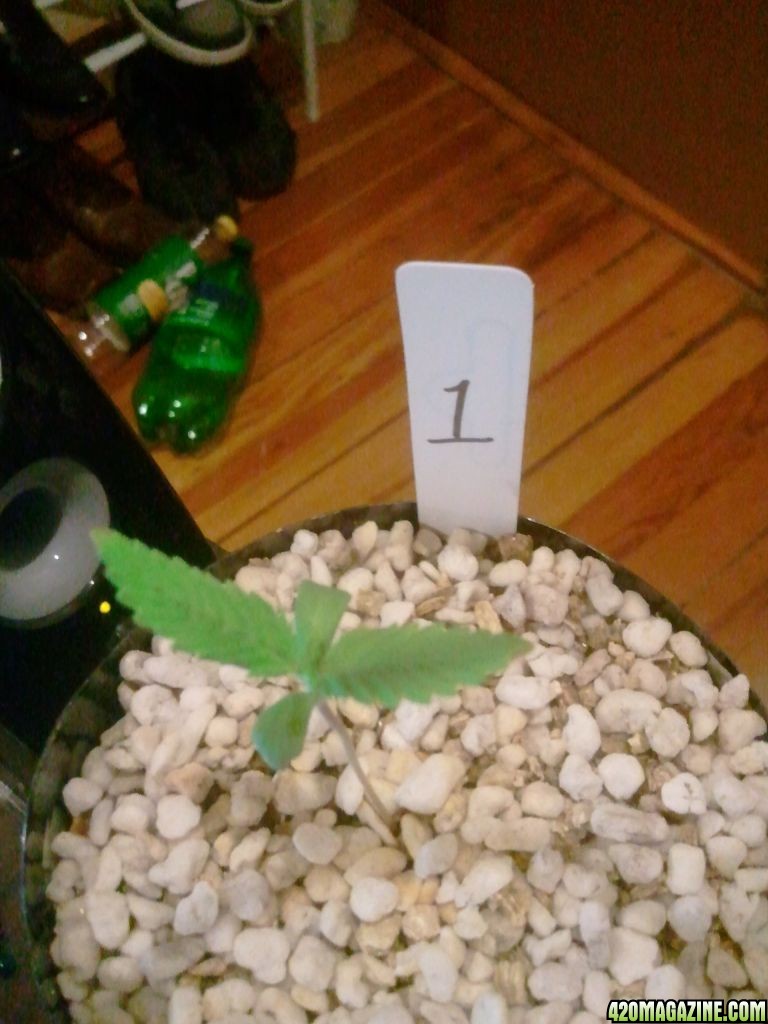
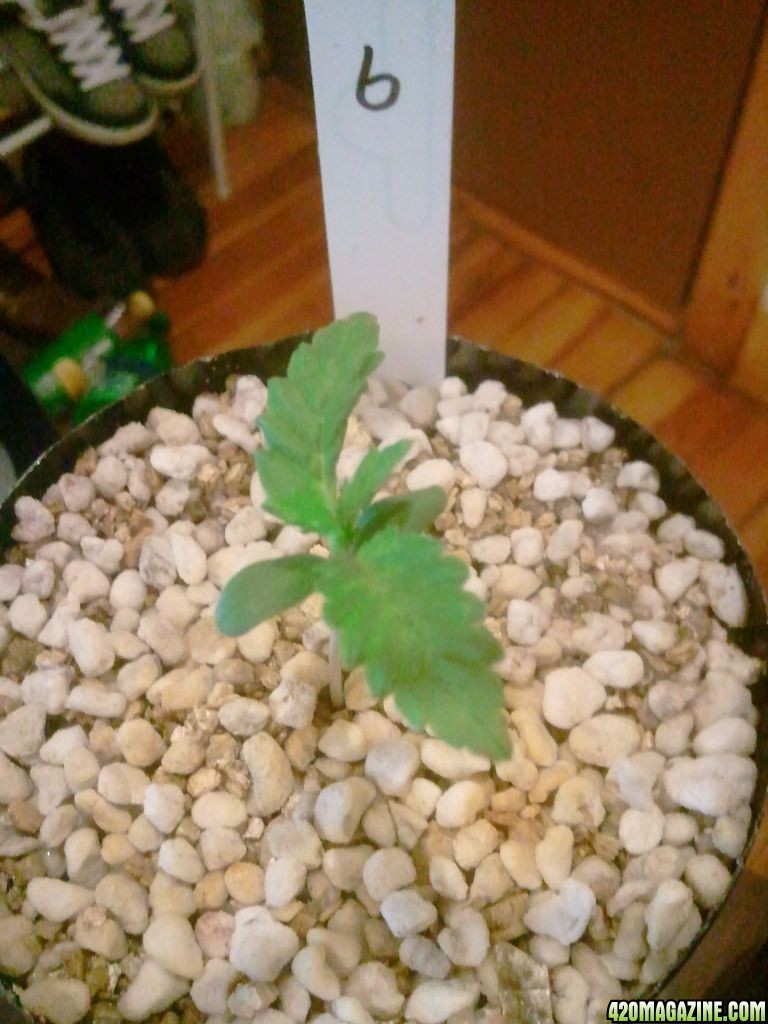
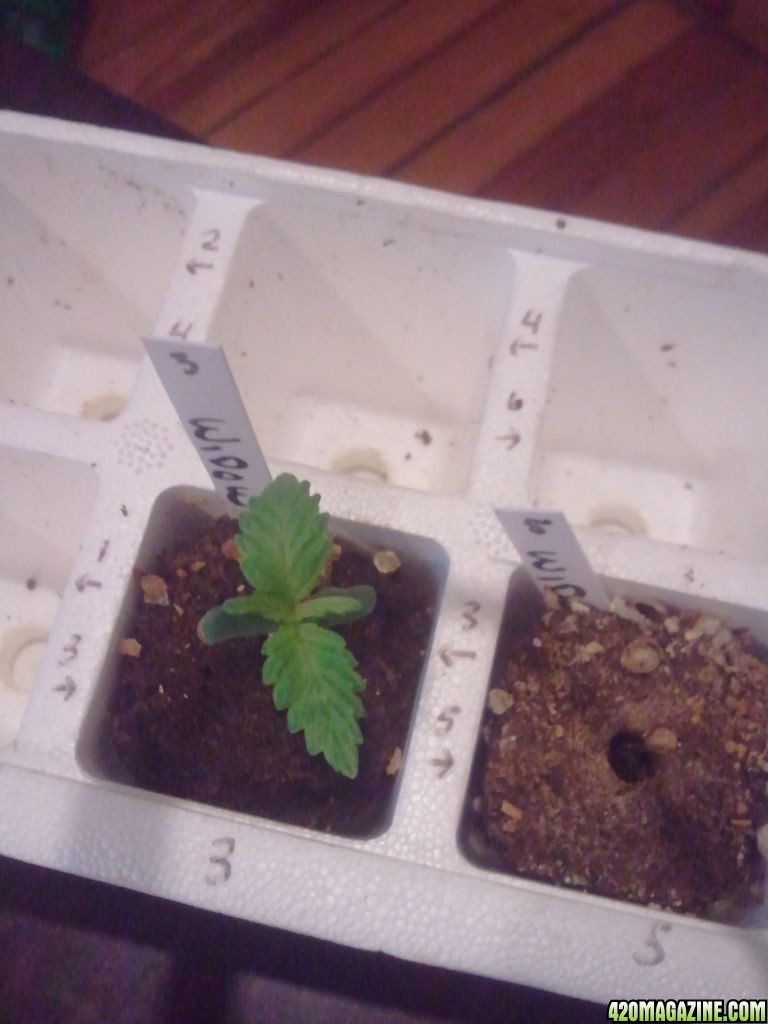
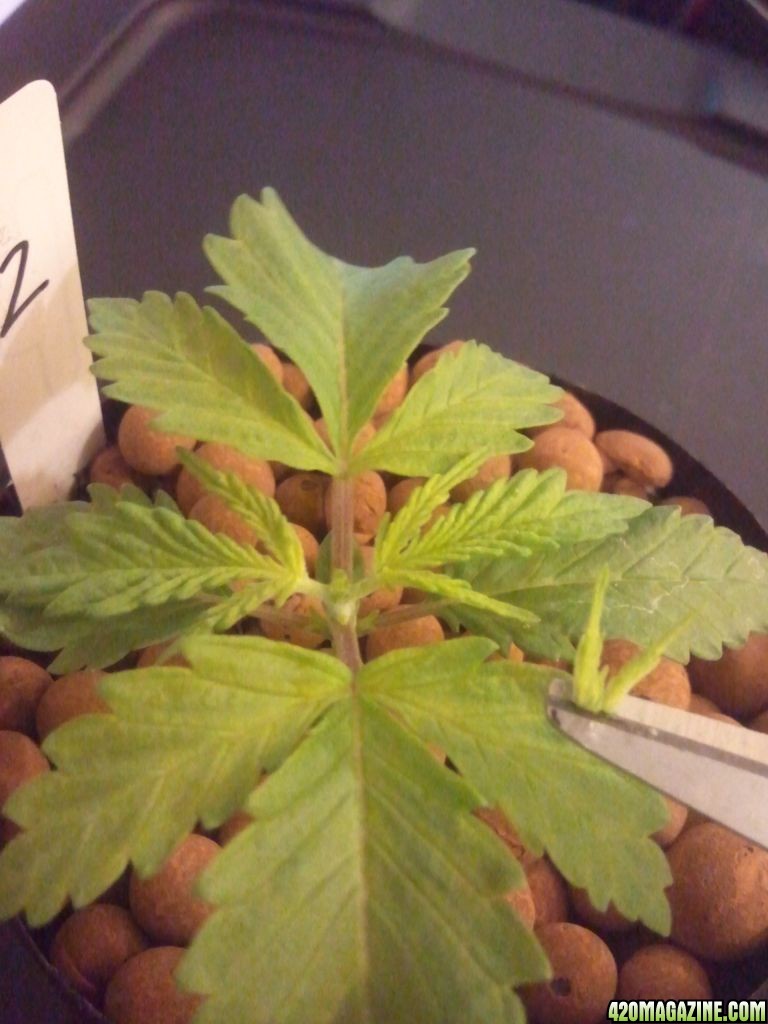
my next update will involve fim,lst,and moving seedlings out of micro pearlite hempys to ffof soil, cuz the seedlings are for seed and hopefully a mother or 2 (working on creating my own strain) will post it in the next 48hrs
 
Before I post any updates or responses, I am starting to get worried about #3, that I just transplanted. So, it's been 2 days since I moved her to a pot, and she's been steadily closing in and up on herself, and at the same time there is brown creeping into her bottom leaves from the tips inward. The smaller, newer growth still looks as green as ever, and even seem to be trying to spread out as they normally would, but their position is being affected by the movement of the larger leaves. I've been watering her with the same water as the other 2 hempy pots, which is also the same water she was getting before her move(it is nuted, but once again, this is the same water she was thriving on, so nuteburn? don't think so). I tested the water, just to be sure, and it was 6-6.5Ph. My humidity has been steady at between 37-39rh throughout, and temps have been between 70-85f. I'm thinking that this is caused by putting too much rooting gel on her when transplanting, because I did really slop it on when I prepared her for the move. This has been my feeling from the beginning when I saw the first deformation, so I watered her a little more than the others(she also needed to build a res, though) and gave her an extra watering this morning, in an attempt to rinse the crap off of her roots. I'm gonna let her dry out a bit, to make sure I'm not drowning her, but any info would be greatly appreciated, as I'd hate to lose her just as she was getting so lush!
First is the root structure, then plant at the time of transplant, then 2 of this morning, and lastly 12 hours after the morning pics.
2011-11-06_09_05_071.jpg

2011-11-06_09_19_46.jpg

2011-11-07_07_38_11.jpg

2011-11-07_07_38_27.jpg

2011-11-07_17_59_18.jpg
 
I got home to an even more miserable plant. i started flushing her with water to rinse the roots, then decided to go balls-out, and uproot her. Since the plug she was in is more solid than the coco mix she got added to, it's not that hard to pull her out, but if her roots have spread, i'll tear them doing that, so I've been hesitant. When I got her out, I could plainly see that the roots had not spread, but shriveled. Where there were once strong, white roots, there are now tiny shriveled brown threads. I'm not sure if it will help her more to get wet or dry out, so I'm gonna do both. First I have her in a small bowl of water, that I'll get bubbly every 30min for the next 2hrs or so, then I'm gonna put her back into the bigger pot(and not water the pot) and let her roots try to breathe. The fact that the plug is out, means the coco around where her roots will be is air-drying right now. So, I guess rooting hormone is meant only on clones where you want to GROW roots, not cover the roots in this to make more, stronger roots, correct? Hopefully she'll be back to life tomorrow night. Any other suggestions are still more than welcome!


The pics here show the roots now, then how they looked less than three days ago before putting rooting hormone on them. Then, I have the dish I'm trying to re-hydrate her roots in(if they've been deprived by the gel), and the hole she came out of.
2011-11-08_17_59_17.jpg

2011-11-08_18_00_47.jpg

2011-11-08_18_02_04.jpg
 
Back
Top Bottom