

Navigation
Install the app
How to install the app on iOS
How To Use Progressive Web App aka PWA On 420 Magazine Forum
Note: This feature may not be available in some browsers.
More options
You are using an out of date browser. It may not display this or other websites correctly.
You should upgrade or use an alternative browser.
You should upgrade or use an alternative browser.
1st Grow In 40 Years
- Thread starter 1970s Grower
- Start date
- Thread starter
- #42
1970s Grower
New Member
Heres a pic of the transplanted plants 5,6,7,&8 on Friday 8/26. Looks 50/50 whether they'll make it.
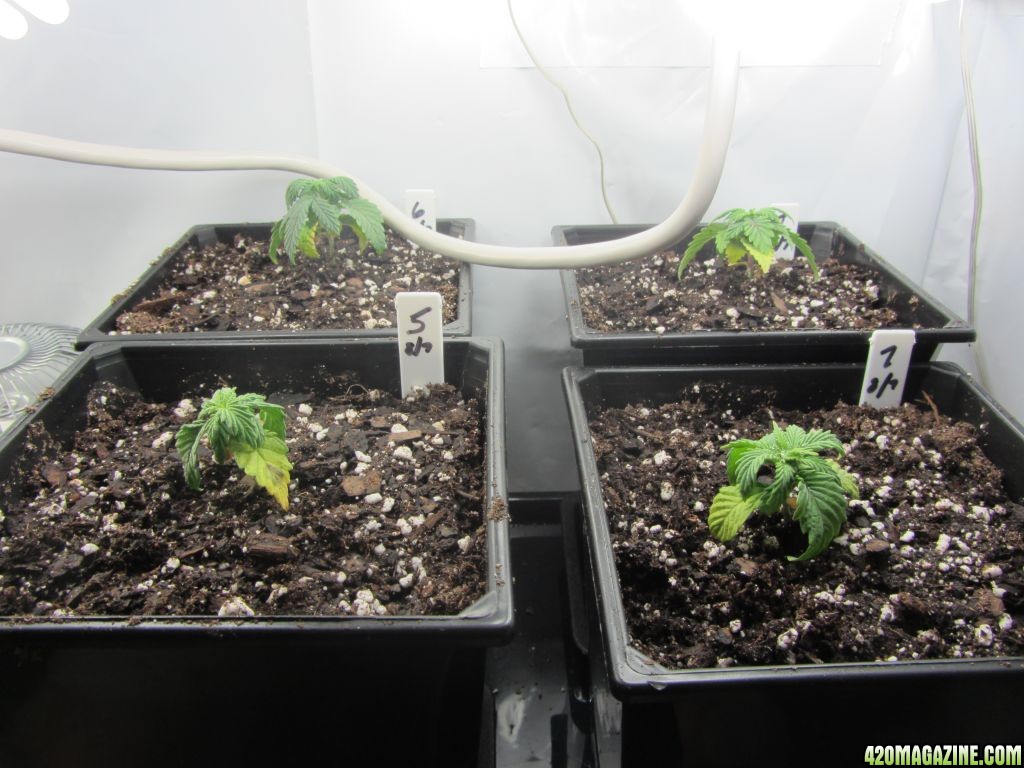
Heres the picture I could not upload yesterday.... Its hard to believe these pictures are just 48 hours apart.8/28... Heres a picture from today, 48 hours after transplant. THey are looking great.

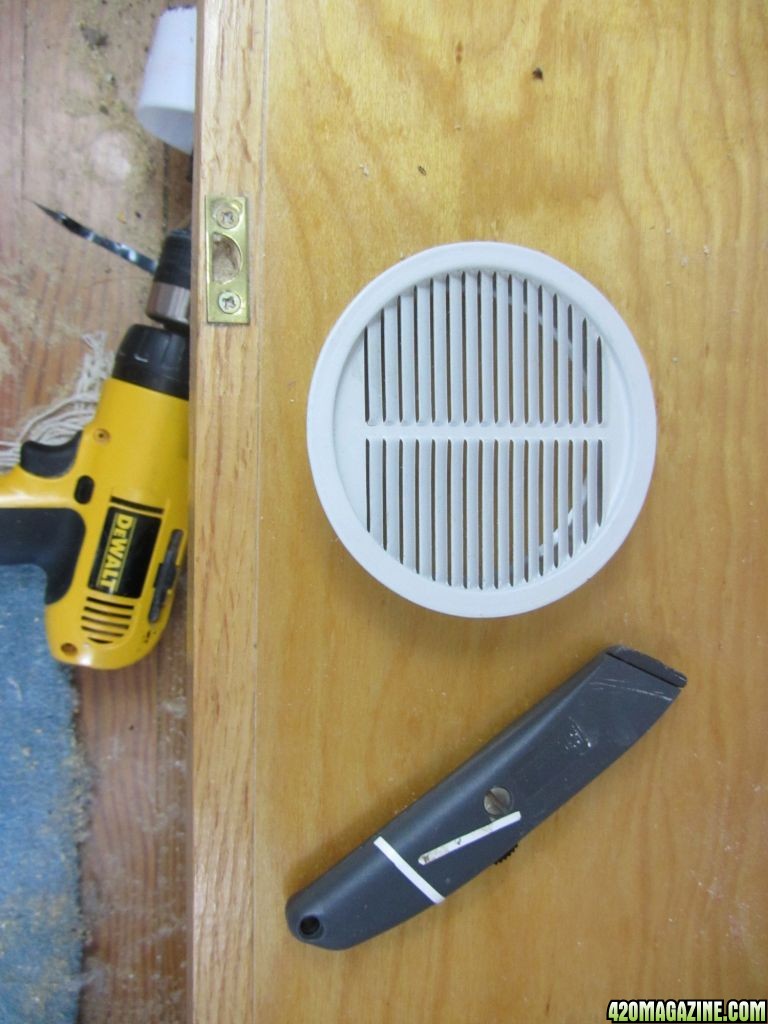
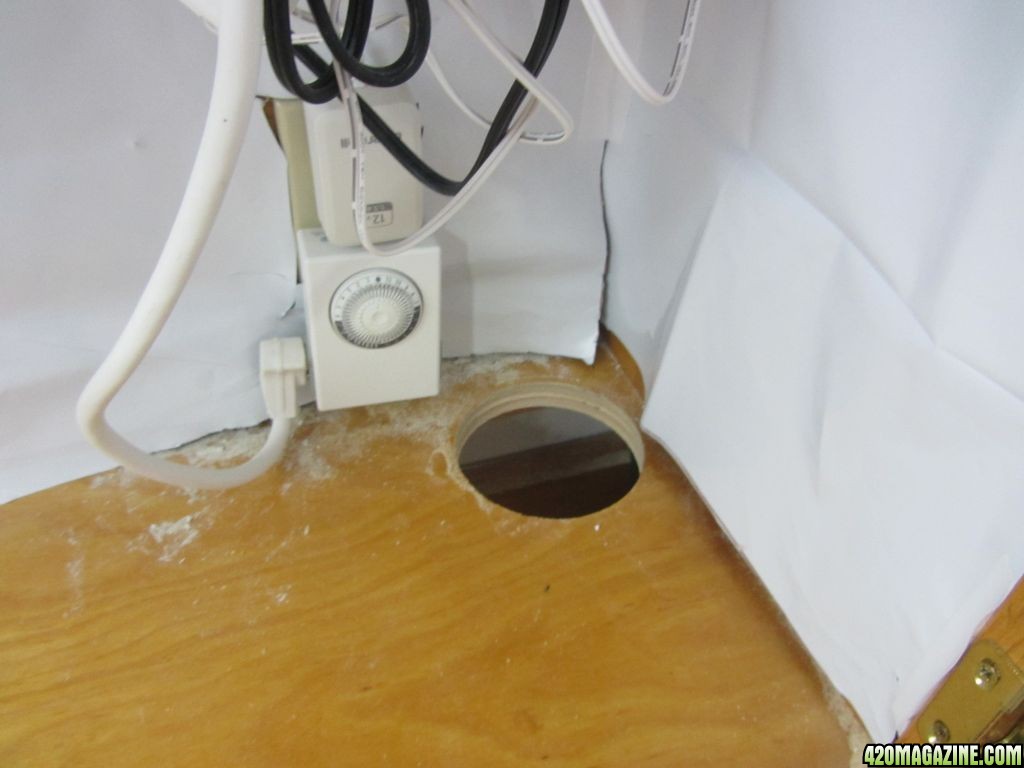
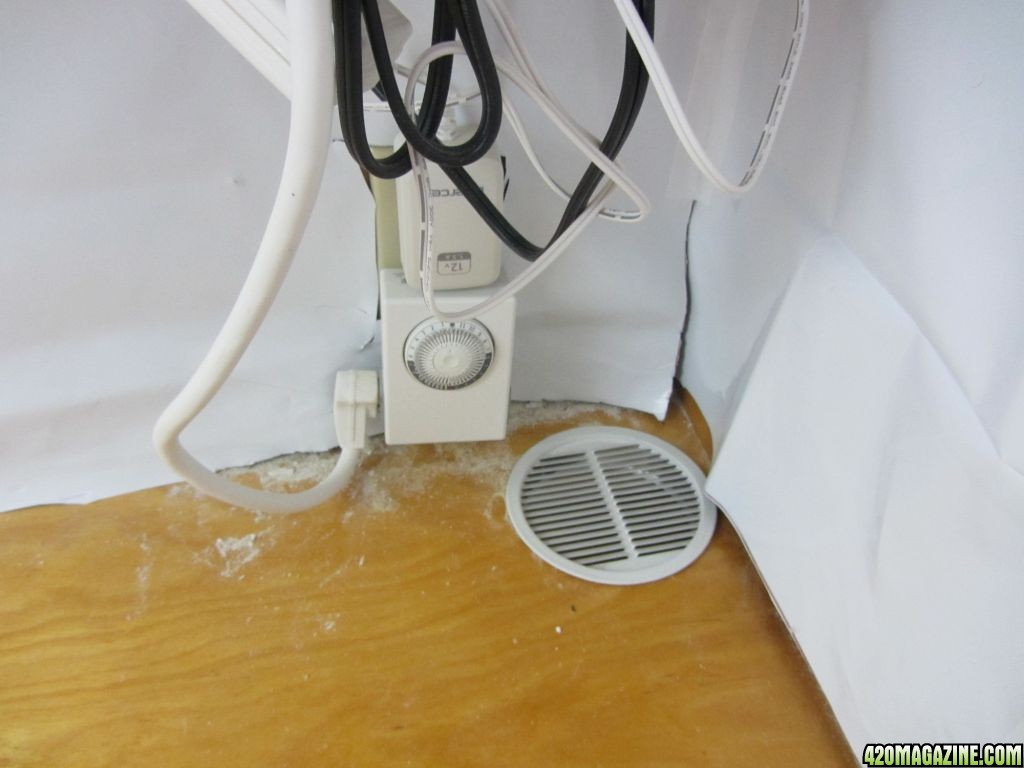
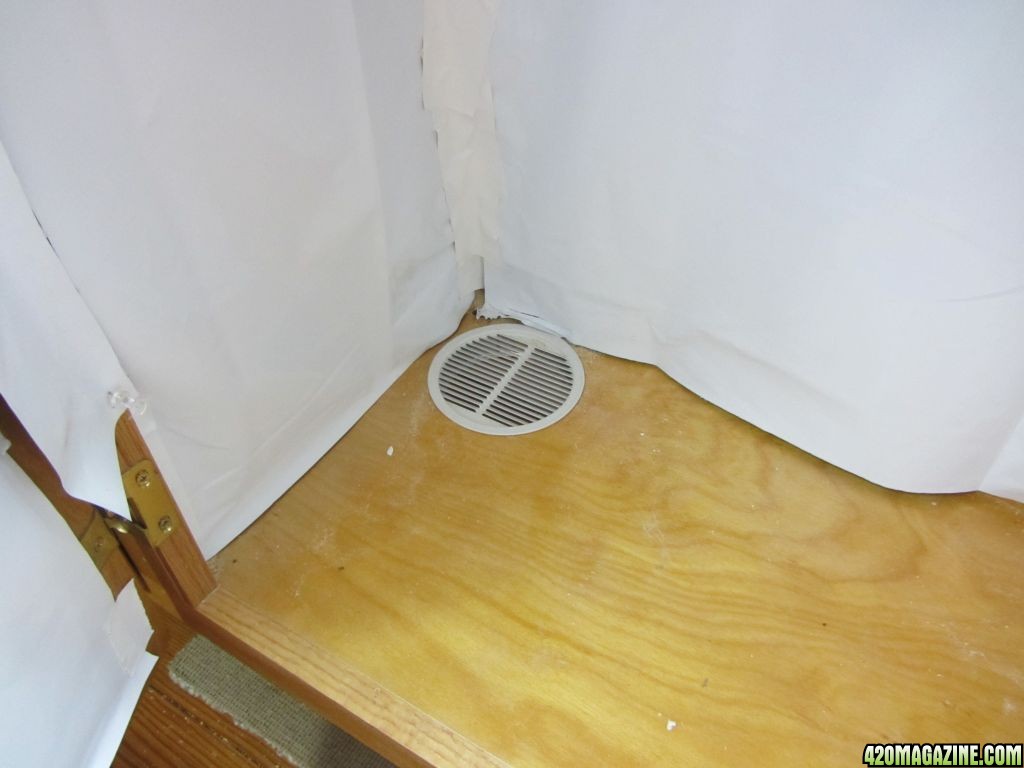
I also had to add some stealth intakes.
For the intakes I picked up some soffit vents from the hardware store. The are 4 inch diameter vents as you can see below. I like the way the ribs are angled so you place the vent at the angle you need to provide the most stealth.
I drilled the whole with a 4" whole saw. and popped the vents in. 10 mintutes plus cleanup and the job was done.


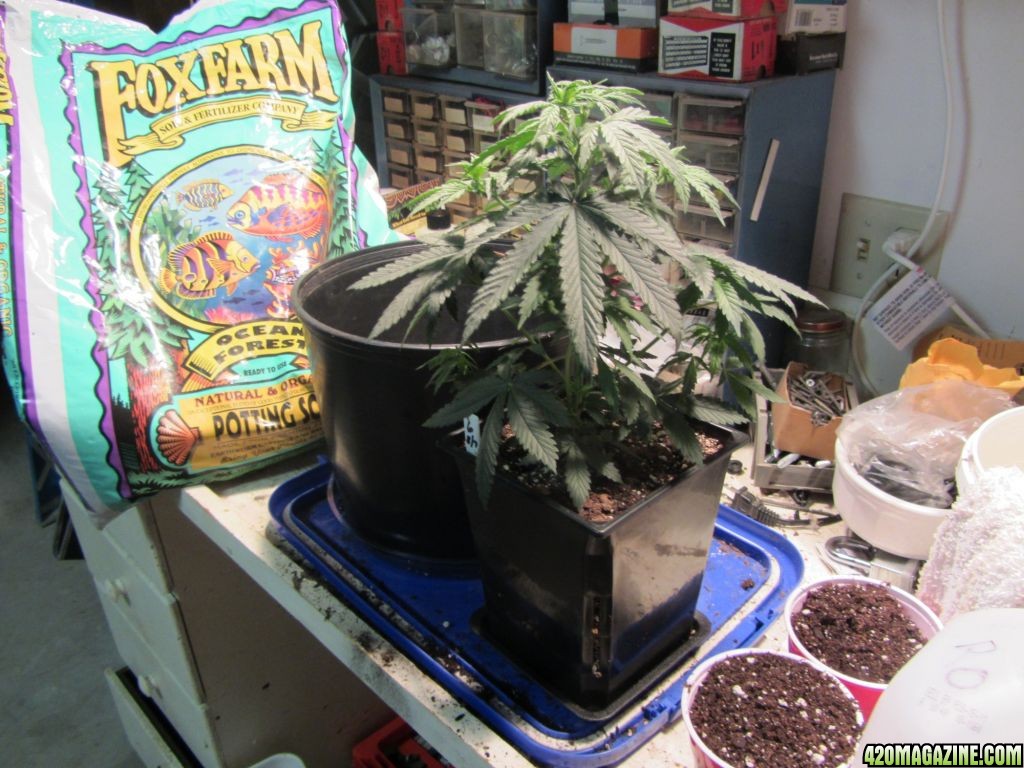
I also mixed up some Fox Farm Big Bloom at 50%. I am going to test it on plant 1.
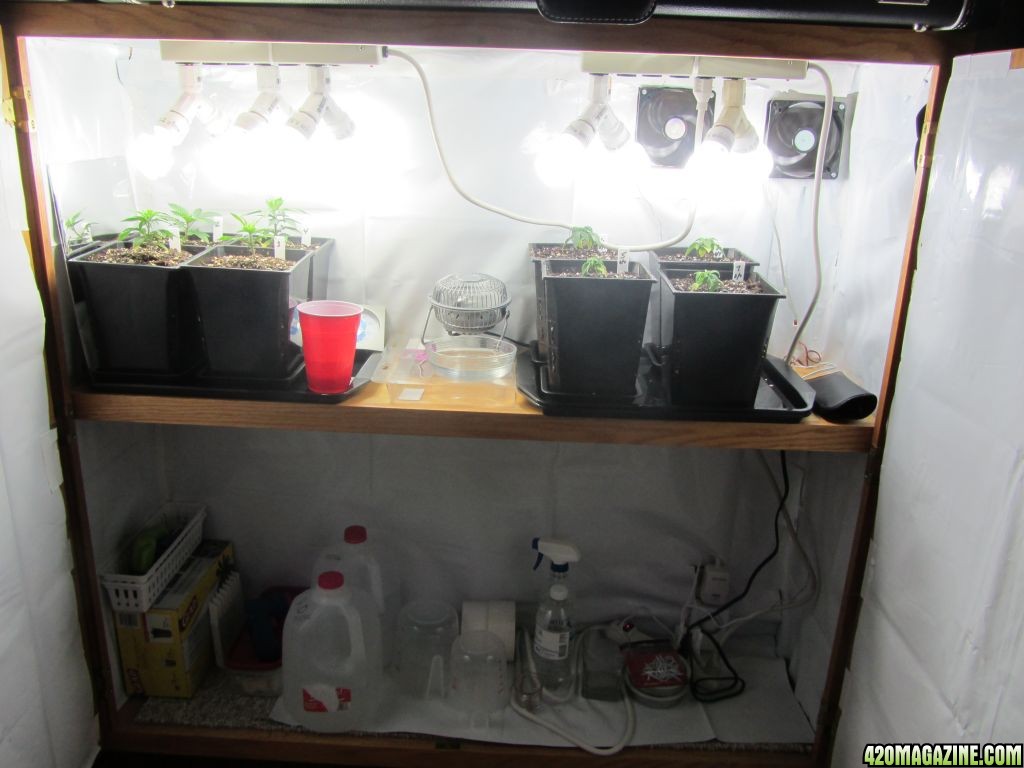
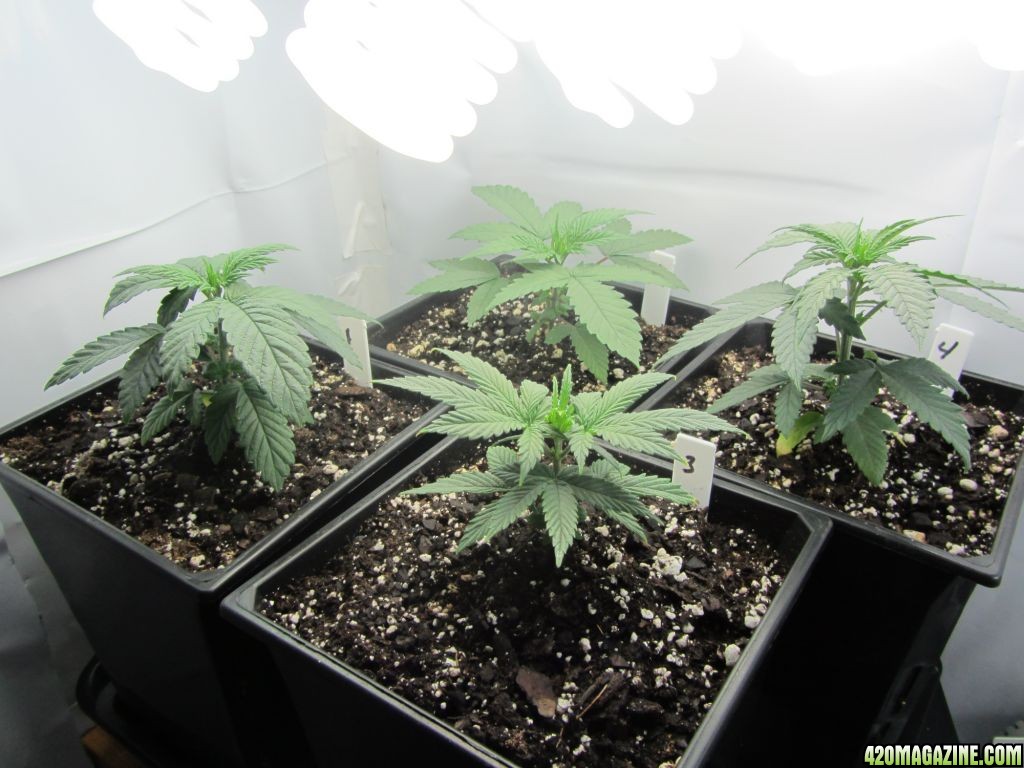
Here's plants 1-4 which are 7 days older than the plants above.
- Thread starter
- #43
1970s Grower
New Member
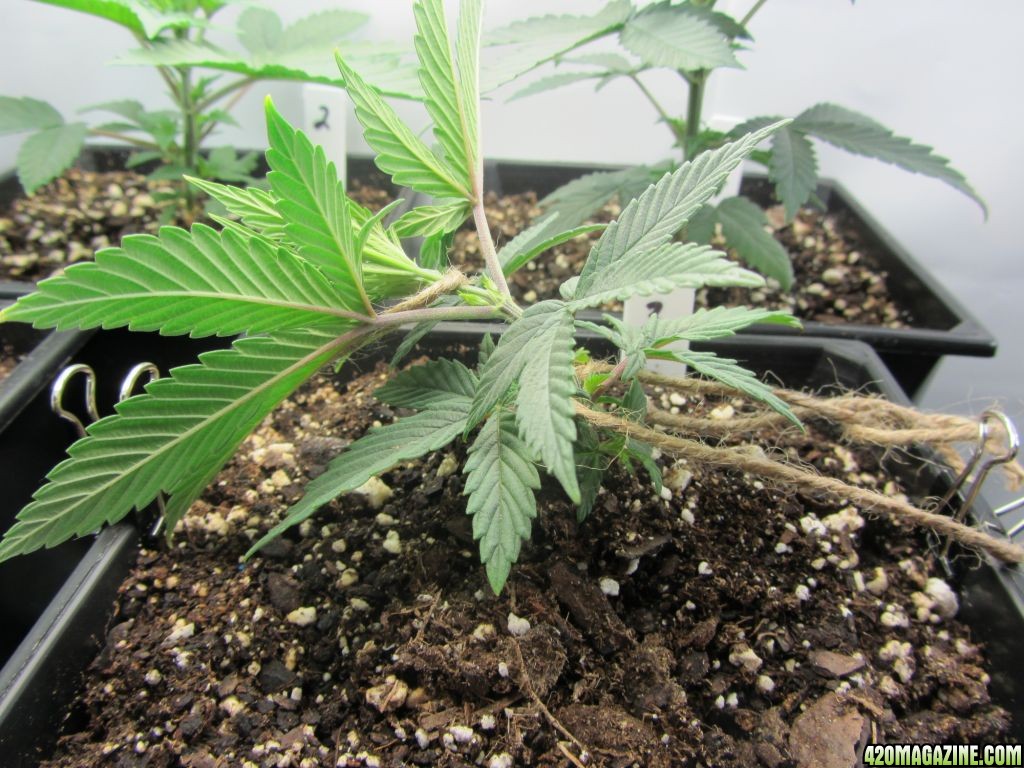
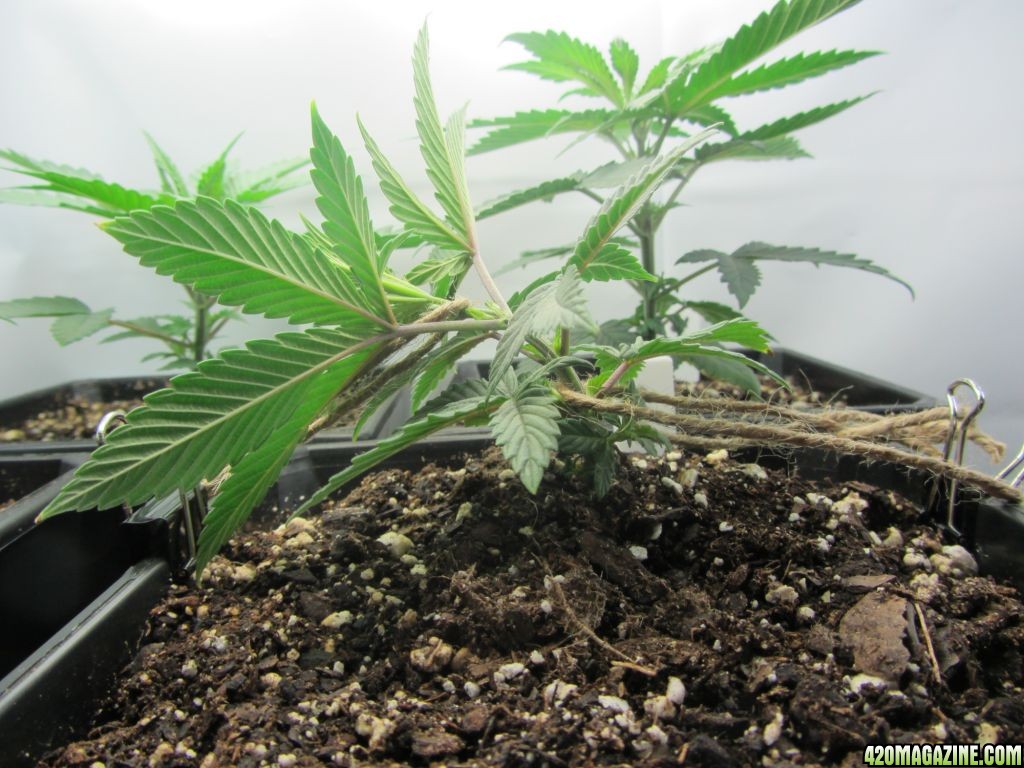
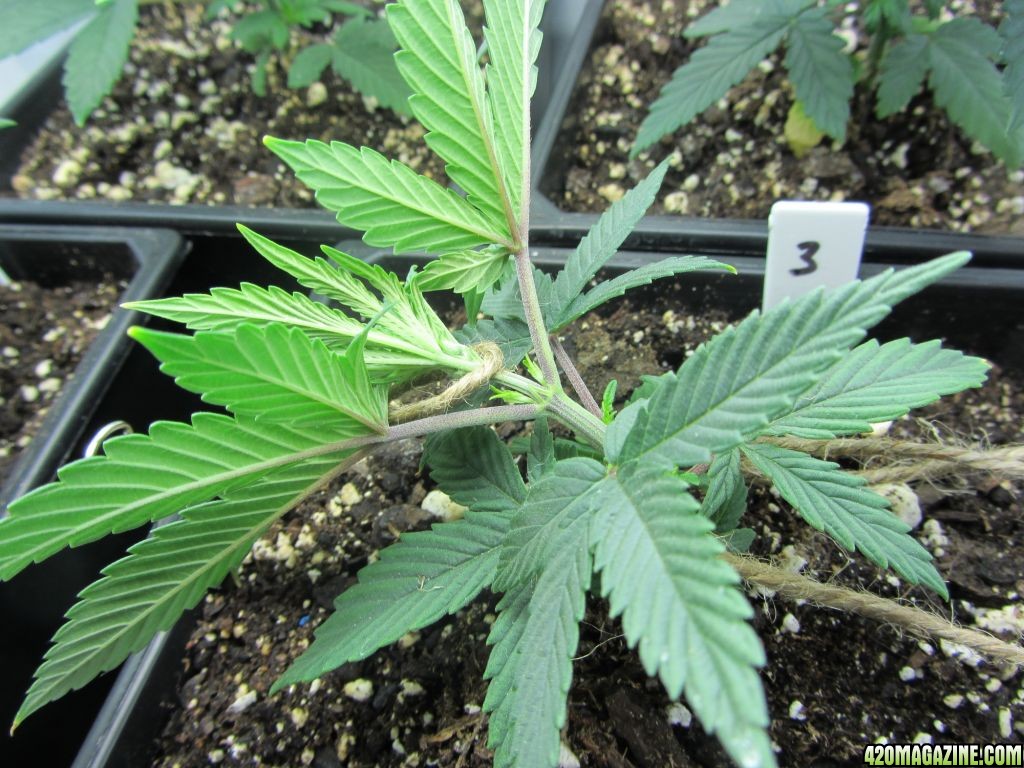
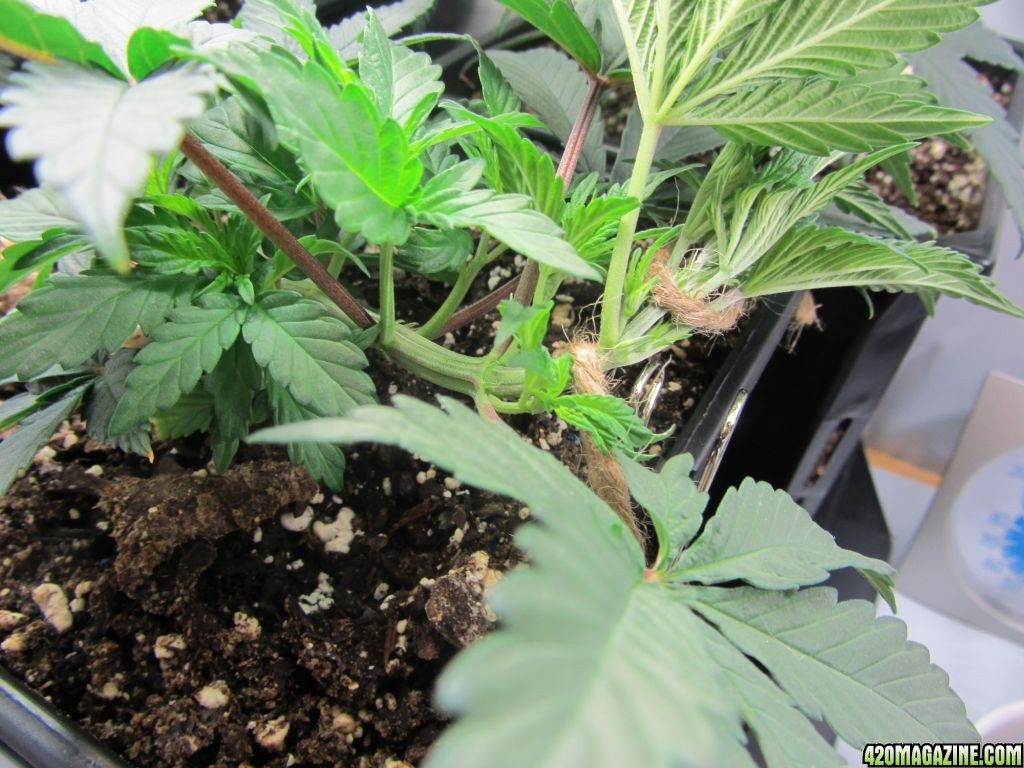
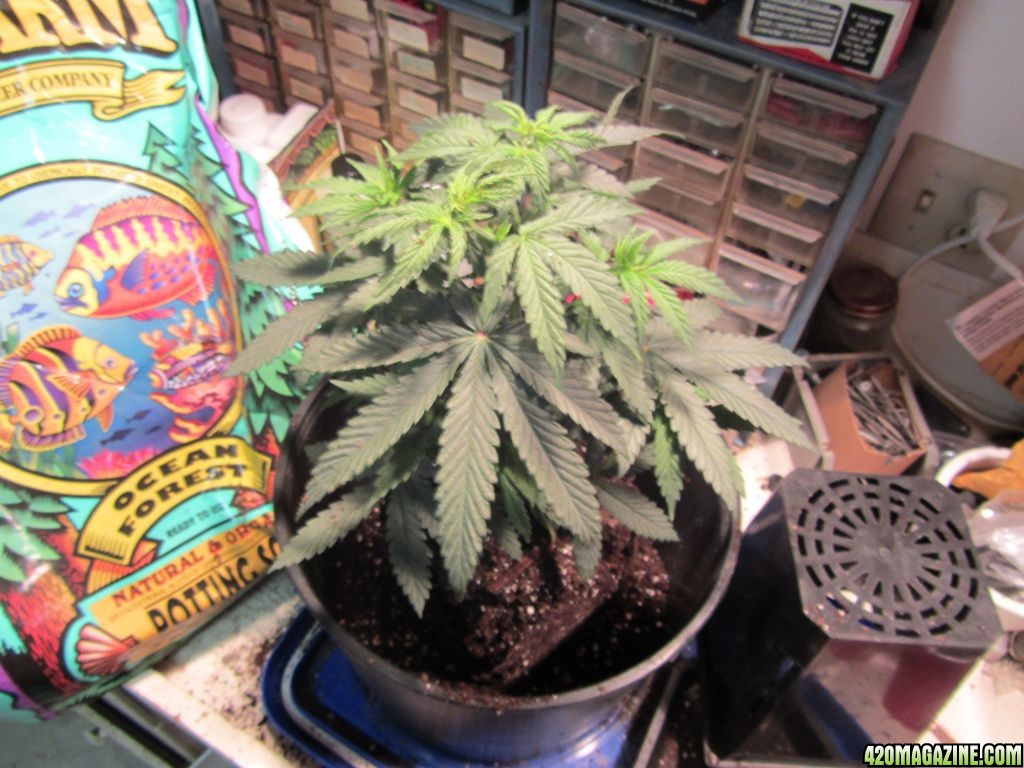
8/29.. I am trying my first LST on plant 3. Not sure quite how or where I should be tying it off to be perfect. I welcome comments on improving my method. I am using string made from hemp so at least I have karma going for me. Here's some pics for critiquing my technique.
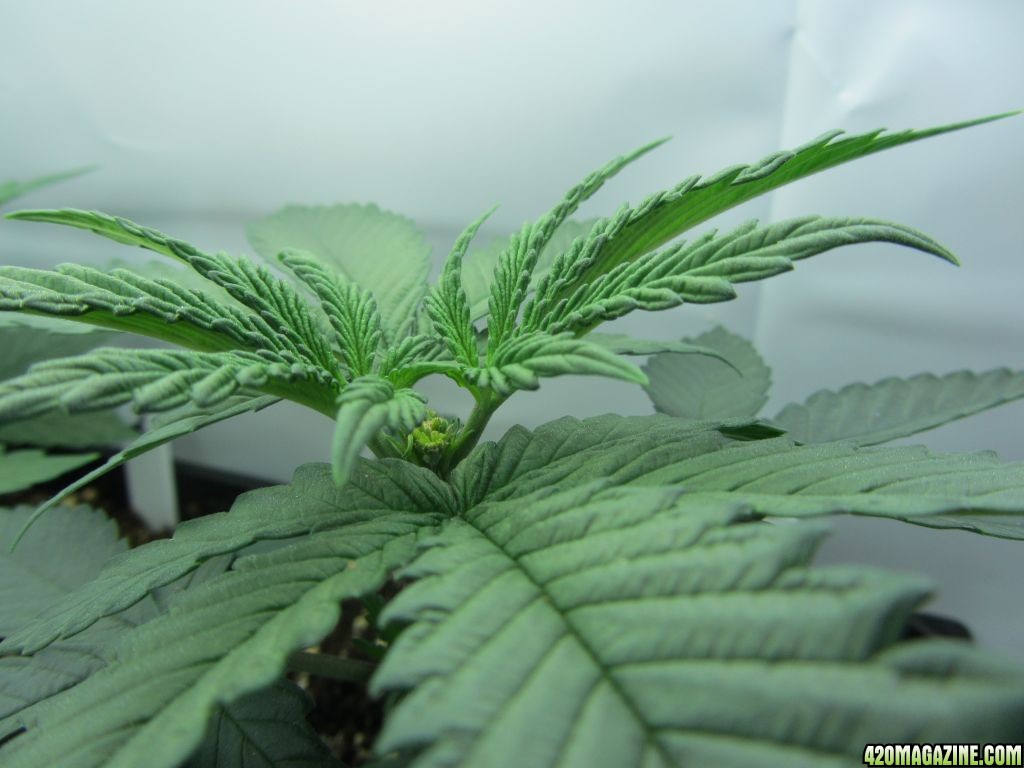
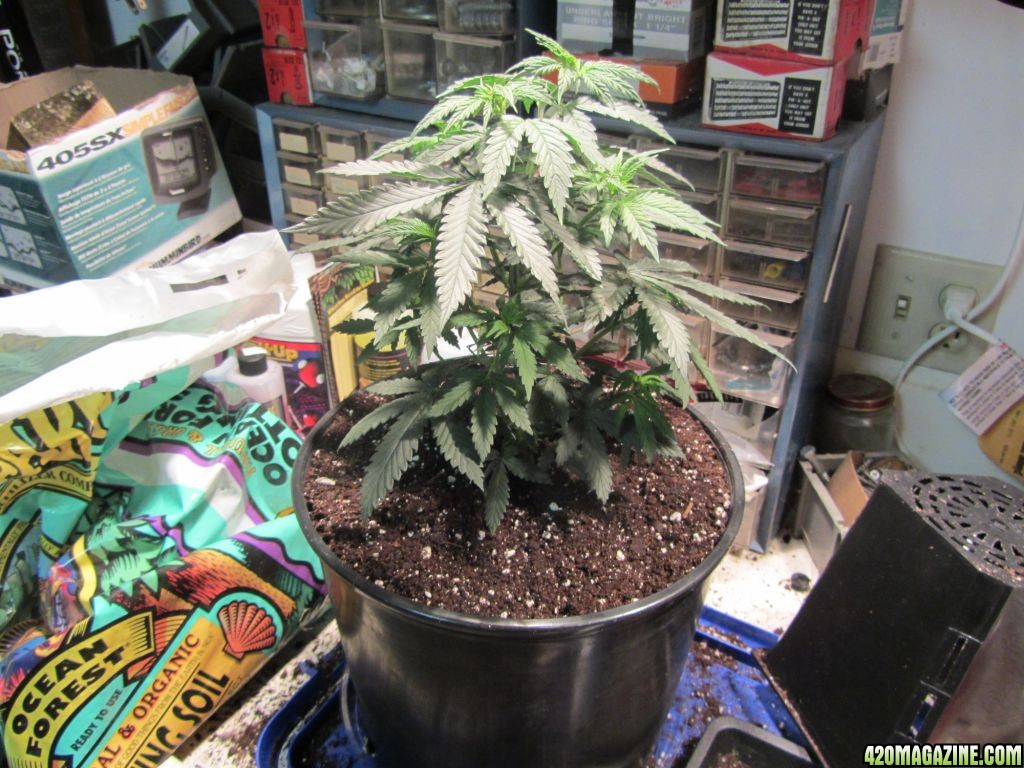
Fuck I Missed.... THis is my first ever attempt a FIM. Back in the day we just topped them. Not sure there really is a difference. The whole experience was like my first time trying to find that fleshy tissue part that makes a girl scream if ya know what I mean. Not sure if I got it right or not (I didn't hear her moan anyway). I kept looking and looking but wasn't sure so I sterilize the scissors and cut it where I thought I should. Not as easy as it looks. I did this yesterday and heres what I see today. Comments?
Someone please give a hand with these and tell me what I did wrong. I want to do it correctly.
8/29.. I am trying my first LST on plant 3. Not sure quite how or where I should be tying it off to be perfect. I welcome comments on improving my method.
Just do your best to get the top bit of the plant as low as possible. Auxins will get redistributed in the plant which will encourage branching in an effort to get secondaries up towards the light.
Snub Knows
New Member
Love the new mod to the cabinet, and the 4 new plants are lookin great! Glad to see the original 4 bounced back well, too. Hard to tell from the photo of the fim cut if it was done right. Even if it wasn't, though, no worries. You'll know for sure as it recovers and starts growing again. First time I fimmed, I thought I botched it. A week later, I had five new branches from the one cut. Sometimes I get two new tops initially, like the fim didn't work, then a few days later an additional new branch or two will pop out. You've obviously been readin up on it, so I'm sure you have a handle on the method. When I do it, I try to leave about 10% on each side of the u-shaped cut. Works pretty well for me. Good luck!
- Thread starter
- #46
1970s Grower
New Member
Love the new mod to the cabinet, and the 4 new plants are lookin great! Glad to see the original 4 bounced back well, too. Hard to tell from the photo of the fim cut if it was done right. Even if it wasn't, though, no worries. You'll know for sure as it recovers and starts growing again. First time I fimmed, I thought I botched it. A week later, I had five new branches from the one cut. Sometimes I get two new tops initially, like the fim didn't work, then a few days later an additional new branch or two will pop out. You've obviously been readin up on it, so I'm sure you have a handle on the method. When I do it, I try to leave about 10% on each side of the u-shaped cut. Works pretty well for me. Good luck!
Well I don't think I got a U shaped cut with a scissors. Further research indicates I should have used a razor blade and did a U cut as you mentioned. THats pretty small and tight area to slip a razor blade in. I guess I just need more practice.
- Thread starter
- #47
1970s Grower
New Member
8/30... I learned a few things recently I thought I would share...
1. My 1 gallon square pots weigh 3 pounds, 10 ounces when they are watered to the point where water comes out the bottom. When I transplanted to these pots, I had to add 16 liquid ounces of water to get water running out the bottm. 16 liquid ounces of water weigh aproximately 1 lb 1oz or 17 ounces. By weighing my plants i can tell how much water they have left in the soil. I have a digital scale for weighing guitars that goes to the tenth of an ounce. As my plants start weighing more, these numbers will change, but water still weighs the same. Doing the math kind of makes it high proof.")
2. I had one plant that I over watered 2 days ago. Today water was still pooled in the tray but it felt like it weighted light. I picked up the plant out of the tray and there was what looked to be a white worm about 5 inches long hanging down. After closer inspection there were about 50 or so of these 1/4 to 1/2 inch things coming out the bottom of the planter. Those be roots dumbass! ...and the plant is begging for water. I could hardly beleive that just 10 days ago I transplanted these from dixie cup size peat pots and now the roots are all over the place! So I put em on the scale and sure enough they were down approximately over a pound in weight since they were saturated just 2 days ago.
3. These plants at 30 days from seed, in 1 gallon containers, drink more than 8 liquid ounces a day.
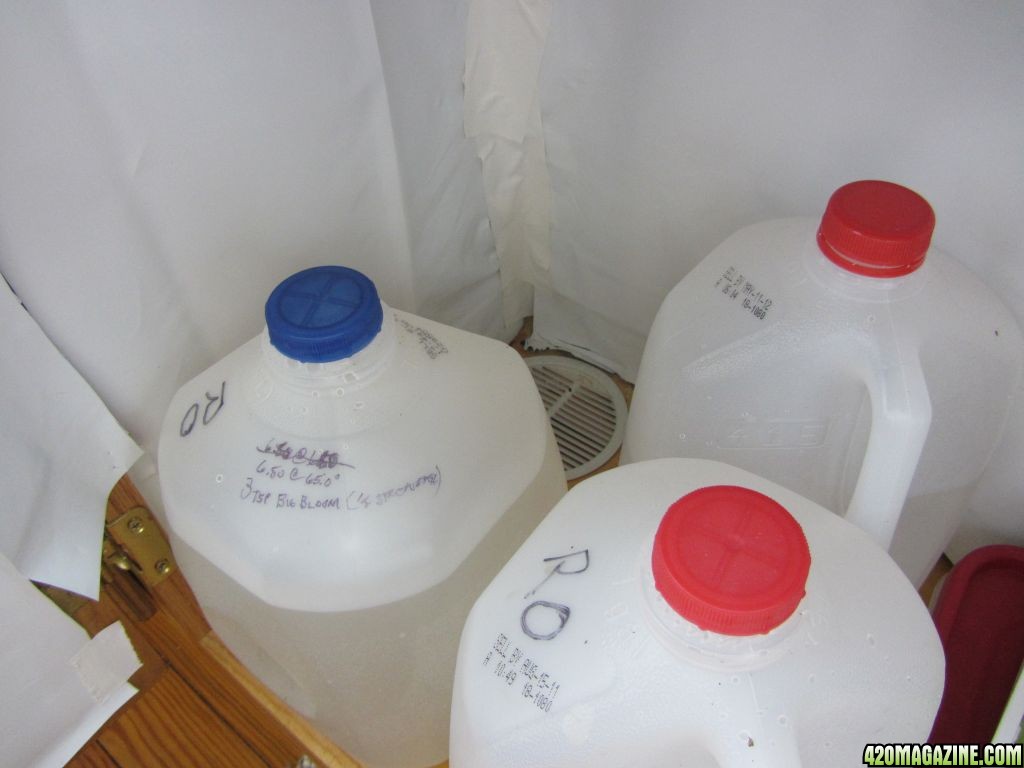
4. A good Reverse ozmosis system is expensive. My 20 year old RO unit showed 600PPM TDS. I replaced it with a 40 gallon per day top of the line unit. I could damn near shower in it there is so much pressure.") TDS is arround 15-20 and getting lower each day. Lots of room for nutes now.
TDS is arround 15-20 and getting lower each day. Lots of room for nutes now.
5. I am watering, and nuting at 6.5PH with the new water and a drop of PH UP per gallon. I made the mistake of putting 4 or 5 drops in the first gallon and PH shot to 9. Thats strong stuff.
6. It takes a full gallon to water 8 plants with 2 cups of water every two days at this growth stage. 1 gallon =128 fl oz 1 cup = 8 fl oz. 8 x 16 oz = 128 fl oz or 1 gallon every 2 days. At this rate I will pay for the new RO unit quickly.
All plants got watered today with 1/2 strength Fox Farm Big Bloom at 3tsp per gallon. I am going to skep the nutes next watering and hit em with 4 tsp per gallon on the following watering.
1. My 1 gallon square pots weigh 3 pounds, 10 ounces when they are watered to the point where water comes out the bottom. When I transplanted to these pots, I had to add 16 liquid ounces of water to get water running out the bottm. 16 liquid ounces of water weigh aproximately 1 lb 1oz or 17 ounces. By weighing my plants i can tell how much water they have left in the soil. I have a digital scale for weighing guitars that goes to the tenth of an ounce. As my plants start weighing more, these numbers will change, but water still weighs the same. Doing the math kind of makes it high proof.
2. I had one plant that I over watered 2 days ago. Today water was still pooled in the tray but it felt like it weighted light. I picked up the plant out of the tray and there was what looked to be a white worm about 5 inches long hanging down. After closer inspection there were about 50 or so of these 1/4 to 1/2 inch things coming out the bottom of the planter. Those be roots dumbass! ...and the plant is begging for water. I could hardly beleive that just 10 days ago I transplanted these from dixie cup size peat pots and now the roots are all over the place! So I put em on the scale and sure enough they were down approximately over a pound in weight since they were saturated just 2 days ago.
3. These plants at 30 days from seed, in 1 gallon containers, drink more than 8 liquid ounces a day.
4. A good Reverse ozmosis system is expensive. My 20 year old RO unit showed 600PPM TDS. I replaced it with a 40 gallon per day top of the line unit. I could damn near shower in it there is so much pressure.
TDS is arround 15-20 and getting lower each day. Lots of room for nutes now. 5. I am watering, and nuting at 6.5PH with the new water and a drop of PH UP per gallon. I made the mistake of putting 4 or 5 drops in the first gallon and PH shot to 9. Thats strong stuff.
6. It takes a full gallon to water 8 plants with 2 cups of water every two days at this growth stage. 1 gallon =128 fl oz 1 cup = 8 fl oz. 8 x 16 oz = 128 fl oz or 1 gallon every 2 days. At this rate I will pay for the new RO unit quickly.
All plants got watered today with 1/2 strength Fox Farm Big Bloom at 3tsp per gallon. I am going to skep the nutes next watering and hit em with 4 tsp per gallon on the following watering.
Snub Knows
New Member
Well I don't think I got a U shaped cut with a scissors. Further research indicates I should have used a razor blade and did a U cut as you mentioned. THats pretty small and tight area to slip a razor blade in. I guess I just need more practice.
Yeah, I know a few people that have grown their thumbnails out a bit as it is the perfect shape. I, however, have the bad habit of biting my nails. I was in a store a few months ago and saw an odd pair of nail clippers. They have a reverse curve on em, and make for a perfect fim clipper. I was actually in that aisle because I was gonna get some press-on nails and just use the thumb press-on. Glad I found the weird clippers, lol.
- Thread starter
- #49
1970s Grower
New Member
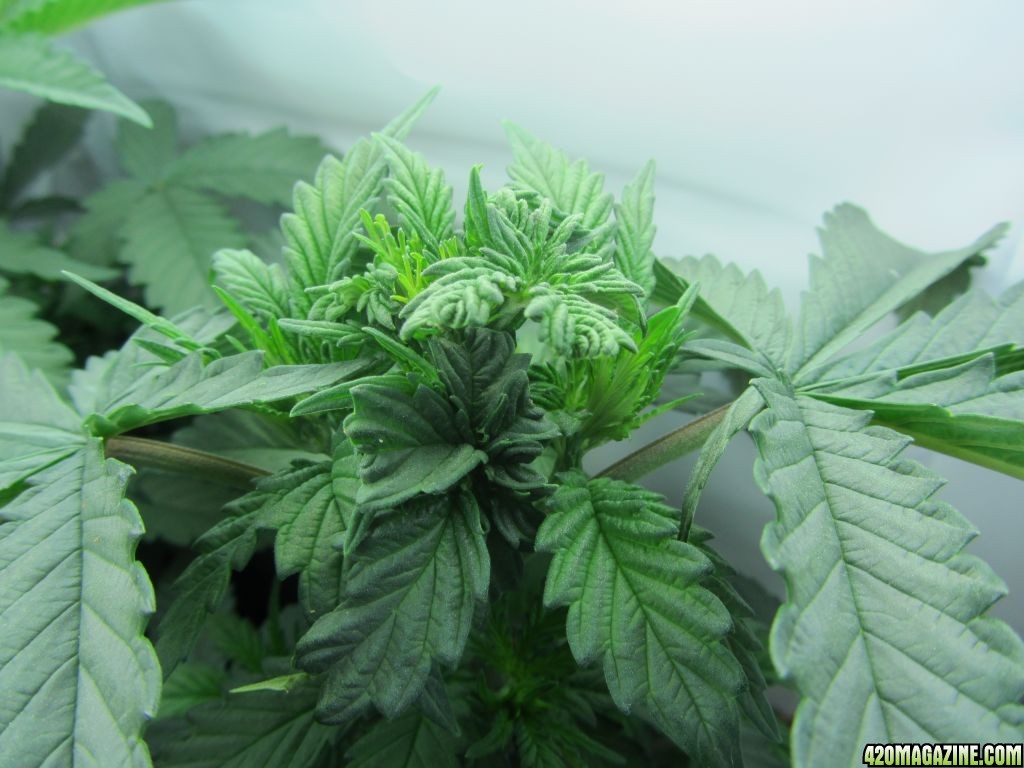
9/4... I tried FIMing some more plants today. The first FIM from a week ago has me a little perplexed. I must have done quite the hatchet job from the looks of these leaves.
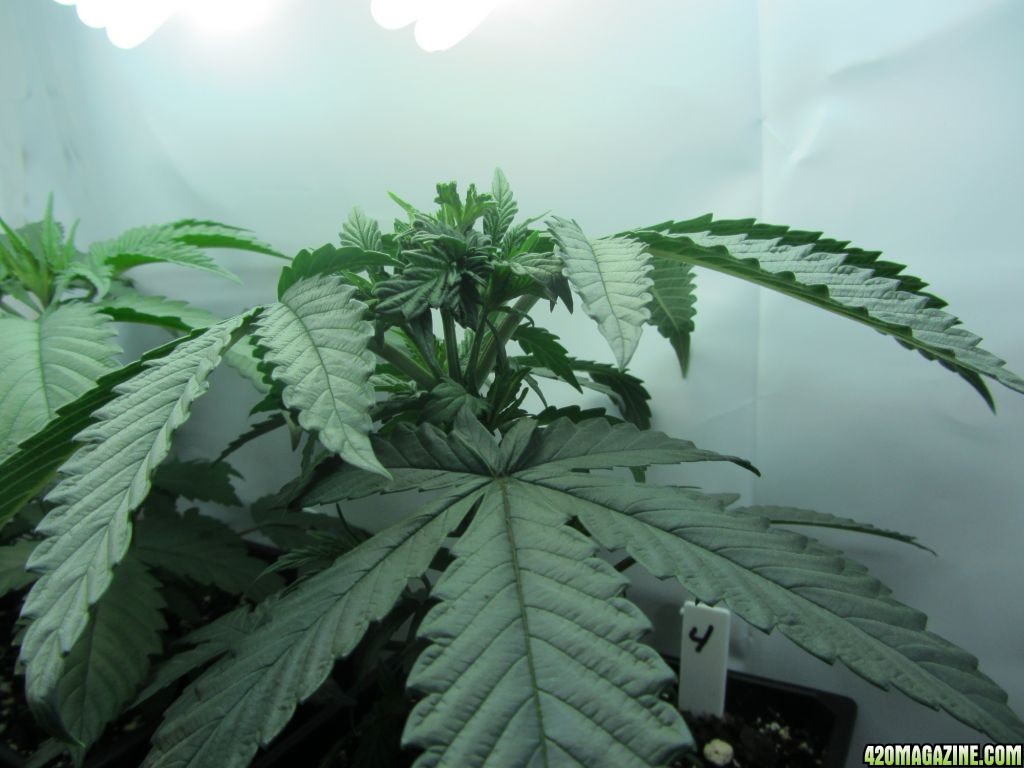

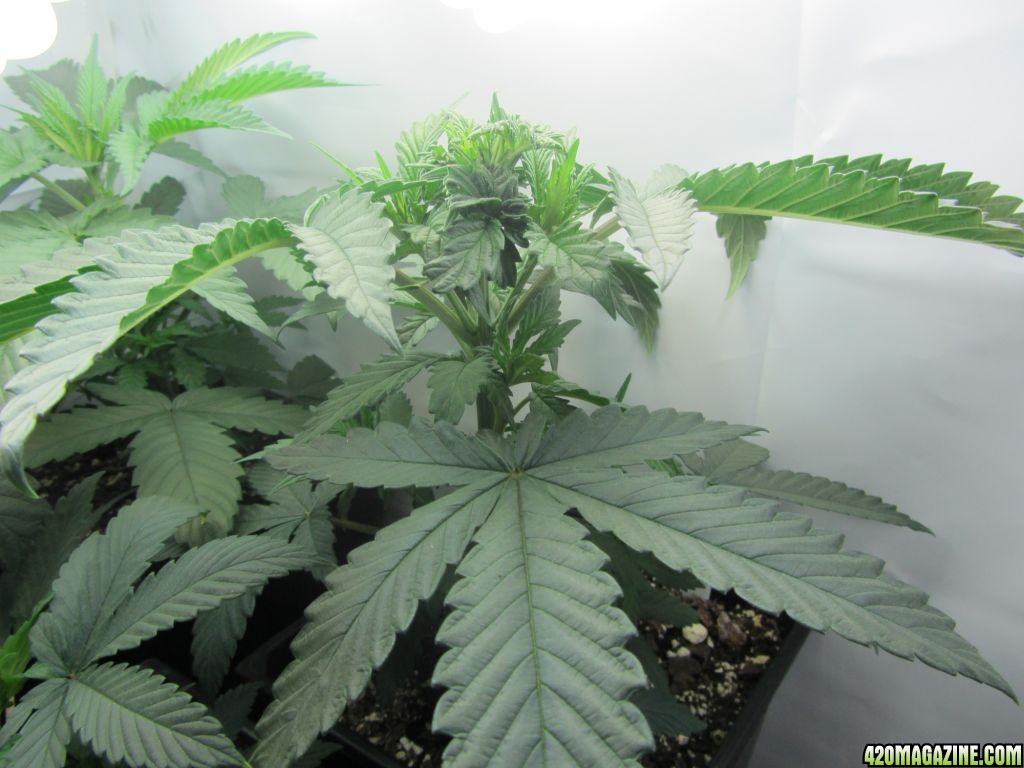
The LST I did last Sunday is progressing. I really like this as it seems pretty easy and you can adjust as necessary to gain experience with it unlike using the FIM method.

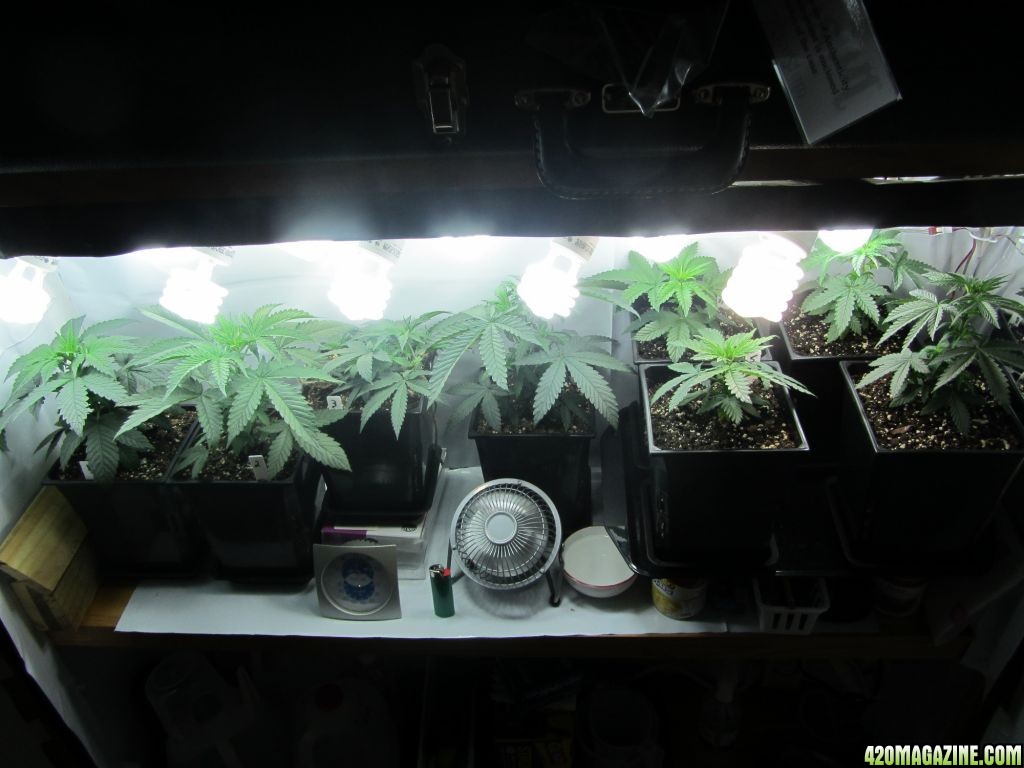
The grow over all is starting to shape up. I added a 3rd power strip and 4 bulbs to the ceiling of the Cabinet. THis gives me more light and flexibilty. The top canopy on the 4 older plants on the left was hiding the light from the bottom when they were bunched together like the younger ones on the right. Spreading them out a little bit wil hopefully help.
Can I cut off some of the big fan leaves from top?? If I could it would let a lot more light through. These Indica/Sativa hybrids act quite different than the Sativas I grew in the 70s. These things are bushes in comparison.
I also have been adding nutes every 4 days which is every other watering. on 9/3 I added 5 tsp/gallon Fox Farm Big Bloom and 2 tsp/gallon Fox Farm Grow Big.
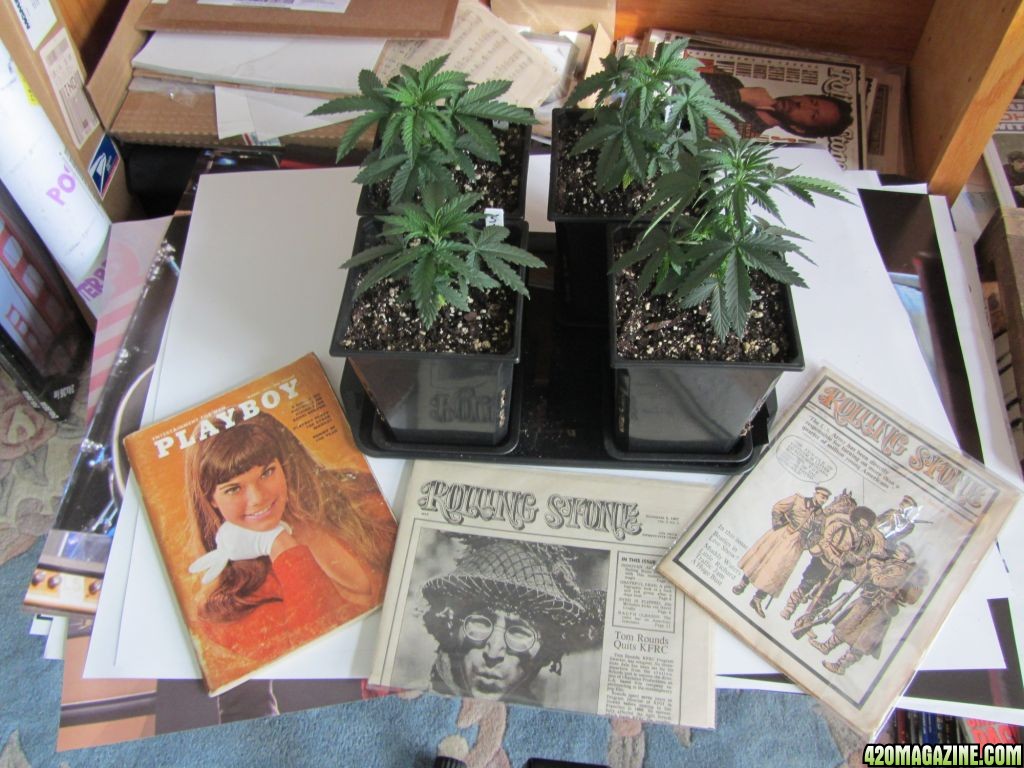
Heres a pose of the 25 day old plants with some 70s memorabilia... an original Rolling Stone #1, and a Rolling Stone with a Story about how the Viet Nam war was responsible for turning on 1/4 million Americans. "The jungsles are littered with roaches". ... and a 1970 Playboy.
My question for those in the know... I have a tap root that has escaped the bottom of planter and is in the water tray. Do I cut it or let it die when the water in the tray goes dry? THis tap root has multiple shoots coming out of it. Its got to be a fricking male. Its the biggest baddest plant I have.
I am scared I will wake up one night with roots arround my leg pulling me into the plant. "Get in my belly"
The LST I did last Sunday is progressing. I really like this as it seems pretty easy and you can adjust as necessary to gain experience with it unlike using the FIM method.
The grow over all is starting to shape up. I added a 3rd power strip and 4 bulbs to the ceiling of the Cabinet. THis gives me more light and flexibilty. The top canopy on the 4 older plants on the left was hiding the light from the bottom when they were bunched together like the younger ones on the right. Spreading them out a little bit wil hopefully help.
Can I cut off some of the big fan leaves from top?? If I could it would let a lot more light through. These Indica/Sativa hybrids act quite different than the Sativas I grew in the 70s. These things are bushes in comparison.
I also have been adding nutes every 4 days which is every other watering. on 9/3 I added 5 tsp/gallon Fox Farm Big Bloom and 2 tsp/gallon Fox Farm Grow Big.
Heres a pose of the 25 day old plants with some 70s memorabilia... an original Rolling Stone #1, and a Rolling Stone with a Story about how the Viet Nam war was responsible for turning on 1/4 million Americans. "The jungsles are littered with roaches". ... and a 1970 Playboy.
My question for those in the know... I have a tap root that has escaped the bottom of planter and is in the water tray. Do I cut it or let it die when the water in the tray goes dry? THis tap root has multiple shoots coming out of it. Its got to be a fricking male. Its the biggest baddest plant I have.
I am scared I will wake up one night with roots arround my leg pulling me into the plant. "Get in my belly"
Snub Knows
New Member
Do I cut it or let it die when the water in the tray
goes dry? THis tap root has multiple shoots coming out of
it.
I'd just prune the exposed root and try to keep the drip tray dry in the future. Maybe wipe out the trays a half hour or so after ya water. Are you getting too much drainage, not enough moisture retention in the soil? Might want to water with less, but water more frequently to help keep the roots from searching outside the pot for water. The plants look great, by the way. When do you plan on switching to 12/12? That spot where ya fimmed is lookin pretty crazy, lol.
- Thread starter
- #51
1970s Grower
New Member
I'd just prune the exposed root and try to keep the drip tray dry in the future. Maybe wipe out the trays a half hour or so after ya water. Are you getting too much drainage, not enough moisture retention in the soil? Might want to water with less, but water more frequently to help keep the roots from searching outside the pot for water. The plants look great, by the way. When do you plan on switching to 12/12? That spot where ya fimmed is lookin pretty crazy, lol.
I have been watering each plant on a scale. I think I may have some dry pockets in the soil that arn't getting water which pools up at the bottom on this plant. I have been watering all plants to the same weight at 3lbs 10oz. On this one and one other too much water hits the pan. Both are my biggest plants. I think I am going to have to increase the watering frequency and lower the total weight on the scale a bit. I also read that using a drop or two of surfactant such as biodegradable dish soap will help soil absorption.
I am going to try that. Thanks for the tip on the roots. I am going to trim them and dry it out.
Snub Knows
New Member
I am going to try that. Thanks for the tip on the roots. I am going to trim them and dry it out.
No worries. You could also add a larger gap between the bottom of the pot and the runoff. Should give the air more time to prune stray roots. Maybe an inch or so higher? Good luck!
- Thread starter
- #53
1970s Grower
New Member
No worries. You could also add a larger gap between the bottom of the pot and the runoff. Should give the air more time to prune stray roots. Maybe an inch or so higher? Good luck!
That is one common sense fix I never thought of. Some one should take your idea, develope a tray with standoffs, patent, and sell it. I found square trays that exactly fit my square pots just need to find some 1 inch blocks. Maybe I will cut some.
I trimmed the roots off of the root monster that was escaping the bottom of the plant. THe plant doesn't seem to have minded at all.
9/6 3 Tablespoons of FF Big Bloom and 3 tsp of FF Grow BIg plus enough PH up to get the PH up to 6.5. I also added 1/2 tsp of Bush Doctor Microbe Brew. I am staying at week 2-3 schedule though the plants are almost 4 and 5 weeks. By 9/9 I will start the week 4 nutes.
9/7 THese things are growing like crazy. . ..just about an inch a day. I am having to water every day and 1/2 now. I need to transplant from 1 to 3 gallon pots but I don't have room for 8-3 gallong pots in the cabinet. I need to make room first by find out which ones are males and pulling them. I searched for an hour today and found one pistol on pot 6. I think I have found 2 males but can't be sure yet. I need to see a more defined ball that is not pear shaped before I wack them.
I am comtemplating whether to start the flower cycle. Some questions for you all....
Can I top early in the flowering stage? I am worried about running out of headroom. I FIM'd 4 plants on 9/1 for 5 FIM'd out of 8 but they keep growing in height. I have 1 LST that has some crooked leaves but is doing well. The last 2 of 8 are younger and bushier, I am betting they are female.
If cut the lights to 12 hours, can I start LST the remaining girls once the males have shown me thier balls. THis might be a week into flowering. With males gone I will have room in the cab to LST.
...or should I just wait til they all show preflower? Then LST and top prior to 12/12 ?
Growing in a small space sure does have some tradeoffs that one must consider.
Thanks to anyone with an opinion or advice in advance. It is appreciated. I feel guilty not returning the favor but I just am not yet qualified to help anyone.
Big thanks to those of you reading and helping out!!
Snub Knows
New Member
I would probably switch to 12/12 and transplant females to 3 (or 2)gal pots as they start to flower. I wouldn't bother topping during flowering. I would supercrop or continue to lst tall main branches as they shoot up. They'll be done stretching by week 4.
Have you seen anything about screen of green (scrog)? Might work well. It's basically a horizontal grid that you train the branches to grow into instead of growing straight up. Works great for spaces where height is an issue. Works great in general, really. Especially with tall sativas.
Have you seen anything about screen of green (scrog)? Might work well. It's basically a horizontal grid that you train the branches to grow into instead of growing straight up. Works great for spaces where height is an issue. Works great in general, really. Especially with tall sativas.
Snub Knows
New Member
Oh, I've also heard of people doing a 36 hour dark period between veg and bloom to jumpstart the flowering process. Never tried it, but it would speed up the sexing process if it works. Which would speed up the transplanting process, too. Something to consider and look into maybe.
HerbFarma
New Member
I did the 36 hour darkness and by day four in flowering I was able to weed out all four males in my current grow.
- Thread starter
- #57
1970s Grower
New Member
9/10... I have planned to start the 12/12 on Sept 11. They will get darkness from 7:00pm until 7:00 am starting at 7:00pm on 9/11. I just added week 4 nutes per Fox Farms Schedule 1st thing this morning.
3 tsp Grow Big
1/4 tsp Open Sesame
1/2 tsp Kangaroots
1 gallon of water
PH of the above mix was 6.3 once adjusted up.
PPM was HOT at 1760 using my Hanna 98129
Fox farm shows a ppm range with this mix to be 1470-1610 so I am definitely hot. I didn't check the recommended range until after the mix was given to the plants. I feel I measured well. I used the 1/4 tsp measure that came in the Open Sesame. THe only thing I can think of is the shotglass style measure I used for the Grow Big might be off.
My plan is stay witht the Fox Farm schedule and do a flush with Sledgehammer and Big Bloom tommorow evenening at 6:00 then set the timer for 12/12 starting at 7:00pm. I am going to watch the plants close for nute burn today and tomorrow. I am going to take some pictures now and post em later today.
I picked up some used 3 gallon containers from a closed nursery I am going to transplant my femails into once I make room in the cab by killing some males. At least I will have some leaves to smoke. Do I need to do anything special to these used containers other than hose them out?
Les Doodess
New Member


- Thread starter
- #59
1970s Grower
New Member
9/11... The plants grew over an inch from yesterday. I was worried about overnuting yesterday and they sure don't look any worse.
I decided to take some time and thoroughly sex the plants today.
#1 Brand new Pistils!
#2 Looks like a single ball on a stick but there are some pointy preflowers too. Undecided on this one.
#3 No balls, but no pistils. Some pointy preflowers. Undecided.
#4 Well defined ball on stick. Probably male. I will wait day or two.
#5 Very undefined. Too early to tell. Undecided
#6 Found pistils on this one a couple days ago. They are well defined.
#7 There is one well defined point on the second node from the top. No pistils, No balls.
#8 Balls and claws. Definitely male.
I decided to transplant the 2 definite females and bunch up the probable males to the ends to make room for the 3 gallon containers.
For my cabinet space I chose short 3 gallon containers. They measure 10.75" wide by 9.5" tall. This will give me the most verticle headroom to grow in my short space. THere are containers that are taller and I chose these instead. I could not find any square 3 gallon containers that were only 9.5"tall. The shortest square container I could find was 10.5' tall and narrow.
Here is a #6 in a square 1 gallon container prior to transplant.
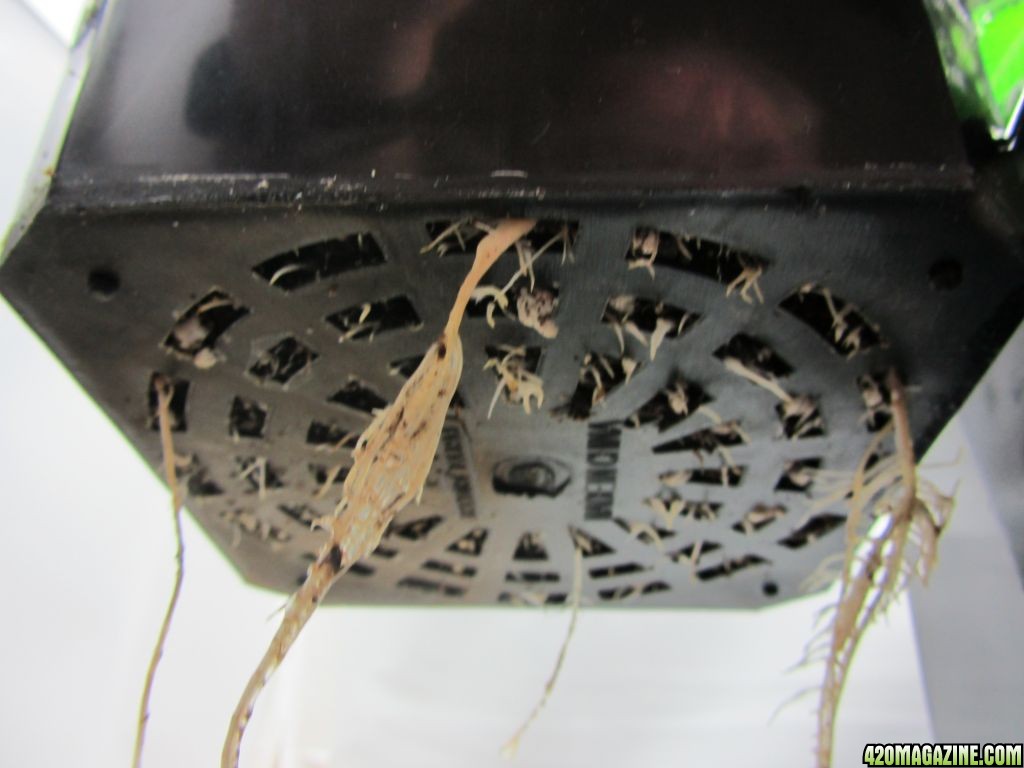
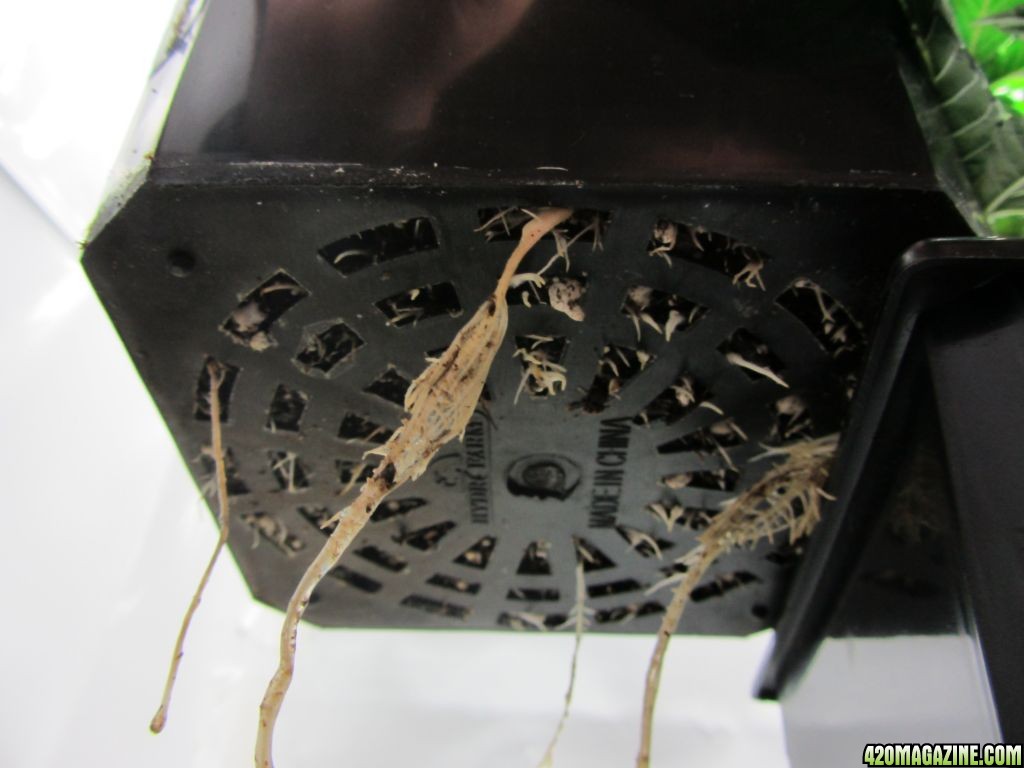
Here is a shot of the roots. I read somewhere that square containers are a waist of soil as roots grow in a ball. Heres proof that there is a definite advantage using sqare container in cabinet grows to make use of the maximum available space.

Right side up and in the pot she goes. Gentle now...
Filled with dirt and ready to go back to the cabinet. Notice that I fill it right to the top. I want to take advantage of ALL the space in that pot. I see many cabinet grows where they don't make use of all the space. In addition, there will be settling of soil by watering so fill 'em up to the top. Its all about maximum yield.
Here is a shot of #1 and #6 transplanted on a rearanged shelf. I am going to 12/12 at 7:00pm today.

I decided to take some time and thoroughly sex the plants today.
#1 Brand new Pistils!
#2 Looks like a single ball on a stick but there are some pointy preflowers too. Undecided on this one.
#3 No balls, but no pistils. Some pointy preflowers. Undecided.
#4 Well defined ball on stick. Probably male. I will wait day or two.
#5 Very undefined. Too early to tell. Undecided
#6 Found pistils on this one a couple days ago. They are well defined.
#7 There is one well defined point on the second node from the top. No pistils, No balls.
#8 Balls and claws. Definitely male.
I decided to transplant the 2 definite females and bunch up the probable males to the ends to make room for the 3 gallon containers.
For my cabinet space I chose short 3 gallon containers. They measure 10.75" wide by 9.5" tall. This will give me the most verticle headroom to grow in my short space. THere are containers that are taller and I chose these instead. I could not find any square 3 gallon containers that were only 9.5"tall. The shortest square container I could find was 10.5' tall and narrow.
Here is a #6 in a square 1 gallon container prior to transplant.
Here is a shot of the roots. I read somewhere that square containers are a waist of soil as roots grow in a ball. Heres proof that there is a definite advantage using sqare container in cabinet grows to make use of the maximum available space.
Right side up and in the pot she goes. Gentle now...
Filled with dirt and ready to go back to the cabinet. Notice that I fill it right to the top. I want to take advantage of ALL the space in that pot. I see many cabinet grows where they don't make use of all the space. In addition, there will be settling of soil by watering so fill 'em up to the top. Its all about maximum yield.
Here is a shot of #1 and #6 transplanted on a rearanged shelf. I am going to 12/12 at 7:00pm today.
Snub Knows
New Member

Looks great, man. How far down does that shelf drop?
Similar threads
- Replies
- 24
- Views
- 841
- Replies
- 228
- Views
- 20K
- Replies
- 129
- Views
- 39K
- Replies
- 411
- Views
- 45K
- Replies
- 93
- Views
- 14K