Vaping the way to go,, just lovin my volcano,, Works so good, :volcano-smiley:

Best tool/toy/precision german engineered machine I ever bot,,:volcano-smiley:

Has to be good or there would not be a smiley volcano smiley with a character that looks like me,,:volcano-smiley:

All together now,,,:volcano-smiley:
 
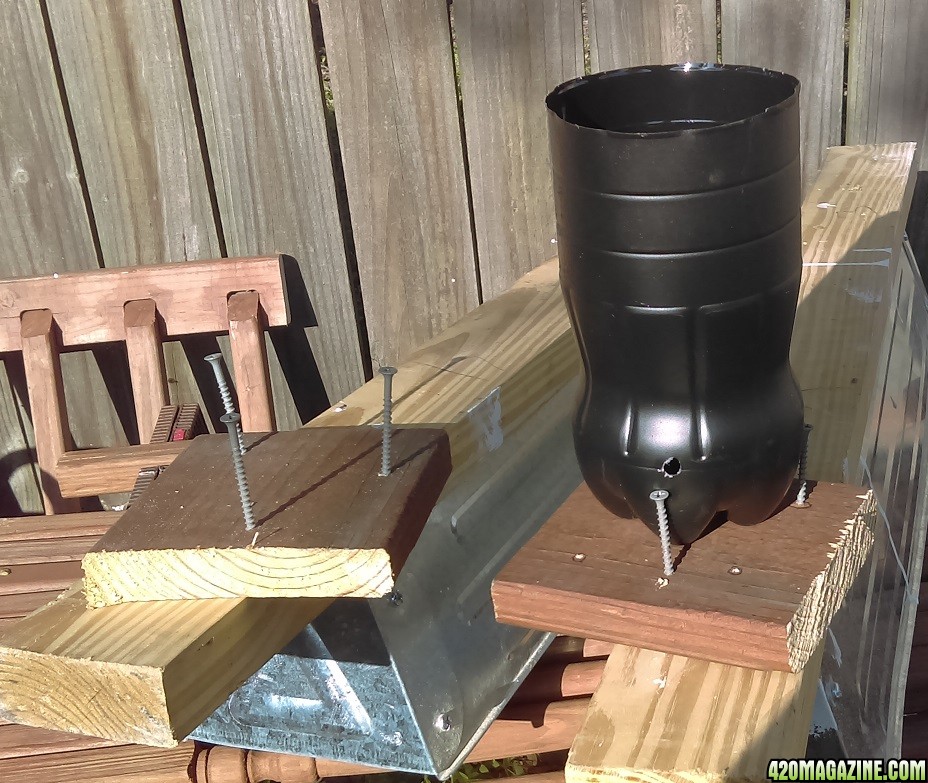
I've dubbed them "Weas's butt plates".

IMAG7579.jpg
 
Uhh thanks Tead. Does that seem to work? I used some 3.5 and 4" screws to hold my plants at times I remember. I kept the screwdriver in the grow room because my cordless drill wasn't always close when I wanted it.
 
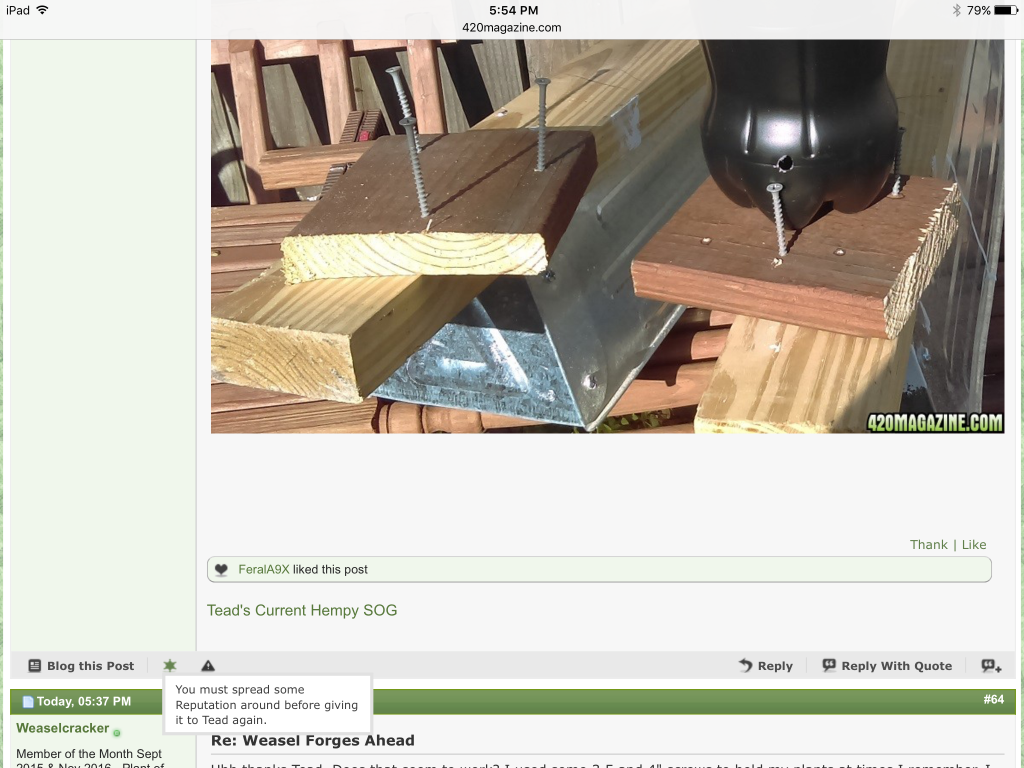
It worked great! The plants are stable as crap. The Coke jugs don't have a flat bottom... several points of contact, but not a flat surface. I've got 'double bubble' insulation on my floor and the combo of the pointy bottoms and double bubble was less than optimal. The flat bottoms of the wood work great. The big screws going up are levered out a bit and form a nice tight force holding the plastic nicely.
Not so much an issue of adding weight... more an issue of giving the 2Ls a big flat bottom.
 
image776.png


God, I love a simple solution.
 
The vaporizer increased my super powers by up to 28% tonight which made things flow very nicely, and I got the chance to put a few hours into the grow, repotting and rearranging the hex setup a bit.


~GRAFTS~

I wanted to get some photos for journaling purposes. Man, my respect for this plant, which was already high, just went up further looking at the way these grafts are progressing. It's really incredible actually, especially if you're really stoned :hmmmm:

Here are my three existing Panama clones. Two on the left are grafted plants. I made a second Panama/Mama Thai/Malawi plant as backup while the first one was finishing, since my Panama was going for shit at that time and backups were definitely in order.
The second/backup one is the little one in the middle. I'm ponytailing two of the strains on it right now, so that the free one (Mama Thai) can catch up to be other two a little. I've been working to balance the grafts so that each strain is about equal size. So- there's been a bit of pruning, LST, supercropping, ponytailing, strategic positioning, and deliberate shading, as I tried to speed some parts up and slow other parts down over the last couple weeks.

IMG_793210.JPG


The bigger one.

IMG_79336.JPG


The grafts look to be turning into branches. :party:

IMG_79369.JPG


IMG_79348.JPG


IMG_793510.JPG


28% was easily enough to allow me to suddenly notice something obvious, which I had never noticed or thought about before.

The first graft I did is backwards. The angle would have been the right one if the Malawi was made the rootstock and the Panama stem cut free, instead of the other way around as it is.
I never thought about the consequences of which way I cut the angle.
It looks like it won't make any functional difference in the end, other than looking weirder.

IMG_79378.JPG


Plant magic. I'm really impressed.
 
I built a better platform for the hexapus plants to sit on, which fits the space better.
I got an idea about how to make an adjustable platform for them, which I can easily raise as the plants stretch. Didn't have time to start that tonight though so I just built the platform then piled up blocks and stuff to support it for now....
Here are the strains I am running under the hex this time, in coco/perlite. They've been in the flowering room for less than a week.


IMG_79457.JPG


They've already taken a bit of a hit already - the usual routine with me and the hex plants, as I found the ph was mysteriously down into the low-mid 4s yesterday. They were getting pretty yellow from deficiencies but are greening up again with a few singed leaf tips. Not sure what happened there- something to do with my ph meter I think.
The PC X MT is Pineapple Chunk crossed with Mama Thai. At least that's how I labelled it. There was some doubt at the time. There are a few other possibilities if it isn't that.
I'm doing a little side by side test with it. The PCMT further to the right is being given powdered beneficial fungi and bacteria (Subculture M and B) and the other one isn't. I've messed around with beneficial teas and such a little bit before, but not regularly especially lately. I thought I'd seize the chance to do some sort of side by side. I like side by side tests of things a lot, because you can really learn something and solve mysteries with semi-scientific credibility. I just want see the difference in plant growth and root health.
The two PCMT plants have been the exact same size throughout their lives.
Now, a week after being given the Subculture, the treated one is looking significantly larger. I don't know if it's the Subculture, or other factors suddenly manifesting themselves.


The two little Pineapple Chunk shown in there are clones I'm using for making seeds. They were cuttings which were put into the flowering room at the first sign of roots. PC 2 got sprayed with home made colloidal silver till it started showing hermies.

IMG_79398.JPG


IMG_79408.JPG


I'll have to build a place for it somewhere very soon, so it can be separated from the straight girls before it pollinates anyone.
When its ready to do the dirty deed and pollinate it's clone sister/self, I'll bring PC 1 out to it and 'rub them together'. Or something. Then PC 2 will be destroyed and PC 1 will go back to flowering.

I'm looking for a good replacement for the PC strain as it's a bit of a headache for me to grow sometimes, but I want seeds first. I've been dreaming about replacing the PC for a long time now, but can never find anything as good to fill the niche it fills in my grow, which is- super strong and dank knockout indica.


The flowering room.

IMG_794210.JPG
 
I'm hoping the Chovolate Mint might be the PC's replacement in the 'sledgehammer to forehead' dope category. Critical Cheese comes close. Maybe Y Griega as well. All three of those strains are ridiculously smelly. The Y Griega I didn't even consider continuing growing because it was so damn loud.
The Critical Cheese is not shy about raising a stink either, but at least it behaves itself better, is less gruesomely sticky to work with, and doesn't go mouldy if you look at it wrong.
 
Pasting this in from Sweetsue's journal where I posted it yesterday. It's actually not 100%, as the company hasn't got back to me but I'm sure it will happen.

If someone wants the gallon of Terpinator I won in the Nug of the Year contest, and you think you might be excited to test it out, and hopefully post about it, just pm me to let me know. The Geopot and Terpinator stuff doesn't ship to Canada. I think you have to be in the US. I already rerouted the Geopot stuff.
 
~COLLOIDAL SILVER~


This is how I make it.

You need:

- A power source- AC/DC adapter or 9 volt battery.

- Silver (coins, scrap, jewelry (it won't wreck the jewelry but you may still want to be careful and not get caught doing this if the jewelry happens to not belong to you.) In this case I'm using some odd shaped scraps leftover from making cutout jewelry.

- Distilled water. (I'm not sure it needs to be distilled but it seems a good idea. I use rainwater)

IMG_79617.JPG


Find a AC/DC adapter. Common power supply for most small electrical devices, and I'm guessing most people have lots of extras around the place that they can afford to butcher.
If not then you only need to hit up any second hand store or similar type rubbish heap and you'll find bins full. The planet is clogged with these things. Grab a couple in case one burns out.

You can use a nine volt battery instead of an adapter. But why waste new batteries when you could waste an old adapter.

Cut the thingy off the end and strip the wires back a couple inches.

Then I like to test that the adapter is working by putting the wires in a dark place and touching them together briefly. If it's active there will be a tiny spark. But it's very small so you do need a dark corner to see it.

Twist each wire around a piece of silver. You may need to drill a hole in it if it's a coin. But probably you'll be able to improvise your way around that if you don't want to drill a hole in the silver. Just tie it tightly so there's good contact.

Hang them in the water together.


IMG_796212.JPG


Within a few minutes you'll see bubbles starting to form on at least one of the silver pieces.


IMG_79638.JPG


I've left mine 24 hours and used the result successfully. The second batch, which I'm using now, I left for 48 hours, and the water was a disgusting looking sludge by then. I strained it to lose the black foam that had formed.


Adapters tend to burn out doing this. If it's not bubbling anymore it's probably burnt out.

Someone told me that pure water is a crappy electrical conductor and I should find something to add to it to increase conductivity, but I never looked into it.
I'm sure the process is exponential as the more silver there is in the water, the better it conducts. So it probably struggles in the beginning and is more prone to burn out then.

I'm just giving you the basic concept, which works. I'll trust you to be smart enough to go ahead and fill in any blanks and extra frills. (Consider cleaning contact points on the silver, use disposable container, vary voltages and time for strength of CS solution, look into ways to improve upon my method, etc etc)

I got this from a tutorial online a few years ago. I remember that it came with all sorts of dire warnings about the exact way as you had to do everything for it to work properly. I just pretty much ignored them all. The concept is very simple, and we aren't making something here that we plan on drinking.

Don't drink it, and don't use your girl's silver without asking, and you won't die.
 
Back
Top Bottom