- Thread starter
- #181
luckiestman13
New Member
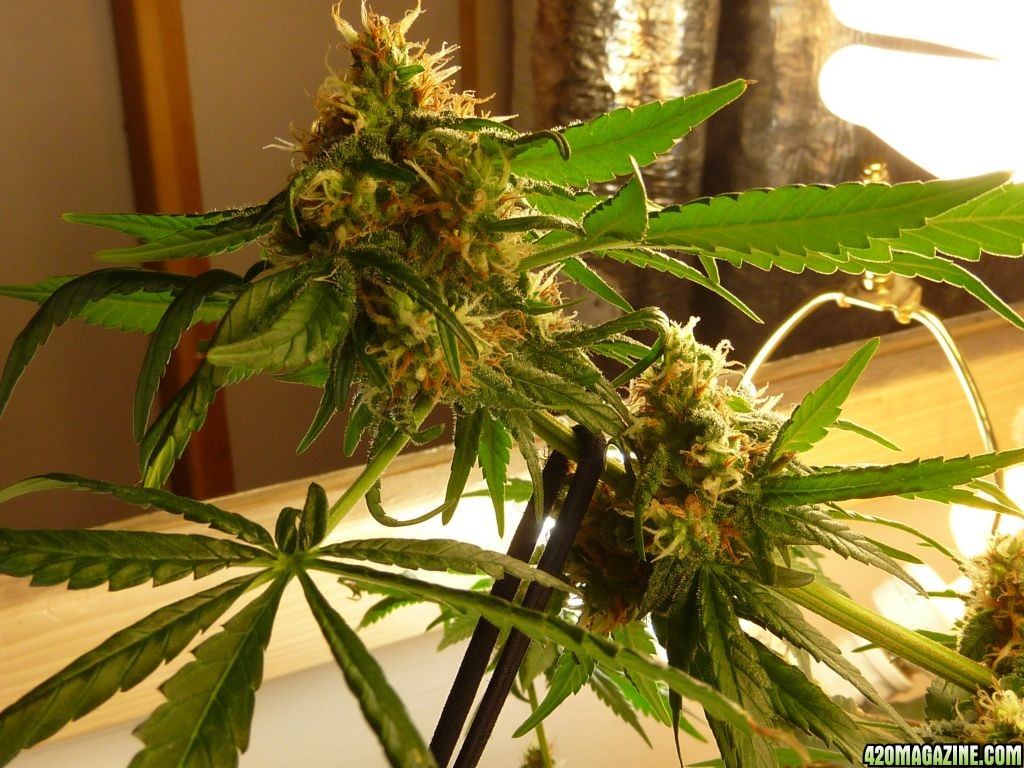
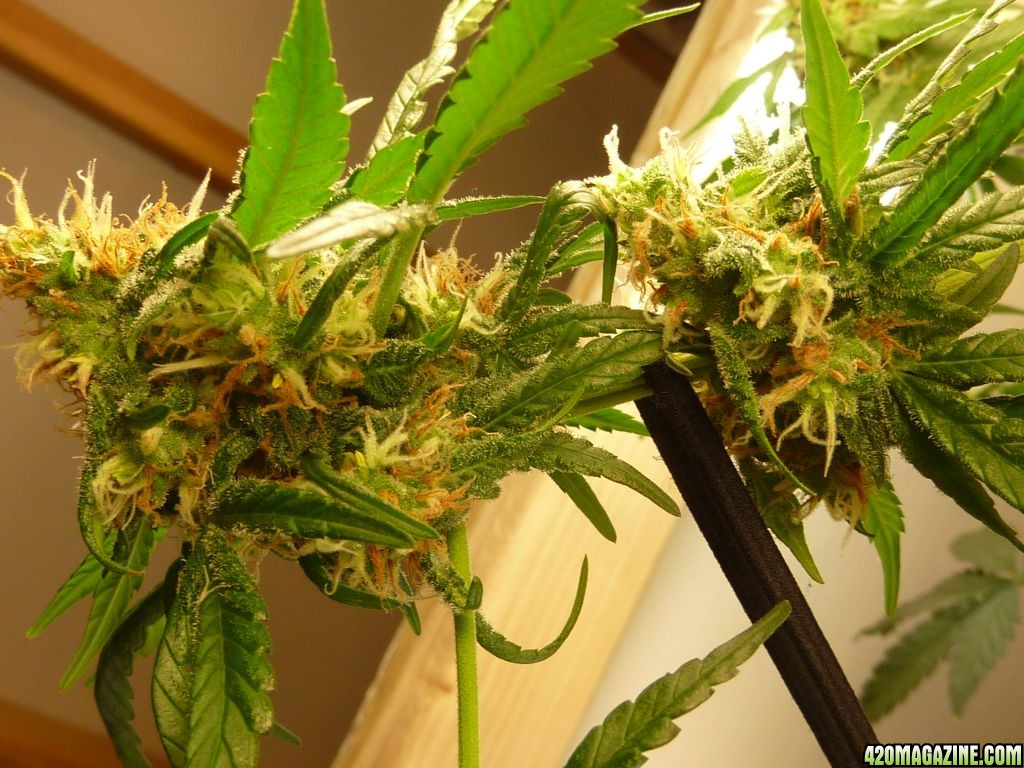
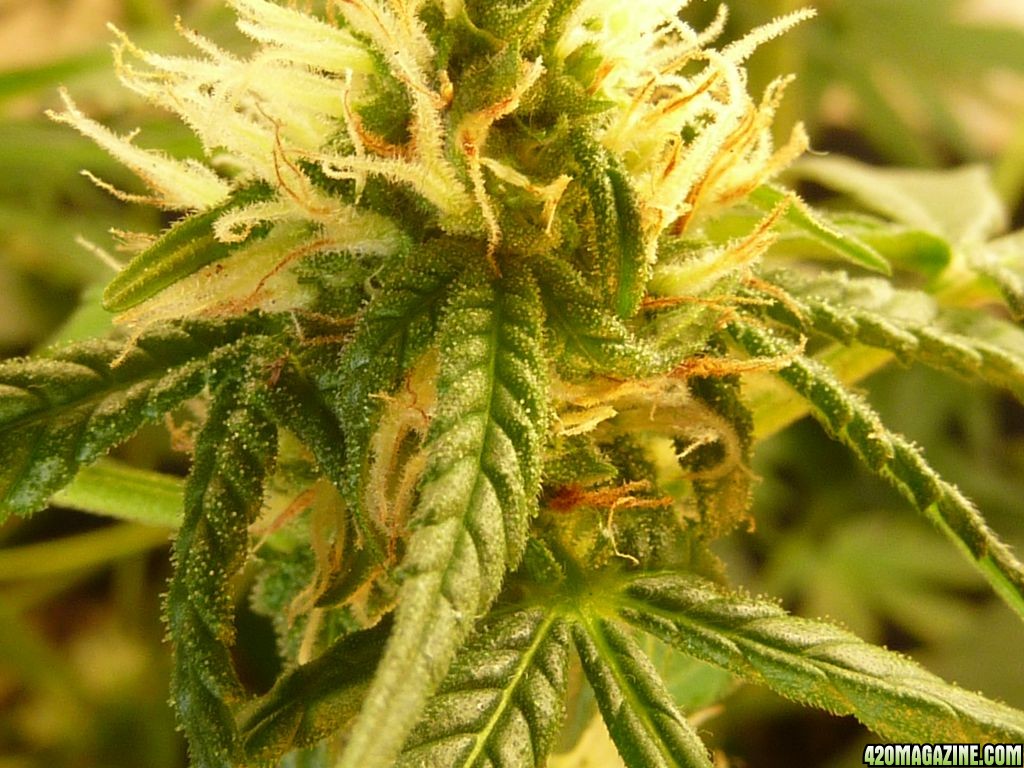
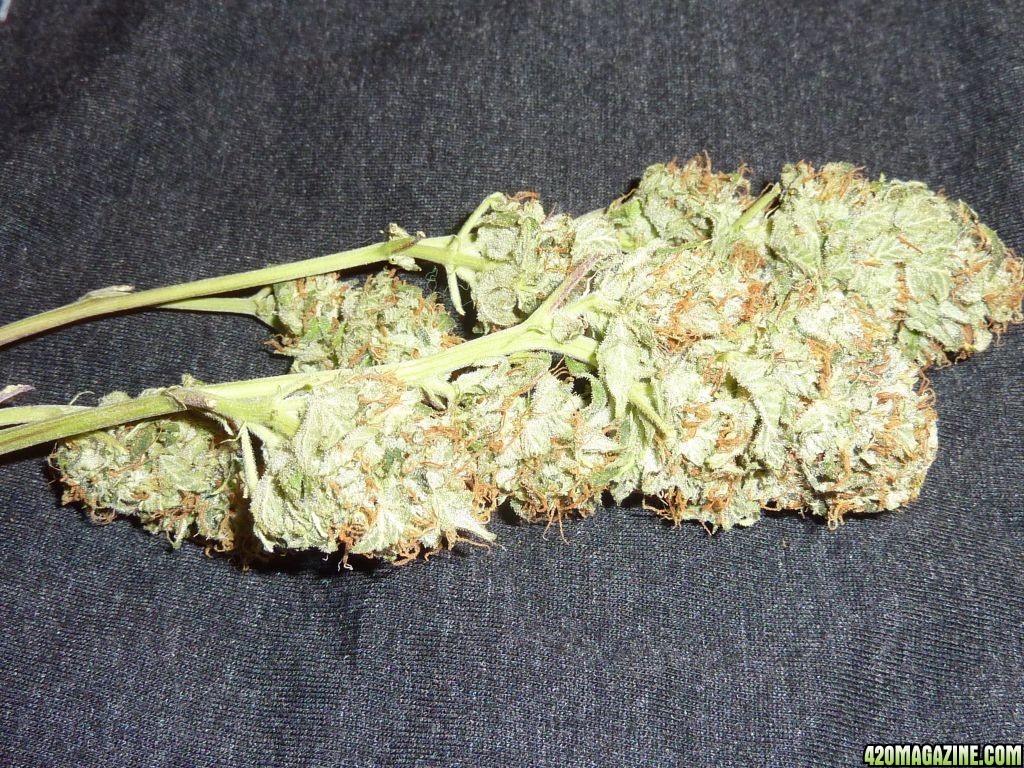
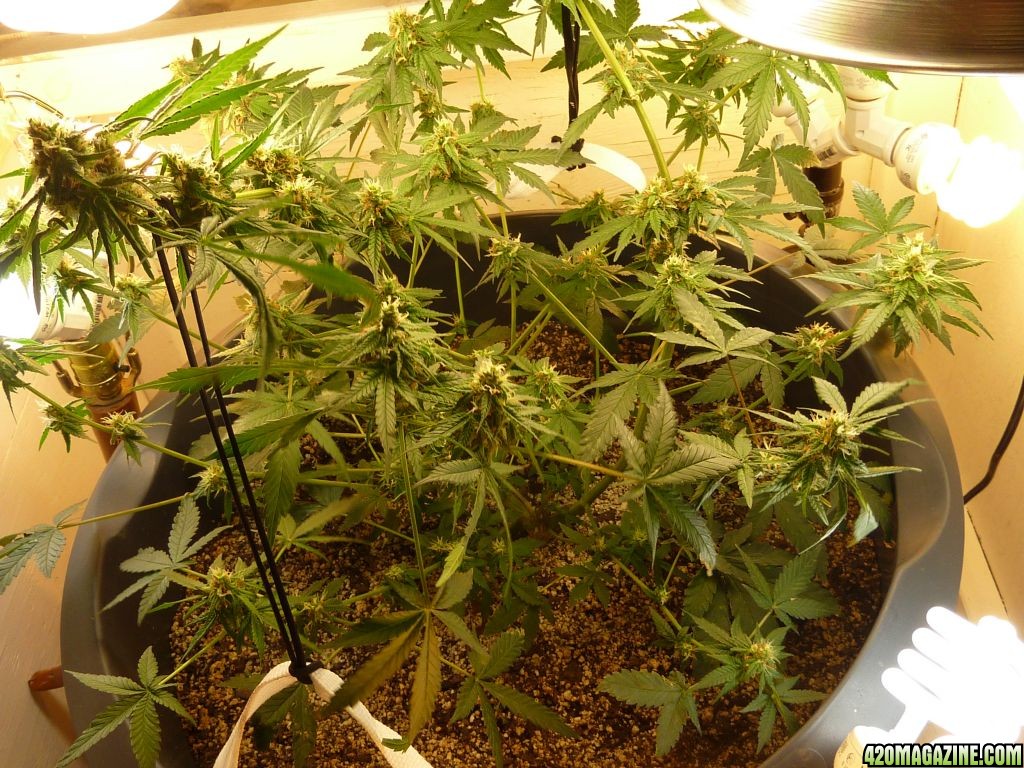
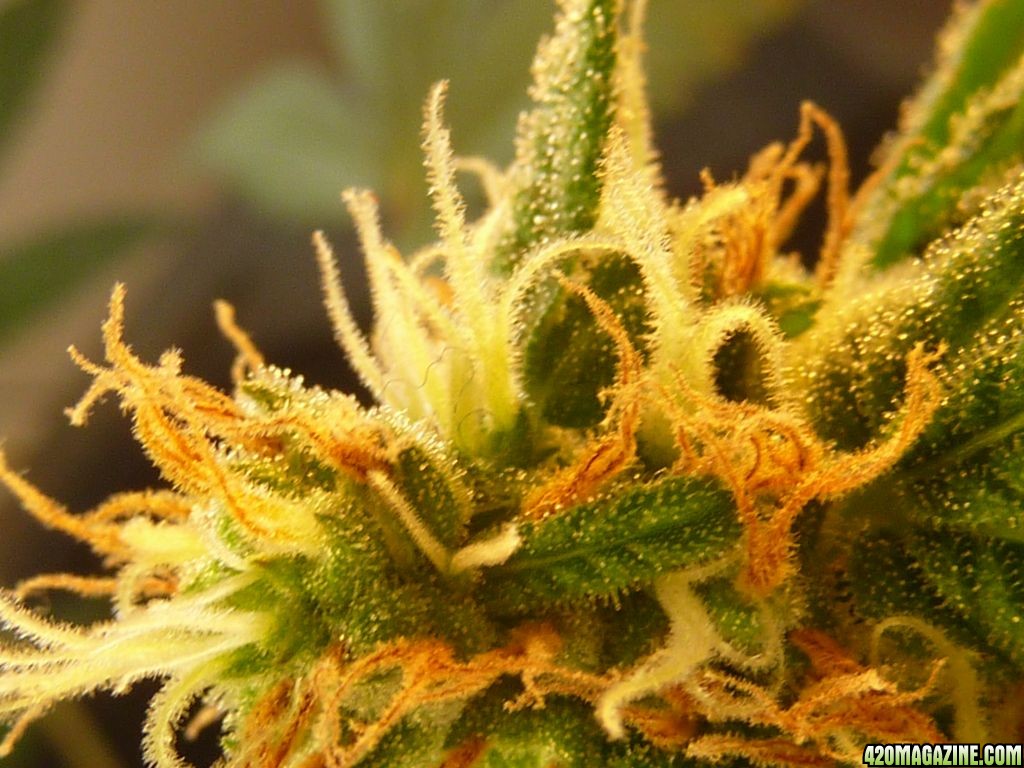
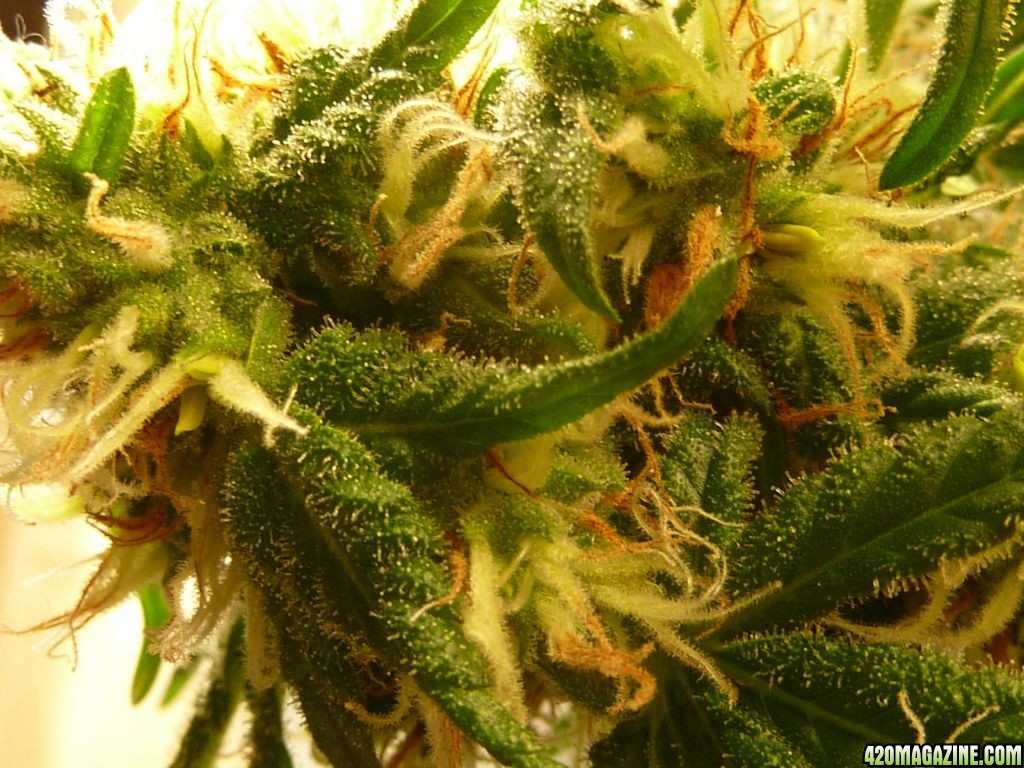
Should I trim the under growth and give it the 'lollipop' effect? Or is it to late?
How To Use Progressive Web App aka PWA On 420 Magazine Forum
Note: This feature may not be available in some browsers.
Should I trim the under growth and give it the 'lollipop' effect? Or is it to late?
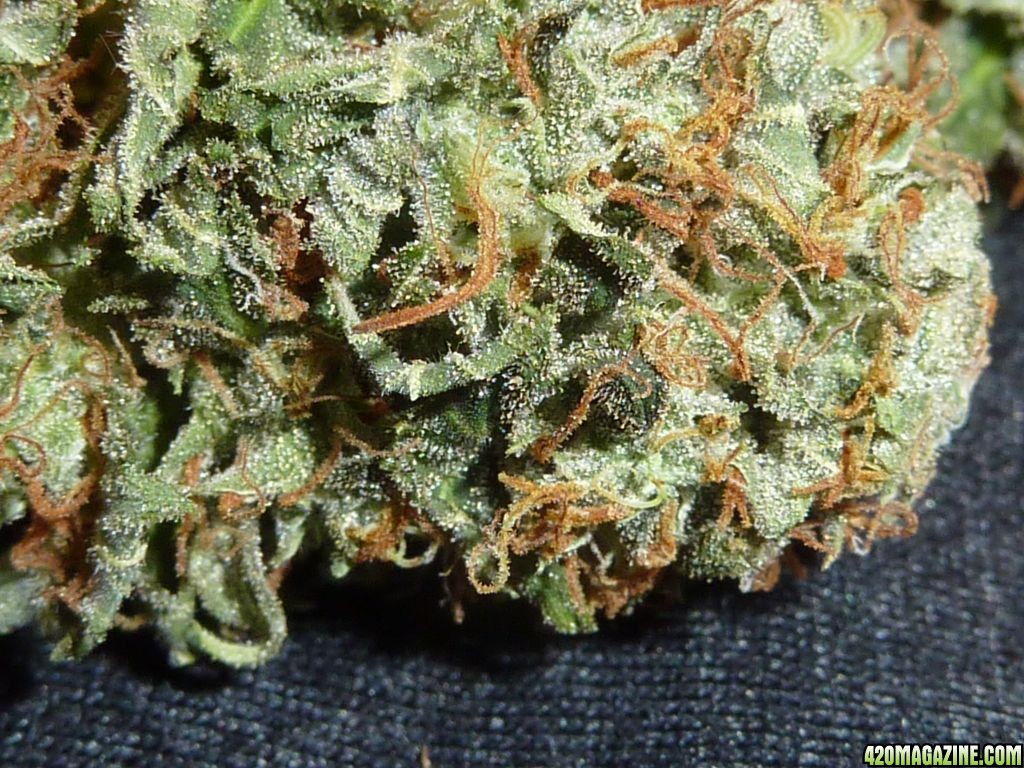
I never met a fan leaf I didn't cut!
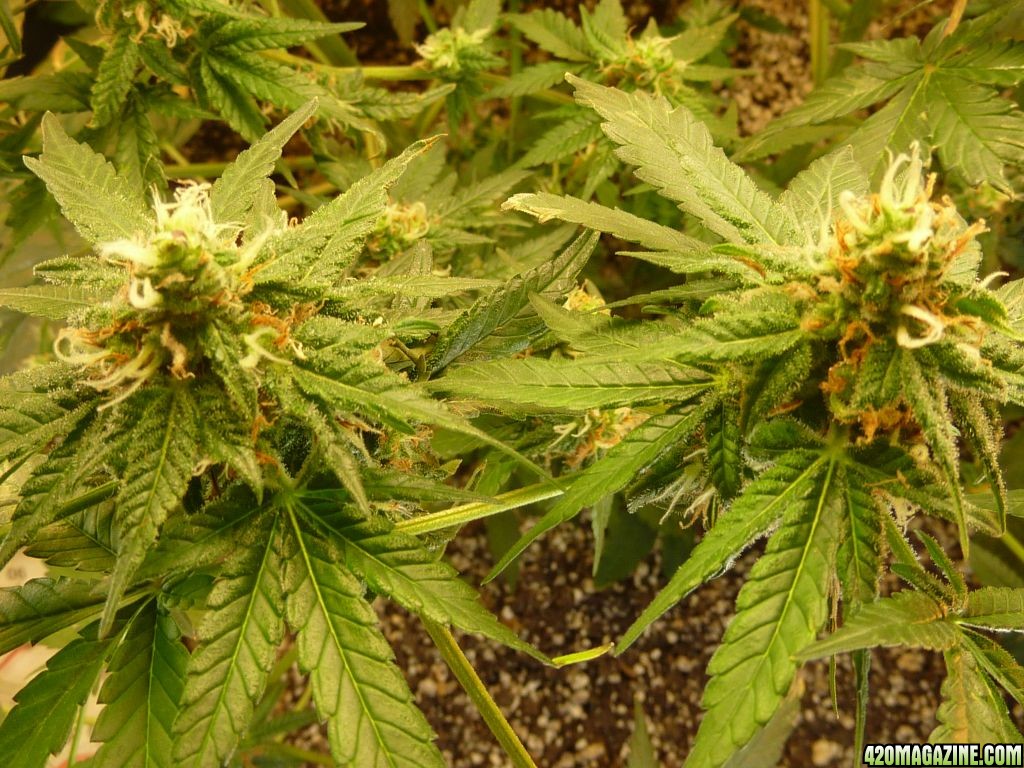
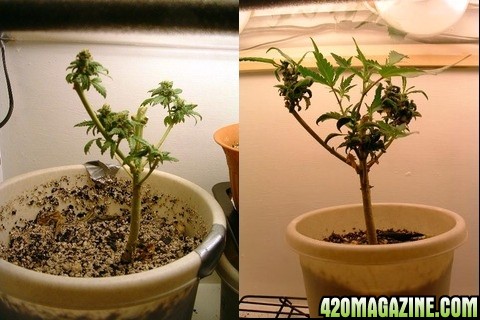
Got it all done this morning for the most part. Spent about $90 for it all. Not sure how big the plastic tote is I repotted in but it's large. Probably 20 gallon or so. I got 2 more bags of the soil and 3 bags of perlite.
I think she's going to be pretty happy!!!
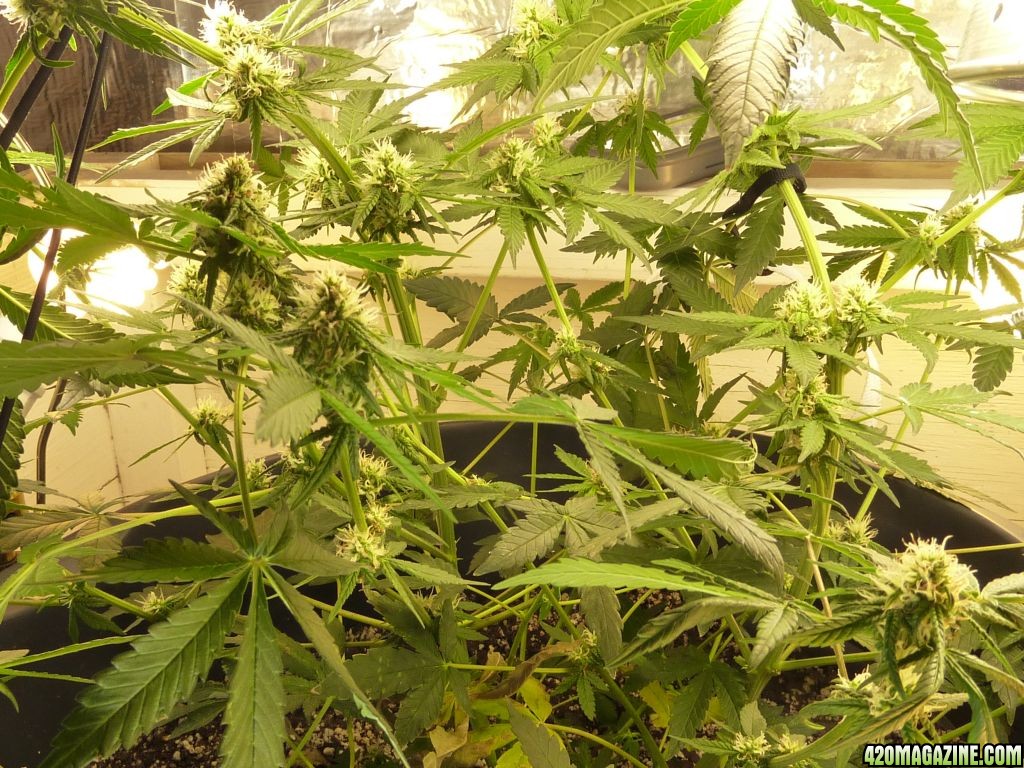
Im ganna laugh when this thing yields monstrous buds haha
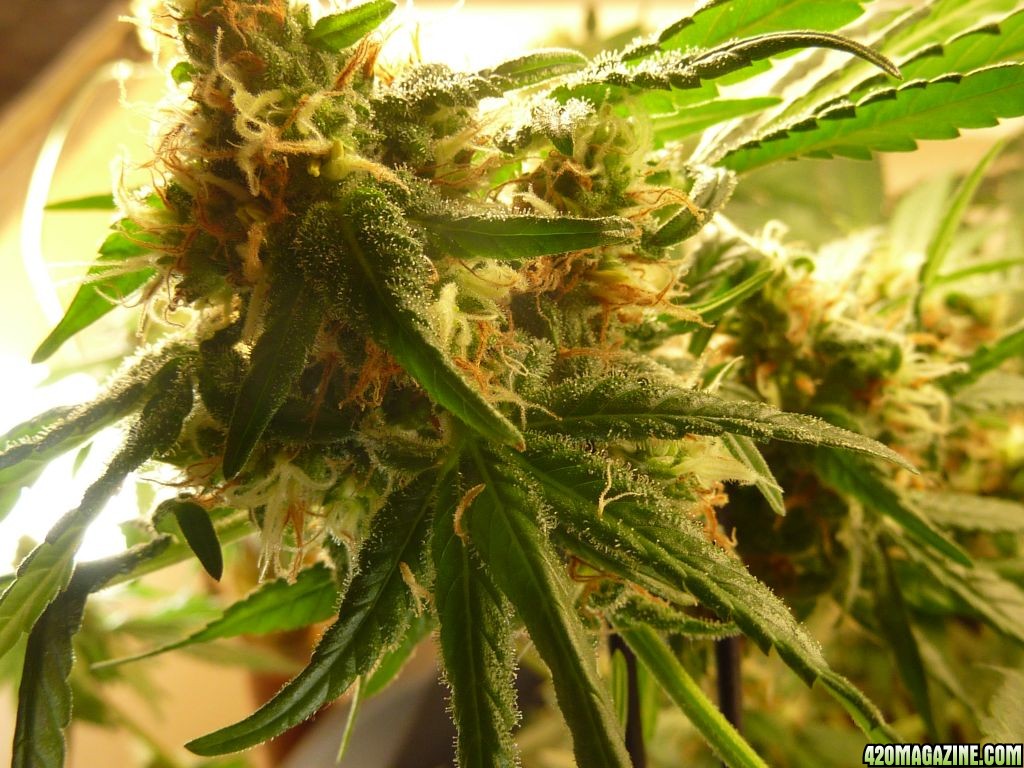
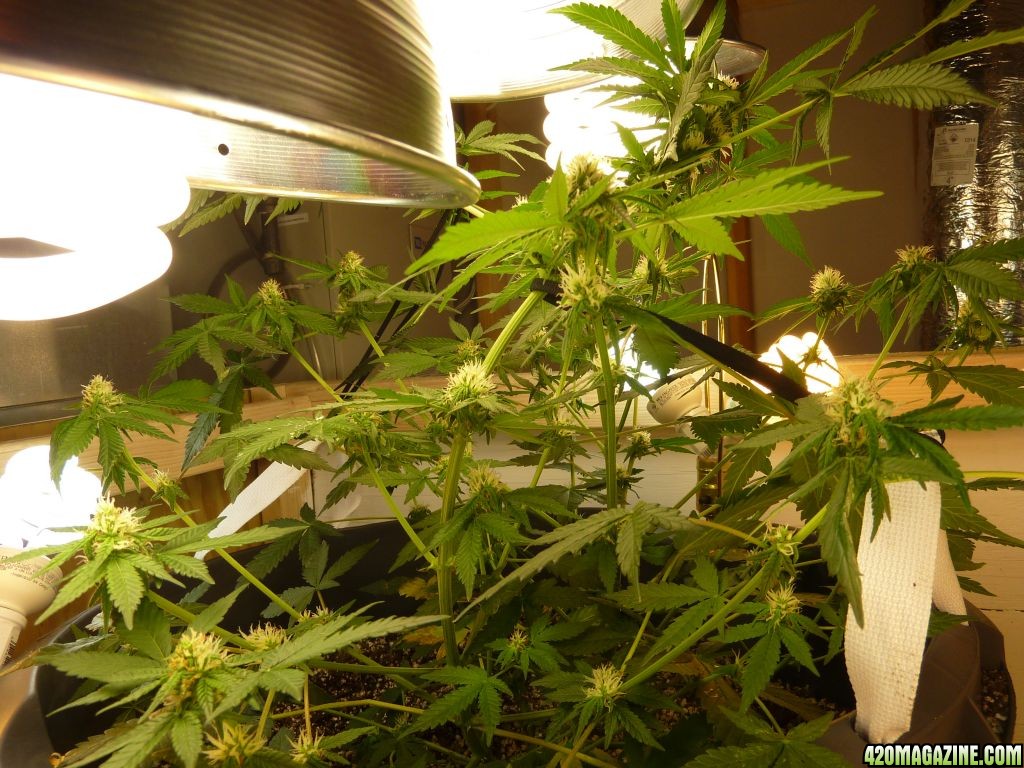
I'm really curious how this plant would do under some real light. My buddy I think got me a hook up with some metal halides. Not sure if I'll be able to get them in time for it to make any difference with this grow.
When I harvest can I just cut off the buds and not chop down the whole plant? I think I read somewhere that she might go back to veg if given more hrs of light. That way I can grow this plant the right way when I get my 9x6 grow room built.
A lot of books and websites say that Cannabis is an annual plant, which means it usually germinates, flowers, and dies in one year/season. This is not necessarily true!
It is quite possible when growing indoors to grow a plant from seed, through the vegetative cycle, flowering and harvest, and then force the plant back into the vegetative cycle to repeat the whole process!
How does this happen?
Cannabis' life is governed by the hours of light it receives, if a plant is kept under a light for around 16 or more hours per day it will stay in the vegetative cycle indefinitely, if the light hours are reduced to around 12 hours per day the plant will go into flowering mode. If, when the flowering has finished and the crop harvested the light's are put back to 18 +hrs per day, the plant will be forced back into the vegetative cycle.
How is it done?
It is possible to harvest plants and then rejuvenate (re-vegetate) them vegetatively for a 2nd and even 3rd harvest. A second harvest can be realized in as little as 6-8 weeks. Since the plant stalk, and roots are already formed, the plant can produce a second, even third harvest of buds in a little more than half the time of the original harvest. When harvesting, take off the top 1/3rd of the plant. Leave most healthy fan leaves in the middle of the plant, cutting buds off branches carefully. On the lower 1/3rd of the plant, take off end flowers, but leave several small flowers on each branch. These will be the part of the plant that is regenerated. The more buds you leave on the plant, the faster it will regenerate. Feed the plant some high nitrogen plant food immediately after harvest.
After you have harvested your plant and left some of it still in tact, you need to transplant your mother because she needs new soil and room to grow a new root structure to support the new growth. Make sure your soil is semi-dry so that the root structure when it slides out of it's old home stays mostly in-tact, but since you have reduced the size of your plant you can also reduce the size of your root structure significantly. You can break off parts of the rootball mass without injuring the plant
When you intend to regenerate a plant, make sure it never gets too starved for nitrogen as it is maturing, or all the sun leaves will fall off, and your plant will not have enough leaves to live after being harvested.
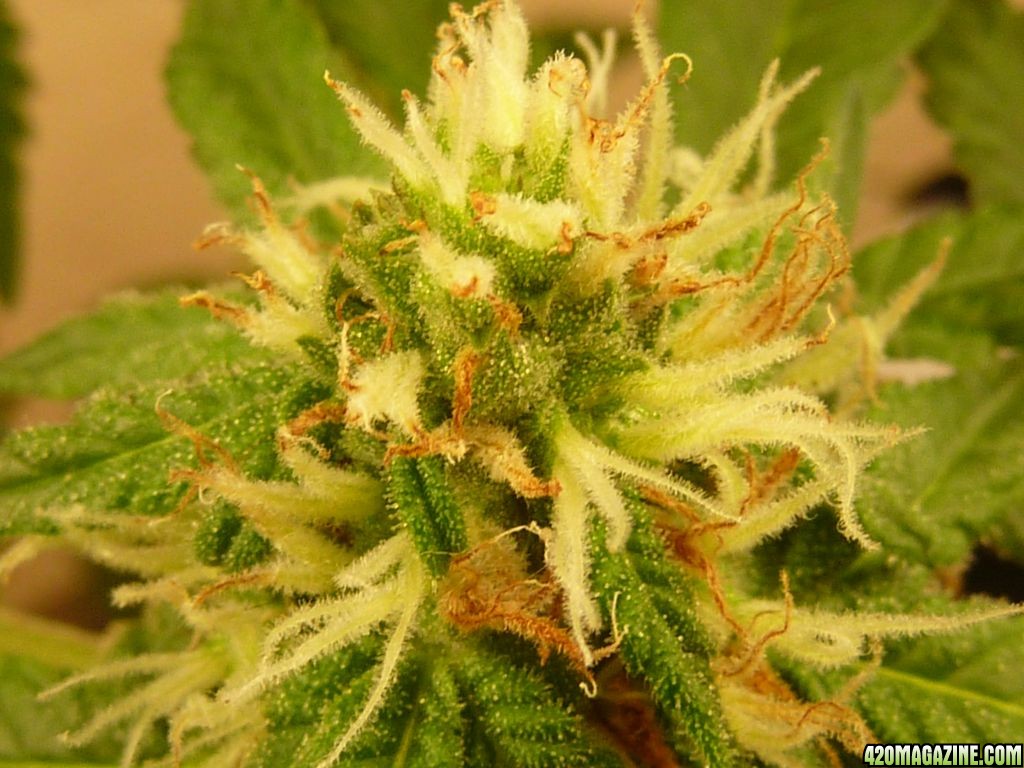
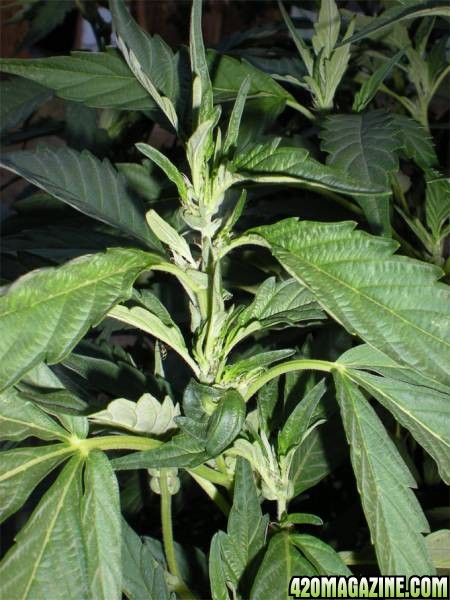
Harvested plants can come inside for rejuvenation under continuous light or are left outside in summer to rejuvenate in the natural long days. As stated before, and in contrast to normal growth patterns, lower branches will be the first to sprout new vegetative growth. With the light's back to the veg cycle and the plant fed, the plant will start to grow new shoots. Usually it takes 2 or 3 weeks before any new shoots are noticed and the growth of the new shoots can look very strange, single leaves will grow aswell as other mutant looking leaves (as seen in the pic below). This is completely normal and after a couple of weeks growth the 'proper' leaves will start to appear.
How Long Do I Veg For?
As with all Cannabis plants, the longer you keep the plant in the re-veg cycle before switching to flowering, the bigger and better your plant will eventually become. Although, for best results it is better to wait until the re-vegged plant is producing a good amount of 'proper', full leaves again before switching to the flowering cycle.

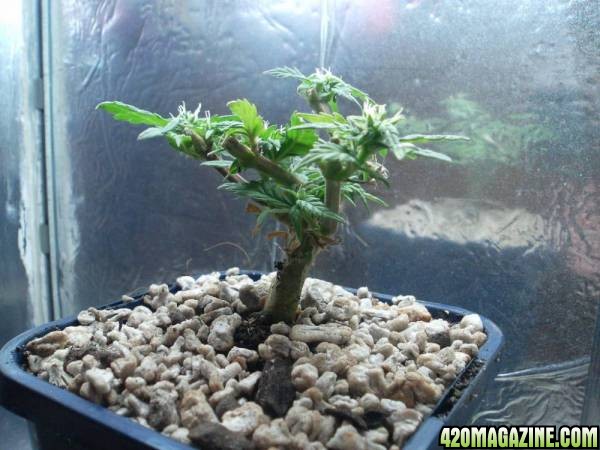
After harvest and 45 days in re-vegging
Re-Vegging Clones
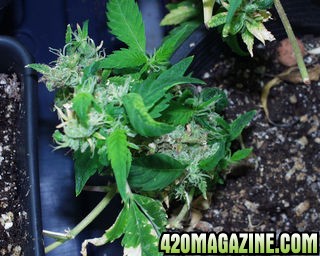
As with re-vegging whole plants, it is quite possible to re-veg a plant from a clone/cutting taken from a plant in flower. (as in the pic below).The exact same principles apply to clones.
I'm in the hurry and want to dry it correctly and cure it
Drying and curing cannabis properly will yield the most THC-potent smoke. When dried and cured improperly, potency can diminish substantially. The level of THC in a plant is determined by its genetics. Proper drying and curing will keep the THC level as high as genetically possible. It does not increase potency. A little background on what happens inside and outside the harvested drying plant will help you understand why proper drying and curing are so important to good quality dope.
Drying evaporates most of the 70- 75 percent water content in fresh marijuana. Drying also converts THC from its non-psychoactive crude acidic form to its psychoactive pH-neutral form. Once dry, THC-potent marijuana can be smoked and you will get high. Every THC molecule must shed their moisture content before they are fully psychoactive. In other words fresh green marijuana will not be very potent.
When you cut a plant or plant part and hang it to dry, the transport of fluids within the plant continues, but at a slower rate. Stomata, small openings on leaf undersides, close soon after harvest and drying is slowed since little water vapor escapes. The natural plant processes slowly come to an end as
the plant dries. The outer cells are the first to dry, but fluid still moves from internal cells to supply moisture to the dry outer cells. When this process occurs properly, the plant dries evenly throughout. Removing leaves and large stems upon harvest speeds drying, however, moisture content within the "dried" buds, leaves and stems is most often uneven. Quick drying also traps chlorophylls and other pigments, starch and nitrates within plant tissue, making it taste "green" burn unevenly and taste bad.
Taste and aroma improve when these pigments break down. Slow even drying — where the humidity is similar inside and outside the foliage — allows enough time for the pigments to degrade. Hanging entire plants to dry allows this process to occur over time, about 3-4 weeks at 50-60 percent relative humidity and a temperature range of 60-70 degrees F. (15-21 degrees C.) The large outer leaves also form a protective sheath around buds. This protective foliage shields resin glands on buds from rupture and bruising.
Removing large leaves and stems upon harvest saves time. This is what most growers do, because fresh supple leaves are easier to work with than dry leaves. When you are looking a manicuring 5 kilos, you make it as easy as possible! However, this process often causes uneven drying and keeps moisture inside the foliage. This is why it is important to "cure" the "dry" marijuana.
Curing lets the plants continue to dry slowly. The first week of curing affects potency in that it removes moisture within the bud evenly, so that virtually all the THC is psychoactive. Curing also allows buds to dry enough so that mold does not grow when it is stored. A well-cured bud will also burn with an even glow.
Note:
Rough handling and friction from fondling hands will bruise and knock off resin glands. Even with proper drying and curing, brutal handling of harvested marijuana will diminish THC content.
Drying
Here is one of the best ways to dry plants to retain the maximum amount of psychoactive THC. Cut the entire ripe plant at the base and hang it upside down on a line to dry. Try to keep plants from touching each other to avoid uneven drying and mold. Keep the humidity between 50-60 percent. Keep the temperature at about 60-70 degrees F. (15-21 degrees C.). The room should be relatively dark as light, especially direct sunlight, degrades THC.
A circulation and ventilation fan may be necessary to control heat and humidity. You can also use a dehumidifier to control humidity or an air conditioner to lower ambient relative humidity and control room temperature. Do not train fans directly on drying plants it causes them to dry unevenly.
Depending upon atmospheric conditions and the size and density of plants and buds, plants should be dry enough to smoke in about a week. Plants with outer "fan" leaves intact take longer to dry than if leaves have been removed.
Check for dryness by bending a stem. It should snap. The bud should be dry to touch, but not brittle. The bud should burn well enough to smoke now.
Once dry, carefully manicure buds by cutting large leaves where they attach to the stem. Leaving the petiole (leaf stem) can cause mold to grow. Snip off smaller leaves that show little resin so that buds a beautiful bud remains.
Freeze Drying
Dry ice is frozen carbon dioxide. CO" changes from its frozen solid to a gas without turning into a liquid, a dry (ice) process that is called sublimation. The atmosphere contains little CO2. Dry ice sublimes (converts) completely into a gas leaving virtually no liquid. It is dry.
When moist marijuana is enclosed with dry ice at virtually zero relative humidity, water molecules migrate from the cannabis to the dry ice. The relative humidity of the CO2 increases and the moisture content of the marijuana decreases. This process occurs below 0 degrees C (32 degrees F), preserving the cannabis.
Place equal amounts of dry ice and bud into a container. Dry ice on the bottom and bud on top. Seal with a lid. Make a few small holes in the lid of the container for excess gas to exit. Place in the freezer. Check the dry ice every 24 hours. When the ice is gone, the buds will be completely dry. If not dry, add more dry ice until cannabis is dry. Conserve dry ice by partially drying buds for a few days before enclosing with dry ice.
This method retains potency, freshness and causes very little degradation of resin glands by the bad guys — heat, light, air and fondling hands. The marijuana tastes 'minty' because the chlorophyll does not break down.
Curing
Even though the plants appear to be dry, they still contain moisture inside. This moisture affects taste and potency. To remove this excess moisture, curingis necessary. Curing makes the bud uniformly dry and converts virtually all THC into its psychoactive form. Cut stems into manageable lengths — less than 12 inches (30 centimeters) — and place them in an airtight container.
Glass containers with a rubber or similar seal on top are the best. Avoid Ziploc plastic bags, which are not airtight. Many growers also avoid plastic containers such as Tupperware, sighting the plastic imparts an undesirable flavor in the buds.
Enclose buds in a container. This creates a microclimate that allows moisture to "even out" within the buds. Internal moisture will migrate to the dry portions of the bud. Gently pack as many buds in the glass container as possible without damaging them. Leave the jar(s) in a cool dry dark place. Check the jar in 2-4 hours to see if buds "sweated" moisture. Check buds by gently squeezing to feel if they are moister than they were a few hours before. Be careful when squeezing buds, they bruise easily. Most often they will be completely dry. If not, leave them in the sealed jar overnight and check the next day.
The buds will be a bit moist. Remove them from the jar and gently lay in the bottom of a paper bag. They can be stacked in the paper bag as high as 10 centimeters (3 inches). Close the top of the bag by folding once. Check the buds 2-3 times during the day to see if they are dry. Carefully turn them in the bag so that different sides are exposed. Remove when they are dry and place back into the sealed glass jar. Check them the next day to see if they are evenly dry and not moist again. If moist, remove and place back in the paper bag until dry. When dry place back in the glass container. Repeat process until buds are evenly dry.
If buds appear to have fairly low moisture content, you may be able to leave them in the jar and let excess moisture escape out the top. Simply open the jar for a few minutes every few hours to let the excess moisture escape before closing the lid again.
Check the container daily, leaving the top open for 5-10 minutes so moisture evacuates. After a week or two, it should be totally dry and ready to seal airtight. Vacuum seal the jar and place it in the refrigerator for storage. Leave it in the refrigerator or a cool dark dry place for a month or longer. The taste and potency will be tops! Refrigeration slows decomposition but remember, refrigerators have a high humidity level, so the container must be sealed airtight. I just checked the relative humidity in temperature in my refrigerator — 65 percent relative humidity and 5 degrees C. (40 degrees F). Do not place it in the freezer. Freezing draws moisture to the surface of buds, which can harm resin glands on the surface.
FAST DRYING
I do not recommend fast drying however here is a brief rundown on several methods for those of you who can't wait.
Method One: Manicure fresh buds. Spread them out evenly and wrap in paper or enclose in an envelope. Place the paper or envelope on top of a warm object — refrigerator, radiator, television, etc. Depending upon heat level, buds will be dry in a few hours to overnight. Buds should be a bit crispy when dry. Place buds in an airtight container until they sweat. Follow curing instructions above.
Method Two: Cut up fresh buds and foliage. Place on a 6-inch (15 centimeter) square of tinfoil. Hold or place it over a 60-80-watt light bulb. Stir every 30 seconds. The weed takes 1-3 minutes to dry.
Method Three: Place cut up buds and foliage on a cookie sheet in an oven at 65 degrees C. (150 degrees F.) for 10-15 minutes. Check regularly until dry. Follow curing instructions above.
Method Four: Place cut up buds and foliage in a microwave oven. Power the oven to 40-50 percent and give short 5-10 second bursts. Check regularly until dry.
Method Five: Cut fresh buds and foliage into small pieces and place them in a glass jar with an airtight lid. Place several silica gel desiccant packs (the kind that come with electronic devices and cameras) into the glass jar and seal the jar. Moisture will migrate to the silica gel in a few hours. Remove the packets and dry in the sun. Replace silica packs until marijuana is dry enough to smoke. Find silica gel packs at auto parts or electronic stores.
Method Six: Peel stems so they plants dry faster. First remove large leaves. Peel off the outer layer of the stem with a knife. This exposes the inside of the stem and cuts drying time by about 20 percent.
Patient growers smoke no bud before its time!
Hey Grant, thanks for the demo on rejuvenating/revegetating. It is some great info man. Gives me a great idea with my 5 white widows that are getting ready to be harvested. I definitely want to get all I can out of each plant so if I can get them to yield again that's what I am going to do. Can't wait to see how they do. I always wondered if you can do that.
OOPS!
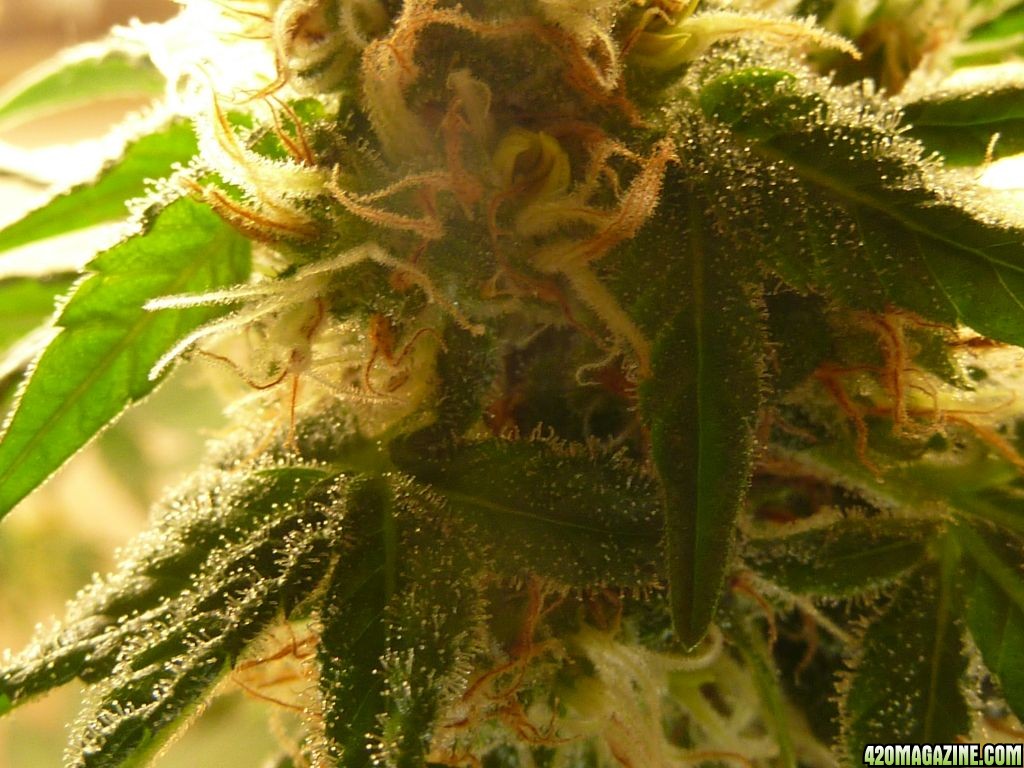
Forgot to say, your gal looks fine. And those are great photos, like the kind you find in High School Marijuana 101 textbooks. (They do teach cannabis cultivation, along with Sex Ed in high school these days, don't they?)