420's Bear Goes Perpetual - Multi-Strain - 2015 - Coco & Perlite

Auto VS Photo-Period & Why


  • Total voters
    28
TODAY'S UPDATE

Planted the 2 Afghani reg seeds I got free with my last order. Hope i get better getting seeds to sprout have gone through about 40 alchemy seeds and only have pammy to show for it ( luckly they were a bag seed bunch I had ) . The last batch I planted have not sprouted yet. Am gonna start playing with differant germinating styles and see what works for me ( one seed at a time) realy the way I have things set up I have 3 areas to grow in. the little closet for seeds, a 6x7.5x7.5 area for veg and a 4x7.5x7.5 area for flower so I can keep things pretty fluid ( ty sue for that concept) i am just gowing for myself so things are easier dont have to worry so much about amount of harvest but concentrate on good bud. Sad to announce that I scraficed Sunny yessterday if you remember she was the lemon diesel that got heat stressed real bad. She wasnt bouncing back like i would like and compared to her sister she was not worth the effort or space and I can use her 3 gal pot for one of the afghani if they sprout. Am letting the pots tell me when to water. Everyone in flower seems to be holding on didnt get to take pics today before lights out but the line up is as follows

Pammy Alchemy at 78 days
Terry Amnesia Auto at 51 days
Jazzy Lemon Diesel umsexed at 41 days
Georgia Bubba Kush x Blue Dream Unknown Age rescue plant

that is all for today see ya all in the funny papers
 
ummmmmmm can rethink the idea was using the smaller area cause it has a window for venting
 
so far the temps seem to be better but the room isnt fiinished yet will see how things go when I add the insulate panels. Have a 12 in window fan sucking air out of the room.
 
Good work on improving your rooms. Getting your environment (Light/Temp/RH) dialed in is, according to Doc Bud, one of the most important elements of growing dank weed - more important than quality soil nutrients. This from a guy who loves talking about nutrients.

I have cooked seeds with a heating mat.
I have killed seeds by overwatering.
I have seen others kill seeds with adult soil nutrients.
I have killed seeds with high water PH.

My latest seed was in water 2 days until seed coat cracked, then into pre-watered seedling soil before the seed tail was showing (just a litte bit of white.)
The seedling soil was 3 parts perlite, 2 parts peat moss, 1/2 part compost.
Then I waited 5 days until the seedling burst into the air - nervous all the time because it was my third and last Northern Lights seed. .

Air temp 76. CFL 10 inches above soil.

With cannabis, less is usually more.
 
For those who are interested HERE'S how I got to nearly 100% germination rate.
 
-TODAY"S UPDATE
Walked into room this morning and I thought I had lost Pammy. She was all drooped and dead looking ( thought to myself what did I do now) gave a a gal of nute and bloom and 3 hrs later she has perked up looks almost normal so I think I let her get too dry.:oops: 
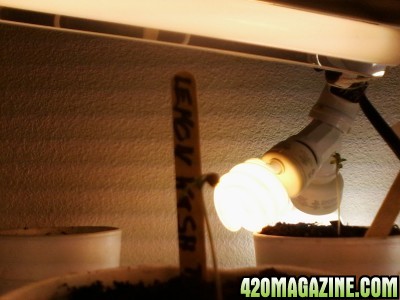
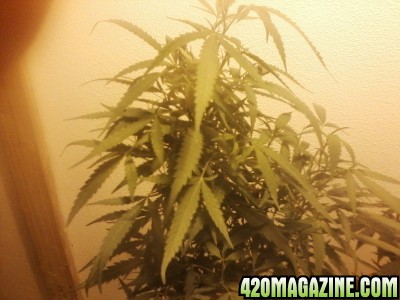
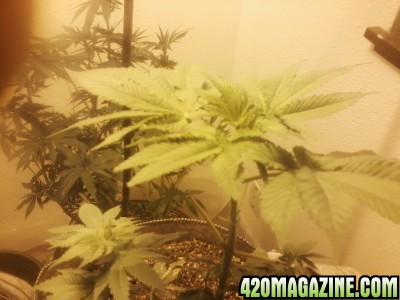
temps seem to be doing good as the grow room is the coolest room now in the whole second floor ( don;t know how I accomplished that just by putting the 12 in faN IN THE WINDOW SUCKING OUT?) Planted my free dela haze fem today ( last of freebies from last order). Gave everyone nutes and bloom today not seeing any pistals or buds yet. Here are the girls
Pammy
Pammy1.jpg

Georgia
Georgia5.jpg

Jazzy
Jazzy1.jpg

Terry
Terry.jpg


that is all for today see ys sll in the funny papers
 
Generally, walking into the grow room and seeing droopy means you have some thirsty girls. A gallon of water and she'll be a happy camper.

Glad you got it figured out, Holmes!
 
TODAY'S UPDATE

JAZZY IS PREGNATE. went into room and lo and behold there are buds starting or what I think are buds they are little lumps with white fuzzy hair looking things. I was getting disappointed because it was 44 days today with no signs of anything happening. Now if Pammy and Terry would start doing something we will be doing good. Pammy is 75 days today and no sign of anything yet and terry is 47 days today.At least I am seeing progress. Will just keep praying to the grow gods and see what is to come
 
TODAY'S UPDATE

Looked in flower room and Lemon Kush 1 & 2 Popped today. Have started sepperating the 2 rooms temps are high today outside temp is 105 broke my thermometor so have to get a new one so dont know what the temp is inside room right now. photos in morning when lights come on
 
:bravo::clap::clap::clap::clap::bravo:
 
she is 48 inches from top of soil to top of plant top 19 inches is what is green i havested the rest of her
 
TODAY'S UPDATE
Lemon Kush #3 popped it's head out today. ok lets look at this
#2 planted in coco/perlite
#3 in potting soil and compost mix
#1 planted outside in plain dirt
#4 planted in straight coco ( not popped yet)
will have to think on this and see what is differant with each. The water i am using is the same except #1 was getting watered with 7 ph water then flushed with 6 ph water 2 times daily. Also started an experiment with putting a half tsp of miracle grow in a gal of water then use that water to soak seeds have 19 seeds soaking for 3 days now showing signs of cracking. The bubba kush x blue dream has been curing 14 days and she is tasting good but i kinda miss the taste of "fresh" bud.i think I have come up with about 1.5-2 oz off georgia so far ( have her in re-flower to see if top 19 inches does anything. Today she was showing signs of new life so gonna just keep her in there till she croaks.Buds on Lemon diesel is getting bigger. had a pro grower over last night he lookeed things over and said she is looking strong. Pammy is still not showing signs of doing anything except growing but we are now poz it is Pammy and not a Paul. Broke down and bought a acurite digital temp/rh gauge today and was not happy with what I saw. temps outside were 205 again today and temps in room were 101 high 86 low 30%-19% humidity (low humidity at high temps) . I know I need to get a ac but right now just cant fit it in the budget.Temps are supposed to be dropping again bout Tues.
our 8 day forcast

Sun Aug 2 103° 73°
Mon Aug 3 96° 70
Tue Aug 4 95° 65°
Wed Aug. 5 89° 62°
Thu Aug 6 88° 61°
Fri Aug 7 91° 63°
Sat Aug 8 92° 64°
Sun Aug 9 89° 65°
Mon Aug 10 92° 64°
I hope they don't know what they are talking about and it will be better for me but Murphy"s LAw "ALWAYS" applies:cheesygrinsmiley:
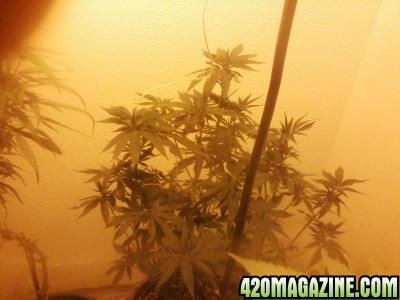
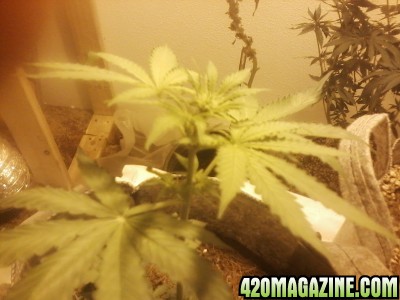
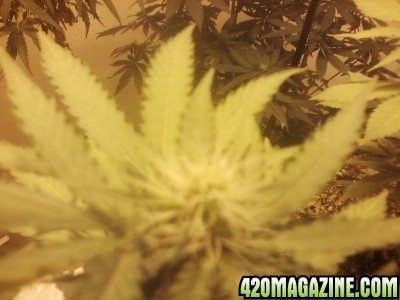
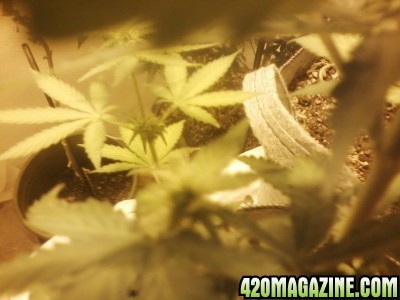
. Again was away all day but these are the pics I took before I left
Sassy_azz_bratt day 1
Sassy_azz_bratt.jpg

Izzy day 1
Izzy.jpg

Jazzy packing on something day 57
Jazzy_Buds.jpg

Jazzy_Buds_2_.jpg

that is all for today see ya all in the funny papers
 
TODAY'S UPDATE

Yesterday was a bad day in the lab my 600w fell out of the cieling and took out all plants in flower. Pammy took the worst of it. took out one of her main bottom braanches and some of the side ones trussed her like a xmas turkey and am hoping i can get her to finish ( seems I missed the stud when hanging light. ) went out yesterday and bought ratchiting light hangers and boy it is alot easier now adjusting light.I also broke down abd bought myself a present

Thunder (TM) 6 Inch Cool Tube with Reflector - 5 Year Manufacturer Warranty
by HydroponicsPro
Price: $25.74 + $19.25 shipping
Dimension 25" (L) / Vent Size 6" / Socket E39
Encased in fully heavy duty powder-coated galvanized steel. Made of 95% reflective German aluminum for excellent reflectivity.
Equipped with a reflective inner sheet for 360 degree vertical and horizontal lighting.
Comes with built-insocket and 15' pre-wired lam cord. Accommodates most lamp types up to 1000w
Fully packaged with a built-in socket, 15' pre-wired lamp cord, and hangars. 5 Year Manufacturer Warranty !

hopefully this will help with heat probs. JAzzy is doing great she is starting to show me she is worth the trouble I been having with heat. Thought sbout closing grow but have spent to much time and money on this endevor to give up ( ty again sue for the words of encouragement) . There was some good news also a grower from Seattle came down and gave me some trim from his last harvest and gave me some pointers he also gave me his "secret" recipe for Honey Oil ab=ns told me to share with ya'll so here it is

How To Make Pure THC Honey Oil Resin From Marijuana
Equipment and Materials To Make Marijuana Honey Oil
1. Marijuana stalk, leaf and bud can be used. Make sure your marijuana is dry. DO NOT GRIND UP YOUR WEED. Start off this recipe with 4 ounces of weed. You can use as little as one ounce or as much as you want. Simply cook just leaf and produce a wicked honeyoil. Try to use buds for special occasions. The best place to get free weed is off of someone who just finished a grow room and has a whole bunch of trimmed leaves and stalk lying around.
2. Isopropyl Alcohol 99% pure. Make sure it is 99% pure Isopropyl Alcohol. The alcohol ranges from $5CDN to $13CDN per 4-litre plastic jug. Any pharmacy should have Isopropyl Alcohol 99% on the shelf. When using 4 ounces of weed as mentioned above you will need 2-litres of Isopropyl Alcohol 99%.
3. Empty 4-litre plastic milk jugs (4). Three jugs you cut the top off so you turn them into a pail. The other one you cut the bottom off so you can use it as a big funnel. Sterilize each one with hot water and clean thoroughly. DO NOT use soaps or cleansers to clean. No foreign debris in the jugs.
4. Empty 2-litre plastic coke bottles (2). Cut the tops off so you can use them like a funnel to pour into the bottom part of the bottle. Make sure the pieces are very clean. Again, just use very hot water to clean with and NO soap or cleansers.
5. Ordinary coffee filters. You'll need at least three filters to start with. You will be using the top of the cut up coke bottle and the filters together.
6. Refrigerator freezer or an IceBox to freeze all the ingredients.
7. Clear plastic tubing to fit the lid on a pressure cooker. 6 to 7 feet. Determine the size you need by reading the next item below.
8. Pressure Cooker of average size. They can be found at any second hand store. Can pay as little as $10CDN for second hand. Or you can buy one new. Pressure cookers have one or two holes in the lid, usually two. Take off the top fittings from the holes in the lid and insert three feet of clear plastic tubing in each hole. Maybe use some tubing from an aquarium. You can get cheap tubing from any hardware store. Pay attention to what size tubing you need for your lid. Please ensure when inserting the tubing into the top of the lid that it is secured airtight somehow. This is really the only pain in the butt part of it all. There are fittings you can get from the hardware stores or plumbing stores to help you. The alcohol will be going through the tubing while under a vacuum pressure. If you are not too handy at this, seek a friends help. Test your pressure cooker with boiling water. Positively NO LEAKS at the lid please. The open ends of the tubing will run into a collection pail so you can reuse your Isopropyl Alcohol over and over. The main purpose of a pressure cooker is to recycle your Isopropyl Alcohol and control dangerous fumes. You can just have the Isopropyl Alcohol evaporate away so you don't have to use tubing but this isn't recommended, it's highly flammable.
9. Electric Frying Pan that the pressure cooker will sit in.
10. Water to put into the electric frying pan to slowly heat the pressure cooker.
11. Small Pane of glass for drying out a finished product.
Preparation For Extracting Hash Honey Oil From Marijuana
1. Place the dry weed and jug of Isopropyl Alcohol 99% into the freezer. They can be in plastic containers. Do not grind up or rip up the weed. Just put it into the freezer.
2. Now prepare a juice weasel. Simply cut the jugs as described above. Check out all your plastic jugs for debris, hair, etc. Make sure they are clean.
3. Take weed and alcohol out of the freezer after a good hour or two of freezing. The colder they get, the better the reactions will be.
4. Rinse the weed with the frozen Isopropyl Alcohol 99%. Just put the weed in a jug with holes at each end. Simply pour the alcohol over the weed quickly and collect the alcohol/THC liquid mixture you will be left with. The alcohol/THC liquid mixture should look golden brown or yellowish in color. Don't throw out the weed you just washed. Again the weed and alcohol that was just used should end up in two seperate containers. One with washed weed and one with the Iso/THC mix.
5. Repeat this rinse cycle a good three times. DO NOT let the Isopropyl Alcohol 99% soak in the weed. You just want to do quick rinses while the alcohol and weed are still very cold. Otherwise you loose the nice golden yellowish clear color and the oil turns green from chlorophyll.
6. Place a doubled up coffee filter in the funnel you made from the coke bottle.
7. Now filter the rinsed out alcohol/THC liquid mixture by pouring it through the double coffee filter funnel and into the coke bottle. This gets rid of any sediment.
8. Throw away the double filter and use a single filter for a second pour or filtering. Never filter over a kitchen sink. Fire can go right down the drain and become very serious.
9. Now warm up the alcohol/THC liquid mixture to room temperature. This makes it easier to cook with.
10. The final product should look clear of debris and light brownish/yellowish honey in color. You have collected all the THC into the Isopropyl Alcohol. You are now ready to get rid of the alcohol and have just the THC left.
Cooking Marijuana Into Hash Honey Oil
1. Run an extension cord to a discrete place outdoors. the best method is to cook in the trunk of an old car in the backyard. The biggest reason for outside cooking is to help deal with dangerous alcohol fumes from the evaporation process. Cooking can be done inside on an open stove burner in a stainless steel pot, however the fumes in the air can ignite quite fast. A pressure cooker helps keep fumes in. A safer way to cook indoors is to use a pressure cooker on your stove. Very low heat. The pressure cooker helps recycle your alcohol for use again. So you see, it can be done indoors but at your own risk. It can be done with or without a pressure cooker. OUTDOORS PLEASE.
2. Fill your electric frying pan half full of water.
3. Place the filtered solution of alcohol/THC liquid mixture into the pressure cooker and place the lid on. Check the lid and make sure the fittings are tight.
4. Put the pressure cooker full of the alcohol/THC liquid mixture onto the electric fry pan half full of water. The warm water will evaporate the Isopropyl Alcohol.
5. Have the hoses running off your pressure cooker lid drip into a collection jug. You are recycling your alcohol. Do not place the tubing inside the jugs, have the tubing drip into them. If the tubing is right inside the alcohol in your collection jug and the pressure cooker drys up, a reverse vacuum will occur and your alcohol will be sucked back into the pressure cooker. This will happen at the end of the cooking process. A tight seal for the tubing on the pressure cooker lid is needed because a vacuum is created during cooking and is an essential part of the process so it must be working properly. If your seal is OK then the process goes real smooth. Again it is not recommended but the Isopropyl can just be evaporated in the air. OUTDOORS PLEASE.
6. Now turn on the heat for the electric frying pan to around 190 degrees Fahrenheit. NO HIGHER. VERY LOW HEAT. You are about to evaporate the Isopropyl Alcohol out of the THC.
7. Watch the process. It should take an hour to complete give or take fifteen minutes. The alcohol will begin to run out of the tubing at a steady rate. Just let it evaporate. Very low heat. Do not get impatient. Not too often, but every once in a while, lift up the pressure cooker lid and look at the progress being made. All you are really doing now is evaporating away the alcohol so you will be left with a high concentration of THC in oil form.
8. The alcohol in the tubing will stop being a steady stream and start to be airy with bubbles telling you no more alcohol is left. Another way to see if all the alcohol is evaporated is just look inside. The oil should be almost like a hot tar. If you tilt the pressure cooker around the oil will move like a slow liquid.
9. The process is now done cooking and should have 90% of your Isopropyl Alcohol returned in the collection jug. One can use the Isopropyl Alcohol over and over again.
Finishing Making Marijuana Honey Oil
1. While the pressure cooker is still warm, pour the finished honey oil onto something like a pane of glass. The honey oil still needs to evaporate a little more alcohol out of it. Just for an hour or so. Keep your eyes on the honey oil, as you don't want it to get rock hard. You'll like to be able to pick up the honey oil by a knife and have it drip slowly into a glass vial for storage. Don't mind the texture being a consistency to pick it up with a knife but it won't drip off into the glass vial, it needs just a little heat from a gas lighter to get the honey oil to flow.
2. Marijuana Honey Oil will store forever in glass jars.
3. Yields are 1 gram to 3 grams of honey oil per ounce of leaf/stalk or 5 grams to 7 grams of honeyoil per ounce of bud.
4. The old weed you rinsed can be soaked in Isopropyl Alcohol instead of a quick rinse. Soak it for 2 or three hours. Use the same cooking procedures. This will produce a lesser quality green marijuana oil that everyone is used to seeing.
5. Smoke it in a pipe, on a rolling paper with weed, on charcoal, off a pin, off a hot knife, or whatever you think is cool. Personally, try to a bent the end of kitchen knife to sit on a small torch. Stays on the torch all day.
6. The honey oil is well worth the effort. One hoot and you are wasted.

I have tried the finish product of this recipe but have not tried to make yet was told the oil you end up with is 90-95% pure thc. Also found out I am getting a dozen Jackaloupe seeds ( ty you OG) Lost the Dela HAze seed I had germinating ( my puppy the "Moose") went over to say hello to it and knocked over the cup I had her in and seed ended up as dirt in my carpet In seedling closet. 13 alchey I planted did not pop. am 3 out of 4 for lemon Kush germinating,. Was out side planting more alchemy and again "THE MOOSE" tried to help and I ended up with 25- 50 seeds ending up all over wet ground. so threw some dirt over them and I guess I will be ok on babies for awhile(lol)
Work to be done today
1 nute and bloom flower
2 water seedlings ( 3 tbs every day)
3 finish hanging light
4 empty cups of dead seeds
just went in and took pics and we have a new member to the family INTRODUCING Joy she is one of the free Afghani's I got.
 
Oh no Bear that's not good!

Sorry to hear about the accident. That shit will be the end of us. Hang in there big guy. I know it can be discouraging but keep your head high!

Lots of love,
 
:bump:
Oh no Bear that's not good!

Sorry to hear about the accident. That shit will be the end of us. Hang in there big guy. I know it can be discouraging but keep your head high!

Lots of love,
 
pics to come everyone is hanging in there
 
Back
Top Bottom