

- Thread starter
- #81
The 'Tent Topper' for air extraction from the tent is finished. Now I get to install it.

Tent Topper for Air Extraction
Tent Topper for Air Extraction
How To Use Progressive Web App aka PWA On 420 Magazine Forum
Note: This feature may not be available in some browsers.
Hey Mr. Salt, sorry to hear that you haven't been feeling great. Hope that you are getting good care, and that the tests get you sorted out quick!It's a late update, sorry for that. There have been a lot of ups and downs as I've been put through a battery of medical tests. I've had shortness of breath, fatigue, and chest pains. Preliminary test indicate aortic valve calcification or stenosis. More test are scheduled.
Plants: Jun 04, 2019
lookin awesome salts I like this oneThe 'Tent Topper' for air extraction from the tent is finished. Now I get to install it.
Tent Topper for Air Extraction
The vent hole in the top of the tent was too large, and incorrectly placed for the Tent Topper. I cut the light socks off with an exacto knife, and removed the stiching. I cut the side that was sewn to the tent off to get rid of the needle holes, and cut it in half. I used Lepage PL Premium construction adhesive to glue the halves together, and clamped the seam between two scrap pieces of wood. The adhesive was allowed to cure overnight. I now had a roughly square patch to cover the vent hole in the top of the tent.
I applied construction adhesive to the top of the tent around the edges of the vent hole. I also applied the construction adhesive around the edges of the patch. I positioned the patch over the vent hole, Covered the patch with wax paper, and put the Tent Topper in place. A piece of plywood was placed inside the tent under the vent hole, with wax paper between it and the hole. This was wedged against the Tent Topper using a suspension pole supplied with the tent, and the light hanger. The adhesive was allowed to cure over night. The wax paper prevented any excess glue squeezed out from bonding with the plywood or Tent Topper. This easily peeled away from the tent.
While waiting for the adhesive to cure, I cut neoprene seals from a 3mm (1/8") self adhesive sheet. These will form a seal between the tent, and the diffusers. After the cure the plywood, suspension pole, and wax paper was removed. The holes for the diffusers were cut in the top of the tent with an exacto knife, using the holes in the Tent Topper as guides. The neoprene seals were installed, followed by the diffusers.

Tent Preparation
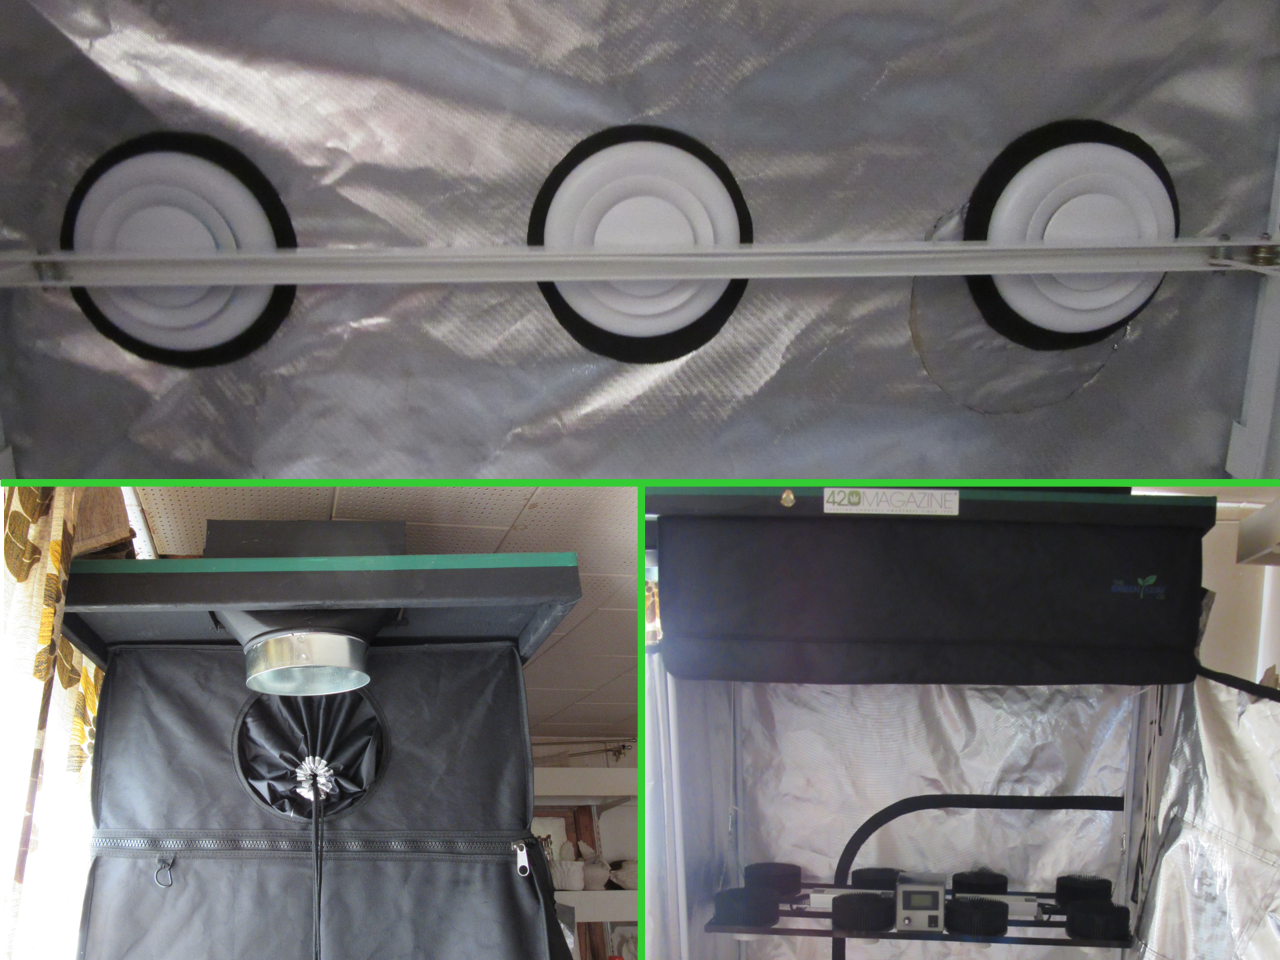
Tent Topper Installed
There is one problem with this setup. The diffusers won't fully open due to the light hanger. There should be enough clearance, but it would have been better to lower the light hanger. As the light hanger is welded together, that's difficult to do at this time. I'll use it as is, and see if modification is required later.

Looks like something folks would pay at least $200 for on Am*zon..
It's long past time to transplant into their final containers. Before that can be done I need to mix up some more substrate.
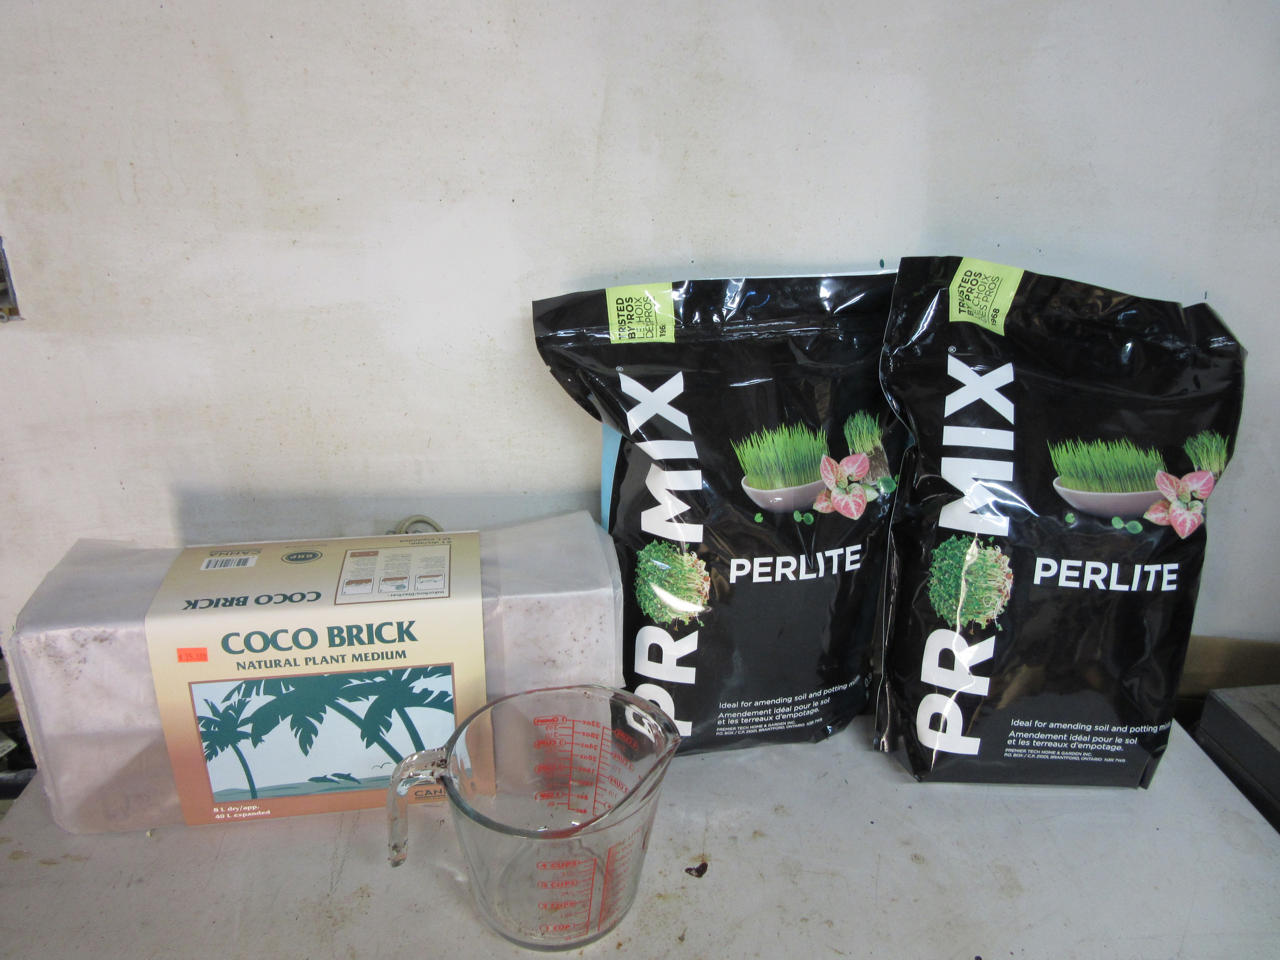
Coco & Perlite Ingredients
1 X Canna Coco Bricks + 18l nutrient solution = 40l coco coir
mix your nutrient solution as per your current stage of growth, I'm at the aggressive vegetation stage so the mix at 30% label strength is:
40 l coco cuir + 18l perlite = 70% coco / 30% perlite substrate
- 18 l water
- 7.5 ml CALiMAGic (50% extra as I'm seeing a deficiency)
- 14.25 ml Flora Micro
- 21.4 ml Flora Grow
- 7.1 ml Flora Bloom
- 1.4 ml Rapid Start
- 6.75 ml Floralicious Grow
- 6.75 ml Liquid Koolbloom
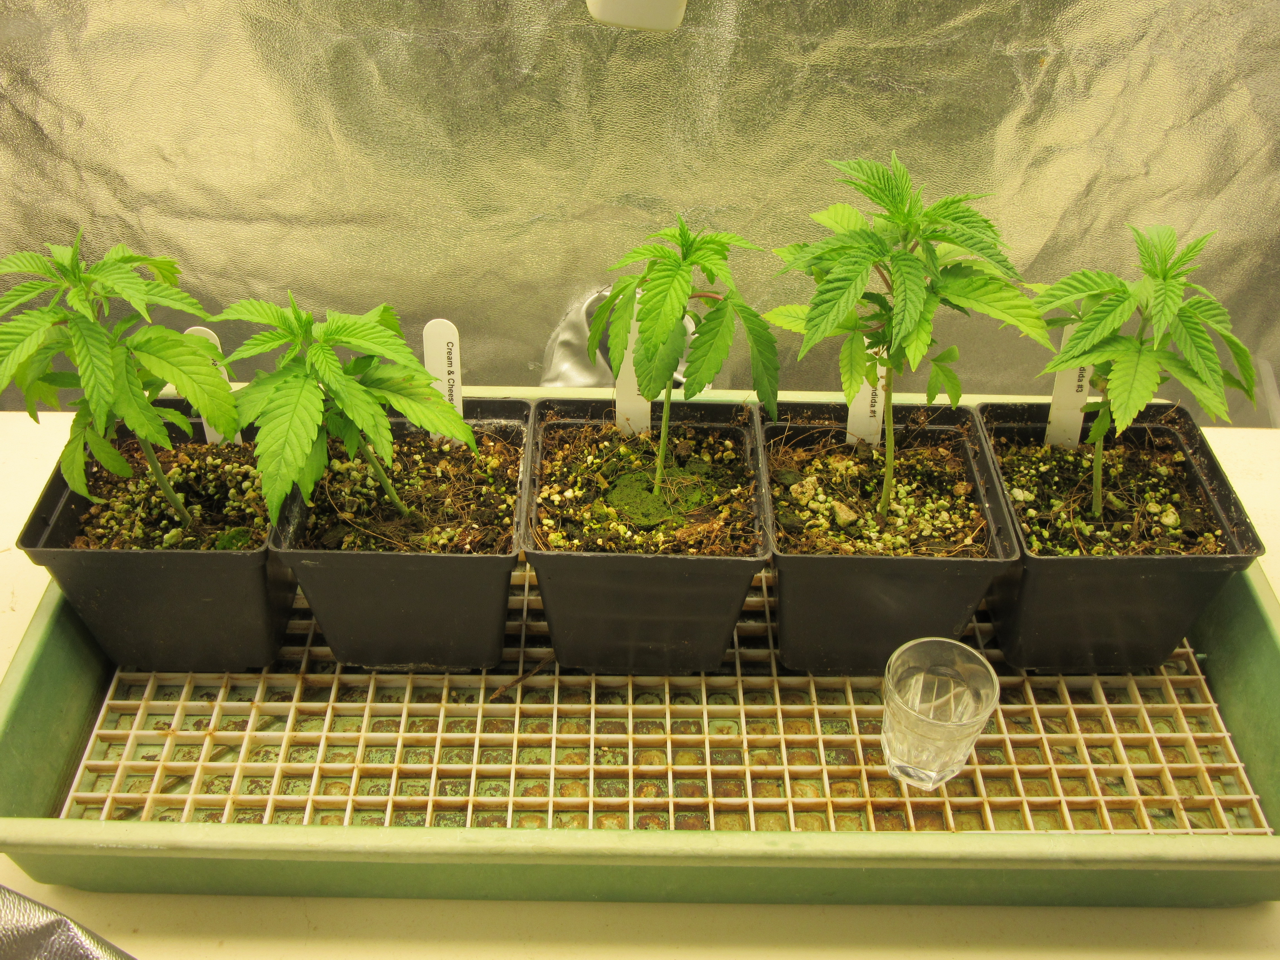
Here are the plants before transplant. They were topped between the fourth and fifth nodes two days ago...

Pre Transplant
...and with the 4" (10cm) pots removed.
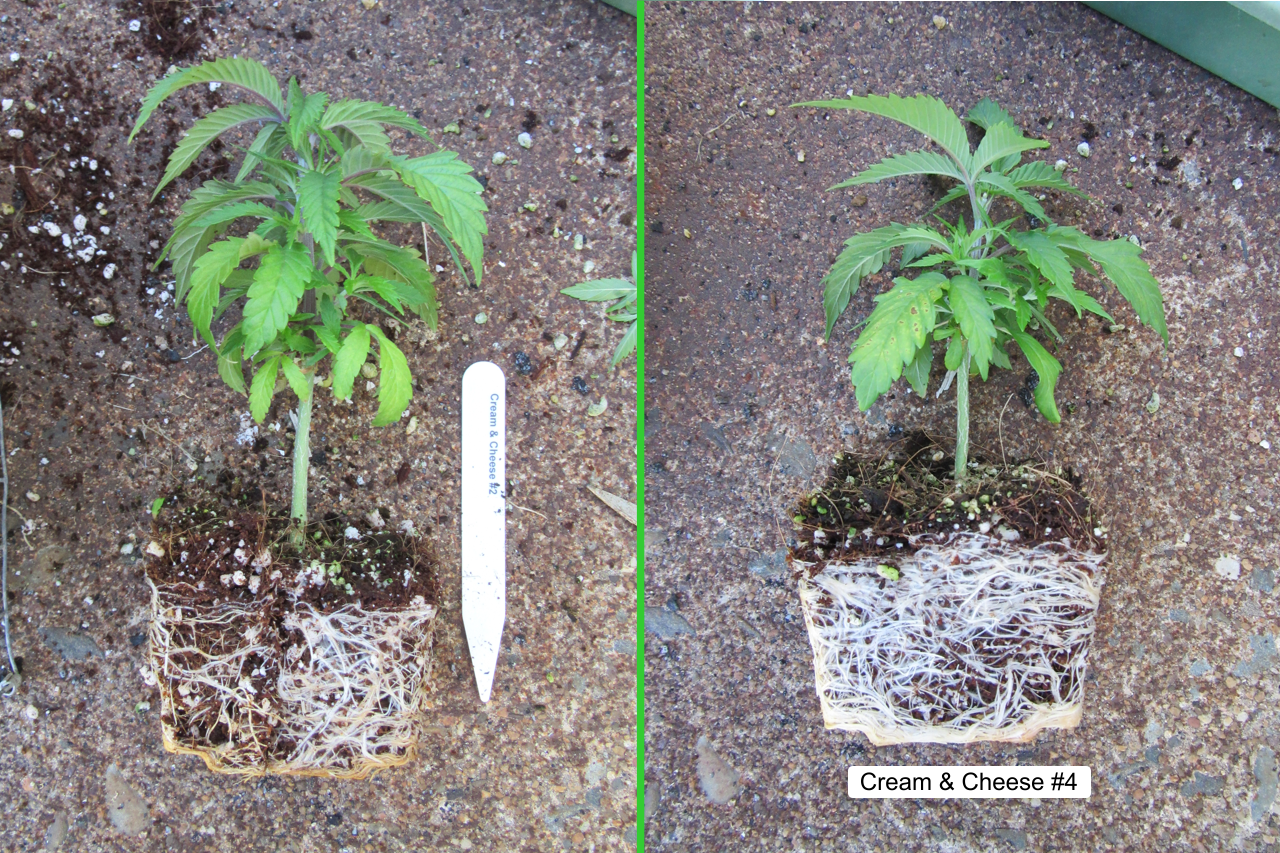
Cream & Cheese - Note Signs of cal/mag Deficiency
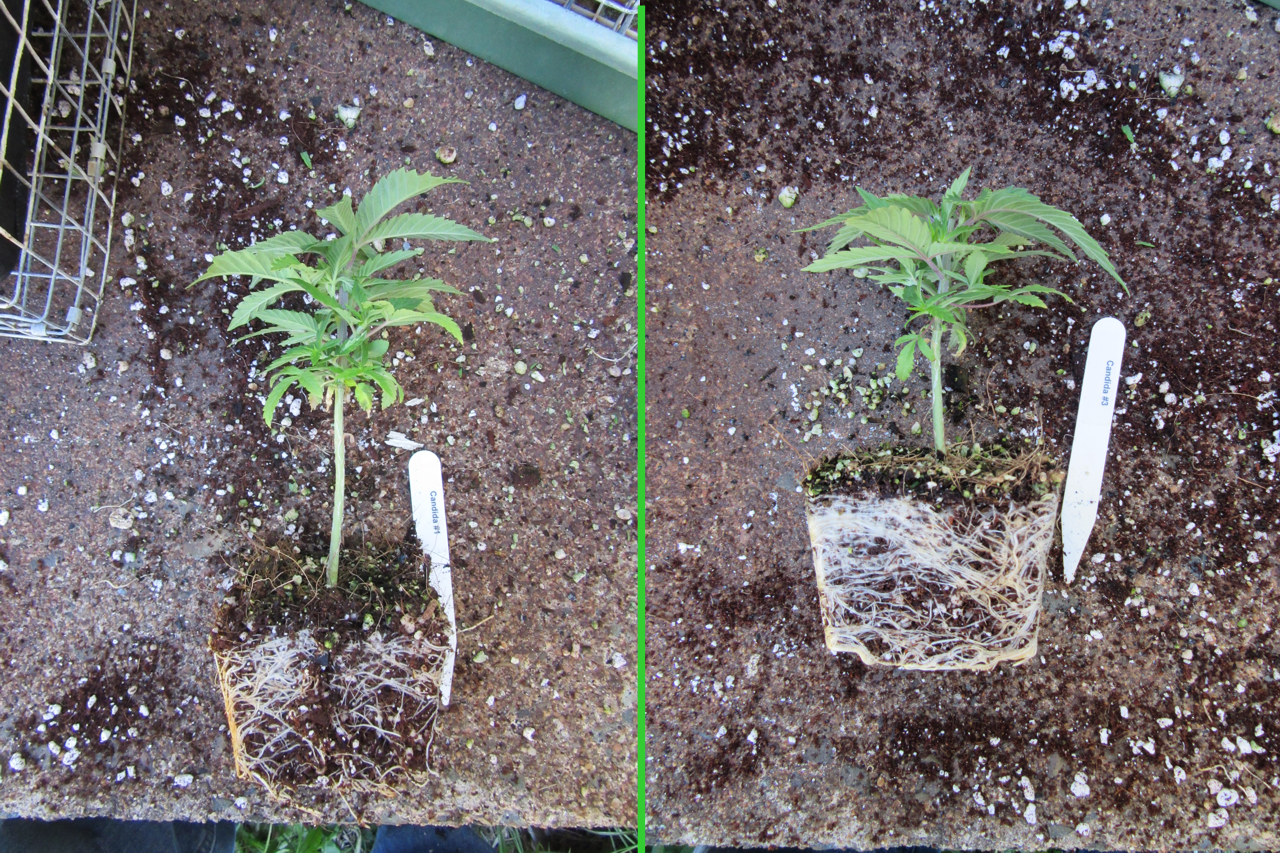
Candida - Roots Cut on Candida #1
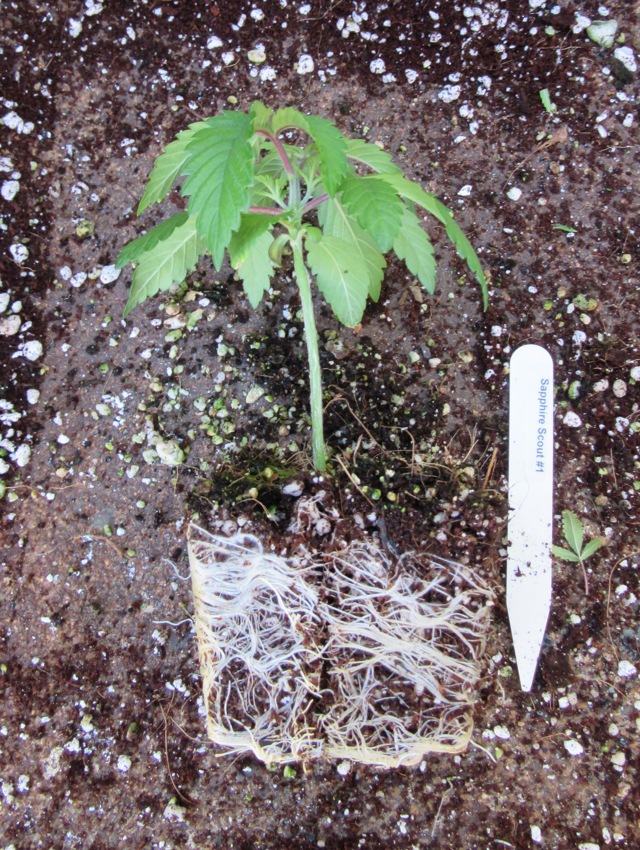
Sapphire Scout - The Only One of Five that Made It.
All of the plants had their roots cut on each of the four sides to break the circling before transplanting them into 11l caged grow bags. Each plant was given 3l of the nutrient solution to ensure they were fully hydrated. I got about 50% run off for this stage. After letting them drain, they were returned to the tent.

Back in the Tent

 Damn them plants sure were root bound, but your roots are looking healthy and strong. I'm sure they'll explode with growth the next week after the transplant!
  Loving your setup and grow style, keep doing what you're doing! I'm real excited for this grow.
I bought two of these fans:

USB Bladeless Fan Tower Fan
According to the description:
It's not low noise, something inside is rubbing. and vibrating.
- Low Noise
- This Fan Gives You Two Levels Of Air Speed To Choose And It Also Can Oscillate.
It does not oscillate.
I'm still looking for a fan...
Thanks. I've seen several reports of these fans failing within a month or two lately, so I'm a little leery of forking out the cash for them.Morning, Mr. Salt! I found a fan on the big South American river.ca that I like.

It oscillates, has two speeds, and the best part, has a clamp that fits directly on round tent poles. Not sure if it suits your criteria, but an option to consider.
How are you feeling these days?
Thanks. I've seen several reports of these fans failing within a month or two lately, so I'm a little leery of forking out the cash for them.
I'm waiting for the health care system to schedule the tests. The system is falling behind in its ability to handle the demand. I've been shouting this out for over ten years, but folks don't want to do anything unless they have been impacted. One of the main buildings for the hospital has had four major floods due to pipe breakage in the past two years. My wife had to wait over ten years for knee replacement surgery, although the system only acknowledges 9 months of that. The rest of the time was spent waiting for a specialist's appointment slot to open up. After my TIA (mini stroke) I had to wait three months for surgery. It was rescheduled twice as there was no room in the hospital. This was despite having a 5% chance of dying per week of delay.
I'm a bit late to this party but if you don't mind I'll tag along. Working on a seed run myself so any info I can get from a pro can only help. Great looking stuff so far @Old Salt.
Where did you get you sodium thiosulfate?