Timewreck - Grown In Hydro With LED & A ScrOG

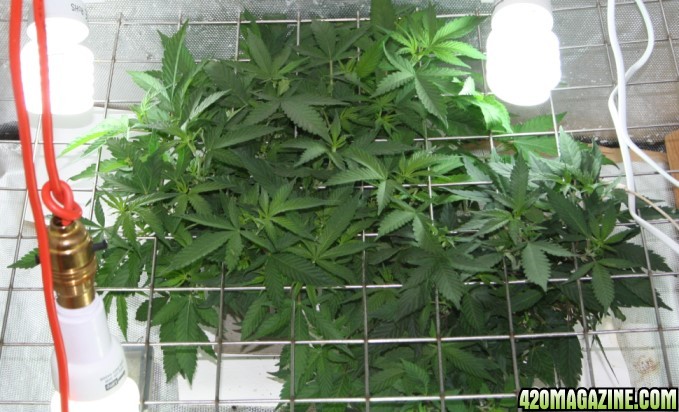
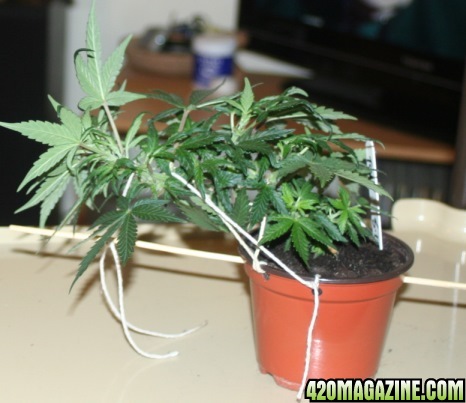
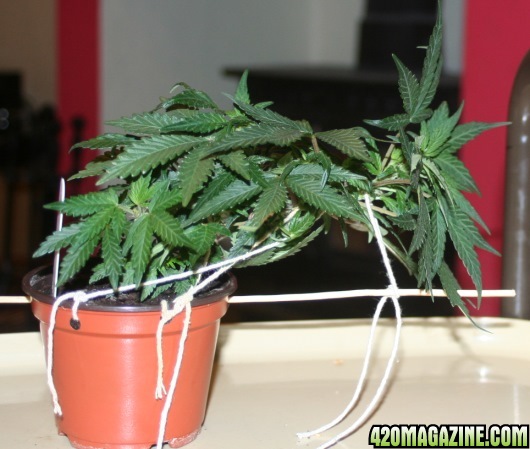
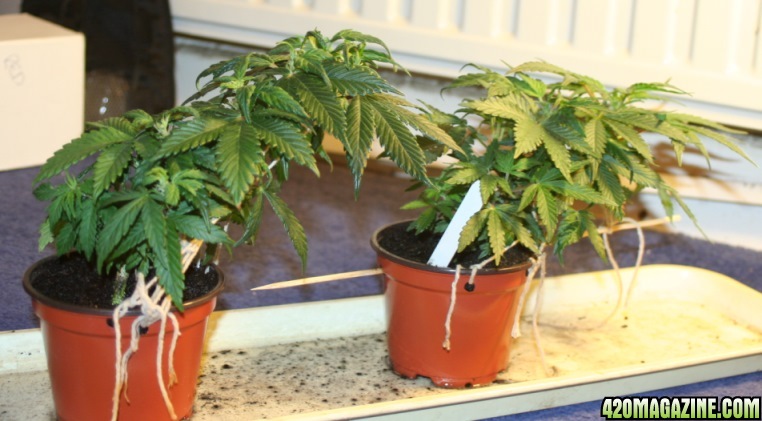
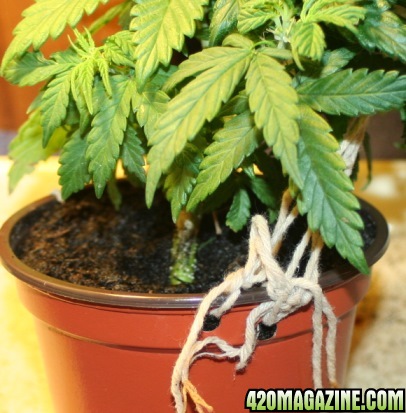
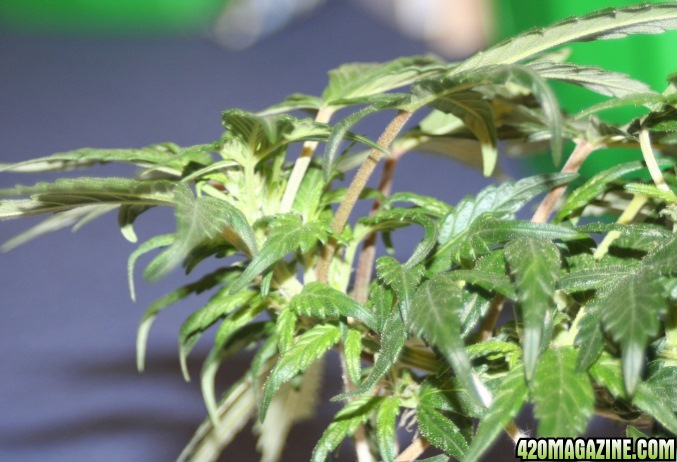
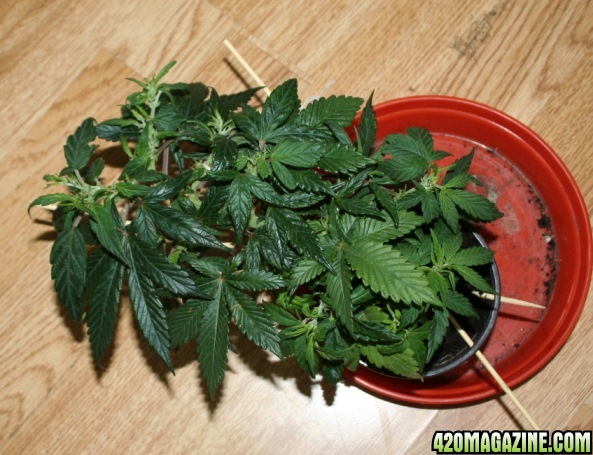
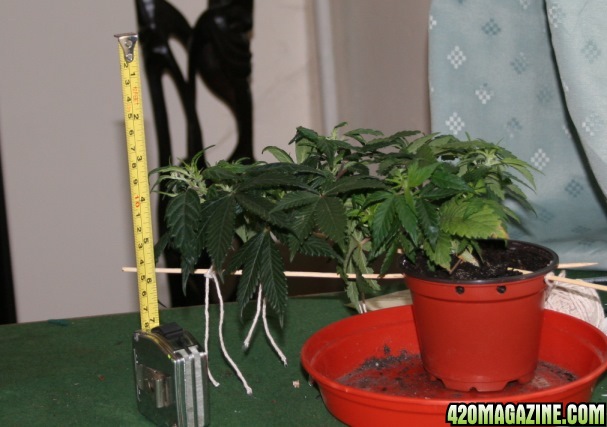
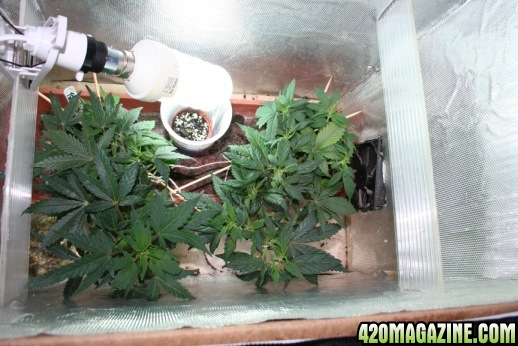
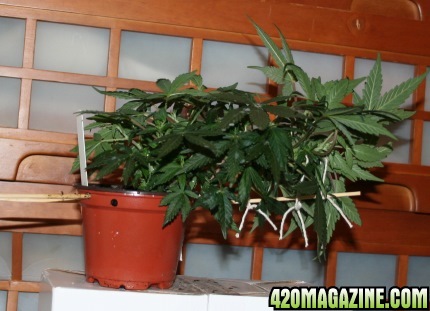
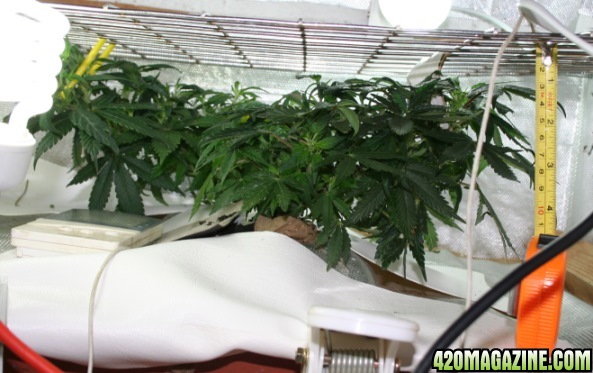
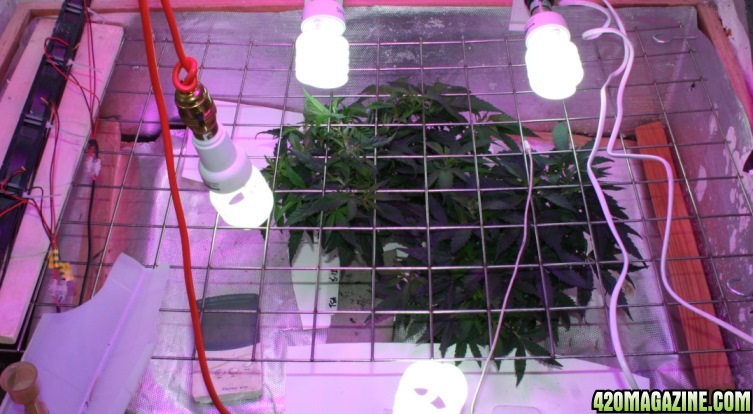
I have had to tie down the new growth again, to avoid curling the main stem always towards the pot by always lacing the string through the pot rim I have inserted a bamboo skewer at almost horizontal, and tied string around that. It is keeping the main stem low, there is a secondary growing clear of the main stem, I have removed the tip of the bud.

TW_28_01_14_2_skewer_a.jpg


TW_28_01_14_2_skewer_b.jpg


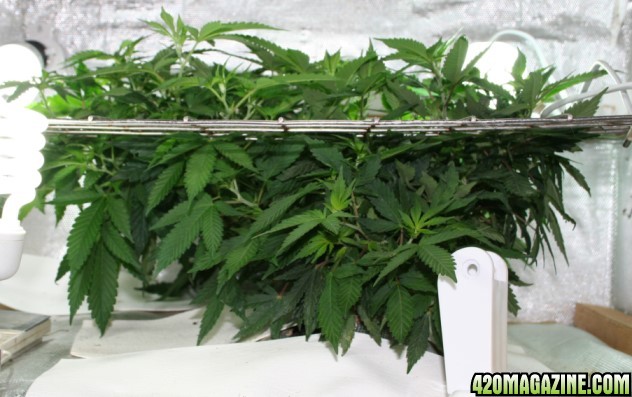
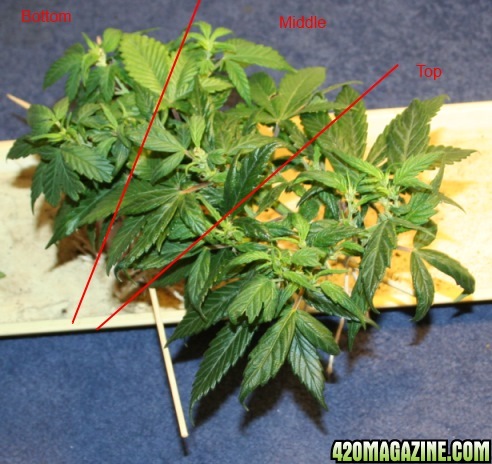
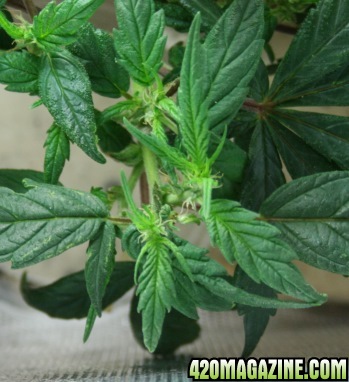
It has a busy top on the main stem, too early in my photographic course to tell what is going on, but she will reveal herself in the coming days.

TW_28_01_14_1_top_a.jpg


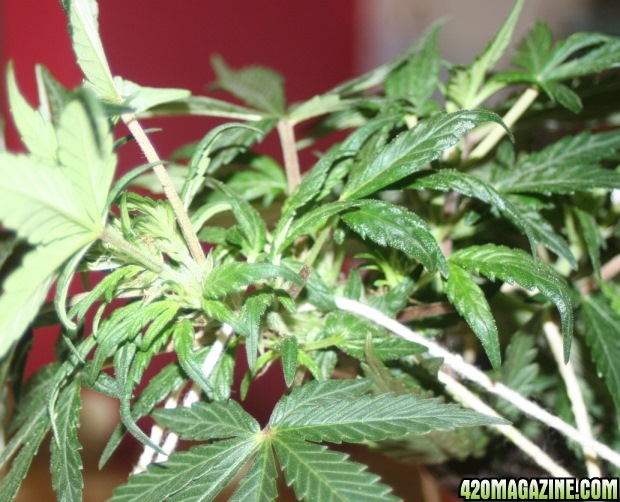
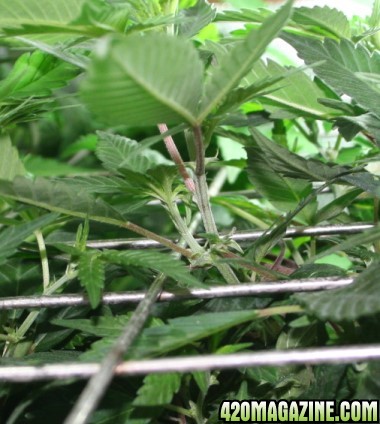
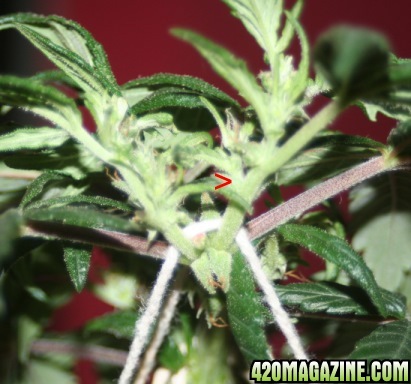
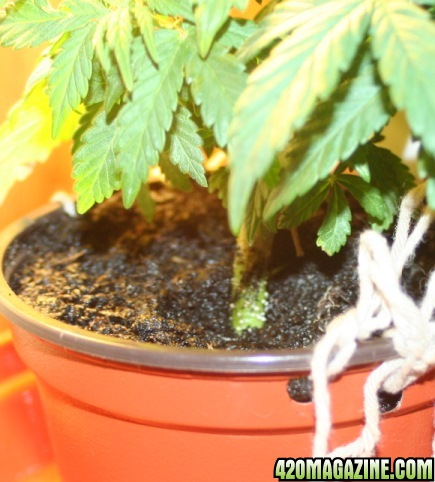
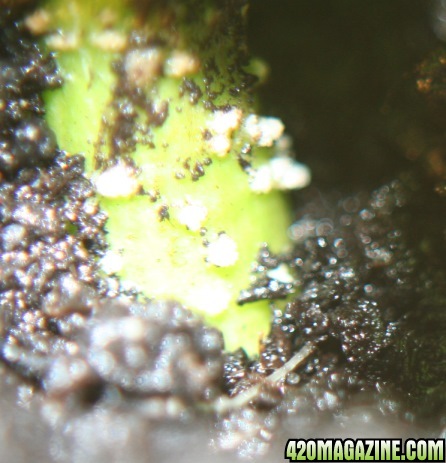
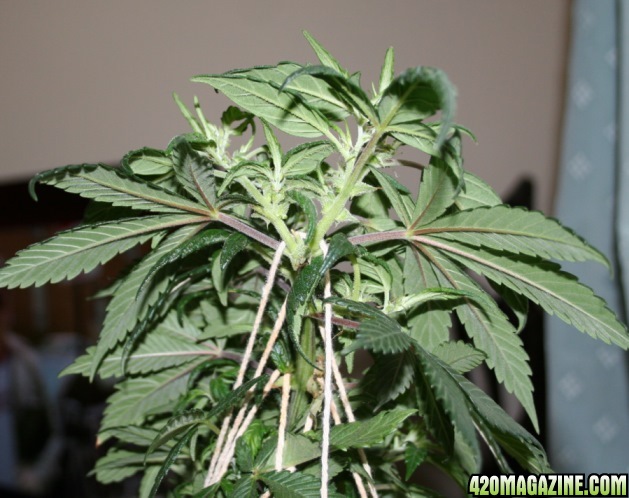
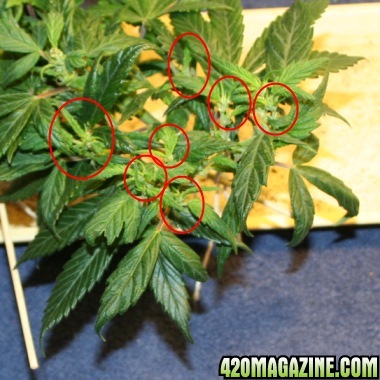
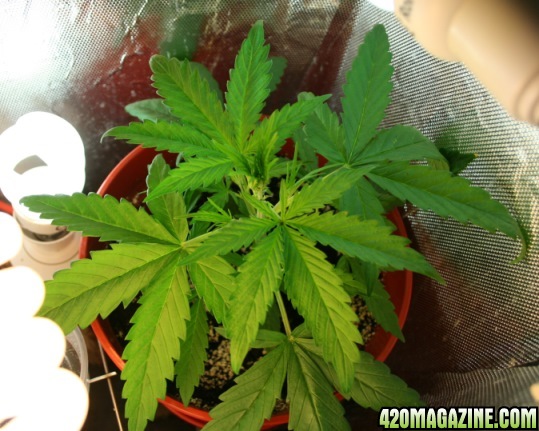
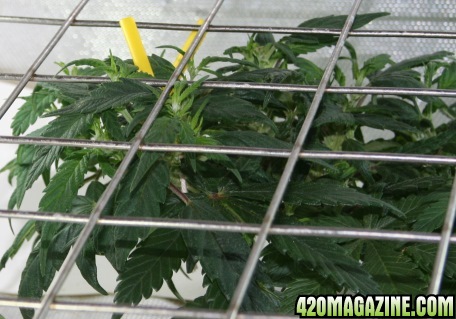
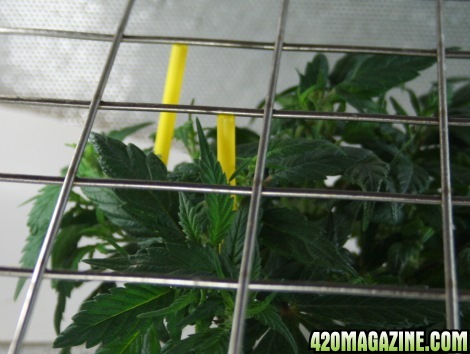
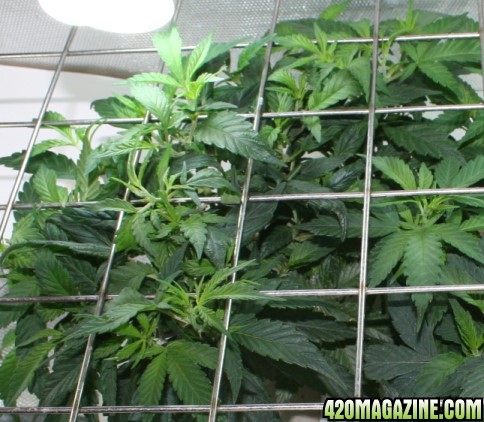
Where I removed the main grow tip has developed into 2 stems which I will LST to separate into opposing directions. I have arrowed a secondary stem growing already, or is that due to topping whilst still ‘in flower’ or a successful FIM?
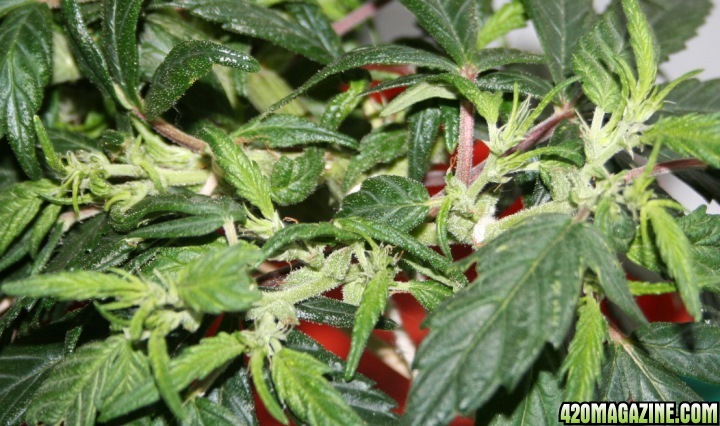
Arrow_26_01_14.jpg
 
This is very interesting on the 12/12 seed starting AJ! I am in the front row making sure to take notes. :thumb:

I am amazed at the speed they start to show flowery bits and the 'monster-cloning' effect, I am definitely going to start my next seeds when these are flipped to 12/12 and follow the same process. I am looking forward to seeing how they are in a few weeks when I can roughly count the number of tops, a bit caned so I hope that makes sense, it does in my World!

When my next auto bin is empty I shall start a regular on 12/12, it it's Female I will flower it out (in the bin) and see if autos are as good as I first thought!

:passitleft:
 
The Timewreck girls have been on GLR for 25 days, I am still amazed that all the pistils are slowly reabsorbed into the plant!

30_01_14_TW_Girls_a.jpg

I will use a skewer to lower the tallest one next week.

I think the roots starting to grow from the base of the main stem may be a sign that they need re-potting, only 3 weeks to,

30_01_14_TW_root_bumps_b.jpg

30_01_14_TW_root_bumps_a.jpg

30_01_14_TW_root_bumps_detail_a.jpg

It is a shame they are not more like Tomato plants, those bumps would not be air-pruned but turn into a sucker that you can detach and start a new plant.

The Tops are too busy to get a detailed photo of what’s actually going on, at the moment!

TW_30_01_14_a_Busy_Top.jpg
 
Now that the individual stalks to each bud have had a chance to develop it is easier to see how the multiple branching occurs.

TW_03_02_14_2_tops_a.jpg


The plant has been on 12/12 since emerging from the seed, she started to show pistils after 3.5 weeks and the lighting was then changed to GLR 4 weeks ago Today. Each grow top, very few on such a young plant, developed a few bud sites and each bud site is now a grow top.

TW_03_02_14_2_multiple_tops_b.jpg


I have inserted another skewer through the top of the pot, at an angle of about 45degrees to the initial skewer, this has given me something to tie some side-branching to, in an effort to fan out the grow tops.

TW_03_2_14_over_head_c.jpg


I removed all the existing LST and tied the main stem, and its new growth, closer to the horizontal and spread 2 well developed side branches to the angled skewer.

TW_03_02_14_2_sideview_a.jpg
 
I wish I had taken some more detailed pictures of them whilst starting to flower so I could count how many ‘bud-sites’ there were. From overhead there appears to be three zones or clumps of multiple tops, possibly from 3 bud sites?

5_02_14_Zones.jpg


The top-most ‘clump’ is developing into 6 or 7 ‘tops’ with slightly brighter green growth, it could be ‘normal’ secondary branch growth, I would expect a leaf node between each ‘branch’ but that is not always the case.

Rings_tops_a.jpg


I will defoliate when they go Hydro to try and get some clearer photographic evidence.

5_2_14_multi_top_c.jpg


The nursery cardboard box is just a little too small for much more vegging

Nursery_b.jpg


and another Mighty Midget (Bridget2) has now broken ground so it will soon get even more short of room. .

Bridget2.jpg

I can just see the beginning of her first proper leaves.

Bridget1 is now in a grow bin with 105W of Red and Blue CFLs, she is sitting on 5 bricks so I can lower her as she reaches light height.

Bridget1_c.jpg
 
looking good! please don't defoliate this time or you'll get those leafy buds again.
 
There are times when even indoor gardening has to take a back seat. The bamboo skewers are enabling me to keep the main stems fairly low and the second skewers are working fine with the side shoots. It is becoming increasingly difficult to fit two of them in the Nursery, I keep poking the extract fan with the skewers ending judders through my arm or pushing them against the side of the box so the skewers either come out of one side of the pot or the string ties come off.

TW_tied_down.jpg


The grow room has been cleaned with H2O2 and plenty of steam, I raised the screen 2", there is now almost 7" of space for the plants. I have sorted all the cables and gang sockets so that I can get 2 demijohns on the heat pad but raising the screen now means the very expensive 'designer' CO2 gutter is no longer high enough to feed directly to the back of the fans. Some more Imagineering required.

Sideview_Rule_12_2_14_b.jpg


I hollowed out the rockwool cubes to accommodate the root ball and positioned them so they would be diagonally opposite (?). There were 2 shoots on the back girl that, once released from their ties, were already at screen height,

Hi_tops_12_2_14_a.jpg


with nothing (yet) to tie anything to at plant base height to pull them down, I have used short lengths of a drinking straw, with a 'V' cut in the bottom end, to push the stems away from the screen. I am sure there are some scissors called 'Pinking shears' that would make cutting the 'notches' far easier.

Straws_12_2_14_a.jpg


I do not intend waiting to fill the screen during Veg, concentrate on bringing a decent harvest home instead.

Canopy_12_2_14_b.jpg


The NFT reservoir has SNS 209 added and I am spraying with Rosemary oil based foliar feed at every lights off.
 
First thorough inspection of the Garden for a few days. Ph was steady at 5.8 and TDS has dropped from 310ppm to 270ppm in about 3 days, so the sweet spot at this stage of their life must be above 310, I will add 6l of diluted nuts tomorrow and aim to leave at 320ppm, after adding recommended minimum veg nutes I will add some Silicon to help strengthen the branches.

Canopy_16_2_14_b.jpg


One top was tall enough to move it to fill a new square, I have 4 x 30watt Blue CFL bulbs and 180watt LED on the Girls at the moment, I am planning on adding at least 1 more 30w. The leaves are clear and unblemished by insect marks of any kind!

Tops_16_2_14_a.jpg

A note to any buying new CFLs, something I have only realised since Cannafan asked about Bulb details, a new 30w Bulb now stocked in most shops and many FleaBay traders emits 1900 Lumens, the Older Bulbs still available on FleaBay are 2000 Lumens, only 5% more, but it all helps.

I found a visitor in the Garden, rather a sad side to Winter sunshine and warmth, no food for them or Mates to procreate with! I have put a saucer of sugar water out for immediate sustenance, the other need is beyond me,

B_Fly_16_02_14_a.jpg


B_Fly_16_02_14_b.jpg
 
nice update. the plants look good. 300 ppm sounds like a reasonable mixture. :thumb:
 
Awesome update :) loving your little set up. Keep the good innovative work going :)

Hi LA, your current Flux beauty is a real inspiration :adore: 
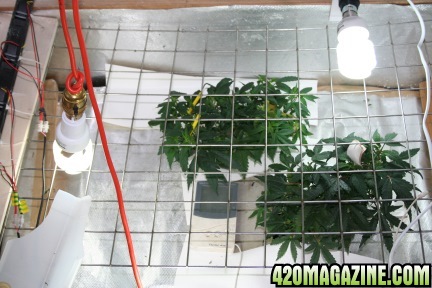
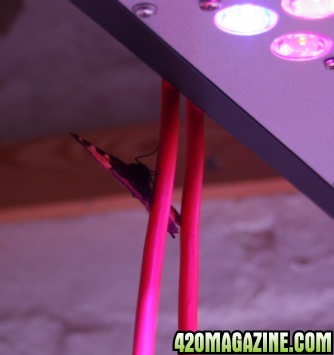
I can imagine the screen working like your wire restraints, but upside down-ish, an Inverse-Flux if you will :laughtwo:
 
I have been unable to spend much time with the Girls, to my frustration and their benefit, 1 res change was required that I inadvertently made a bit 'hot' but I have established that 370ppm is still below their appetite, I have made up to 390ppm and will see if that has gone down in 24hrs. They are happier with the TDS higher than my last grow, I am thinking that this could be strain dependent or a sign of their health, or both?

Canopy_26_2_14_a.jpg


The roots are looking good and are about to 'shoot-the weir', I cut the spreader mat to slightly hang over the edge to encourage access to the res.

Shooting_the_weir.jpg


I will tuck all the shoots I can tomorrow (-ish) and start to plan clearing out under the screen. I can remove the screen if the extra 2" gap is not enough room for me to access the shoots, on my earlier grows I have found this stage the most challenging and I was hoping to leave the screen in place, time will tell.

Sideview9.jpg


I intend to remove as many 'tertiary' branches as possible,

Sideshoot_a.jpg


:thumb:
 
Back
Top Bottom